
As you work in your project plan, you can quickly get assistance and other information when you need it—from online Help, from discussion forums, and from Project 2010 feedback while you’re working.
Note
Previous versions of Microsoft Project included a set of project guides that provided instructions, controls, and wizards to help set up tasks and resources, track progress, or generate reports. Project guides are discontinued in Project 2010. The ribbon takes on some functionality that was previously carried out by the project guides. In addition, you can use Visual Basic for Applications (VBA) to enable any custom project guides you created.
You can find Help topics to assist you with your project plan. A set of Help topics is installed and available with Project 2010 on your local computer. A more comprehensive set of Help topics and other forms of assistance are available on the web through Office.com. You can:
Browse Project Help contents.
Search for topics using key words or phrases.
Browse for more Project Help on Office.com.
Join and ask questions from a Microsoft Project discussion forum.
If you want to see a list of Help topics, follow these steps:
In the upper-right corner of the Project 2010 window, click the Help icon.
You can also press F1 or, on the File tab, click Help, and then click Microsoft Office Help.
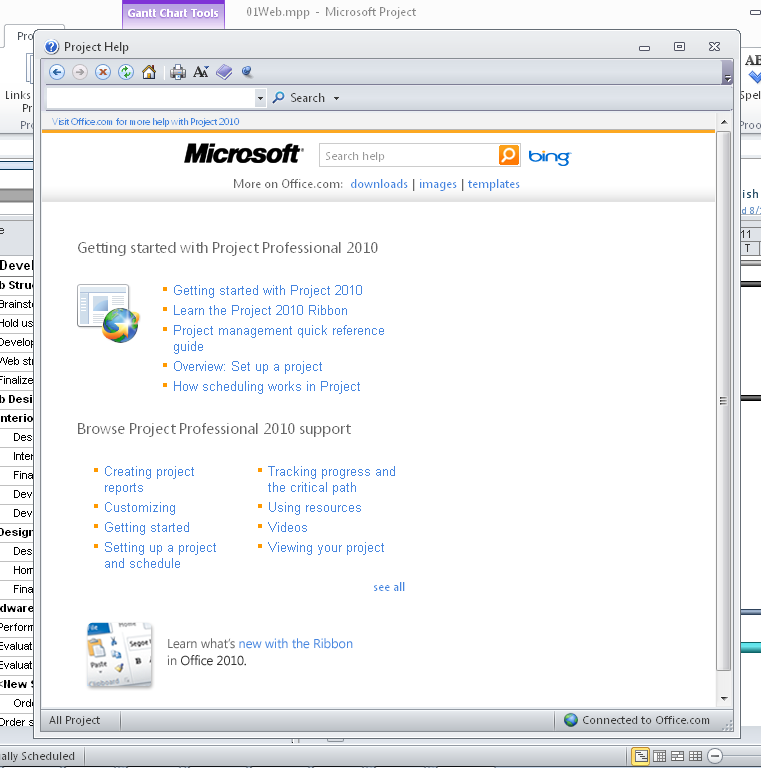
Project Help appears in a separate window, as shown in Figure 1-29.
Click the name of the category you want. If necessary, click a topic under the Subcategories section.
Under Topics, click the link for the Help topic you want to view.
If you’re connected to the Internet and Office.com, you see even more categories and topics listed in the Project Help window.
Inside Out: Get better Help results by connecting to Office.com
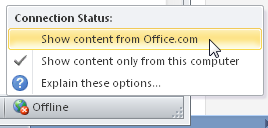
You can toggle whether Project 2010 presents Help from your local computer or from Office.com on the web. The current mode shows in the lower-right corner of the Project Help window. If you click the mode button, a menu appears with other choices.
Help works the same whether or not you’re connected to Office.com. You can browse categories and topics as usual; the difference is that more categories and topics are available on Office.com because more are being added over time. Also, when you search on a certain word or phrase, you tend to see better results when you’re connected to Office.com.
Rather than going through a hierarchical list of topics, sometimes it’s faster to just ask a direct question and get a direct answer. If you prefer to get your help that way, search using a question or phrase as follows:
In the upper-right corner of the Project 2010 window, click the Help icon.
Near the top of the Project Help window, click in the search box.
Type the word, phrase, or question in the search box, and then click Search.
The Project Help window appears with a list of Help topics related to your question, as shown in Figure 1-30.
Click a topic that matches what you’re looking for, and then read the article about your question.
To read a different Help topic that was listed, click the Back button to return to the list of topics, and then click the other topic.


There is a Help topic for each and every field in Project 2010. One way to find such topics is by browsing the Project Help contents, as follows:
In the upper-right corner of the Project 2010 window, click the Help icon.
If the Project Help window is already open, click the Home button in the Project Help toolbar.
If you’re accessing Project Help through Office.com, under the categories, click See All, and then click Reference.
If you’re accessing Project Help from your offline computer, click General Reference.
Under Subcategories, click Available Fields Reference.
Click the topic for the field you want to learn more about.
Each field reference topic includes best uses, examples, calculations if applicable, and particular issues to be aware of when working with this field.
You can also open a field reference Help topic if the field is showing in a table. Position your mouse pointer over the column heading; a ScreenTip pops up that provides a brief description of the field. Press F1 while the ScreenTip is showing to display a Help topic for the selected field in a separate Help window.

You have already seen how you can search on a keyword or browse the contents of Project Help topics on Office.com on the web. As long as you’re connected to the Internet, you can also simply open Office.com in a full web browser window. To do this, follow these steps:
On the File tab, click Help, and then click Getting Started.
Even if you don’t want to see the Getting Started Help topic, this step gets you to the right place quickly.
The Office.com website appears in a separate web browser.
To show just the resources available for Project 2010, in the path showing under the menu bar, click Project, as shown in Figure 1-31.
The Project page appears, as shown in Figure 1-32. This page includes links to videos, demos, top issues, and training courses, in addition to the Help topic categories listed on the right side of the page.
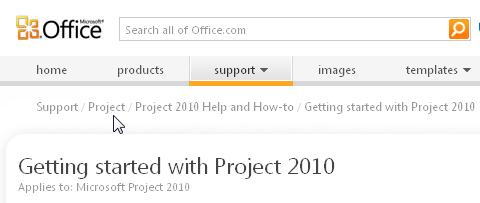
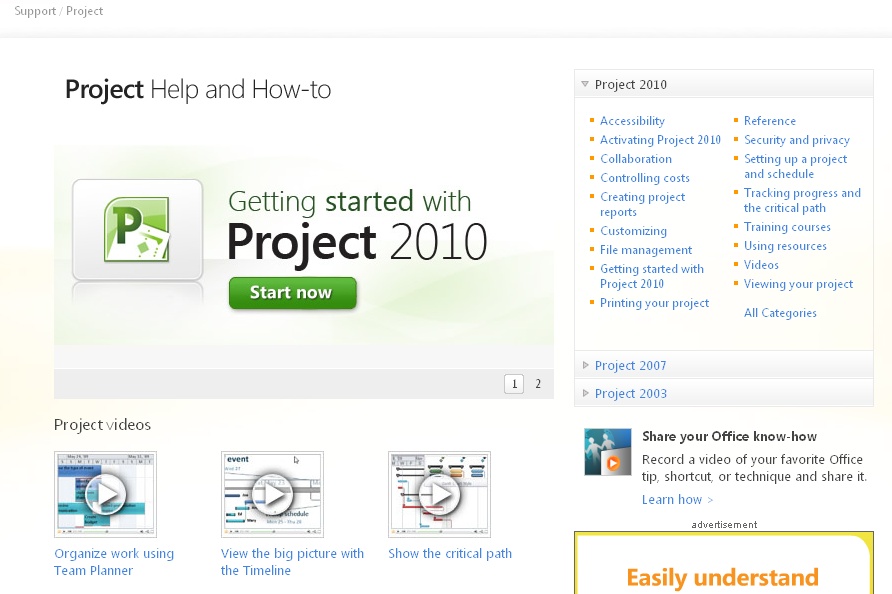
Figure 1-32. The Project page on Office.com includes a variety of online resources from which to learn more about Project 2010.
The following are some highlights of the Project page on Office.com:
Getting started with Project 2010
Get to know Project 2010
Microsoft Project basics
Introduction to project management
Project roadmap
Near the bottom of this page are links to various Microsoft Project community sites, including expert blogs. There is a link to the Project Developer Center, which includes the Project 2010 Software Development Kit and access to Project 2010 topics on Microsoft TechNet.
You can keep up with tips, techniques, and news about Project 2010 through the following social media channels:
Facebook. www.facebook.com/pages/Microsoft-Project/95221953802
Twitter. twitter.com/ProjectHelpTeam
MSDN blog for Microsoft Project. blogs.msdn.com/b/project/
Note
For more information about these and other resources, see the Microsoft Project 2010 Inside Out companion website at oreilly.com/catalog/9780735626874/.
It’s often easiest to learn from your more experienced buddies. A built-in group of knowledgeable friends willing to help can be found on Office.com. There you will find a Project 2010 discussion forum that can help you find answers to your questions and where you can also learn from questions posed by other users. To find and join a Project 2010 discussion forum:
In the address bar of your web browser, enter www.answers.microsoft.com.
Under Microsoft Office, click More Office Products.
Under Answers By Forum, in the Visio, Project, InfoPath, And Access line, click Project.
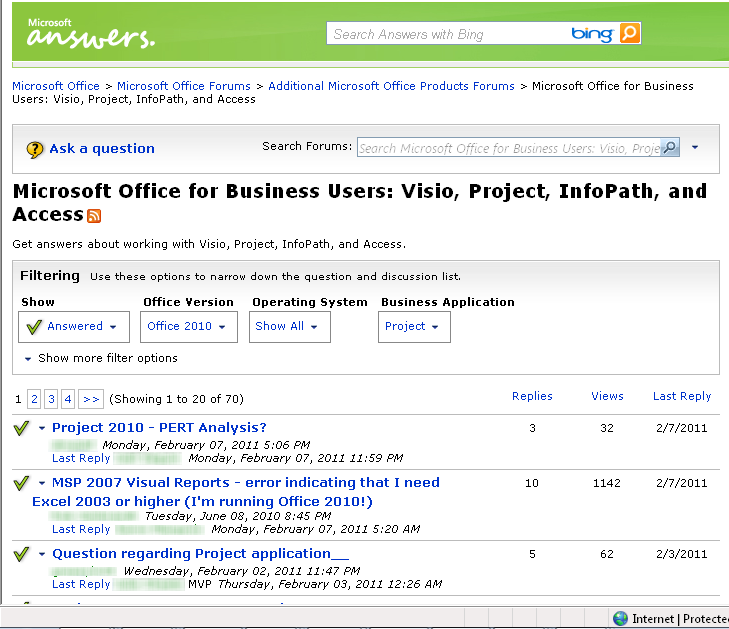
The forum page for Microsoft Office For Business Users: Visio, Project, InfoPath, And Access appears, with the discussion items filtered for Microsoft Project.
Click in the Office Version box, and then click Office 2010.
The discussion items are now filtered for Project 2010, as shown in Figure 1-33.
Figure 1-33. The Project discussions page represents a community of Project users and experts who ask and answer questions.
You can search for a particular topic or browse through a list of topics.
Before you ask a question, check whether your question has been asked (and answered) previously. Enter a keyword or phrase in the Search Forums box.
It’s a great idea to do this before posting a new question, especially if you’re a newer user.
If you don’t find anything in the archives that answers your question, click the Sign In button to sign in with your Windows Live ID, and then click Ask A Question. A form appears in which you can type your question and post it to the discussion forum.
You’ll find that you get great answers to your questions, often quite quickly. If you stick around long enough, you’ll soon find that you’re knowledgeable enough to answer others’ questions. To reply to an existing question, click the Reply button. Enter your answer and post it to the discussion forum.
More advanced Project 2010 users might find the TechNet discussion forums useful.
In the address bar of your web browser, enter www.technet.microsoft.com.
In the menu bar, click Forums.
Scroll down and click one of the forum categories under Project Professional or Project Server.
Note
For more information about discussion forums and additional resources to help you learn and use Project 2010, see Appendix B.
When you make certain types of adjustments to your project plan, Project 2010 presents an indicator with an option button, as shown in Figure 1-34. This is interactive feedback that specifies the action you’ve just taken, along with implications that the action might have. You see information, especially in certain ambiguous situations, to ensure that the result is really your intention. You also see options to switch to a different action if you intended a different outcome.
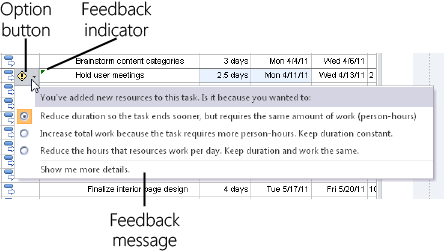
Figure 1-34. An indicator shows as a green triangle in a cell that contains a potential issue that Project wants to confirm. When you move your mouse pointer over the green triangle, the option button appears. Click the button to display the options in a drop-down menu.
Indicators and option buttons might appear for four operations:
Changing resource assignments
Changing start or finish dates
Changing work, duration, or units
Deleting a task or resource in the Name column
The indicator appears in the cell as long as the edit is available for an Undo operation. After you make a new edit, the indicator disappears.
You can turn off the display of indicators and option buttons. On the File tab, click Options, and then click Display in the left pane. Under Show Indicators And Option Buttons For, clear the check boxes for the categories of changes for which you don’t need indicators.
Note
For more information about using the indicators and option buttons for scheduling feedback, see Changing Resource Assignments.