
Chapter at a glance
Move
Navigating a document by scrolling and using keyboard shortcuts
Search
Searching and navigating a document by using the Navigation pane

Collapse
Collapsing and expanding document content

Read
Working with documents in the new Read Mode
IN THIS CHAPTER, YOU WILL LEARN HOW TO
Navigate a document by scrolling and using keyboard shortcuts.
Search and navigate a document by using the Navigation pane.
Collapse and expand document content.
Work with documents in the new Read Mode.
Explore research tools in Read Mode.
In the previous chapter, you were introduced to various ways of viewing a document, such as switching to Read Mode, viewing options, and turning on the ruler display. In this chapter, you’ll learn more methods for navigating documents that range from scrolling to using the Navigation pane. You’ll also learn about new features that have been added, such as collapsing and expanding document content for quick navigation. In addition, you’ll learn how to use the new Read Mode and research tools.
Practice Files
To complete the exercises in this chapter, you need the practice files contained in the Chapter06 practice file folder. For more information, see Download the practice files in this book’s Introduction.
The most common method for document navigation is scrolling, which is achieved by using the scroll bars, the mouse wheel, or the scroll area on a touchpad. You can also use keyboard shortcuts to navigate, which also moves the cursor. When using the scroll bars to navigate in a document, you need to click the mouse to position your cursor at your desired location.
Tip
In Microsoft Word 2013, the scroll bars will disappear from view after a few seconds of mouse inactivity or when you begin entering text. They will reappear after you move your mouse.
The size of a scroll box is related to the size of the document—the smaller the scroll box, the larger the document. Additionally, the position of the scroll box in the scroll bar indicates where you are in a document.
Use the following methods for scrolling by using the vertical scroll bar. Keyboard shortcuts that produce the same or a similar action follow each item in the list.
Click above or below the scroll box to scroll one screen forward or backward.
Click the arrows on the scroll bar to scroll one line at time.
Drag the scroll box to scroll a greater distance forward or backward.
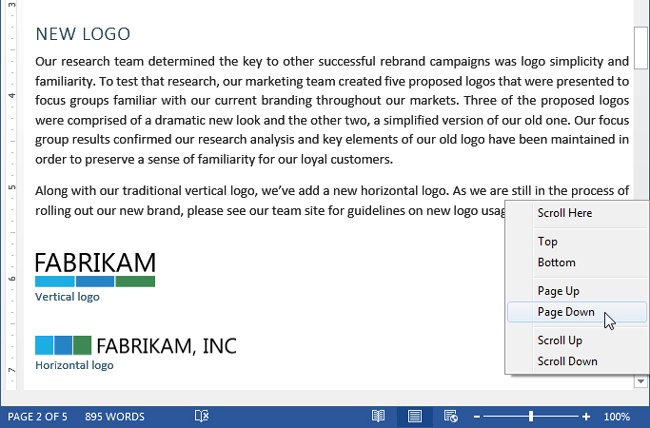
Right-click the scroll bar to display a list of scrolling options. For example, if you want to scroll down one page, click the Page Down command.
Tip
The Scroll Here command that appears when you right-click the scroll bar will scroll the document relative to the location at which you right-clicked. For example, if you right-click at the top of the scroll bar and then click Scroll Here, you’ll scroll to the top of the document. Additionally, scrolling by using the horizontal scroll bar is similar to scrolling with the vertical scroll bar, but you move left and right instead of up and down.

When you are using a mouse wheel or scroll area on a touchpad, the number of lines you scroll, or whether you scroll a full screen of text, is dependent on the wheel settings for your mouse or touchpad as set in the Mouse Properties of the Control Panel.
Another way to navigate a document is to use the Navigation pane. Unlike scrolling, using the Navigation pane navigates based on the content of your document, such as a search term, heading, graphic, or table, rather than by screens or lines.
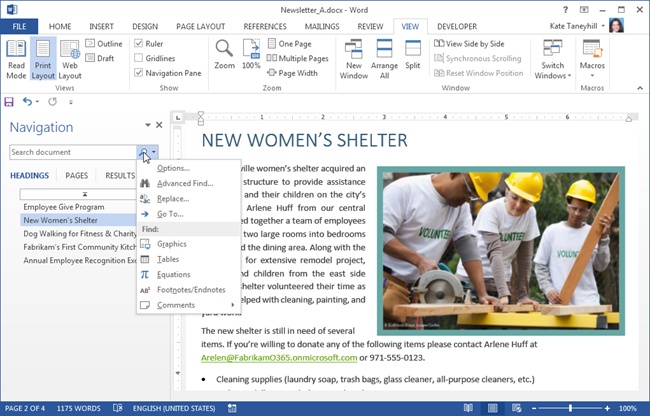
The Navigation pane is accessed on the View tab, in the Show group. To view other navigation methods or search options, click the magnifying glass displayed on the right side of the Search box on the Navigation pane.
Tip
You can also click the page number on the left end of the status bar to toggle the view of the Navigation pane.
The following options are initially displayed in the Navigation pane:
Search document. Enter a search term in the Search box. Yellow highlighted results are shown in both the document and the Navigation pane as you enter the text. To jump between search results, click the Next and Previous buttons below the Search box.
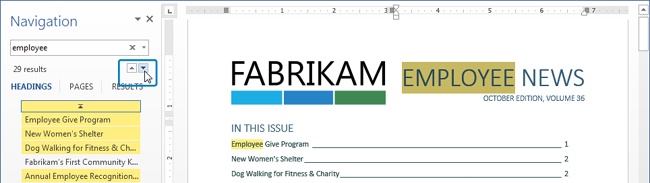
Headings. The Headings section provides a clickable mini table of contents. The text that appears in the Navigation pane corresponds to paragraphs that are formatted with heading styles that are used to outline a document. To jump to a different heading in a document, click the corresponding heading.
When you are searching a document, the headings in the Navigation pane will also be displayed with a yellow highlight, indicating that the search term can be found below the heading. You can click a highlighted heading to jump to that location in the document and then use the Next button to find your search term below the heading.
Tip
The heading for the current cursor location in a document will have a blue highlight. When you are searching a document, if your current location heading is included in the search results, it will be displayed with an outline and blue font color.
See Also
For more information about formatting a document by using heading styles, see Chapter 8.
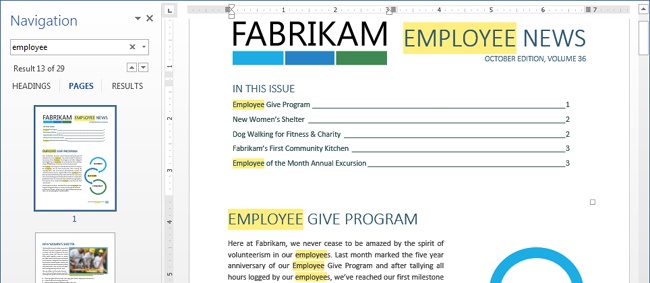
Pages. The pages feature displays a thumbnail of each page in the document. Click a thumbnail to navigate to that page.
When you are searching for a specific term or phrase in a document, the yellow highlighted search results will also be displayed on the page thumbnails.
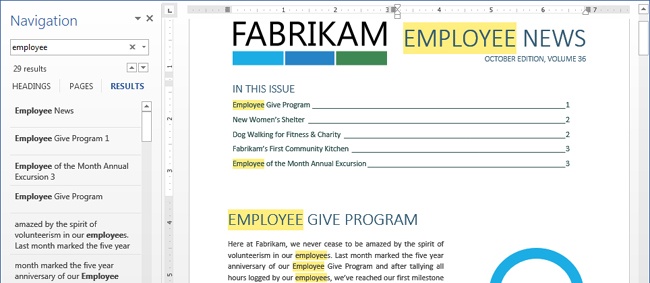
Results. This option displays a summary of search results with the term formatted in bold. As with the other Navigation pane views, you can click a search summary to jump to that location in the document.
The other search options that are displayed when you click the magnifying glass to the right of the Search box, such as Advanced Find, Graphics, and Tables, work the same as searching for a term. You use the Next and Previous buttons below the Search box to jump between results or click a highlighted heading to jump to the general location. However, you won’t find highlighted results or a summary of results when viewing Page or Results in the Navigation pane.
To clear the search results for both search terms and other search options, click the X that appears to the right of the Search box. The results will also be cleared when you close the Navigation pane.
In this exercise, you’ll navigate a document by using the Navigation pane and then search for text and graphics.
Set Up
You need the Newsletter_A document located in the Chapter06 practice file folder to complete this exercise. Open the Newsletter_A document and then follow the steps.
On the View tab, in the Show group, select the Navigation Pane check box.
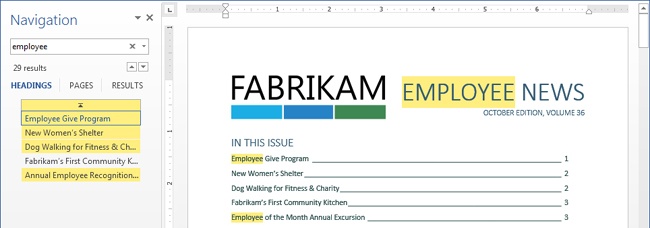
On the Navigation pane, in the Search box, enter employee.
Note the total of 29 results that is displayed below the Search box and the first occurrence of the word employee in the document.
Below the Search box, click the Next button a few times to navigate to additional occurrences of the word employee.
Click the Previous button to navigate to the previous occurrence of the word employee.
On the Navigation pane, in the Headings section, click Dog Walking for Fitness & Charity to view the occurrences of the search term employee below that heading. Also note how only the exact letters you entered in the Search box are highlighted in the word employees rather than the entire word.
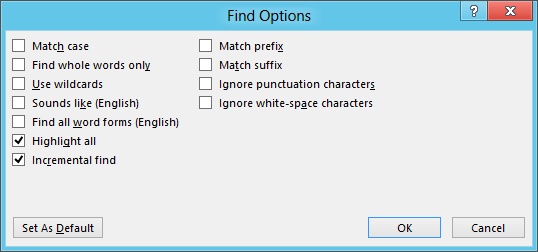
To specify that you want only whole words highlighted, on the Navigation pane, click the arrow at the end of the Search text box and then click Options.
In the Find Options dialog box, select Find whole words only and then click OK.
When you change the search settings, the results are cleared. Search for employee again and note there are now 14 total results instead of 29.
Click the X on the right side of the Search box to clear the results.
Press Ctrl+Home to navigate to the beginning of the document.
To navigate by graphics, on the Navigation pane, click the magnifying glass and then click Graphics.
Click the Next button to jump to the next graphic.
Clear the search results and move the cursor back to the beginning of the document.
Close the Navigation pane.

As noted in the previous section, the headings in the Navigation pane are paragraphs that are formatted with heading styles that create outline levels in a document. For example, a paragraph formatted with Heading 1 is a first level paragraph. Heading 2 is a second level paragraph, or subheading, and so forth. Along with providing a quick way to jump to different locations from the Navigation pane, heading styles are also used to create a table of contents, to create chapter-style numbering, and more. In Word 2013, headings play an even greater role. Now you can collapse all content below a heading or quickly collapse an entire document and display only the first level headings, making it even easier to navigate within a document.
Tip
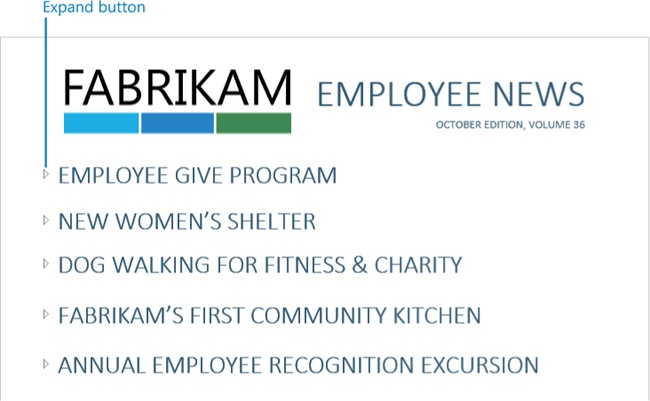
The title of the newsletter isn’t included in the collapsed view, because the paragraphs formatted with heading styles begin after the title.
To collapse a heading, point to the left of a paragraph that has been formatted with a heading style, and then click the triangular collapse button that is displayed. When a heading is collapsed, the expand button will always show. Clicking the button will expand the content that appears below the heading.
If a document contains subheadings, there will be collapse and expand buttons in the Navigation pane as well. Clicking these buttons only affects the headings in the Navigation pane and not the document’s contents.
In this exercise, you’ll use the new collapse and expand capabilities of headings in both the document and the Navigation pane.
Set Up
You need the Newsletter_B document located in the Chapter06 practice file folder to complete this exercise. Open the Newsletter_B document and then follow the steps.
In the document, point to the left of the heading Employee Give Program and click the collapse button.
To expand the heading, click the expand button.
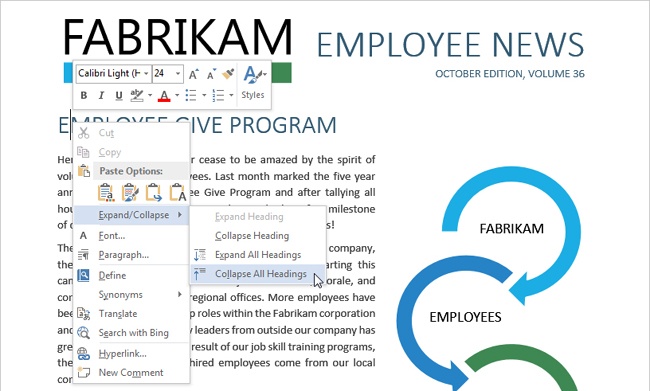
To quickly collapse the entire document and display only the first level headings, right-click the first heading, point to Expand/Collapse, and then click Collapse All Headings.
Expand the Annual Employee Recognition Excursion heading.
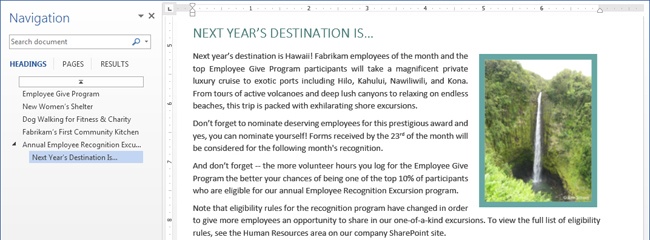
At the end of Annual Employee Recognition Excursion, expand the, Next Year’s Destination Is... subheading.
To expand all headings, right-click a heading, point to Expand/Collapse, and then click Expand All Headings.
View the Navigation pane and, below Annual Employee Recognition Excursion, note the subheading Next Year’s Destination Is....
In the Navigation pane, click the collapse button to the left of Annual Employee Recognition Excursion and note that the document content does not change.
Click the expand button to redisplay it.
Turn off the display of the Navigation pane.

When you’re viewing a document in Read Mode, the primary focus is placed on reading rather than how the document looks when printed. The size of text is increased and reflowed into columns that automatically adjust to fit the available space on your screen. The size of objects, such as charts, tables, and pictures, are decreased to fit the available column width. In addition, words are automatically hyphenated, the ribbon and Quick Access Toolbar are not displayed, and the available commands pertain to reading and commenting rather than editing.

Although the focus is placed more on reading text than viewing objects, you can double-click an object to magnify it and zoom in on the details.
The following list provides the view options that are located on the View menu for Read Mode:
Edit Document. Closes Read Mode and returns to Print Layout view.
Show Comments. Displays review comments in the markup area on the right side of the screen.
Navigation Pane. Toggles the view of the Navigation pane. If you previously turned on the Navigation pane, it will automatically be displayed in Read Mode.
Column Width. This option changes the number of columns that will display the document’s contents. If you’re viewing multiple columns of text, called screens, a dividing line is displayed between them. To navigate to the next or previous set of screens, click the arrows on the far right and left side of the window.
There are three options for Column Width: Narrow, Default, and Wide. The narrower the column, the smaller the line of text on each screen. For both the Narrow and Default options, the number of viewable screens depends on your display settings, such as resolution, magnification, document zoom level, and the size of your document window. For example, if you select Narrow and you’re using a small restored document window, the text may only appear on a single screen. Typically, when you choose Narrow, the information is displayed in three screens; Default displays two screens, and Wide displays the content in one screen.
Page Color. There are three page color options: None, Sepia, and Inverse. Sepia uses a brown color scale instead of a black-and-white scale. If your page is white, the content will be displayed as a light pinkish-brown color. Inverse is similar to a photo negative. Dark colors become light and light colors are dark. If you’re reading black text in a document with a white background, it will appear as a document with a black background with white text.
Layout. This option toggles the document’s content between Column Layout and Paper Layout. When using Paper Layout, the document view is similar to Print Layout, but the ribbon and Quick Access Toolbar are suppressed and editing is disabled. Additionally, column and page color modifications are not displayed.
In this exercise, you’ll explore the available view options for Read Mode.
Set Up
You need the Fabrikam Rebrand Campaign document located in the Chapter06 practice file folder to complete this exercise. Open the Fabrikam Rebrand Campaign document and then follow the steps.
If the practice file isn’t already displayed in Read Mode, on the View tab, in the Views group, click the Read Mode button.
To advance to the next set of screens, click the arrow at the right side of the window.
To return to the previous screen, click the arrow on the left side of the window.
If the Navigation pane isn’t displayed, click View and then click Navigation Pane.
In the Navigation pane, click Brand Colors.
In the document, click the collapse button to the left of Brand Colors to collapse the heading.
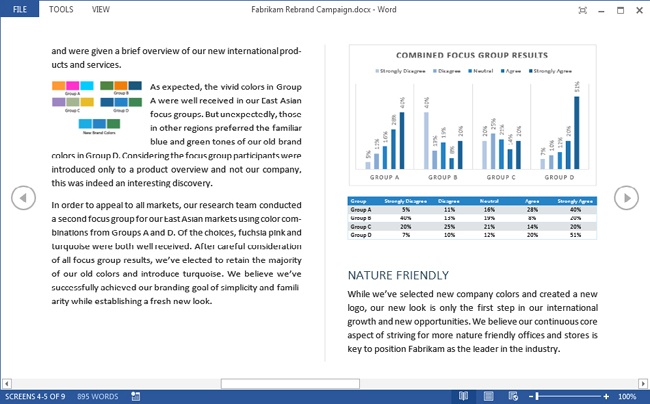
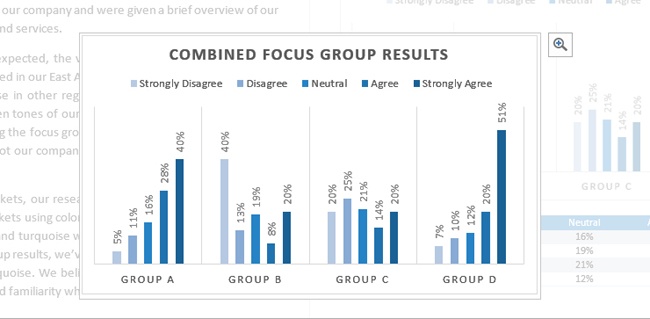
If the Combined Focus Group Results chart and table are not shown, below Brand Colors, use the horizontal scroll bar to scroll to the right.
To magnify the chart, double-click the chart.
In the upper-right corner of the magnified chart, click the magnifying glass to increase the chart’s magnification.
To close the magnified view, click away from the chart in the document window.
Double-click the table to increase its magnification and then close the magnified view.
To view a single screen of text, click the View menu, point to Column Width, and then click Wide.
To change the page color, click View, point to Page Color, and then click Sepia.
Repeat step 13 but change the page color to Inverse.
To view a layout that includes headers, footers, and page margins, click View, point to Layout, and then click Paper Layout.
Use the vertical scrollbar on the right side of the window to scroll through the document.
To return to a column layout, click View, point to Layout, and then click Column Layout.
Set the page color and column width to your preference.
Turn off the display of the Navigation pane.
To exit Read Mode, click View and then click Edit Document.
Tip
When you open a document that originated from an Internet location, like an email attachment, it will be displayed in Read Mode by default. To bypass Read Mode for those documents, click the File tab to display the Backstage view, click Options, and then near the bottom of the General tab, clear the check box for Open Email Attachments And Other Uneditable Files In Reading View.
While reading a document, you may encounter words or phrases you’re not familiar with or that you may want to find more information about on the Internet. Instead of reaching for a dictionary or opening a web browser, you can use the research tools available on the shortcut menu in Read Mode. To use these tools, right-click a word and then click Define, Translate, or Search With Bing.
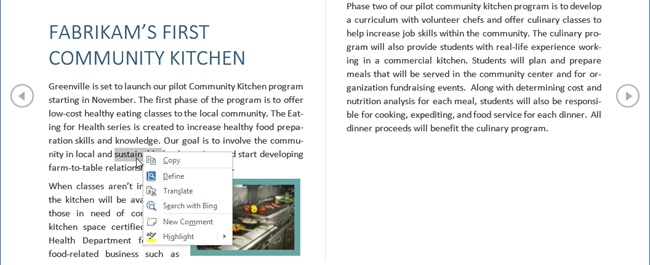
Below is an overview of the research tools:
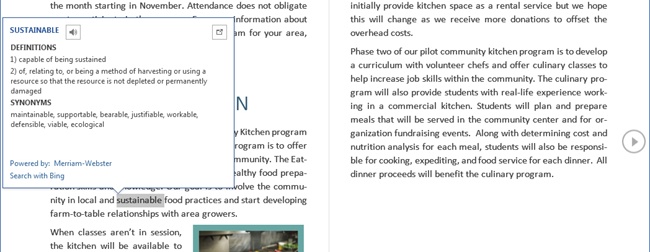
Define. This option searches for a word in an online dictionary and displays the results in a pop-up window. Along with a definition, most dictionaries include a list of synonyms and a verbal pronunciation of the word. To hear a verbal pronunciation of a search term in an online dictionary, click the speaker button displayed next to the word.
Important
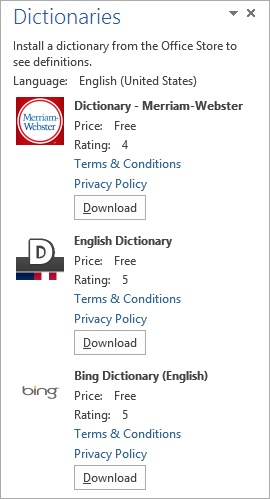
You need to be signed in to Office with a Microsoft Account and have a dictionary installed in order to look up words from an online source. Definitions, synonyms, and other results may vary depending on the installed dictionary. If a dictionary isn’t installed, a Dictionary pane will be displayed with available dictionaries from the Office Store, including those that are free. To install a dictionary, click the Download button for the dictionary you want to install.
See Also
For more information on signing in to Office and using a Microsoft account, see Chapter 3.
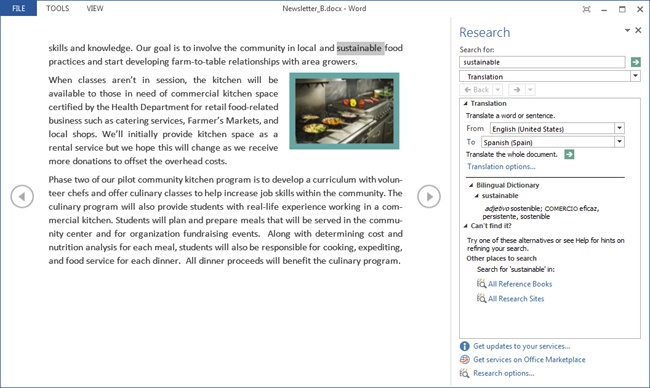
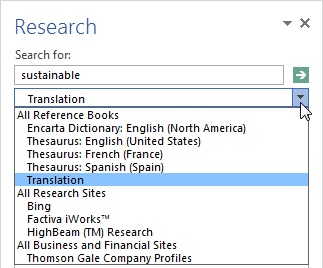
Translate. When you want to translate a word into another language, this feature opens the Research pane with a translation of the word or selected sentence. While the pane is displayed, when you click another word or select another sentence, the word or phrase will be translated.
Tip
Subsequent automatic translation may not occur on all devices. For example, when using Microsoft Surface, you may need to tap or click the Translate command each time you want to translate a word or selected sentence.
Important
You may need to configure the From and To language pairs and install the bilingual dictionaries before you can use the translation service. To configure the language pairs, in the Research pane, below Translate A Word Or Sentence, use the drop-down lists to the right of From and To. If you need to install a bilingual dictionary, you’ll be prompted with a message box the first time you use the translation service. Click OK to complete the installation.
You can also obtain dictionary definitions and synonyms in the Research pane. To change from the translation option to another option, near the top of the pane, click Translation to display a list of choices.
Tip
A translation service provided by a computer only gives you a basic translation and does not change sentence structure or tone that might be required in order to convey meaningful information in another language. It’s recommended that you use a human translation service for important or sensitive files.
Search with Bing. When you choose this option, a web browser opens and uses Bing as the web search engine to search and display results for the word or phrase you specified.
The research tools are also available when you right-click a word or phrase in the other document views, such as Print Layout. The Define and Translate commands are also located on the Review tab, along with Thesaurus. However, the results may be displayed differently in other views. For example, when you use the Define command, the results will be displayed in a Dictionary pane instead of a small window like you previously viewed in Read Mode.
The most common document navigation method is scrolling.
Heading styles are used to outline a document, to create a table of contents, and for viewing features, such as the Navigation pane.
The Navigation pane can be used as a mini table of contents for documents that have paragraphs formatted with heading styles.
With the Navigation pane, you can move through a document based on the content, such as a search term, heading, graphic, or table, rather than by screens or lines.
You can click the arrow to the left of a heading paragraph to collapse and expand the content below the heading.
The primary focus of Read Mode is to read a document rather than edit it or view how it will look when it is printed.
Almost all editing commands are disabled when using Read Mode.
Research tools, such as Define and Translate, are available when you right-click a word or selected phrase.