
Chapter at a glance
Format
Formatting simple lists by using bullets and numbering
Create
Convert
Enhance

IN THIS CHAPTER, YOU WILL LEARN HOW TO
Format simple lists by using bullets and numbering.
Create tabbed lists.
Insert and convert tables.
Enhance tables.
Most of the time you can use paragraphs of text to convey your information. Other times you may need to present your information in a more structured format, such as in a list or in multiple columns. Or you may use structured elements to make your document easier to follow. For example, if you have a long list of information separated by commas, you can use bullets or numbering to break it down into smaller paragraphs. Or if you have several pieces of related information that you want to keep next to each other on the same line, you can use a tabbed list or a table.
The following provides a description of various ways to present information in a structured format in Microsoft Word.
Numbered list. This is a series of paragraphs that begin with a number and are usually formatted with a hanging indent so wrapped lines of the paragraph align to the text and not the number. This type of list is typically used for sequential steps when the order is important, such as a set of step-by-step instructions.
Bulleted list. This is similar to a numbered list, but each item begins with a symbol instead of a number. Like a numbered list, it’s usually formatted with a hanging indent so wrapped lines of the paragraph align to the text and not the bullet. You use a bulleted list when the order of the paragraphs isn’t important, such as a list of inventory items or a summary of information.
Tabbed list. This is simply columns that are separated by tabs, such as a list of names and addresses.
Table. A table is an arrangement of rows and columns typically used for more complex information. Unlike the other list types, tables have more formatting options, such as the ability to add shading to alternating rows or columns. You can also add table column headings that can be set to repeat at the top of a page for long lists of information.
In this chapter, you’ll create a simple numbered and bulleted list, and a tabbed list that uses manual tabs. At the end of the chapter, you’ll create tables and convert existing text into a table. You’ll also enhance tables by using built-in table styles and new border formatting features.
Practice Files
To complete the exercises in this chapter, you need the practice files contained in the Chapter09 practice file folder. For more information, see Download the practice files in this book’s Introduction.
There are two methods you can use to create a simple list formatted with bullets or numbers:
Automatic. Word has an AutoFormat As You Type feature that converts characters you enter into a bulleted or numbered list. For a bulleted list, precede your paragraph text with an asterisk and then press the Spacebar. After the space is added, the asterisk is converted to a bullet character, and then a bulleted list is created. For a numbered list, precede your paragraph text with the number 1 followed by a period or closing parenthesis. As with a bulleted list, a numbered list is created when you press the Spacebar. You can also press Tab after the number and the numbered list will be created when you press Enter.
Tip
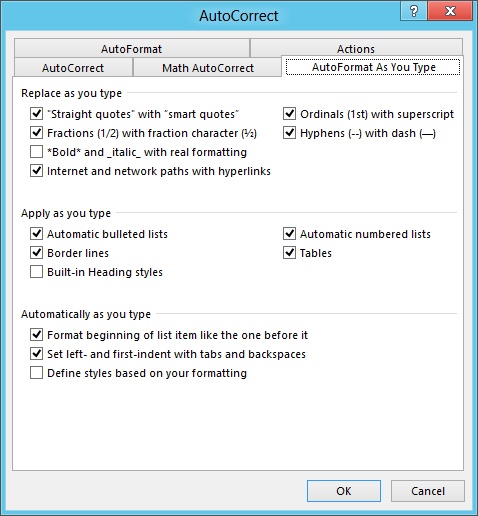
To turn off the automatic bullets and numbering feature, or to explore other AutoFormat As You Type options, click the File tab to display the Backstage view, and then click Options. On the Proofing page, click the AutoCorrect Options button and then click the AutoFormat As You Type tab. In the Apply As You Type section, clear the check boxes for Automatic Bulleted Lists and Automatic Numbered Lists.
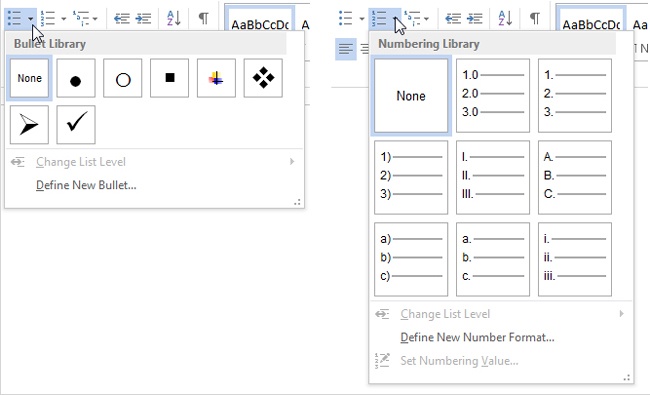
Bullets and Numbering galleries. The Bullets and Numbering galleries are located on the Home tab, in the Paragraph group.
You can use these galleries to format existing selected paragraphs as a bulleted or numbered list, or you can select a bullet or numbering format before you begin creating the list.

When you use either method, Word also formats your text with the built-in List Paragraph style, which adds an indent and suppresses the space between the paragraphs.
See Also
For more information on styles, see Chapter 8.
In this exercise, you’ll create an automatic numbered list, modify the number format, and then change the numbered list to a bulleted list.
Set Up
You don’t need any practice files to complete this exercise. Start Word, create a blank document, and then follow the steps.
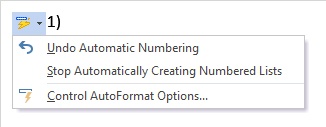
On the first line of your document, enter 1) and press the Spacebar.
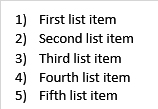
Enter First list item and then press Enter to create list item 2.
Next to the second list item, enter Second list item and press Enter.
Create a total of five list items.
After you enter the fifth list item, press Enter two times to end the numbered list and return to normal text.
Tip
Pressing Enter twice is built-in functionality for ending a numbered or bulleted list, and you’re not adding an empty paragraph. Within a list, if you place your cursor at the beginning of the paragraph, you can press Backspace to remove the number or bullet and keep the indent. Pressing Backspace twice will format the paragraph as normal text.
Select all of your list items, and on the Home tab, in the Paragraph group, click the arrow next to the Numbering button, and in the Numbering Library, select another numbering format, such as one that uses Roman numerals or alpha characters.
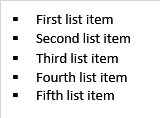
To change your numbered list to a bulleted list, on the Home tab, in the Paragraph group, click the arrow next to the Bullets button, and in the Bullets Library, select another bullet style, such as a square bullet.
A tabbed list can be used for a small amount of information that will stay together on the same page and within a small number of columns. To easily control the position of each column and align the data in the columns, you set your own tabs, called manual tab stops. When you press the Tab key without first setting a manual tab stop, you move between default tab stops that are left aligned and occur every 0.5 inches, or 1.27 centimeters.
As demonstrated in the exercise for composing documents in Chapter 7, you only want to press the Tab key once to align information horizontally. A manual tab stop overrides the default tab stop, enabling you to press the Tab key once to position your data. This functionality also enables you to reposition a column after your data is entered, by moving the tab stop.
There are three tabs for aligning text: left, center, and right. Similar to the text alignment commands, the tabs align text within the columns to the specified type. For example, a center tab will align each item in a column at the center of the tab stop. The manual tab used specifically for numbers is a decimal tab. This tab type aligns numbers to the decimal point position, and the numbers in a table will align to a decimal tab without being preceded by a tab character.
Tip
Decimal tabs are preferred over right tabs when aligning numbers, because this setting aligns numbers according to the position of the decimal, or period, even if you’re not using decimals. You can also use a decimal tab to align any type of data that contains a period or full stop.
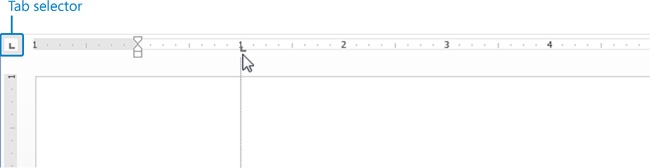
To select a manual tab type, click the tab selector, located at the intersection of the vertical and horizontal ruler. Each time you click the tab selector, you cycle through the different types of tabs. Then, to set a tab, click the ruler at the location where you want the tab to be set. To remove a tab, drag it up or down off the ruler.
Tip
The first line and hanging indent markers are also available when you cycle through the tab selector, and you can set those like you do manual tabs. Another tab type is the vertical bar. This tab doesn’t position data. Instead, it inserts a vertical bar at the manual tab stop position. To determine the type of tab or indent that’s displayed in the tab selector or on the ruler, point to the tab and view the ScreenTip.
In this exercise, you’ll set a manual tab stop for existing data and change the position of the tab after it’s been set. You’ll also set a manual tab to create a memo heading.
Set Up
You need the List Example document located in the Chapter09 practice file folder to complete this exercise. Open the List Example document, and then follow the steps.
If your ruler isn’t displayed, on the View tab, in the Show group, select the check box for Ruler.
On the Home tab, in the Paragraph group, click the Show/Hide ¶ button to view the formatting marks.
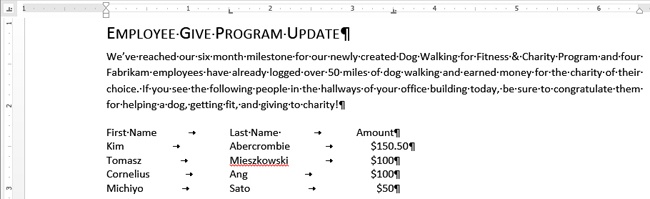
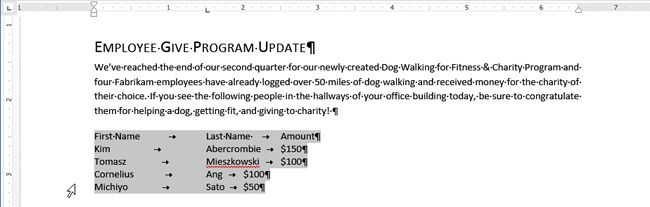
Note the single tab between all of the list items and how the amounts don’t align correctly. Place your cursor in one of the lines in the list and note the left manual tab stop in the ruler.
To set a decimal tab and align the amounts, select the list headings and all employee information.
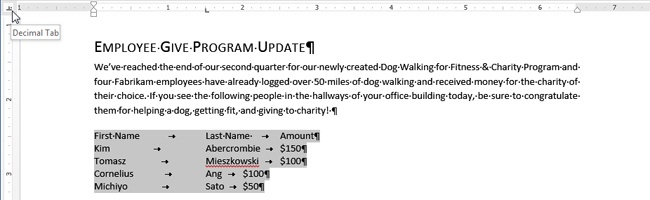
At the intersection of the vertical and horizontal ruler, click the tab selector until a Decimal Tab is displayed.
On the ruler, click the 5-inch or 13-centimeter mark to set the decimal tab and note how the amounts correctly align.
To reduce the amount of space between the last names and amounts, with the list selected, drag the decimal tab to the 3.5-inch or 9-centimeter mark.
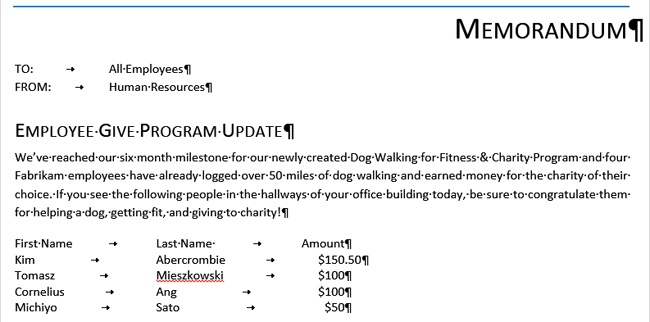
To demonstrate how numbers align to the decimal point position, change the first amount in the list to $150.50.
Press Ctrl+End to move your cursor to the end of the document and remove the text selection.
To set a manual tab for the memo heading, move the cursor after the word TO: near the top of the document.
Click the tab selector until a left tab is displayed, and set a left tab at the 1-inch or 2.5-centimeter mark.
Press the Tab key, enter All Employees, and then press Enter.
Enter FROM:, press the Tab key, and then enter Human Resources.

A table is a grid-like structure with columns and rows. The intersection of each column and row forms a cell, and the data you enter is entered in the cell. You can put almost anything in a cell that you can put in normal document text, and you can format table text the same way you format a paragraph of text. There are several methods you can use to create a table, which are located on the Insert tab, in the Tables group.
Table gallery. Creates an empty table using the dimensions you select by clicking the table grid at the intersection of the number of columns and rows you want to use in your table. The inserted table spans the width of the text area with evenly distributed columns and rows.
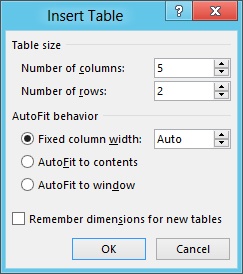
Insert Table. For adding additional options to a table before it’s created, the Insert Table dialog box enables you to select the number of rows and columns, similar to the Table gallery. But unlike the Table gallery, the Insert Table dialog box allows you to select an AutoFit behavior.
The following provides descriptions for each of the AutoFit options:
Fixed Column Width. You can set a default size for each column or use the Auto setting to insert a table that spans the width of the text area with evenly distributed columns and rows.
AutoFit to contents. Inserts a table with small columns that resize as you enter your information.
AutoFit to window. The inserted table initially spans the width of the text area with evenly distributed columns and rows. But unlike in the fixed column width option, column sizes and the table size are based on percentages rather than fixed measurements. If you change the paper size or page orientation, the table will be resized to fit the new text area.
Draw Table. For a less structured table that doesn’t have uniform columns and rows, you can use the Draw Table command to draw your table in a document. This type of table is good for creating a fill-in-the-blank type of form or for a complex page layout.
See Also
For more information on using a table for a complex page layout, see the sidebar titled Using tables to lay out information on a page at the end of this section.
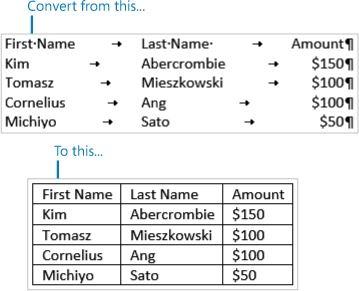
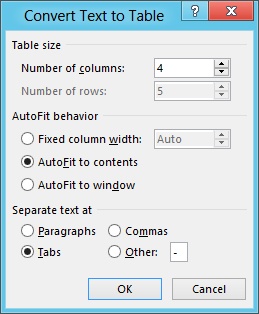
Convert Text to Table. Converts list data that is separated by a divider, such as a tab or comma, to a table. The Convert Text to Table dialog box has the same AutoFit behavior options as the Insert Table dialog box, and it also includes options to identify the character to replace with a table column.

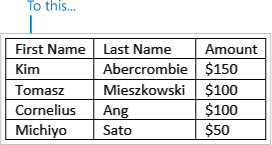
In this exercise, you’ll convert the tabbed list you created in a previous exercise to a table that will always maintain the same width of the text area, and you’ll change the page orientation to gain a better understanding of the AutoFit To Window option. You’ll then insert a new table by using the Table gallery.
Set Up
You need the List Example_B document located in the Chapter09 practice file folder to complete this exercise. Open the List Example_B document, and then follow the steps.
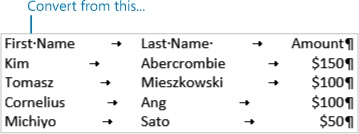
Select the list of names, including the headings, and on the ruler, at the 3.5-inch mark, drag the decimal tab off the ruler to delete it. (You’ll add it back in another exercise.)
On the Insert tab, in the Tables group, click the Table button, and then click Convert Text to Table.
In the Convert Text to Table dialog box, note that the number of rows and columns match the tabbed selection, and near the bottom, under Separate text at, the Tabs option is selected.
Click OK to convert the tabbed list to a table.
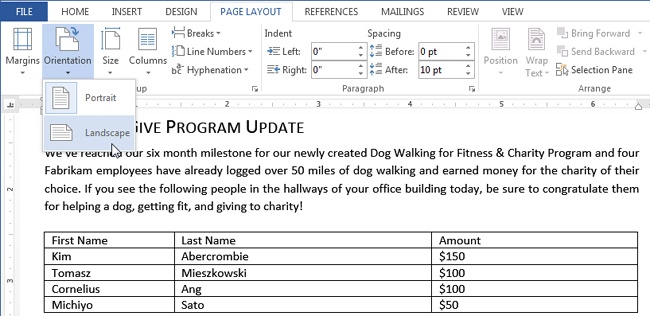
To view how the table will be resized to fit your text area, on the Page Layout tab, in the Page Setup group, click the Orientation button, and then click Landscape.
Change the page orientation back to portrait.
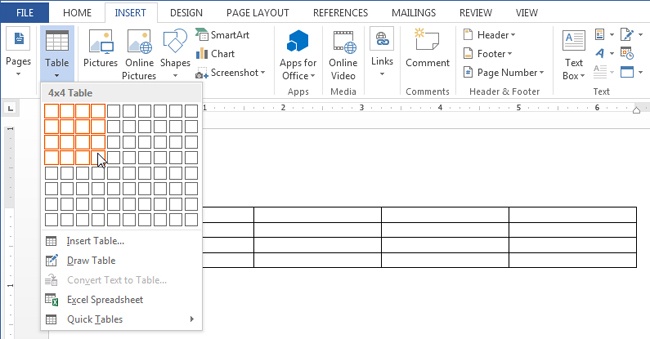
To insert a table by using the Table gallery, press Ctrl+End to move the cursor to the end of the document and press Enter twice.
On the Insert tab, in the Tables group, click Table and then, in the grid, select a 3-column-by-5-row table.
Clean Up
Save the document as My List Example. If you’re proceeding to the next exercise, leave Word and My List Example open. Otherwise, close the document and exit Word.
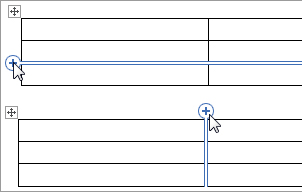
When you create a table, you’re not limited to the number of rows and columns you initially selected, and you can resize both the columns and the rows. To add new rows or columns, point to the left of the table between two rows or above the table between two columns. Watch for the on-screen insertion indicator to appear, and then click the indicator to insert a new row or column. When you are inserting new columns, if the width of the table is the same size as the text area, the width of the table columns will be reduced to accommodate the newly added column.
Tip
You can also use the Table Tools Layout tools tab and the Rows & Columns group to insert new rows and columns.
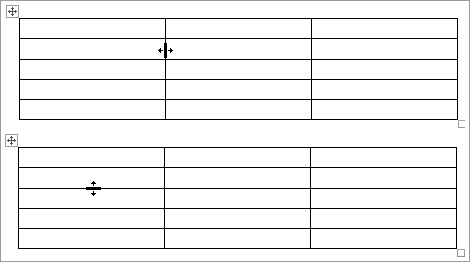
To change the width of a column or height of a row, point at the right border of the column you want to resize or point to the bottom border of the row you want to resize. Watch for the mouse pointer to change to a sizing pointer, and then drag.
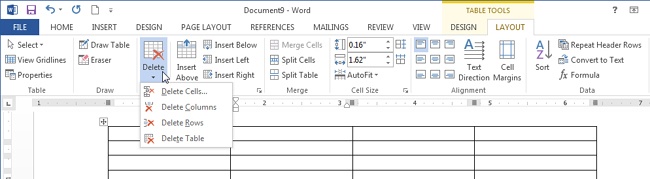
To delete cells, rows, columns, or the entire table, place your cursor in the table element you want to delete. On the Table Tools Layout tool tab, in the Rows & Columns group, click Delete, and then click the command that corresponds with what you want to delete, such as Delete Rows.
When you insert a table, all of the columns and rows are formatted with a 1/2 point border by default. After your table is created, you can modify the border formatting or shade rows and columns. To format a table, place your cursor in the table, and then click the Table Tools Design tool tab.

The following list provides descriptions of the primary tools that are located on the Table Tools Design tool tab:
Table Styles gallery. The Table Styles gallery contains preformatted table styles that match your current document theme. To apply a table style, click a style in the gallery.
Table Style Options group. The options in the Table Style Options group enable you to turn on or off special formats that are included in most of the table styles. For example, if the first row of your table has text that identifies each column, you can use the Header Row option to format it differently than other rows. The Total Row, First Column, and Last Column options will also add different formatting to the corresponding table element. The Banded Rows and Banded Columns options will format odd and even rows or columns differently. The exact formats that are added by these options will vary depending on the table style you choose. You can select options in this group before you apply a table style, and the gallery will be updated to reflect the formats. You can also turn the table style options on or off after a table style has been applied to modify the table formatting.
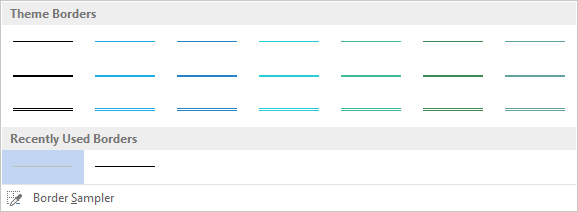
Border Styles gallery. The Border Styles gallery provides a collection of border styles that match the current document theme.
When you select a style from the gallery, it turns on the Border Painter, located at the end of the Table Tools Design tool tab, in the Border group. Using the Border Painter is similar to drawing a table, because you paint borders by dragging through the borders you want to format.

After your table is formatted, you can add additional formats to the contents of a table just like you would do for text and paragraphs, using the Home tab and either the Font or Paragraph group.
In this exercise, you’ll format names and amounts in a table that you created in the previous exercise, using the Table Styles gallery, the Table Style options, and the Border Painter.
Set Up
If the My List Example document and Word are still open from the previous exercise, then follow the steps. Otherwise, you need the List Example_C document located in the Chapter09 practice file folder to complete this exercise. Open the List Example_C document, and then follow the steps.
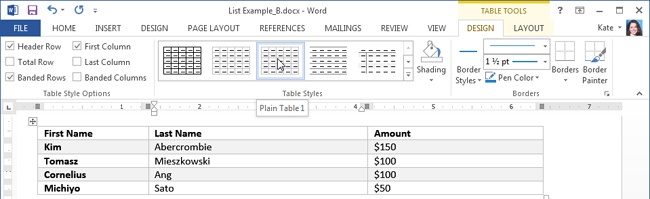
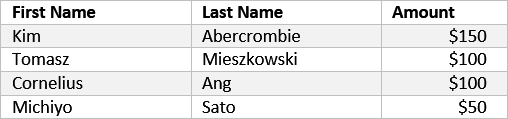
Place your cursor in the table of names and amounts.
On the Table Tools Design tool tab, in the Table Styles gallery, click the third table style, Plain Table 1.
To remove the bold formatting from the first column, in the Table Style Options group, clear the check box for First Column.
To gain a better understanding of alternating row formatting, in the Table Style Options group, clear the check box for Banded Rows.
Turn the banded row formatting back on.
To resize the Last Name column, place your mouse pointer on the right border of the column, watch for the sizing pointer, and then drag to the left until it’s about 1.27 inches or 3.23 centimeters wide.
Resize the Amount column so it’s about 0.8 inches or 2 centimeters wide.
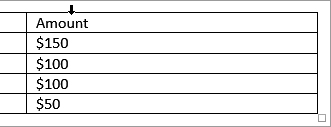
To add the decimal tab back and align the values in the Amount column, point to the top edge of the Amount column, watch for the column select arrow, and then click to select the entire column.
Tip
To select a row, place your mouse in the selection bar, point at the row you want to select, and then click to select the entire row. To select the entire table, click the icon with the multidirectional arrows in the upper-left corner of the table. You can also use the icon to drag a table to another location, so make sure you click, rather than click and drag, when using it to select a table.
On the ruler, click the tab selector until a Decimal Tab is displayed, and then set a decimal tab near the right end of the Amount column.
Click anywhere in the document to remove the column selection.
Using tables to lay out information on a page
Though tables can be used for lists of data, they can also be used for complex layouts, to position information, or to flow paragraphs in parallel side-by-side columns. When tables are used in this manner, columns and rows don’t appear in a printed document; all you get is the information. In the document, you can turn the table gridlines on or off while you’re working by using the Gridlines button in the Tables group on the Table Tools Layout tool tab. This type of table is called a borderless table.
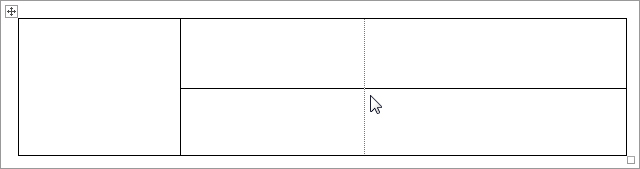
An example of a borderless table is located in the Example Newsletter document included in the Chapter09 practice file folder. The top of the newsletter has a two-column table. It is used to place the newsletter title along with the edition and volume to the right of the company logo. The second column is divided into two rows in order to create a taller cell for the newsletter title, Employee News, so more space can be added above and below the title.

To remove border formatting from a table, select the table and on the Table Tools Design tool tab, in the Borders group, click the arrow below Borders, and then in the Borders gallery, click No Border.
You can present your information in a more structured format, such as in a list or in multiple columns.
To create a bulleted list while entering text, enter an asterisk and then press the Spacebar.
To create a numbered list while entering text, enter the number 1 followed by a period or closing parenthesis and then press the Spacebar.
You can change a bulleted list to a numbered list by choosing a number format from the Numbering Library, and vice versa.
A tabbed list is best for small amounts of information that will stay together on the same page and for a small number of columns.
For lists that may not stay together on the same page or have several columns, use a table instead of a tabbed list.
You can convert a tabbed list to table.
The AutoFit To Window option in the Insert Table dialog box will create a table that automatically resizes to the text area if the page orientation or page margins change.
When you are formatting tables by using built-in table styles, the Table Style Options group on the Table Tools Design tool tab enables you to turn special table formats, such as a header row, on or off.