
Chapter at a glance
Familiarize
Discovering the new features in PowerPoint 2013
Resume
Resume where you left off, ???

Add
Add guides to slide masters, ???

IN THIS CHAPTER, YOU WILL LEARN HOW TO
Get started working with PowerPoint 2013.
Explore the PowerPoint 2013 tools.
Discover the new features in PowerPoint 2013.
Microsoft PowerPoint is arguably the world’s most common presentation tool, and PowerPoint 2013 makes it even easier to create and deliver presentations than ever before. Better integration with the cloud and Internet means that accessing online content is more streamlined, and online storing, sharing, and collaboration tools are front-and-center features.
In this chapter, you’ll explore the PowerPoint 2013 interface and work with new and improved features.
As with Microsoft Word and Excel, you typically start PowerPoint 2013 from the Start screen in Windows 8 (not the Start screen in PowerPoint) or the Start menu in Windows 7. You can also start PowerPoint 2013 and open a file at the same time by opening a presentation from an email attachment or by double-clicking one from a place like your Windows Desktop.
Regardless of how you open or start a presentation, before too long, you will more than likely create and edit slides in the PowerPoint workspace interface, which is also known as Normal view.
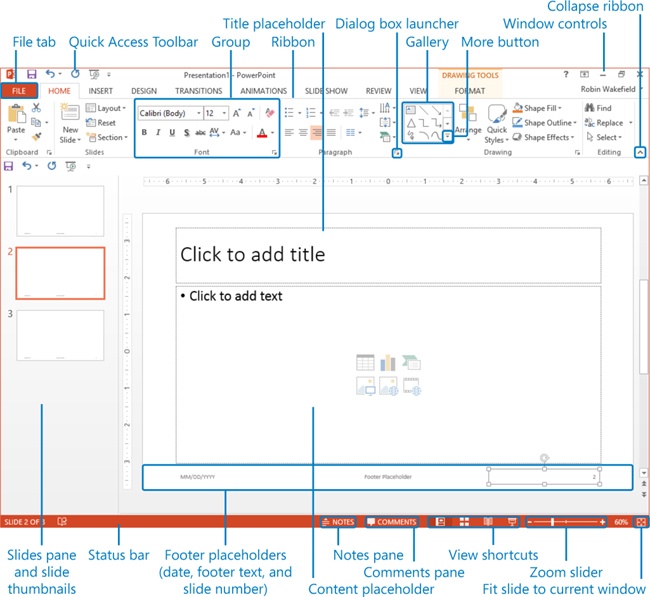
Ribbon. The ribbon is the main component of the PowerPoint interface. It’s where you’ll find most of the tools for working with your presentations. The ribbon contains task-oriented tabs, and each tab has groups of related commands. For example, on the Home tab, the Clipboard group contains commands for copying and pasting information in your files. Groups that have additional commands that aren’t shown on the ribbon have a Dialog Box Launcher. Clicking the Dialog Box Launcher will display a task pane or dialog box with options that are related to the group. For example, if you click the Dialog Box Launcher for the Font group, the Font dialog box will be displayed, giving you more formatting choices, such as Small Caps, Superscript, and Subscript.
Also note the More button, which is found on most galleries. Clicking the More button expands a gallery and displays all of its options at once. (Alternatively, you can use the up and down arrows immediately above the More button to scroll through the gallery line by line.)
Important
The screen shots of the ribbon and interface were captured with a screen resolution of 1280x800. If your display settings are different, the screen shots of the ribbon will appear differently on your screen due to its dynamic capabilities. For example, buttons may appear stacked vertically instead of horizontally. If you experience these differences, you can either adapt the exercise instructions to your screen or modify your display settings to match those in this book.
See Also
For instructions on how to modify your display settings and adapt exercise instructions, see Chapter 1.
File tab. This is the first tab on the ribbon. Unlike other ribbon tabs, the File tab displays the Backstage view where commands for working with the entire contents of a document, such as Save As, Print, Share, and Export, are located. The Backstage view is also where application options are located and where you can find information about your user account and your version of Microsoft Office.
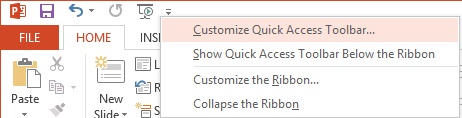
Quick Access Toolbar. This toolbar holds your most frequently used commands. By default, Save, Undo, Redo, and Start Slide Show have already been added.
Tip
To quickly add other commands to your Quick Access Toolbar, right-click a command on the ribbon, and then click Add To Quick Access Toolbar. To remove a command from the Quick Access Toolbar, right-click the command you wish to remove and then click Remove From Quick Access Toolbar. Opting to show the Quick Access Toolbar below the ribbon gives you more room for tools and puts them closer to your workspace.
Title bar. The title bar appears at the top of the window and displays the name of the active document, along with the application name. If you’re working with a presentation that hasn’t been saved, the title bar will display a name such as Presentation3 - PowerPoint. After the file has been saved, the title bar will reflect the name of the saved file.
Window Controls. These display at the right end of the title bar. Along with the name of the account you signed into Office with, there are standard Minimize, Restore Down/Maximize, and Close buttons, as well as the Help and Ribbon Display Options.
Collapse ribbon. To collapse the ribbon, click the button on the right end of the ribbon. Double-click any tab (except the File tab) to restore the ribbon.
Status bar. This appears at the bottom of the window and displays information about the current presentation, such as the number of slides. You can also open the Notes and Comments panes from here. The right end of the status bar has view options for switching your presentation to a different view, along with a zoom slider to change the magnification of your active document and a button that resizes your slide to fit the available workspace.
Slides pane. This pane appears at the left of the window and lets you access any slides in the presentation. Click a thumbnail to select a slide, and it will appear in the main workspace so you can edit it.
Notes pane. Click this button to open a pane where you can enter notes. These notes will be available to you in Presenter view, but will not be displayed for the audience to see.
Placeholders. Placeholders are preformatted content holders. PowerPoint has placeholders for slide titles, for subtitles, and for content such as text, pictures, tables, charts, SmartArt graphics, and video.
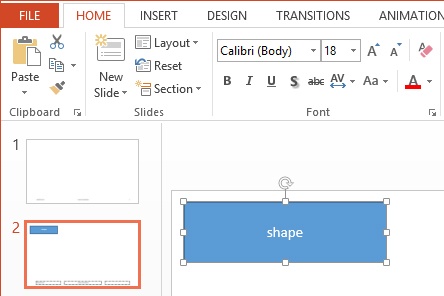
The Home tab in PowerPoint contains most of the tools you’d use to create a quick, basic presentation. You’ll find the same Clipboard tools here that you’ll find in Word, Excel, and Publisher, along with font and paragraph formatting tools.
In addition, the Home tab has drawing tools that include the Shapes gallery, Arrange tools (for alignment, ordering, and so on), and object formatting tools. Find, Replace, and Selection tools are at the end of this tab. When in doubt, head to the Home tab.

If a button is unavailable and appears to be grayed out, then try selecting an object that can use that command. For example, in order for the buttons in the Font group on the Home tab to be available, you need to select a text box or shape on a slide.
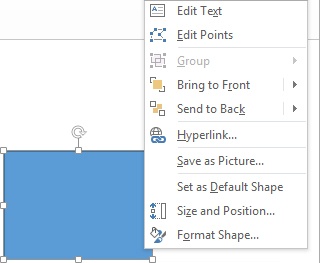
Don’t forget about the ability to right-click. You might find tools you didn’t even know existed. For example, on the Design tab, right-click one of the themes in the gallery, and you’ll notice that an option will appear that allows you to set that theme as your default theme.

Access the formatting panes quickly and easily by right-clicking an object. For example, right-click a shape and choose Format Shape to open the Format Shape pane.
The best thing you can do to become quicker and more proficient with PowerPoint 2013 is to set up your Quick Access Toolbar. You can right-click any command on the ribbon and add it to the Quick Access Toolbar. You can also right-click the Quick Access Toolbar itself and choose Customize Quick Access Toolbar to add tools that are not available on the ribbon and to apply other customizations.
See Also
For more step-by-step instructions on customizing your Quick Access Toolbar, see Chapter 1.
This section introduces you to key application features for PowerPoint 2013, offering screen shots where applicable. Many of the features included are discussed in detail along with step-by-step instructions throughout this part of the book.
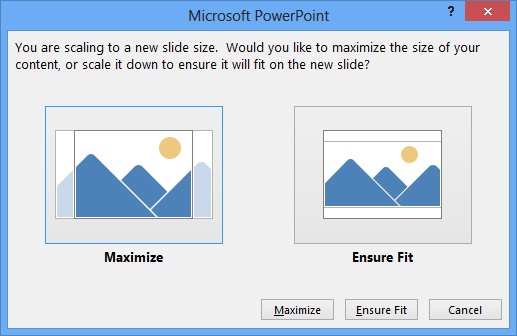
16:9 slide size default. New presentations are automatically created with a 16:9 aspect ratio for widescreen monitors and displays. And the new scaling options help you convert a widescreen slide size (16:9) to a standard slide size (4:3).
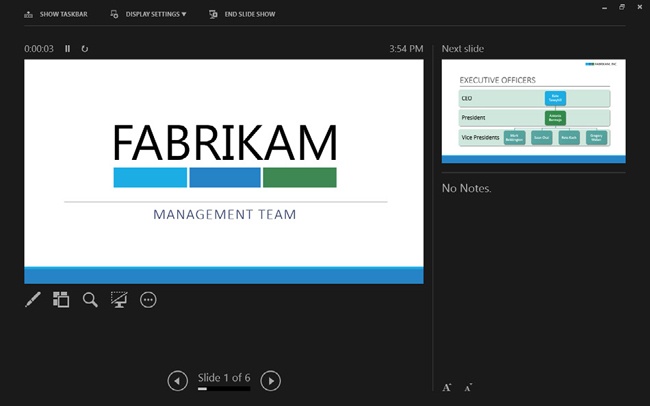
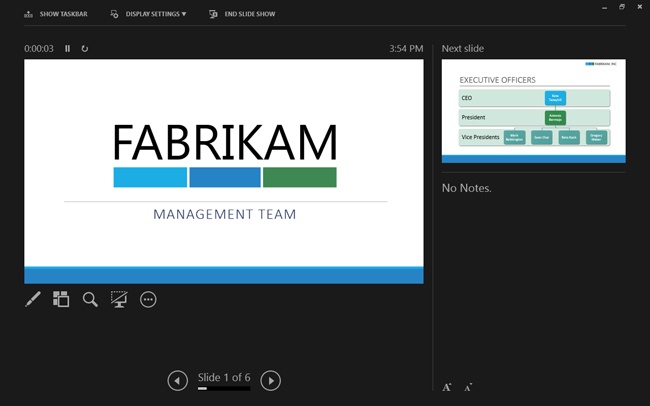
Presenter view. The redesigned look of Presenter view makes it easier to determine exactly what the audience sees. And you can now rehearse your presentation in Presenter view without the need for two monitors.
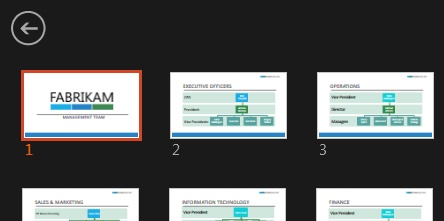
Navigation grid. The new navigation grid in Slide Show view displays thumbnail views of your slides so you can jump to the slide you need faster.
Slide Show zoom. Now you can call attention to specific details during your presentation by zooming in on a portion of your slide.
Slide Show pop-up toolbar. The new pop-up toolbar in Slide Show view gives you more tools for presenting.
New Transitions. New transitions include Page Curl and Peel Off.
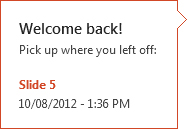
Resume Reading. When you close a presentation, PowerPoint automatically creates a bookmark for your last position. When you reopen the presentation, you can pick up right where you left off.
Theme variants. New themes for PowerPoint now include variants to give you more color choices for a specified theme.
Master and slide layout guides. Now you can set guides on slide masters and layouts so you won’t accidently move them when you’re working on slides. For the guides you want to move, you can still add those to individual slides.
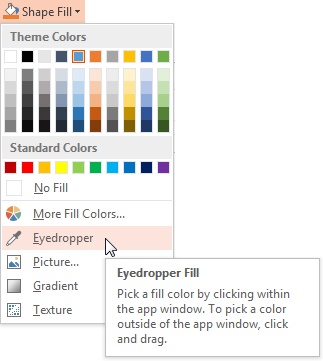
Eyedroppers. Select fill, outline, and glow colors for text and shapes and apply them to others. Use colors from within your presentation or from any color that appears on your screen. You can also use the Eyedropper to add a color wash to pictures.
Improved motion paths. When you add or edit a motion path, a subdued view of your object will appear at the endpoint so you can visually see where the object will begin and end.
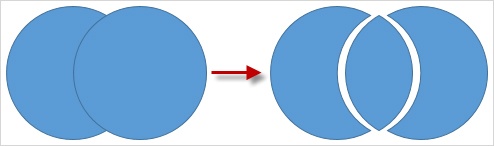
Fragment shapes. Use the new Fragment tool to break up overlapping shapes into new separate shapes.
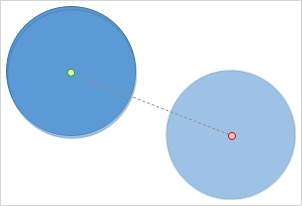
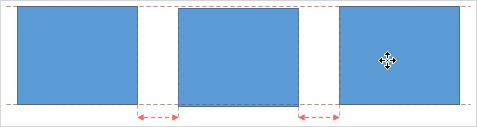
Smart Guides for equal distance. Smart Guides now appear when shapes are placed an equal distance from each other.
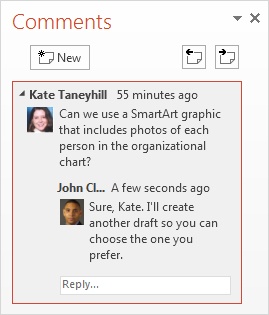
Threaded comments. When multiple people review a presentation, they can now reply to each other’s comments. And the new Comments pane makes it easier to keep track of those conversations.


Setting up your Quick Access Toolbar helps you work more quickly.
The PowerPoint interface will change depending on your log-in status and your screen resolution.
PowerPoint 2013 introduces a number of new tools for presenters: enhanced Presenter view, a navigation grid, a newly designed pop-up toolbar, and slide show zoom.