
Chapter at a glance
Organize
Creating and organizing sections
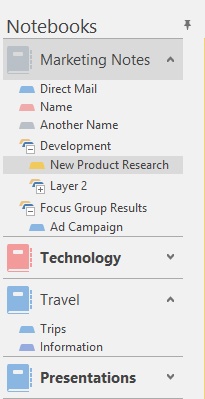
Images
Recover
Recovering deleted sections or pages
IN THIS CHAPTER, YOU WILL LEARN HOW TO
Create and organize notebooks.
Create, organize, and manage sections and section groups.
Create and organize pages and subpages.
Add and organize notes.
Insert images and work with ink and shapes.
Recover deleted sections or pages.
Microsoft OneNote is built around the metaphor of a spiral-bound notebook—though of course you can have multiple notebooks in OneNote if you like. Each notebook is divided into sections, and each section contains the pages where your notes are located.
Before you can get started capturing ideas and research with OneNote, you need to get your notebooks, sections, and pages set up. Adding notebooks is easy. You need to decide where you want to store them and what you want to call them, but after that, you’re ready to go. You can have as many notebooks as you have storage space for. Notebooks must have at least one section, but they don’t have to have more than one. Likewise, each section has to have at least one page, but can have only one. It’s not likely you’ll want to have a notebook that has only a single section and single page in it, but you can.
Creating a notebook is quite simple to do. Simply click the File tab to go to the Backstage view and then choose New. The New Notebook page appears, and it’s time to make your first important choice—where to put your new notebook.
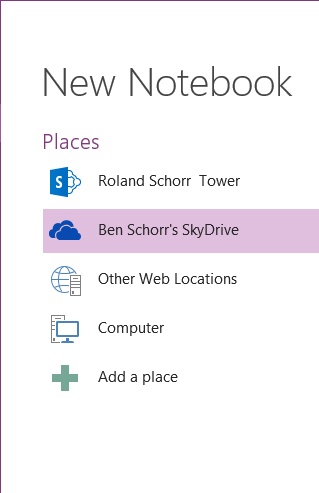
OneNote shows you the list of places it recognizes and gives you the option to add a place that it doesn’t. It’s worth noting that the Add A Place option only offers choices of places in the cloud. You won’t get local or network locations there. The default location in OneNote 2013, as in many programs of the Microsoft Office Home and Student 2013 suite, is on your Microsoft SkyDrive. On the list shown just previously, you may notice from the icon that the first place listed is a Microsoft SharePoint site.
When you are choosing a location to store your new notebook, there are a few things you should know:
If you plan to share this notebook with mobile devices, only the Windows Phone version of OneNote mobile can access notebooks stored on SharePoint. If you’re an iPhone, iPad, or Android user, you’ll need to store the notebook on SkyDrive.
If you plan to share this notebook with other PCs, you can select any network location those PCs also have access to. A network file share, network storage device, SharePoint, or SkyDrive will all work fine as long as all of the PCs involved can access that location.
After you’ve selected your location, give your notebook a name. Choose a name that makes sense to you, but try not to make it too long. Marketing and Clients are great names. Collection of notes about my trips throughout North Carolina, California, Canada, and much of Southern Mississippi is a poor name.
With your location chosen and notebook named, click Create Notebook. Your new notebook is created and opened in OneNote with a single section and a single page within that section.
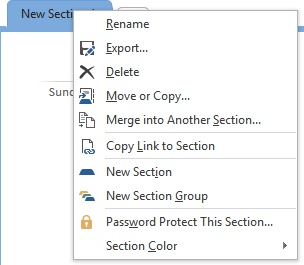
OneNote helpfully creates the first section for you, and it’s a safe bet that you don’t really want that section to be named New Section 1. To rename the section, right-click the section tab and select Rename from the menu that appears (or just double-click the name on the section tab).
The same naming guidelines you followed for the notebooks apply to sections, as well. The names should be descriptive but not ridiculously long or detailed.
Tip
Try to avoid using too much punctuation in notebook or section names. Notebooks are stored as folders and sections as files; too much punctuation can cause problems with synchronization and file storage.
Creating a new section is as simple as clicking the + tab. When you do so, OneNote creates a new section and names it New Section x. Rename it to whatever you’d like, as described previously.
If you’d like to rearrange the order of your sections, just click a tab and drag it left or right along the tab row above your page or drag a section up or down on the Navigation pane at the left.
See Also
If you need a refresher on section tabs or the Navigation pane, see Chapter 24.
Now that we’ve looked at notebooks and sections, you’re probably wondering what section groups are. Section groups are merely an organizational construct that let you group your sections together in a logical fashion (hence the name).
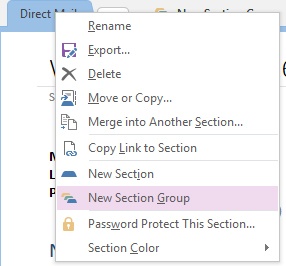
To create a section group, right-click any of the section tabs or the empty space to the right of the section tabs and select New Section Group.
A group called New Section Group will be created, which you can right-click and rename.
Click the section group to go into it, and click the green swirly arrow at the left side of the section tabs to go back up to the previous level.
Tip
You can create just about as many layers of section groups as you want, but don’t get too crazy about it. Nine layers of section groups could be rather difficult to easily navigate.
To add a section to a section group, click in that section group and create a new section. To move existing sections into a section group, drag them onto the section group.
The real york in OneNote gets done on pages. All the rest (notebooks, sections, section groups) are just a framework to help organize those pages. Everything we talk about when it comes to typing notes or inserting images or ink happens on pages.
Creating a page is quite simple:
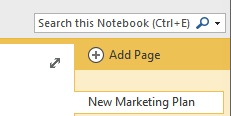
As with sections and section groups, your page will have a default name; for example, Untitled Page, which you are encouraged to change. There are several ways to rename your page:
Right-click the page tab and select Rename
Click in the page title area of the page (above the horizontal line) and enter a name for your page.
Enter some text on the page. In the absence of a formal name, OneNote will use whatever the first line of text is for the title of the page.
After you’ve created your page, you can change the order by dragging it up or down in the page list on the right side of the window.
Tip
A popular feature request is the ability to sort pages alphabetically. OneNote 2013 doesn’t include that feature, but there have been Microsoft PowerToys available for download in the past that could do it.
After the page is created, click anywhere on the page to begin adding notes and content.
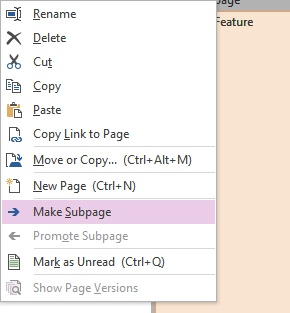
A subpage is a regular page that is indented a bit in the page list in order to show that it is a subpage of the page above it. Do you have to use subpages? No, but you might want to, because an organizational construct will separate related data onto multiple pages.
To create a subpage, follow these steps:
Adding notes to a page in OneNote is as simple as clicking where you’d like the note to appear and adding your content. Most often, that content tends to be typed notes, but it can also be ink, images, web content, and more.
To add typed text, click where you want the text to appear and begin entering text. Don’t be too concerned if you decide to change the layout later. You can move your notes around on the page whenever you want.
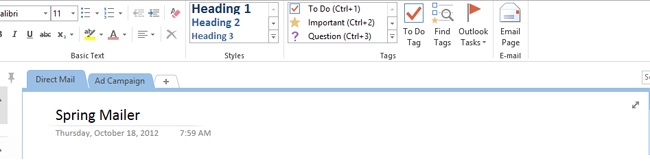
To format your text, select the text you want to format and use the formatting tools on the Home tab of the ribbon or on the Mini Toolbar that appears just above the selected text. You can apply various font colors, font sizes or types, effects like Bold or Underline, and also highlights to your text.
OneNote makes a basic set of Styles that you can use to format your notes. To apply a style, select the text you want to apply the style to, and then select the style you want to apply from the Styles gallery on the ribbon.
There are a number of ways you can insert images into your notes in OneNote 2013. First, select the note page where you want the image to appear. Then use one of the following techniques to insert your image:
On the Insert tab, click Pictures to select an image from your hard drive or Online Pictures to search online sources for an image or piece of clip art to insert.
On the Insert tab, click Screen Clipping to use the Screen Clipping tool to select and insert a portion of your screen. This is great for inserting images of error messages or other on-screen content.
If you have a scanner connected to your computer or device, you can click Scanned Image on the Insert tab to insert an image from your scanner.
In some cases, you can drag images from other applications right into your notes.
You can press the Windows logo key+N to open the Send to OneNote tool, then press N again to start a screen clipping action. Select a section of the screen you want to clip, and then paste it into your notes.
After you’ve inserted an image into OneNote, you can move it to wherever you would like it to appear on the page. Just drag the image to place it. You can also resize the image by dragging one of the image’s handles that appear at the sides and corners of the image when you select it.

OneNote was originally created to be the “killer app” on the original tablet PCs. Back in the early 2000s, Microsoft got on board to promote a variant of the laptop computer that had a touch screen. Some were laptops where the screen could lie flat; these were called convertibles. Others had screens that detached entirely from the keyboard, much like early, primitive, iPads. These were called slates. The devices ran a version of Windows that was designed specifically for tablets, and OneNote (then OneNote 2003) was a powerful tool for those early efforts at tablet computing. Though those tablets never really took off, OneNote has endured and thrived, and the ink capability of those early devices has continued in OneNote.
In this exercise, you’ll explore the inking capabilities of OneNote.
Set Up
You don’t need any practice files to complete this exercise. Just open OneNote and open a blank page that you can practice drawing on.
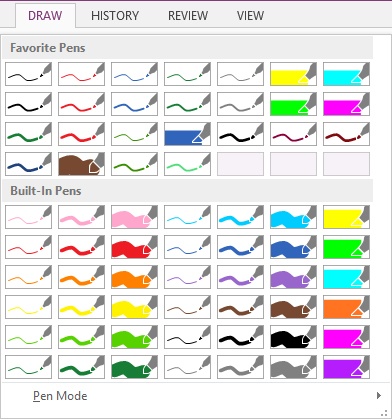
Click the Draw tab.
On the Draw tab, in the Tools group, you’ll find a selection of pen colors and thicknesses. Click one of the pens from the pen gallery to select it, or click the More button on the right edge of the gallery to expand it and show more pen choices.
After you’ve selected a pen, click in the page area. Then draw, write, or annotate with that pen, using your mouse or a stylus.
To change back to entering text, click the Type button at the left end of the Draw tab.

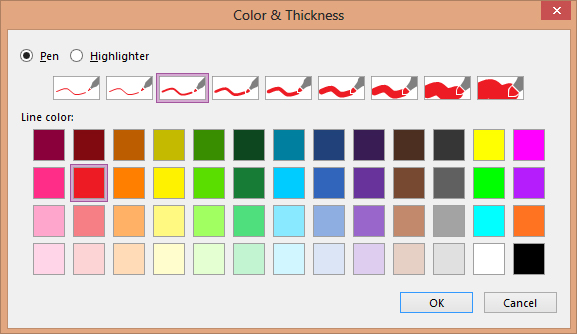
If you can’t find the pen you want, you can create a custom pen by clicking the Color & Thickness button in the middle of the Draw tab.
Next to the Color & Thickness button you’ll find the Shapes gallery. These shapes may look like the kind of shapes you’re used to in other applications, but actually, they’re just predefined ink strokes. That’s important to understand, because you use the pens gallery to select the color and thickness of the lines in your shape.
To create a shape, select the pen you want to use from the pens gallery, and then select the shape you want to draw from the shapes gallery. Use your mouse or stylus to drag the shape onto the page where you want it to appear.
Didn’t get it exactly the right size or precisely where you want it? Just drag and drop the shape where you want it or grab one of the resizing handles and make the shape larger or smaller.
If you want multiple copies of the same shape, select your shape, click Copy (or press Ctrl+C), then move to another part of the page and click Paste (or press Ctrl+V). You can make as many copies of the same shape as you like, then drag those shapes to various places on the page.
If you want to select multiple shapes and move them as a group, you should use the Lasso Select option. Click Lasso Select button on the Draw tab and draw a line around the shapes you want to select. When you’ve completed the loop, OneNote will select all of the items within that Lasso. Then you can drag the shapes or delete the group as you choose.
If the shape isn’t aligned the way you’d like, you can rotate it to the right or left. Select your item and click Rotate on the Draw tab (or right-click the shape and select Rotate from the shortcut menu) to display more choices for how you can rotate the shape.

If you don’t like what you’ve drawn, you can use a couple of methods provided by OneNote to erase it. The first way, if it’s something you just drew, is to simply use Undo (press Ctrl+Z). You can undo several steps in case you wish to go back further than one step. Just continue pressing the key combination until you’ve removed the steps you don’t want.
If you accidentally undo one too many steps, you can use Redo (press Ctrl+Y) to advance one step.
If you want to do a somewhat more determined sculpting of your ink, you can use the Eraser tool on the Draw tab. When you click the Eraser tool, the pointer turns into an eraser that you can use to erase ink or shapes (or parts of them) from your page.
You have four different types of erasers to choose from. To select one, click the arrow below the Eraser button to view the menu.
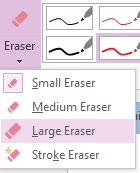
The types of erasers are described in the following list.
Small Eraser. An eraser with a small head for very fine work.
Medium Eraser. An eraser that is a bit bigger than the small eraser; used for faster erasing.
Large Eraser. A rather large eraser head; used for wiping large swathes of the page in quick strokes.
Stroke Eraser. A special eraser that removes entire ink strokes with a single click. This eraser is useful for quickly removing a specific ink stroke without disturbing other ink around it.
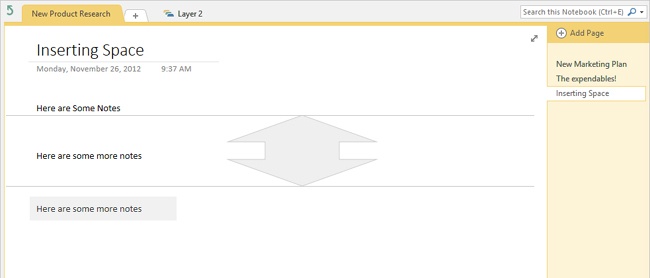
Sometimes you’ll want to move items down the page so that you can insert other items above them. The Insert Space tool helps you do that. Just point above the items you want to move down, click the Insert Space button on the Draw tab, and drag down to move all of the items below that point down.

You can also insert space horizontally with the Insert Space tool. Simply point to the side of the page; the Insert Space line will change from a horizontal line to a vertical line. Then you can drag left or right to move everything over.
Tip
The Insert Space button can also be used to remove space. If you have some blank space in your page and you want to move everything below that space up, point above the items you want to move up, click Insert Space, and drag up to remove the excess space.
To illustrate how this works, enter some text on the page. Then enter some text in a different note container that appears somewhat lower on the page. Next, click Insert Space on the Draw tab, and point to the space between those two note containers. Then drag down to insert more space between them.
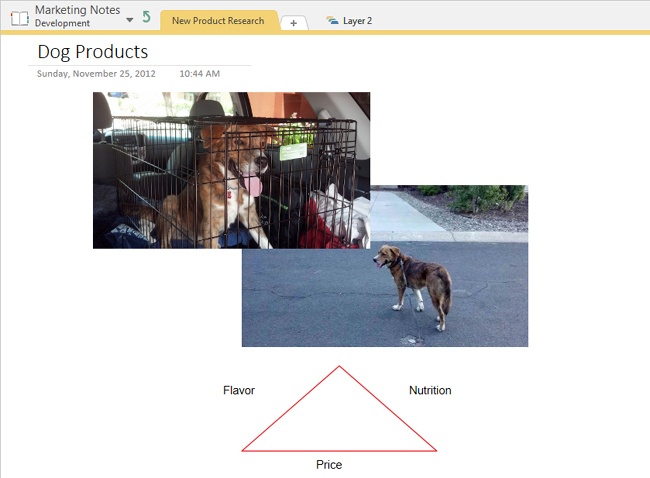
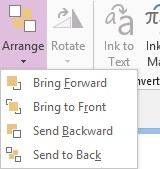
Shapes don’t only exist in two dimensions in OneNote. You can also layer them front to back, and for that you use the Arrange tool.
To place a shape in front of another shape, select that shape, click the Arrange tool on the Draw tab, and select Bring To Front.
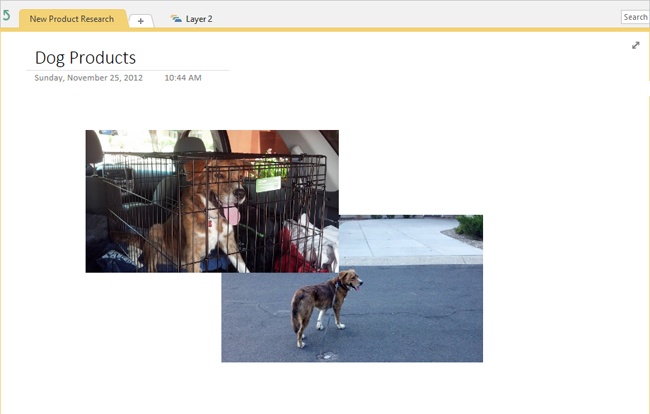
After you’ve brought the shape to the front, drag it on top of the shape you want it to be in front of. In the following graphic, you can see that the Arrange tool has been used to bring the photo of the dog in the crate to the front of the image, and send the other dog photo to the back. Then the front photo was moved so that it overlaps the back photo.
If you play around with the Arrange features, you’ll find that you can create some complex layers of shapes.
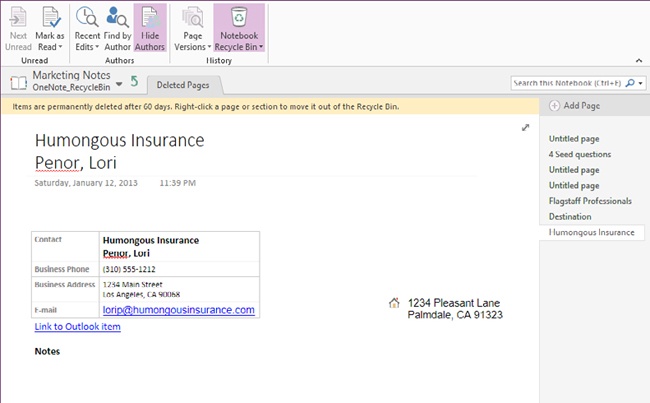
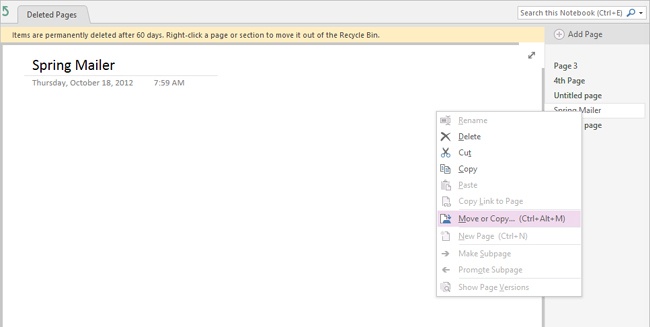
If you’ve deleted a page or section and want to get it back, then the Notebook Recycle Bin is your friend.

Following are the steps for restoring deleted sections or pages.
On the History tab, click the Notebook Recycle Bin button, and then select Notebook Recycle Bin from the menu that appears. OneNote displays deleted pages or sections it still has from the current notebook.
To restore a section or page, right-click the tab for the section or page, choose Move or Copy, and move it back to where you’d like it in the notebook.
If you’re sure that you don’t need anything in the Recycle Bin, you can empty it to save a little bit of space. Just click Notebook Recycle Bin on the History tab. Then select Empty Recycle Bin from the menu.
OneNote 2013 uses notebooks, sections, and pages to help you organize your notes. You can have as many notebooks as you like, each containing one or many sections. Each section can contain one or many pages.
You can move pages and sections between notebooks.
On a page, you can take notes with text, images, ink, shapes, or other kinds of content.
Ink and shapes are drawn with pens, which can have many different colors or thicknesses.
Ink and shapes can be moved, resized, or rotated as needed.
OneNote’s eraser provides several options for cleaning up any mistakes.
If you accidentally delete a section or page, it can be recovered from OneNote’s Notebook Recycle Bin.