
Chapter at a glance
Share
Share your OneNote notes via SkyDrive, Moving a notebook to SkyDrive
Collaborate
Connect to teammates by storing notebooks on a common network drive, Using a file server to share notes

Communicate
Use OneNote and Outlook together to send your notes to anybody, Sending notes via email
IN THIS CHAPTER, YOU WILL LEARN HOW TO
Share notes by using SkyDrive.
Make notes available to your team on a network drive.
Use SharePoint to share notes with your entire department.
Send notes via email.
Export your notes to other formats.
In Chapter 25, you learned how to create notes. In this chapter, you’ll examine some of the tools OneNote gives you to share those notes with others. Data capture is made even more powerful by collaborating on those notes with others.
In Chapter 25, you learned that the preferred storage location for OneNote files is Microsoft SkyDrive. When you store notebooks on SkyDrive, you can synchronize them with other computers and devices you own (described in Chapter 28), and you can also share them with other people.
In this exercise, you’ll create a new notebook located on SkyDrive.
Set Up
You don’t need any practice files to complete this exercise. Log into your Microsoft Account, and then start OneNote. If you don’t already have a Microsoft Account, go to http://www.live.com and sign up for one (it’s free).
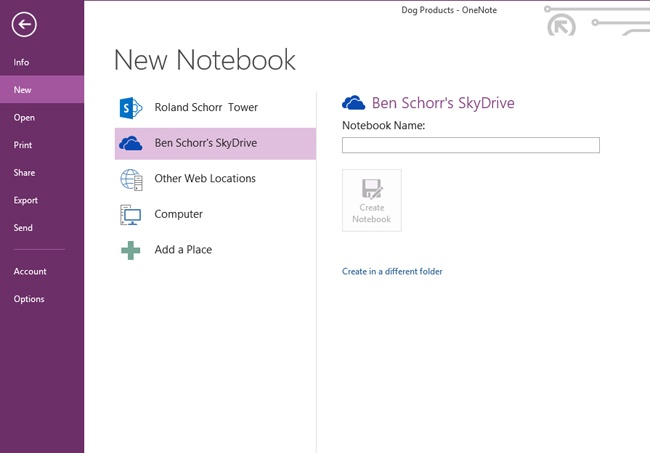
In OneNote, click the File tab, and then click New.
Make sure your SkyDrive is selected as the storage location.
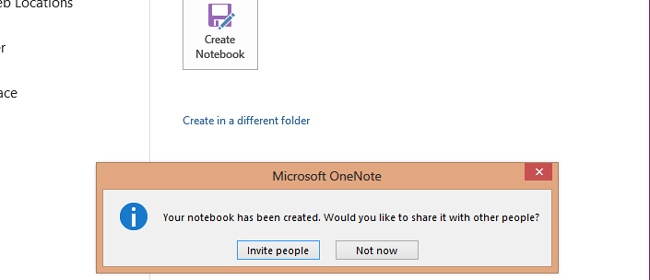
Give the notebook a name, and click Create Notebook.
OneNote will ask if you want to invite other people to share the notebook. Click Invite people.
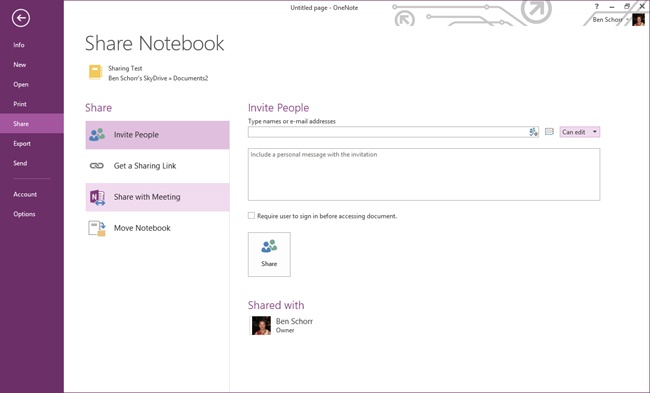
OneNote will open the Share Notebook page and give you some options for inviting people.
In the Type names or e-mail addresses field, enter the names or email addresses of people you’d like to share this notebook with. If there are multiple names, you can separate them with semicolons (;).
Enter a personal message in the box provided, with a quick explanation of what the notebook is that you’re sharing.
Click Share to send the invitations.
Clean Up
You may want to delete the practice notebook you just created; otherwise, no cleanup is required.
You do have some control over the permissions these users will have.
To the right of the field where you list he people to share with, you’ll find a control that lets you specify if those people can edit the notebook or if they are to have Read-Only access. If you need to give some people Edit permissions and others Read-Only, then invite them in two separate steps. Invite the editors first, then click the File tab on the ribbon, click Share, and repeat steps 6-8 with the permissions field set to Can View.
Tip
If you’re paranoid about security, you can check the Require User To Sign In Before Accessing Document check box to make it more difficult for a passerby to open your notebook from the intended user’s computer by using cached credentials.
After the other users start using your notebook, if they have Can Edit permissions, any changes they might make will be seamlessly synchronized to your notebook, and your changes will be seamlessly synchronized to theirs. Under ideal circumstances, these changes may appear in nearly real time. Under most circumstances, due to Internet performance and other factors, the appearance of changes may be delayed by a matter of minutes.
If you’ve got an existing notebook that is already on SkyDrive that you would like to share, you can simply click the File tab on the ribbon, then click Share and go through steps 6-8 as described previously.
If you have an existing notebook that is not on SkyDrive that you would like to share via SkyDrive, clicking the File tab and then Share will cause OneNote to prompt you to move the notebook to SkyDrive.
In this exercise, you’ll move an existing notebook to SkyDrive.
Set Up
You don’t need any practice files to complete this exercise. Start OneNote, open a local notebook, and then follow the steps.
Select the notebook you want to share.
Click the File tab, and then click Share.
Make sure your SkyDrive account is selected as the destination location. Click it once if you need to select it.
Click Move Notebook.
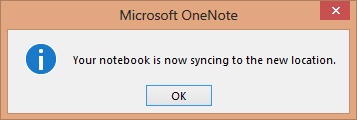
OneNote will notify you that the notebook is now syncing to the new location. Click OK.
OneNote will return you to the Share Notebook page and ask if you want to invite other people to share the notebook. If so, click Invite people.
OneNote will open the Share Notebook page and give you some options for inviting people.
In the Type names or e-mail addresses field, enter the names or email addresses of people you’d like to share this notebook with. If there are multiple names, you can separate them with semicolons (;).
Enter a personal message in the box provided with a quick explanation of what the notebook is that you’re sharing.
Click Share to send the invitations.
OneNote will give you the same options to control what kind of sharing you’d like to offer: Can Edit or Can View.

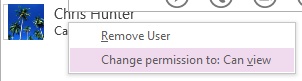
If you’d later like to remove permissions for one or more users who share the notebook, click File, then click Share. A list of users that the notebook is shared with is displayed near the bottom of the screen. Right-click the name of the person whose permissions you’d like to change, and you’ll have the option to change their permissions to Can View (or Can Edit if they were already Can View people), or you can remove their access entirely.
Many companies have a network file server (or many file servers) where it’s common for users to store and share documents, spreadsheets, and other files with others in the company. This can be an excellent place to store OneNote notes for several reasons:
It’s central and presumably accessible to all members of your team.
It’s always on, which means there’s no need to worry if turning your computer off at the end of the day will disrupt others’ access to the notebooks.
It’s presumably secure, within the corporate firewall and thus not easily accessible to the outside world. If the information in your notes is sensitive, you may be reluctant to store those notes on a server outside the company walls (like SkyDrive).
Your information technology (IT) department should be making sure it’s regularly backed up to protect against data loss.
There are also a few disadvantages to storing your notes on the company file server:
It’s more difficult to share the notes with people outside the company.
Unless you have a facility in place for remote access, your user may not be able to synchronize changes when they’re outside of the office.
You can’t synchronize the notebooks to any mobile devices like iPads or Android phones, because those (currently) require SkyDrive for sharing.
Sharing your notebooks via the company server is more or less like sharing any other kind of file via the company server. You’ll need a folder on the company server that everybody you want to share with has the proper permissions to (read, or read/write).
In this exercise, you’ll create a notebook on a network file share.
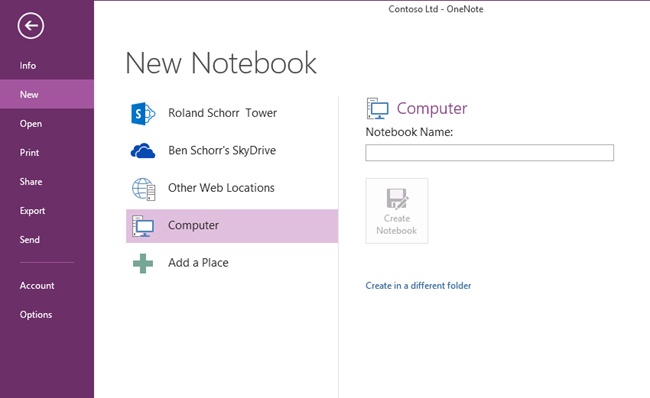
Click the File tab, then click New.
Select Computer as the destination location.
Click Create in a different folder.
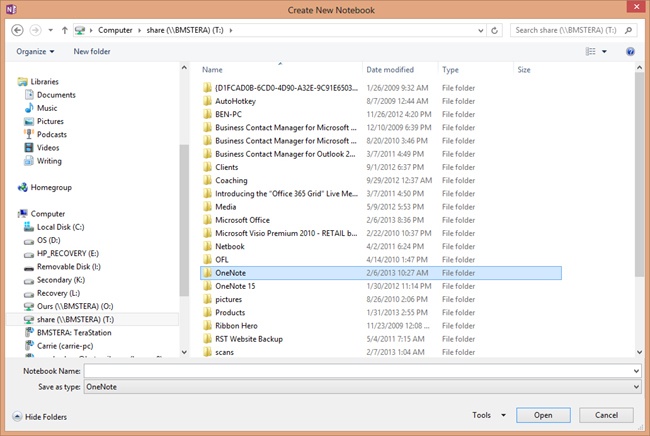
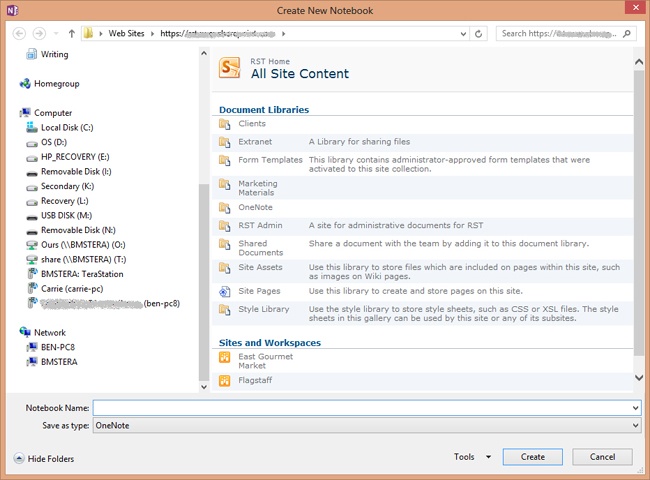
OneNote will open the browser dialog box to let you select a different location.
In the Places pane on the left, expand Computer and find the drive letter that you mapped to the destination share. If you didn’t map a drive letter to it, expand the Network group instead, find the server where the notebook is to be hosted, expand that device, and select the share where the folder is located.
In the Folders pane on the right, navigate to and select the folder where you want the notebook to be hosted. Remember, because you intend to share this notebook, you’ll have to choose a folder that the people you intend to share with can access.
Enter a notebook name into the field at the bottom of the dialog box.
Click Create. OneNote will create the notebook with the initial section and page.
Click File, then click Share.
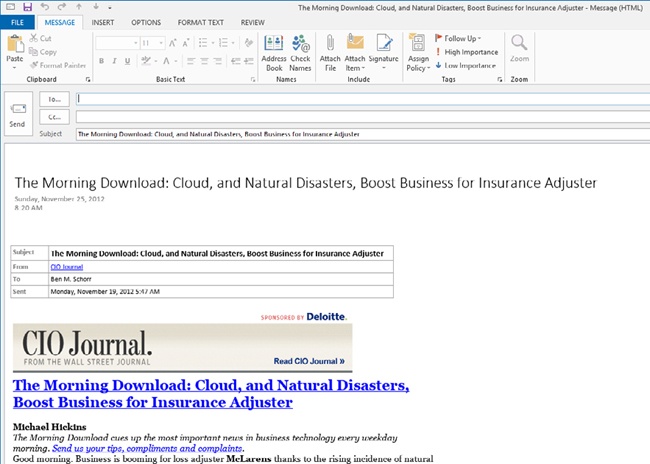
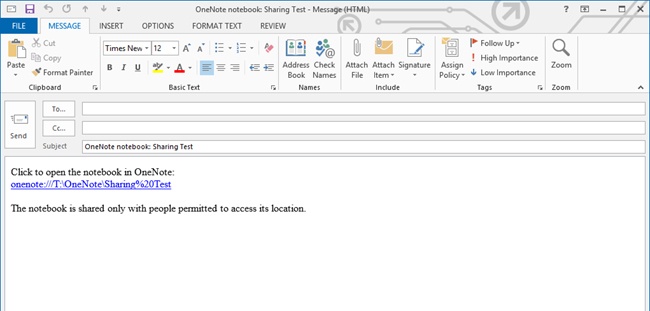
Click Email Others About the Notebook. OneNote will create an Outlook email message with a link to the new notebook already in the body of the message.
Address the message to the people you want to share with, enter any explanatory text you want, and then click Send.
Any changes you make to the notebook will be automatically and immediately synchronized to any of the other users who have that notebook open in their OneNote at the time. Synchronizing changes to a corporate server over a local network can be extremely fast, sometimes approaching real-time speeds.
Clean Up
If you didn’t intend to keep the notebook you just created, you can close it from OneNote and delete it from the folder where it was created. If you actually invited others to share it in step 10, you may want to let them know it was just practice.
There are a couple of ways to stop sharing via a file server. First, you can revoke the access permissions to the file or folder where the notebook exists.
Second, you can relocate the notebook from the server to a different location that others don’t have permission to, like your local hard drive.
In this exercise, you’ll move a notebook from its location on the network file share to a different location.
Set Up
You don’t need any practice files to complete this exercise. Start OneNote, and open a notebook that is being shared on your network server that you want to stop sharing.
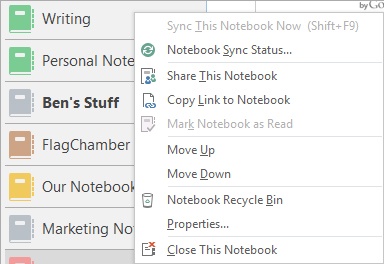
Right-click the notebook that you want to relocate in the Notebook pane at the left.
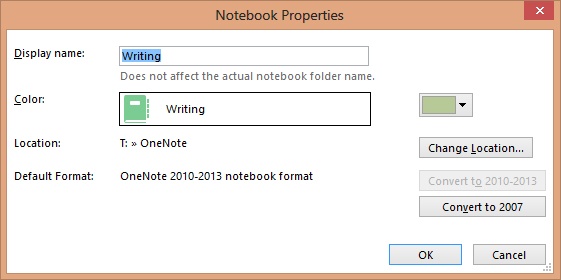
Select Properties.
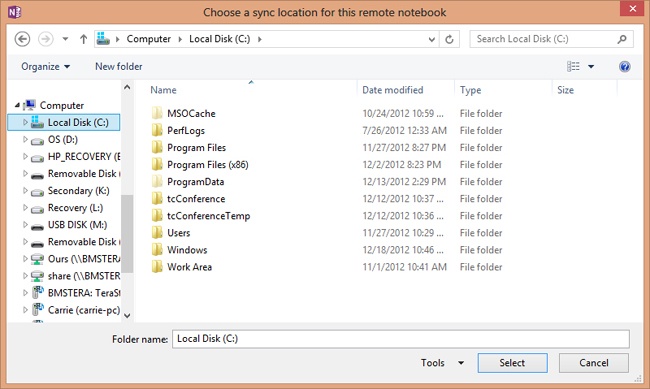
Click Change Location.
OneNote will prompt you to navigate to the new location for the notebook. Select a folder to move the notebook to.
OneNote will acknowledge your success. Click OK.


Sharing your notebooks via Microsoft SharePoint gives you some of the advantages of sharing via SkyDrive, along with some of the advantages of sharing via your local network. SharePoint is more likely to be remotely accessible than your local network drive is, and companies may feel that they have more control over SharePoint from a security standpoint (especially if your SharePoint server is hosted on premises). If you’re using a Windows Phone and Windows tablets, you’ll be able to sync your SharePoint-hosted notebooks to your mobile devices, but (currently) if you’re using Android or iOS, you can’t.
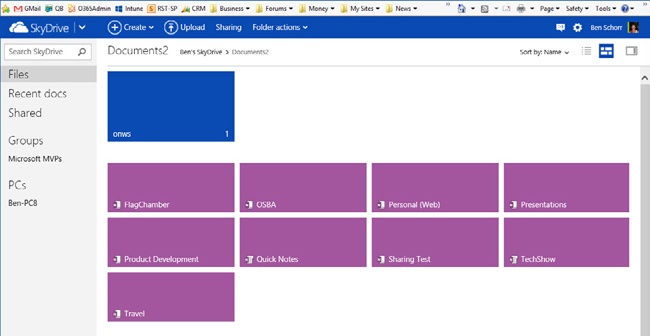
The first step in sharing a notebook via SharePoint is to select or create a document library on the SharePoint site where your OneNote notebooks will be hosted. For this example, a dedicated document library just for OneNote notebook was created, named OneNote.
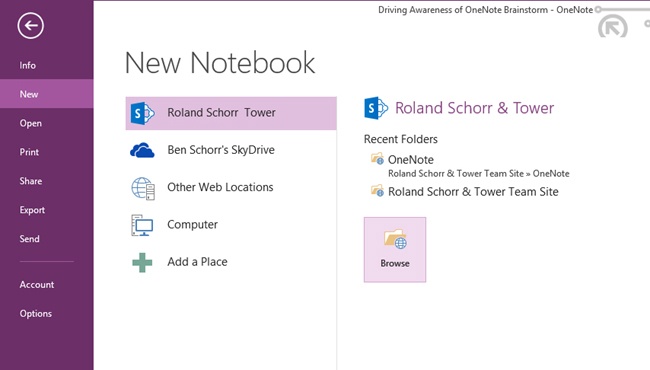
If your SharePoint site is an Office 365 or SharePoint Online site, then you’ve got an easy path ahead of you. When you click File and then New your Office 365 or SharePoint account is listed as one of the options. Select that option, and OneNote will display a list of recent folders that you can choose from. If the folder you want to use is not visible, click Browse, select the OneNote document library you created (or any other document library you want), name your notebook, and click Create. Job done.
Tip
If you have an Office 365 or SharePoint Online account, but the account isn’t listed, you may have to add it. Click File, then Account, and add the service.
If you don’t have an Office 365 or SharePoint Online account, then your route to hosted SharePoint notebooks may be slightly more primitive, but it’s still not difficult to do.
In this exercise, you’ll create a new notebook and move it to a corporate SharePoint server.
Set Up
You don’t need any practice files to complete this exercise. Start OneNote. Log into your SharePoint account if you aren’t already logged in. Remember, this exercise is for people who are using corporate SharePoint. If you have SharePoint Online or Office 365 SharePoint, you can create new notebooks in essentially the same way SkyDrive users do.
Click the File tab, then click New.
Select Computer for your location.
Enter a name in the Notebook Name field, and then click Create Notebook.
In the OneNote Notebook pane, right-click your notebook and select Properties. Be sure to remember the notebook’s location.
Click Cancel.
Right-click your new notebook again and choose Close this notebook.
Open your SharePoint site in Windows Internet Explorer.
Navigate to the document library where you want your OneNote notebook to be. You’ll probably find your list of libraries along the left side of the window.
Upload your notebook to the document library.
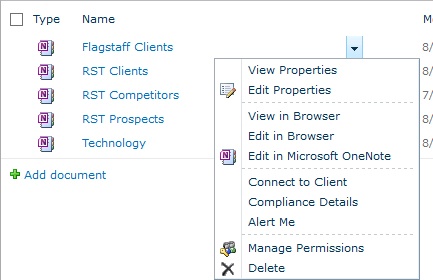
Confirm that your OneNote notebook now appears in the document library, and then click the down arrow to the right of the OneNote notebook’s name.
Select Edit in Microsoft OneNote.
At this point, your new notebook will re-open in OneNote, and you’re all set for sharing. Make sure anybody else you want to share it with has the proper permissions in SharePoint to access the notebook. They’ll only need to do steps 10 and 11 in order to open it for themselves.
Now that your notebook is shared via SharePoint, OneNote will automatically sync any time you have a connection to that SharePoint server.
One of the new features of OneNote 2013 is the ability to easily share notes with others in a meeting. When you create, or accept, a meeting item in Outlook 2013, you can click the Meeting Notes button to create a OneNote page that will serve as a place to take notes during the meeting. That’s not new; OneNote has done that for years. What’s new is that now when you do that, OneNote will ask you if you want to take notes on your own or share notes with others in the meeting.
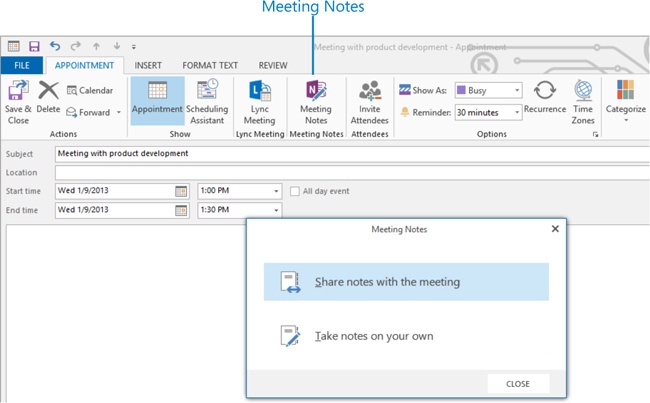
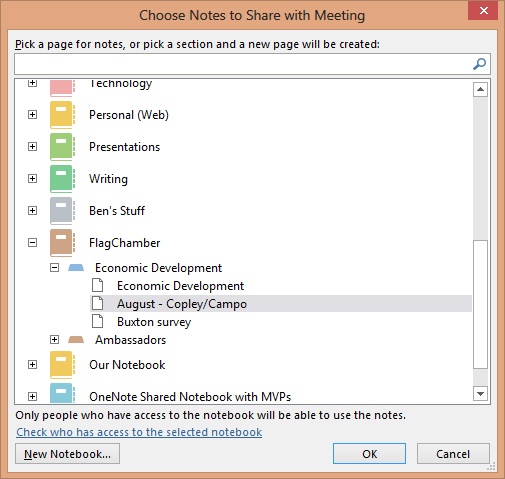
Select Share Notes With The Meeting and OneNote will prompt you to select a section (and page, if desired) from among your shared notebooks. If you select an existing page, that page will be attached to the meeting invitation in Outlook and shared with the other attendees. If you merely select a section, a new page will be created (and shared with those attending the meeting).
Tip
In order to share meeting notes, the notebook containing the shared page has to be in a location that the other attendees can access. If the other attendees are all within your own company, then you can probably use a notebook shared on the company SharePoint server or a Windows file server. If some of the attendees don’t have access to that resource, then you’re better off using a notebook stored on SkyDrive.
During the meeting, you and the other attendees can take notes in the shared page, and you’ll all be able to view each other’s notes, almost like a shared whiteboard.
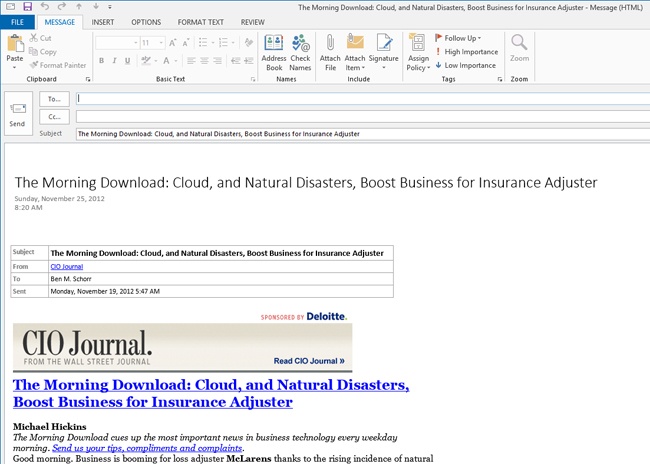
If you don’t want to share a live notebook, another option is to send your notes via email. OneNote makes that very easy to do. Simply go to the page you want to share and click the Email Page button on the Home tab of the ribbon. OneNote will launch Outlook and create a new email message with the note page in the body of the message. All you need to do is address the message and click send. The recipient does not need to have OneNote in order to read the notes.

Tip
OneNote can optionally include a .one file containing the page you’re emailing as an attachment to the email item. If that attachment doesn’t appear when you create a new email message, then you need to enable that option. In OneNote, click the File tab, click Options, and then click Advanced, and in the Email Sent From OneNote section, make sure that the Attach A Copy Of The Original Notes As A OneNote File check box is selected.
Sometimes you may need to share notes with somebody who doesn’t have OneNote at all, and for that you may want to export your notes into another format.
OneNote supports a number of formats, most of which are widely understood.
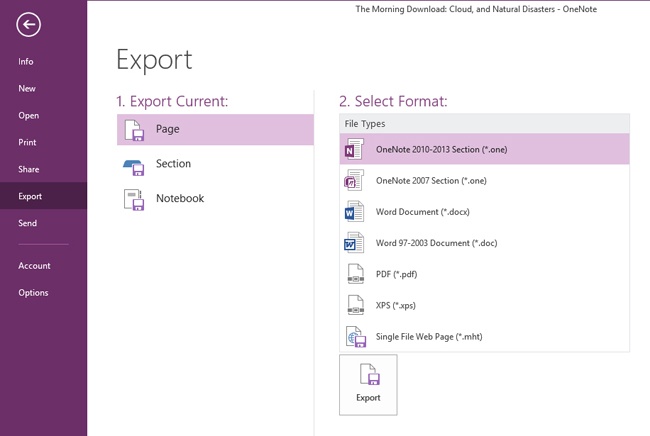
OneNote 2010-2013 section (*.one). This exports the current page or section as a .one file in the OneNote 2010-2013 format. Anybody with a recent version of OneNote will be able to open it, except those who have OneNote 2007.
OneNote 2007 section (*.one). This also exports the current page or section as a .one file, but this time it does it in a OneNote 2007 format. This is convenient if you need to share a page or section with somebody who is using OneNote 2007, but you may lose a few features that aren’t compatible with the older version.
Word document (*.docx). This creates a Word 2007-2013 formatted document from your notes.
Word 97-2003 document (*.doc). If you need to be able to open the notes in an older version of Word, you can export your page or section into the venerable .doc format.
PDF (*.pdf). With this option, you can export your selected page, section, or notebook into the widely accepted PDF format. This format is essentially read-only.
XPS (*.xps). You can also export your selected page, section, or notebook into XML Paper Specification (XPS) format. This format is not very widely used, however, so don’t be surprised if the person you send it to isn’t quite sure what to do with it.
Single file webpage (*.mht). This option exports your selected page or section as an HTML document that can be viewed in most common web browsers.
OneNote package (*.onepkg). Exports your selected notebook into a special package file that can be unpacked by OneNote 2007, OneNote 2010, or OneNote 2013. This is a great option for archiving a OneNote notebook, or if you need to ship an entire notebook to a user who has OneNote but doesn’t want to use SkyDrive or SharePoint to share the file.
Exporting your notes into one of these formats is easy.
In this exercise, you’ll export notes into another format.
Set Up
You don’t need any practice files to complete this exercise. Start OneNote and open a notebook, section, or page that you can practice exporting.
Select the page, section, or notebook you want to export.
Click File.
Click Export.
Select the scope of your export (page, section, or notebook).
Select the format you want to export to (see the bulleted list before this exercise).
Click Export.
Select a destination to save to (such as your local hard drive).
Give your exported file a name.
Click Save.
After that is done, you can send the exported file to the person you want via email, flash drive, or any other file sharing mechanism you choose.
OneNote 2013 makes it easy to share your notes with other people.
You can store notebooks on a commonly accessible location such as SkyDrive, SharePoint, or a Windows file share and invite others to open those notebooks in their copy of OneNote.
When you share notebooks from a common storage location, everyone’s edits and changes will be synchronized to all of the other participants for a truly collaborative experience.
You can email notes to people who don’t have OneNote, and they’ll be able to read your notes in their email client.
You can export your notes into a wide variety of compatible formats, such as .docx or PDF, and send those files to others.