
Chapter at a glance
Synchronize
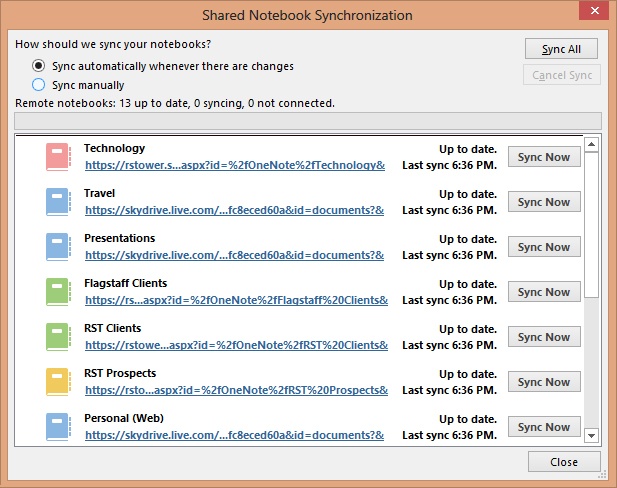
Syncing your notes by using SkyDrive
Edit
Edit your notes in any web browser with OneNote Web App, Accessing your notes in a web browser
Access
Access OneNote with OneNote Mobile on Windows Phone 8, Using OneNote on an iPhone or iPad

IN THIS CHAPTER, YOU WILL LEARN HOW TO
Sync your notes among multiple computers.
Access your notes in a web browser.
Use OneNote on your phone or tablet.
In Chapter 27, you learned to use your notes to collaborate with others. In this chapter, you’ll share notes with yourself. These days it’s common for people to have multiple devices that they use on a regular basis, and your notes are more powerful and useful if you can have them with you no matter what device you’re using.
The most important thing to sort out, when you’re going to sync your notes among multiple computers, is the platform you’re going to use to host the notes. Will you use Microsoft SkyDrive, SharePoint, a USB flash drive, or some sort of network-attached storage?
After you’ve figured that part out, then keeping your notes synchronized is fairly easy. With Microsoft OneNote 2013, the most common platform to use for syncing notes is going to be SkyDrive, because Microsoft Office Home and Student 2013 makes it so easy to locate your notebooks there.
So let’s try creating a notebook that we’ll use on multiple computers. One of the natural ways to want to do that is by using the Microsoft SkyDrive cloud storage service.
In this exercise, you’ll create a notebook in SkyDrive and then synchronize it to a second computer.
Set Up
You don’t need any practice files to complete this exercise. You need a Microsoft Account to complete this exercise. If you don’t already have one, open your Internet browser, enter www.live.com, and then register for a new account. It’s free. In OneNote, click the File tab, and then click Account to confirm that your SkyDrive account appears as a connected service in the lower-left part of the window. If it doesn’t, click Add A Service, then Storage to add it. Then follow the steps. You also need a second computer with OneNote 2010 or OneNote 2013 installed on it, with which to synchronize your notebook.
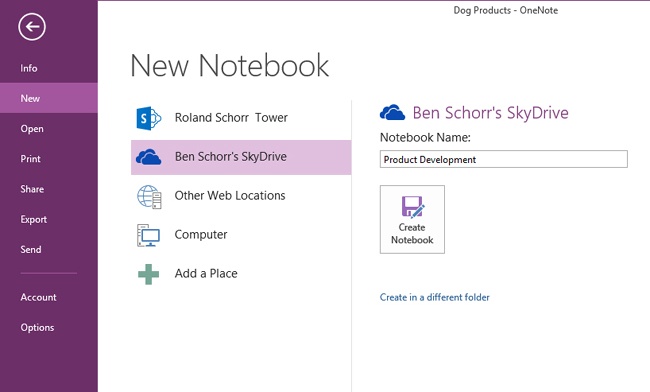
Open OneNote and click the File tab, then click New.
Make sure that your SkyDrive account is selected in the first column of the New Notebook page.
Give your notebook a name, and click Create Notebook.
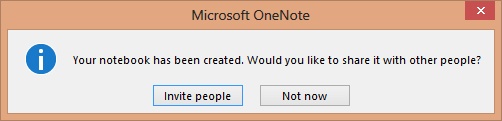
OneNote will ask if you want to share the notebook with other people. If you want to invite other people, click Invite People and invite them to the notebook. As you may recall, this process was discussed in Chapter 27. If you’re only going to share the notebook with yourself on other devices, then click Not Now.
Go to the other computer you want to synchronize this notebook with.
Open OneNote.
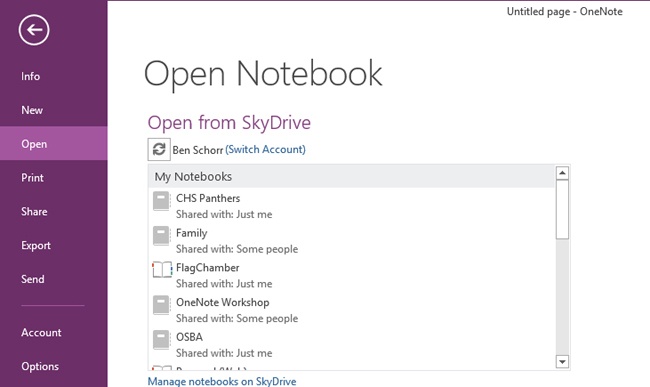
Click File, then click Open.
A list of notebooks that you can open on SkyDrive is displayed. Find the notebook you just created, and click that notebook. It will open in OneNote.
Just like that, you’ve now got a notebook open on both devices.
Tip
Click the default first page created in the new notebook and enter some text. Then look at the same notebook on the other device. Assuming that both devices are connected to the Internet, the text should be displayed within a matter of seconds or a couple of minutes.
Tip
Go to SkyDrive in Internet Explorer and find a SkyDrive-hosted notebook that isn’t open in your OneNote desktop yet. Right-click the notebook and click Open In OneNote to add it to your OneNote desktop.
See Also
To review the procedures for creating notebooks, read the material in Chapter 25.
This same process works for other locations as well. You can store your notebooks on a network drive, as long as all of your PCs can access that network drive. Then they’ll be able to sync. You can also store your notebooks on Microsoft SharePoint and sync them that way. Just remember that as of this writing, only PCs can sync notebooks located on a network drive, and only PCs or a Windows Phone can sync notebooks located on SharePoint.
There’s another good reason to store your notebooks on SkyDrive (or SharePoint). It’s known as OneNote Web App.
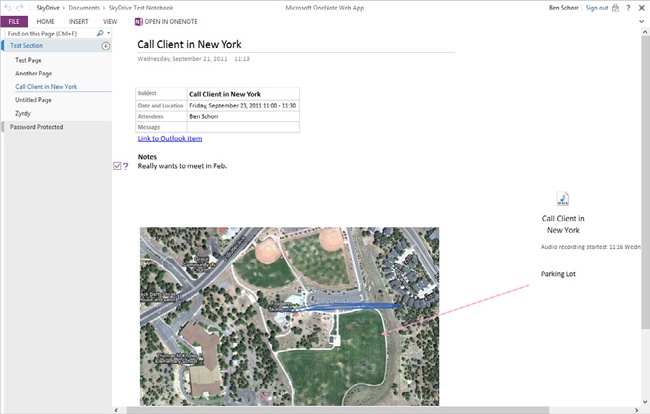
Any notebooks you store on SkyDrive can be opened and edited in the web browser, even on computers and devices that don’t have OneNote installed.
In this exercise, you’ll open a notebook in OneNote Web App on SkyDrive.
Set Up
You don’t need any practice files to complete this exercise. You’ll need to have created at least one notebook in SkyDrive to complete this exercise. Refer to the previous exercise for a refresher.
Open your web browser and navigate to https://skydrive.live.com.
Log in, if prompted.
Find your notebooks. They should be easy to locate, because they’ll be displayed in a purple color and they’ll have the OneNote icon. By default, they should be located in the Documents folder, though you could have chosen a different folder when you created them.
Select the notebook you’d like to open, and click it.
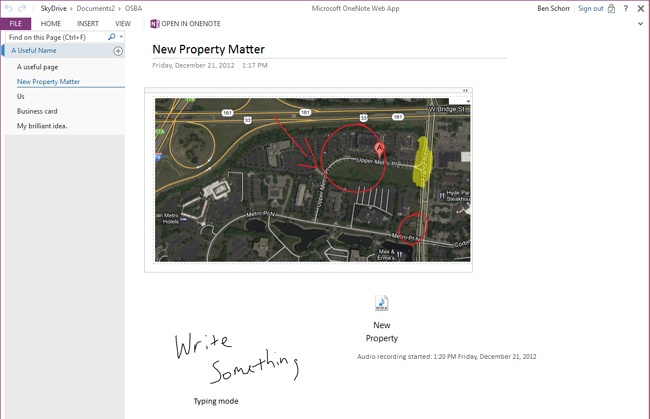
At this point, the notebook you select will open in the browser. OneNote Web App is considerably more limited than the desktop program, but it’s perfectly sufficient to let you read or edit notes.

Important
OneNote Web App does not currently support opening password-protected sections. If you’ve got any of those, you’ll need the desktop client in order to open them.
There are a couple of other limitations of OneNote Web App:
It will display inked notes but can’t create any.
There is support for tags but no customized tags.
It doesn’t support audio or video recording.
You can easily add pages in OneNote Web App by clicking the plus sign next to the section title in the upper-left of the browser window. After you’ve created the new page, enter a title in the title area at the top of the page, and you can then click anywhere on the page and start typing notes.
Any pages and notes you create will automatically sync to any devices you have that are connected to your SkyDrive with OneNote.
The best notes are the ones that go with you wherever you are. Accordingly, Microsoft has created OneNote Mobile apps for a number of different platforms: iPhone, iPad, Android, and Windows Phone, just to name a few. Like OneNote Web App, the mobile apps are considerably more limited than the desktop OneNote is and, in many cases, more limited than a web app due to the nature of the devices they’re designed to be used on.
Any notes you create in the mobile apps can be synchronized to your desktop version of OneNote or even shared with other users. Previously, you learned how to synchronize your notes among multiple computers. In Chapter 27, you learned how to use your notes with others.
These apps are slightly different from each other and evolve so quickly that it’s likely that most of them will have changed by the time you read this book. With that recognition, this section offers information on how to use each application without being so specific that this content will be outdated before the ink dries.
OneNote Mobile for the iPhone or iPad (they are two separate apps) can be found in the iTunes App store. Currently, it’s free for up to 500 pages of notes, which is actually quite a few. If you need to exceed that number of pages, then the upgrade is just a one-time charge of $4.99 currently.
Both versions of OneNote Mobile for iOS have the following key features:
Support for multiple notebooks
Support for viewing tables
The ability to create bulleted lists or checklists
The ability to insert photos in notes
Support for OneNote tags
The ability to search for notes
Both versions of OneNote Mobile for iOS have the following key limitations:
Synchronization requires a (free) Windows account with SkyDrive.
They do not currently support inked notes.
Creating new notebooks or renaming sections has to be done in the desktop or Web App; they will then sync to the Mobile app.
They do not support password-protected sections.
They are not available in all countries.
They require iOS 4.3 or later.
To be honest, the only real difference between the two versions is that the iPad version is optimized for the larger screen of the iPad.
In this exercise, you’ll install OneNote Mobile for iOS on your iPhone or iPad.
Set Up
You don’t need any practice files to complete this exercise. You need an iPhone or iPad with at least iOS 4.3 and an active Internet connection to complete this exercise.
To get OneNote for iOS, turn on your iPhone or iPad.
Navigate to the App Store.
Search for OneNote.
Locate the official OneNote Mobile for iOS app.
Click the app to download and install it.
When you’ve installed OneNote Mobile for iOS and you run it for the first time, it will ask you to sign into your Microsoft Account (SkyDrive). If you don’t have one, you can sign up for the account, for free, by going to www.live.com or clicking the link the OneNote Mobile app will offer you.
After you’ve signed into your Live account, you’ll find that the OneNote Mobile app already has one notebook created. It’s called Personal (Web), and it’s required for OneNote Mobile to store unfiled notes. You can’t create additional notebooks in the Mobile app; however, you can create additional notebooks in the SkyDrive OneNote Web App or on your desktop OneNote (make sure they’re stored on SkyDrive), and those notebooks will synchronize to the OneNote Mobile app.
Tip
Do you own an iPhone and an iPad? You can install OneNote Mobile on both devices, and the notes you take on one will automatically sync to the other!
Creating new notes is easy. Navigate to the notebook and section where you want to locate the page, and click the New Page button at the bottom of the app. You can enter in any notes you like, and when you’re finished, just go back to the page list in the section.
To create bulleted lists or checklists in your notes, tap the appropriate button (just above the keyboard) and then start typing your list. Each time you tap the return button, a new list item will be created.
If you want to insert a photo into your notes, just tap the location in your notes where you want the picture to appear. Then tap the camera button that appears just above the keyboard.
To find notes on your iPhone or iPad, click the Search button in the lower-left corner of the screen, and then enter your search term or phrase into the search box that appears at the top of the screen.
Tip
You can save a lot of time by using the Recents feature. Click the Recents button at the bottom of the screen to view a list of recently used pages. If you have one (or more) that you plan to refer to often, you can even pin them to the top of the Recents list by clicking the pushpin icon to the right of the page name on the Recents list.
OneNote Mobile for Android can be found in the Google Play store. Unlike the iOS version, there is just one version of the Android app, which works on both Android phones and Android tablets. Currently, it’s free for up to 500 pages of notes, which is actually quite a few. If you need to exceed that number of pages, the upgrade is just a one-time charge of $4.99 currently.
OneNote Mobile for Android has the following key features:
Support for multiple notebooks
Support for tables
Support for hyperlinks to external sites (but not internal hyperlinks, yet)
Spell check
The ability to insert photos into notes
OneNote Mobile for Android has the following key limitations:
Synchronization requires a (free) Windows account with SkyDrive.
It does not currently support inked notes.
Creating new notebooks has to be done in the desktop or Web App; they will then sync to the Mobile app.
It is not available in all countries.
It requires Android 2.3 or later.
In this exercise, you’ll install OneNote Mobile for Android on your Android device.
Set Up
You don’t need any practice files to complete this exercise. You need an Android phone or tablet with at least Android version 2.3 installed and an active Internet connection to complete this exercise.
To get OneNote for Android, turn on your Android device.
Navigate to the Google Play Store.
Search for OneNote.
Locate the official OneNote Mobile for Android app and click the app to install.
When you’ve installed OneNote Mobile for Android and you run it for the first time, it will ask you to sign into your Microsoft account (SkyDrive). If you don’t have one, you can sign up for the account, for free, by going to http://live.com.
After you’ve signed into your Live account, you’ll find that the OneNote Mobile app already created a notebook for you called Personal (Web). It’s required for OneNote Mobile to store unfiled notes. You can’t create additional notebooks in the Mobile app; however, you can create additional notebooks in the SkyDrive OneNote Web App or on your desktop OneNote (make sure they’re stored on SkyDrive), and those notebooks will synchronize to the OneNote Mobile app.
There are two ways to create new pages in OneNote Mobile for Android, and the difference tends to confuse new users a bit. The New Page button at the top of the screen is actually a New Quick Note button. Any notes you create with that button will be stored in the Unfiled Notes section just like Quick Notes you create with OneNote 2013. If you want to create a new page in the current section, however, click the menu button and select New Page from the menu that appears.
To create a bulleted or numbered list or a checklist, tap the appropriate button from the menu at the top of the screen when you’re editing a note. Then start typing your list items. Each time you tap the return key, a new line appears for your next list item.
To insert a photo into your notes, tap where you’d like the image to appear, then tap the camera button on the left end of the menu at the top of the screen.
OneNote Mobile comes preinstalled on Windows Phone 7.x and 8.x. Currently, it’s free for as many notes as your device can store. Not surprisingly, OneNote Mobile for Windows Phone is the most capable of the Windows Mobile versions.
OneNote Mobile for Windows Phone has the following key features:
Support for multiple notebooks
Support for tables
Support for SkyDrive and SharePoint synchronization
Support for inserting photos and audio recordings in your notes
The ability to create bulleted or numbered lists or checklists
The ability to display inked notes
Support for searching within the app
OneNote Mobile for Windows Phone has the following key limitation:
Creating new notebooks has to be done in the desktop or Web App. In turn, they will sync to the Mobile app.
The first time you run OneNote for Windows Phone, it will give you the option to open any notebooks you have stored in your OneNote folder. If you’re a SharePoint user, especially via Microsoft Office 365, you’ll also have the option to sign into that service and open any notebooks you have stored there.
As with the other OneNote Mobile apps, the Windows Phone version always has one notebook created called Personal (Web), and it’s required for OneNote Mobile to store unfiled notes. You can’t create additional notebooks in the Mobile app. However, you can create additional notebooks in the SkyDrive OneNote Web App or on your desktop OneNote (make sure they’re stored on SkyDrive), and those notebooks will synchronize to the OneNote Mobile app.
To create pages on OneNote Mobile for Windows Phone, click the New Page button that looks like a plus sign (+) at the bottom of the screen. Then you can enter your notes on the page that appears.
To insert a photo into your notes, tap where you’d like the photo to appear, and then tap the camera button at the bottom of the screen.
To insert an audio recording, tap where you’d like the recording to be placed in your notes, tap the microphone button at the bottom of the screen, and then start speaking.
Windows 8 tablets are a bit of an anomaly. They are capable of running the full version of Office Home and Student 2013, but they also come with a special version of OneNote that is optimized for the touch interface.
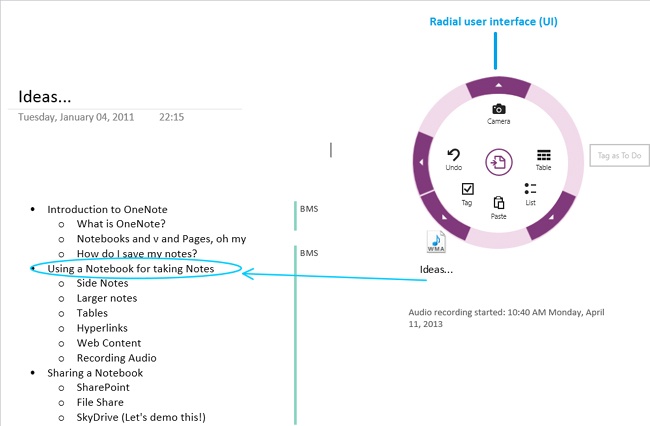
The touch-enabled version of OneNote is in the Windows 8 store on any Windows 8 device (not just tablets). Though it does have some innovative features (like the radial user interface, as shown following this text), it also has significant limitations in the current version. For example:
Only SkyDrive-shared notebooks are easily accessed.
Audio or video recording is not supported.
There is a limited set of note tags and no customization.
Like most of the Windows Store (formerly called Metro) apps in Windows 8, the special Windows 8 OneNote app is fairly limited compared to the full-fledged desktop version.
You can find the OneNote Windows Store app in the Windows Store on any Windows 8 computer.
OneNote gives you a lot of opportunities to use your notes wherever you are.
Using SkyDrive, SharePoint, a network drive, or even a simple USB flash drive, you can share notes between multiple devices.
If your notes are stored in SkyDrive or SharePoint, you can access them from any computer with a web browser via OneNote Web App.
OneNote Mobile lets you access your notes on the go on your iPhone, iPad, Android, Windows tablet, or Windows Phone devices.