
Chapter at a glance
Find
Find tags in your notes with the Tags Summary pane, Set Up
Record

Capture
Capture ideas quickly and easily with Quick Notes, Using Quick Notes
IN THIS CHAPTER, YOU WILL LEARN HOW TO
Find tags.
Record audio.
Capture ideas and information with Quick Notes.
Insert screen clippings into your notes.
Create linked notes that connect to documents, presentations, webpages, or other notes.
Create templates on which to build your notes.
Microsoft OneNote 2013 is a surprisingly powerful tool for collecting and organizing ideas and research, and getting your projects moving in the right direction. In this chapter, you will learn about tools that you may not have even realized OneNote 2013 has.
OneNote is for unstructured data, so it’s appropriate for this chapter to introduce you to these tools in no particular order.
Practice Files
To complete the exercises in this chapter, you need the practice files contained in the Chapter29 practice file folder. For more information, see Download the practice files in this book’s Introduction.
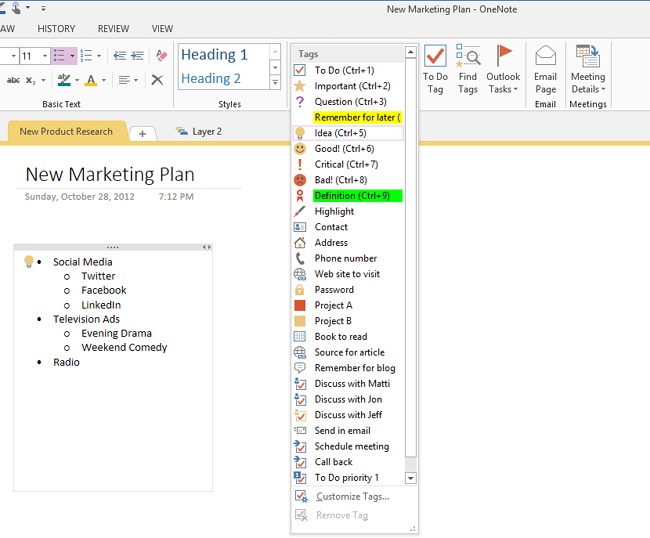
In Chapter 27, you learned about adding tags to notes. You can tag a note as a phone number, as Important, as a to-do item, or even as a question. There’s a tags gallery right there on the Home tab of the ribbon that offers you many tags, as well as the ability to create your own custom tags.
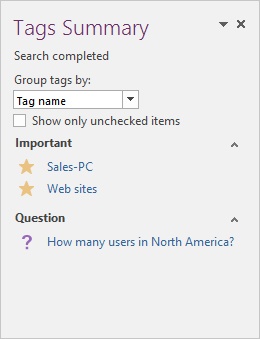
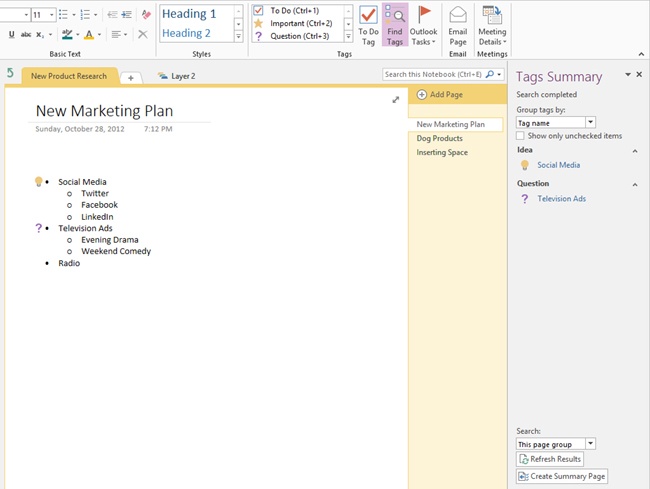
Did you know there’s a powerful tool in OneNote for finding those tags after you’ve used them? Immediately to the right of the Tags gallery, you’ll find Find Tags, and if you click it, the Tags Summary pane on the right side of the screen shows you all the tags you’ve used. You have a few options for what you can do with that tool.
At the bottom of the pane, you can use the Search option to set the scope that the Tags Summary is going to apply to. Click the arrow on the right end of the field to display a drop-down list of choices.
Following are several useful options:
All notebooks
This notebook
This section
This page group (which is as close to this page as you can get)
Today’s notes
The Tags Summary pane is a static pane. That means that if you add, change, or remove a tag from the notes, the Tags Summary results don’t automatically change. To update the pane, click the Refresh Results button located below the Search field.
In this exercise, you’ll use the Find Tags feature to quickly locate tags that you’ve assigned to your notes.
Click a paragraph in your notes.
Assign a tag to that paragraph from the Tags gallery on the Home tab of the ribbon.
Repeat steps 1 and 2 as desired.
The Tags Summary pane appears on the right side of the screen, showing all tagged items within the selected scope (Page, Section, Notebook, This Week, and so on).
Select a tag and click it. OneNote will immediately take you to the page and paragraph where that tag is located.
Clean Up
You’ll probably want to reuse your page of sample notes for other exercises, so you don’t need to do anything with them at this point.
Tags are great organizational tools when you’re browsing your notes, because they help you quickly identify what you’ve written. They’re even more powerful when you can find them later.
Tip
The next time you’re in a meeting, take notes with OneNote. When you have questions, flag them with the Question tag. When you get to the part of the meeting where it’s time to ask questions, use the Find Tags feature to gather all of your questions into one pane so you can quickly refer to them.
While you’re attending those meetings, there’s another powerful feature available that gives you the ability to record audio. The audio recording appears right on your note page, so it’s readily available when you want to play it back later.
Tip
Be sure you have permission to record the audio in your meeting. In some cases, it’s required by law, but in all cases, it’s just good manners to let folks know they’re being recorded.
To start recording audio, click the Insert tab on the ribbon, and then click Record Audio. Be warned that the recording will start as soon as you click the button. Therefore, don’t click Record Audio until you’re ready to start recording.

While the audio is recording, continue taking notes normally. When you’re ready to stop recording, click the Stop button on the ribbon (it looks like a square). It’s as easy as that. OneNote will insert your audio recording into your notes as an icon along with a portion of text that details when the audio was recorded.
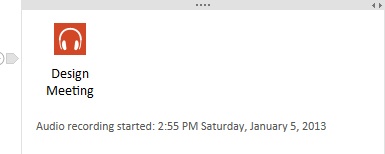
To play your audio back later, just double-click the icon that OneNote inserts into the notes.
Later, when you’re playing the audio, OneNote highlights the notes you were taking while the audio was being recorded. As a bonus, you can take notes while listening to the audio playback, and OneNote will synchronize those notes to the recording as well.
Tip
If you plan to do a lot of audio recording, you should invest in a decent microphone. The ones built into most laptops are good enough to record your voice, but they aren’t likely to produce excellent quality audio in a large meeting.
Tip
The next time you’re on a technical support phone call, put the support person on speakerphone and use the OneNote recording feature to record the call as he or she helps you. Any notes you take during the call will be synchronized to the audio. This enables you to save the instructions for future use. Just make sure it’s legal to record phone calls where you are.
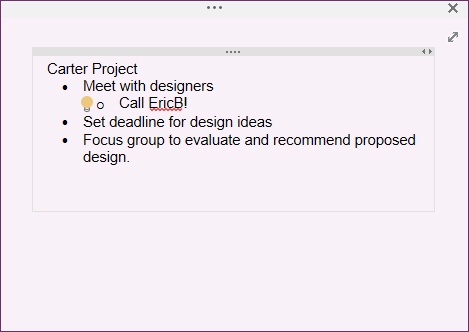
Have you ever been sitting at your desk when some brilliant idea that’s unrelated to what you’re working on hits you? When that happens, just press the Windows key+N and then another N; OneNote will open a Quick Note window for you that looks like a small sticky note on the screen. This enables you to write down the thoughts you had for future reference.
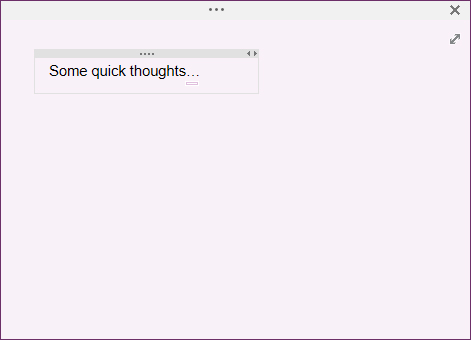
You can have as many Quick Notes open at a time as you want, and you can easily file them, print them, share them, or delete them if they turn out to not be so brilliant.
To access the ribbon commands in a Quick Note, click the three dots on the bar at the top of the Quick Note window.
If you close a Quick Note without filing it, OneNote will automatically put it in the Quick Notes section at the bottom of the OneNote Notebook pane on the left.
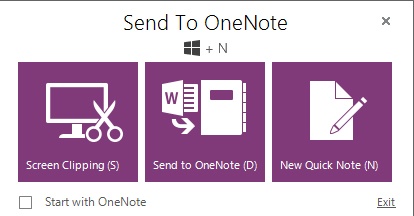
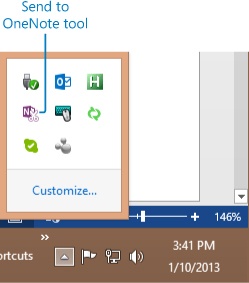
To access Quick Notes, press Windows key+N and then press N again when the Send To OneNote window appears.
Quick Notes are a great way to take notes during phone calls or when you just want to capture random ideas that occur during the day, rather than scribbling them on the back of pieces of paper.
OneNote has always had a very good integrated screen clipping capability. What’s screen clipping? It’s the ability to take a picture of an area of your screen, which is great for capturing error messages, images, or other content.
To use the screen clipping capability, press the Windows key+S (OneNote doesn’t even have to be open at the time). Your screen will dim somewhat, and your mouse pointer will turn into a crosshair pointer, and you can use the left mouse button to drag the mouse pointer across an area of the screen that you want to capture. When you release the mouse button, OneNote will ask you what page of your notebook you’d like to put that screen clipping on. It’s as simple as that.
In this exercise, you’ll use OneNote’s screen clipping feature to capture part of your screen and insert it into your notes.
Set Up
You need a page in OneNote where you can place an image clipped from your screens to complete this exercise.
Check to make sure that the Send to OneNote tool is on your system tray (where the clock is; usually in the lower-right corner of your screen). It should be there by default, but if it isn’t, start OneNote, click the File tab, click Options, and then click Display. Then ensure that the Place OneNote icon in the notification area of the taskbar check box is selected.
Press Windows key+S.
When the screen dims, move your mouse pointer to the upper-left corner of the area of the screen you would like to clip.
Press and hold the left mouse button while dragging down and right across the area of the screen you want to capture.
When you’ve selected the area you want, release the left mouse button.
OneNote will ask you what page you would like to place the clipping on. Select a page, and click OK.
Screen clippings are a powerful way to capture things happening on your screen (like a portion of a webpage or an error message) in your notes.
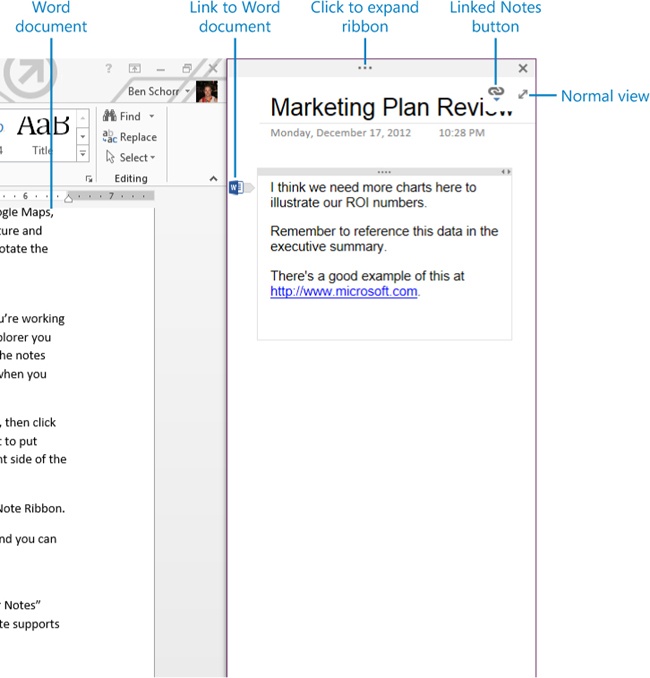
OneNote 2010 introduced the ability to take linked notes. What that means is that while you’re working on a Microsoft Word document, a Microsoft PowerPoint presentation, or even when you’re browsing websites in Windows Internet Explorer, you can have OneNote docked to the side of the screen where you can take notes. As you take notes, OneNote stores a link with the notes to the document or websites you were working with when you took those notes, so that you can easily return to them.
To use linked notes, open the document, presentation, or website you want to take notes on, open or create the OneNote page where you want to take the linked notes, and then click the Dock To Desktop button on the View tab in OneNote.
When you’re done taking notes, you can click the Normal View button on the View tab of the OneNote ribbon or just close the docked page.
In this exercise, you’ll use OneNote to take notes that are linked to a Word document.
Start Word.
Open a document in Word that you want to take notes about.
In OneNote, navigate to the page where you want to take those notes.
Click the View tab on the ribbon.
Click the Dock to Desktop button. OneNote will dock itself to the right side of the screen, by default. The Word document should now occupy the rest of the screen.
Take notes in the OneNote page while navigating up or down in the Word document. Your notes will be linked to the Word document.
To exit docked view, click the Normal View button, which looks like a two-headed arrow at the upper-right corner of the docked window.
Tip
Your Word document must be saved and named at least once for the linking to work. If you want to create linked notes on a brand new document, you’ll need to save it first.
To use those linked notes later, navigate to the page where you took those notes, and you can click the provided links to jump back to the document or website you were working with.
In Chapter 25, you learned how to insert a photo image or document into OneNote. You can use the screen clipping feature, print from the original application to OneNote, or go to the Insert tab in OneNote and select Pictures, Online Pictures, Screen Clipping, or even Scanned Image.
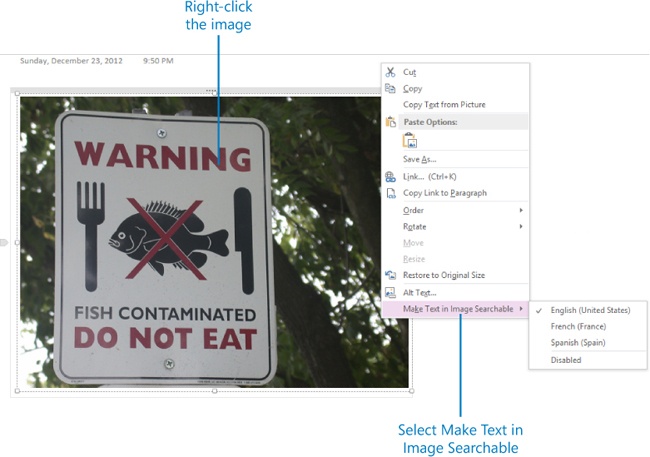
Did you know that OneNote can automatically try to recognize any text that appears in those images? That process is called OCR or Optical Character Recognition.
Naturally, the results will vary by the quality of the picture and the legibility of the text. However, a photo of handwritten text on a whiteboard could be successfully recognized, if the photo is clear and the handwriting is fairly easy to read. A photo of a printed stop sign will very likely be recognized.
In this exercise, you’ll insert an image into a page of notes.
Set Up
You need the 29 Practice image 1.jpg image located in the Chapter29 practice file folder to complete this exercise. Create a practice OneNote page that you can insert an image into.
Navigate to the OneNote page you want to insert the image on.
Click the location on the page where you want to place the image.
Click the Insert tab on the ribbon.
Navigate to and insert the 29 Practice image 1.jpg file
Next, confirm that the page will be indexed. Right-click the image you just inserted and select Make Text in Image Searchable.
Set the language you want to use.
OneNote will attempt to index the text in the image in the background, and that text will subsequently appear in your search results if you look for that string (or part of it).
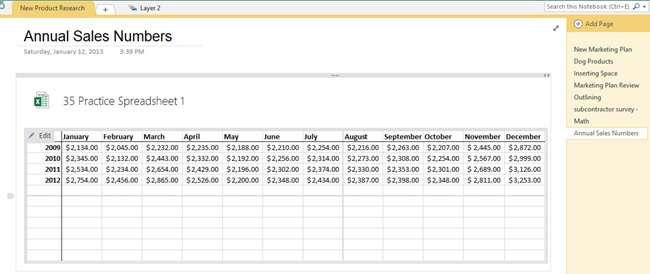
One of the features folks have been asking for in OneNote since the very beginning has been the ability to embed content from other file types in a OneNote document other than just being able to print it there. OneNote 2013 has some of that capability with the Insert Spreadsheet feature.
In this exercise, you’ll embed a Microsoft Excel spreadsheet on a OneNote page.
Set Up
You need the 29 PracticeSpreadsheet.xlsx workbook located in the Chapter29 practice file folder to complete this exercise.
Open OneNote.
Navigate to a page where you want to insert the sample spreadsheet.
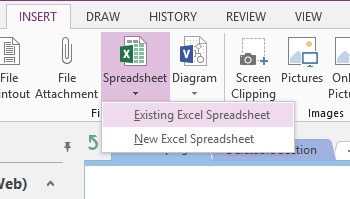
On the Insert tab, click Insert Spreadsheet.
OneNote will ask if you want to insert a new spreadsheet or an existing spreadsheet.
Select Existing Excel Spreadsheet.
Navigate to the folder containing the 29 Practice Spreadsheet and select it.
Click Insert.
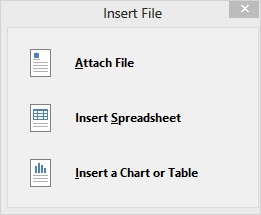
OneNote will ask if you want to Attach File, Insert Spreadsheet, or Insert a Chart or Table.
Choose Insert Spreadsheet. OneNote will insert the spreadsheet you selected onto the note page.
Any changes that were made to the sheet will automatically be updated in OneNote. However, you can’t edit the sheet in OneNote. To do that, you would have to click the Edit button in the upper-left corner of the window, which will open Excel. Then you can make and save your changes, which will appear in OneNote.
If you asked 100 OneNote users what Napkin Math was. about 98 respondents wouldn’t know the answer. Napkin Math is the name given to the feature in OneNote where you can enter a mathematical equation and OneNote will solve it for you.
For example: enter 2+2= then press Enter, and OneNote will insert the 4 for you. Napkin Math understands a surprising number of mathematical operators. In addition to addition, subtraction, multiplication, and division, it can also do exponents (squared, cubed, x5, and so forth), square roots, percentages, and more. You can use the currency symbol ($) to have it treat the result as currency, and you can even enter some fairly long formulas.
Napkin Math cannot calculate with variables or references like Excel does. It won’t let you create a calculated cell in a table, for example. In that instance, you would do better to use the inserted spreadsheet tool discussed in the previous section.
If the plain white sheets of electronic paper are just a little too plain for you, then you can dip into the OneNote collection of templates. Templates are precreated pages that already contain specific elements such as formatting, tables, graphics, or instructions.
In this exercise, you’ll use a template to create a new page in OneNote.
Click the Insert tab on the ribbon.
Click the Page Templates button.
From the Recently Used list, select a template you use often (if any), or click the Page Templates item at the bottom of the menu to open the Templates pane on the right side of the screen.
Select a template from the Templates pane by expanding the category (such as Academic or Business) and clicking the template you like. If you don’t like the template you selected, simply repeat step 3 and select a different template. After you enter notes onto the page, you won’t be able to change the underlying template and keep your notes. You’ll have to create a new page with the new template and move your notes to it.
On the Templates task pane, you can select from among a couple dozen pre-created templates, including special types of notes pages, planners, and more. Or, you can create your own.
Tip
To create your own template, create a page that is exactly the way you want it—page title, paper color, any tables or content you want inside—and then click the Templates pane. Click the Save Current Page As A Template link at the bottom of the Templates pane. OneNote will ask you to give your template a name. Then you can save it in the My Templates section at the top of the Templates pane.


Page templates are a unique way to create pages that have pre-existing formatting so they are ready for you to enter notes without having to create new formatting parameters each time.
OneNote 2013 has some powerful features that aren’t obvious to the casual observer.
Tags help you organize and categorize your notes, and the Find Tags feature makes it easy to find your tagged items later.
OneNote has the ability to record audio and video that can help you more accurately capture notes in a meeting or conference.
Quick Notes make it possible to quickly capture ideas or events (like phone calls) as they occur and make them searchable and shareable later.
Screen clippings let you save anything visible on your screen in your notes.
If you’re taking notes on a document, presentation, webpage or other OneNote page, you can link your notes to that item to quickly return to it when you review the notes later.
If there is text in your picture, OneNote can recognize that text and make it searchable.
OneNote 2013 lets you insert spreadsheets (and Microsoft Visio files) into your notes and keeps the inserted spreadsheet updated so if the source data changes, the table in your notes changes too.
Napkin Math lets you make quick and simple calculations within your notes.
Templates let you create pre-formatted pages that you can use and reuse in your notes.