
Chapter at a glance
Modify

Change

Discover
Discovering what’s new in Word 2013

IN THIS CHAPTER, YOU WILL LEARN HOW TO
Explore the Word 2013 user interface.
Modify your document view.
Change other view options.
Discover what’s new in Word 2013.
Microsoft Word 2013 is a word processing application that you can use for a wide range of tasks. You can create basic documents, such as letters, memos, reports, forms, newsletters, envelopes, labels, contracts, and more. And you can use Word for more complex documents, like a book or report that includes a table of contents, figures, indexes, footnotes, endnotes, and cross-references.
Whether your document is simple or complex, this part of the book provides you with the foundation for all of your document needs—from creating, formatting, layout, and pagination essentials to preparing your document for print, sharing, or exporting.
In this chapter, you’ll get familiar with the Word 2013 user interface and learn how to modify your document view options so they’re more suited to your specific work flow. And at the end of this chapter, you’ll get an overview of the key new and improved features for Word 2013.
You typically start Microsoft Word 2013 from the Start screen in Windows 8 or the Start menu in Windows 7. You can also start Word and open a file at the same time by opening a document from an email attachment or by double-clicking a document from a place like your desktop.
Tip
If you have Windows set to view file extensions, the primary file extension for Word documents is .docx. Windows associates a file extension with an application, which enables you to open a document and start Word at the same time.
When you start Word without opening a file, the new Word Start screen appears.

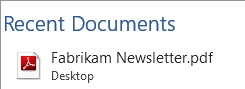
From the Start screen, you can open a recent document, open an existing document, or create a new one from a template.
Tip
If you haven’t previously used Word 2013, the Recent documents list on the Start screen may appear empty.
After you create or open a document, the main window is displayed with a blank document along with the tools for working with the content of a document, such as the ribbon and Quick Access Toolbar.

Ribbon. The ribbon is the main component of the Word interface and where you’ll find the primary commands for working with the content of your documents. The ribbon is comprised of task-oriented tabs and each tab has groups of related commands. For example, on the Home tab, the Clipboard group contains commands for copying and pasting information in your Word documents. Groups that have additional commands that aren’t shown on the ribbon have a dialog box launcher. Clicking the dialog box launcher will display a task pane or dialog box with options that are related to the group. For example, if you click the dialog box launcher for the Font group, the Font dialog box will be displayed, giving you more formatting choices such as Strikethrough, Superscript, and Subscript.
Important
In this book, the images of the ribbon were captured with a screen resolution of 1024x768, at the default 100 percent magnification. If your display settings are different than these, the images of the ribbon will appear differently on your screen due to its dynamic capabilities. For example, buttons may appear stacked vertically instead of horizontally. If you notice these differences, you can either adapt the exercise instructions to your screen or modify your display settings to match ours.
See Also
For instructions on how to modify your display settings and adapt exercise instructions, see Chapter 1.
File tab. This is the first tab on the ribbon. Unlike other ribbon tabs, the File tab displays the Backstage view where commands for working with the entire document, such as Save As, Print, Share, and Export, are located. The Backstage view is also where application options are located and where you can find information about your user account and your version of Office.
Quick Access Toolbar. This toolbar holds your most frequently used commands. By default, Save, Undo, and Redo have already been added.
Tip
To add other commands to your Quick Access Toolbar, right-click the command you want and then click Add To Quick Access Toolbar. To remove a command from the Quick Access Toolbar, similar to adding a command, just right-click the command you wish to remove and then click Remove From Quick Access Toolbar.
Title bar. This bar is located at the top of the window, and it displays the name of the active document along with the application name. If you’re working with a document that hasn’t been saved, a name such as Document1—Word is displayed. After the document has been saved, the title bar will reflect the name of the saved document.
Window controls. These controls are displayed at the right end of the title bar. Along with the standard Minimize, Restore Down/Maximize, and Close buttons, there are two additional buttons—Help and Ribbon Display Options.
Status bar. The status bar is located at the bottom of the window and displays information about the current document, such as the page and word count. On the far right end of the status bar are the viewing options for switching your document to a different view, along with a zoom slider to change the magnification of your active document.
See Also
For a more comprehensive list of ribbon and user interface elements, along with detailed instructions on how to customize your user interface, including the ribbon and Quick Access Toolbar, see Chapter 1.
You can modify how Word displays a document on your screen by changing the document view and zoom level on the View tab.

Word 2013 has five main document views:
Read Mode. The new Read Mode is optimized for reading and hides the ribbon and other elements that aren’t specific to reading a document. Unlike the Full Screen Reading view in earlier versions of Word, Read Mode allows you to zoom in on objects, like pictures and charts, and adjust the column layout. This view is also the default view when you open a document from an Internet source, such as an email attachment.
See Also
For more information on using Read Mode, see Chapter 6.
Print Layout. This is the default view for Word 2013. In this view, your document looks almost identical to how it will look when it’s printed. All page margins and other elements of your document are displayed, such as multiple columns, tables, graphics, headers, and footers.
Web Layout. This view is used when creating a webpage or a blog post. Similar to viewing a webpage, text will wrap to the size of your window and zoom setting, rather than page margins. Objects like pictures and charts will align differently than in other views and will appear as they will be displayed when viewed in a web browser.
Outline view. The Outline view shows the document’s organization according to paragraphs that have been formatted with a heading style, such as Heading 1, Heading 2, and Heading 3. In Outline view, you can choose to show only specific heading levels and quickly rearrange entire sections of your document by dragging a collapsed section to another location.
Draft view. Formerly known as Normal view in earlier versions of Word, Draft view is similar to the old Normal view, because it displays the page margins and headers; the footers are suppressed. However, Draft view also suppresses the view of objects, such as pictures and charts, and multi-column layouts are displayed as a single column.
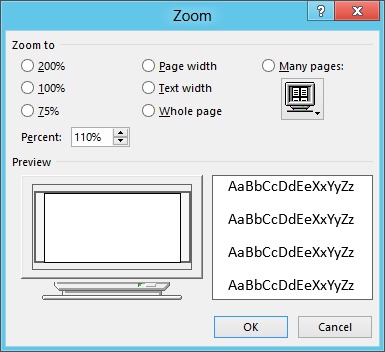
In the Zoom group, the majority of the options are fairly self-explanatory, such as setting your zoom to 100% or choosing whether you want to view a single page or multiple pages. Of the zoom options, the Page Width command is one that may need a little more explanation. When you click Page Width, your document is scaled to fit the width of the available document space. The available space for your document is determined by the size of your application window and any task panes you have displayed. For example, if you’re using a wide screen monitor and do not have any task panes open, your zoom level may increase to 154%. But if your application window is restored and the Clipboard task pane is open, your zoom level may decrease to 80%.
You can also switch to Read Mode, Print Layout, or Web Layout and set your zoom level in the lower-right corner of the status bar.

To increase or decrease your zoom level, drag the slider or click the plus and minus icons. You can also click the Zoom Level button to display the Zoom dialog box, which lets you set several zoom options at the same time.
With the exception of the Draft and Outline views, your last view and zoom level will be saved with your document. If you save and close a document in Draft or Outline view, the document will reopen in Print Layout view. Additionally, new documents you create will inherit your last zoom setting.
Tip
To enable documents to be opened in Draft view, click the File tab to display the Backstage view, and then click Options. On the Advanced page, scroll to the bottom of the options to the General section, and then select Allow Opening A Document In Draft View. Note that this is an application option, which means it isn’t saved with the document. If you send your document to someone else, whether it opens in Draft view depends on their settings.
Important
A document change, such as a text edit, is required in order to save your zoom or desired view with your document. If you want to make sure these settings have been saved, after modifying your view settings and prior to saving your document, press the Spacebar key and then press the Backspace key to create a text edit. This will force Word to save any changes you’ve made to your view.
You can modify your document’s view by turning on the ruler display or splitting your screen into two panes that can be scrolled independently of each other. You can use the ruler to view or modify page margins or to set tabs and modify indents. And you can split a document window if you want to compare or refer to portions of your document that aren’t located beside each other, or you can move content between two areas without scrolling back and forth.
Both of these options are also on the View tab.

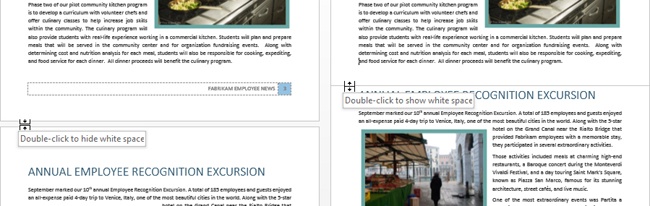
To toggle the ruler view, on the View tab, in the Show group, select the check box for Ruler.
To split your document window, on the View tab, click Split. After you click Split, the name of the command changes to Remove Split. Your document window will be split into two equal panes. Initially, the split will appear on your current page. Scroll the contents in either pane to view different areas of your document. If you prefer a larger top or bottom pane, you can drag the splitter to resize them.
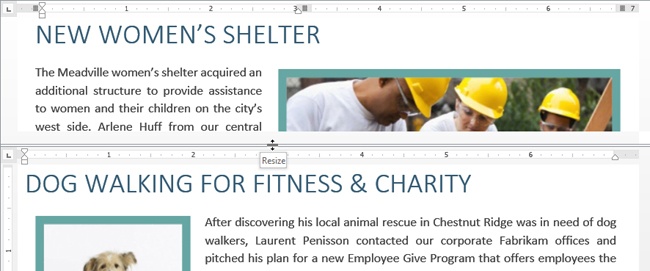
To remove the split view, click Remove Split, drag the splitter to the top or bottom of your document window, or double-click the splitter.
Tip
In earlier versions of Word, a toggle for showing and hiding the ruler and the ability to split the window are located above the horizontal scrollbar. These options are no longer available in Word 2013. If you frequently use these commands, you can add them to your Quick Access Toolbar. To do so, right-click the command in the ribbon and then click Add To Quick Access Toolbar.
See Also
For more information on how to customize your Quick Access Toolbar, see Chapter 1.
This section introduces you to key new and improved features for Word 2013 along with screenshots where applicable. The majority of the features included are discussed in detail along with step-by-step instructions throughout this part of the book.
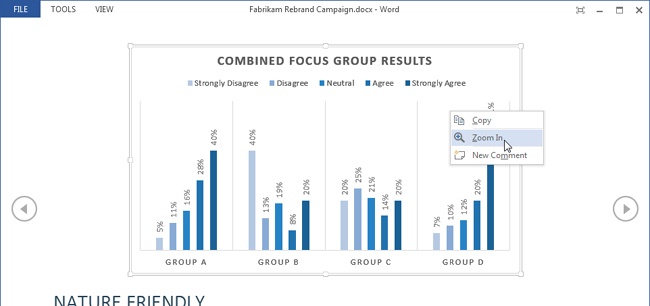
Read Mode. In Read Mode, commands that aren’t essential for reading are hidden from view and text is reflowed in columns to fit the available screen. While in Read Mode, you can right-click or double-click objects, like tables, charts, and images, to zoom in and view the details.
Resume reading. When you close a document, Word creates a bookmark of the last location where you were working inside the document. When you reopen a document, click the resume reading notification to pick up right where you left off.
PDF Reflow. Now you can open and convert PDF files in Word for editing. With PDF Reflow, tables, headers, footers, footnotes, and lists are all converted into editable content.
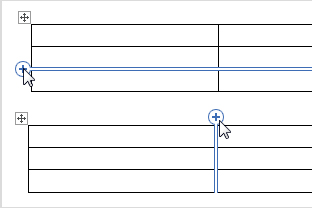
One-click table row/column insertion. Insert new rows and columns without the need to visit the ribbon or use a shortcut menu. Point to the left of the table between two rows or above the table between two columns. Watch for the on-screen insertion indicator to appear, and then click the indicator to insert a new row or column.
Table Border tools. The new Border Styles gallery provides you with a variety of border formatting choices that are coordinated to match the current theme. After you make a selection from the gallery, you use the new Border Painter to apply, or “paint” the border formatting on your tables. With the new Border Sampler, you can transfer existing border formatting to the Border Painter for reuse.
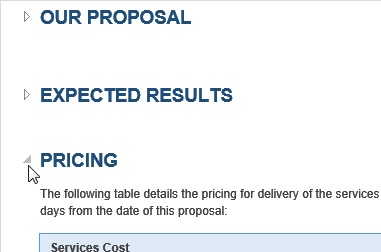
Collapsible headings. While editing or reading a document, you can expand or collapse paragraphs that are formatted with a Heading style. When a heading is collapsed, all of the content that’s associated with it is hidden from view. Large documents can be collapsed to a summary view for faster navigation.
Threaded comments. When multiple people review a document, they can reply to each other’s comments and check them off as they’re completed. With the new comment indicator, you can click to show or hide a specific set of comments.
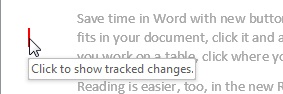
Simple markup. When working with tracked changes, simple markup reduces the view of revisions in your documents. Clicking a revision mark will toggle the display of all changes, making it easier to switch between a clean and marked-up view.
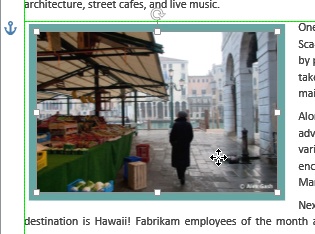
Alignment guides and Live Layout. New alignment guides help you visually align objects, like pictures, shapes, and diagrams, to paragraphs and page margins. With Live Layout, now you can view the exact placement of a photo, video, or shape as you drag it into position in a document.
Layout Options. When you select an image, shape, or SmartArt graphic, the Layout Options button will appear. Clicking the button displays layout options, such as text-wrapping choices, along with a link to view more advanced layout options.
Design tab. The new Design tab contains commands for setting default formatting for your documents. Now you can change a document’s theme, colors, fonts, paragraph spacing, and more from a single place. And the new Style Sets gallery enables you to quickly change the collection of styles that are displayed on the Home tab in the Styles gallery.
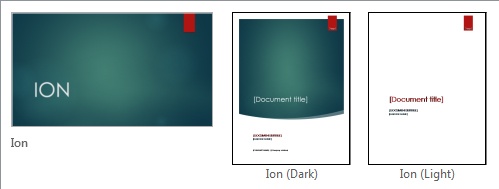
Building Blocks. New cover page, header, and footer building blocks have been added to help you create coordinating documents across the applications. For example, find new cover pages along with headers and footers that match the Ion slide design in Microsoft PowerPoint.
File Format. The Word file format has been updated to accommodate page layout improvements. Along with improvements for graphics, text wrapping, and pagination, the most noticeable change is to table layout. In earlier versions of Word, the text in a table aligned to text outside of the table. In Word 2013, the table borders, rather than the text in the table, now align to the surrounding text.
See Also
For more information on the layout changes in Word 2013, see www.support.microsoft.com/kb/2740483.


You start Word 2013 from the Start screen in Windows 8 or the Start menu in Windows 7.
The ribbon is made up of task-oriented tabs for working with your document’s content.
Use the View tab to change your document’s view, modify your zoom settings, turn on the ruler display, or split your screen.
With the exception of the Draft and Outline views, your last view and zoom level will be saved with your document.
New documents will inherit your last zoom setting.
You can also modify your zoom settings and switch to the Read Mode, Print Layout, and Web Layout views in the status bar on the View toolbar.