
Chapter at a glance
Correct
Inspect
Inspecting documents before publishing

Create
IN THIS CHAPTER, YOU WILL LEARN HOW TO
Correct proofing errors.
Inspect documents before publishing.
Mark documents as final.
Create PDF files in Word.
Print documents.
There are two different ways to distribute a final Microsoft Word document: You can print a hard copy of your document or publish it electronically through email, your company network, or on a website. Prior to its delivery, there are a few things you should consider.
First, regardless of how your document will be distributed, you want to ensure there are no proofing errors you haven’t already addressed. Second, if you’ll deliver your document electronically, you may want to remove personal data and make sure there isn’t other information in your document that you don’t know about, such as hidden text. Then for an electronic file, you can mark it as a final copy to let others know additional edits shouldn’t be made, or deliver it as a PDF file rather than as a Word document. Finally, it’s also a good idea to review it in its final format to make sure there are no errors you may have previously missed. Keep in mind that the proofing tools won’t catch everything, and you are the best proofreader.
In this chapter, you’ll learn how to perform a final proofing check, use the Document Inspector to inspect a document, and remove personal information. You’ll also learn how to mark your document as a final copy and create a PDF file that contains navigation bookmarks. At the end of this chapter, you’ll learn how to print your entire document, along with how to print a portion of it if you find that certain pages need to be reprinted after your final review.
Practice Files
To complete the exercises in this chapter, you need the practice file contained in the Chapter10 practice file folder. For more information, see Download the practice files in this book’s Introduction.
By default, the following types of proofing errors are flagged as you enter text in Word 2013:
Spelling errors. A red wavy line is displayed below words that might be misspelled. The red wavy line doesn’t necessarily mean that a word is misspelled; it means that the word isn’t in a built-in or custom dictionary.
Grammar errors. A blue wavy line is displayed below a word, phrase, or sentence that breaks a grammar rule or a frequently confused word, such as affect or effect. The blue wavy line doesn’t always mean that there’s an error; as with misspelled words, it’s up to you to determine if it’s correct.
Tip
In previous versions of Word, grammatical errors are identified with a green wavy line. Additionally, grammar errors may not be identified until you correct spelling errors or complete a sentence by entering a period, or full stop, and pressing the Spacebar key. A blue wavy line under a frequently confused word might also appear as you’re typing a sentence and then disappear as you provide more context. Because of this, it’s best to correct grammar errors after you’ve entered the full sentence.
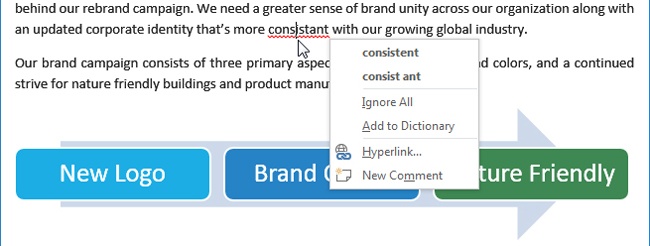
To correct a proofing error as you enter text, you can right-click the word or phrase that has a wavy line underneath it and select an option from the list of available corrections.

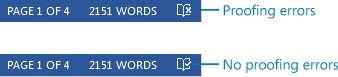
If you’re like most users, you likely correct spelling and grammar errors as you’re composing a document. Even if you may have made corrections while working, as noted at the beginning of this chapter, it’s a good idea to perform a final proofing check prior to distribution. A quick way to determine if your document has proofing errors is to view your status bar.
If the Spelling And Grammar Check icon, which looks like a book, displays an X, there are errors in your document. If the icon shows a check mark, then there are no proofing errors.
If your document has proofing errors, you can perform a final proofing check by using one of the following methods:
On the Review tab, in the Proofing group, click the Spelling & Grammar button.
Click the Spelling and Grammar Check icon in the status bar.
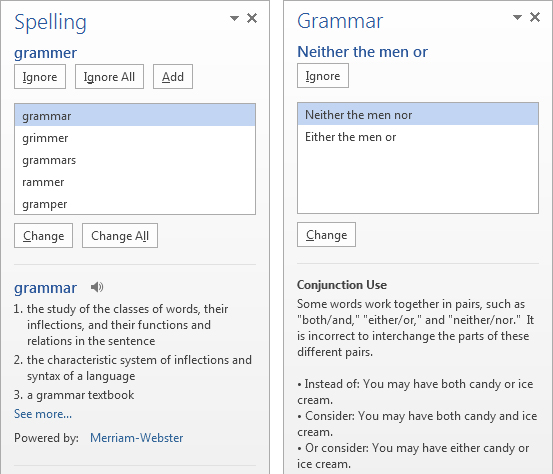
Either method will display the new Proofing pane, which identifies the type of error and the error itself at the top of the pane. It also provides suggestions and more information to help you make the right correction.
Tip
If the listed suggestions for a spelling error aren’t correct or if you don’t get any suggestions, edit the word in the document and try to get closer to the correct spelling.
If the error is a spelling error, you can click each suggested alternate word and obtain a definition to help you make the right selection. For grammar errors, suggestions are provided along with details about the error. Most have additional examples for rewording the sentence or phrase to make it grammatically correct. As you correct or ignore the various errors, Word will find the next error and display it in the Proofing pane. You can also click a spelling or grammar error in a document and the Proofing pane results will reflect your current selection.
Tip
If you choose to add a correctly spelled word to your dictionary, note that it’s added to your custom dictionary only and may appear as a spelling error if the document is opened on someone else’s computer.
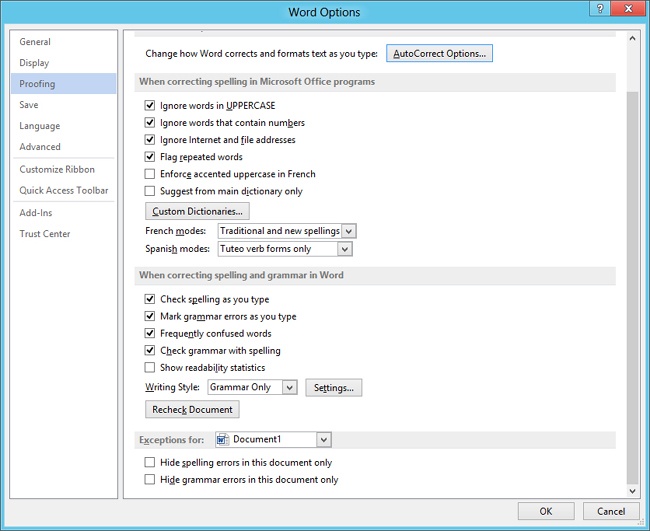
Additionally, if you often enter words in all caps, a default setting in Word ignores words in uppercase. You may want to change this setting to ensure a more accurate spell check. Another default setting ignores words that contain numbers. If you don’t work with a lot of numbers, you may want to change this setting as well. Otherwise, words that may have a number one instead of an L, or a zero instead of an O, could be missed. To view the available proofing options, click the File tab to display the Backstage view, click Options, and then click Proofing.
If you’re publishing your document electronically outside your company—for example, sending it by email, or publishing it on a webpage or as a PDF file—it’s a good idea to remove information that’s stored with your document in the document properties. The properties of a document can contain personal information, such as the name of the author and other data that may have been added to the document, including document tags. It’s also a good idea to make sure your document doesn’t contain information that is not visible, such as hidden text or collapsed headings that may be suppressed from view, even if you don’t intend to distribute it externally. To view both document properties and a list of items that you may not be aware of, click the File tab to display the Backstage view, and then click Info.
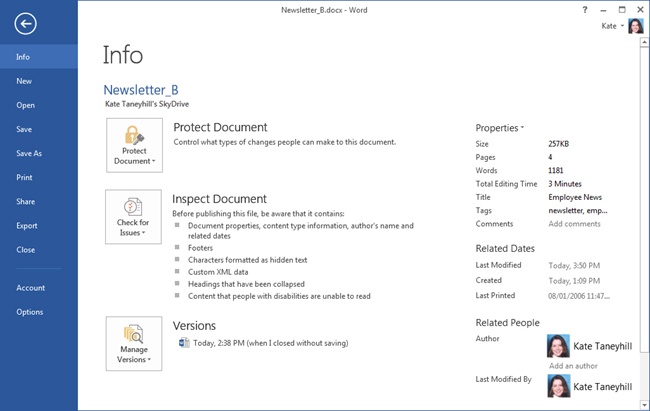
Document properties are listed on the right side of the Info page. A list of items to review before publishing is located under the Inspect Document heading.
Tip
To view all document properties, on the right side of the Info page, click Properties and then click Advanced Properties.
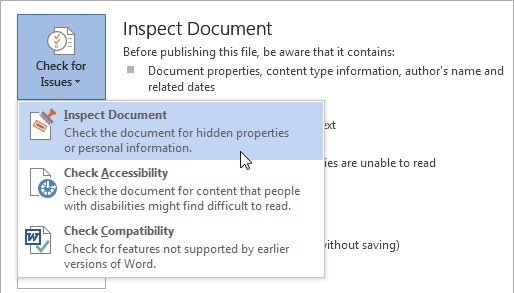
Instead of manually scrutinizing your document and deleting information you may not want to share, you can use the Document Inspector to check your document and remove that information for you. To view the Document Inspector, on the Info page, click the Check For Issues button, and then click Inspect Document.
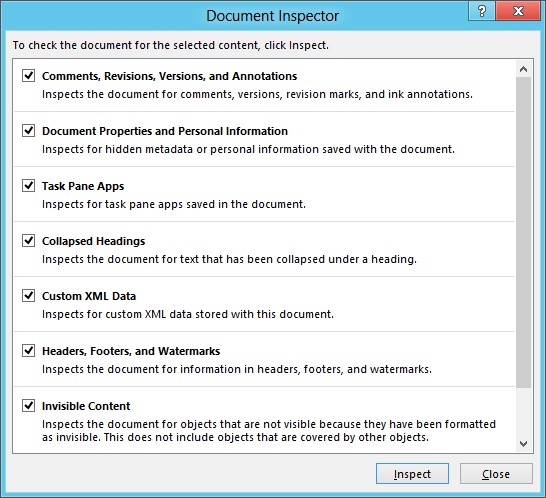
When you inspect a document, the Document Inspector doesn’t automatically remove document properties or other data. It checks whether the document contains the type of content listed and presents you with the inspection results for each type of check it preforms. You can then choose to remove the data, make corrections in your document, or not change the information after you’ve determined it’s okay to keep.
In this exercise, you’ll run the Document Inspector and correct the issues it discovers.
Set Up
You need the Newsletter_B document located in the Chapter10 practice file folder to complete this exercise. Open the Newsletter_B document, and then follow the steps.
On page 1, to the left of the Employee Give Program heading, click the Collapse button.
Scroll through the document and note the footer, Fabrikam Employee News along with the page number, at the bottom of each page.
Click the File tab to display the Backstage view. If the Info page is not displayed, click Info.
Review the document properties on the right side of the Info page, such as the title, tags, and author names. Review the list of items to be aware of prior to publishing, below the Inspect Document heading.
To the left of the Inspect Document heading, click the Check for Issues button and then click Inspect Document.
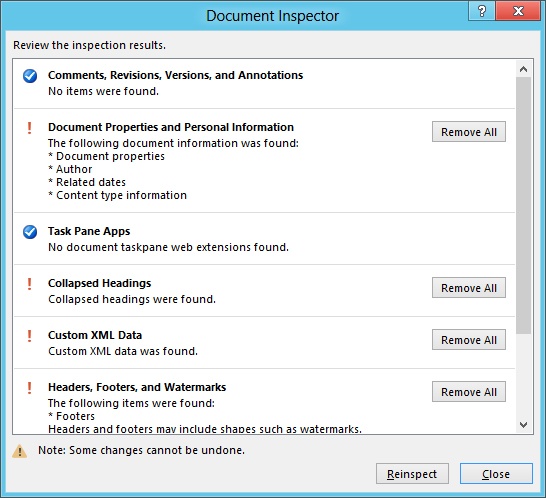
In the Document Inspector dialog box, click the Inspect button to run it and review the inspection results.
To the right of Document Properties and Personal Information, click the Remove All button.
To the right of Collapsed Headings, click the Remove All button.
Close the Document Inspector dialog box without removing additional data.
Tip
Because there is a visible footer at the bottom of each page, you don’t want to remove it. Additionally, the table of contents in the newsletter creates both custom XML data and hidden table of contents fields. The custom XML data can’t be removed, and even though hidden text is reported in the list of items on the Info page, because it’s associated with the table of contents, it passed the test and the Document Inspector doesn’t offer to remove it.
On the Info page, note that the title, tags, and author names were removed.
Click the Back arrow to close the Backstage view and return to the document.
View page 1 and note that the Employee Give Program heading is now expanded.
Clean Up
Save the document as My Newsletter_B. If you’re proceeding to the next exercise, leave the document and Word open. Otherwise, close the document and exit Word.
The Document Inspector will continue to remove document properties each time you save your document. Other elements, such as headers, footers, or comments, aren’t automatically removed, and you’ll need to run the Document Inspector again if you make additional editing changes.
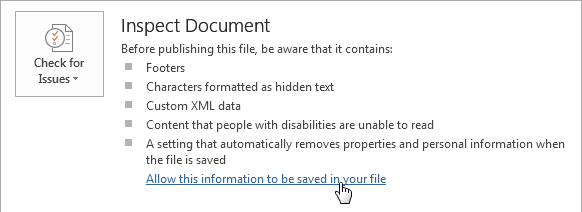
To allow Word to start saving document properties after they’re removed, on the Info page, below the list of items to be aware of, click the link titled Allow This Information To Be Saved In Your File.
If you’re publishing a final version of your document and want to make sure additional edits aren’t made, you can mark your document as final to let others know they’re viewing the final version. To do so, on the Info page, click the Protect Document button, and then click Mark As Final.
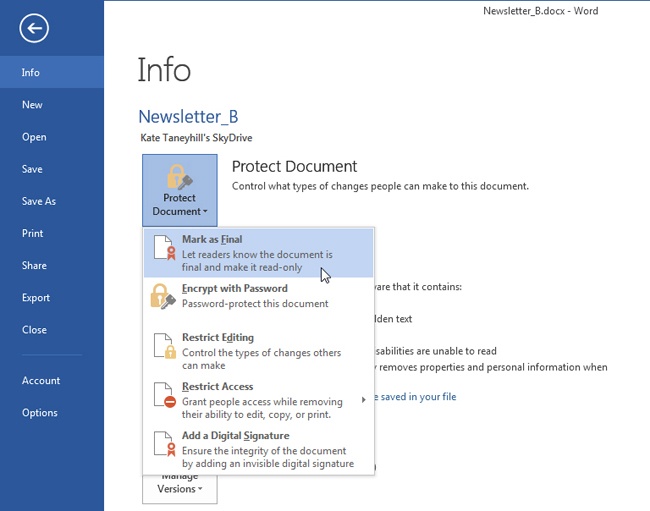
Keep in mind that marking a document as final isn’t a security option, and other users can still edit the document. After a document has been finalized, an Info bar is displayed at the top of the document. Although it discourages editing, it also includes an Edit Anyway button. If this button is clicked, the Mark As Final option is removed.
If you’re sharing a final document with others, your document may not look the same as it does on your computer. The recipient may be using a different printer, which can change document pagination, or he or she may be viewing it in Word Web App, or on another device, such as a Microsoft Surface or smartphone. If exact layout and pagination is a concern, you can save your document as a PDF file, which helps prevent layout changes and can be viewed using a number of PDF viewers, such as the new Windows 8 Reader.
Important
Creating a PDF file doesn’t prevent it from being edited. And editing a PDF file is easier now that Word can convert a PDF file into editable content. If you have sensitive documents that need additional protection, you need to use a PDF application that has extra security options to restrict editing, such as Adobe Acrobat Pro, instead of using Word to create your PDF files.
To create a PDF file, click the File tab to display the Backstage view, click Export, and then click the Create PDF/XPS button.
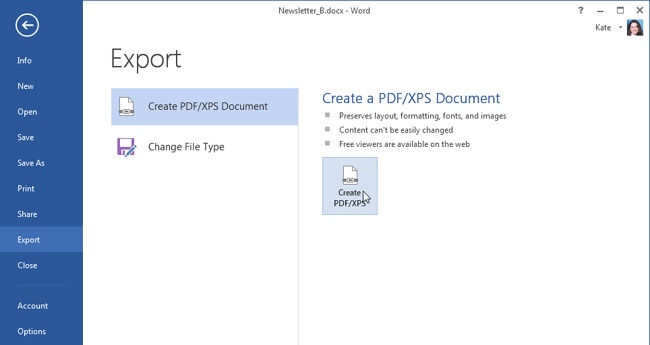
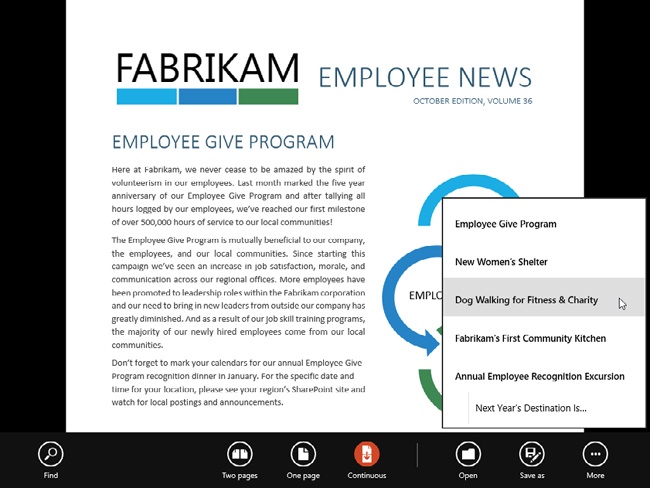
When you publish a document as a PDF file, rather than using a PDF printer to create it, you also have the ability to include additional options. For example, you can use heading styles in the document to create navigation bookmarks when it’s viewed in readers such as the Windows 8 Reader or Adobe Reader.

See Also
For more information on heading styles, see Chapter 8.
In this exercise, you’ll create a PDF document and add navigation bookmarks by using the heading styles.
Set Up
If Word and My Newsletter_B are still open from the previous exercise, then follow the steps. Otherwise, you need the Newsletter_B document located in the Chapter10 practice file folder to complete this exercise. Open the Newsletter_B document, and then follow the steps.
Click the File tab to display the Backstage view, and then click Export.
Verify that the Create PDF/XPS Document page is selected, and then click the Create PDF/XPS button to display the Publish as PDF or XPS dialog box.
If you prefer to save the PDF in a location other than your Chapter10 practice files folder, navigate to that location. For example, choose your Microsoft SkyDrive, if desired.
In the File Name text box, enter My Newsletter_PDF.
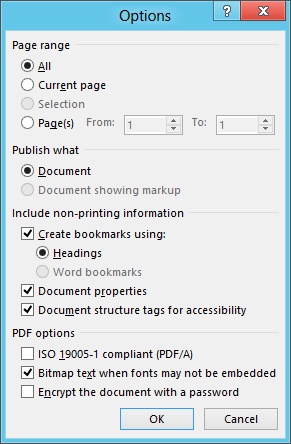
In the Options dialog box, below Include non-printing information, select the check box for Create bookmarks using and verify that the Headings option is selected.
Click the OK button.
In the Publish as PDF or XPS dialog box, click the Publish button to save the newsletter as a PDF file.

Tip
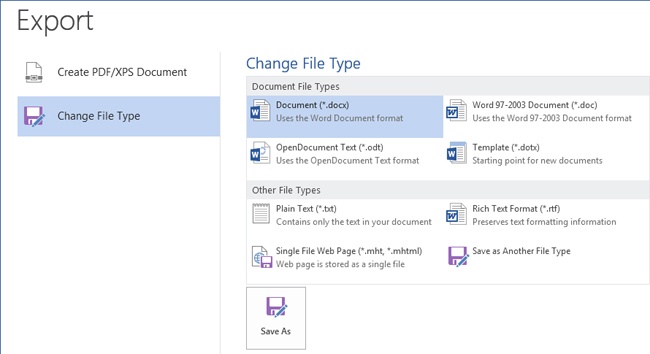
The Export page in the Backstage view also has a Change File Type option for saving your Word documents in other formats files, such as OpenDocument or HTML.
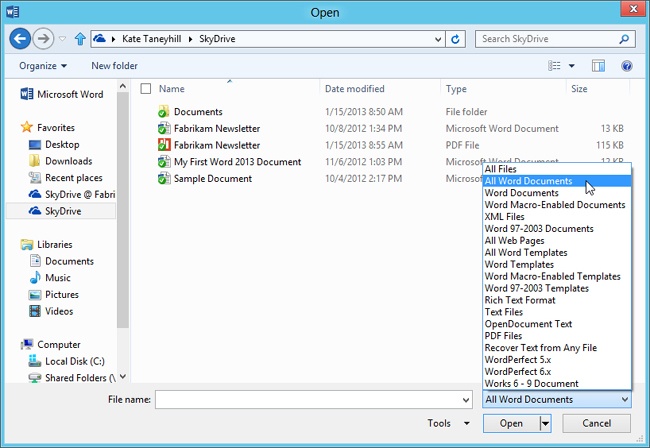
A new feature in Word 2013 is PDF Reflow, which converts tables, headers, footers, footnotes, and lists into editable content in Word. You open a PDF file just like you do other Word documents. However, Word doesn’t open the original PDF file for editing. Instead, it converts the contents of the PDF file to a Word document. After you make your modifications, you’ll need to create the PDF file again by using the steps provided in the Creating PDF files in Word section earlier in this chapter.
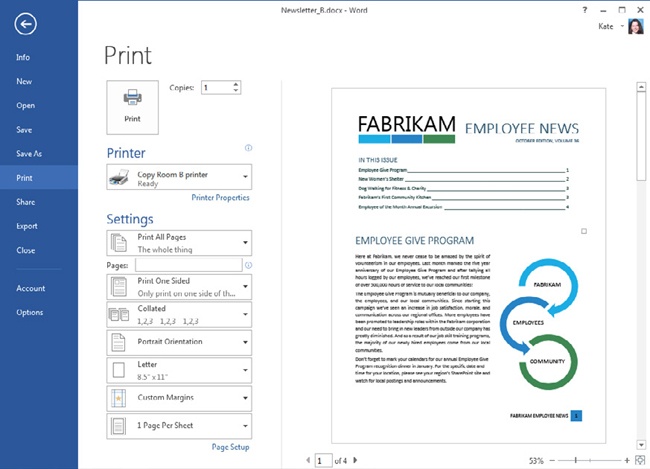
To print a document in Word, you click the File tab to display the Backstage view, and then click Print. The Print page displays a full-page print preview along with printing and page layout options.

Tip
If you want to send your document directly to your default printer without previewing it first, you can use the Quick Print command. To add the command to your Quick Access Toolbar, click the arrow at the end of your Quick Access Toolbar and then click Quick Print.
See Also
For more information on customizing your Quick Access Toolbar, see Chapter 1.
In the Printer section, if the printer shown isn’t the printer you want to use, click the printer to display a list of additional printers. In the Settings section, there are several options that change your document settings and those that change only how the document will print. The options that will modify your document are page orientation, paper size, and page margins.
The options that will effect only how the document is printed are:
Print One-Sided. If your printer can automatically print on both sides of the paper, which is called duplexing, then you’ll have an option to print on both sides. Otherwise, you’ll have a manual option that requires you to reload the paper to print on the other side of the page when prompted.
Collated. If you are printing multiple copies of your document, the Collated option will print each copy of your document in sequential order. If you want to group each copy of a page together when it prints, select Uncollated.
1 Page per Sheet. You can change this option to print multiple pages of your document on a single sheet. For example, you may want to print two pages per sheet to proof a draft copy of your document to save paper.
Word also allows you to print only a portion of your document; for example, if you want to only print the current page. To choose what part of the document to print, click Print All Pages, directly below the Settings heading, and select another option, such as Print Selection, Print Current Page, or Custom Print.
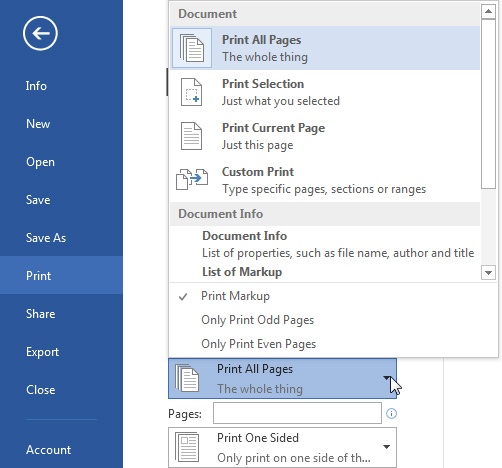
Most of the options are self-explanatory, such as printing only your selected content in the document or the current page. When you select the Custom Print option, you enter a print range in the Pages text box. To print multiple pages that aren’t next to each other, enter each page number separated by a comma, as in 3, 6, 8. To enter a range of pages, separate the starting page number and ending page number with a hyphen, as in 2-5.
Tip
When you choose an option other than Print All Pages, the document preview to the right will not update to reflect your selection and will still show all pages in your document.
After you’ve made any needed adjustments, click the Print button at the top of the page to send your document to the printer.
Printing documents with sections
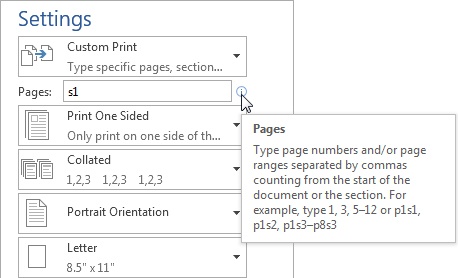
If your document has section breaks, and you want to print a portion of your document, you use the Custom Print option and enter the section and page information. If you want to print an entire section, enter an s followed by the section number. For example, if you want to print only section 1, you enter s1. To enter a specific page in a section, you enter a p followed by the page number and then an s followed by the section number. For example, to print page 4 in section 3, you enter p4s3. If you want additional examples of how to enter pages and sections, point to the information icon to the right of the Page text box to display the ScreenTip.
Tip
To determine section numbers for your pages, click in the part of the document you want to print and view the section information in the status bar. If this information is not displayed, right-click the status bar and in the Customize Status Bar options, click Section. The page number information should be displayed in the status bar, by default. If it is not displayed, right-click the status bar and then click Page Number.
See Also
For more information on working with sections, see Chapter 8.
Tip
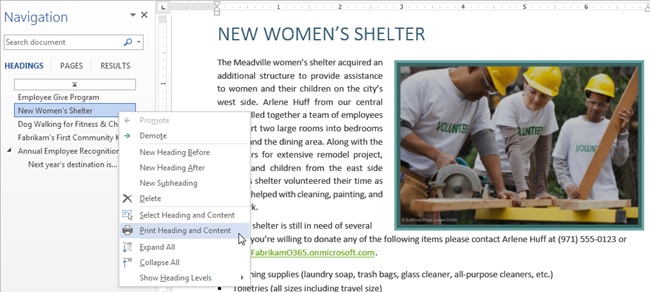
If your document has heading styles, and you want to print a specific heading and its related content, you can use the Navigation pane to select that portion of your document and set the print options on the Print page in the Backstage view. To do so, in the Navigation Pane, right-click the heading you want to print and then click Print Heading and Content.
Even if you correct spelling and grammar errors while you’re composing your document, you should include a final proofing check prior to finalizing a document.
To quickly check for proofing errors, view the Spelling And Grammar icon on your status bar. If the icon displays an X, there are still proofing errors in your document.
You can use the Document Inspector to remove personal information, such as document properties, and check for items you may not be aware of, such as collapsed headings, hidden text, or other data that may not be visible in a document.
You don’t have to remove all items identified by the Document Inspector. Some information may need to be kept, such as headers and footers. Other information can’t be removed, such as the custom XML data that is created by the table of contents feature.
A document that’s been marked as final can still be edited.
If you’re creating a PDF file and your document contains headings, you can add navigation bookmarks that can be used in the PDF viewer.
Creating a PDF file doesn’t prevent it from being edited.
PDF files can be converted into editable content in Word 2013.
You can print an entire document or print only a portion of it.