7: Creating a Web Presentation
What You’ll Do
Create Hyperlinks to External Objects
Save a Presentation as Web Graphics
Access Office Information on the Web
Introduction
With Microsoft PowerPoint, you can incorporate action buttons and hyperlinks within your presentation to add an element of connectivity to your work. If you add action buttons to your slides, you can click a button in a slide show to jump instantly to another slide, presentation, or program file. If you add hyperlinks to objects, you can jump to Internet and intranet locations. You can also customize your hyperlink by adding sound to it.
PowerPoint provides you with the tools you need to save your slides for use on the Web in a variety of Web graphic file formats, such as GIF, JPEG, or PNG. In addition to slides, you can also save a presentation as a picture presentation. Each slide is saved as a picture in the presentation. This is useful for distributing your presentation as a single file to others, yet still protecting your content.
You can no longer save a presentation as a Web page in PowerPoint 2010. However, if you have Web presentation saved in a previous version of PowerPoint, you can open the HTML (Hypertext Markup Language) file in PowerPoint 2010. After you open a Web presentation, you can preview it as it would appear on the Web.
If you want more information about PowerPoint and related resources, check out Office.com. Microsoft Office.com offers tips, software updates, tools, and general information to help you work with your PowerPoint presentation as well as other Office documents.
Adding Action Buttons
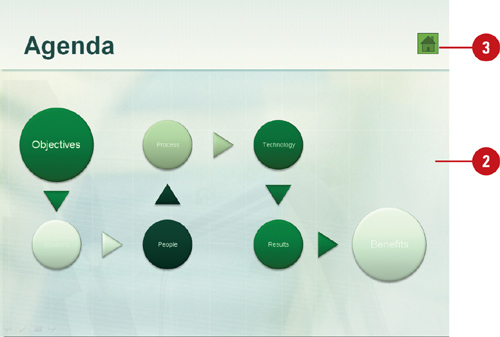
When you create a self-running presentation to show at a kiosk, you might want a user to be able to move easily to specific slides or to a different presentation altogether. To give an audience this capability, insert action buttons, such as Back, Forward, Home, Help, or Return, which a user can click to jump to a different slide or presentation. Clicking an action button activates a hyperlink, a connection between two locations in the same document or in different documents.
Insert an Action Button
![]() Click the Home or Insert tab.
Click the Home or Insert tab.
![]() Click the Shapes button, and then choose the action button (at the bottom) you want, such as Back, Forward, Home, Information, Return, Movie, Document, Sound, or Help.
Click the Shapes button, and then choose the action button (at the bottom) you want, such as Back, Forward, Home, Information, Return, Movie, Document, Sound, or Help.
![]() Drag the pointer to insert the action button, and then release the mouse button when the action button is the size you want.
Drag the pointer to insert the action button, and then release the mouse button when the action button is the size you want.
![]() Fill in the hyperlink settings you want as needed.
Fill in the hyperlink settings you want as needed.
![]() Click OK.
Click OK.
Test an Action Button
![]() Click the Slide Show View button.
Click the Slide Show View button.
![]() Display the slide containing the action button.
Display the slide containing the action button.
![]() Click the action button.
Click the action button.
Create an Action Button to Go to a Specific Slide
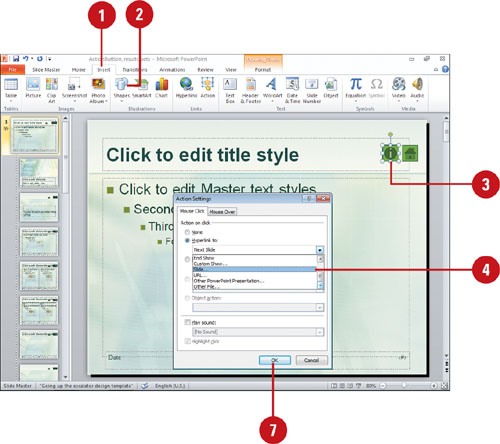
![]() Click the Home or Insert tab.
Click the Home or Insert tab.
![]() Click the Shapes button, and then click the Custom action button (at the bottom far right).
Click the Shapes button, and then click the Custom action button (at the bottom far right).
![]() Drag the pointer to insert the action button on the slide.
Drag the pointer to insert the action button on the slide.
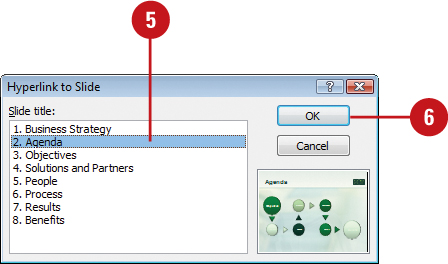
![]() Click the Hyperlink To option, click the list arrow, and then click Slide from the list of hyperlink destinations.
Click the Hyperlink To option, click the list arrow, and then click Slide from the list of hyperlink destinations.
![]() Select the slide you want the action button to jump to.
Select the slide you want the action button to jump to.
![]() Click OK.
Click OK.
![]() Click OK.
Click OK.
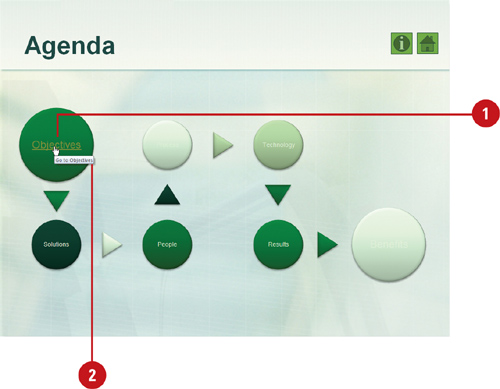
![]() Select the action button object, and then type the name of the slide the action button points to.
Select the action button object, and then type the name of the slide the action button points to.
![]() Click outside the action button to deselect it.
Click outside the action button to deselect it.
![]() Run the slide show and test the action button.
Run the slide show and test the action button.
Did You Know?
You can insert the Return action button to help navigate the slide show. If you want to return to the slide you were previously viewing, regardless of its location in the presentation, insert the Return action button.
You can create a square action button.
Press and hold Shift as you drag to create a square action button.
Adding Hyperlinks to Objects
You can turn one of the objects on your slide into an action button so that when you click or move over it, you activate a hyperlink and jump to the new location. You can point hyperlinks to almost any destination, including slides in a presentation and Web pages on the Web. Use the Action Settings dialog box to add sound to a hyperlink. You can add a default sound such as Chime, Click, or Drum Roll, or select a custom sound from a file.
Add a Hyperlink to a Slide Object
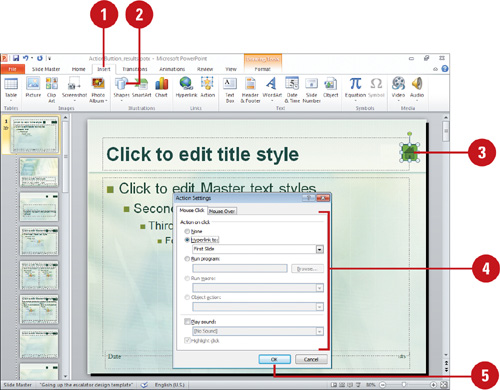
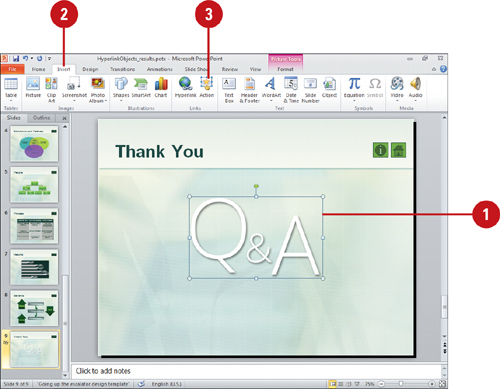
![]() Click the object (not within a SmartArt graphic) you want to modify.
Click the object (not within a SmartArt graphic) you want to modify.
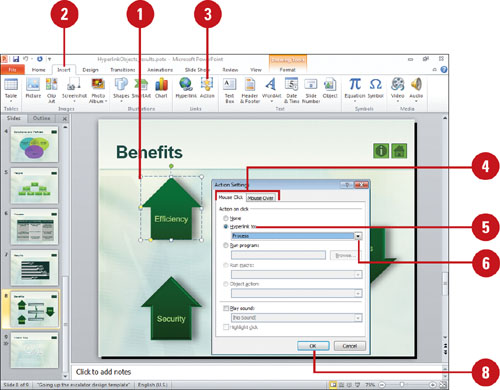
![]() Click the Insert tab.
Click the Insert tab.
![]() Click the Action button.
Click the Action button.
![]() Click the Mouse Click or Mouse Over tab.
Click the Mouse Click or Mouse Over tab.
![]() Click the Hyperlink to option.
Click the Hyperlink to option.
![]() Click the Hyperlink to list arrow.
Click the Hyperlink to list arrow.
![]() Click a destination for the hyperlink.
Click a destination for the hyperlink.
![]() Click OK.
Click OK.
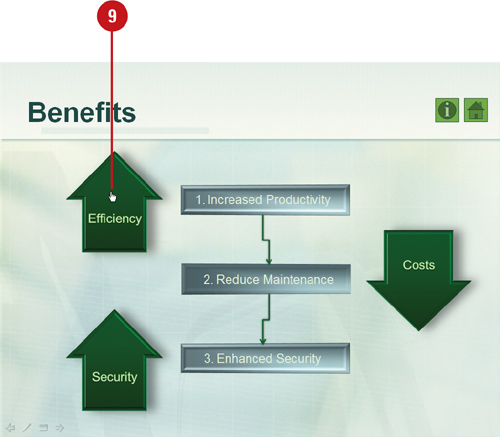
![]() Run the slide show and test the hyperlink by pointing to or clicking the object in the slide show.
Run the slide show and test the hyperlink by pointing to or clicking the object in the slide show.
Did You Know?
You can edit a hyperlink quickly.
Right-click the object with the hyper-link, and then click Edit Hyperlink.
You can highlight a click or mouse over. When you click or move over a hyperlink, you can highlight the object. In the Action Settings dialog box, select the Highlight Click or Highlight When Mouse Over check box.
![]() Click the object (not within a SmartArt graphic) you want to modify.
Click the object (not within a SmartArt graphic) you want to modify.
![]() Click the Insert tab.
Click the Insert tab.
![]() Click the Action button.
Click the Action button.
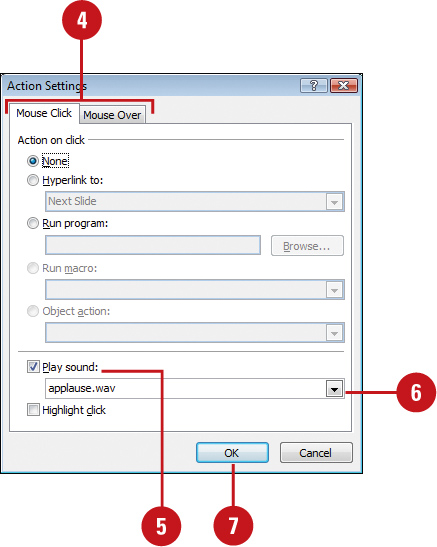
![]() Click the Mouse Click or Mouse Over tab.
Click the Mouse Click or Mouse Over tab.
![]() Select the Play sound check box.
Select the Play sound check box.
![]() Click the Play Sound list arrow, and then click the sound you want to play when the object is clicked during the show.
Click the Play Sound list arrow, and then click the sound you want to play when the object is clicked during the show.
![]() Custom Sound. Or scroll to the bottom of the Play Sound list, and then click Other Sound, locate and select the sound you want to use, and then click OK.
Custom Sound. Or scroll to the bottom of the Play Sound list, and then click Other Sound, locate and select the sound you want to use, and then click OK.
![]() Click OK.
Click OK.
Did You Know?
You can create an action button for a sound. Click the Slide Show menu, point to Action Buttons, click the Sound action button, drag to create the sound action button, click the Play Sound list arrow, select the sound you want, and then click OK.
Creating Hyperlinks to External Objects
You can create hyperlinks in your presentation that access other sources, such as another presentation, a file, a Web site, or even a program. This feature is especially useful for kiosk presentations, where you want to make information available to your audience, even if you can’t be there to provide it. Depending on your audience, you can set a hyperlink to be activated by clicking the hyperlink with the mouse or by moving the mouse over the hyperlink.
Create a Hyperlink to Another Presentation
![]() Click the object (not within a SmartArt graphic) you want to modify.
Click the object (not within a SmartArt graphic) you want to modify.
![]() Click the Insert tab, and then click the Action button.
Click the Insert tab, and then click the Action button.
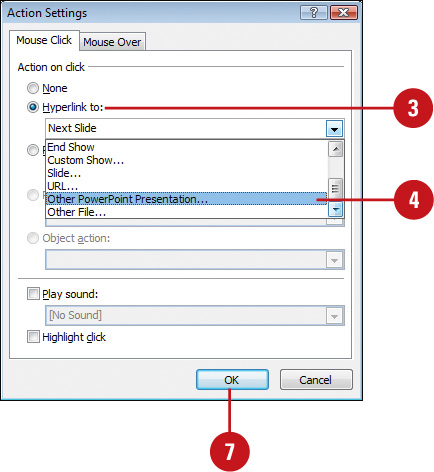
![]() Click the Hyperlink To option.
Click the Hyperlink To option.
![]() Click the list arrow, and then click Other PowerPoint Presentation from the list of hyperlinks.
Click the list arrow, and then click Other PowerPoint Presentation from the list of hyperlinks.
![]() Locate and select the presentation you want, and then click OK.
Locate and select the presentation you want, and then click OK.
![]() Select the slide you want to link to.
Select the slide you want to link to.
![]() Click OK, and then click OK again.
Click OK, and then click OK again.
Create a Hyperlink to an External File
![]() Click the object (not within a SmartArt graphic) you want to modify.
Click the object (not within a SmartArt graphic) you want to modify.
![]() Click the Insert tab, and then click the Action button.
Click the Insert tab, and then click the Action button.
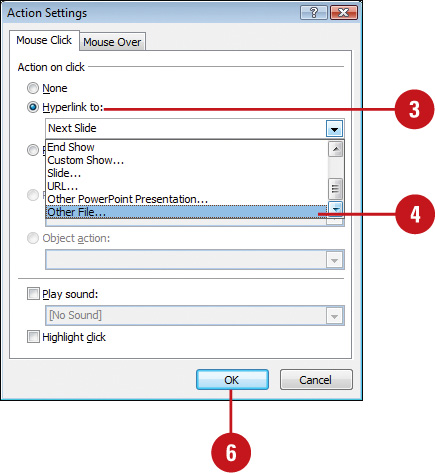
![]() Click the Hyperlink To option.
Click the Hyperlink To option.
![]() Click the list arrow, and then click Other File in the list of hyperlinks.
Click the list arrow, and then click Other File in the list of hyperlinks.
![]() Locate and select the file on your computer, and then click OK.
Locate and select the file on your computer, and then click OK.
![]() Click OK, and then click OK again.
Click OK, and then click OK again.
Create a Hyperlink to a Web Page
![]() Click the object (not within a SmartArt graphic) you want to modify.
Click the object (not within a SmartArt graphic) you want to modify.
![]() Click the Insert tab, and then click the Action button.
Click the Insert tab, and then click the Action button.
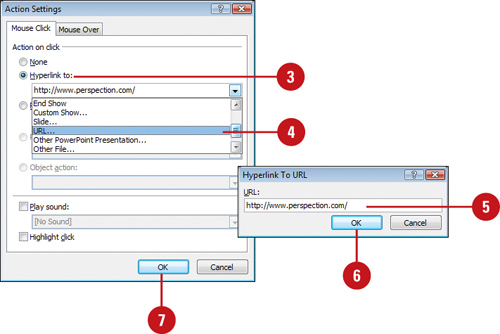
![]() Click the Hyperlink to option.
Click the Hyperlink to option.
![]() Click the Hyperlinks to list arrow, and then click URL.
Click the Hyperlinks to list arrow, and then click URL.
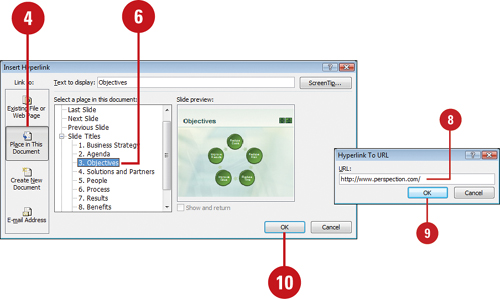
![]() Enter the URL of the Web page.
Enter the URL of the Web page.
![]() Click OK.
Click OK.
![]() Click OK again.
Click OK again.
Create a Hyperlink to a Program
![]() Click the object (not within a SmartArt graphic) you want to modify.
Click the object (not within a SmartArt graphic) you want to modify.
![]() Click the Insert tab, and then click the Action button.
Click the Insert tab, and then click the Action button.
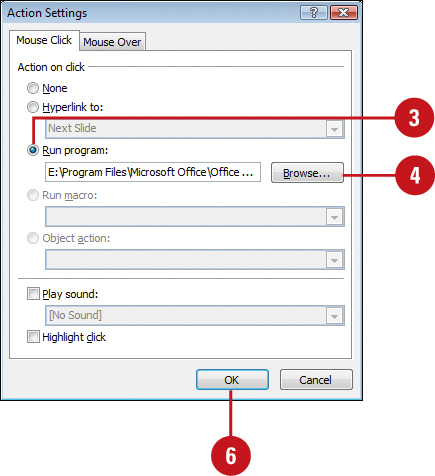
![]() Click the Run Program option.
Click the Run Program option.
![]() Click Browse, and then locate and select the program you want.
Click Browse, and then locate and select the program you want.
![]() Click OK.
Click OK.
![]() Click OK again.
Click OK again.
Did You Know?
You can use Mouse Over instead of Mouse Click. Set a hyperlink to be activated by clicking the hyperlink with the mouse or by moving the mouse over the hyperlink. To set a hyperlink to be activated by moving the mouse over it, click the Mouse Over tab in the Action Settings dialog box.
Inserting Hyperlinks
When you reference information included earlier in a presentation, you had to duplicate material or add a footnote. Now you can create a hyperlink—a graphic object or colored, underlined text that you click to move (or jump) to a new location (or destination). The destination can be in the same presentation, another file on your computer or network, or a Web page on your intranet or the Internet. PowerPoint inserts an absolute link—a hyperlink that jumps to a fixed location—to an Internet destination. PowerPoint inserts a relative link—a hyperlink that changes when the hyperlink and destination paths change—between documents. You must move the hyperlink and destination together to keep the link intact.
Insert a Hyperlink Within a Presentation
![]() Click where you want to insert the hyperlink, or select the text or object you want to use as the hyperlink.
Click where you want to insert the hyperlink, or select the text or object you want to use as the hyperlink.
![]() Click the Insert tab.
Click the Insert tab.
![]() Click the Insert Hyperlink button.
Click the Insert Hyperlink button.
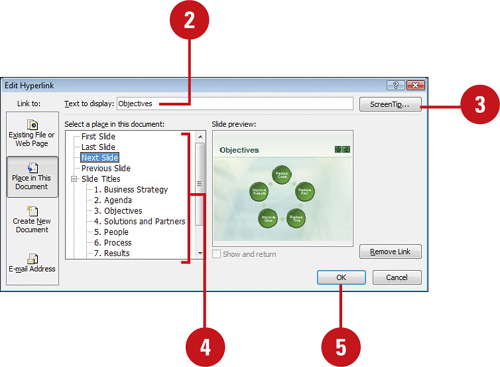
![]() Click Place In This Document.
Click Place In This Document.
![]() Click a destination in the document.
Click a destination in the document.
The destination can be a PowerPoint slide, slide title, or custom show.
![]() Type the text you want to appear as the hyperlink.
Type the text you want to appear as the hyperlink.
![]() Click ScreenTip.
Click ScreenTip.
![]() Type the text you want to appear when someone points to the hyperlink.
Type the text you want to appear when someone points to the hyperlink.
![]() Click OK.
Click OK.
![]() Click OK.
Click OK.

Insert a Hyperlink Between Documents
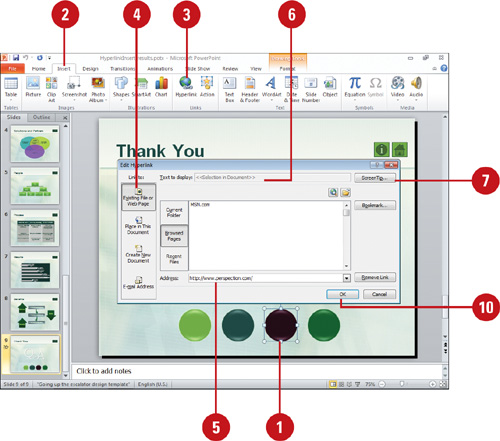
![]() Click where you want to insert the hyperlink, or select the text or object you want to use as the hyperlink.
Click where you want to insert the hyperlink, or select the text or object you want to use as the hyperlink.
![]() Click the Insert tab.
Click the Insert tab.
![]() Click the Insert Hyperlink button.
Click the Insert Hyperlink button.
![]() Click Existing File Or Web Page.
Click Existing File Or Web Page.
![]() Enter the name and path of the destination file or Web page.
Enter the name and path of the destination file or Web page.
![]() Or click the Bookmark button; select the bookmark, and then click OK.
Or click the Bookmark button; select the bookmark, and then click OK.
![]() Type the text you want to appear as the hyperlink, if available.
Type the text you want to appear as the hyperlink, if available.
![]() Click ScreenTip.
Click ScreenTip.
![]() Type the text you want to appear when someone points to the hyperlink.
Type the text you want to appear when someone points to the hyperlink.
![]() Click OK.
Click OK.
![]() Click OK.
Click OK.
Did You Know?
You can create a hyperlink to send e-mail messages. Click where you want to insert the hyperlink, click the Insert tab, click the Insert Hyperlink button on the Insert tab, click E-Mail Address, enter the recipients e-mail address, enter a subject, enter the hyperlink display text, and then click OK.
For Your Information
Understanding Web Addresses and URLs
Every Web page has a uniform resource locator (URL), a Web address in a form your browser program can decipher. Like postal addresses and e-mail addresses, each URL contains specific parts that identify where a Web page is located. For example, the URL for Perspection’s Web page is http://www.perspection.com where “http://” shows the address is on the Web and “www.perspection.com” shows the computer that stores the Web page. As you browse various pages, the URL includes their folders and file names.
Using and Removing Hyperlinks
Hyperlinks connect you to information in other documents. Rather than duplicating the important information stored in other documents, you can create hyperlinks to the relevant material. When you click a hyper-link for the first time (during a session), the color of the hyperlink changes, indicating that you have accessed the hyperlink. If a link becomes outdated or unnecessary, you can easily revise or remove it. PowerPoint repairs broken links. Whenever you save a presentation with hyperlinks, PowerPoint checks the links and repairs any that aren’t working. For example, if a file was moved, PowerPoint updates the location.
Use a Hyperlink
![]() In Slide Show view, position the mouse pointer (which changes to a hand pointer) over any hyperlink.
In Slide Show view, position the mouse pointer (which changes to a hand pointer) over any hyperlink.
![]() Click the hyperlink.
Click the hyperlink.
Depending on the type of hyperlink, the screen
![]() Jumps to a new location within the same document.
Jumps to a new location within the same document.
![]() Jumps to a location on an intranet or Internet Web site.
Jumps to a location on an intranet or Internet Web site.
![]() Opens a new file and the program in which it was created.
Opens a new file and the program in which it was created.
![]() Opens Outlook and displays a new e-mail message.
Opens Outlook and displays a new e-mail message.
![]() Right-click the hyperlink you want to edit, and then click Edit Hyperlink.
Right-click the hyperlink you want to edit, and then click Edit Hyperlink.
![]() If you want, change the display text.
If you want, change the display text.
![]() If you want, click ScreenTip, edit the custom text, and then click OK.
If you want, click ScreenTip, edit the custom text, and then click OK.
![]() If necessary, change the destination.
If necessary, change the destination.
![]() Click OK.
Click OK.
Remove a Hyperlink
![]() Right-click the hyperlink you want to remove.
Right-click the hyperlink you want to remove.
![]() Click Remove Hyperlink.
Click Remove Hyperlink.
TIMESAVER Drag the I-beam pointer across the hyperlink to select it, and then press Ctrl+Shift+F9 to delete a hyperlink.
![]() If necessary, delete the text or object.
If necessary, delete the text or object.

Did You Know?
You can format a hyperlink. You can change the look of a hyperlink just as you do other text—select it and apply attributes. Select the hyperlink, click the Home tab, and then use WordArt styles, and formatting buttons, such as Bold, Italic, Underline, Font, and Font Size. You can also use Shape styles on the Format tab under Drawing Tools.
Saving Slides as Web Graphics
As you develop a Web site, you can incorporate slides from any of your PowerPoint presentations. You can save any slide in a presentation in the GIF, JPEG, or PNG Web graphic format. Graphics Interchange Format (GIF) is a form of compression for line drawings or other artwork. Office converts to GIF such images as logos, graphs, line drawings, and specific colored objects. Joint Photographic Experts Group (JPEG) is a high-quality form of compression for continuous tone images, such as photographs. Office converts to JPEG such images as photographs or other images that have many shades of colors. Portable Network Graphics Format is a new bit-mapped graphics format similar to GIF.
Save a PowerPoint Slide as a Web Graphic
![]() Open the PowerPoint presentation with the slide you want to save as a Web graphic, and then display the slide.
Open the PowerPoint presentation with the slide you want to save as a Web graphic, and then display the slide.
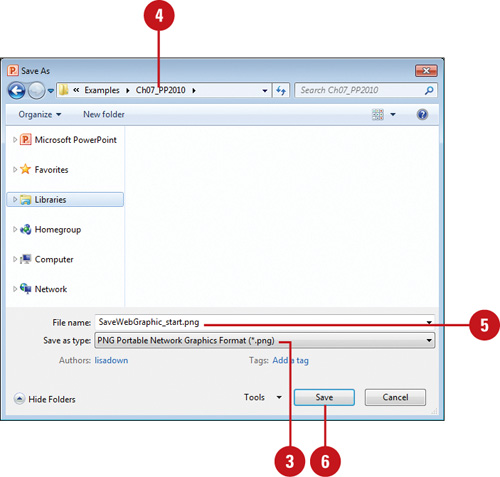
![]() Click the File tab, and then click Save As.
Click the File tab, and then click Save As.
![]() Click the Save as type list arrow, and then click GIF Graphics Interchange Format, JPEG File Interchange Format, or PNG Portable Network Graphics Format.
Click the Save as type list arrow, and then click GIF Graphics Interchange Format, JPEG File Interchange Format, or PNG Portable Network Graphics Format.
![]() Click the Save in list arrow, and then select a location for the file.
Click the Save in list arrow, and then select a location for the file.
![]() Type a name for the file.
Type a name for the file.
![]() Click Save.
Click Save.
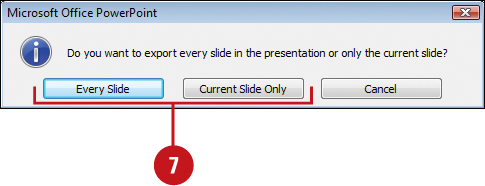
![]() Click Every Slide or Current Slide Only.
Click Every Slide or Current Slide Only.
See Also
See “Saving a Presentation with Different Formats” on page 26 and “Saving Slides in Different Formats” on page 303 for information on saving files with different file formats.
Saving a Presentation as Web Graphics
Instead of saving individual slides in a presentation as graphics, you can save each slide in a presentation as a graphic. With the PowerPoint Picture Presentation file (New!) with the .pptx file format, you can convert each slide in a presentation to a picture. In other words, everything on a slide, including shapes, text, and images, is converted to a picture. This is useful for distributing your presentations to others with PowerPoint, yet still protecting your content.
Convert Presentation Slides to Web Graphics
![]() Open the PowerPoint presentation you want to save.
Open the PowerPoint presentation you want to save.
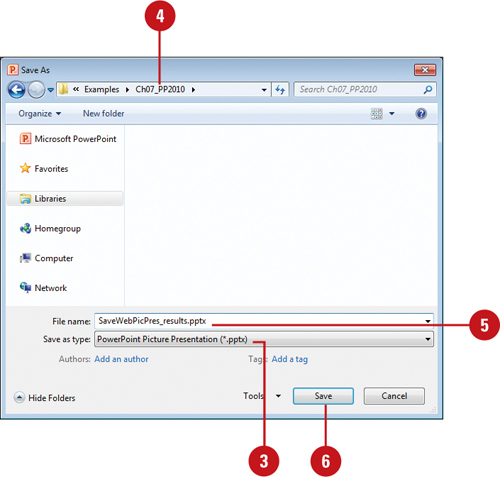
![]() Click the File tab, and then click Save As.
Click the File tab, and then click Save As.
![]() Click the Save as type list arrow, and then click PowerPoint Picture Presentation (*.pptx).
Click the Save as type list arrow, and then click PowerPoint Picture Presentation (*.pptx).
![]() You can also click the File tab, click Save & Send, click Change File Type, click PowerPoint Picture Presentation (*.pptx), and then click Save As.
You can also click the File tab, click Save & Send, click Change File Type, click PowerPoint Picture Presentation (*.pptx), and then click Save As.
![]() Click the Save in list arrow, and then select a location for the file.
Click the Save in list arrow, and then select a location for the file.
![]() Type a name for the file.
Type a name for the file.
![]() Click Save.
Click Save.
![]() Click OK.
Click OK.
See Also
See “Saving a Presentation with Different Formats” on page 26 and “Saving Slides in Different Formats” on page 303 for information on saving files with different file formats.
Exploring XML
Introduction
XML (Extensible Markup Language) is a platform-independent universal language that enables you to create documents in which data is stored independently of the format so you can use the data more seamlessly in other forms. XML is a markup language just like HTML. You mark up a document to define the structure, meaning, and visual appearance of the information in the document.
When you mark up a document, using XML or HTML, you use codes called tags that define the appearance or structure of the document. In HTML, the tags define the appearance and location of your data, while in XML, the tags define the structure and meaning of your data. For a HTML document, the tags determine where titles, text, and information goes in a document. For a XML document, the tags defines the kind of data, which makes it possible to reuse or exchange data. The
You cannot use HMTL in place of XML. However, you can wrap your XML data in HTML tags and display it in a Web page. HTML is limited to a predefined set of tags, while XML allows you to create tags that describe your data and its structure. This makes XML an extensible markup language.
In order to share XML data among programs and operating systems, it needs to be well-formed, which means it conforms to a standard set of XML rules. In addition to well-formed data, XML also uses schemas and transforms. A schema is an XML file (.xsd extension instead of the typical .xml) with a set of rules that defines the elements and content used in an XML document. XML schemas are created by developers who understand XML. The schema is used to validate the data in an XML document and help prevent corrupted data. After you validate an XML data file with a schema, you can apply a transform that allows you to reuse the data in different forms, such as a document or work-sheet, or exchange the data with a data system, such as a database. The XML data file, schema, and transform make up the components of a XML system.
Microsoft Office XML
XML is supported in Microsoft Office 2010 through PowerPoint, Word, and Excel. Each of these Office programs uses XML as the default file format. XML allows you to work with the Office interface and create XML documents, without ever knowing the XML language. In Word and Excel, you can use the Developer tab to work with XML structure, schema, and documents. In Access and Excel, you can import and export XML data. Office programs can work with schemas, transforms, and data from other suppliers as long as the XML is well-formed.
XML Benefits
The XML format significantly reduces file sizes, provides enhanced file recovery, and allows for increased compatibility, confidentially, sharing, reuse, and transportability. The XML format uses ZIP and other compression methods to reduce the file size by as much as 75%. Since XML separates the data from the structure and meaning, it’s easier for Office programs to recover data or remove sensitive information. In fact, you can even open a damaged file in Microsoft Notepad to recover some of the information. The XML format is also royalty free, which makes it more available.
Saving an XML Presentation
When you save a presentation, PowerPoint 2010 saves it by default in a XML file format (.pptx ). PowerPoint allows you to create and save documents as XML (Extensible Markup Language), without ever knowing the XML language. The XML format significantly reduces file sizes, provides enhanced file recovery, and allows for increased compatibility, sharing, reuse, and transportability.
Save an XML Presentation
![]() Open the PowerPoint presentation you want to save.
Open the PowerPoint presentation you want to save.
![]() Click the File tab, and then click Save As.
Click the File tab, and then click Save As.
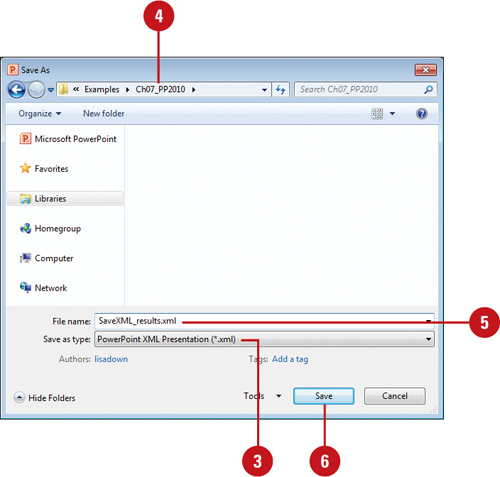
![]() Click the Save as type list arrow, and then click PowerPoint XML Presentation (*.xml).
Click the Save as type list arrow, and then click PowerPoint XML Presentation (*.xml).
![]() Click the Save in list arrow, and then click the drive or folder where you want to save the file.
Click the Save in list arrow, and then click the drive or folder where you want to save the file.
![]() Type a presentation file name.
Type a presentation file name.
![]() Click Save.
Click Save.
For Your Information
Understanding Extensions: PPTX vs. PPTM
PowerPoint 2010 files with the default “x” at the end of the extension(.pptx) cannot contain Visual Basic for Application (VBA) macros or ActiveX controls, which decreases the security risks associated with files that contain embedded code. PowerPoint 2010 files with an “m” at the end of the extension (.pptm) contain VBA macros and ActiveX controls. The embedded code is even stored in a separate section within the .pptm file to make it easier to isolate if necessary. The two different extensions make it easier for antivirus software to identify potential threats and block documents with unwanted macros or controls.
Opening a Web Page
You can no longer save a presentation as a Web page in PowerPoint 2010 (New!). However, if you have Web presentation saved in a previous version of PowerPoint or created in another program, you can open the HTML (Hypertext Markup Language) file in PowerPoint 2010. This allows you to quickly view the Web page without having to switch to another program. You can open Web pages in the following file formats: HTM, HTML, MHT, and MHTML (single file format).
Open a Presentation as a Web Page in PowerPoint
![]() Click the File tab, and then click Open.
Click the File tab, and then click Open.
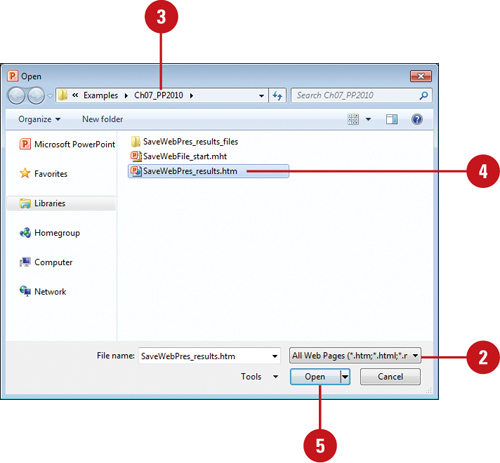
![]() Click the Files of type list arrow, and then click All Web Pages.
Click the Files of type list arrow, and then click All Web Pages.
![]() Click the Look in list arrow, and then select the folder where the file is located.
Click the Look in list arrow, and then select the folder where the file is located.
![]() Click the Web presentation file.
Click the Web presentation file.
![]() Click Open.
Click Open.
![]() To open the Web page in your browser, click the Open button arrow, and then click Open in Browser.
To open the Web page in your browser, click the Open button arrow, and then click Open in Browser.
Did You Know?
You can change the appearance of Web pages and Help Viewer window. In the Internet Options dialog box for Windows, click Accessibility on the General tab, select the Ignore Colors Specified On Web pages check box, and then click OK. In the Internet Properties dialog box, click Colors to select text and background colors or Fonts to change text style.
Previewing a Web Page
It is a good idea to preview your page before publishing it to the Web. Previewing a Web page shows you what the page will look like once it’s posted on the Internet. When you display a Web presentation in a Web browser, a navigation bar appears with toolbar buttons to make it easy to navigate through the Web presentation. You can also view your presentation as a Web page one slide at a time, in full-screen mode, as an outline, or as the slide master.
Preview a Web Page
![]() Open the presentation file you want to view as a Web page.
Open the presentation file you want to view as a Web page.
![]() Click the Web Page Preview button on the Quick Access Toolbar. If necessary, use PowerPoint Options to add the button to the Quick Access Toolbar.
Click the Web Page Preview button on the Quick Access Toolbar. If necessary, use PowerPoint Options to add the button to the Quick Access Toolbar.
Your Web browser opens, displaying your Web page.
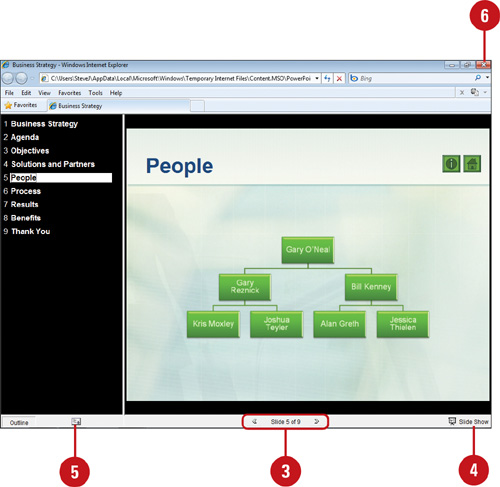
![]() Click the Next Slide or Previous Slide button on the navigation bar to move from slide to slide.
Click the Next Slide or Previous Slide button on the navigation bar to move from slide to slide.
![]() Click the Full Screen Slide Show button on the navigation bar to display the presentation in slide show, and press ESC to exit.
Click the Full Screen Slide Show button on the navigation bar to display the presentation in slide show, and press ESC to exit.
![]() Click the Expand/Collapse Outline button on the navigation bar to display more or less outline detail.
Click the Expand/Collapse Outline button on the navigation bar to display more or less outline detail.
![]() Click the Close button to quit the browser and return to PowerPoint.
Click the Close button to quit the browser and return to PowerPoint.
For Your Information
Previewing an Individual Slide or in Full Screen
Start your Web browser, click the File menu, and then click Open. If necessary, click Browse to help you locate your Web presentation. Locate and open the folder containing your Web presentation files, double-click the file slide000X, where “X” is the number of the slide, and then click OK, if necessary. To view the Web presentation in Full-Screen mode, double-click the file FULLSCREEN.
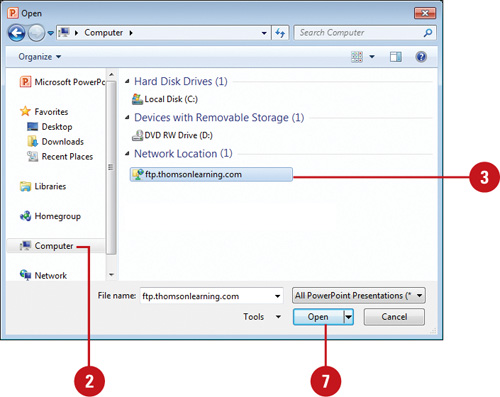
Getting Documents from the Web
File Transfer Protocol (FTP) is an inexpensive and efficient way to transfer files between your computer and others on the Internet. You can download or receive, from another computer, any kind of file, including text, graphics, sound, and video files. To download a file, you need an ID and password to identify who you are. Anonymous FTP sites are open to anyone; they usually use anonymous as an ID and your e-mail address as a password. You can also save the FTP site address to revisit the site later.
Add FTP Locations
![]() Click the File tab, and then click Open.
Click the File tab, and then click Open.
![]() Click Computer in the left pane.
Click Computer in the left pane.
![]() Right-click a blank area, and then click Add a network location.
Right-click a blank area, and then click Add a network location.
![]() Follow the Add Network Location wizard to create a link to an FTP site or other network, and then click Finish to complete it.
Follow the Add Network Location wizard to create a link to an FTP site or other network, and then click Finish to complete it.
![]() To complete the process, you need the complete address for an FTP site, and a username and password.
To complete the process, you need the complete address for an FTP site, and a username and password.

![]() Click the File tab, and then click Open.
Click the File tab, and then click Open.
![]() Click Computer in the left pane.
Click Computer in the left pane.
![]() Double-click the FTP site to which you want to log in.
Double-click the FTP site to which you want to log in.
![]() Enter a password (your E-mail address or personal password), and then select a log on option.
Enter a password (your E-mail address or personal password), and then select a log on option.
![]() Click Log On.
Click Log On.
![]() Select a folder location, and then select a file.
Select a folder location, and then select a file.
![]() Click Open.
Click Open.
Accessing Office Information on the Web
New information about programs comes out with great frequency. You have access to an abundance of information about Office programs and other programs in the Office Suite from Microsoft. This information is constantly being updated. Answers to frequently asked questions, user forums, and update offers are some of the types of information you can find about Microsoft Office. You can also find out about conferences, books, and other products that help you learn just how much you can do with your Microsoft Office software.
Find Online Office Information
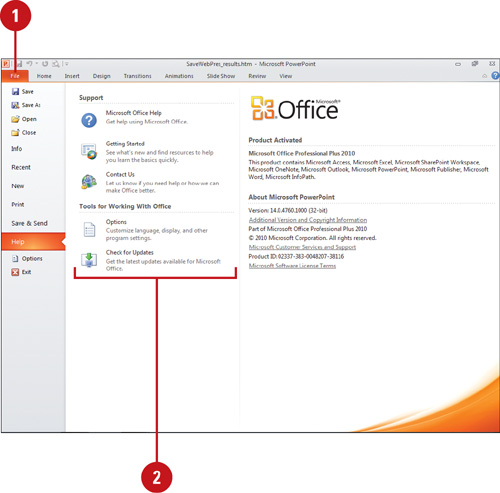
![]() Click the File tab, and then click Help.
Click the File tab, and then click Help.
![]() Click any of the following options to display online information:
Click any of the following options to display online information:
![]() Getting Started. Accesses information to help you get started with the product.
Getting Started. Accesses information to help you get started with the product.
![]() Contact Us. Accesses the Microsoft Support web site, where you can get assistance.
Contact Us. Accesses the Microsoft Support web site, where you can get assistance.
![]() Check for Updates. Accesses Windows Update to check for the latest Office updates.
Check for Updates. Accesses Windows Update to check for the latest Office updates.
Your Web browser opens, displaying a Microsoft Office Online Web page.
![]() Click a hyperlink of interest.
Click a hyperlink of interest.
![]() Click the Close button to quit the browser and return to the Office program.
Click the Close button to quit the browser and return to the Office program.