11: Reviewing and Securing a Presentation
What You’ll Do
Add and Edit Comments in a Presentation
Compare and Merge Presentations
Add Password Protection to a Presentation
Select Trusted Publishers and Locations
Set Document Related Security Options
Set Add-In, ActiveX and Macro Security Options
Change Message Bar Security Options
Mark a Presentation as Read-Only
Review a Presentation for Review Using E-Mail
Send a Presentation by Internet Fax
Introduction
When you’ve developed content in your presentation and want feedback, you can electronically send a PowerPoint presentation to reviewers so that they can read, revise, and comment on the presentation without having to print it. Instead of reading handwritten text or sticky notes on your printout, you can get clear and concise feedback right in your presentation.
Adding a password to protect your presentation is not only a good idea for security purposes, it’s an added feature to make sure that changes to your presentation aren’t accidentally made by unauthorized people. Not only can you guard who sees your presentation, you can set rights on who can add changes and comments to your presentation.
The Trust Center is a place where you set security options and find the latest technology information as it relates to document privacy, safety, and security from Microsoft. The Trust Center allows you to set security and privacy settings—Trusted Publishers, Trusted Locations, Trusted Document, Add-ins, ActiveX Settings, Macro Settings, Message Bar, File Block Settings, and Privacy Options—and provides links to Microsoft privacy statements, a customer improvement program, and trustworthy computing practices. If you receive a security warning when you open a presentation, you can set options in the Trust Center to enable macro or active content. If you trust the content provider, you can add the trusted publishers or location to alleviate the warning in the future.
After you finish making changes to your presentation, you can quickly send it to another person for review using e-mail or an Internet Fax service.
Adding Comments to a Presentation
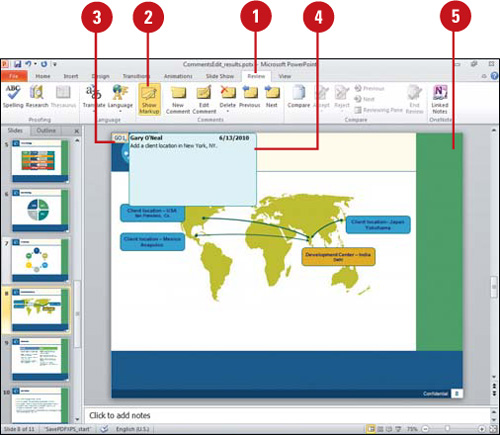
When you review a presentation, you can insert comments to the author or other reviewers. Comments are like electronic adhesive notes tagged with your name. They typically appear in yellow boxes in PowerPoint. You can use comments to get feedback from others or to remind yourself of revisions you plan to make. A comment is visible only when you show comments using the Show Markup button and place the mouse pointer over the comment indicator. You can attach one or more comments to a letter or word on a slide, or to an entire slide. When you insert a comment, PowerPoint creates a comment thumbnail with your initials and a number, starting at 1, and a comment box with your user name and date. When you’re reviewing a presentation, you can use the Show Markup button on the Review tab to show and hide comments and saved annotations during a slide show.
Insert a Comment
![]() Click the slide where you want to insert a comment or select an object.
Click the slide where you want to insert a comment or select an object.
![]() Click the Review tab.
Click the Review tab.
![]() Click the New Comment button.
Click the New Comment button.
![]() Type your comment in the comment box or pane.
Type your comment in the comment box or pane.
![]() Click outside the comment box.
Click outside the comment box.
Did You Know?
You can move a comment. Drag it to a new location on the same slide.
You can show annotations. During a slide show you can add annotations to a slide, which you can save. When you show markups in PowerPoint, annotations are included. You can select, move, and delete them.
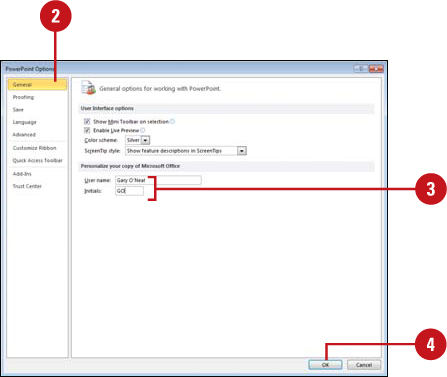
My reviewer initials and name are incorrect. You can change them in PowerPoint Options. Click the File tab, click Options, click General, enter your User name and Initials in the boxes provided, and then click OK.
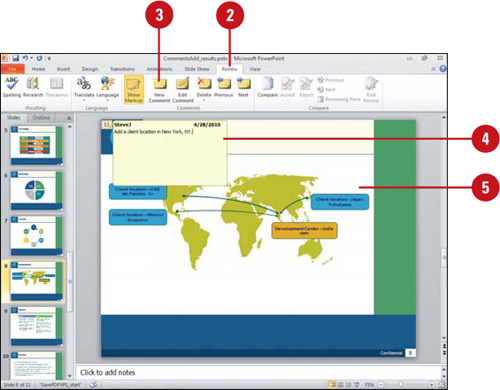
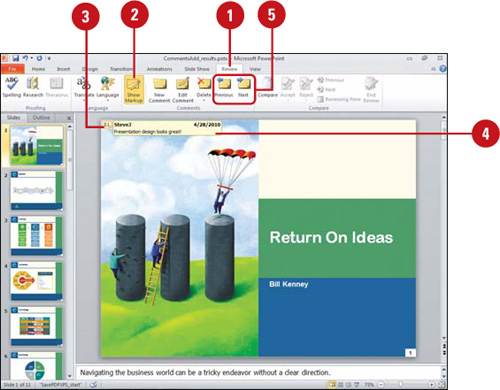
![]() Click the Review tab.
Click the Review tab.
![]() Click the Show Markup button to show all comments.
Click the Show Markup button to show all comments.
The Show Markup button toggles to show (button highlighted) or hide (button not highlighted) comments and annotations.
![]() Point to the comment box.
Point to the comment box.
![]() Read the comment.
Read the comment.
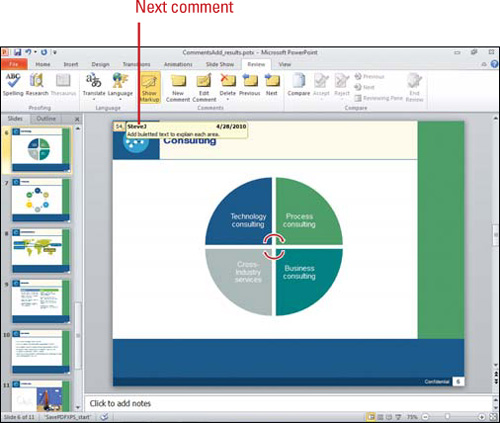
![]() Click the Previous or Next button to read another comment.
Click the Previous or Next button to read another comment.
![]() When you reach the end of the presentation, click Continue to start at the beginning again or Cancel.
When you reach the end of the presentation, click Continue to start at the beginning again or Cancel.
Did You Know?
You cannot merge PowerPoint 2010 comments back into a PowerPoint 2003 presentation. If you use PowerPoint 2003 or earlier to send your presentation for review, reviewers who use PowerPoint 2010 can view and add commands to your presentation, but you cannot merge their comments into your presentation.
Editing Comments in a Presentation
PowerPoint uses a different color comment for each reviewer, which is based on the User name and Initials settings in PowerPoint Options. When you add or edit a comment, the color of the review comment changes to the reviewer’s color, and changes the comment name and date. You can use the Previous and Next button to quickly review each comment. When you’re done, you can delete one comment at a time, all the comments on a slide, or all the comments in the presentation. If you want to save the text in a comment, you can save it to the Clipboard and then paste it into another document.
Change Reviewers
![]() Click the File tab, and then click Options.
Click the File tab, and then click Options.
![]() In the left pane, click General.
In the left pane, click General.
![]() Enter a User name and Initials.
Enter a User name and Initials.
![]() Click OK.
Click OK.
Edit a Comment
![]() Click the Review tab.
Click the Review tab.
![]() Click the Show Markup button.
Click the Show Markup button.
![]() Right-click the comment, and then click Edit Comment.
Right-click the comment, and then click Edit Comment.
TIMESAVER Double-click the comment box to open and edit it.
![]() Make your editing changes.
Make your editing changes.
If you’re a different reviewer, the comment color and name changes to reflect the reviewer.
![]() Click outside the comment box.
Click outside the comment box.
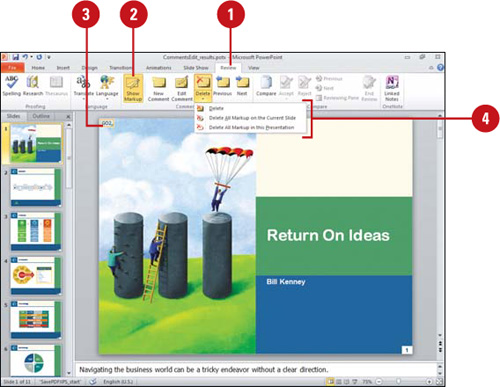
![]() Click the Review tab.
Click the Review tab.
![]() Click the Show Markup button.
Click the Show Markup button.
![]() Click the comment you want to remove.
Click the comment you want to remove.
![]() Click the Delete Comment button arrow, and then click one of the options:
Click the Delete Comment button arrow, and then click one of the options:
![]() Delete to remove the selected comment.
Delete to remove the selected comment.
![]() Delete All Markup on the Current Slide to remove all comments on the current slide.
Delete All Markup on the Current Slide to remove all comments on the current slide.
![]() Delete All Markup in this presentation to remove all comments.
Delete All Markup in this presentation to remove all comments.
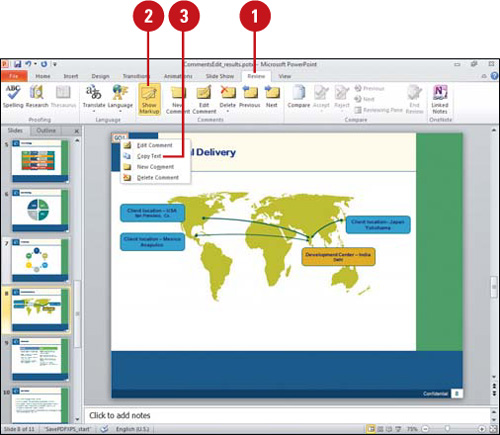
Copy Comment Text
![]() Click the Review tab.
Click the Review tab.
![]() Click the Show Markup button.
Click the Show Markup button.
![]() Right-click the comment you want to copy, and then click Copy Text.
Right-click the comment you want to copy, and then click Copy Text.
All the text in the comment is copied to the Clipboard, including the person who wrote the comment and the date.
![]() Paste the comment text where you want.
Paste the comment text where you want.
Comparing and Merging Presentations
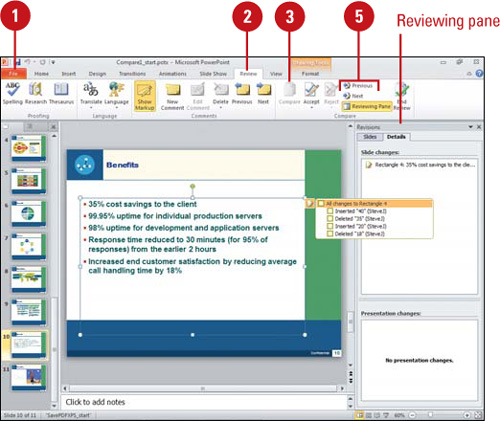
If you want to compare an earlier version of a presentation with the current version, or if you receive multiple edited versions of the original presentation back from the recipients, you can compare the presentations and merge the changes into one presentation (New!). The changes can be merged into one presentation or viewed for comparison. When you compare or merge presentations, the text that differs between the two versions will be identified by a Change icon and list, and displayed by slide or details in the Reviewing pane.
Compare and Merge Presentations
![]() In PowerPoint, open the original presentation in which you want to compare and merge.
In PowerPoint, open the original presentation in which you want to compare and merge.
![]() Click the Review tab.
Click the Review tab.
![]() Click the Compare button.
Click the Compare button.
![]() Select the presentation to which you want to compare and merge, and then click Open.
Select the presentation to which you want to compare and merge, and then click Open.
The Reviewing pane opens, displaying the Slides or Details tab with information about the differences between the presentations. A Change icon appears displaying a list of the individual changes.
![]() To move between the slide changes, click the Previous or Next button.
To move between the slide changes, click the Previous or Next button.
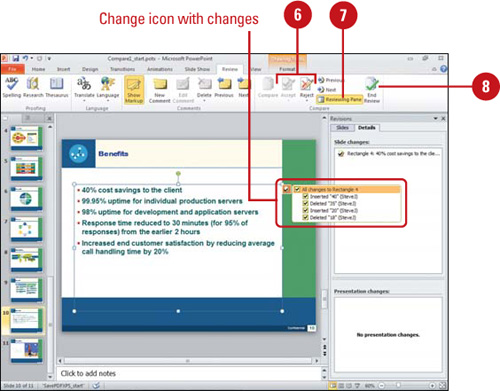
![]() To accept or reject a change, select or clear a Change icon check box, or click the Accept or Reject button arrow, and then click an option to accept or reject an individual change, all changes to the current slide, or all changes to the presentation.
To accept or reject a change, select or clear a Change icon check box, or click the Accept or Reject button arrow, and then click an option to accept or reject an individual change, all changes to the current slide, or all changes to the presentation.
![]() To close or open the Reviewing pane, click the Reviewing Pane button.
To close or open the Reviewing pane, click the Reviewing Pane button.
![]() To end the review, click the End Review button.
To end the review, click the End Review button.
Creating and Opening OneNotes
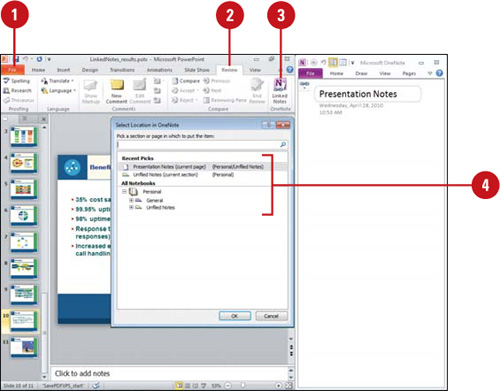
Microsoft OneNote is a digital notebook program you can use to gather, manage, and share notes and information. In PowerPoint and Word, you can create and open notes directly from the Review tab (New!) by using the Linked Notes button. OneNote auto-links notes to the Office document you’re viewing, which you can disable or change in the Advanced section of OneNote Options. You can open a OneNote note by clicking the Linked Notes button. The Linked Notes button is not available on the Review tab until you start the program and create an initial account, which is quick and easy.
Create and Open OneNotes
![]() In PowerPoint or Word, open a document.
In PowerPoint or Word, open a document.
![]() Click the Review tab.
Click the Review tab.
![]() Click the Linked Notes button.
Click the Linked Notes button.
![]() On first document use, select a section or page in which to put the notes, and then click OK.
On first document use, select a section or page in which to put the notes, and then click OK.
![]() In OneNote, enter the notes you want for the page.
In OneNote, enter the notes you want for the page.
![]() To work with notes in OneNote, click the Linked Note icon, and then click an option:
To work with notes in OneNote, click the Linked Note icon, and then click an option:
![]() Linked File(s). Use to select a linked Office document to view.
Linked File(s). Use to select a linked Office document to view.
![]() Delete Link(s) on This Page. Use to delete links on the current page.
Delete Link(s) on This Page. Use to delete links on the current page.
![]() Linked Notes Options. Select to open OneNote Options.
Linked Notes Options. Select to open OneNote Options.
![]() When you’re done, click the Linked Note icon in OneNote, and then click Stop Taking Linked Notes. To restart it, click Start Taking Linked Notes on the file tab.
When you’re done, click the Linked Note icon in OneNote, and then click Stop Taking Linked Notes. To restart it, click Start Taking Linked Notes on the file tab.
![]() To view linked notes, click the Linked Notes button to open OneNotes if needed, point to a note, and then click the Office program icon.
To view linked notes, click the Linked Notes button to open OneNotes if needed, point to a note, and then click the Office program icon.

Inspecting Documents
While you work on your presentation, PowerPoint automatically saves and manages personal information and hidden data to enable you to collaborate on creating and developing a presentation with other people. The personal information and hidden data includes comments, revision marks, versions, ink annotations, document properties, invisible content, off-slide content, presentation notes, document server properties, and custom XML data. The Document Inspector uses inspector modules to find and remove any hidden data and personal information specific to each of these modules that you might not want to share with others. If you remove hidden content from your presentation, you might not be able to restore it by using the Undo command, so it’s important to make a copy of your presentation before you remove any information.
Inspect a Document
![]() Click the File tab, click Save As, type a name to save a copy of the original, specify a folder location, and then click Save.
Click the File tab, click Save As, type a name to save a copy of the original, specify a folder location, and then click Save.
![]() Click the File tab, and then click Info.
Click the File tab, and then click Info.
![]() Click the Check for Issues button, and then click Inspect Document.
Click the Check for Issues button, and then click Inspect Document.
![]() Select the check boxes with the content you want to find and remove:
Select the check boxes with the content you want to find and remove:
![]() Comments and Annotations. Includes comments and ink annotations.
Comments and Annotations. Includes comments and ink annotations.
Did You Know?
What is metadata? Metadata is data that describes other data. For example, text in a presentation is data, while the number of slides is metadata.

![]() Document Properties and Personal Information. Includes metadata document Properties (Summary, Statistics, and Custom tabs), the file path for publishing Web pages, document server properties, and content type information.
Document Properties and Personal Information. Includes metadata document Properties (Summary, Statistics, and Custom tabs), the file path for publishing Web pages, document server properties, and content type information.
![]() Custom XML Data. Includes any custom XML data.
Custom XML Data. Includes any custom XML data.
![]() Invisible On-Slide Content. Includes objects formatted as invisible. Doesn’t include objects covered by other objects.
Invisible On-Slide Content. Includes objects formatted as invisible. Doesn’t include objects covered by other objects.
![]() Off-Slide Content. Includes objects (such as clip art, text boxes, graphics, and table) off the slide area.
Off-Slide Content. Includes objects (such as clip art, text boxes, graphics, and table) off the slide area.
![]() Presentation Notes. Includes text entered in the Notes section. Doesn’t include pictures in the Notes section.
Presentation Notes. Includes text entered in the Notes section. Doesn’t include pictures in the Notes section.
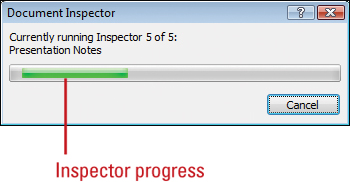
![]() Click Inspect.
Click Inspect.
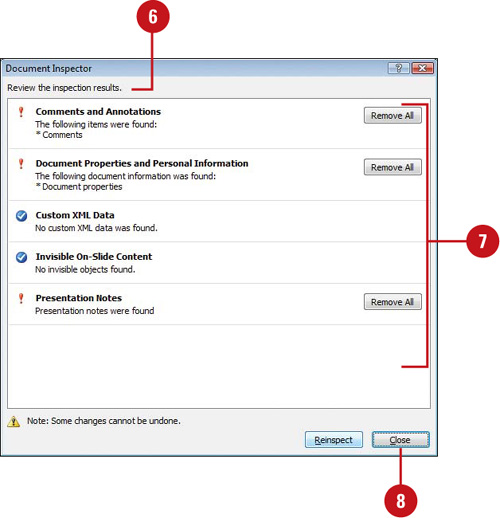
![]() Review the results of the inspection.
Review the results of the inspection.
![]() Click Remove All for each inspector module in which you want to remove hidden data and personal information.
Click Remove All for each inspector module in which you want to remove hidden data and personal information.
TROUBLE? Before you click Remove All, be sure you want to remove the information. You might not be able to restore it.
![]() Click Close.
Click Close.
Adding Password Protection to a Presentation
You can assign a password and other security options so that only those who know the password can open the presentation, or to protect the integrity of your presentation as it moves from person to person. At times, you will want the information to be used but not changed; at other times, you will want only specific people to be able to view the presentation. Setting a presentation as read-only is useful when you want a presentation, such as a company-wide bulletin, to be distributed and read, but not changed. Password protection takes effect the next time you open the presentation.
Add Password Protection to a Presentation
![]() Open the presentation you want to protect.
Open the presentation you want to protect.
![]() Click the File tab, and then click Save As.
Click the File tab, and then click Save As.
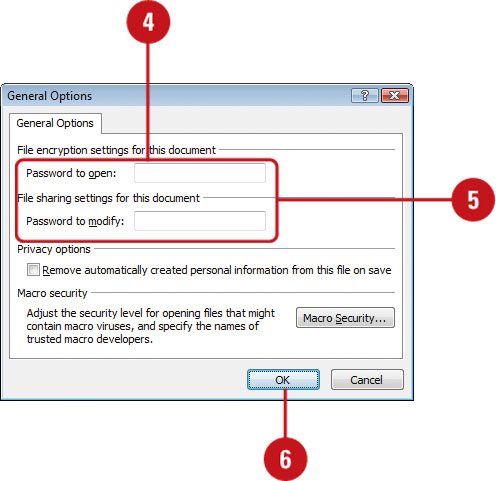
![]() Click Tools, and then click General Options.
Click Tools, and then click General Options.
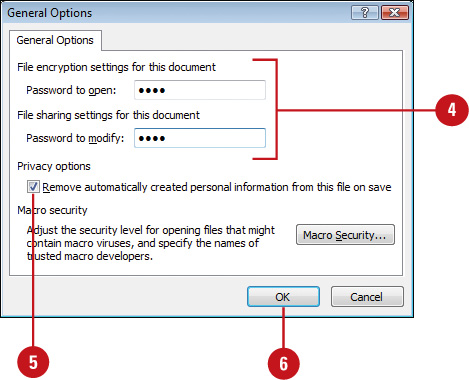
![]() Type a password in the Password To Open box (encrypted) or the Password To Modify box (not encrypted).
Type a password in the Password To Open box (encrypted) or the Password To Modify box (not encrypted).
IMPORTANT It’s critical that you remember your password. If you forget your password, Microsoft can’t retrieve it.
![]() Select or clear the Remove automatically created personal information from this file on save check box.
Select or clear the Remove automatically created personal information from this file on save check box.
Personal information includes author, title, subject, manager, company, and other hidden data, such as invisible content, off-slide content, reviewer’s names, notes, and custom XML Data.
![]() Click OK.
Click OK.
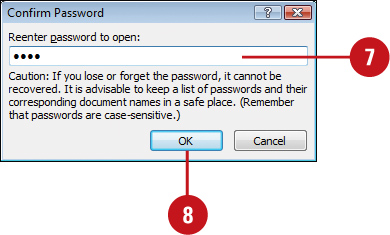
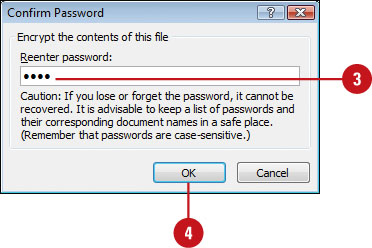
![]() Type your password again.
Type your password again.
![]() Click OK.
Click OK.
![]() Click Save, and then click Yes to replace existing presentation.
Click Save, and then click Yes to replace existing presentation.
For Your Information
Using a Strong Password
Hackers identify passwords as strong or weak. A strong password is a combination of uppercase and lowercase letters, numbers, and symbols, such as Grea8t!, while a weak one doesn’t use different character types, such as Hannah1. Be sure to write down your passwords and place them in a different location.
Open a Presentation with Password Protection
![]() Click the File tab, click Open, navigate to a presentation with password protection, and then click Open.
Click the File tab, click Open, navigate to a presentation with password protection, and then click Open.
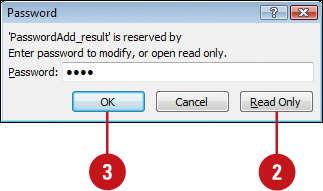
![]() Click Read Only if you do not wish to modify the presentation, or type the password in the Password dialog box.
Click Read Only if you do not wish to modify the presentation, or type the password in the Password dialog box.
![]() Click OK.
Click OK.
Change or Remove the Password Protection
![]() Click the File tab, click Open, navigate to a presentation with password protection, and then click Open.
Click the File tab, click Open, navigate to a presentation with password protection, and then click Open.
![]() Type the password in the Password dialog box, and then click OK.
Type the password in the Password dialog box, and then click OK.
![]() Click the File tab, click Save As, click Tools, and then click General Options.
Click the File tab, click Save As, click Tools, and then click General Options.
![]() Select the contents in the Password To Modify box or the Password To Open box.
Select the contents in the Password To Modify box or the Password To Open box.
![]() Choose the option you want.
Choose the option you want.
![]() Change password. Type a new password, click OK, and then retype your password.
Change password. Type a new password, click OK, and then retype your password.
![]() Delete password. Press Delete.
Delete password. Press Delete.
![]() Click OK.
Click OK.
![]() Click Save, and then click Yes to replace existing presentation.
Click Save, and then click Yes to replace existing presentation.
Adding Security Encryption to a Presentation
File encryption is additional security you can apply to a presentation. File encryption scrambles your password to protect your presentation from unauthorized people from breaking into the file. You don’t have to worry about the encryption, PowerPoint handles everything. All you need to do is remember the password. If you forget it, you can’t open the file. Password protection takes effect the next time you open the presentation. To set password protection using file encryption, use the Protect Presentation button and Encrypt with Password command on the Info screen, enter a password, write it down for safekeeping, and then reenter the password again.
Apply File Encryption
![]() Click the File tab, and then click Info.
Click the File tab, and then click Info.
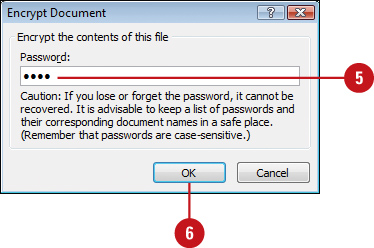
![]() Click the Protect Presentation button, and then click Encrypt with Password.
Click the Protect Presentation button, and then click Encrypt with Password.
![]() Type a password.
Type a password.
![]() Click OK.
Click OK.
![]() Retype the password.
Retype the password.
![]() Click OK.
Click OK.
Did You Know?
You can remove file encryption. Click the File tab, click Info, click the Protect Presentation button, click Encrypt With Password, delete the file encryption password, and then click OK.
Marking a Presentation as Read-Only
As a precaution to prevent readers and reviews from making accidental changes, you can use the Mark as Final command to make a PowerPoint 2010 presentation read-only. The Mark as Final command disables or turns off typing, editing commands, and proofing marks, and sets the Status property field in the Document Information Panel to Final. The Mark as Final command is not a security option; it only prevents changes to the presentation while it’s turned on and it can be turned off by anyone at any time.
Mark a Presentation as Final
![]() Click the File tab, and then click Info.
Click the File tab, and then click Info.
![]() Click the Protect Presentation button, and then click Mark as Final.
Click the Protect Presentation button, and then click Mark as Final.
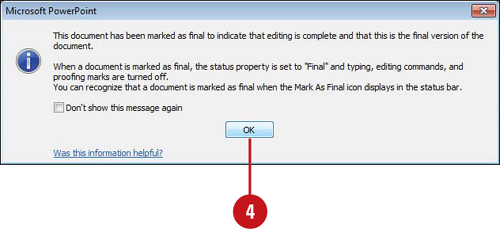
![]() Click OK.
Click OK.
The presentation is marked as final and then saved.
![]() Click OK.
Click OK.
The Mark as Final icon appears in the Status bar to indicate the presentation is currently marked as final.
IMPORTANT A PowerPoint 2010 presentation marked as final is not read-only when opened in an earlier version of Microsoft PowerPoint.
Did You Know?
You can enable editing for a presentation marked as final. Click the Edit Anyway button on the Message bar, or File button, click Info, click the Protect Presentation button, and then click Mark As Final again to toggle off the Mark As Final feature.

Adding a Digital Signature
After you’ve finished a presentation, you might consider adding a digital signature—an electronic, secure stamp of authentication on a document. Before you can add a digital signature, you need to get a digital ID, or digital certificate, which provides an electronic way to prove your identity, like a drivers license. A digital certificate checks a public key to validate a private key associated with a digital signature. To assure a digital signature is authentic, it must have a valid (non expired or revoked) certificate issued by a reputable certification authority (CA), and the signing person must be from a trusted publisher. If you need a verified authenticate digital certificate, you can obtain one from a trusted Microsoft partner CA. If you don’t need a verified digital certificate, you can create one of your own. If someone modifies the file, the digital signature is removed and revoked. If you’re not sure if a presentation is digitally signed, you can use the Signatures task pane to view or remove valid signatures.
Create a Digital ID
![]() Click the File tab, click Info, click the Protect Presentation button, and then click Add a Digital Signature.
Click the File tab, click Info, click the Protect Presentation button, and then click Add a Digital Signature.
![]() If an alert message appears, click Signature Services from the Office Marketplace to open an informational Web site where you can sign up for a digital certificate, or click OK to create your own.
If an alert message appears, click Signature Services from the Office Marketplace to open an informational Web site where you can sign up for a digital certificate, or click OK to create your own.
If you don’t want to see this dialog box again, select the Don’t show this message again check box.
![]() If necessary, click OK.
If necessary, click OK.
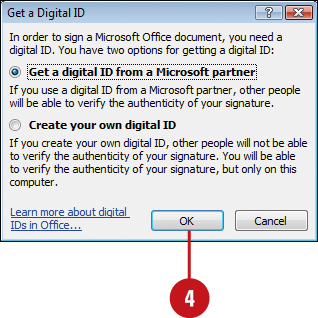
![]() If you don’t have a digital ID, click the option to get an ID from a Microsoft Partner or create your own, and then click OK.
If you don’t have a digital ID, click the option to get an ID from a Microsoft Partner or create your own, and then click OK.
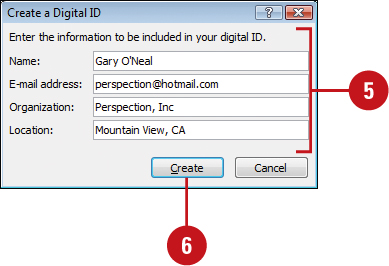
![]() Enter your name, e-mail address, organization name, and geographic location.
Enter your name, e-mail address, organization name, and geographic location.
![]() Click Create.
Click Create.
You can sign a document, or click Cancel.

Add a Digital Signature to a Document
![]() Click the File tab, click Info, click the Protect Presentation button, and then click Add a Digital Signature.
Click the File tab, click Info, click the Protect Presentation button, and then click Add a Digital Signature.
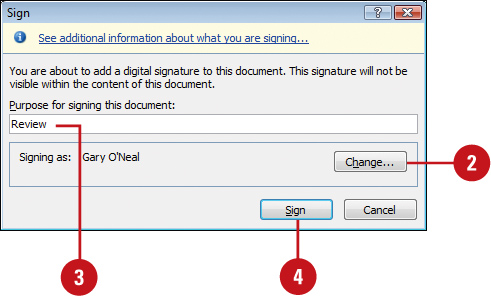
![]() To change the digital signature, click Change, select the one you want, and then click OK.
To change the digital signature, click Change, select the one you want, and then click OK.
![]() Enter the purpose for signing this document.
Enter the purpose for signing this document.
![]() Click Sign.
Click Sign.
![]() If necessary, click OK.
If necessary, click OK.
View or Remove Signatures
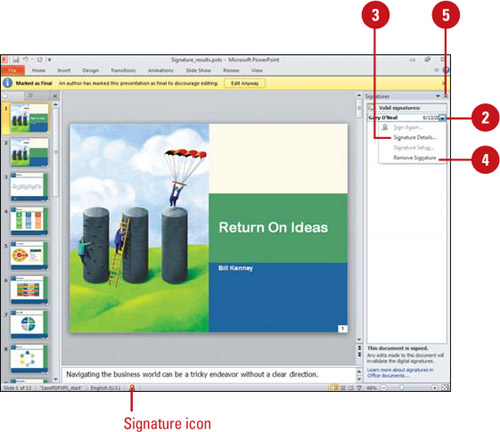
![]() Click the Signature icon on the Status bar, or click the File tab, click Info, and then click the View Signatures button.
Click the Signature icon on the Status bar, or click the File tab, click Info, and then click the View Signatures button.
The Signatures task pane appears, displaying valid signatures in the document. Invalid signatures are no longer automatically removed.
![]() Point to a signature, and then click the list arrow.
Point to a signature, and then click the list arrow.
![]() To see signature details, click Signature Details, select a signature, click View, click OK when you’re done, and then click Close.
To see signature details, click Signature Details, select a signature, click View, click OK when you’re done, and then click Close.
![]() To remove a signature, point to a signature, click the list arrow, click Remove Signature, click Yes, and then if necessary click OK.
To remove a signature, point to a signature, click the list arrow, click Remove Signature, click Yes, and then if necessary click OK.
![]() Click the Close button on the task pane.
Click the Close button on the task pane.

Sending a Presentation for Review Using E-Mail
After you finish making changes to a presentation, you can quickly send it to another person for review using e-mail. PowerPoint allows you to send presentations out for review as an attachment, either a presentation, PDF, or XPS document, using e-mail from within the program so that you do not have to open your e-mail program. An e-mail program, such as Microsoft Outlook, needs to be installed on your computer before you begin. When you send your presentation out for review, reviewers can add comments and then send it back to you.
Send a Presentation for Review Using E-Mail
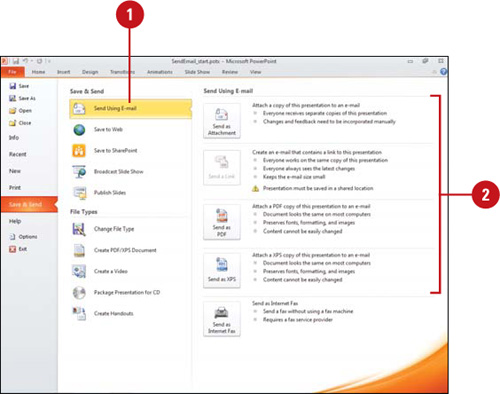
![]() Click the File tab, click Save & Send, and then click Send Using E-mail.
Click the File tab, click Save & Send, and then click Send Using E-mail.
![]() Click the Send as Attachment, Send a Link, Send as PDF, or Send as XPS.
Click the Send as Attachment, Send a Link, Send as PDF, or Send as XPS.
![]() If the Compatibility Checker appears, click Continue or Cancel to stop the operation.
If the Compatibility Checker appears, click Continue or Cancel to stop the operation.
IMPORTANT To complete the following steps, you need to have an e-mail program installed on your computer and an e-mail account set-up.
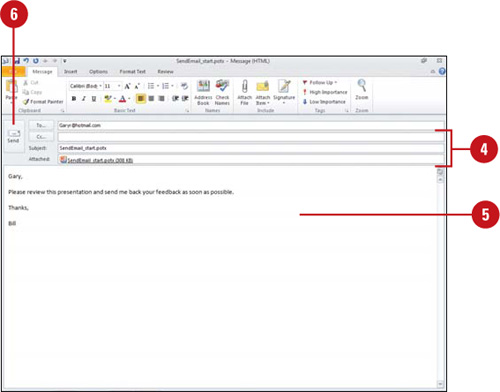
An e-mail message opens in Microsoft Outlook with your document attached. The subject line contains the file name of the document that you are sending.
![]() Enter your recipients and subject (appears with document name by default).
Enter your recipients and subject (appears with document name by default).
![]() To add recipients from your address book or contacts list, click To, click the recipient names, click To, Cc, or Bcc until you’re done, and then click OK.
To add recipients from your address book or contacts list, click To, click the recipient names, click To, Cc, or Bcc until you’re done, and then click OK.
![]() Enter a message for your reviewer with instructions.
Enter a message for your reviewer with instructions.
![]() Click the Send button.
Click the Send button.
Sending a Presentation by Internet Fax
If you are a member of an online fax service, such as eFax, InterFAX, MyFax, or Send2Fax, you can use PowerPoint to send and receive faxes over the Internet directly from within your Microsoft Office program. If you’re not a member, a Web site can help you sign up. You also need to have Microsoft Outlook and Word installed to use the fax service and Outlook must be open to send your fax. If Outlook is not open and you send the fax, it will be stored in your Outbox and not sent until you open Outlook again.
Send a Presentation by Internet Fax
![]() Click the File tab, click Save & Send, and then click Send Using E-mail.
Click the File tab, click Save & Send, and then click Send Using E-mail.
![]() Click the Send as Internet Fax button.
Click the Send as Internet Fax button.
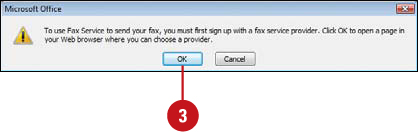
![]() If you’re not signed up with an Internet Fax service, click OK to open a Web page and sign up for one. When you’re done, return to PowerPoint, and then repeat Step 1.
If you’re not signed up with an Internet Fax service, click OK to open a Web page and sign up for one. When you’re done, return to PowerPoint, and then repeat Step 1.
![]() If the Compatibility Checker appears, click Continue or Cancel to stop the operation.
If the Compatibility Checker appears, click Continue or Cancel to stop the operation.
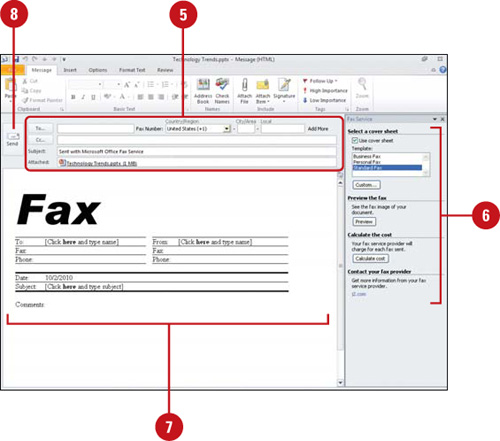
An e-mail opens in Microsoft Outlook with your document attached as a .tif (image) file.
![]() Enter a Fax Recipient, Fax Number and Subject (appears with presentation name by default).
Enter a Fax Recipient, Fax Number and Subject (appears with presentation name by default).
![]() You can enter a fax number from your address book. Country codes must begin with a plus sign (+).
You can enter a fax number from your address book. Country codes must begin with a plus sign (+).
![]() To send your fax to multiple recipients, click Add More, and then enter fax information.
To send your fax to multiple recipients, click Add More, and then enter fax information.
![]() In the Fax Service pane, choose the options you want.
In the Fax Service pane, choose the options you want.
![]() Complete the cover sheet in the body of the e-mail message.
Complete the cover sheet in the body of the e-mail message.
![]() Click the Send button.
Click the Send button.
Avoiding Harmful Attacks
Spreading Harmful Infections
Many viruses and other harmful attacks spread through file downloads, attachments in e-mail messages, and data files that have macros, ActiveX controls, add-ins, or Visual Basic for Applications (VBA) code attached to them. Virus writers capitalize on people’s curiosity and willingness to accept files from people they know or work with, in order to transmit malicious files disguised as or attached to benign files. When you start downloading files to your computer, you must be aware of the potential for catching a computer virus, worm, or Trojan Horse. Typically, you can’t catch one from just reading a mail message or downloading a file, but you can catch one from installing, opening, or running an infected program or attached code.
Understanding Harmful Attacks
Phishing is a scam that tries to steal your identity by sending deceptive e-mail asking you for bank and credit card information online. Phishers spoof the domain names of banks and other companies in order to deceive consumers into thinking that they are visiting a familiar Web site.
Phishers create a Web address that looks like a familiar Web address but is actually altered. This is known as a homograph. The domain name is created using alphabet characters from different languages, not just English. For example, the Web site address “www.microsoft.com” looks legitimate, but what you can’t see is that the “i” is a Cyrillic character from the Russian alphabet.
Don’t be fooled by spoofed Web sites that look like the official site. Never respond to requests for personal information via e-mail; most companies have policies that do not ask for your personal information through e-mail. If you get a suspicious e-mail, call the institution to investigate and report it.
Spam is unsolicited e-mail, which is often annoying and time-consuming to get rid of. Spammers harvest e-mail addresses from Web pages and unsolicited e-mail. To avoid spam, use multiple e-mail addresses (one for Web forms and another for private e-mail), opt-out and remove yourself from e-mail lists. See the Microsoft Windows and Microsoft Outlook Help system for specific details.
Spyware is software that collects personal information without your knowledge or permission. Typically, spyware is downloaded and installed on your computer along with free software, such as freeware, games, or music file-sharing programs. Spyware is often associated with Adware software that displays advertisements, such as a pop-up ad. Examples of spyware and unauthorized adware include programs that change your home page or search page without your permission. To avoid spyware and adware, read the fine print in license agreements when you install software, scan your computer for spy-ware and adware with detection and removal software (such as Ad-aware from Lavasoft), and turn on Pop-up Blocker. See the Microsoft Windows Help system for specific details.
Avoiding Harmful Attacks Using Office
There are a few things you can do within any Office program to keep your system safe from the infiltration of harmful attacks.
1) Make sure you activate macro, ActiveX, add-in, and VBA code detection and notification. You can use the Trust Center to help protect you from attached code attacks. The Trust Center checks for trusted publisher and code locations on your computer and provides security options for add-ins, ActiveX controls, and macros to ensure the best possible protection. The Trust Center displays a security alert in the Message Bar when it detects a potentially harmful attack.
2) Make sure you activate Web site spoofing detection and notification. You can use the Trust Center to help protect you from homo-graph attacks. The Check Office documents that are from or link to suspicious Web sites check box under Privacy Options in the Trust Center is on by default and continually checks for potentially spoofed domain names. The Trust Center displays a security alert in the Message Bar when you have a document open and click a link to a Web site with an address that has a potentially spoofed domain name, or you open a file from a Web site with an address that has a potentially spoofed domain name.
3) Be very careful of file attachments in e-mail you open. As you receive e-mail, don’t open or run an attached file unless you know who sent it and what it contains. If you’re not sure, you should delete it. The Attachment Manager provides security information to help you understand more about the file you’re opening. See the Microsoft Outlook Help system for specific details.
Avoiding Harmful Attacks Using Windows
There are a few things you can do within Microsoft Windows to keep your system safe from the infiltration of harmful attacks.
1) Make sure Windows Firewall is turned on. Windows Firewall helps block viruses and worms from reaching your computer, but it doesn’t detect or disable them if they are already on your computer or come through e-mail. Windows Firewall doesn’t block unsolicited e-mail or stop you from opening e-mail with harmful attachments.
2) Make sure Automatic Updates is turned on. Windows Automatic Updates regularly checks the Windows Update Web site for important updates that your computer needs, such as security updates, critical updates, and service packs. Each file that you download using Automatic Update has a digital signature from Microsoft to ensure its authenticity and security.
3) Make sure you are using the most up-to-date antivirus software. New viruses and more virulent strains of existing viruses are discovered every day. Unless you update your virus-checking software, new viruses can easily bypass outdated virus checking software. Companies such as McAfee and Symantec offer shareware virus checking programs available for download directly from their Web sites. These programs monitor your system, checking each time a file is added to your computer to make sure it’s not in some way trying to change or damage valuable system files.
4) Be very careful of the sites from which you download files. Major file repository sites, such as FileZ, Download.com, or TuCows, regularly check the files they receive for viruses before posting them to their Web sites. Don’t download files from Web sites unless you are certain that the sites check their files for viruses. Internet Explorer monitors downloads and warns you about potentially harmful files and gives you the option to block them.
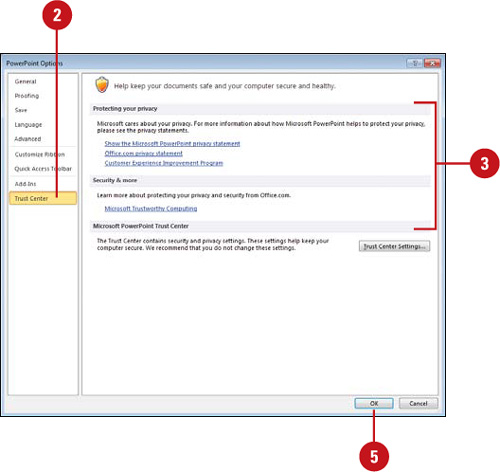
Using the Trust Center
The Trust Center is a place where you set security options and find the latest technology information as it relates to workbook privacy, safety, and security from Microsoft. The Trust Center allows you to set security and privacy settings—Trusted Publishers, Trusted Locations, Trusted Documents (New!), Add-ins, ActiveX Settings, Macro Settings, Protected view (New!), Message Bar, External Content, File Block Settings (New!), and Privacy Options—and provides links to Microsoft privacy statements, a customer improvement program, and trustworthy computing practices.
View the Trust Center
![]() Click the File tab, and then click Options.
Click the File tab, and then click Options.
![]() In the left pane, click Trust Center.
In the left pane, click Trust Center.
![]() Click the links in which you want online information at the Microsoft Online Web site.
Click the links in which you want online information at the Microsoft Online Web site.
![]() Show the Microsoft PowerPoint privacy statement. Opens a Microsoft Web site detailing privacy practices.
Show the Microsoft PowerPoint privacy statement. Opens a Microsoft Web site detailing privacy practices.
![]() Office.com privacy statement. Opens a Microsoft Office.com Web site detailing privacy practices.
Office.com privacy statement. Opens a Microsoft Office.com Web site detailing privacy practices.
![]() Customer Experience Improvement Program. Opens the Microsoft Customer Experience Improvement Program (CEIP) Web site.
Customer Experience Improvement Program. Opens the Microsoft Customer Experience Improvement Program (CEIP) Web site.
![]() Microsoft Trustworthy Computing. Opens a Microsoft Web site detailing security and reliability practices.
Microsoft Trustworthy Computing. Opens a Microsoft Web site detailing security and reliability practices.
![]() When you’re done, close your Web browser or dialog box, and return to PowerPoint.
When you’re done, close your Web browser or dialog box, and return to PowerPoint.
![]() Click OK.
Click OK.
Selecting Trusted Publishers and Locations
The Trust Center security system continually checks for external potentially unsafe content in your documents. Hackers can hide Web beacons in external content—images, linked media, data connections and templates—to gather information about you or cause problems. When the Trust Center detects potentially harmful external content, the Message Bar appears with a security alert and options to enable or block the content. Trusted publishers are reputable developers who create application extensions, such as a macro, ActiveX control, or add-in. The Trust Center uses a set of criteria—valid and current digital signature, and reputable certificate—to make sure publishers’ code and source locations are safe and secure. If you are sure that the external content is trustworthy, you can add the content publisher and location to your trusted lists, which allows it to run without being checked by the Trust Center.
Modify Trusted Publishers and Locations
![]() Click the File tab, and then click Options.
Click the File tab, and then click Options.
![]() In the left pane, click Trust Center.
In the left pane, click Trust Center.
![]() Click Trust Center Settings.
Click Trust Center Settings.
![]() In the left pane, click Trusted Publishers.
In the left pane, click Trusted Publishers.
![]() Select a publisher, and then use the View and Remove buttons to make the changes you want.
Select a publisher, and then use the View and Remove buttons to make the changes you want.
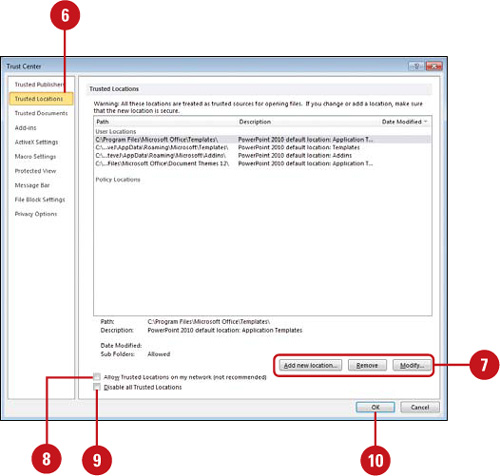
![]() In the left pane, click Trusted Locations.
In the left pane, click Trusted Locations.
![]() Select a location, and then use the Add new location, Remove, and Modify buttons to make the changes you want.
Select a location, and then use the Add new location, Remove, and Modify buttons to make the changes you want.
![]() Select or clear the Allow trusted locations on my network (not recommended) check box.
Select or clear the Allow trusted locations on my network (not recommended) check box.
![]() Select or clear the Disable all Trusted Locations check box.
Select or clear the Disable all Trusted Locations check box.
![]() Click OK.
Click OK.
![]() Click OK.
Click OK.
Setting Document Related Security Options
The Trust Center security system allows you to set file-related options to check for potentially unsafe content in your documents (New!). In Trusted Documents (New!), you can set options to open trusted documents without any security prompts for macros, ActiveX controls and other types of active content in the document. For a trusted document, you won’t be prompted the next time you open the document even if new active content was added to the document or changes were made to existing active content. You should only trust documents if you trust the source. Protected view (New!) provides a place to open potentially dangerous files, without any security prompts, in a restricted mode to help minimize harm to your computer. If you disable Protected view, you could expose your computer to possible harmful threats. In File Block Settings (New!), you can select the Open and Save check boxes to prevent each file type from opening, or just opening in Protected view, and from saving.
Set Options for Trusted Documents
![]() Click the File tab, and then click Options.
Click the File tab, and then click Options.
![]() In the left pane, click Trust Center.
In the left pane, click Trust Center.
![]() Click Trust Center Settings.
Click Trust Center Settings.
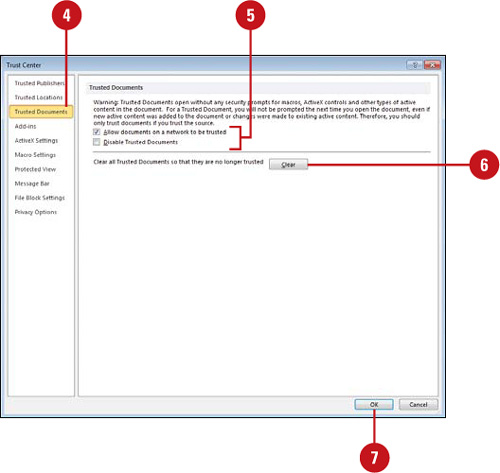
![]() In the left pane, click Trusted Documents.
In the left pane, click Trusted Documents.
![]() Select or clear the check boxes you do or don’t want.
Select or clear the check boxes you do or don’t want.
![]() Allow documents on a network to be trusted.
Allow documents on a network to be trusted.
![]() Disable Trusted Documents.
Disable Trusted Documents.
![]() To clear all trusted documents so they are no longer trusted, click Clear.
To clear all trusted documents so they are no longer trusted, click Clear.
![]() Click OK.
Click OK.
![]() Click OK.
Click OK.
Set Options for Protected View
![]() Click the File tab, and then click Options.
Click the File tab, and then click Options.
![]() In the left pane, click Trust Center.
In the left pane, click Trust Center.
![]() Click Trust Center Settings.
Click Trust Center Settings.
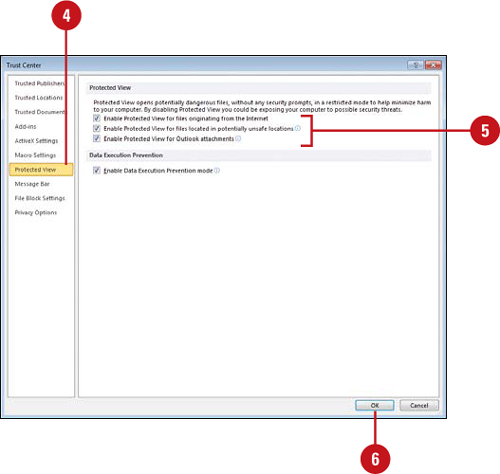
![]() In the left pane, click Protected View.
In the left pane, click Protected View.
![]() Select or clear the check boxes you do or don’t want.
Select or clear the check boxes you do or don’t want.
![]() Enable Protected View for files originating from the Internet.
Enable Protected View for files originating from the Internet.
![]() Enable Protected View for files located in potentially unsafe locations.
Enable Protected View for files located in potentially unsafe locations.
![]() Enable Protected View for Outlook attachments.
Enable Protected View for Outlook attachments.
![]() Click OK.
Click OK.
![]() Click OK.
Click OK.
Set Options for File Block Settings
![]() Click the File tab, and then click Options.
Click the File tab, and then click Options.
![]() In the left pane, click Trust Center.
In the left pane, click Trust Center.
![]() Click Trust Center Settings.
Click Trust Center Settings.
![]() In the left pane, click File Block Settings.
In the left pane, click File Block Settings.
![]() Select the Open and Save check boxes you want to block for the different file types from opening or saving or clear the ones you don’t want.
Select the Open and Save check boxes you want to block for the different file types from opening or saving or clear the ones you don’t want.
![]() Select the open behavior option you want.
Select the open behavior option you want.
![]() Click OK.
Click OK.
![]() Click OK.
Click OK.

Setting Add-in Security Options
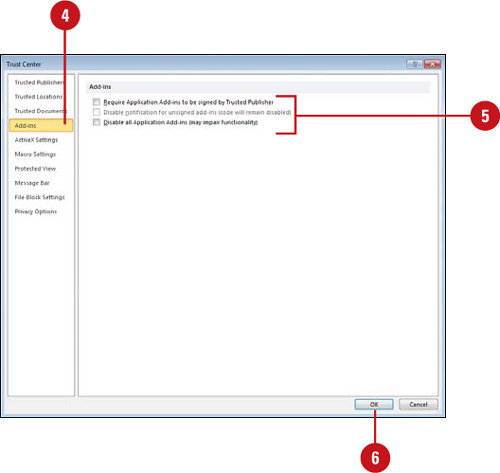
An add-in extends functionality to Microsoft Office programs. An add-in can add buttons and custom commands to the Ribbon. When an add-in is installed, it appears on the Add-Ins tab of an Office program and includes a special ScreenTip that identifies the developer. Since add-ins are software code added to Microsoft Office programs, hackers can use them to do malicious harm, such as spreading a virus. The Trust Center uses a set of criteria—valid and current digital signature, reputable certificate and a trusted publisher—to make sure add-ins are safe and secure. If it discovers a potentially unsafe add-in, it disables the code and notifies you in the Message Bar. If the add-in security options are not set to the level you need, you can change them in the Trust Center.
Set Add-in Security Options
![]() Click the File tab, and then click Options.
Click the File tab, and then click Options.
![]() In the left pane, click Trust Center.
In the left pane, click Trust Center.
![]() Click Trust Center Settings.
Click Trust Center Settings.
![]() In the left pane, click Add-ins.
In the left pane, click Add-ins.
![]() Select or clear the check boxes you do or don’t want.
Select or clear the check boxes you do or don’t want.
![]() Require Application Add-ins to be signed by Trusted Publisher. Select to check for a digital signature on the .dll file.
Require Application Add-ins to be signed by Trusted Publisher. Select to check for a digital signature on the .dll file.
![]() Disable notification for unsigned add-ins (code will remain disabled). Only available if the above check box is selected. Select to disable unsigned add-ins without notification.
Disable notification for unsigned add-ins (code will remain disabled). Only available if the above check box is selected. Select to disable unsigned add-ins without notification.
![]() Disable all Application Add-ins (may impair functionality). Select to disable all add-ins without any notifications.
Disable all Application Add-ins (may impair functionality). Select to disable all add-ins without any notifications.
![]() Click OK.
Click OK.
![]() Click OK.
Click OK.
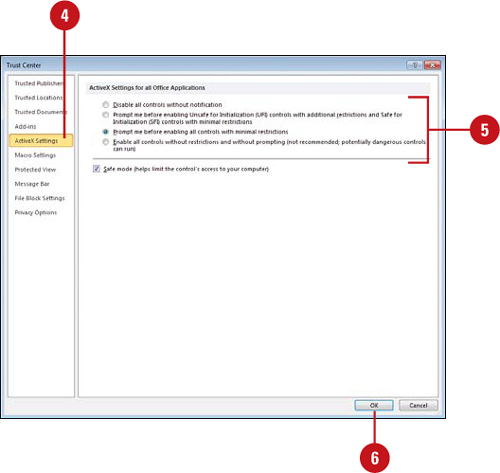
Setting ActiveX Security Options
An ActiveX control provides additional functionality, such as a text box, button, dialog box, or small utility program. ActiveX controls are software code, so hackers can use them to do malicious harm, such as spreading a virus. You can use the Trust Center to prevent ActiveX controls from harming your computer. If the ActiveX security options are not set to the level you want, you can change them in the Trust Center. If you change ActiveX control settings in one Office program, it effects all Microsoft Office programs. The Trust Center uses a set of criteria—checks the kill bit and Safe for Initialization (SFI) settings—to make sure ActiveX controls run safely.
Change ActiveX Security Settings
![]() Click the File tab, and then click Options.
Click the File tab, and then click Options.
![]() In the left pane, click Trust Center.
In the left pane, click Trust Center.
![]() Click Trust Center Settings.
Click Trust Center Settings.
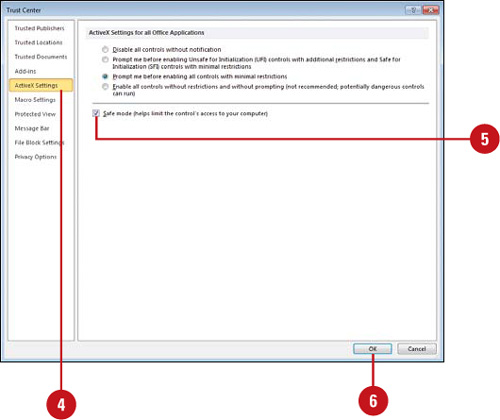
![]() In the left pane, click ActiveX Settings.
In the left pane, click ActiveX Settings.
![]() Click the option you want for ActiveX in documents not in a trusted location.
Click the option you want for ActiveX in documents not in a trusted location.
![]() Disable all controls without notification.
Disable all controls without notification.
![]() Prompt me before enabling Unsafe for Initialization controls with additional restrictions and Save for Initialization (SFI) controls with minimal restrictions (default).
Prompt me before enabling Unsafe for Initialization controls with additional restrictions and Save for Initialization (SFI) controls with minimal restrictions (default).
![]() Prompt me before enabling all controls with minimal restrictions.
Prompt me before enabling all controls with minimal restrictions.
![]() Enable all controls without restrictions and without prompting (not recommended, potentially dangerous controls can run).
Enable all controls without restrictions and without prompting (not recommended, potentially dangerous controls can run).
![]() Click OK.
Click OK.
![]() Click OK.
Click OK.
Setting Macro Security Options
A macro allows you to automate frequently used steps or tasks to save time and work more efficiently. Macros are written using VBA (Visual Basic for Applications) code, which opens the door to hackers to do malicious harm, such as spreading a virus. The Trust Center uses a set of criteria—valid and current digital signature, reputable certificate and a trusted publisher—to make sure macros are safe and secure. If the Trust Center discovers a potentially unsafe macro, it disables the code and notifies you in the Message Bar. You can click Options on the Message Bar to enable it or set other security options. If the macro security options are not set to the level you need, you can change them in the Trust Center.
Change Macro Security Settings
![]() Click the File tab, and then click Options.
Click the File tab, and then click Options.
![]() In the left pane, click Trust Center.
In the left pane, click Trust Center.
![]() Click Trust Center Settings.
Click Trust Center Settings.
![]() In the left pane, click Macro Settings.
In the left pane, click Macro Settings.
![]() Click the option you want for macros in documents not in a trusted location.
Click the option you want for macros in documents not in a trusted location.
![]() Disable all macros without notification.
Disable all macros without notification.
![]() Disable all macros with notification (default).
Disable all macros with notification (default).
![]() Disable all macros except digitally signed macros.
Disable all macros except digitally signed macros.
![]() Enable all macros (not recommended, potentially dangerous code can run).
Enable all macros (not recommended, potentially dangerous code can run).
![]() If you’re a developer, select the Trust access to the VBA project object model check box.
If you’re a developer, select the Trust access to the VBA project object model check box.
![]() Click OK.
Click OK.
![]() Click OK.
Click OK.

Changing Message Bar Security Options
The Message Bar displays security alerts when Office detects potentially unsafe content in an open document. The Message Bar appears below the Ribbon when a potential problem arises. The Message Bar provides a security warning and options to enable external content or leave it blocked. If you don’t want to receive alerts about security issues, you can disable the Message Bar.
Modify Message Bar Security Options
![]() Click the File tab, and then click Options.
Click the File tab, and then click Options.
![]() In the left pane, click Trust Center.
In the left pane, click Trust Center.
![]() Click Trust Center Settings.
Click Trust Center Settings.
![]() In the left pane, click Message Bar.
In the left pane, click Message Bar.
![]() Click the option you want for showing the Message bar.
Click the option you want for showing the Message bar.
![]() Show the Message Bar in all applications when active content, such as ActiveX controls and macros, has been blocked (default).
Show the Message Bar in all applications when active content, such as ActiveX controls and macros, has been blocked (default).
This option is not selected if you selected the Disable all macros without notification check box in the Macros pane of the Trust Center.
![]() Never show information about blocked content.
Never show information about blocked content.
![]() Click OK.
Click OK.
![]() Click OK.
Click OK.

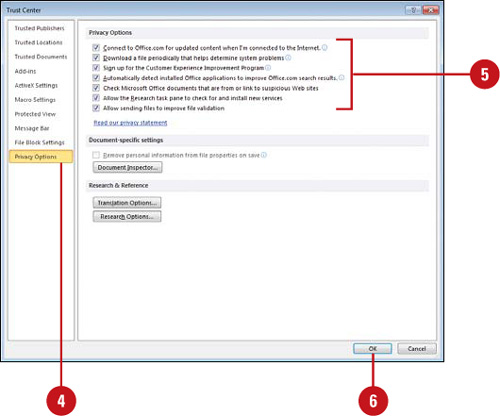
Setting Privacy Options
Privacy options in the Trust Center allow you to set security settings that protect your personal privacy online. For example, the Check Office documents that are from or link to suspicious Web sites option checks for spoofed Web sites and protects you from phishing schemes. If your kids are doing research online using the Research task pane, you can set Privacy Options to enable parental controls and a password to block sites with offensive content.
Set Privacy Options
![]() Click the File tab, and then click Options.
Click the File tab, and then click Options.
![]() In the left pane, click Trust Center.
In the left pane, click Trust Center.
![]() Click Trust Center Settings.
Click Trust Center Settings.
![]() In the left pane, click Privacy Options.
In the left pane, click Privacy Options.
![]() Select or clear the check boxes you do or don’t want.
Select or clear the check boxes you do or don’t want.
![]() Connect to Office.com for updated content when I’m connected to the Internet.
Connect to Office.com for updated content when I’m connected to the Internet.
![]() Download a file periodically that helps determine system problems. Select to have Microsoft request error reports, update help, and accept downloads from Office.com.
Download a file periodically that helps determine system problems. Select to have Microsoft request error reports, update help, and accept downloads from Office.com.
![]() Automatically detect installed Office applications to improve Office.com search results. Select to automatically detect applications.
Automatically detect installed Office applications to improve Office.com search results. Select to automatically detect applications.
![]() Check Microsoft Office documents that are from or link to suspicious Web sites. Select to check for spoofed Web sites.
Check Microsoft Office documents that are from or link to suspicious Web sites. Select to check for spoofed Web sites.
![]() Allow the Research task pane to check for and install new services.
Allow the Research task pane to check for and install new services.
![]() Allow sending files to improve file validation.
Allow sending files to improve file validation.
![]() Click OK.
Click OK.
![]() Click OK.
Click OK.
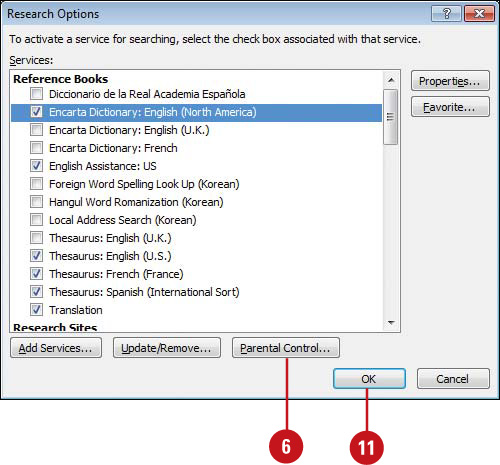
Set Parental Controls for Online Research
![]() Click the File tab, and then click Options.
Click the File tab, and then click Options.
![]() In the left pane, click Trust Center.
In the left pane, click Trust Center.
![]() Click Trust Center Settings.
Click Trust Center Settings.
![]() In the left pane, click Privacy Options.
In the left pane, click Privacy Options.
![]() Click Research Options.
Click Research Options.
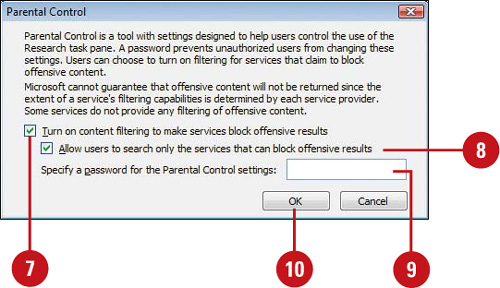
![]() Click Parental Control.
Click Parental Control.
![]() Select the Turn on content filtering to make services block offensive results check box.
Select the Turn on content filtering to make services block offensive results check box.
![]() Select the Allow users to search only the services that can block offensive results check box, if necessary.
Select the Allow users to search only the services that can block offensive results check box, if necessary.
![]() Enter a password, so users cannot change these settings.
Enter a password, so users cannot change these settings.
![]() Click OK, retype the password, and then click OK.
Click OK, retype the password, and then click OK.
![]() Click OK.
Click OK.
![]() Click OK.
Click OK.
Working with Office Safe Modes
Microsoft Office uses two types of safe modes—Automated and User-Initiated—when it encounters a program problem. When you start an Office 2010 program, it automatically checks for problems, such as an extension not properly loading. If the program is not able to start the next time you try, the programs starts in Automated Safe mode, which disables extensions—macros, ActiveX controls, and add-ins—and other possible problem areas. If you’re having problems and the Office program doesn’t start in Automated Safe mode, you can start the program in User-Initiated Safe mode. When you start an Office program in Office Safe mode, not all features are available. For instance, templates can’t be saved, AutoCorrect list is not loaded, preferences cannot be saved, and all command-line options are ignored except /a and /n. Before you can use Office Safe mode, you need to enable it in the Trust Center. When you’re in safe mode, you can use the Trust Center to find out the disabled items and enable them one at a time to help you pin point the problem.
Enable Safe Mode
![]() Click the File tab, and then click Options.
Click the File tab, and then click Options.
![]() In the left pane, click Trust Center.
In the left pane, click Trust Center.
![]() Click Trust Center Settings.
Click Trust Center Settings.
![]() In the left pane, click ActiveX Settings.
In the left pane, click ActiveX Settings.
![]() Select the Safe Mode (Helps limit the control’s access to your computer) check box.
Select the Safe Mode (Helps limit the control’s access to your computer) check box.
![]() Click OK.
Click OK.
![]() Click OK.
Click OK.
See Also
See “Maintaining and Repairing Office” on page 30 for information on fixing problems with a Microsoft Office 2010 program.
Start User-Initiated Safe Mode
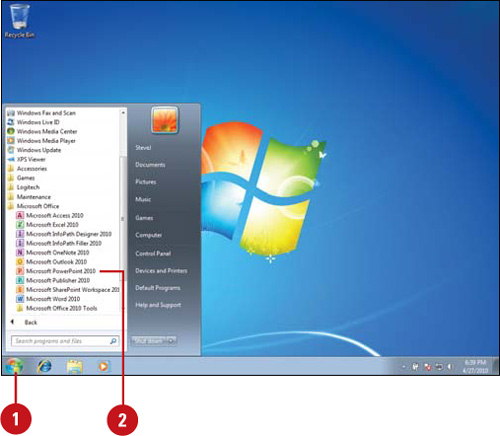
![]() Click the Start button on the taskbar, point to All Programs, and then click Microsoft Office.
Click the Start button on the taskbar, point to All Programs, and then click Microsoft Office.
![]() Press and hold Ctrl, and then click Microsoft PowerPoint 2010.
Press and hold Ctrl, and then click Microsoft PowerPoint 2010.
Did You Know?
You can use the Run dialog box to work in Safe mode. At the command prompt, you can use the /safe parameter at the end of the command-line to start the program.
View Disabled Items
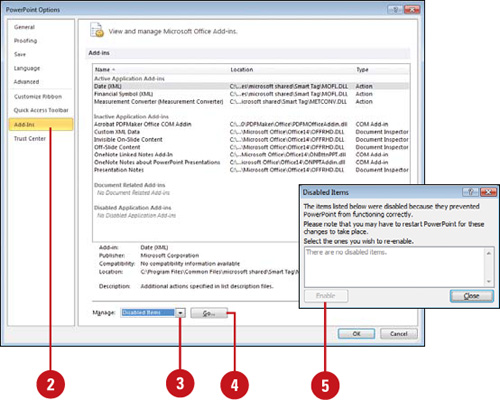
![]() Click the File tab, and then click Options.
Click the File tab, and then click Options.
![]() In the left pane, click Add-Ins.
In the left pane, click Add-Ins.
![]() Click the Manage list arrow, and then click Disabled Items.
Click the Manage list arrow, and then click Disabled Items.
![]() Click Go.
Click Go.
![]() In the dialog box, you can select an item, click Enable to activate and reload the add-in, and then click Close.
In the dialog box, you can select an item, click Enable to activate and reload the add-in, and then click Close.