
The requirements you will need to build the Android application are as follows:
- TensorFlow 1.13
- Python 3.7
- NumPy 1.15
- python-speech-features
Python link: https://pip.pypa.io/en/stable/installing/
Numpy link: https://docs.scipy.org/doc/numpy-1.13.0/user/install.html
Python-speech-features link: https://github.com/jameslyons/python_speech_features
Now, let's start building the Android application from scratch. In this application, we will record audio and then convert it into text.
We will use the TensorFlow sample application and edit it according to our needs.
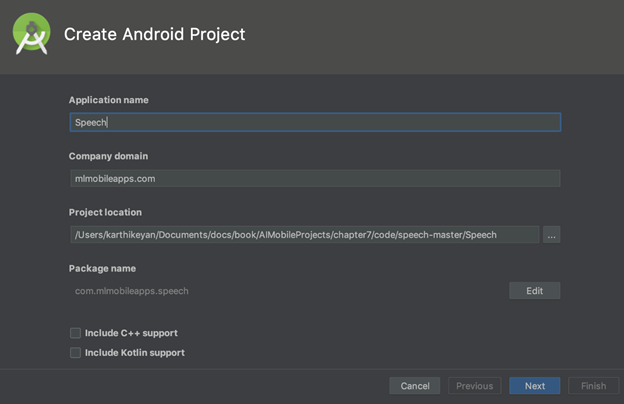
Add Application name and the Company domain name, as shown in the following screenshot:
In the next step, select the Target Android Devices version. We will select the minimum version as API 15:

After this, we will add either Empty Activity or No Activity:

Now, let's start adding the activity and use the generated TensorFlow model to get the result. We need to enable two permissions so that we can use them in our application, as shown in the following code block:
<manifest xmlns:android="http://schemas.android.com/apk/res/android"
    package="com.mlmobileapps.speech">

    <uses-permission android:name="android.permission.WRITE_EXTERNAL_STORAGE"/>
    <uses-permission android:name="android.permission.RECORD_AUDIO" />

    <uses-sdk
        android:minSdkVersion="25"
        android:targetSdkVersion="25" />

    <application android:allowBackup="true"
        android:debuggable="true"
        android:label="@string/app_name"
        android:icon="@drawable/ic_launcher"
        android:theme="@style/MaterialTheme">

        <activity android:name="org.tensorflow.demo.SpeechActivity"
            android:screenOrientation="portrait"
            android:label="@string/activity_name_speech">
            <intent-filter>
               <action android:name="android.intent.action.MAIN" />
               <category android:name="android.intent.category.LAUNCHER" />
            </intent-filter>
        </activity>
    </application>
</manifest>
We will have a minimal UI for the application, with a couple of TextView components and a Button:

The following XML layout mimics the UI in the preceding screenshot:
<FrameLayout
    xmlns:android="http://schemas.android.com/apk/res/android"
    xmlns:app="http://schemas.android.com/apk/res-auto"
    xmlns:tools="http://schemas.android.com/tools"
    android:layout_width="match_parent"
    android:layout_height="match_parent"
    android:background="#6200EE"
    tools:context="org.tensorflow.demo.SpeechActivity">

    <LinearLayout
        android:layout_width="match_parent"
        android:orientation="vertical"
        android:layout_height="wrap_content">
        <TextView
            android:id="@+id/textView"
            android:layout_width="wrap_content"
            android:layout_height="wrap_content"

            android:layout_gravity="top"
            android:textColor="#fff"
            android:layout_marginLeft="10dp"
            android:layout_marginTop="30dp"
            android:text="Talk within 5 seconds"
            android:textAlignment="center"
            android:textSize="24dp" />

        <TextView
            android:id="@+id/output_text"
            android:layout_width="wrap_content"
            android:layout_height="wrap_content"
            android:textColor="#fff"
            android:layout_gravity="top"
            android:layout_marginLeft="10dp"
            android:layout_marginTop="10dp"
            android:textAlignment="center"
            android:textSize="24dp" />
    </LinearLayout>

    <Button
        android:id="@+id/start"
        android:background="#ff0266"
        android:textColor="#fff"
        android:layout_width="wrap_content"
        android:padding="20dp"
        android:layout_height="wrap_content"
        android:layout_gravity="bottom|center_horizontal"
        android:layout_marginBottom="50dp"
        android:text="Record Voice" />

</FrameLayout>
Let's add the steps for the speech recognizer activity, as follows:
@Override
protected void onCreate(Bundle savedInstanceState) {
  // Set up the UI.
  super.onCreate(savedInstanceState);
  setContentView(R.layout.activity_speech);
  startButton = (Button) findViewById(R.id.start);
  startButton.setOnClickListener(
      new View.OnClickListener() {
        @Override
        public void onClick(View view) {
            startRecording();
        }
      });
  outputText = (TextView) findViewById(R.id.output_text);
  // Load the Pretrained WaveNet model.
  inferenceInterface = new TensorFlowInferenceInterface(getAssets(), MODEL_FILENAME);
  requestMicrophonePermission();
}
Next, we will launch the recorder, as follows:
public synchronized void startRecording() {
  if (recordingThread != null) {
    return;
  }
  shouldContinue = true;
  recordingThread =
      new Thread(
          new Runnable() {
            @Override
            public void run() {
              record();
            }
          });
  recordingThread.start();
}
The following code shows the implementation of the record() method:
private void record() {
  android.os.Process.setThreadPriority(android.os.Process.THREAD_PRIORITY_AUDIO);

  // Estimate the buffer size we'll need for this device.
  int bufferSize =
      AudioRecord.getMinBufferSize(
              SAMPLE_RATE, AudioFormat.CHANNEL_IN_MONO, AudioFormat.ENCODING_PCM_16BIT);
  if (bufferSize == AudioRecord.ERROR || bufferSize == AudioRecord.ERROR_BAD_VALUE) {
    bufferSize = SAMPLE_RATE * 2;
  }
  short[] audioBuffer = new short[bufferSize / 2];

  AudioRecord record =
      new AudioRecord(
          MediaRecorder.AudioSource.DEFAULT,
          SAMPLE_RATE,
          AudioFormat.CHANNEL_IN_MONO,
          AudioFormat.ENCODING_PCM_16BIT,
          bufferSize);

  if (record.getState() != AudioRecord.STATE_INITIALIZED) {
    Log.e(LOG_TAG, "Audio Record can't initialize!");
    return;
  }

  record.startRecording();

  Log.v(LOG_TAG, "Start recording");

  while (shouldContinue) {
    int numberRead = record.read(audioBuffer, 0, audioBuffer.length);
      Log.v(LOG_TAG, "read: " + numberRead);
    int maxLength = recordingBuffer.length;
    recordingBufferLock.lock();
    try {
        if (recordingOffset + numberRead < maxLength) {
            System.arraycopy(audioBuffer, 0, recordingBuffer, recordingOffset, numberRead);
        } else {
            shouldContinue = false;
        }
      recordingOffset += numberRead;
    } finally {
      recordingBufferLock.unlock();
    }
  }
  record.stop();
  record.release();
  startRecognition();
}
The following code shows the implementation of the audio recognizing method:
public synchronized void startRecognition() {
  if (recognitionThread != null) {
    return;
  }
  shouldContinueRecognition = true;
  recognitionThread =
      new Thread(
          new Runnable() {
            @Override
            public void run() {
              recognize();
            }
          });
  recognitionThread.start();
}

private void recognize() {
  Log.v(LOG_TAG, "Start recognition");

  short[] inputBuffer = new short[RECORDING_LENGTH];
  double[] doubleInputBuffer = new double[RECORDING_LENGTH];
  long[] outputScores = new long[157];
  String[] outputScoresNames = new String[]{OUTPUT_SCORES_NAME};


    recordingBufferLock.lock();
    try {
      int maxLength = recordingBuffer.length;
        System.arraycopy(recordingBuffer, 0, inputBuffer, 0, maxLength);
    } finally {
      recordingBufferLock.unlock();
    }

    // We need to feed in float values between -1.0 and 1.0, so divide the
    // signed 16-bit inputs.
    for (int i = 0; i < RECORDING_LENGTH; ++i) {
      doubleInputBuffer[i] = inputBuffer[i] / 32767.0;
    }

    //MFCC java library.
    MFCC mfccConvert = new MFCC();
    float[] mfccInput = mfccConvert.process(doubleInputBuffer);
    Log.v(LOG_TAG, "MFCC Input======> " + Arrays.toString(mfccInput));

    // Run the model.
    inferenceInterface.feed(INPUT_DATA_NAME, mfccInput, 1, 157, 20);
    inferenceInterface.run(outputScoresNames);
    inferenceInterface.fetch(OUTPUT_SCORES_NAME, outputScores);
    Log.v(LOG_TAG, "OUTPUT======> " + Arrays.toString(outputScores));


    //Output the result.
    String result = "";
    for (int i = 0;i<outputScores.length;i++) {
        if (outputScores[i] == 0)
            break;
        result += map[(int) outputScores[i]];
    }
    final String r = result;
    this.runOnUiThread(new Runnable() {
        @Override
        public void run() {
            outputText.setText(r);
        }
    });
    Log.v(LOG_TAG, "End recognition: " +result);
  }
The model is run through the TensorFlowInferenceInterface class, as shown in the preceding code.
Once we have the completed code running, run the application.
On the first run, you will need to allow the application to use the phone's internal microphone, as demonstrated in the following screenshot:

Once we give permission to use the microphone, click on RECORD VOICE and give your voice input within 5 seconds. There are two attempts shown in the following screenshots for the how are you input keyword with an Indian accent. It works better with US and UK accents.
The first attempt is as follows:

The second attempt is as follows:

You should try this with your own accent to get the correct output. This is a very simple way to start building your own speech detector that you can improve on even further.