
After having covered the introductory material until now, it is time to let the rubber hit the road. This chapter will walk you through the upgrade of a single-player game into its multiplayer counterpart.
Unlike the game we developed in Chapter 1, Getting Started with Multiplayer Game Programming, this game will need to be played in real-time, as opposed to being turn-based, which brings a whole set of challenges to the table. Once we solve the fundamental problems associated with synchronizing real-time game worlds across two or more players, we'll look into other fundamental, yet more involving concepts.
In this chapter, we will discuss the following principles and concepts:
- Fixing your game loop for multiplayer gaming
- Implementing an authoritative server
- The lobby and room system
- Matchmaking algorithms
- Socket programming with Socket.io
Surely, you must have written a hello world program when you were learning programming. In game development, I'd say the classic hello world game every developer should start with is snake. The concept is simple: move a block around the screen collecting special blocks that cause your block to stretch into a sequence of connected blocks that resemble the movement of a snake. If you run the head of the snake into its body, you lose.
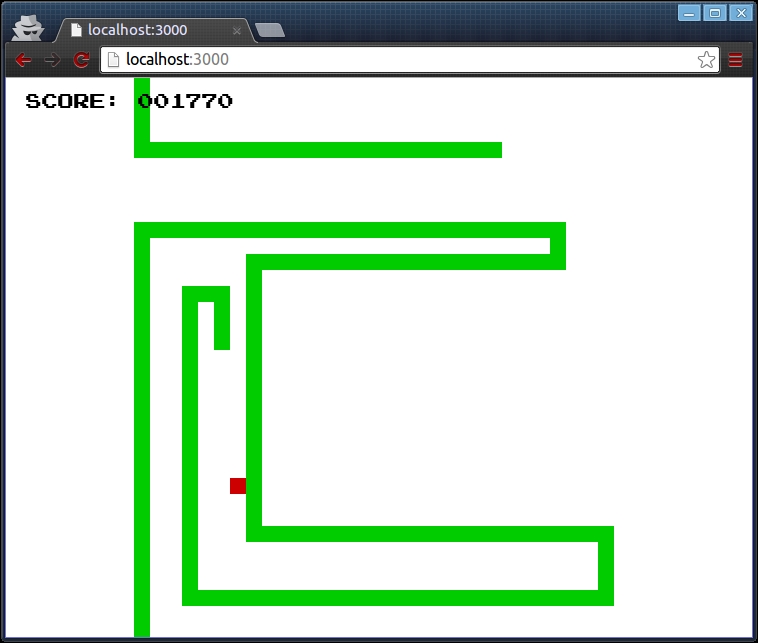
This implementation only allows the snake to move up, down, left, or right. Once you specify the direction for the snake to move, it will continue moving in that direction until you move it in a different direction. As a bonus, this particular implementation allows you to wrap around the screen—that is, if you move outside one of the sides of the screen, the snake will appear on the opposite side.
Catching a red block makes the snake grow by one extra block and increments your score by 10 points. Running the snake into itself stops the game loop and prints a simple game over message.
In order to keep things simple for this initial version, there aren't any additional screens, including a main entry screen. The game simply begins once it is fully loaded. As we build upon this single player version of the game, we'll add the required screens that will make it more intuitive and user friendly for more than one player to join the game.
The goal of this initial single player version of the game is to make a playable game with as few lines of code by using the most basic model that we can build on. Thus, many additional details are left as an exercise for you.
In preparation for the next step, where we'll add server-side components to the game, we've written the first version of the game using Node.js and exported it to the browser using Browserify, as discussed in Chapter 2, Setting Up the Environment.
In keeping with the theme of making everything as simple possible, we will use a package.json file that only requires the Express framework to help us with routing and the Grunt plugins to help us to automatically build and export our modules with Browserify:
// ch3/package.json
{
    "name": "snake-ch3",
    "dependencies": {
        "express": "*",
        "express-generator": "*"
    },
    "devDependencies": {
        "grunt": "~0.4.5",
        "grunt-browserify": "~3.4.0",
        "grunt-contrib-uglify": "~0.8.0",
        "grunt-contrib-watch": "~0.6.1"
    }
}
Note
Express.js is a web framework for Node.js that allows us to very quickly set up the entire web server to host and serve our game. (refer to http://expressjs.com/.) While Express plays a major role in our project, as it routes user requests for the appropriate files, understanding how it works is not a prerequisite to this chapter or the rest of the book. We will cover enough of the absolute basics to get you started using this powerful framework.
With all this in place, we use the Express command-line tool to build the project.
npm install
express snake-ch3
cd snake-ch3
npm install
After executing the preceding sequence of commands, we have set up our boilerplate Node.js server with all of Express' defaults, which, for our purpose, will work just fine. If anything goes wrong for whatever reason, there will be enough error messages to help you understand why and what the problems are. Provided that everything seems to be going fine after you enter the preceding commands, you can now test the project by starting your server with the following command:
npm start
This will start the server on port 3000, which you can load on your modern browser of choice at http://localhost:3000/.

The project structure will now look like the one in the preceding screenshot, except for the files enclosed within the red box that will not be generated by Express Generator. We will be creating and editing these files by hand, as you will see in the next several sections.
By default, Express will create an index file that displays a welcome message. Since all we need for now is a single screen to display the game, we'll just edit this file for our own purpose:
// ch3/snake-ch3/views/index.jade
extends layout

block content
  div#gameArea
    p#scoreA SCORE: <span>000000</span>
    p#gameOver.animated.pulse.hidden Game Over
    canvas#gameCanvas
    div#statsPanel
  script(src='/js/app.build.js')
If you squint hard enough, you will see the HTML markup. If you're not familiar with the Jade templating language that Express uses by default, don't worry. What we do in the template is create a <p> element where we'll display the current score, one for the game over message, and a canvas element that we'll use to render the game. We also include the main script file, which is the output of the Grunt task that concatenates all our files and runs Browserify over them so that we can load it in the browser. Since index.jade is the only thing we'll see of Jade in this book, we won't go into it any further. For more information about how Jade works and what it can do, visit its website at http://www.jade-lang.com.
With the preceding structure in place, all that we need now is a couple of classes that implement the game. We'll do this in five classes so that we can reuse individual pieces of logic when we implement the game server.
Here's how we'll implement our game.js file:
// ch3/snake-ch3/share/game.js
var Game = function (fps) {
    this.fps = fps;
    this.delay = 1000 / this.fps;
    this.lastTime = 0;
    this.raf = 0;

    this.onUpdate = function (delta) {
    };
    this.onRender = function () {
    };
};

Game.prototype.update = function (delta) {
    this.onUpdate(delta);
};

Game.prototype.render = function () {
    this.onRender();
};

Game.prototype.loop = function (now) {
    this.raf = requestAnimationFrame(this.loop.bind(this));

    var delta = now - this.lastTime;
    if (delta >= this.delay) {
        this.update(delta);
        this.render();
        this.lastTime = now;
    }
};

Game.prototype.start = function () {
    if (this.raf < 1) {
        this.loop(0);
    }
};

Game.prototype.stop = function () {
    if (this.raf > 0) {
        cancelAnimationFrame(this.raf);
        this.raf = 0;
    }
};

module.exports = Game;
This module is the cornerstone of our project. It defines a very simple interface that abstracts away a simple game loop. All that we need to do when we implement this class is define the update() and render() methods.
You will notice the use of requestAnimationFrame, which is a special function defined by browsers to help us render the game. Since the game server won't render the game, neither will it have the function available to it, we'll need to adapt to that when we start working on the server. We'll talk more about frame rate independence in the next section.
We'll be adding the following code to our snake.js file:
// ch3/snake-ch3/share/snake.js
var keys = require('./keyboard.js'),
var EventEmitter = require('events').EventEmitter;
var util = require('util'),

var Snake = function (id, x, y, color_hex, width, height) {
    this.id = id;
    this.color = color_hex;
    this.head = {x: x, y: y};
    this.pieces = [this.head];
    this.width = width || 16;
    this.height = height || 16;
    this.readyToGrow = false;
    this.input = {};
};

Snake.events = {
    POWER_UP: 'Snake:powerup',
    COLLISION: 'Snake:collision'
};

util.inherits(Snake, EventEmitter);

Snake.prototype.setKey = function (key) {
    this.input[keys.UP] = false;
    this.input[keys.DOWN] = false;
    this.input[keys.LEFT] = false;
    this.input[keys.RIGHT] = false;
    this.input[key] = true;
};

Snake.prototype.update = function (delta) {
    if (this.readyToGrow) {
        this.pieces.push({x: -10, y: -10});
        this.readyToGrow = false;
    }

    for (var len = this.pieces.length, i = len - 1; i > 0; i--) {
        this.pieces[i].x = this.pieces[i - 1].x;
        this.pieces[i].y = this.pieces[i - 1].y;
    }

    if (this.input[keys.LEFT]) {
        this.head.x += -1;
    } else if (this.input[keys.RIGHT]) {
        this.head.x += 1;
    } else if (this.input[keys.UP]) {
        this.head.y += -1;
    } else if (this.input[keys.DOWN]) {
        this.head.y += 1;
    }
};

Snake.prototype.checkCollision = function(){
    var collide = this.pieces.some(function(piece, i){
        return i > 0 && piece.x === this.head.x && piece.y === this.head.y;
    }, this);

    if (collide) {
        this.emit(Snake.events.COLLISION, {id: this.id, point: this.head, timestamp: performance.now()});
    }
};

Snake.prototype.grow = function() {
    this.readyToGrow = true;
    this.emit(Snake.events.POWER_UP, {id: this.id, size: this.pieces.length, timestamp: performance.now()});
};

module.exports = Snake;
The snake class extends Node's EventEmitter class so that it can emit events to the main application. This way we can isolate the specific behavior of the class and decouple it from any concrete implementation that responds to the snake as per our choice.
We also create a simple interface that the main application can use to control the snake. Again, since the immediate goal of this version is to get the game running in a browser, we will make use of browser-specific functionality, which in this case is window.performance.now(), which we'll replace with a module compatible with Node.js when we need to.
There are three other classes (namely, fruit.js, keyboard.js, and renderer.js) that merely wrap the canvas and canvas context objects, a JavaScript equivalent of an enumeration to help us refer to keyboard input, and a simple point that we'll use to represent the pellet that the snake will eat. For brevity, we will omit the code for these classes.
Here's how our app.client.js module should look like:
// ch3/snake-ch3/share/app.client.js
game.onUpdate = function (delta) {
    var now = performance.now();

    // Check if there's no fruits left to be eaten. If so, create a new one.
    if (fruits.length < 1) {
        fruitDelta = now - lastFruit;

        // If there's been enough time without a fruit for the snakes,
        // create a new one at a random position, and place it in the world
        if (fruitDelta >= fruitDelay) {
            fruits[0] = new Fruit(
              parseInt(Math.random() * renderer.canvas.width / BLOCK_WIDTH / 2, 10),
              parseInt(Math.random() * renderer.canvas.width / BLOCK_HEIGHT / 2, 10),
              '#c00', BLOCK_WIDTH, BLOCK_HEIGHT
         );
        }
    }

    player.update(delta);
    player.checkCollision();

    // Check if the snake has gone outside the game board.
    // If so, wrap it around to the other side
    if (player.head.x < 0) {
        player.head.x = parseInt(renderer.canvas.width / player.width, 10);
    }

    if (player.head.x > parseInt(renderer.canvas.width / player.width, 10)) {
        player.head.x = 0;
    }

    if (player.head.y < 0) {
        player.head.y = parseInt(renderer.canvas.height / player.height, 10);
    }

    if (player.head.y > parseInt(renderer.canvas.height / player.height, 10)) {
        player.head.y = 0;
    }

    // Check if there's a fruit to be eaten. If so, check if the snake has just
    // eaten it. If so, grow the player that ate it.
    if (fruits.length > 0) {
        if (player.head.x === fruits[0].x && player.head.y === fruits[0].y) {
            fruits = [];
            player.grow();
            lastFruit = now;
        }
    }
};

game.onRender = function () {
    ctx.clearRect(0, 0, renderer.canvas.width, renderer.canvas.height);

    ctx.fillStyle = player.color;
    player.pieces.forEach(function(piece){
        ctx.fillRect(
           piece.x * player.width,
           piece.y * player.height,
           player.width,
           player.height
        );
    });

    fruits.forEach(function(fruit){
        ctx.fillStyle = fruit.color;
        ctx.fillRect(
           fruit.x * fruit.width,
           fruit.y * fruit.height,
           fruit.width,
           fruit.height
        );
    });
};
The first part of the app.client module, which is the concrete implementation of the game, imports all the required classes and modules and instantiates the game loop and player classes. Next (as seen previously) we implement the two game loop life cycle methods, namely the update and render methods. The only change that we'll need to make to these two methods when we add multiplayer functionality is to update and render an array of snakes rather than a single one.
Since the actual update for each player is delegated to the snake class itself, the game loop has no issues over what is done inside that method. In fact, the game loop doesn't even care about the output of the update methods, as we'll see later. The key here is that the game loop's update method allows every entity in the game to update itself during the update phase.
Similarly, during the render phase, the game loop only cares about rendering the current state of each entity that it wants to render. Although we could have also delegated the rendering of the snake and other visual entities, we'll leave the concrete rendering inside the game loop for simplicity.
Finally, at the end of the app.client module, we hook up to the incoming events that we care about. Here, we listen for game events that were created by the snake object. The Snake.events.POWER_UP and Snake.events.COLLISION custom events let us execute callback functions to respond to when the snake consumes a pellet and collides with itself respectively.
Next, we bind to the keyboard and listen for key press events. Due to the game mechanics that we implement, we don't care about any keys that are not being pressed, so that's why we don't register any listeners for these events. This particular block of code is a great candidate for refactoring later on since the way the client will receive this kind of input will be different from the server. For example, the client will still take input directly from the user using the same keyboard events as input, but the server will receive this input from the user, which will notify the server of its state through the socket connection:
// whenever we receive a POWER_UP event from the game, we
// update the player's score and display its value inside scoreWidget.
player.on(Snake.events.POWER_UP, function(event){
    var score = event.size * 10;
    scoreWidgets.filter(function( widget){
        return widget.id === event.id;
    })
        .pop()
        .el.textContent = '000000'.slice(0, - (score + '').length) + score + '';
});

// whenever we receive a COLLISION event from the game, we
// stop the game and display a game over message to the player.
player.on(Snake.events.COLLISION, function(event){
    scoreWidgets.filter(function(widget){
        return widget.id === event.id;
    })
        .pop()
        .el.parentElement.classList.add('gameOver'),

    game.stop();
    setTimeout(function(){
        ctx.fillStyle = '#f00';
        ctx.fillRect(event.point.x * player.width, event.point.y * player.height, player.width, player.height);
    }, 0);

    setTimeout(function(){
        gameOver.classList.remove('hidden'),
    }, 100);
});

document.body.addEventListener('keydown', function (e) {
    var key = e.keyCode;

    switch (key) {
        case keys.ESC:
            game.stop();
            break;
        case keys.SPACEBAR:
            game.start();
            break;
        case keys.LEFT:
        case keys.RIGHT:
        case keys.UP:
        case keys.DOWN:
            player.setKey(key);
            break;
        case keys.D:
            console.log(player.pieces);
            break;
    }
});