
7. Accessing Entertainment on the Go
In this chapter, you’ll learn how to use digital music and video to turn your MacBook into a portable entertainment center, including
• Watching DVD video
• Viewing video files online
• Adding support for Windows Media and other video
• Using iTunes to play audio CDs
• Copying audio CDs into iTunes
• Buying digital media using iTunes
• Syncing your iOS device with iTunes
• Keeping your computers in sync with Home Sharing
Introduction
One of the best things about having a portable computer is that it provides all the entertainment possibilities of a desktop computer, but your laptop goes where you do. Downloadable video and music are available wherever and whenever you want. Using iTunes and your MacBook, you can build a “to-go” library of thousands of songs, TV shows, and movies.
In addition to iTunes, your MacBook also includes software to play your existing DVD library and thousands of online videos. Even when you run your MacBook from battery power, you still have hours of fun at your fingertips. When you leave home, you no longer have to leave your entertainment collection behind.
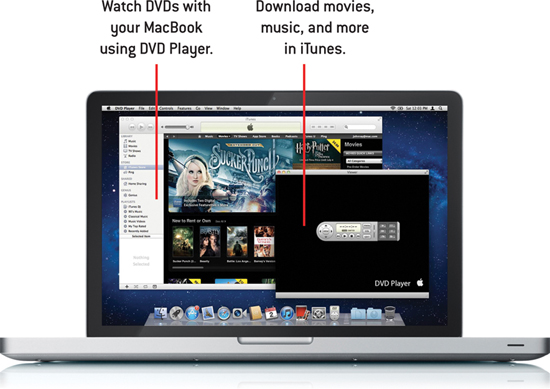
Using DVD Player
DVD Player is an application bundled with OS X that allows you to watch DVDs on your MacBook. Unless your MacBook preferences have been changed from the standard settings, DVD Player launches automatically when you insert a video DVD in your optical drive.
Note
At the present time, MacBooks play standard DVD content but cannot play Blu-ray discs, the format for high-definition video.
Playing a DVD
If you’ve used a standalone DVD player and remote, you should have no trouble applying your experience to navigating menus and playback controls on your MacBook. To begin playing a DVD, follow these steps:
1. Insert a disc in your optical disc drive. The content opens fullscreen, and a controller appears at the bottom to allow you to navigate DVD menus and control playback.
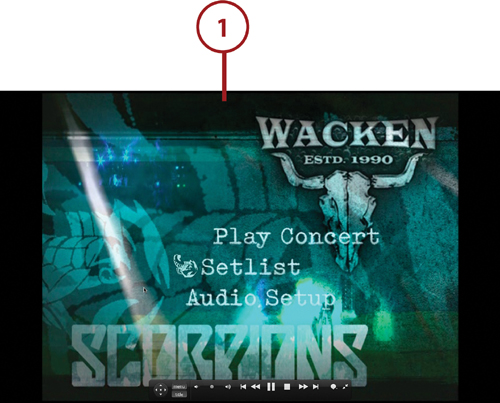
2. Navigate the DVD menu. You can use either your trackpad or the arrow keys on your keyboard.
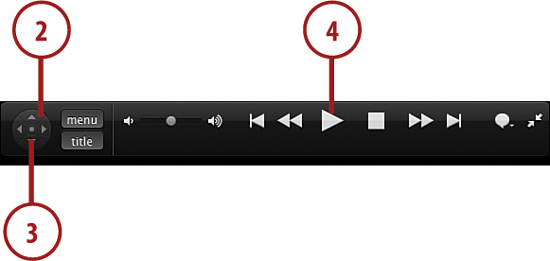
3. Press the Return (enter) key on your keyboard, or use your cursor to click the onscreen Enter (center) button to select an item, such as an episode, scene, or special features.
4. To toggle playing and pausing the video, click the Play/Pause button or press the spacebar. To stop playback, click the Stop button.
5. Press Escape to exit fullscreen mode, if desired. When in windowed mode, a slightly different (but equally functional) controller is displayed.

6. To eject the DVD, press the Eject key on your keyboard, or use the Eject button on the windowed mode controller.
Note
The first time you play a DVD in DVD Player, the drive region is set to match the code of that DVD. If you later insert a disc from another region, you have the option to change; however, you can only change your region code settings five times (including the initial setting).
Setting Bookmarks
If you want to mark your favorite parts of a DVD, DVD Player allows you to set bookmarks. Bookmarks are stored on your computer, not the DVD itself, so they are only available when you watch the DVD from your MacBook.
Setting Bookmarks
To set a bookmark, follow these steps:
1. When you’re watching a DVD in full-screen mode, move your cursor to the top of the screen to reveal the DVD Player menu.
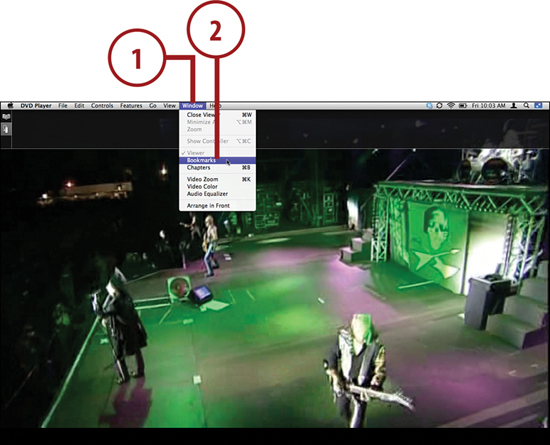
2. Choose Window, Bookmarks. The Bookmarks window opens.
3. Use the DVD controls (shown in the previous task) to rewind or fast-forward playback to the point you want to bookmark.
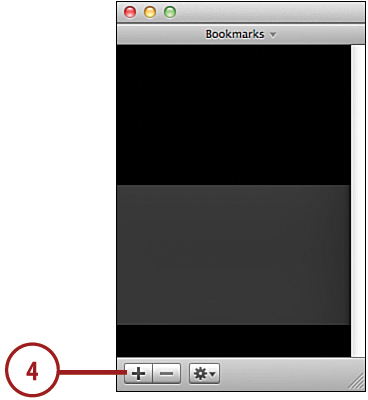
4. Click the + (also known as Add Bookmark) button at the bottom of the Bookmarks window. Playback pauses at the moment to show which frame will be marked.
5. Choose Make Default Bookmark to have video playback automatically start at this point.
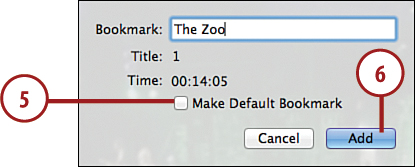
6. Name your bookmark and click Add to set a bookmark.
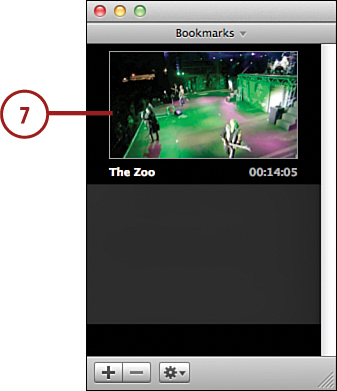
7. The frame, name, and timecode appear in the bookmark window.
Starting Playback at a Bookmark
To start playback at a bookmark you’ve set, follow these steps:
1. Insert the DVD you have bookmarked and begin playback.
2. While in full-screen mode, move your cursor to the top of the screen to reveal a black panel with tabs for Chapters and Bookmarks.
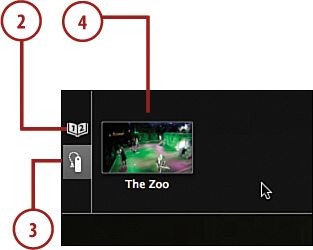
3. Click the Bookmarks icon to reveal bookmarks for the current DVD.
4. Select a bookmark to jump to that location.
Tip
You can also jump between Chapters without leaving playback or full-screen mode by moving your cursor to the top of the window and choosing the Chapters icon from the shaded panel.
Viewing Browser Video or Downloaded Video Files
Your MacBook’s native application for playing media, both within a web browser and from your desktop, is QuickTime. QuickTime, like DVD Player, has fairly standard buttons for controlling playback.
QuickTime supports common digital formats, including MPEG-4 and H.264 video, WAV sound files, and images. (Note, however, the videos on YouTube are another type of video, known as Flash video, which is not typically played in QuickTime.)
Playing QuickTime Files in Your Web Browser
To view a QuickTime movie in your web browser, follow these steps.
1. Open your web browser.
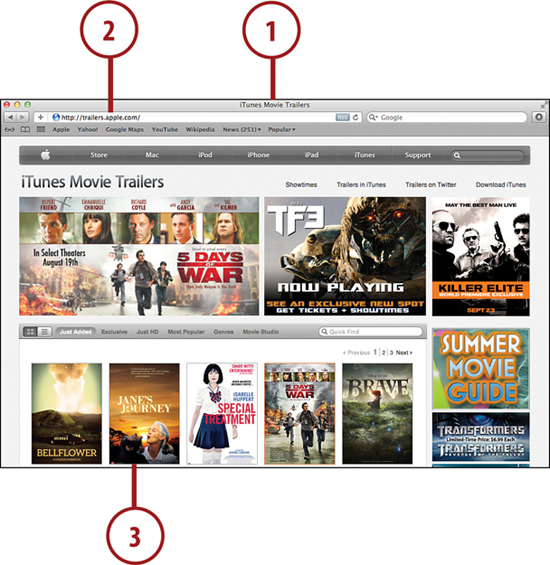
2. Navigate to a page containing QuickTime compatible content. (For example, visit Apple’s movie trailers web page at www.apple.com/trailers/ to enjoy QuickTime previews of upcoming releases.)
3. Select an item.
4. If you’re asked, choose your preferred options on video size, such as automatic or high-definition options (HD). These options affect the wait time for viewing—because larger, higher quality video requires transfer of more data to your MacBook.

5. The QuickTime panel opens and, after a few seconds, begins to play.
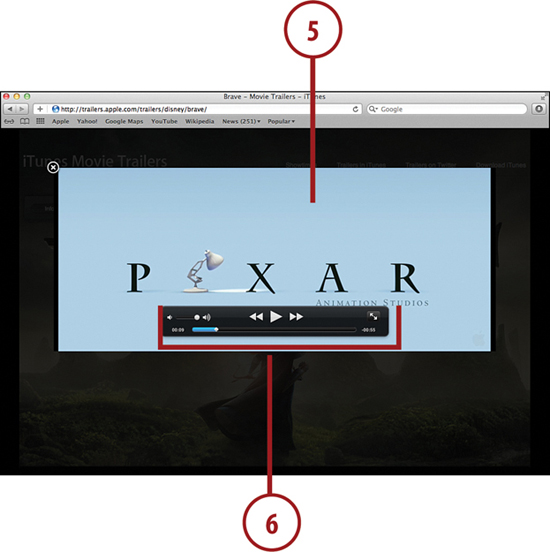
6. You can pause playback, change volume, rewind and fast-forward, or go fullscreen using the controls at the bottom of the panel.
Playing QuickTime Files from Your Desktop
In addition to playing files within a Web page, you can also use QuickTime to play files on your MacBook. Native QuickTime files end with the file extension .mov. (Applications such as Apple’s iMovie and Final Cut Pro export video in this format.)
To play a .mov file, follow these steps:
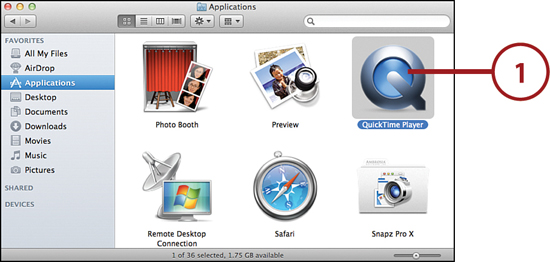
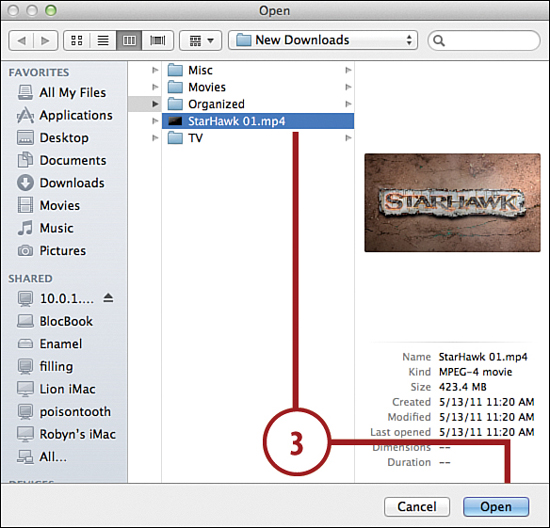
1. Open QuickTime Player (found in your Applications folder).
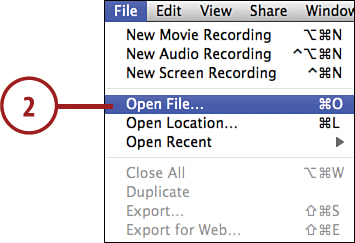
2. Choose File, Open File from the menu.
3. Navigate to the file you want to play and click the Open button.
4. Click the Play button to begin playback.
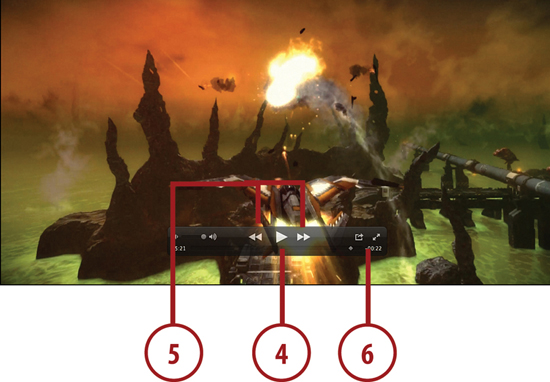
5. Click the rewind and fast-forward buttons to skim backward and forward through the video.
6. Click the double arrows to view the video in fullscreen mode.
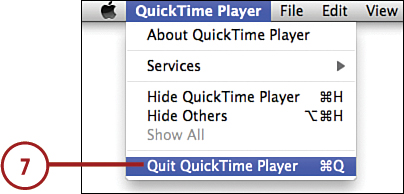
7. Choose QuickTime Player, Quit QuickTime Player to exit.
Creating a Media Library in iTunes
Apple’s iTunes enables you to manage and play digital media files, including song tracks you import from CD, content you purchase from the iTunes Music Store, or podcasts you subscribe to online.
You can also create and sync playlists with your iPod or share them with other iTunes users on your local network.
Running iTunes for the First Time
The first time you launch iTunes, you won’t have anything in your music library. Follow these steps to complete the setup process:
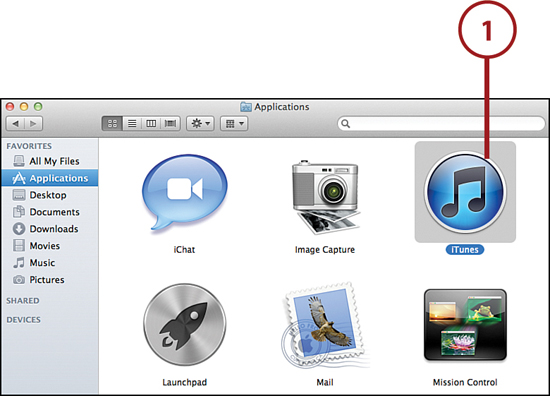
1. Open iTunes from the Dock or locating its application icon in the Applications folder. Click Agree after reviewing the iTunes Software License Agreement.
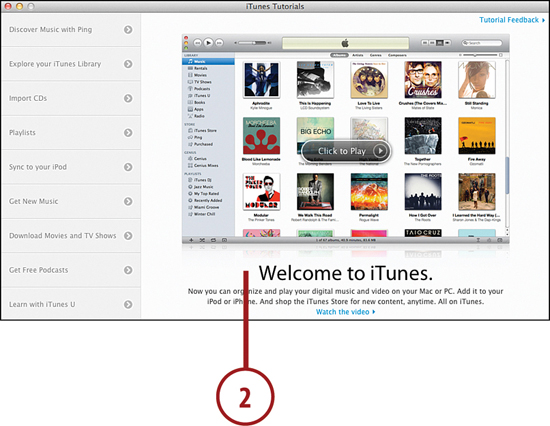
2. The Welcome window, with video tutorials for various tasks, appears. Choose a task to view, or click Close.
3. iTunes displays a screen explaining ways to add content to your Library.
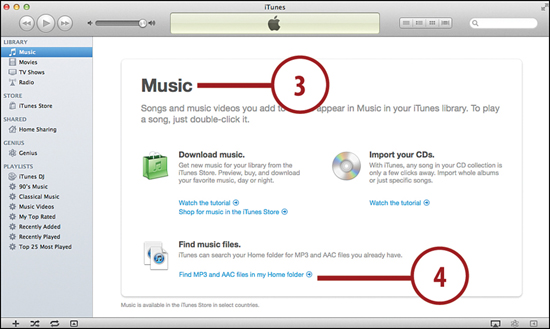
4. Click the Find MP3 and AAC Files in Your Home Folder link to search your account for any music files you may already have. These will be copied to the iTunes folder, inside your Music folder.
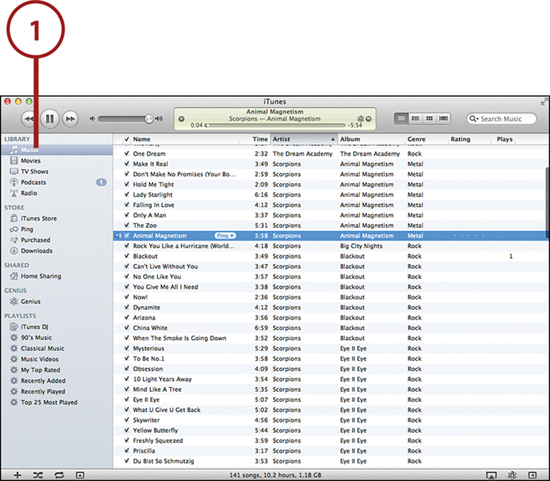
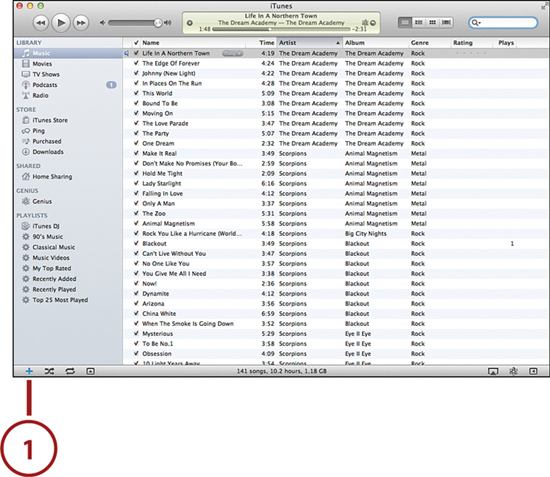
Finding Your Way Around iTunes
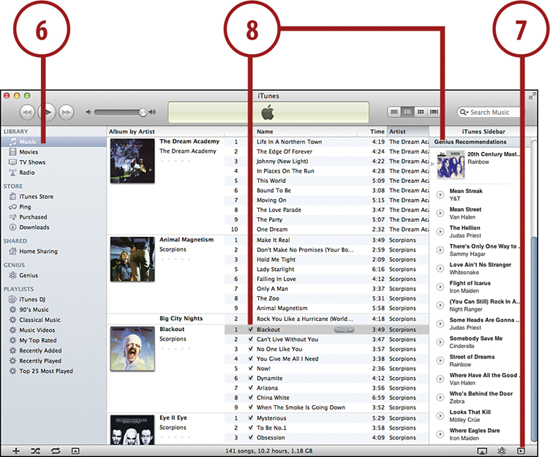
After you’ve configured iTunes, you can begin using it. First, here’s a quick tour of the iTunes window to acquaint you with the basics.
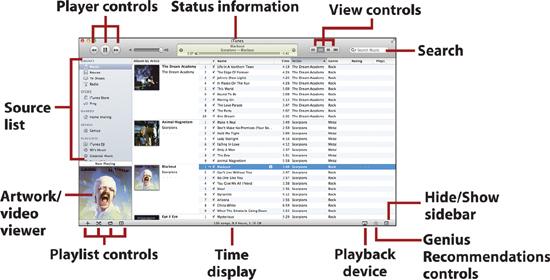
Let’s discuss a few of these elements in greater detail:
• The Source list contains the contents of your library, including any playlists you create, a link to the iTunes Store and Ping (a network for sharing your music tastes), Shared music, and any devices available to iTunes (such as a connected iPod, iPhone, or iPad).
• The Artwork/Video viewer below the source list shows album artwork or video content, if it’s available.
• The View controls allow you to scroll through your library in list, list with artwork, grid, or coverflow mode.
Building Your Media Library
The two most common ways to fill your iTunes Library with media are to import CDs you already own and get new content from the iTunes Store.
Tip
Click Import Setting at the bottom of the iTunes window if you would like to change the format of import from the standard AAC (common for most iTunes content) to other common formats such as MP3, AIFF, or WAV. You can also change the quality (and, subsequently, the file size) of the tracks by switching the Setting drop-down from iTunes Plus to Higher Quality (256 kbps).
Adding Audio CDs
To import audio tracks from a CD, follow these steps:
1. Insert a CD into the computer’s optical disc drive. Your MacBook is automatically set to open iTunes when you insert a music CD.
Note
If iTunes does not automatically open when you insert an audio CD, you can enable this behavior under the System Preferences, CDs & DVDs settings.
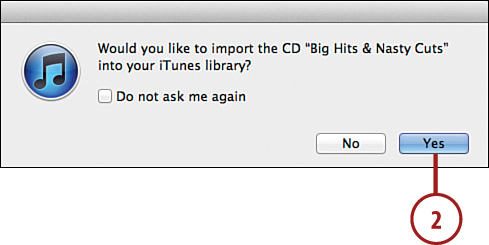
2. Click Yes after iTunes launches and displays a dialog box that asks if you would like to import the CD to your library.
3. iTunes displays the status of the import by showing which tracks have been imported and which are in progress.
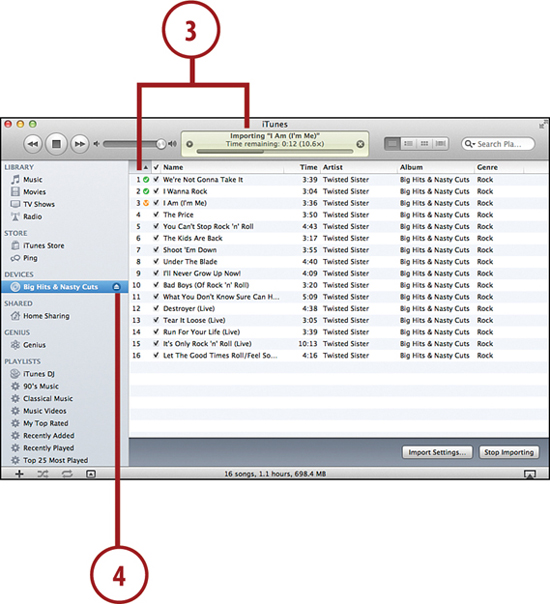
4. Eject your CD by clicking the eject button.
Purchasing Digital Media on the iTunes Store
To purchase media from the iTunes Store, follow these steps:
1. Click iTunes Store in the Source list to connect to the iTunes Store.
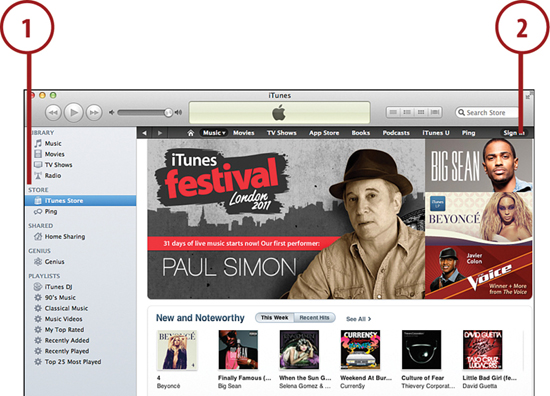
2. Click sign in.
3. Enter your Apple ID and password in the Sign In dialog box.
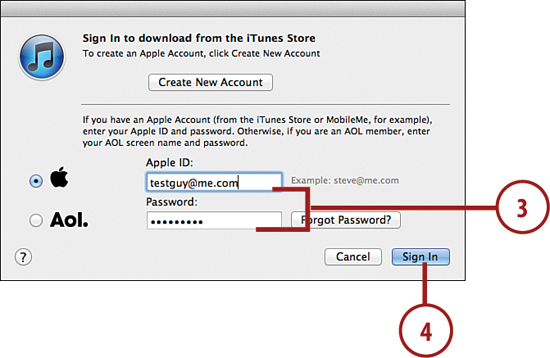
4. Click Sign In. When you’re logged in, your Apple ID appears in place of the Sign In button on the iTunes Home page.
Note
You can authorize up to five computers to play songs purchased on a single account. To do this, choose Store, Authorize Computer and enter your Apple ID. (Remember to deauthorize computers that no longer need access, which frees openings for new computers to be added.)
5. Use the links and on-screen navigation tools, such as scroll arrows and paging controls, to browse content.
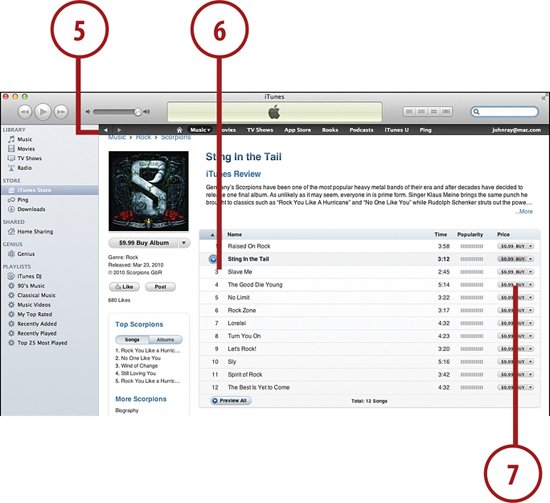
6. Click the blue Play button that appears as you move your cursor over each song to play a preview.
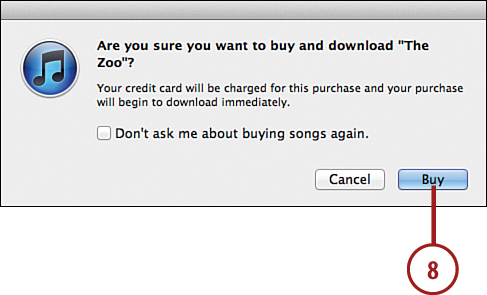
7. To make a purchase, click the Buy button that appears to the right of each item.
8. When you’re asked to confirm that you want to buy the selection, click the Buy button. Your selection is downloaded and added to your library under the Purchased playlist.
Tip
When you choose to rent a movie, you have 30 days to watch it, and 24 hours from the time you start watching it to finish it. Rented movies appear in your library just as other files do.
Viewing Genius Recommendations
Genius Recommendations attempt to predict what new media you might enjoy based on the current items in your library. Follow these steps to enable and peruse Genius Recommendations:
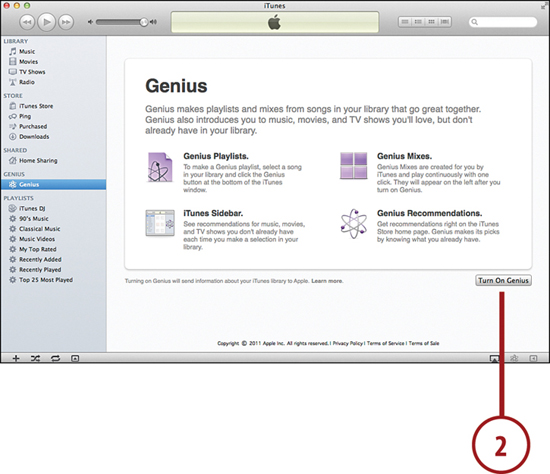
1. Click the Genius link in the source list.
2. Click the Turn On Genius button that appears.
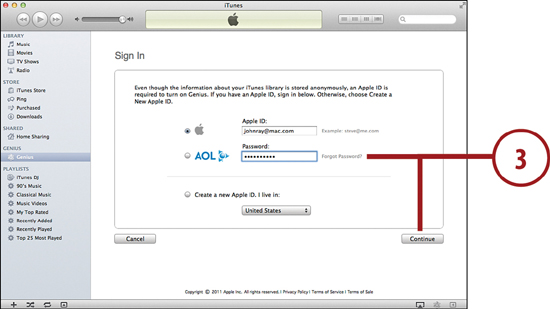
3. Enter your Apple ID and password in the Sign In dialog box and click Continue.
4. Check the box to agree to the terms of service and click Continue.

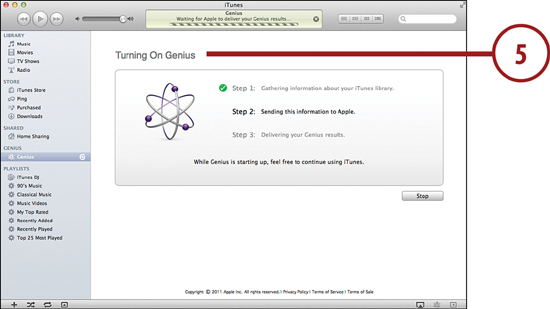
5 A screen announcing “Turning on Genius” appears while the contents of your library are analyzed and personalized results are prepared. Three stages are displayed while this occurs: gathering information, sending information, and delivering Genius results.
6. Select your Music Library from the iTunes source list.
7. Click the arrow button at the bottom-right corner of the iTunes window to open the iTunes sidebar.
8. Select any item in your Library or playlists to view related Genius recommendations from the iTunes Store in the sidebar.
Downloading Podcasts
Podcasts are series of digital files, either audio or video, that you can subscribe to for regular updates. You can locate and subscribe to a variety of podcasts (most of them free) in the iTunes Store by following these steps:
1. Click iTunes Store in the Source list to connect to the iTunes Store.
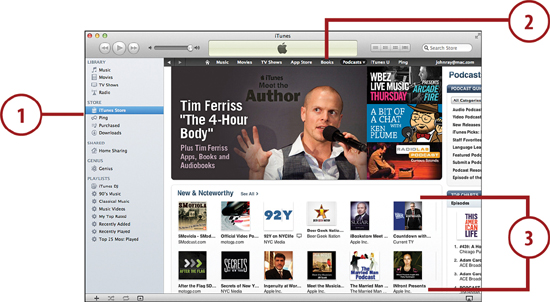
2. Click the Podcasts button in the iTunes Store navigation bar to go to the Podcast home page, or click and hold to see a categorized list of podcasts.
3. Click an item to see details and a list of available episodes.
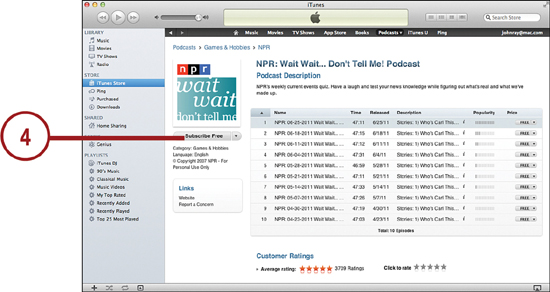
4. Click the Subscribe button to download the most recent episode and all future episodes of this podcast. The podcasts are downloaded to your iTunes library.
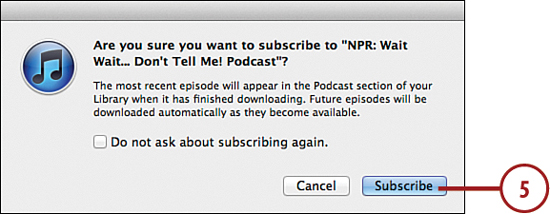
5. Click Subscribe when you’re asked to confirm that you want to subscribe.
6. In the Source list, click Podcasts to view your subscriptions. Blue dots appear next to podcast series with unplayed episodes.
7. Click the arrow in front of each series to show episode titles.
8. Select an episode and click the Play control button to listen.
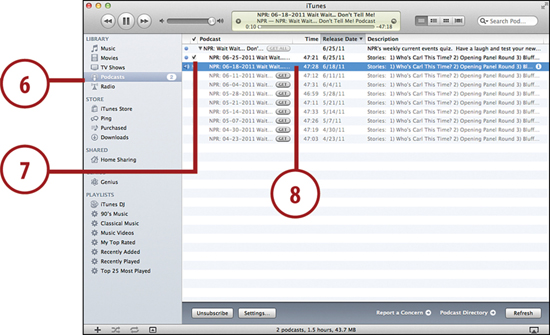
Tip
Episodes produced prior to your subscription appear in gray with a Get button, in case you want to download them as well. You can also click Get All to receive all episodes.
iTunes checks for updates as long as you are subscribed; if you change your mind about following a podcast, select it in the list and click the Unsubscribe button at the lower left of the iTunes window.
Viewing the Library
Your iTunes library can grow large quite quickly with so many sources from which to draw. Fortunately, there are several ways to browse and search to help you find just what you’re looking for.
Browsing Media Files
To browse your media library, follow these steps:
1. Choose a source in the Source list. Options might include Music, Movies, TV Shows, Podcasts, Audiobooks, and so on, depending how actively you’ve added content. These categories are created automatically as you download content from the iTunes Store.
2. Scroll through the content list to locate the one you want to watch/listen to.
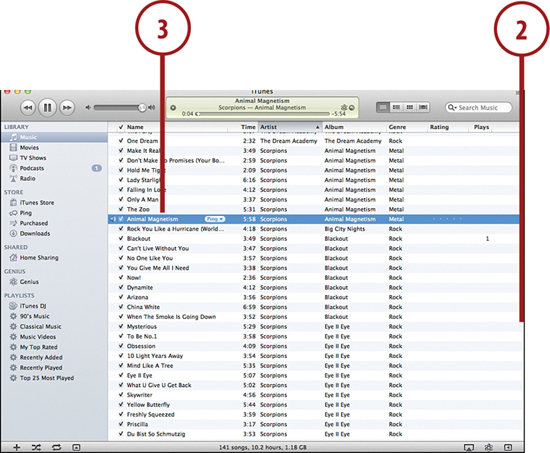
3. Double-click to play the item.
Tip
You can click the View buttons at the top right to change between list, list with artwork, grid, and coverflow views. While you’re in list and coverflow mode, you also can change the sort order by clicking a column heading.
Searching for Media
If you know the title or artist of an item, follow these steps to search for it:
1. Click inside the Search box at the upper right of the iTunes window and begin typing a search term. As you type, the display changes to show matches.
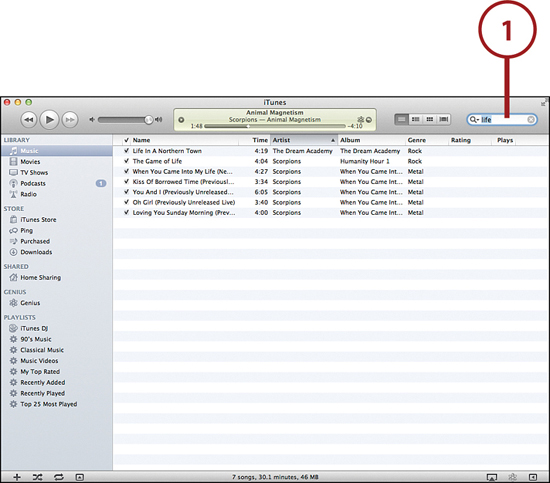
2. If necessary, click the magnifying glass to show a dropdown menu where you can limit the media attributes you are searching.

3. Double-click to play the item you want to watch/listen to.
Using Playlists
Playlists help you organize your music and media into themes to suit your mood. You can define your own playlists, set search criteria to automatically cluster certain artists or genres, or have iTunes use the Genius profile it created from your library to generate lists for you.
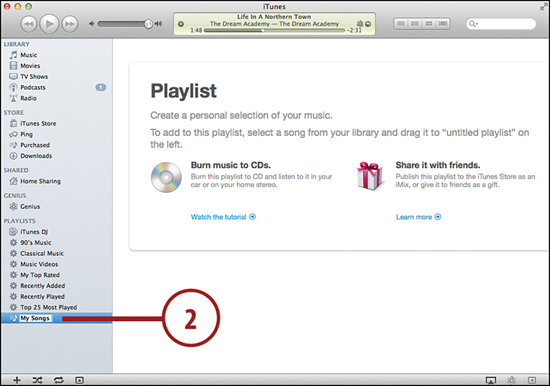
Creating Playlists
To define a playlist of songs you choose, follow these steps:
1. Click the Create a Playlist button, which looks like a plus sign, at the lower left of the iTunes window.
2. Type a name for the playlist that appears in the playlists portion of the Source list.
3. Return to your library to browse or search for songs to add to your playlist.

4. Click and drag a filename from the library list to your playlist. As you pass over a playlist in which you can drop the file, it is highlighted in blue and a green plus sign appears with your mouse cursor.
5. Release the mouse button to place the file in your playlist.
6. Repeat steps 3–5 to continue adding media.
Tip
If you add so many playlists that you feel the need to put them in folders to keep track of them, go to File, New Playlist Folder.
Defining Smart Playlists
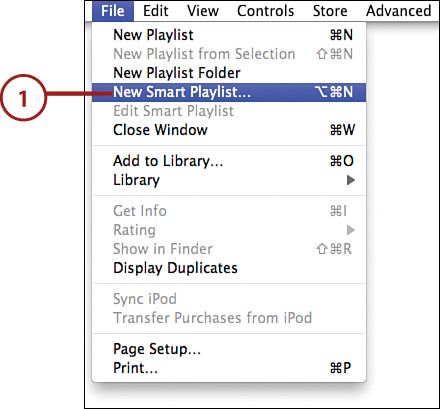
To set criteria that iTunes can use to make a playlist for you, follow these steps:
1. Choose File, New Smart Playlist from the menu.
2. In the Smart Playlist window, set your search criteria. Options include obvious choices, such as artist, album, or rating, as well as more obscure settings, such as bit rate (which relates to sound quality) and skip count (which tells how often you choose not to listen to it). You can also set a limit on the number of songs and allow live updates, which creates a list that changes as your library changes.
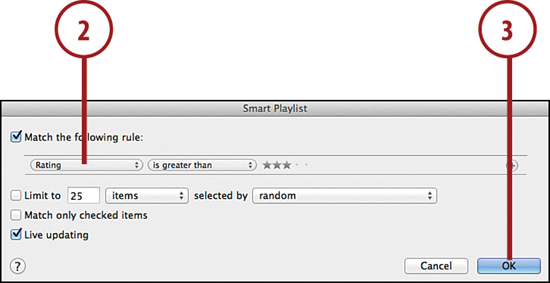
3. Click OK when you’re done setting search criteria. Your Smart Playlist appears under Playlists in the Source list.
4. Click untitled playlist in your Playlists and enter a name.

Tip
To modify the criteria you originally set, select the playlist in the Source list and choose File, Edit Smart Playlist from the menu.
Accessing the Genius Playlists
To see a playlist recommendation for a selected song based on your library, follow these steps:
1. Make sure you have enabled Genius Recommendations. (See the “Viewing Genius Recommendations” task earlier in this chapter.)
2. Go to your Music library to select a song.

3. Click the Genius button at the lower-right corner. The original song you selected plays and a playlist that complements it is listed with it.
4. To save the list generated by Genius, click Save Playlist at the top of the window.
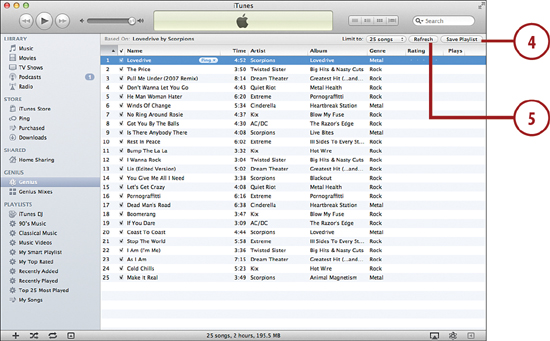
5. To try another playlist based on the original song, click Refresh at the top of the window.
To have iTunes generate playlists based on a profile of your whole music library rather than just a specific song, select Genius Mixes under the Genius category in the Source list.
Playing Internet Radio
To listen to Internet radio through iTunes, follow these steps:
1. Choose Radio under Library in the Source.
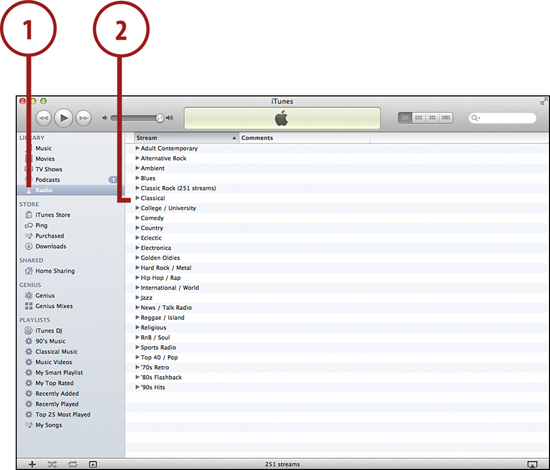
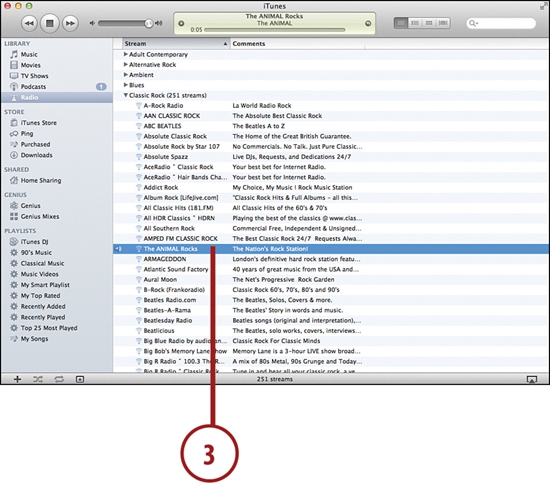
2. Click the disclosure arrow in front of a genre in the Streams list.
3. Double-click an item to connect to the stream and begin playback.
Keeping Media in Sync
iTunes is more than a virtual filing cabinet for storing music and media files. It also syncs with iPods, iPhones, and other computers on your network so you never have to be without those items, even when you’re away from your MacBook.
Syncing, the iCloud Way
By enabling syncing of purchases in iTunes, you ensure that your purchases are downloaded to other copies of iTunes that are signed in with your Apple ID.
Follow these steps to turn on purchase syncing:
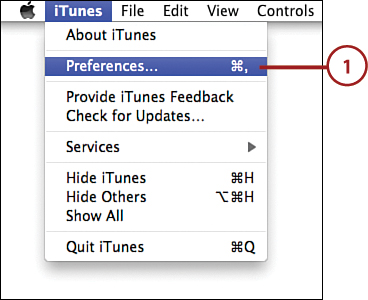
1. Open the Preferences from the iTunes menu.
2. Click the Store button at the top of the Preferences window.

3. Click the checkboxes in front of Music, Apps, and Books (or any combination of these) to automatically download any purchase made on another Mac (or even your iOS device) to your iTunes library automatically.
4. Click OK to close the iTunes Preferences.
Syncing Your Media with Your iPod or iPhone
iTunes was designed to be used with iPods, iPhones, and iPads, which makes syncing your Library between devices a cinch.
Follow these steps to transfer content from your MacBook to your iPod or iPhone:
1. Connect your iPod or your iPhone to your MacBook using the supplied USB cable. iTunes detects the device and, if previously connected, begins synchronizing it. If it has not been connected before, iTunes will prompt you to set up the device.
Note
If your device was previously synced with another Mac, you have the option to Erase and Sync or transfer purchases to your new Mac.
2. To see details about your device, select the device to view the Summary screen, which shows the name, capacity, software version, serial number, and any updates available to your device.
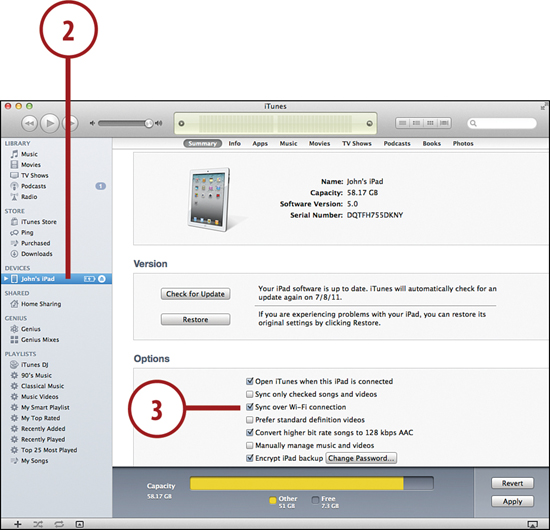
3. Choose Sync over Wi-Fi Connection to sync without your USB cable in the future!
4. To conserve space on your device, open the different Media tabs, and, on each, select which items to sync.
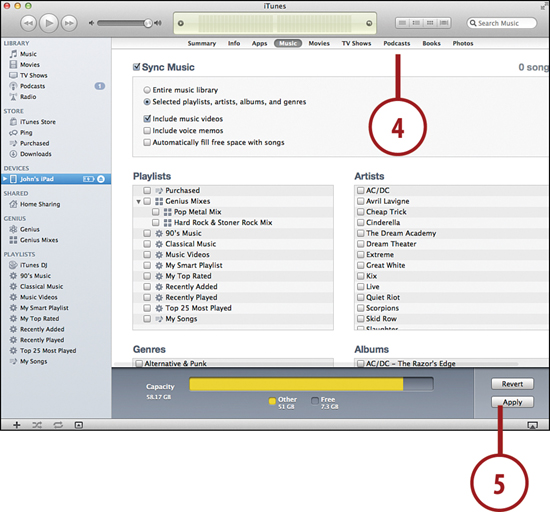
5. Click Apply to apply your selection and sync your device. The status of the sync appears at the top of the window. Do not disconnect your device until syncing is completed.
6. When the sync completes, unplug your device and cable.
Sharing Media Between Home Computers
Home Sharing allows you to browse up to five computers on your local network and import music to your own library—purchased content. In addition, it will allow you to stream media to your iOS device when it is connected to your home network.
Follow these steps to activate Home Sharing:
1. Expand the Shared section of the Source list in the iTunes window and click Home Sharing.
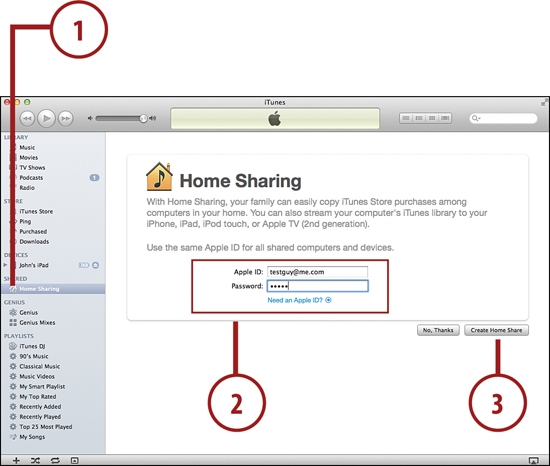
2. Sign in with your iTunes account by entering your username and password.
3. Click Create Home Share.
4. Click Done when the confirmation page appears.
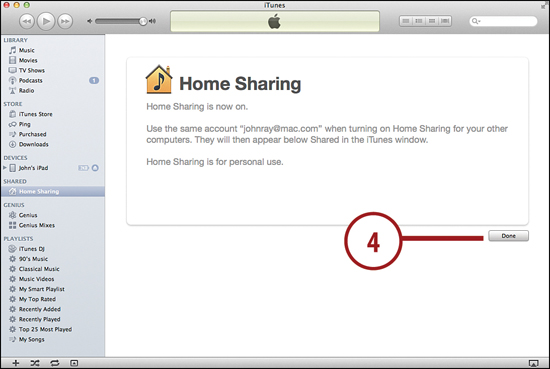
5. Repeat the previous steps for all the other computers in your home, connecting with the same iTunes account. Shared computers appear under the Shared heading in the iTunes Source list.
6. Select the shared Library you want to peruse. You can click the arrow button to the left of its name to reveal categories.
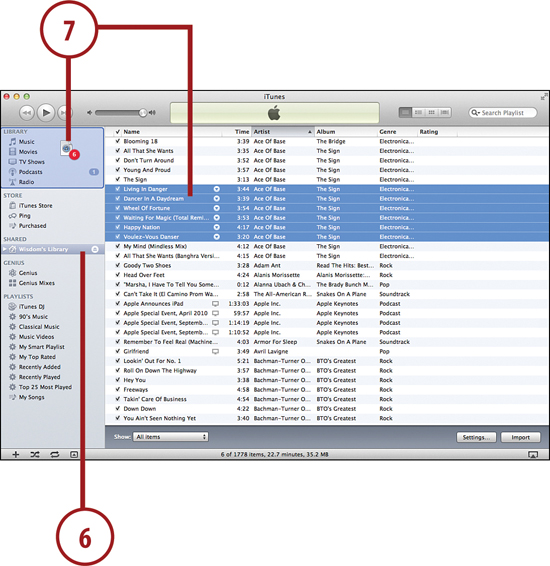
7. Select items and drag them to the Library categories on your local iTunes Library to import them.