
9. Making the Most of Your MacBook Hardware
In this chapter, you’ll learn how to make your MacBook hardware work at its best for your particular needs, including
• Balancing performance and battery efficiency
• Fine-tuning the keyboard settings
• Adjusting trackpad gestures
• Setting sound input and output
• Configuring the monitor resolution and color
• Recording audio
• Recording video and screen actions
Introduction
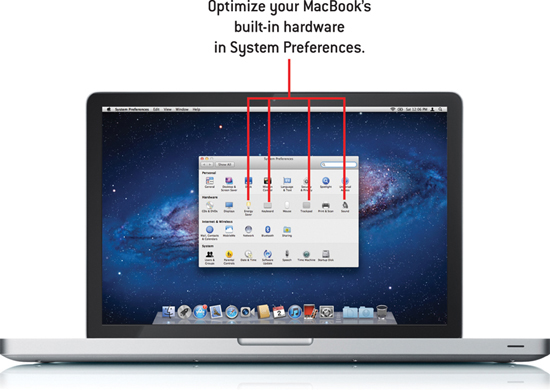
When you purchased your MacBook, you bought more than just a “computer”—you bought a power system, monitor, keyboard, trackpad, video camera, microphone, and speakers! On a desktop system, these might all be separate components, but on your MacBook, they’re part of the package.
To help personalize your MacBook, you can adjust many of the settings available for these hardware devices, such as controlling keyboard illumination, enabling trackpad gestures, or determining whether you want greater graphics capabilities at the cost of battery life. Snow Leopard even includes a few new tricks such as video, audio, and screen recording that let you take advantage of the built-in hardware without needing any additional software.
Balancing Battery Life and Performance
When your MacBook is plugged in, chances are you use it just like a desktop computer; battery life is a non-issue. When you’re on the go, however, the battery becomes the lifeblood of the system. You need to make sure that you get the performance you need from your system, when you need it. Monitoring the battery life of your computer is necessary to keep you aware of when you need a recharge, as well as whether or not there are issues occurring with your MacBook’s built-in battery. Configuring things such as how long the computer waits for input before its energy saver settings kick in and scheduling when the computer goes to sleep are ways to make sure the battery is ready when you are.
Monitoring Battery Life
Follow these steps to use and configure the Lion battery status monitor:
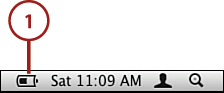
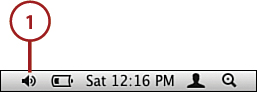
1. By default, the battery status is shown in a battery icon in the menu bar. The dark portion of the battery indicates the remaining life of the battery.
2. Click the battery icon to show the amount of time remaining until the battery power is exhausted, or, if the MacBook is plugged in, until the battery is recharged.
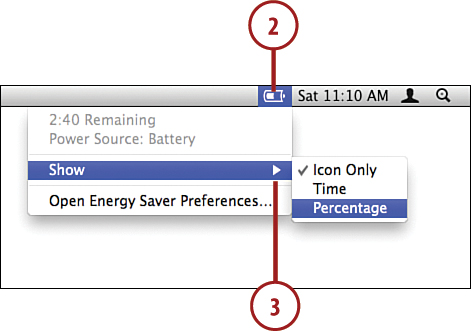
3. Use the Show menu to display more information about the battery in your menu bar, including the time remaining, or the percentage of the battery life left.
Tip
If battery status is not visible in your menu bar, it has been manually removed. You can re-add the icon to the menu bar using the Show Battery Status in the Menu Bar option in the Energy Saver System Preference panel.
Configuring Display, Computer, and Hard Disk Sleep
To help improve battery life, Lion includes the Energy Saver System Preference panel.
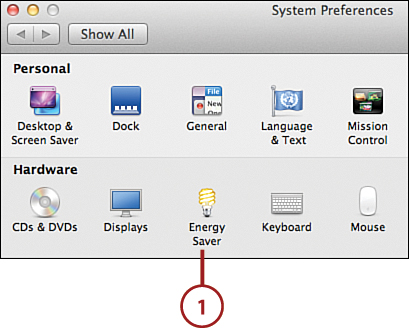
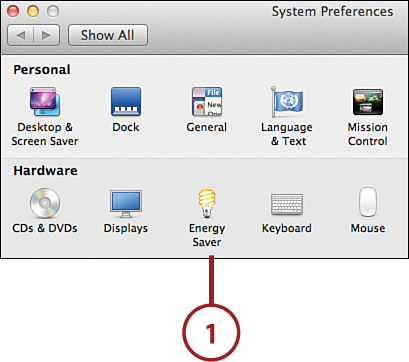
1. Open the System Preferences window and click the Energy Saver icon.

2. Click the Battery or Power Adapter buttons to choose whether you’re configuring the system for when it is running on battery power or when it is connected directly to a power adapter.
3. Drag the sliders, Computer Sleep and Display Sleep to set the period of inactivity after which your MacBook puts itself or its display into sleep mode.
4. Select Put Hard Disks to Sleep When Possible to spin down your hard drive when it’s not in use. This helps save power, but sacrifices some speed.
5. Click Slightly Dim the Display When Using This Power Source to have your display run at a lower brightness level.
6. Choose Automatically Reduce Brightness Before Display Goes to Sleep to dim the display after the system has been inactive, but before the display goes to sleep.
7. Choose Restart Automatically if the Computer Freezes to reboot your MacBook in the unlikely event it crashes.
8. Close the Energy Saver panel.
Creating a Sleep/Wake Schedule
If you have a daily schedule and want your MacBook to follow it, you can configure wake-up and sleep/shutdown times for the MacBook. Follow these steps to set a power schedule for your system.
1. Open System Preferences window and click the Energy Saver icon.
2. Click the Schedule button at the bottom of the window.
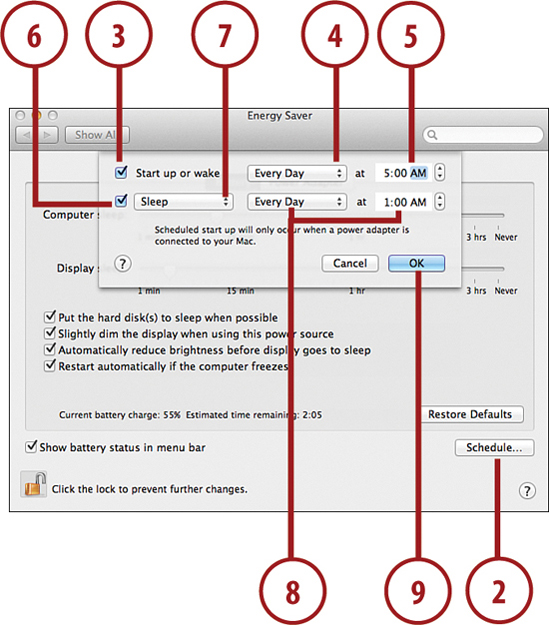
3. To have your computer start up on a schedule, click the checkbox beside Start up or Wake.
4. Use the Every Day pop-up menu to set when (weekdays, weekends, and so on) the startup should occur.
5. Set the time for the computer to start up.
6. To configure your computer to go to sleep, shutdown, or restart, click the checkbox in front of the Sleep pop-up menu.
7. Use the Sleep pop-up menu to choose whether your MacBook should sleep, shutdown, or restart.
8. Configure the day and time for the shutdown to occur, just as you did with the start options in Steps 4 and 5.
9. Click OK and then close the Energy Saver panel.
Updating Keyboard Settings
Your MacBook keyboard can be set to match your unique typing style, and it can even provide a bit of light for you if you’re an avid night-typer. Using the built-in keyboard settings, you can adjust the keyboard repeat rate, key illumination, and even set system-wide shortcuts for trackpad-free operation.
Setting Keyboard Repeat Rate
To choose how frequently the keys on your keyboard repeat, and how long it takes to start repeating, follow these simple steps:
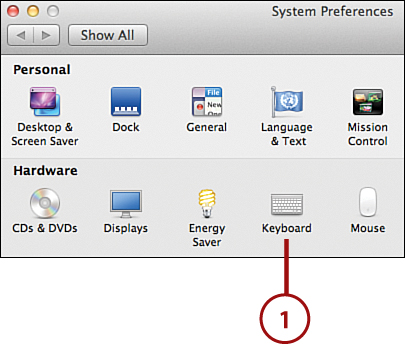
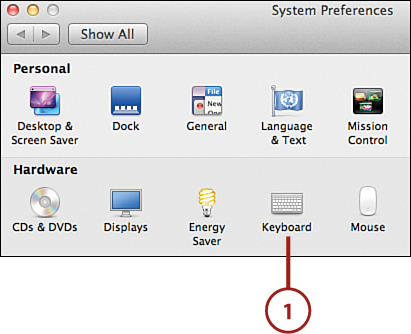
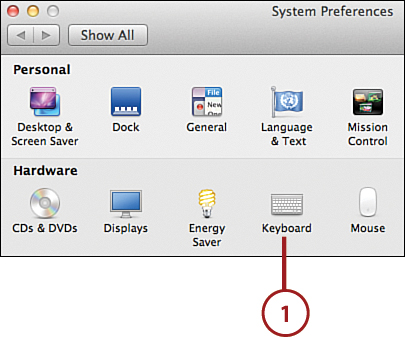
1. Open the System Preferences window and click the Keyboard icon.
2. Click the Keyboard button at the top of the panel.
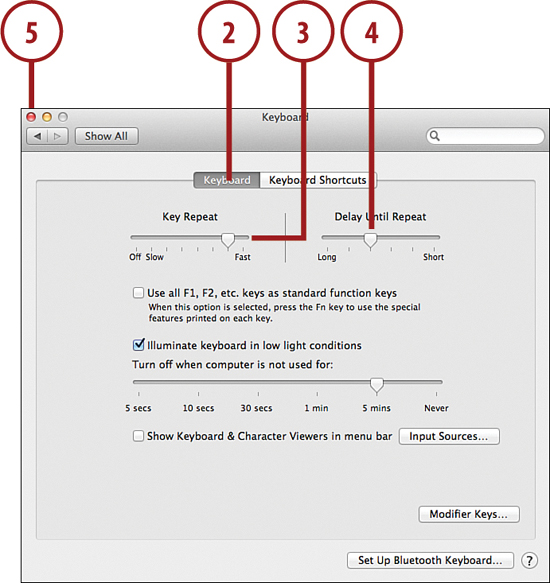
3. Use the Key Repeat Rate slider to set how quickly letters appear when you hold down a key on your keyboard.
4. Move the Delay Until Repeat slider to choose how long you must hold down a key before it starts repeating. Move the slider all the way to the left to turn off repeating.
5. Close the Keyboard panel.
Changing Keyboard Illumination
When it gets dark, your keyboard comes to life, lighting the way for your typing. To activate this function and control how long the lighting stays on, follow these steps:
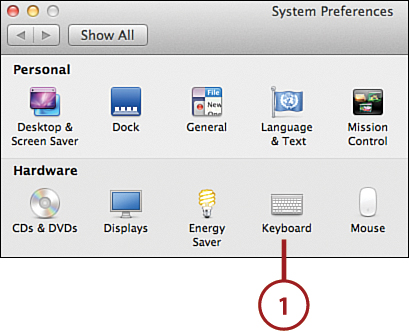
1. Open the System Preferences window and click the Keyboard icon. (Make sure the Keyboard button is chosen in the panel that opens.)
2. Check the Illuminate Keyboard in Low Light Conditions to automatically turn on the keyboard backlight when your environment gets dark.
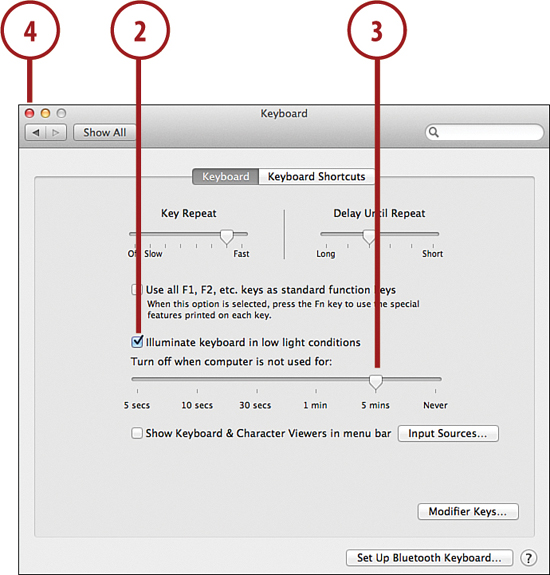
3. Drag the Turn Off slider to choose how long the keyboard remains lit when your computer is idle.
4. Close the Keyboard panel.
Creating Keyboard Shortcuts
There are times you might find yourself working with your MacBook and thinking, “Geez, I wish I could just push a key for that rather than having to mouse around.” Using keyboard shortcuts, you can create key commands for almost anything.
Setting Shortcuts for Existing Lion Actions
To set the shortcut for an existing system feature, follow these steps:
1. Open the System Preferences window and click the Keyboard icon.
2. Click the Keyboard Shortcuts button.
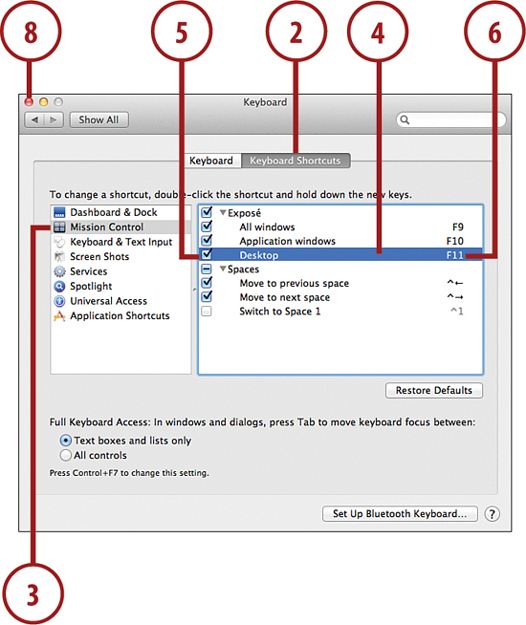
3. Choose one of the Lion system features from the left pane.
4. Scroll through the list of available actions in the right pane.
5. Click the checkbox in front of an action to enable it.
6. Double-click to the far right of an action name to edit its shortcut field.
7. Press the keys that you want to assign to the shortcut.
8. Close the Keyboard panel after making all of your changes.
Setting Shortcuts for Arbitrary Applications
To configure a shortcut that works with an arbitrary application, not a built-in feature, do the following:
1. Open the System Preferences window and click the Keyboard icon.
2. Click the Keyboard Shortcuts button.
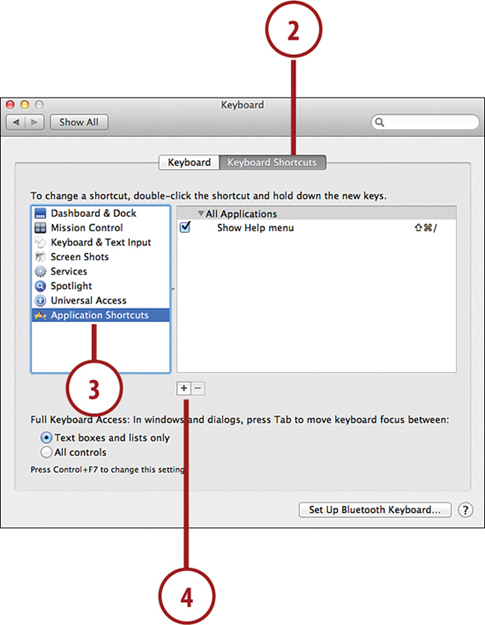
3. Click the Application Shortcuts entry in the list on the left side of the window.
4. Click the + button at the bottom of the shortcut list.
5. In the dialog box that opens, use the Application pop-up menu to choose an application to which you want to assign a shortcut.
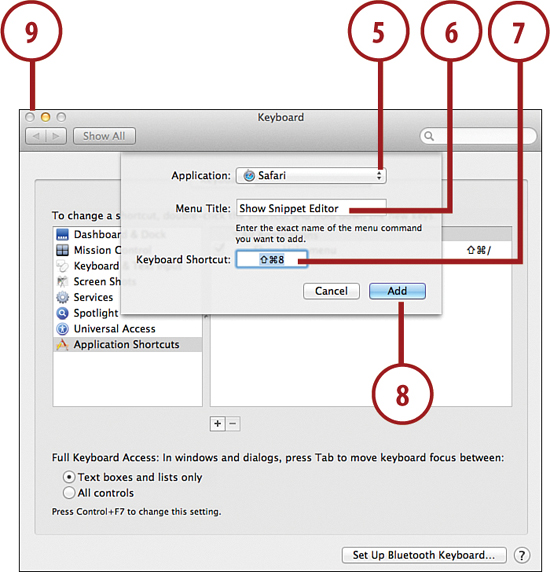
6. Enter into the Menu Title field the exact wording of the menu item that you want the keyboard shortcut to invoke.
7. Click into the Keyboard Shortcut field and then press the keys you want to set as the shortcut.
8. Click Add when you’re satisfied with your settings.
9. Close the Keyboard panel.
Changing Trackpad Options
Your MacBook trackpad gives you fingertip control for pointing, clicking, dragging, scrolling, and even drawing. Using the Trackpad preferences, you can fine-tune how precise these actions are, and even set up different multi-finger gestures as shortcuts in popular applications.
Setting the Trackpad Speed
To choose how quickly your trackpad follows your input, follow these steps:
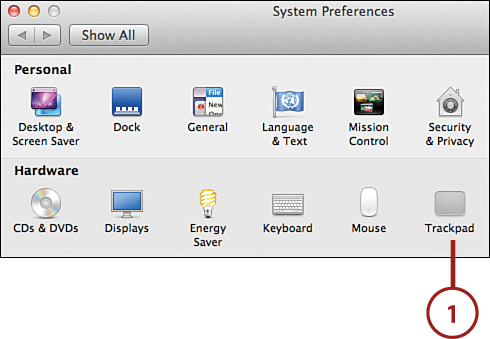
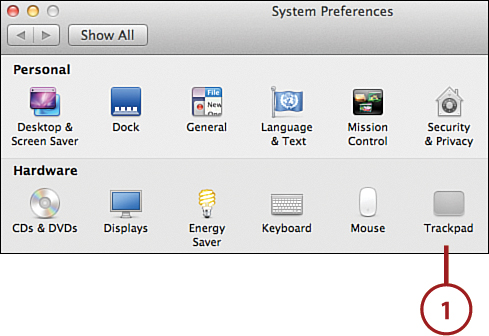
1. Open the System Preferences window and click the Trackpad icon.
2. Click the Point & Click button at the top of the window.
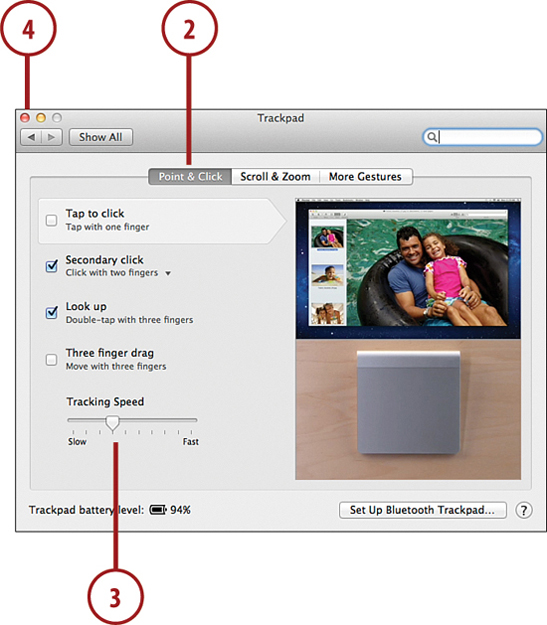
3. Choose how quickly the cursor moves by dragging the Tracking Speed slider.
4. Close the Trackpad panel.
Controlling Gestures
If you have a MacBook that supports gestures (using multiple fingers on the trackpad as shortcuts to commands or actions) as most of the recent models do, you can take advantage of a wide range of different two-, three-, and even four-finger motions to control your applications.
1. Open the System Preferences window and click the Trackpad icon.
2. Use the Point & Click settings to configure click and drag options.

3. Use the Scroll & Zoom settings section to control scrolling, rotation, and pinching gestures.
4. The More Gestures settings control advanced features, such as whether swiping to the left or right moves forward or backward in Safari and how Mission Control is activated.
5. Many settings contain a dropdown menu to fine-tune the gesture.
6. As you mouse over a particular setting, a video demonstrating the action appears in the right side of the window.
7. Close the Trackpad panel.
Adjusting the LCD Display
Your MacBook’s LCD display is your window into your computer, so it’s important that you configure your display to best suit your needs. For detailed CAD or drawing, you might want to use the full resolution. Games or late-night typing might call for a larger (lower resolution) option. Using Snow Leopard’s Display settings, you can control the image so that it is right for the task at hand.
Setting Display Resolution
The display resolution is the number of pixels that are viewable on the screen at any time. The smallest MacBook display is capable of 1280×800 pixels—higher than most broadcast HDTV! To control the screen resolution on your system, follow these steps:
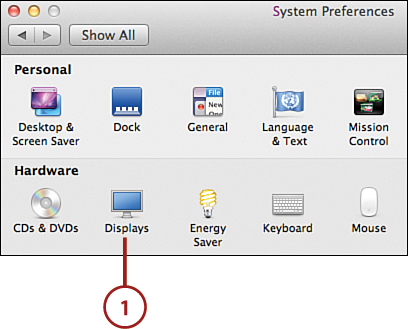
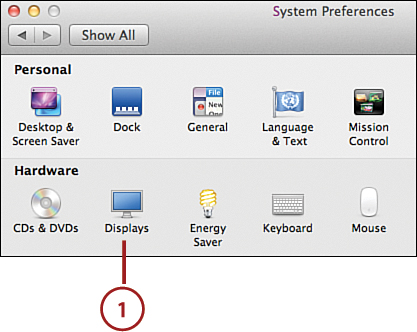
1. Open the System Preferences window and click the Displays icon.
2. Click the Display button at the top of the panel.
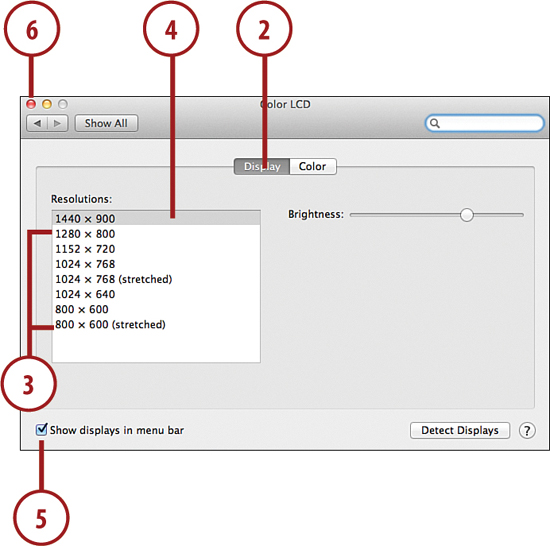
3. Scroll through the list of available resolutions (smaller numbers result in a larger onscreen image).
4. Click a resolution to switch immediately.
5. Click Show Displays in Menu Bar to add your frequently used resolutions to a monitor menu bar item.
6. Close the Display panel.
Controlling Display Brightness
Display brightness is a personal setting; some individuals like muted, dimmed displays and others like colors offered by full-brightness settings. To set the brightness of your display, follow these steps:
1. Open the System Preferences window and click the Displays icon.
2. Click the Display button at the top of the panel.
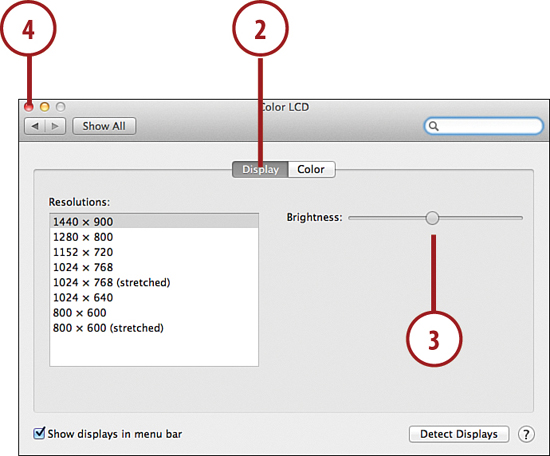
3. Drag the Brightness slider left or right to dim or brighten the display.
4. Close the Display panel.
Choosing a Color Profile
Color profiles help keep colors consistent between computers with different monitors. By choosing a color profile that is calibrated for your display, you’re ensured that colors you see on one machine match a similarly calibrated display on another machine. To choose a calibration profile, follow these steps:
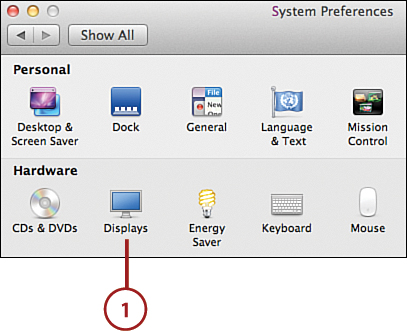
1. Open the System Preferences window and click the Displays icon.

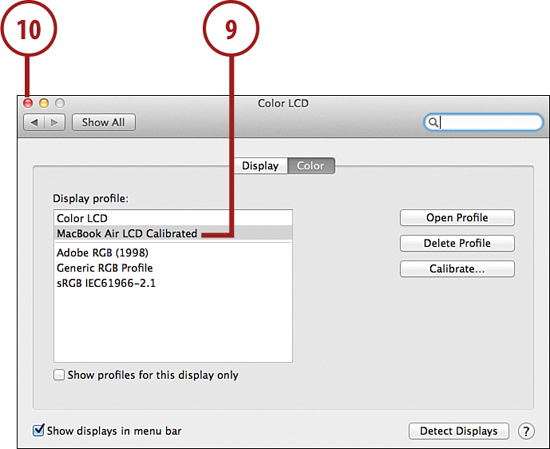
2. Click the Color button at the top of the panel.
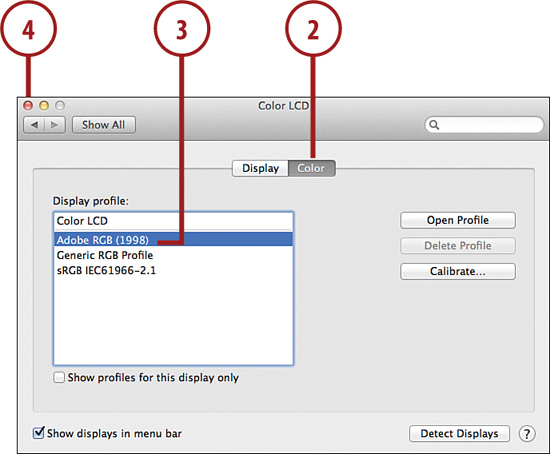
3. Click the preferred profile in the Display profile list. The changes are immediately applied.
4. Close the System Preferences.
Calibrating the LCD Display
If you’d like to calibrate your display manually, Lion provides a wizard-like interface for choosing the best display settings for your MacBook.
1. Open the Displays System Preferences panel.
2. Click the Color button at the top of the panel.
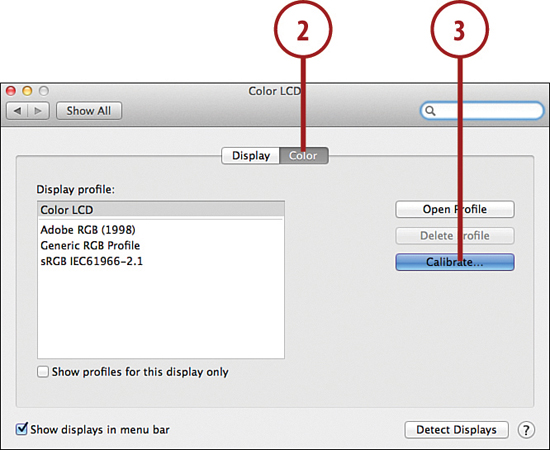
3. Click Calibrate.
4. The Display Calibrator Assistant starts.
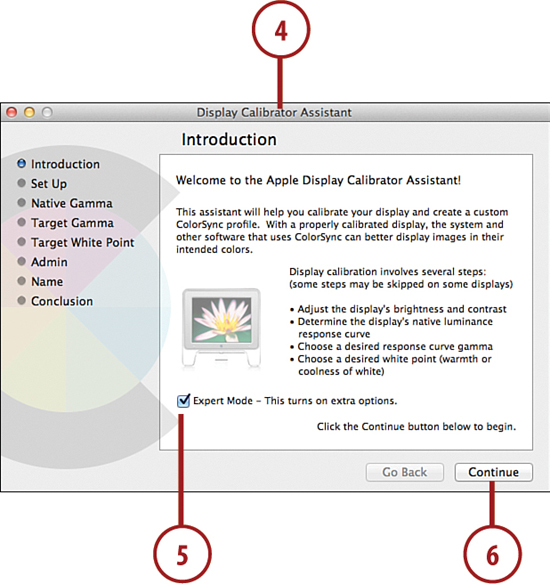
5. Click the Expert Mode checkbox to get the best results.
6. Click Continue to proceed through the assistant.
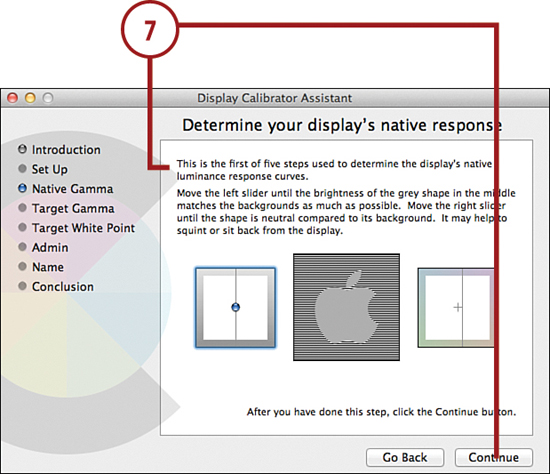
7. Follow the onscreen instructions to test the output of your display and click Continue to move on to the next screen.
8. When finished, enter a name for the new calibrated profile and click Continue.
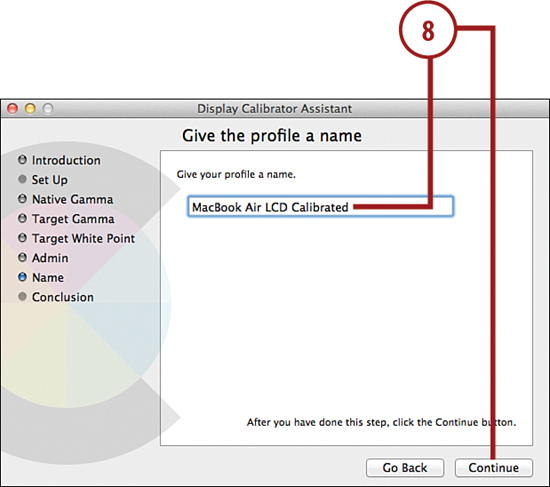
9. The new profile is added to the color profile list.
10. Close the Display panel.
Setting Sound Input and Output
Sound has never been an afterthought on Macintosh systems, and your MacBook is no different. Your system is equipped with a stereo sound system, headphone jack, microphone (shared with the headphone jack in the MacBook), and even digital audio out. You can configure these input and output options to reflect your listening needs.
Setting the Output Volume
Volume, as you might expect, is one control that is needed system-wide. To control the output volume of your system, follow these steps:
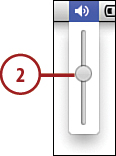
1. Click the speaker icon in the menu bar.
2. Drag the slider up to increase the volume, or slide it down to decrease the volume.
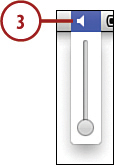
3. Drag the slider all the way to the bottom to mute all output sounds.
Configuring Alert Sounds
Your MacBook generates alert sounds when it needs to get your attention. To configure the sounds, and how loud they play, follow these steps:
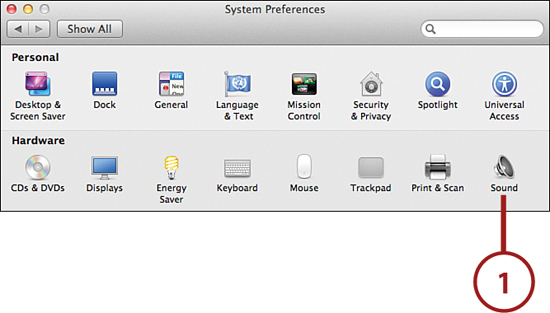
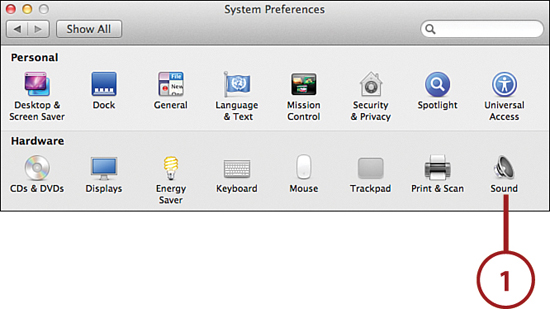
1. Open the System Preferences window and click the Sound icon.

2. Click the Sound Effects button at the top of the panel.
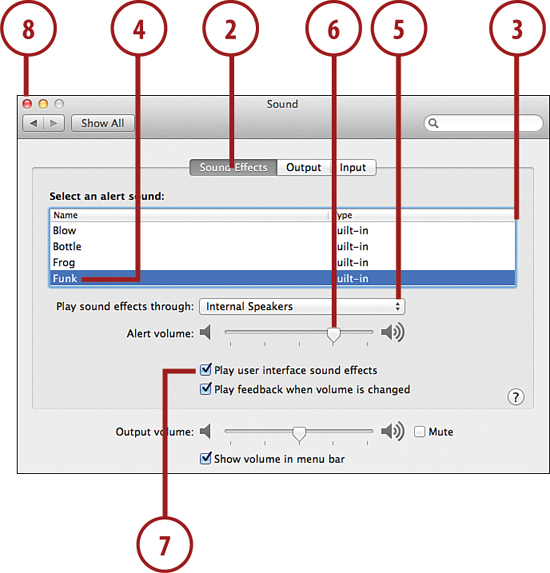
3. Scroll through the alert sound list to see all of the available alert sounds.
4. Click a sound to select it as your alert sound and hear a preview.
5. Choose which sound output device (usually your internal speakers) should play the alert sound.
6. Use the alert volume slider to adjust the volume of alerts that your system plays. This is independent of the system output volume.
7. Check Play User Interface Sound Effects to play sounds when special events occur—such as emptying the trash.
8. Close the Sound panel when finished configuring the sound effects.
Choosing and Adjusting an Output Device
To configure your sound output options with a bit more flexibility than just changing the volume, you need to adjust the output settings for the device that is being used for playback—typically your speaker.
1. Open the System Preferences window and click the Sound icon.
2. Click the Output button at the top of the panel.
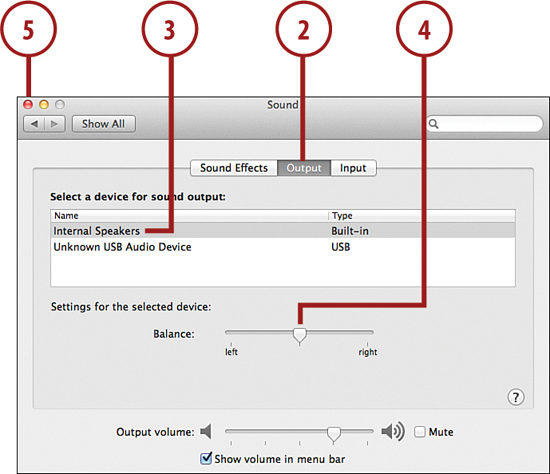
3. Choose the output device to configure (probably your speakers).
4. Use the balance setting to adjust audio to the left or right speaker.
5. Close the Sound panel when finished.
Picking and Calibrating an Input Device
In addition to sound output, you can also input sound on your MacBook using either the built-in microphone or the standard line-in jack on the side. To configure your input device, follow these steps:
1. Open the System Preferences window and click the Sound icon.
2. Click the Input button at the top of the panel.
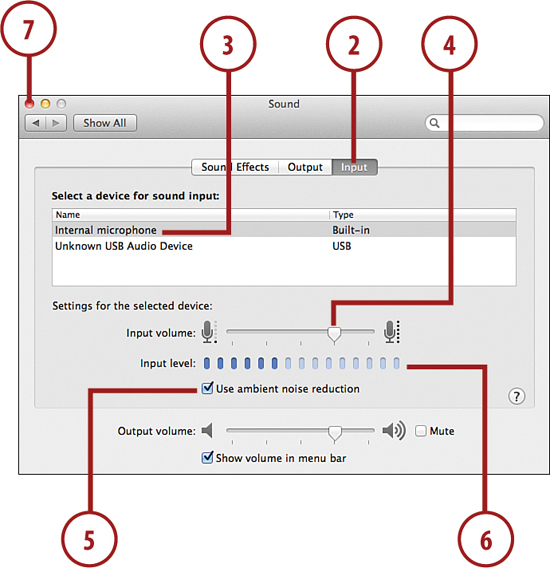
3. Choose the device to use for input.
4. Use the input volume slider to adjust the gain on the microphone—this is how much amplification is applied to the signal.
5. Click the Use Ambient Noise Reduction checkbox if you’re working in an environment with background noise.
6. Speak at the level you want your computer to record. The Input Level graph should register near the middle when you use a normal speaking level. If it doesn’t, readjust the input volume slider.
7. Close the Sound panel.
Recording Audio, Video, and Screen Actions
It has always been possible to record audio and video “out of the box” with a new Macintosh, but not without installing iLife or jumping through a bunch of seemingly unnecessary hoops. With Snow Leopard, Apple has made it easy to take advantage of your MacBook’s built-in capabilities to record audio, video, and even screen actions.
Recording Audio
To create and save a new audio recording, first make sure that you’ve configured your sound input settings correctly (including ambient noise reduction, if needed) then follow these steps:
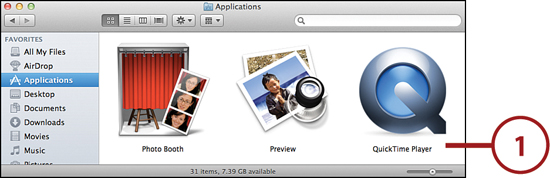
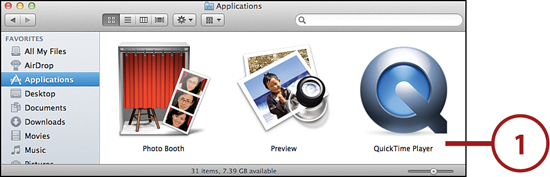
1. Open the QuickTime Player application (find it in the Applications folder if the icon isn’t on your Dock).
2. Choose File, New Audio Recording.

3. Use the drop-down menu on the right of the Audio Recording window to choose an input source, recording quality, and destination.
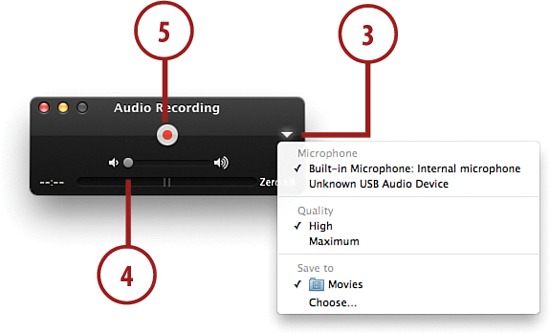
4. If you want to hear audio through the speakers as it is recorded, drag the volume slider to the right.
5. Click the Record button to begin recording.
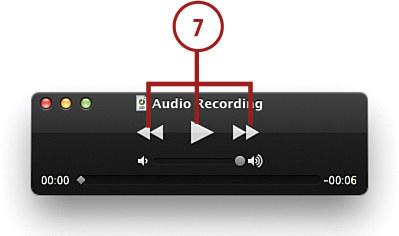
6. Click the Stop button to stop recording. The sound is saved as Audio Recording.mov in your Movies folder by default.
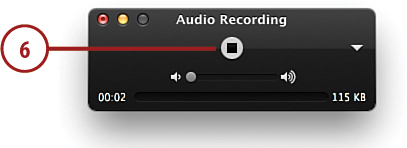
7. Use the playback controls to listen to your creation.
Recording FaceTime Camera Video
Although FaceTime allows you to see video of yourself on your computer, it doesn’t give you the option to record. If you want to take a recording of what the built-in FaceTime camera sees, follow these steps:
1. Open the QuickTime Player application (find it in the Applications folder if the icon isn’t on your Dock).
2. Choose File, New Movie Recording.

3. Use the drop-down menu on the right side of the recording controls to choose a camera (if you have more than one), input microphone, recording quality, and destination.
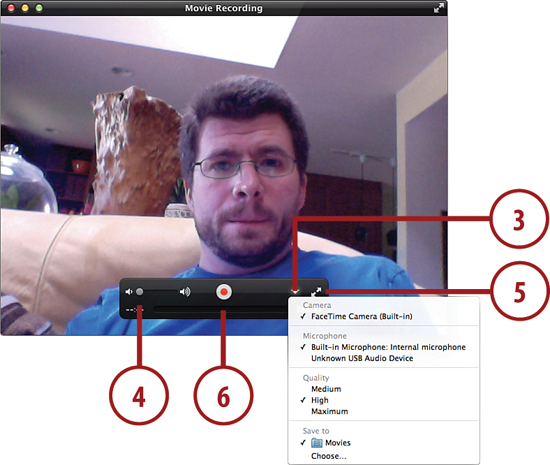
4. If you want to hear audio through the speakers as it is recorded, drag the volume slider to the right.
5. Click the double arrows to expand the video to full screen.
6. Click the Record button to begin recording.
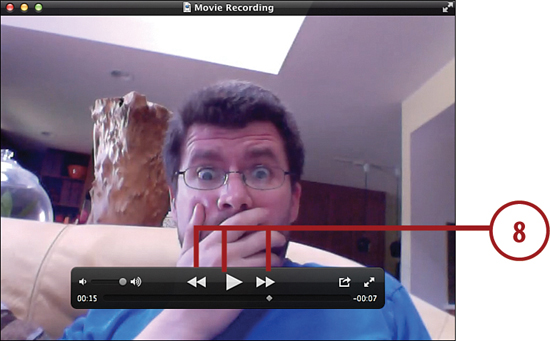
7. Click the Stop button to stop recording. The movie, by default, is saved as Movie Recording.mov in your Movies folder.

8. Use the playback controls to view the video you’ve recorded.
Recording Screen Actions
If you’ve ever been in a situation where you tried to explain to someone how to do something on a computer, chances are you’ve gotten a bit frustrated. By using Snow Leopard’s screen recording capabilities, however, you can quickly create a movie that shows all your onscreen actions and then send that movie to your confused acquaintance to provide a better-than-words tutorial.
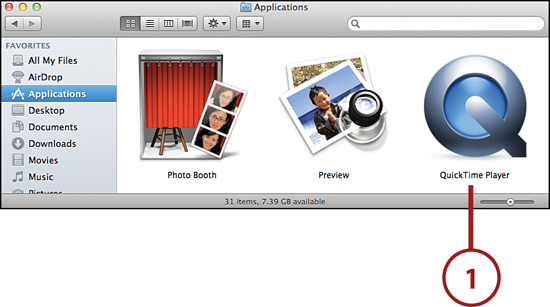
1. Open the QuickTime Player application (find it in the Applications folder if the icon isn’t on your Dock).
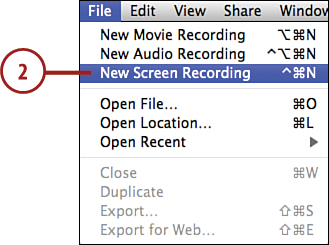
2. Choose File, New Screen Recording.
3. Use the drop-down menu on the right side of the recording controls to choose an input microphone, recording quality, whether or not to show mouse clicks, and, finally destination.
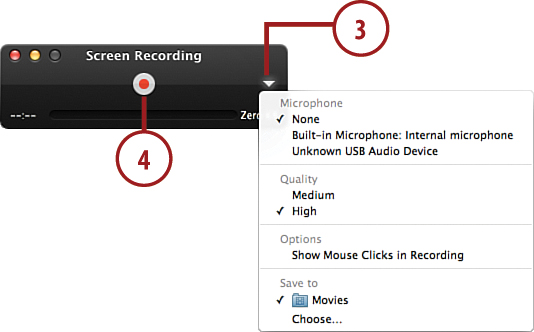
4. Click the Record button to prepare to record actions.
5. Click anywhere on your screen to record the whole screen, or click and drag to define a rectangular area to record.
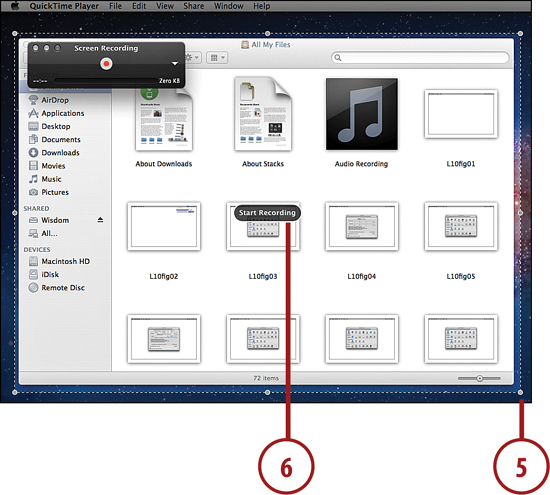
6. If you’ve defined a recording area, click Start Recording, then perform the actions that you want to record.
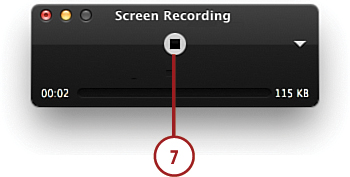
7. Click the Stop button in the recording controls to stop. The movie, by default, is saved as Screen Recording.mov in your Movies folder.
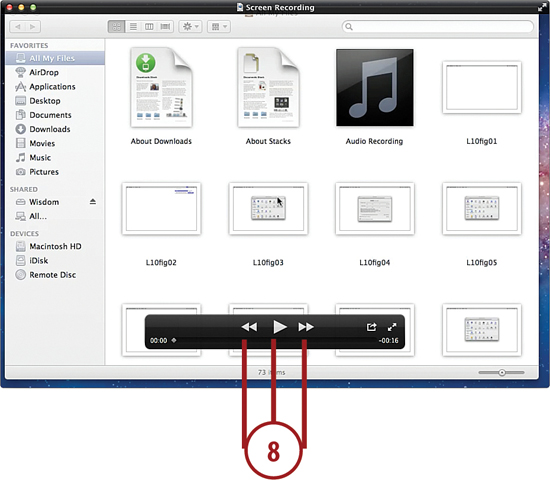
8. Use the playback controls to view the video you’ve recorded.
Transferring Your Recordings to iTunes, Email, MobileMe, Facebook, Vimeo, YouTube, and More!
In addition to being able to record audio and movies using your MacBook hardware, Lion makes it simple to transfer your movies to iTunes for syncing with your iPod, send them in email, or to upload them to a variety of online services.
Transferring Movies to iTunes
To encode your movie so that it is appropriate for transfer to iTunes, and to add it to your iTunes library, follow these steps:
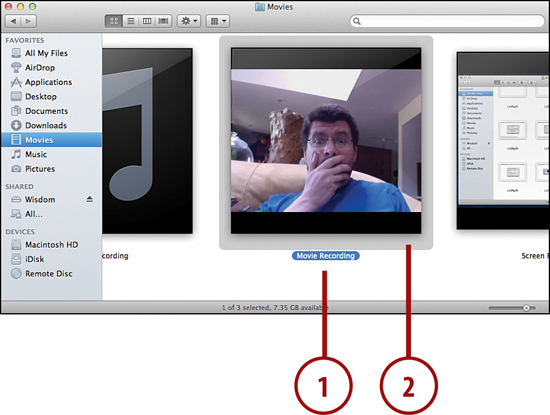
1. Find the movie file you want to use in iTunes.
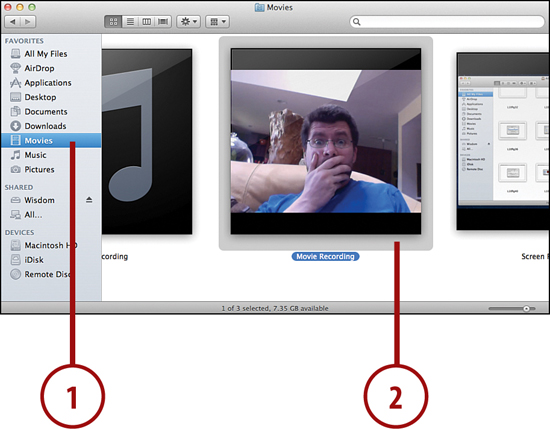
2. Double-click to open it in QuickTime Player.
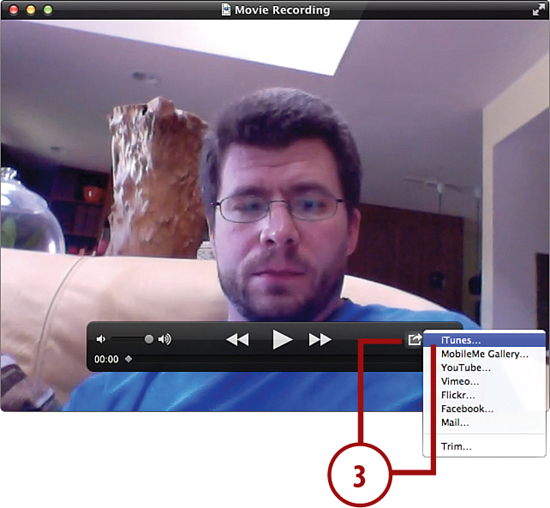
3. Click the Send To icon and choose iTunes from the popup menu that appears.
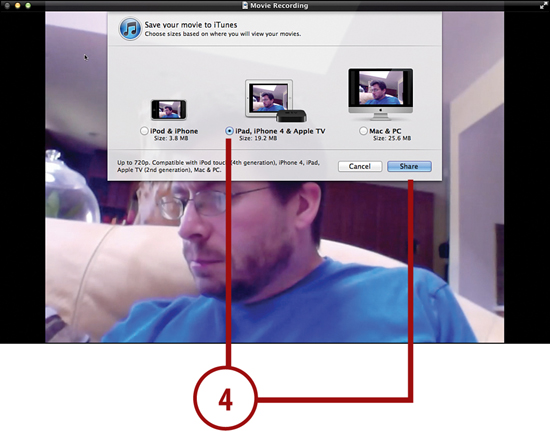
4. Pick which device you plan to use the movie on. Click the Share button. Be aware that not all choices will always be available.
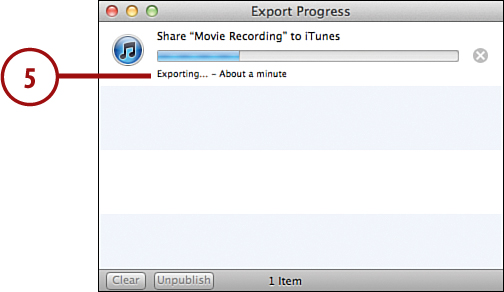
5. The Movie Export window appears and displays the status of the encoding process.
6. When finished, close QuickTime Player. Your movie is available in iTunes.
Transferring Movies to Email
If you’d like to share your video creation with a few friends, or perhaps share a screen recording with a colleague, you can easily do so through email.
1. Find the movie file you want to email.
2. Double-click to open it in QuickTime Player.
3. Click the Send To icon and choose Mail from the popup menu that appears.

4. Choose whether to send the movie in its full, actual size, or a more compressed 480p format.

5. Click Share.
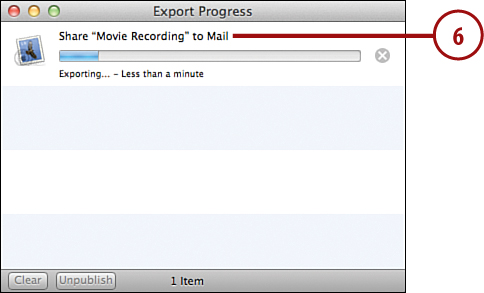
6. The Movie Export window appears and displays the status of the encoding process.
7. When finished, Mail opens and the movie is added as an attachment. Close QuickTime and address the email as you wish!
Uploading Movies to an Online Service
Using Lion, you can now share your compositions with the world via YouTube, Facebook, Vimeo, Flikr, and MobileMe without even needing to touch a web browser. YouTube is the most popular destination for videos on the Internet, so we’ll use that as our example. To upload a video to the online service of your choice, follow these steps:
1. Locate the movie file you want to upload.

2. Double-click to open it in QuickTime Player.
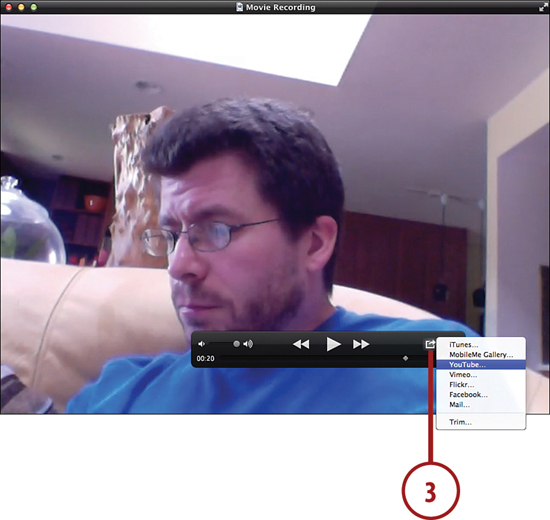
3. Click the Send To icon to display destinations for the movie and choose the online destination (in this case, YouTube) from the pop-up menu.
4. Enter your username and password when prompted.
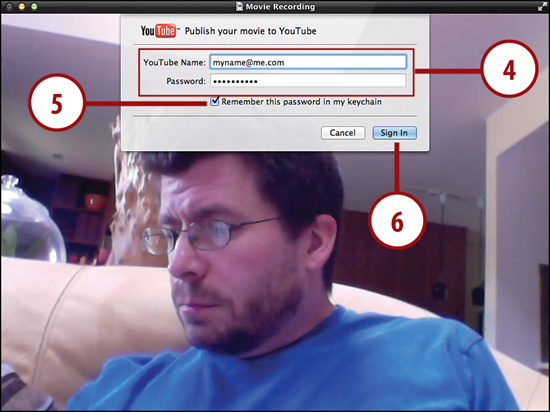
5. Choose Remember This Password in My Keychain to streamline the process in the future.
6. Click Sign In to log into the YouTube service.
7. Set a category for the uploaded video file.
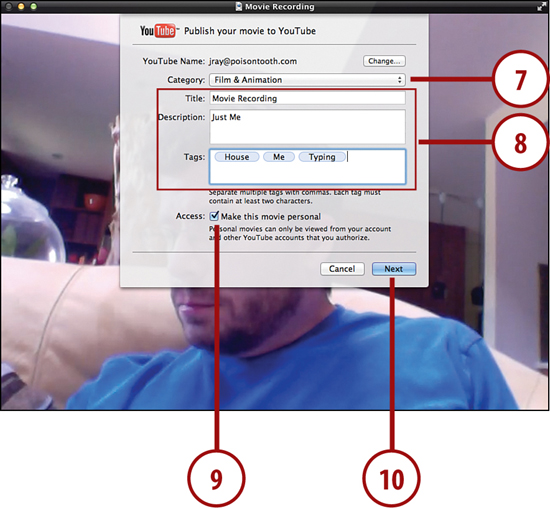
8. Enter a title, description, and a set of keywords (called Tags) to describe the video.
9. Use the Access setting to set the video as Personal, if desired. This limits viewing of the video to individuals that you share it with via the YouTube website. Please note that these settings may vary between the various online services supported in Lion.
10. Click Next.
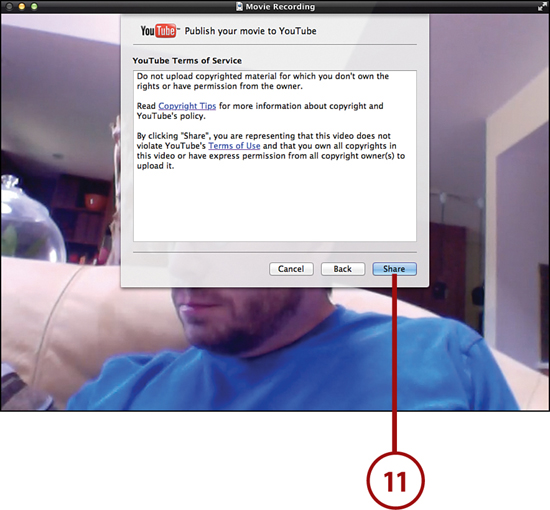
11. Review the YouTube Terms of Service, then click Share
12. The Movie Export window appears and displays the status of the encoding process.
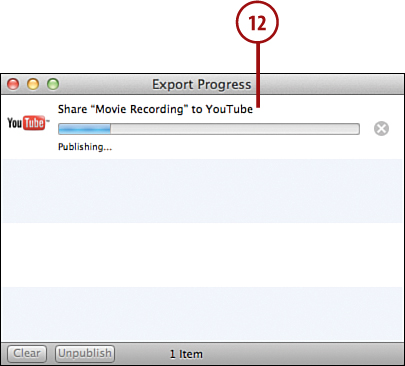
13. When finished, close QuickTime Player. Your movie is available on YouTube!