1. What Is Photos for Mac?
This chapter covers all the requirements you need to run Photos for Mac and use it to its fullest. It also covers the Photos interface, so you can easily return to this chapter when you need a refresher on where things are in Photos.
![]() Getting to know Photos
Getting to know Photos
![]() Getting the current version of Photos
Getting the current version of Photos
![]() Understanding the Photos interface
Understanding the Photos interface
Photos for Mac is different things to different people—it’s a versatile app. However, versatility does not necessarily mean complicated. After you learn Photos, you’ll see just how simple Apple has made it to use. This chapter first describes the three primary things Photos enables you to do: organize, edit, and share your photos. After that, you find out how to keep Photos up to date and take a quick walkthrough of its main interface.
Navigating and Organizing Your Photos

In the days before the digital camera, you could spend a lot time and money taking and developing photographs. But thanks to camera manufacturers going digital, we can now take a virtually limitless (and free) number of photos. Digital camera manufacturers might have freed us from the hassles associated with old, physical development techniques, but the one thing they didn’t do is give us a good way to sort through and organize our digitized pics. Thankfully, Apple has designed Photos for Mac for just that purpose.
Apple realizes that although digital cameras are fun and powerful tools (indeed, it includes one on every iPhone), camera manufacturers aren’t as good at designing software as they are at creating phenomenal photography equipment, so Apple designed Photos to work with any camera on the market. The app lets you easily plug your camera into your Mac and upload your photos in a snap. What’s more, Photos automatically groups your photos by Moments, Collections, and Years, so you can easily browse by date and location. (No more piling all your photos into one big folder or library!) Furthermore, Photos can automatically separate your photos into a specific album called Faces, which lets you navigate through your pics by the people in them. I’ll talk all about Moments, Collections, Years, and Faces later in the book.
Apple also understands that you want control over your photo organization and navigation. That’s why you can easily create albums, folders of albums, and even smart albums, which are albums that have rules applied, such as “Show me all the photos I’ve edited.” When it’s time to find something in your well-organized system, Apple lets you easily search through your photo libraries using Photos’ powerful Search and Tagging features.
Editing Your Photos
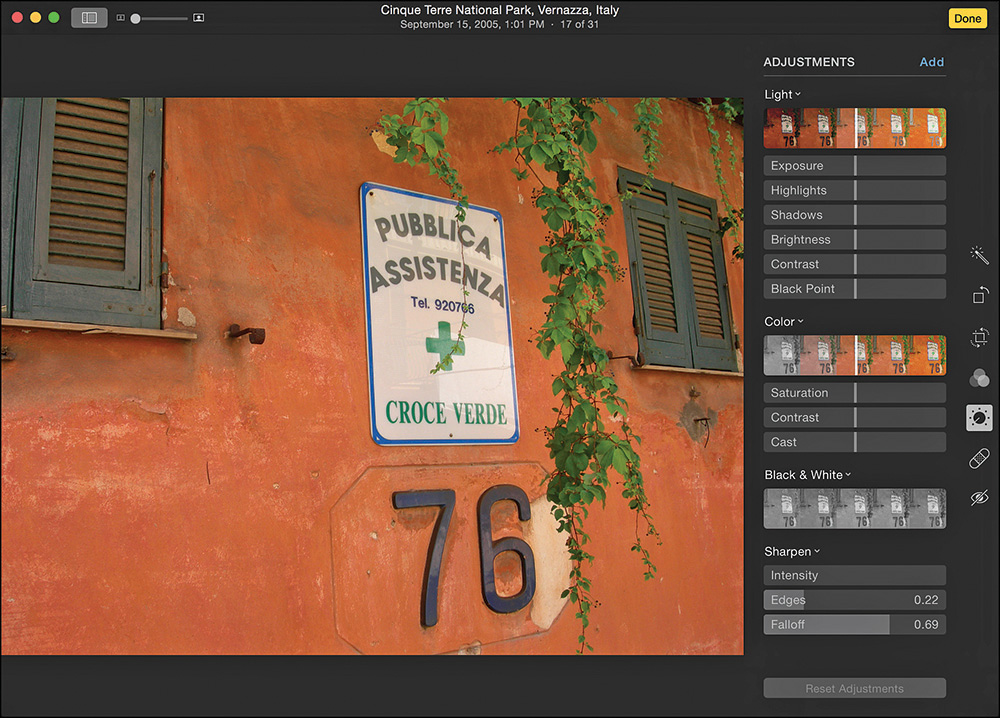
Photos is more than just an organization tool. It’s also a powerful photo editor. Using the built-in editing tools, Photos can rotate and crop your photos, eliminate red-eye and blemishes with the click of a button, and even straighten crooked pictures.
Photos also lets you apply several effects to your photographs, such as lightening or darkening a photo, making it warmer or cooler, and adding sepia tones and other filters to it. In addition, Photos gives you access to complete histogram tools so you can tweak your photos like a pro.
The best (and least known) feature of Photos’ editing capabilities, however, is that it uses a nondestructive editor, which means that when you edit a photo—no matter how many times you adjust a photo’s color, crop it, or apply effects—you can always return to the original photo with a click of a button. Photos accomplishes this by creating and saving an original copy of your imported photograph every time you begin to edit it. It doesn’t matter if you’ve edited a photo 100 times over a period of years. Simply click Revert to Original and the photograph will look as it did the day you took it.
Sharing Your Photos
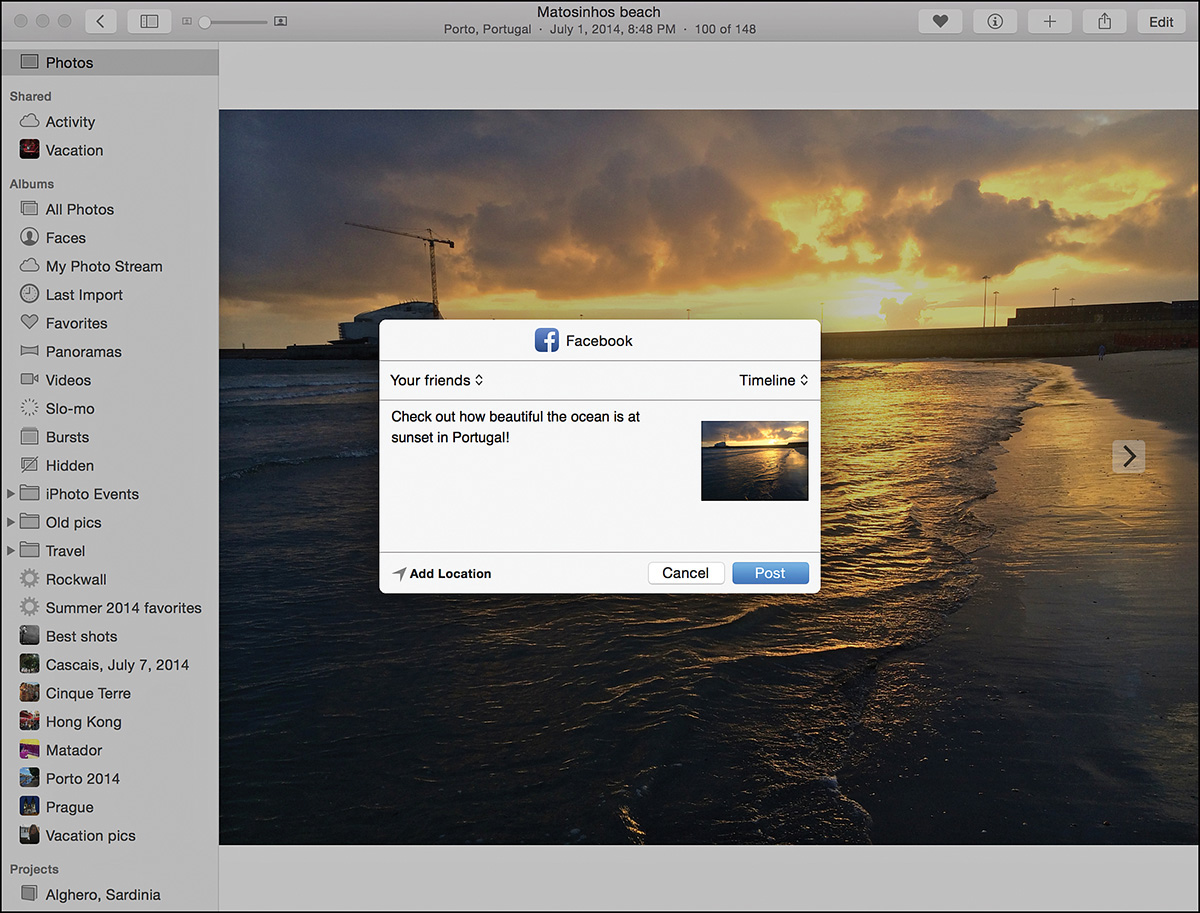
You probably don’t take photographs solely for your own enjoyment. You want to share them with your friends and family. Photos enables you to share photos through many old-school ways, such as printing a photograph on your printer or emailing a photo to a friend. But you can also share your photos across the web via Photos’ tight social networking integration with Facebook, Flickr, Twitter, and other services. Photos also enables you to easily design slideshows, calendars, books, and cards right in the app. You can then purchase these items within Photos and give them to your friends and family as keepsakes.
Getting and Maintaining Photos for Mac
Before you can use Photos, you first need it on your Mac. Thankfully Photos is now a built-in part of the OS X 10.10 Yosemite operating system. If you’ve bought a new Mac recently, you should have the latest version of Photos on it. To make sure you’re running the version of Yosemite that includes Photos on your Mac, go to your Apple menu in the Finder and click About This Mac. Check the version number in the window that opens. Photos is included in Yosemite version 10.10.3 and higher.
If you don’t have OS X Yosemite version 10.10.3 or higher, you can run Software Update on your Mac to upgrade to the latest version of Yosemite (if you’re already running an earlier version of Yosemite), or you can download the latest version of Yosemite for free through the Mac App Store. Simply launch the Mac App Store from the Applications folder on your Mac, search for “Yosemite,” and then click the Get button.
System Requirements
If Photos is already on your Mac, your computer definitely meets the system requirements. However, if you need to download OS X Yosemite to get Photos, make sure your Mac is one of the following models:
• MacBook (Late 2008 Aluminum, Early 2009, or newer)
• MacBook Pro (Mid/Late 2007 or newer)
• MacBook Air (Late 2008 or newer)
• Mac mini (Early 2009 or newer)
• Mac Pro (Early 2008 or newer)
It’s also a good idea to have plenty of free hard-drive space and extra RAM so the Photos app runs fluidly and you have lots of room to store your photos. You need a minimum of 5GB of free hard-drive space and 2GB of RAM, but more is better.
Recommended Extras
The items listed in this section are not necessary to use Photos, but you’ll find having them will enable you to really take advantage of all the app has to offer:
• An Internet connection
• A digital camera (including an iPhone)
• An e-mail account
• An iCloud account
• A Facebook account
• A Flickr account
• A Twitter account
Keep Photos Up-to-Date
Apple frequently updates applications such as Photos. These updates typically provide bug fixes or tweaks, but sometimes updates include new functionality. To make sure you are using the latest version of Photos, do the following:
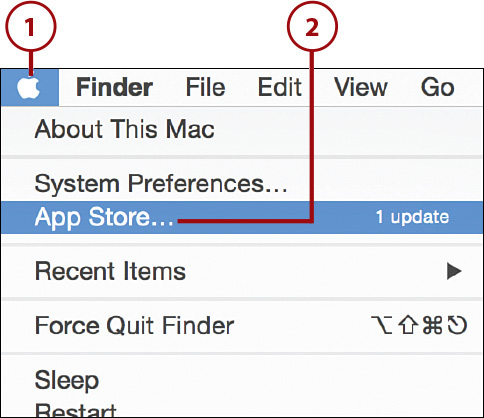
1. Click the Apple menu in the upper-right corner of your screen.
2. Click App Store to open the Mac App Store app.
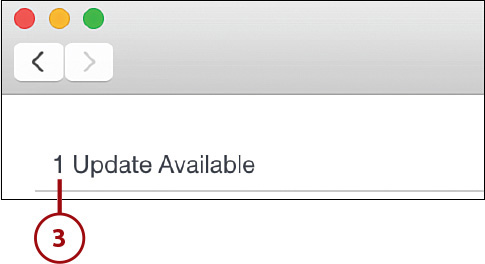
3. Click the Updates tab in the Mac App Store to check for any updates to OS X or any apps on your computer. If it finds any updates, it will list them.
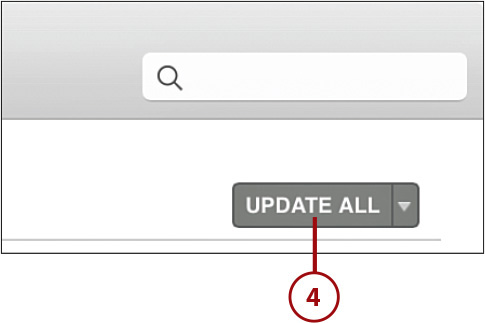
4. Click the Update All button to install the new updates. Any time there is an OS X update, you’ll have the latest version of Photos for Mac after the update is installed.
How Do I Determine the Version?
To check which version of Photos you have, open Photos and select Photos, About Photos. A window opens and you see the version and build number for Photos. This number changes from time to time as you install updates to OS X. The version of Photos talked about in this book is 1.0 and higher.
Launching Photos
Unless you have removed it, Photos’ icon always appears in the Dock at the bottom of your screen. If for some reason the Photos icon is not in the Dock, navigate to your Mac HD icon on your desktop, and then go to the Applications folder. You’ll find Photos there.
Click the Photos icon once in the Dock or via Launchpad to open it; double-click the icon if you are launching Photos from within the Applications folder.
The Photos Interface: A Tale of Two Layouts
The interesting thing about Photos for Mac is that it actually has two different layout options, so you can choose the interface that’s right for you. By default, the first time you launch Photos it opens in the “simplified” layout. This layout has a single large window with four tabs (Photos, Shared, Albums, and Projects) running across the top. This interface might be appealing for its simplicity, but after you’ve used Photos for Mac for longer than 10 minutes you’ll find the alternative interface is much more practical from a workflow standpoint.

Photos’ simplified layout
The alternative interface is the “expanded” interface. This expanded interface removes the four tabs from the top of the Photos windows and adds a sidebar running along the left side of the app. In the sidebar are sections for Photos, Shared, Albums, and Projects, but every individual album, shared library, and project are also listed there. The expanded layout makes it much easier to drag and drop photos from one album to the next and get a complete overview of all the albums, shared libraries, and projects that make up your Photos library.
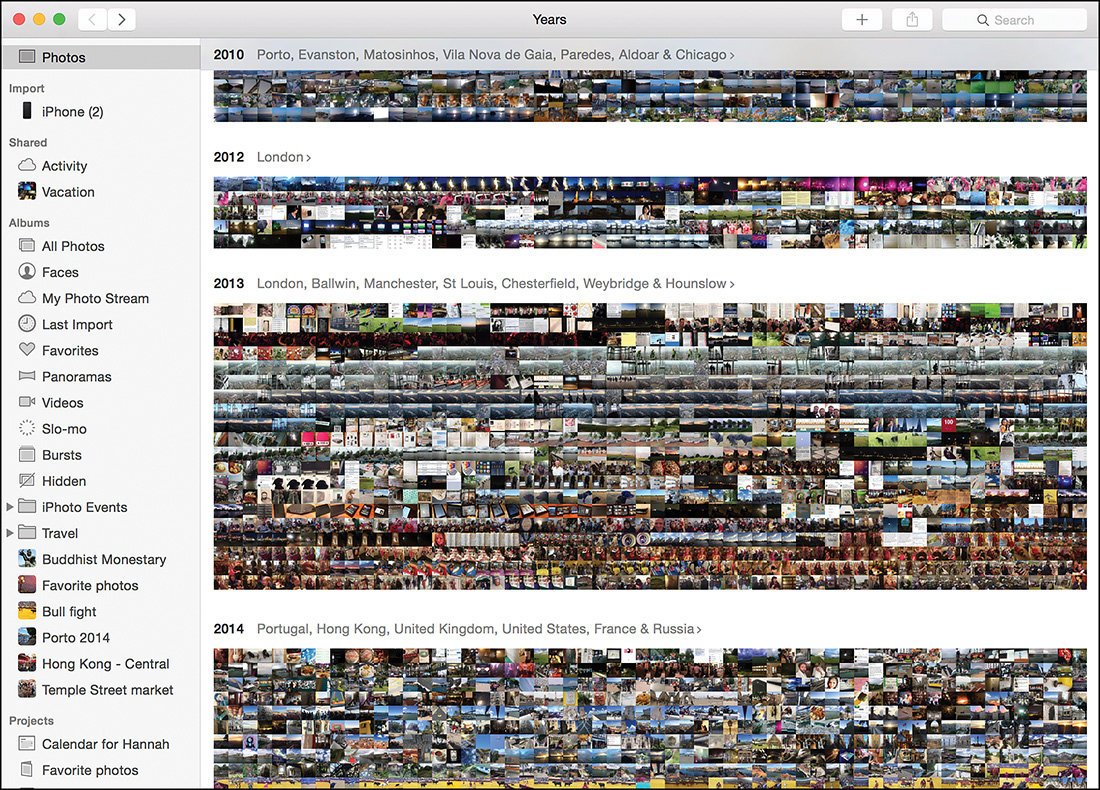
Photos’ expanded layout
Switch Between Simplified and Expanded Layouts
Apple doesn’t force you to use Photos from Mac in one view or the other. You can switch back and forth at will.
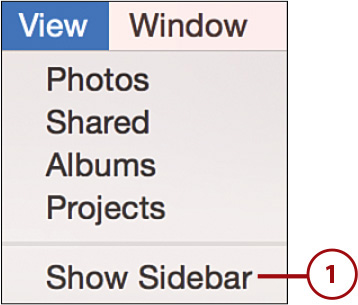
1. From the simplified interface, click View in the menu bar and then click Show Sidebar.
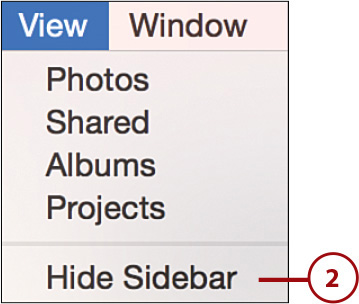
2. Alternatively, from the expanded interface, click View in the menu bar and then click Hide Sidebar.
Keyboard Shortcut
Optionally, you can quickly switch back and forth between layouts using the shortcut hotkey combo Option+Command+S.
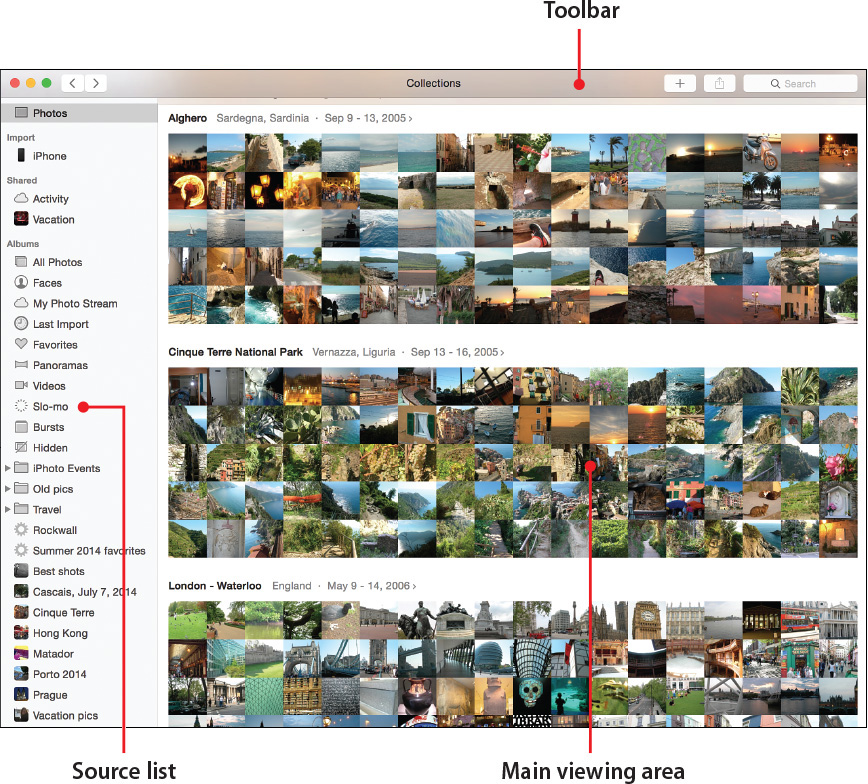
The Main Viewing Area
The main viewing area is a good place to start on your tour of the Photos interface. A majority of Photos’ screen space is taken up by the main viewing area. Each square image within this area represents a photo that you can click to view at a larger size.
As you can imagine, the main viewing area changes depending on what function Photos is performing. When you are editing, the main viewing area shows the edit screen. When you are creating a calendar, the main viewing area shows the projects screen. These screens are covered in detail throughout the book.
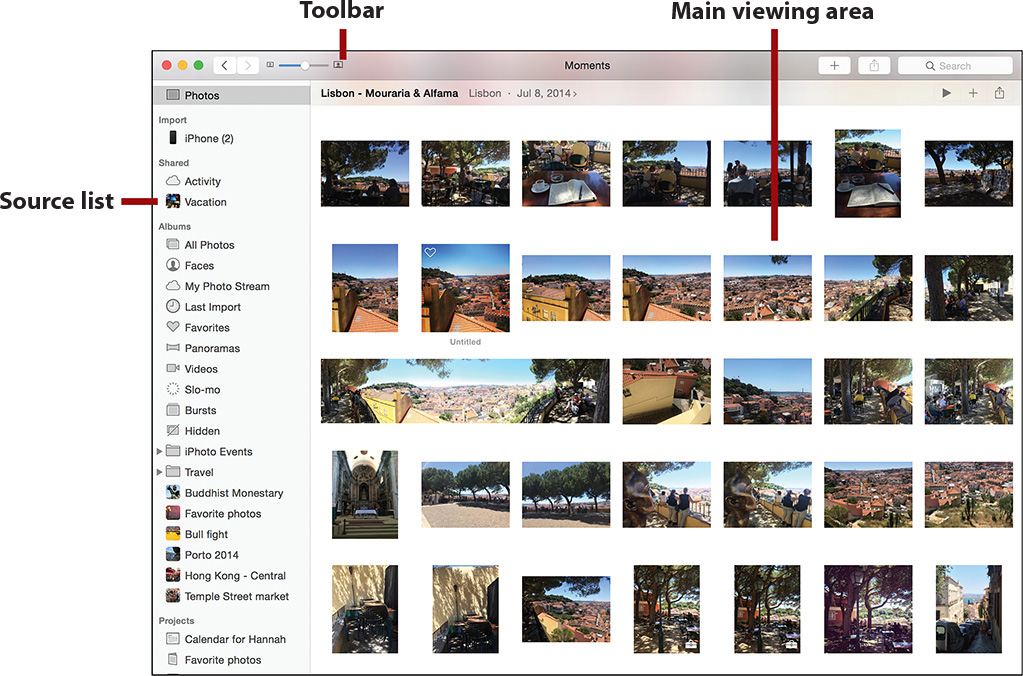
The Toolbar
The toolbar runs along the top of the Photos’ window and its buttons are the primary way you navigate through and interact with your photos. Again, the buttons vary depending on what view or editing mode you are in; the buttons shown in the figure are the defaults you see when viewing your photos in Photos’ simplified layout. If you are in the expanded layout you do not see the Photos, Shared, Albums, Projects, or Import buttons in the toolbar. Instead they are in the Source List on the left side of the screen.

• Stoplights: Click red to close the Photos window; click yellow to minimize the window into the Dock; and click green to make the Photos app full screen. (These buttons are default system-wide OS X buttons that every app has.)
• Back/Forward: Click these buttons to go back to the previous screen or—if you have already clicked the Back button at least one time—to go forward one screen.
• Icon Zoom slider: Adjust this slider to increase or decrease the size of the photo icons in the main viewing area.
• Source buttons: These buttons are arranged in the toolbar only in simplified view. Options include Photos, Shared, Albums, Projects, and Import (although Import is only available when a device that contains photos, such as a camera or SD card reader, is connected). When you click any of these buttons, the main viewing area displays the photos associated with the selected category.
• + button: Click this button to create new albums and projects.
• Share button: Click this button to share currently selected photos with others by uploading them to your iCloud, Twitter, Flickr, or Facebook accounts, or by sending them to friends via email, Airdrop, or Messages. It also allows you to set an image as a desktop picture.
• Search: Click the Search button to find photos by title, keyword, description, date, or location.
The Sidebar
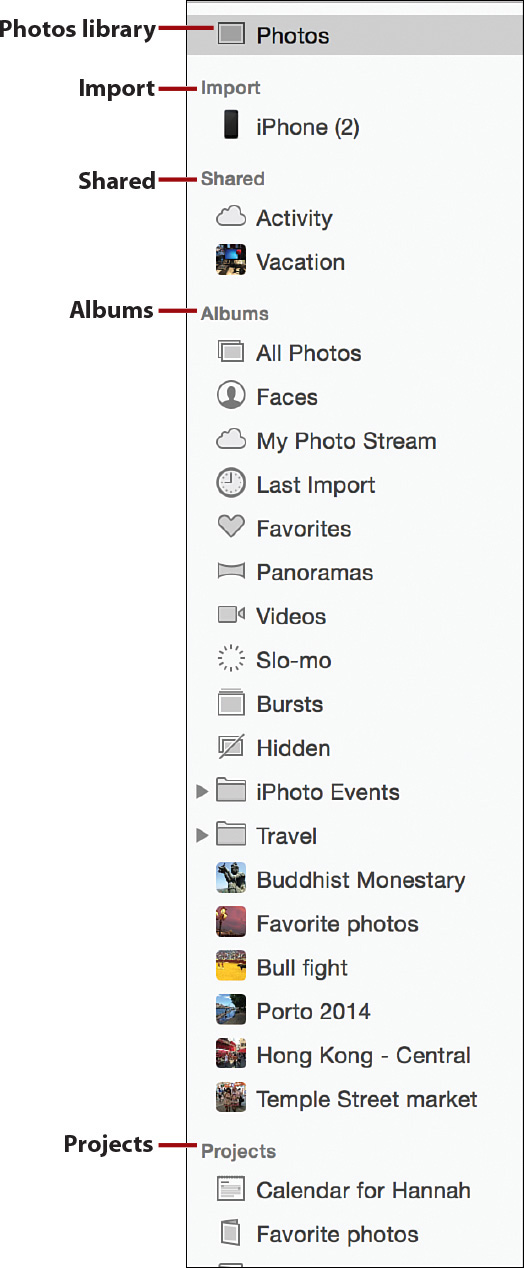
In the expanded view, the Source buttons from the simplified view are reshuffled to a sidebar on the left side of the Photos window. This sidebar is essentially a Source List that displays all your shared libraries, photo albums, and projects. You use the Source List to easily navigate through your photo organization scheme, including how you are sharing the photos and projects.
Photos library: This icon comprises all of the photos in your Photos library organized into Moments, Collections, and Years, so you can easily browse them by date and location.
Import: This header only shows up when you have devices that contain photos plugged into your Mac. It will list any currently connected cameras, iPods, iPhones, and iPads. Read more about importing in Chapter 2, “Importing Your Photos.”
Shared: If you are using any of the iCloud sharing features of Photos, those shared libraries show up here. Read more about iCloud sharing in Chapter 13, “Sharing Your Photos.”
Albums: This header displays all the albums, smart albums, and folders you have created. Albums are covered in Chapter 5, “Working with Albums.”
Projects: Any projects such as cards, slideshows, books, or calendars that you have created or are working on will show up here. Read more about projects in Chapter 11, “Creating Keepsakes.”