8. Sending Email and Instant Messages
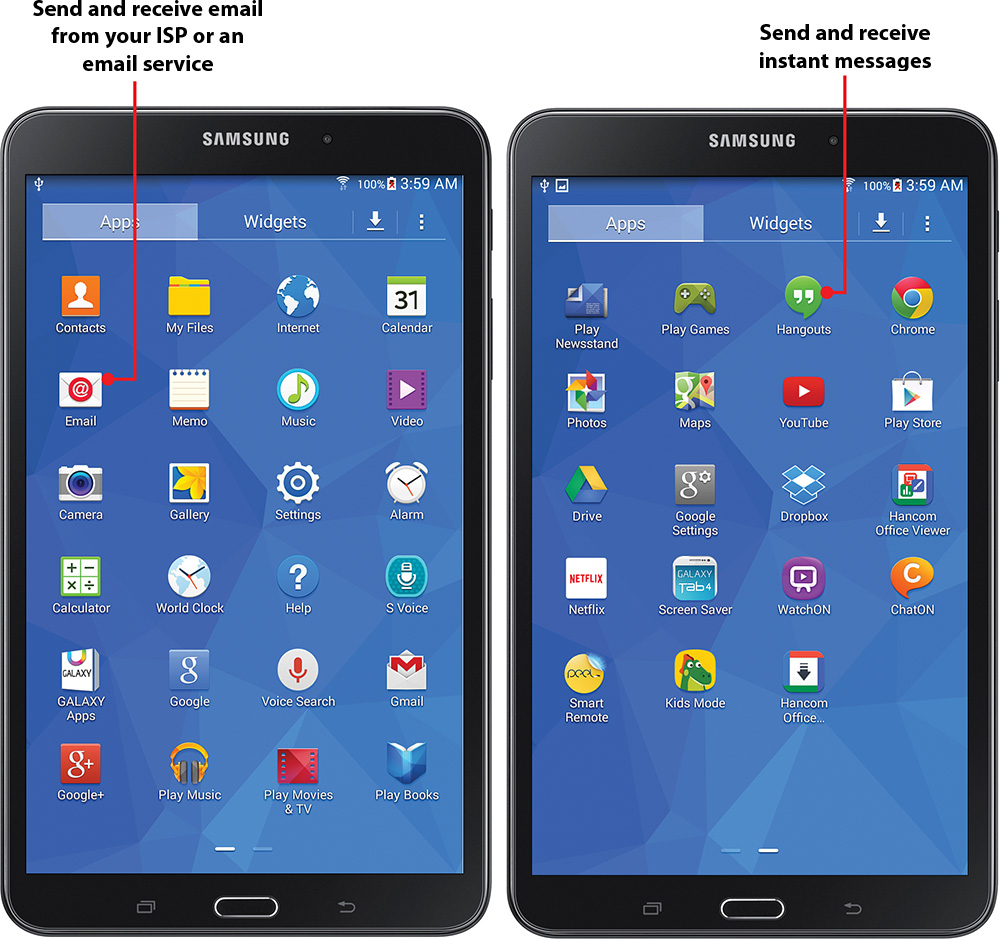
Your Galaxy Tab 4 makes it easy for you to read and respond to email messages when you’re on the go. Before you start, though, you need to configure your email account(s) and then figure out how to use the built-in Email app. Email isn’t the only way to communicate. The Galaxy Tab 4 also contains a built-in Messaging app so you can configure your instant message settings to communicate using standard text message (SMS) and multimedia message (MMS) services. This chapter covers the following topics:
![]() Sending and receiving instant messages
Sending and receiving instant messages
![]() Reading email messages with the Email widget
Reading email messages with the Email widget
Configuring Email
Following is a complete checklist of the information you need to set up your Galaxy Tab 4 to use a traditional email account. If you have an email service such as Exchange, Google Gmail, or Yahoo! you won’t need all this. However, if you don’t configure the email settings, you can’t use webmail services in other apps (like Gmail) to do things such as email web page links or photos, so you need some of the following information no matter what:
• Email address
• Account type (POP or IMAP)
• Incoming mail server address
• Incoming mail user ID
• Incoming mail password
• Outgoing mail server address
• Outgoing mail user ID
• Outgoing mail password
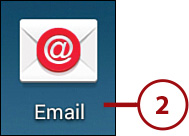
1. On the Home screen, swipe from right to left to view the second page of the Home screen.
2. Tap Email.
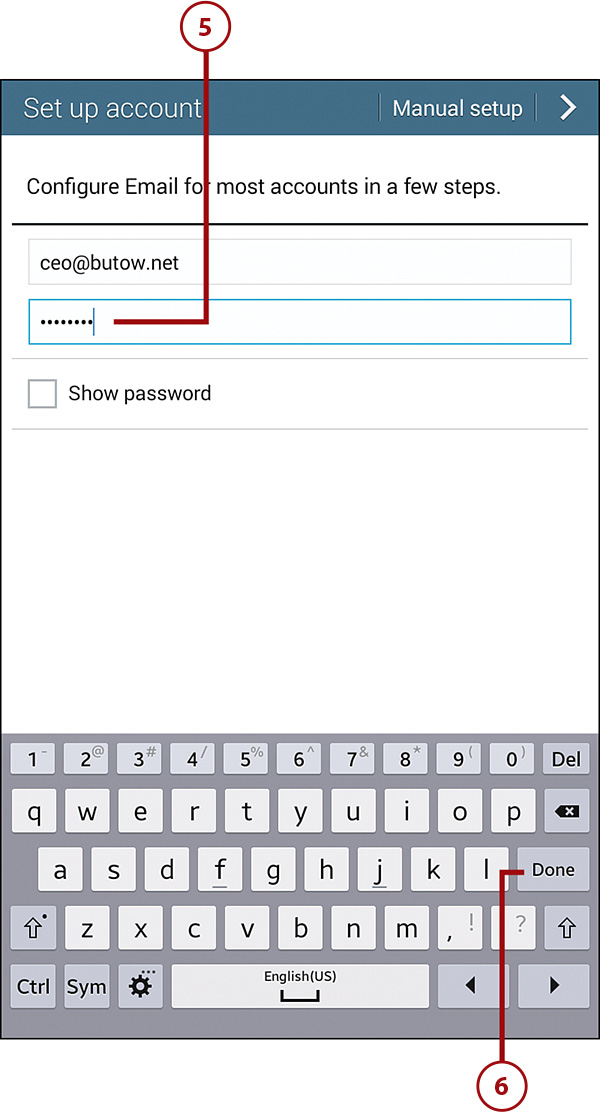
3. Type the email address in the highlighted Email Address field. When you start typing, the keyboard appears at the bottom of the screen.
4. Tap Next in the keyboard.
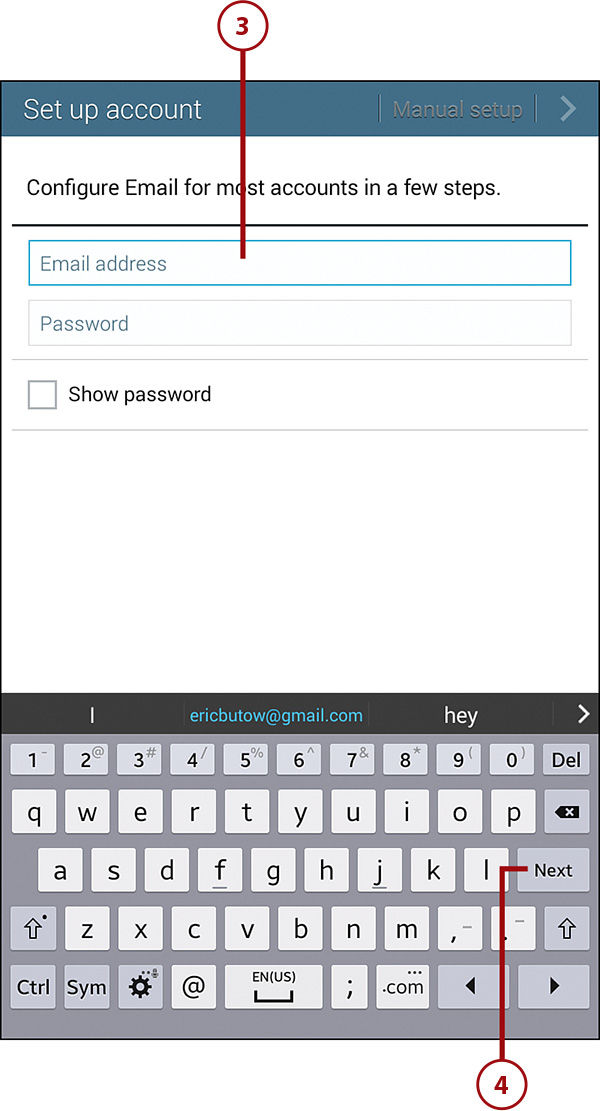
5. Tap the password for your email account in the Password field. As you type in the password characters, they become dots so the password is hidden right away.
6. Tap Done in the keyboard.
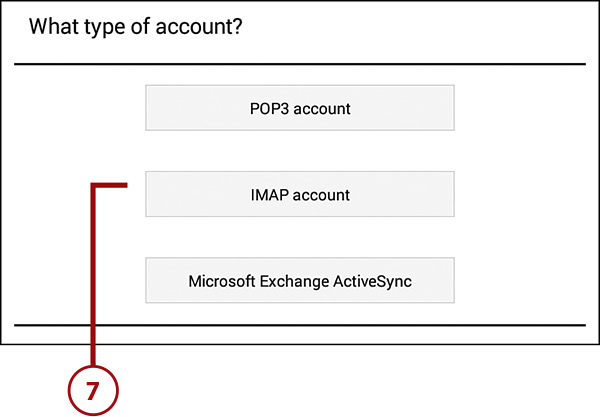
7. Tap the button that corresponds to the account type you have.
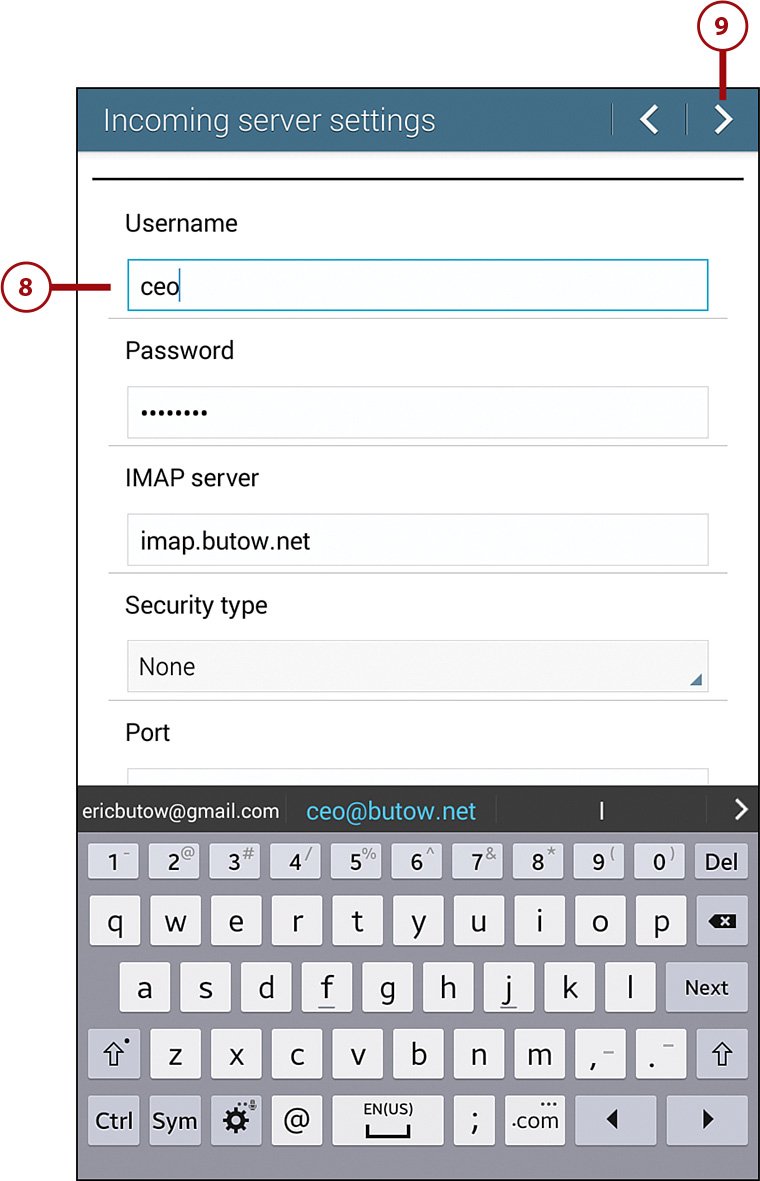
8. Type the incoming server settings into the appropriate fields.
9. Tap the right arrow icon in the menu bar.
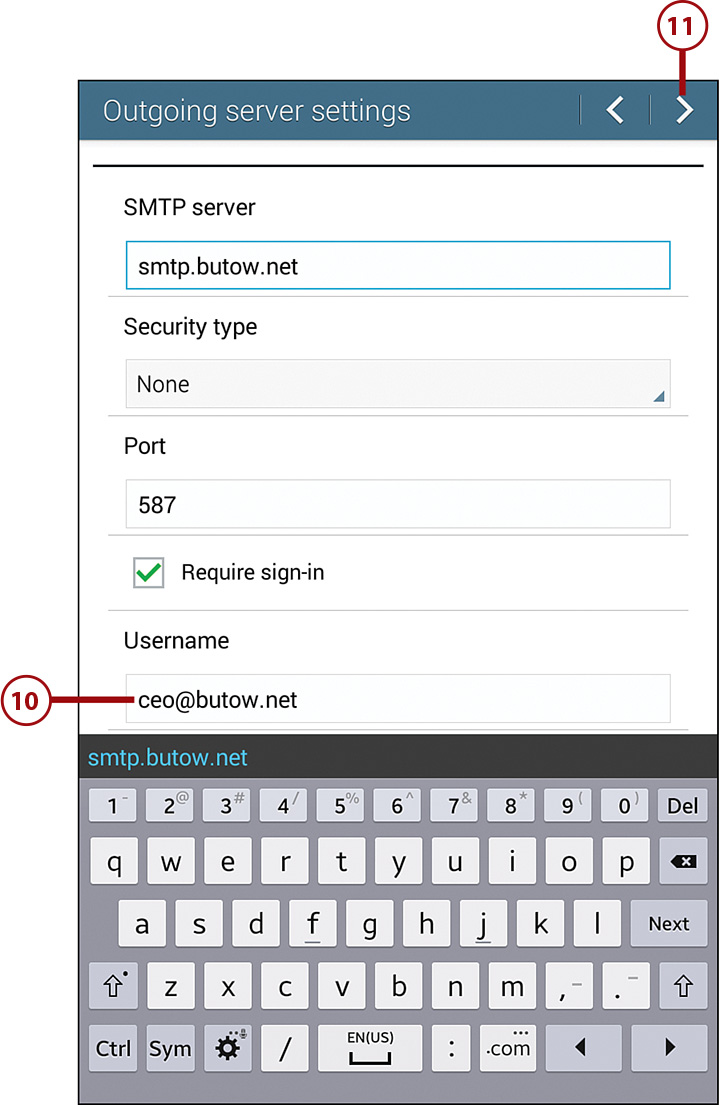
10. After the Galaxy Tab 4 checks your incoming server settings, type the outgoing server settings into the appropriate fields.
11. Tap the right arrow icon in the menu bar.
12. Tap the check box to automatically download files attached to email messages. You can also uncheck the Notify Me When Email Arrives box if you don’t want to be notified when you have new messages.
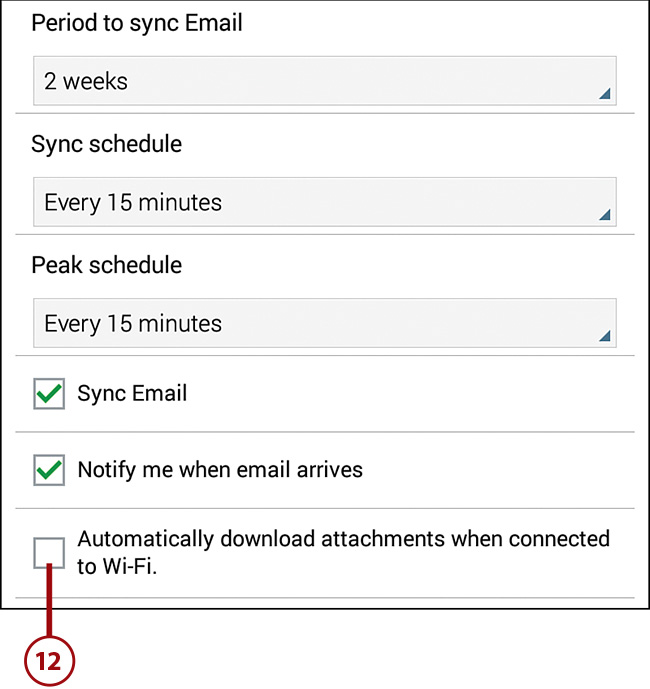
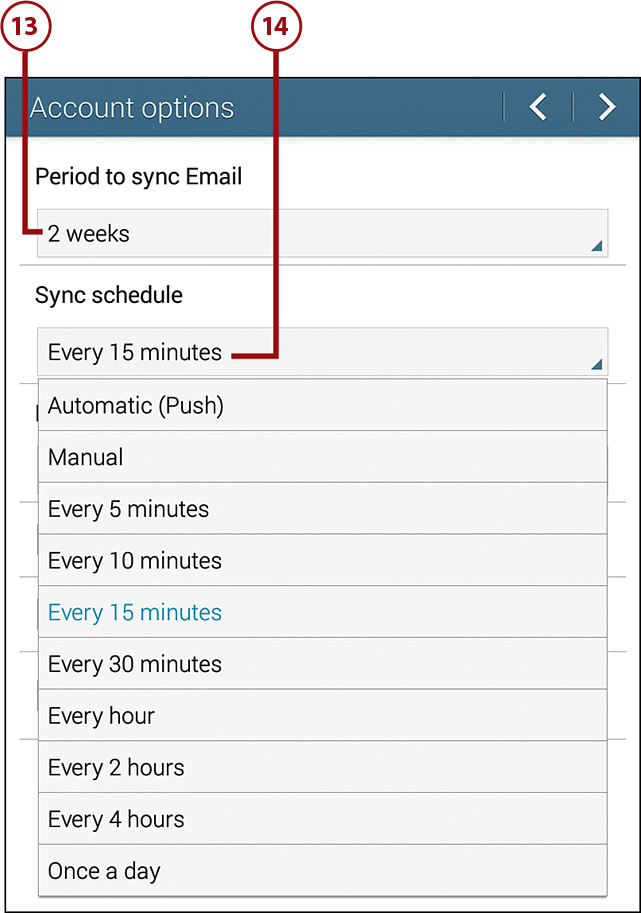
13. Tap the Period to Sync Email field to change the amount of time the Email app keeps messages on your Tab 4. The default time is 2 weeks, but you can have the Tab keep messages on the Tab 4 for 1 day, 3 days, 1 week, or 1 month. You can keep all messages on your Tab 4 by tapping All. Note that if you have more than one email account and you keep messages from all the accounts for a long period of time (1 to 2 weeks or longer) then you will take up more memory on your Tab 4 and that might affect your ability to store data and run apps on your device.
14. Tap the Sync Schedule field to change the checking frequency at which your Tab 4 checks for new messages. The default frequency is to check your inbox every 15 minutes. You can have the Tab check for new email as often as every 5 minutes. If that’s too often, you can have the Tab check every 10 minutes, 15 minutes, 30 minutes, every hour, every 4 hours, or once per day. You can set the time yourself by tapping Manual.
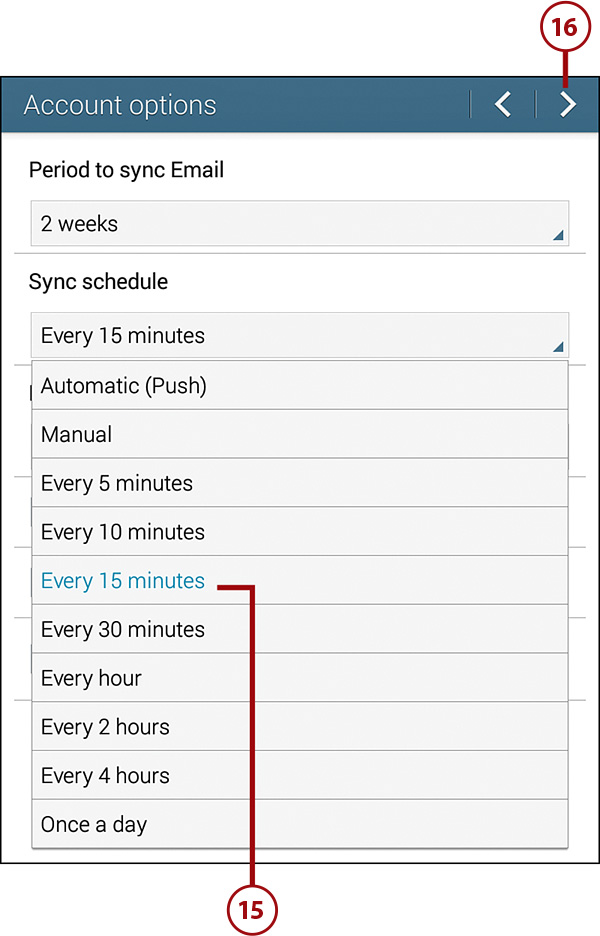
15. Tap the checking frequency in the list.
16. Tap the right arrow icon in the menu bar.
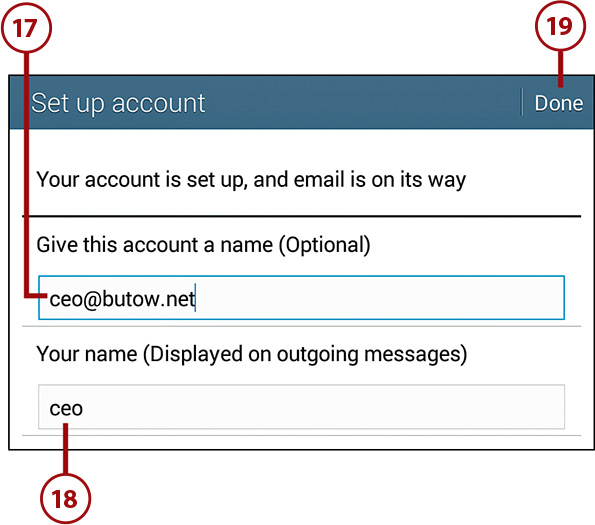
17. Type an optional name into the Give This Account a Name field.
18. Type your name as you want it to be displayed in outgoing messages.
19. Tap Done. A list of your email messages appears in your Inbox screen.
Reading Email
You use the Email app to navigate, read, and type your email messages.
1. On the Home screen, swipe from right to left to view the second page of the Home screen.
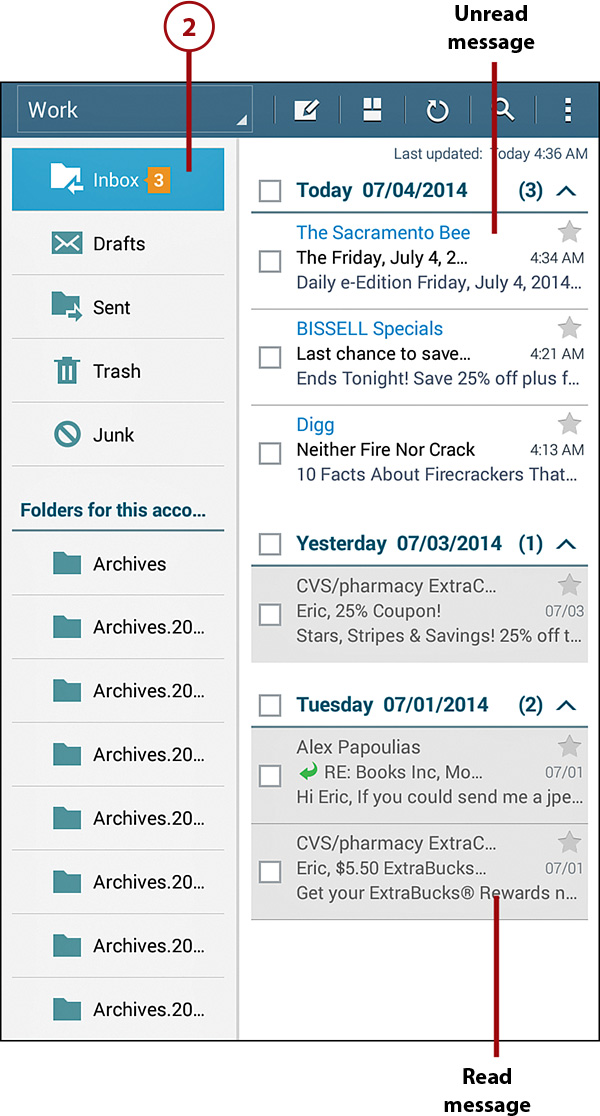
2. Tap Email. Your list of Inbox folder messages displays with a list of folders on the left side of the screen. New, unread messages appear in the list with a white background; read messages have a gray background. A folder you’re currently in is highlighted in blue in the folder list and the number of new messages appears to the right of the Inbox folder name.
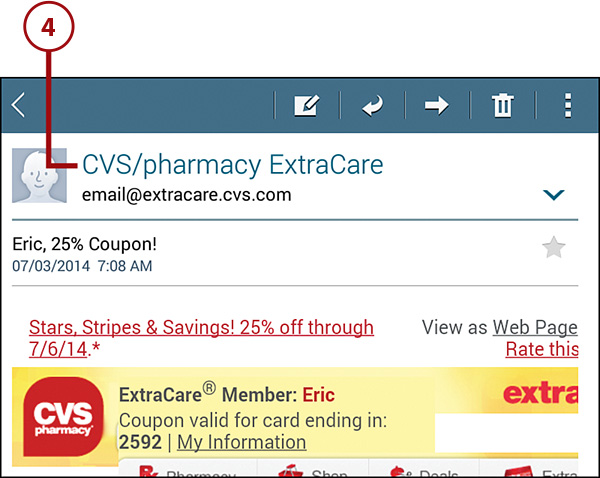
3. Tap a message in the list to view the entire message on the screen.

4. Tap the sender’s name at the top of the page.
5. Tap Create Contact to add the sender to your list of contacts.
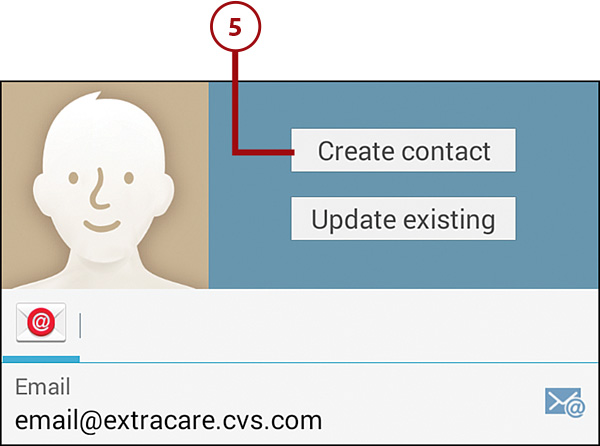
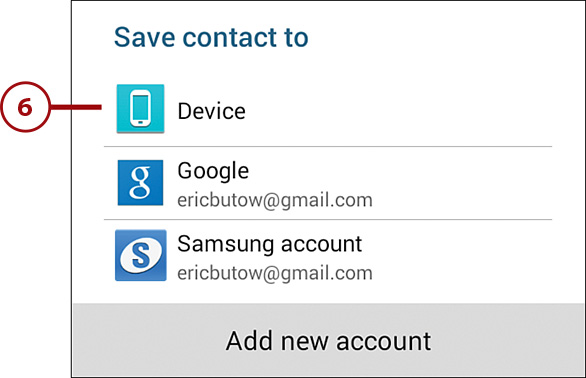
6. Tap Device and then select the account to which you want to add the contact.
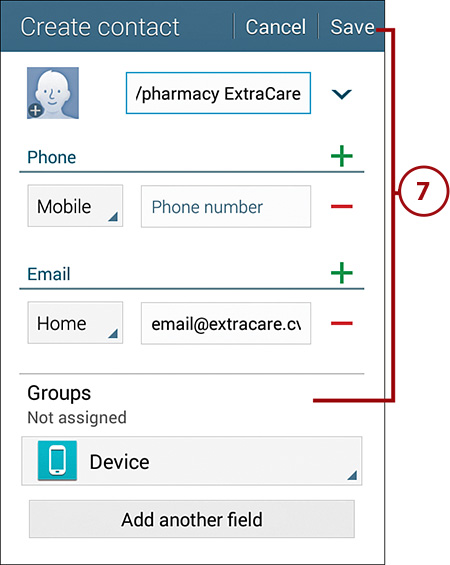
7. Type information into the Create Contact window fields if you want. (You learn more about adding a contact in Chapter 14, “Using Productivity Apps to Simplify Your Life.”) Tap Save to save the new contact and return to the message list.
8. Tap the left arrow icon at the top-left corner of the screen to return to your list of messages and folders.
9. View another account (if you have more than one account in the Email app) by tapping the email account name in the upper-left corner of the screen and then tapping the account name in the list.
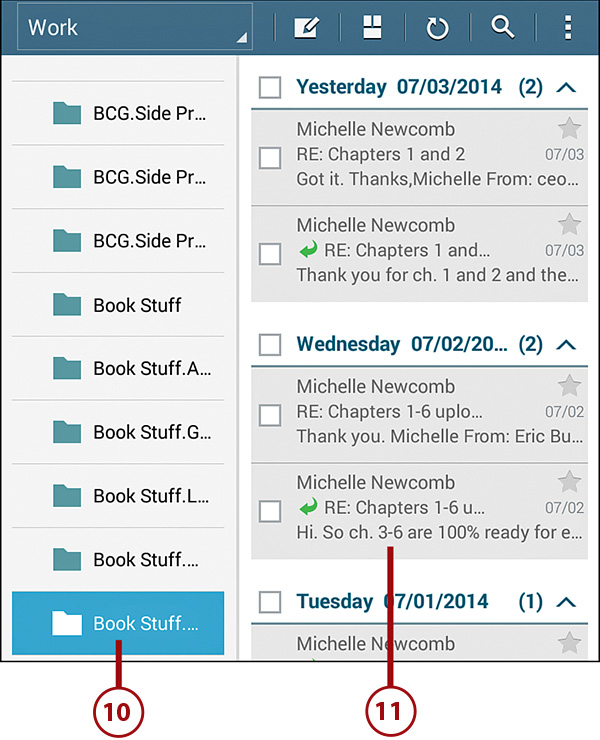
10. Scroll down the folder list to view folders within the Inbox and tap a folder to view messages within that folder. If necessary, tap the Load More Messages button at the top of the list to view messages in the folder.
11. The number of messages in the folder appears to the right of the folder name; if the folder name isn’t long then the list of messages within that folder appears to the right of the folder list.
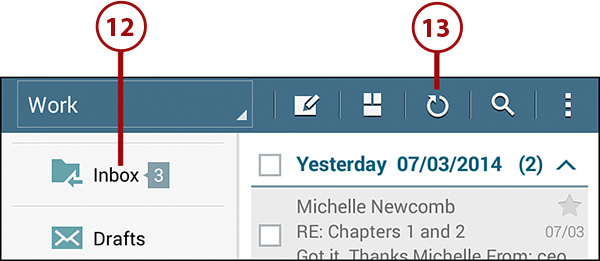
12. Scroll up the folder list until you see the Inbox folder. Tap it.
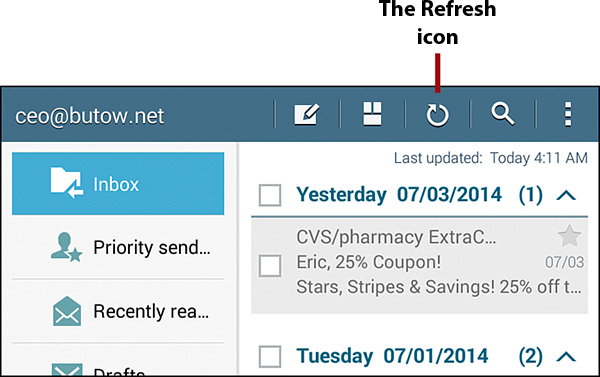
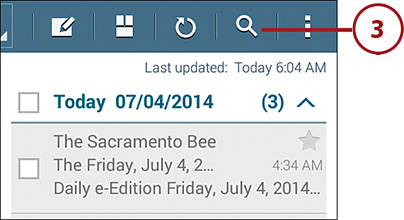
13. Tap the Refresh icon to refresh the message list on the right side of the screen. Any new messages that have come in appear at the top of the list and the Last Updated text at the top of the message list reflects the new time the Email app checked for messages.
Composing a New Message
The process for composing a new message and composing a reply to a message is similar. This section covers composing a message from scratch.
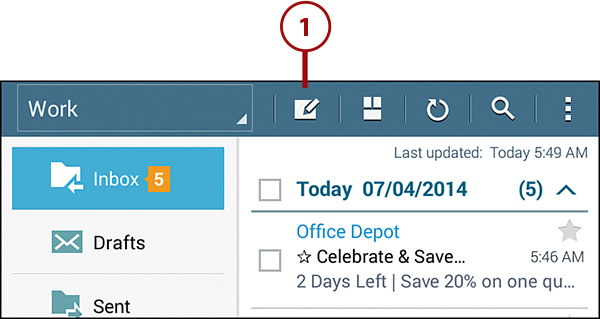
1. Tap the New Mail icon in the Email app.
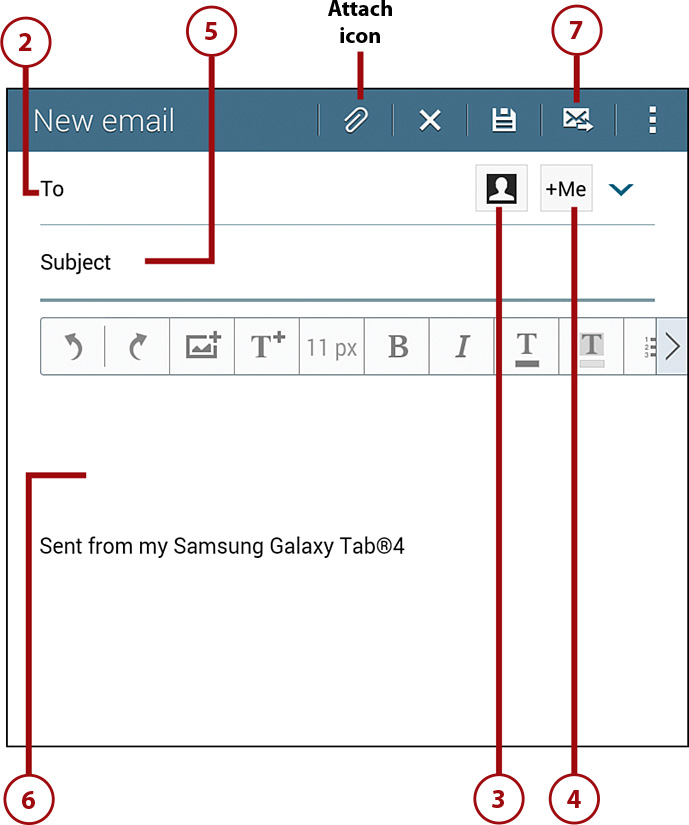
2. Enter the recipient’s address in the To field.
3. Tap the Contacts button to select the recipient(s) from your list of contacts.
4. Tap the +Me button if you’d like to send a copy of the message to your own email address so that you have a record of what you sent.
5. Tap in the Subject field and then type a subject for the email.
6. Tap below the Subject field in the body of the email and then type your message.
7. Tap Send.
Creating Your Own Signature
You can create a signature that automatically appears at the end of your messages. You create your signature in the Email app.
1. On the Home screen, swipe from right to left to view the second page of the Home screen.
2. Tap Email.
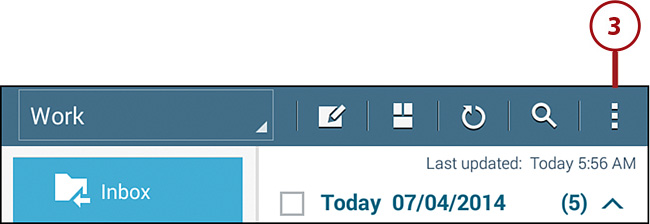
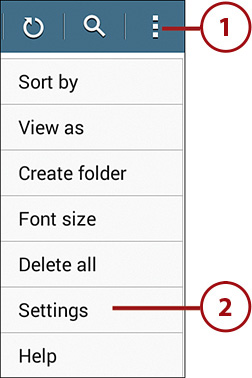
3. Tap the Menu icon in the menu bar.
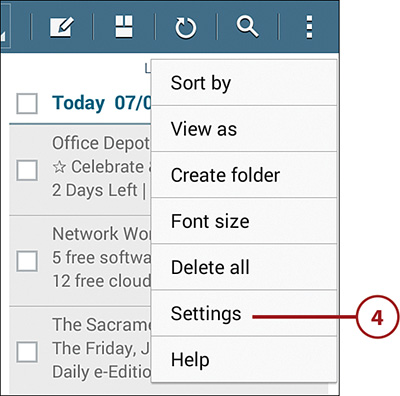
4. Tap Settings.
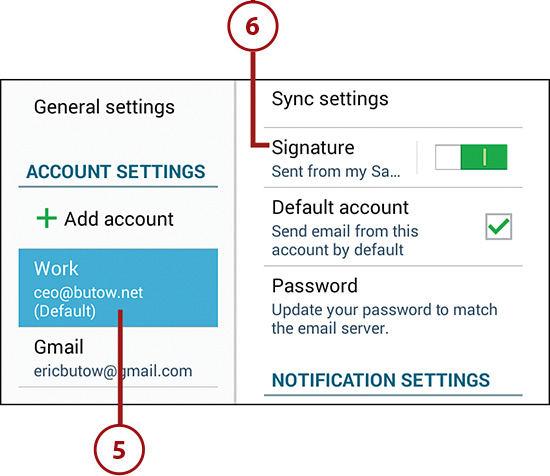
5. Tap your account name in the list.
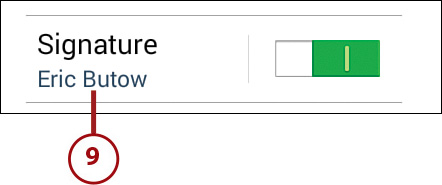
6. Tap Signature. You can disable the signature field in your email messages by moving the slider from right to left. The slider button turns gray and displays an O (for Off), but you can turn it back on by sliding the bar to the right so the button turns green and displays an I (for On).
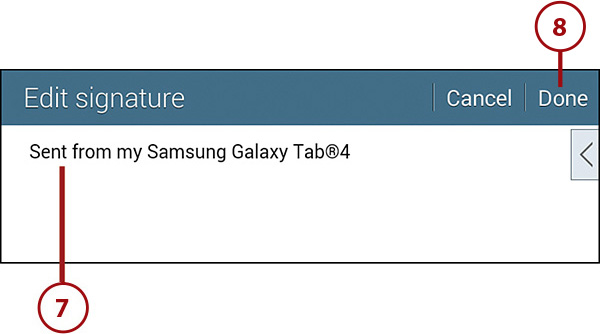
7. Type what you want the signature to say (such as your full name) in the Edit Signature screen.
8. Tap Done.
9. The signature as it will appear in your Message Composition field appears under the Signature heading.
Deleting Messages
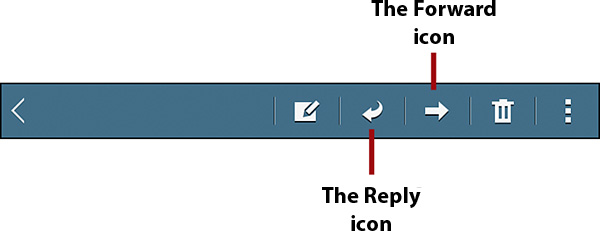
When you view a message, you can tap the Delete icon and move the message to the trash.
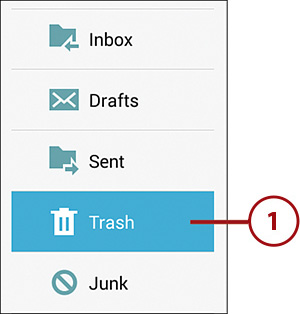
1. In the Email app, go to any mailbox and any subfolder, such as your Trash folder.
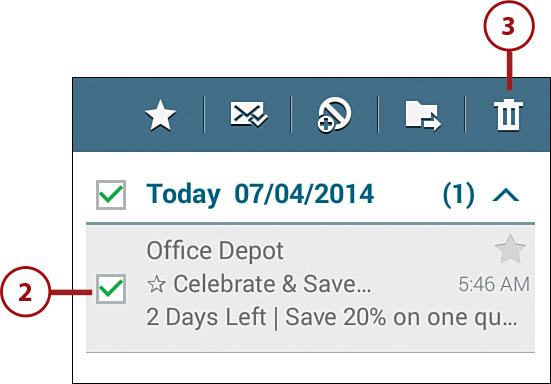
2. Tap a check box at the left side of the message entry that you want to delete. You can select multiple check boxes if you want to delete multiple messages.
3. Delete the messages by tapping the Trash icon.
4. Tap Delete in the confirmation box.
Searching Through Email
By default, the Galaxy Tab 4 doesn’t let you search through your email messages. You can change this quickly and then search text in your email messages.
1. On the Home screen, swipe from right to left to view the second page of the Home screen.
2. Tap Email.

3. Open a folder or subfolder and then tap the Search icon.
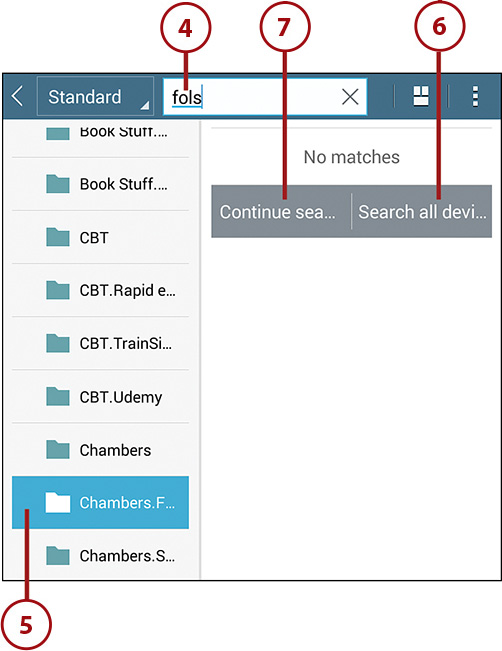
4. Type the search term into the Search field.
5. As you type, updated results display below the field. In my example, I opened the Chambers. Folsom subfolder and typed fols into the field.
6. If you don’t find the search results you want, continue searching for messages that match your search term(s) on all connected devices by tapping Search All Devices.
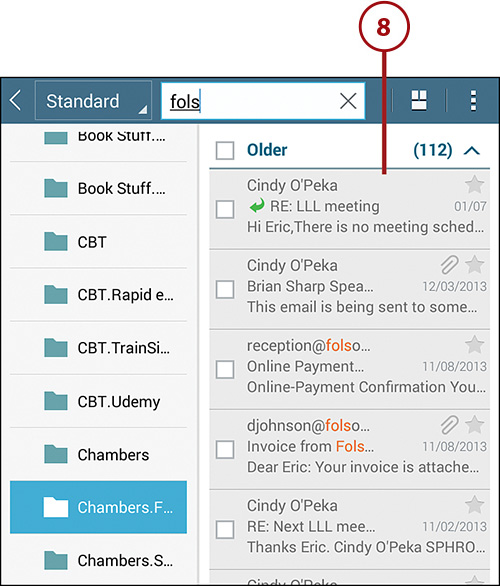
7. The message list displays all recent email messages in this folder that match your search term. If the messages in the folder aren’t recent, as in this example, tap Continue Searching to search for older messages in the folder.
8. Messages appear in the list so you can read a message by tapping it. Note that it may take a few seconds for all folder messages to appear in the list.
Configuring Email Settings
The Galaxy Tab 4 enables you to update your email account settings as needed.
1. Follow the steps from earlier tasks in this chapter to open the Email app if you aren’t there already. Then tap the Menu icon in the menu bar.
2. Tap Settings.
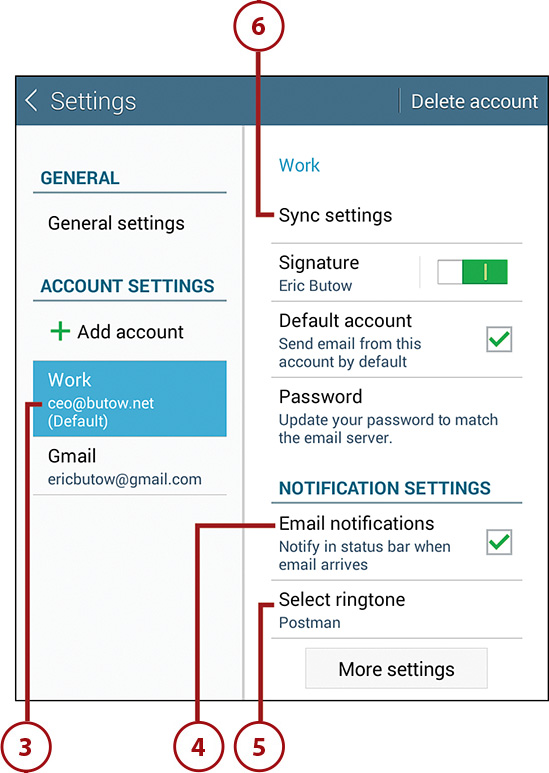
3. Tap your account in the Account Manager list if there is more than one. If not, your account appears on the screen automatically.
4. Tap Email Notifications to specify whether the Galaxy Tab 4 should notify you when email arrives. This feature is activated by default. Deactivate it by tapping the check box.
5. Tap Select Ringtone to select a ringtone or to designate that there should be no ringtone at all. Select the ringtone from the Select Ringtone pop-up window. The default ringtone is Postman.
6. Tap Sync Settings; in the Sync Settings list that appears, tap Sync Schedule.
7. Tap Set Sync Schedule and then select the time interval in the Sync Schedule window as described in the “Configuring Email” section earlier in the chapter.
8. Tap the Peak Schedule check box if you don’t want to set a separate email syncing schedule. When you clear the check box, the app disables all the options in the Peak Schedule section underneath the checkbox.
9. Tap Set Peak Schedule to change the peak schedule syncing interval in the Set Peak Schedule window. Tap the appropriate interval for syncing during the peak schedule. (Each interval is the same as in the Sync Schedule field.)
10. By default the peak days are Monday through Friday, and the peak days are highlighted in green. Tap a day to select or deselect it to add or delete it from the peak schedule, respectively.
11. Change the peak start time by tapping Peak Start Time.
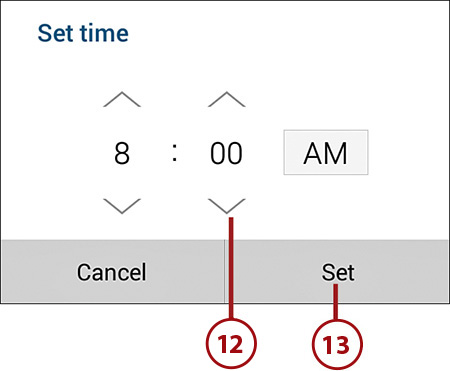
12. Change the time by tapping on the up and down arrows above (from left to right) the hour, minute, and AM/PM settings.
13. When you finish setting the time, tap Set.
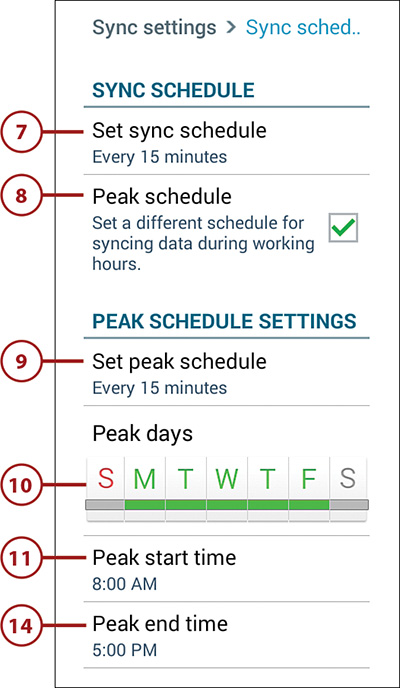
14. Your new peak start time appears. Change the peak end time by tapping Peak End Time.
15. Change the peak end time in the window as you did with the peak start time. The new peak end time appears.
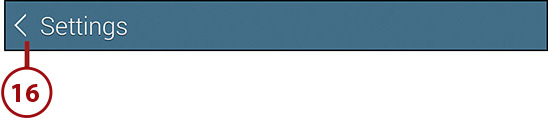
16. Go back to the main Settings screen by tapping the left arrow icon in the menu bar.
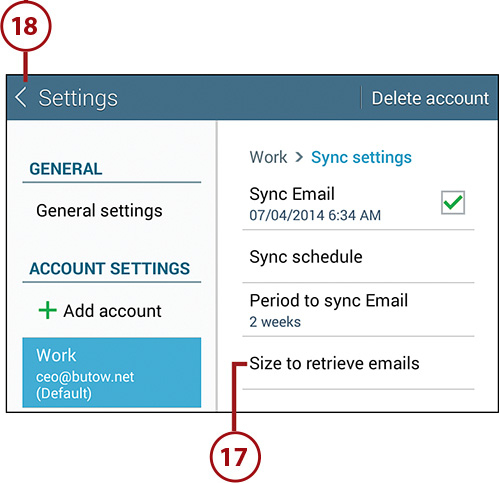
17. Tap Size to Retrieve Emails to open the Size to Retrieve Emails list and change the default amount of data you can receive in an email message. When you receive messages, the Email app only downloads the first 50KB of data in a message by default. If the message has more than 50KB of data then at the bottom of the message the app asks if you want to download the rest of the message. You can choose from 2KB to 100KB.
18. Go back to the main Settings screen by tapping the left arrow icon in the menu bar.
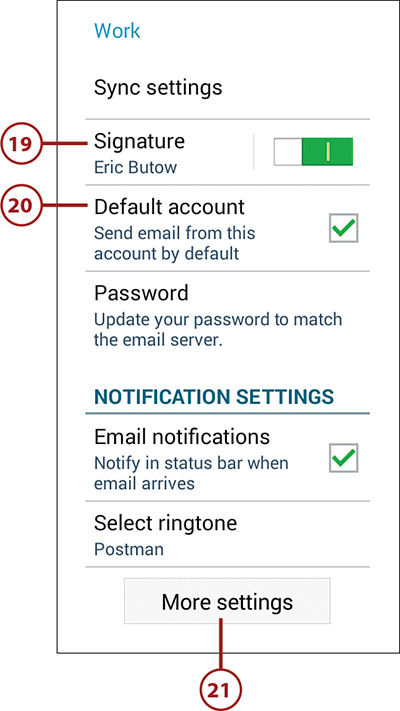
19. Tap the Signature field to change your signature. Read the “Creating Your Own Signature” task earlier in this chapter for more information about signatures.
20. The Default account check box is checked when the Email app sends and receives email automatically from the account you’re viewing. If you don’t want to send email from that account, clear the check box by tapping Default Account.
21. Tap More Settings.
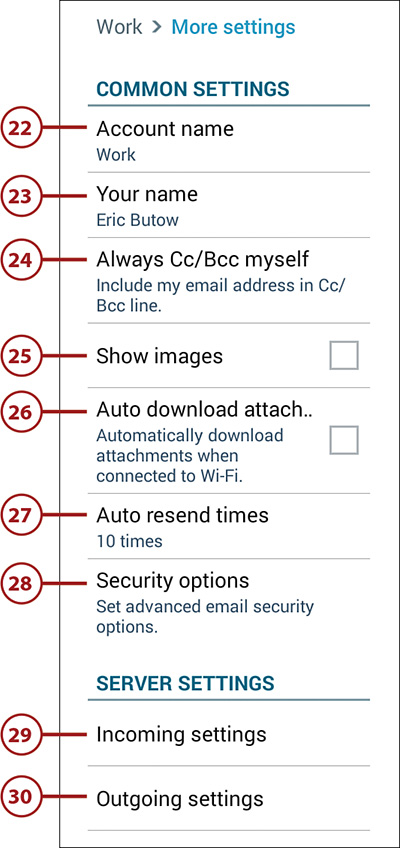
22. Tap Account Name to change your account name.
23. Tap Your Name to add or change your name.
24. Tap Always Cc/Bcc Myself and then select Cc or Bcc in the pop-up window if you always want to add your email address in the Cc or Bcc box.
25. Tap Show Images to automatically show images in a message when you view it.
26. Tap Auto Download Attachments to download file attachments in a message to the app automatically.
27. Tap Auto Resend Times to change the number of times you automatically resend a message if it doesn’t go through the first time. Then tap the number of times (1, 3, 5, 10, or 20) you want the Email app to resend the unsent message before giving up. The default is No Limit.
28. Set advanced security options by tapping Security Options. In the Security Options screen that appears, you can encrypt all outgoing email, sign all outgoing email, and create and manage encryption keys for keeping your email messages private.
29. Change your incoming settings (as you did with a new account earlier in this chapter) by tapping Incoming Settings.
30. Change your outgoing settings (as you did with a new account earlier in this chapter) by tapping Outgoing Settings.
Sending and Receiving Instant Messages
You can send and receive instant messages using the built-in Hangouts app from Google.
1. Open the Apps screen and then swipe from left to right to view the second page in the Apps screen.
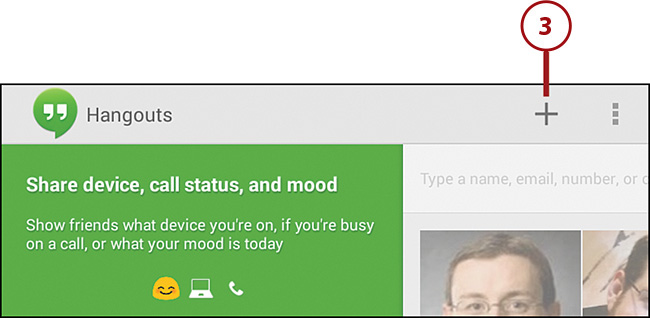
2. Tap Hangouts.
3. Tap the plus icon to select the circles or names with which you want to connect in the Contacts window.
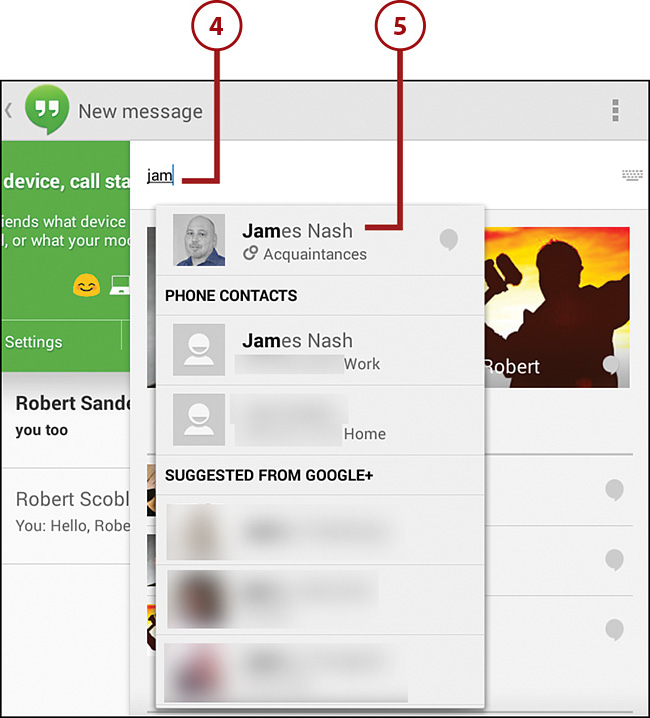
4. Tap the recipient field and then type the name of the person with whom you want to chat.
5. As you type, matches appear in the drop-down list underneath the field. Tap the name of the person with whom you want to chat.
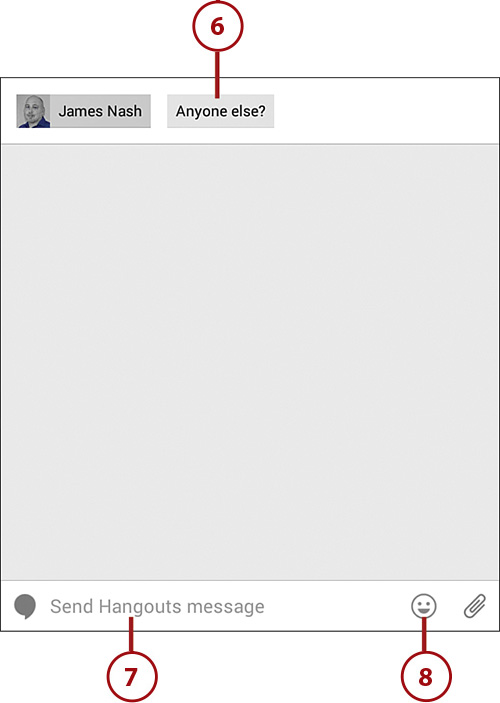
6. Add more people you want to include in the conversation by tapping Anyone Else?, scroll down the list of users or Google+ groups in the window, and then add the user or group to recipient field by tapping the user or group name.
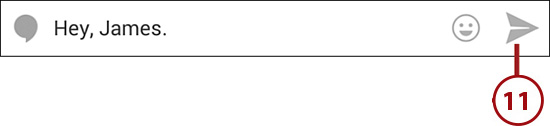
7. Type your message in the Send Hangouts Message field.
8. Add an emoticon to better convey the meaning of your message by tapping the emoticon icon to the right of the Send Hangouts Message field.
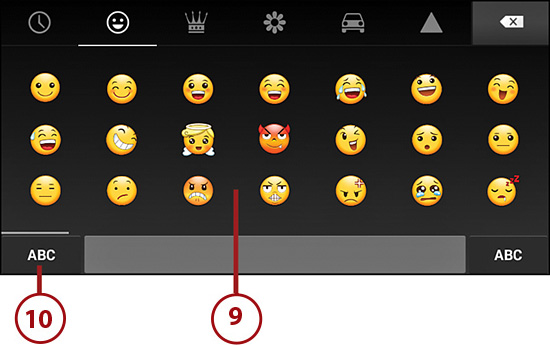
9. Swipe down the section of emoticons and then tap the emoticon you want. The emoticon appears at the end of your message.
10. Return to the keyboard by tapping the ABC key.
11. Tap the Send icon to send your message.
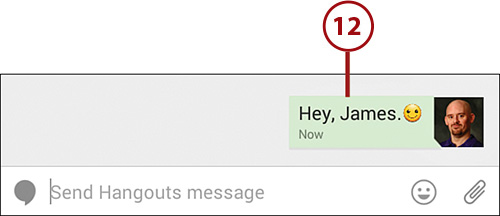
12. Your message appears above the Send Hangouts Message field. If you receive a message from the recipient, your message will be moved up and you will see the recipient’s response above the Send Hangouts Message field.
Configuring Google Hangouts Settings
You can change your Google Hangouts settings so you can manage your messages to your liking, determine how you want to be notified of new messages that come into your message Inbox, and change your Google+ profile.
1. Open the Apps screen and then swipe from left to right to view the second page in the Apps screen.
2. Tap Hangouts.
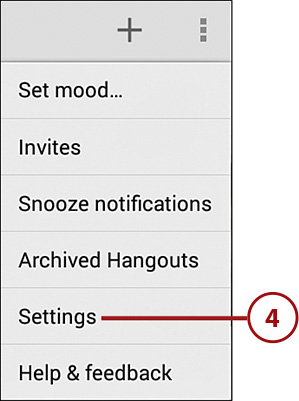
3. Tap the Menu icon in the menu bar.

4. Tap Settings.
5. Tap your Google account email address in the list.
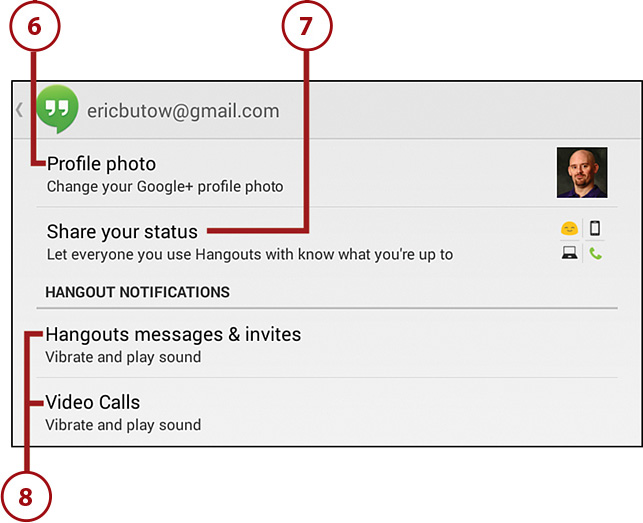
6. Tap Profile Photo to change your Google+ profile photo. You can take a photo using the Camera app or you can choose a photo within the Gallery app.
7. Tap Share Your Status if you want to let everyone in your Google+ circles who use Hangouts know what you’re doing. You can display an emoticon showing how you’re feeling currently, what device you’re currently using (that is, smartphone, tablet, or computer), and if you’re currently busy with a video or phone call on one of your devices.
8. Tap Hangouts Messages & Invites to change what happens when you get messages and invites, and tap Video Calls to change what happens when you get video calls. The options in subsequent steps in this section are the same when you tap Hangouts Messages & Invites or Video Calls.
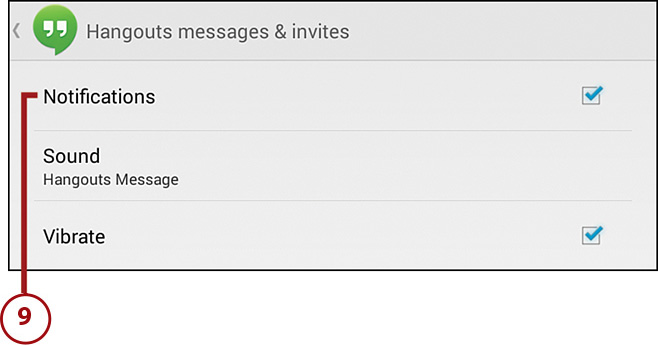
9. The Notifications and Vibrate check boxes are checked by default so you receive notifications about new Google Hangouts (which are live video chats) started by one of your contacts and when you receive a request to join a Google Hangout. If you don’t want to be notified about any Hangouts, tap Notifications to clear the check box.
10. Tap Sound to open the Sound window and set a tone that notifies you when someone has joined your Hangout or you have received a request for someone to join your Hangout. By default you will feel the Tab 4 vibrate and see a message on the screen.
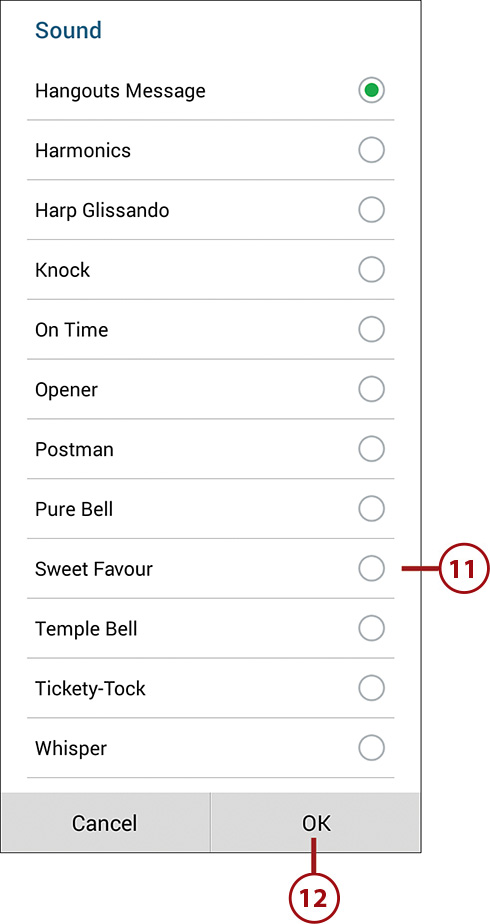
11. Select from the preselected silent mode, the default ringtone, or a number of other ringtones. Scroll up and down the list to view the entire list and tap the button to the right of the tone so you can listen to the sound.
12. Tap OK when you’ve selected a sound. The name of the selected sound appears within the Sound entry in the Hangout Notifications section.
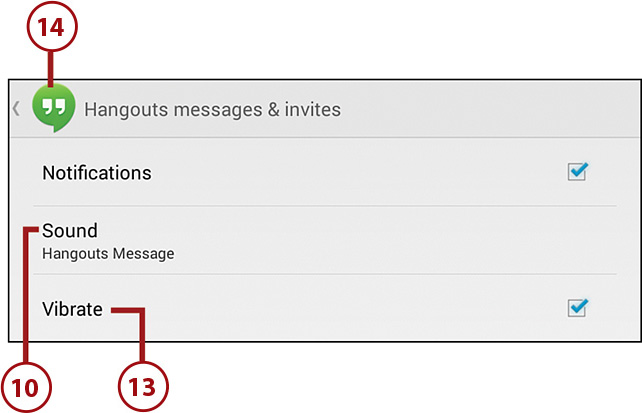
13. Tap Vibrate if you don’t want the Tab 4 to vibrate when you receive a message or invite, or if you receive a video call, depending on the screen you’re in. You can turn on vibrations by tapping Vibrate again.
14. Return to the main Hangout Settings screen by tapping the Google Hangouts logo at the left side of the menu bar.
15. Tap Customize Invites to determine who can join your Hangouts.
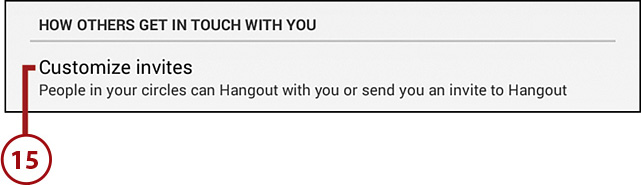
16. In the Customize Invites screen, you can determine the circles that can join a Hangout with you or request that you accept them as a Hangout participant. Circles include ones that you created in Google+ as well as the default Public circle that includes all Google+ users. Change how users in each circle can request Hangout participation by tapping the circle name in the list. In the window that appears, you can tap Hangout with You or Invite Only.
17. After you change the request type, the type appears underneath the circle name.
18. Return to the main Hangout Settings screen by tapping the Google Hangouts logo at the left side of the menu bar.

19. Tap Google+ Profile to change your Google+ profile settings within the Internet browser app.
20. Tap Blocked People to view a list of blocked users. In the Blocked People screen that appears, you see a list of users (if any) that you blocked in Google+.
21. Tap Hidden Contacts to view a list of Google+ contacts you’re connected with but who aren’t visible on your Google+ profile page.
22. Tap Sign Out to sign out of Google Hangouts and close the Hangouts app.
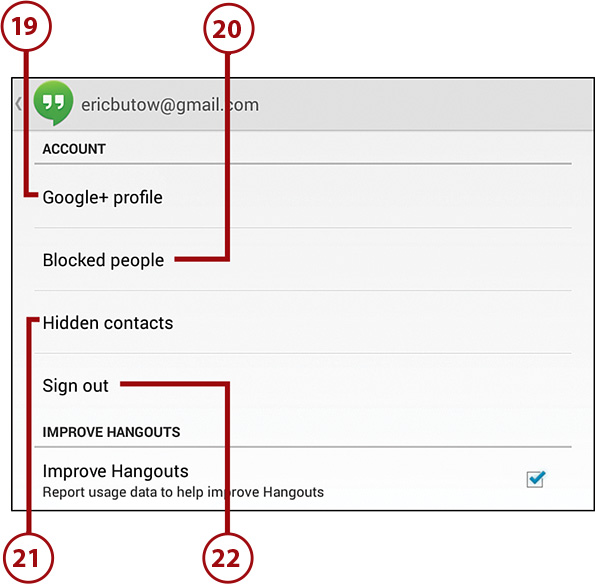
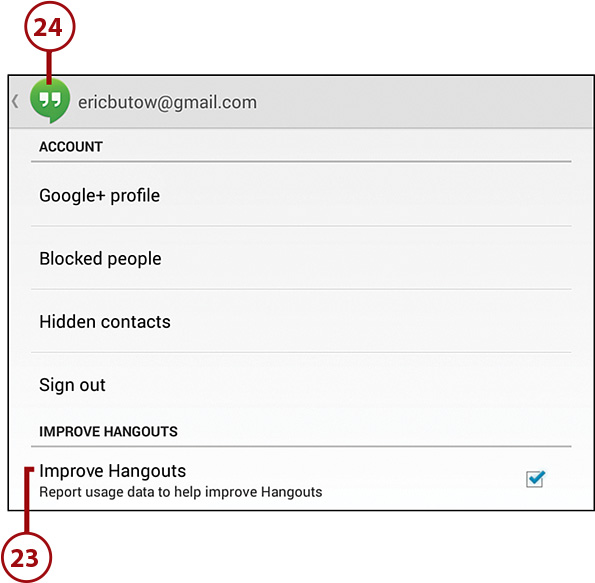
23. Tap Improve Hangouts if you don’t want to report your usage data to Google to help improve the Hangouts app.
24. Return to the Hangouts screen by tapping the Google Hangouts icon at the left side of the menu bar.
Reading Email Messages Using the Email Widget
Chapter 5, “Adding Widgets to Your Home Screens,” explains how to add widgets to your Home screens to perform certain tasks. In this task you see how to add the Email widget to a Home screen so you can view your latest email messages without having to open the Email app.
1. Tap the Apps icon on the Home screen.

2. Tap Widgets.
3. Swipe on the Widgets screen from right to left until you see the Email widget.

4. Tap and hold on the widget and then add the widget to the Home screen you want as described in Chapter 5.
5. The number of messages you see in the widget depends on the size of the widget on your Home screen. In this example, the five most recent messages in my Inbox folder appear in the widget. By default you see all messages from all email accounts that you set up in the Email app.

6. View a message in the Email app by tapping the message within the widget. If you want to view email in a specific account, tap the arrow button at the left side of the menu bar.

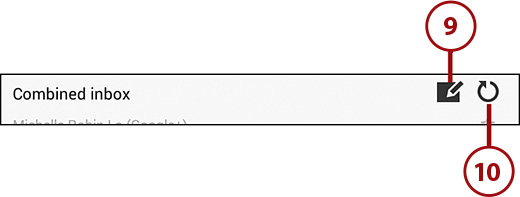
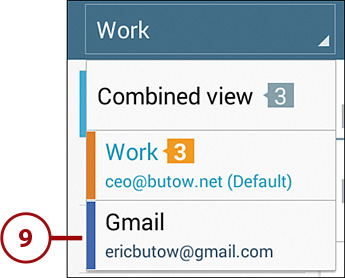
7. View messages in an individual account by tapping the Combined View button and then selecting the account in the list. The button label changes to reflect one of your accounts and the list of messages changes to display the most recent messages in that account’s Inbox folder. Tap the button again to view Inbox folder messages in another account.

8. Return to the Email widget by pressing the Home button.
9. Tap the New Mail icon to write a new message in the Email app as described in this chapter.
10. Tap the Refresh icon to have the widget check for new messages in the Inbox folder.