6. Finding Widgets
Chapter 5 describes how to add a widget to a Home screen. Your Galaxy Tab 4 comes with a number of preinstalled widgets you can use. Some of these widgets are new with the latest version of KitKat and others are unique to the Galaxy Tab 4. The widgets include the Picture Frame widget, the Calendar widget, and more. This chapter covers the following topics:
![]() Finding widgets on the Galaxy Tab 4
Finding widgets on the Galaxy Tab 4
![]() Getting weather information
Getting weather information
![]() Adding and viewing videos
Adding and viewing videos
![]() Viewing photos in the Picture Frame widget
Viewing photos in the Picture Frame widget
![]() Accessing Web bookmarks
Accessing Web bookmarks
![]() Using the Calendar widgets
Using the Calendar widgets
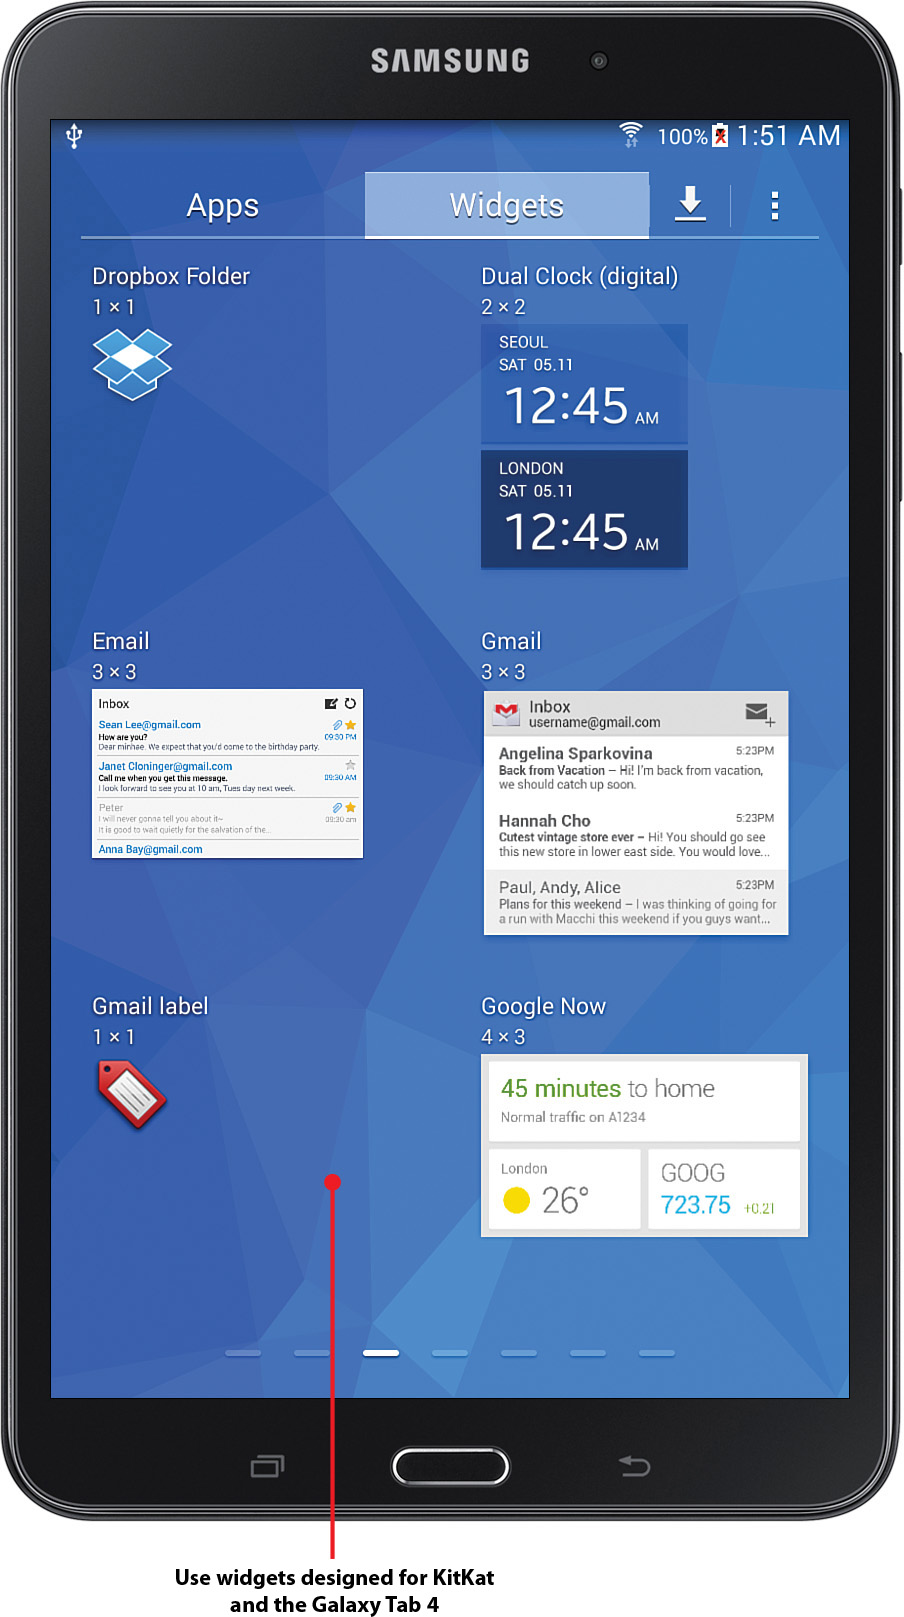
The Galaxy Tab 4 comes with 40 widgets installed on the device. Two of those widgets appear within the Home screen pages. You can also access all the widgets from within the Widgets screen, and in this chapter we focus on several popular widgets for getting current weather conditions, viewing photos and videos, accessing your Web browser bookmarks, and using the Calendar.
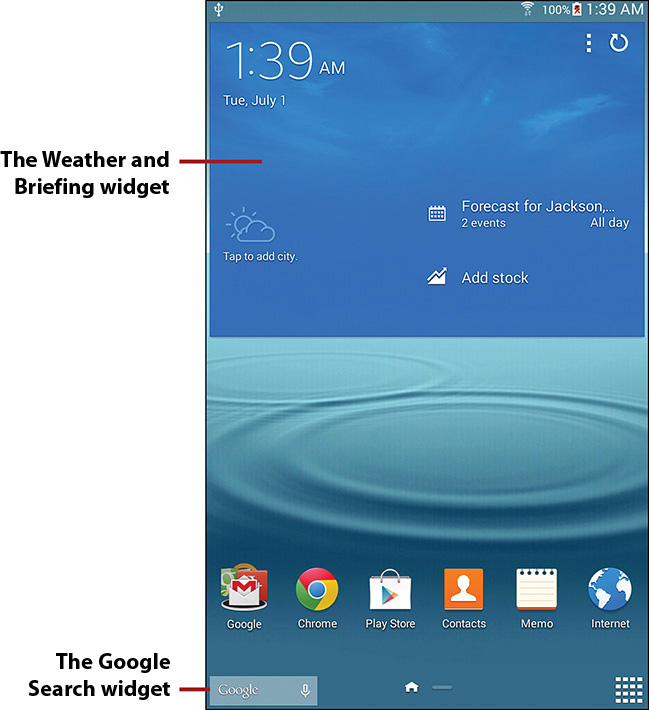
• The primary Home screen contains the Weather and Briefing widget at the top of the screen. This widget displays the current date and time as well as the current weather conditions for your location. At the bottom-left corner of the screen, the Google Search widget enables you to set up the Google Now app so you can get information you need without having to launch a browser app.
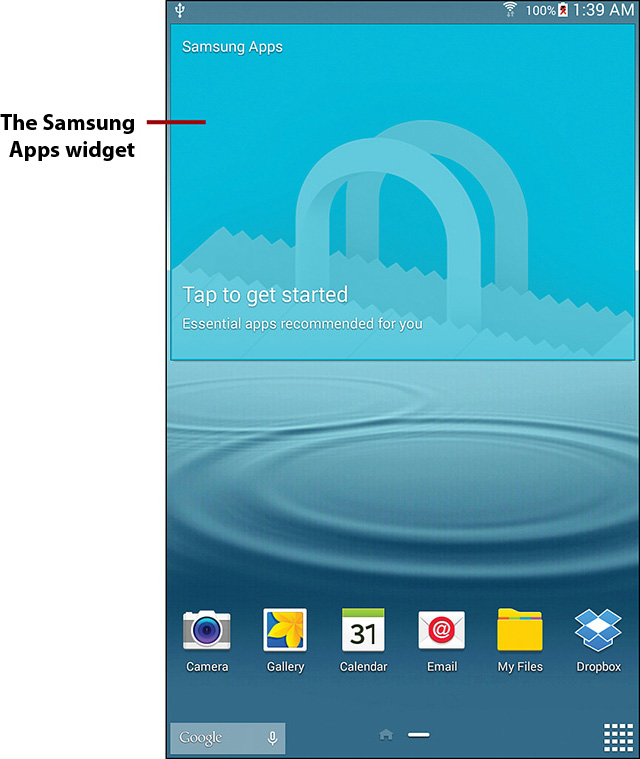
• Swipe from right to left on the primary Home screen to view the Samsung Apps widget on the Home screen. This widget doesn’t display any information because you haven’t set up the widget to display suggested apps from the Samsung App Store yet.
Find Widgets on the Widgets Pages
The widgets covered in this chapter are also within the Widgets screen pages. Some of them are already on Home screens by default, but it’s useful to know where the widgets are within the Widgets screen in case you remove a widget and want to place it on a Home screen again.
1. Tap the Apps icon on the Home screen.
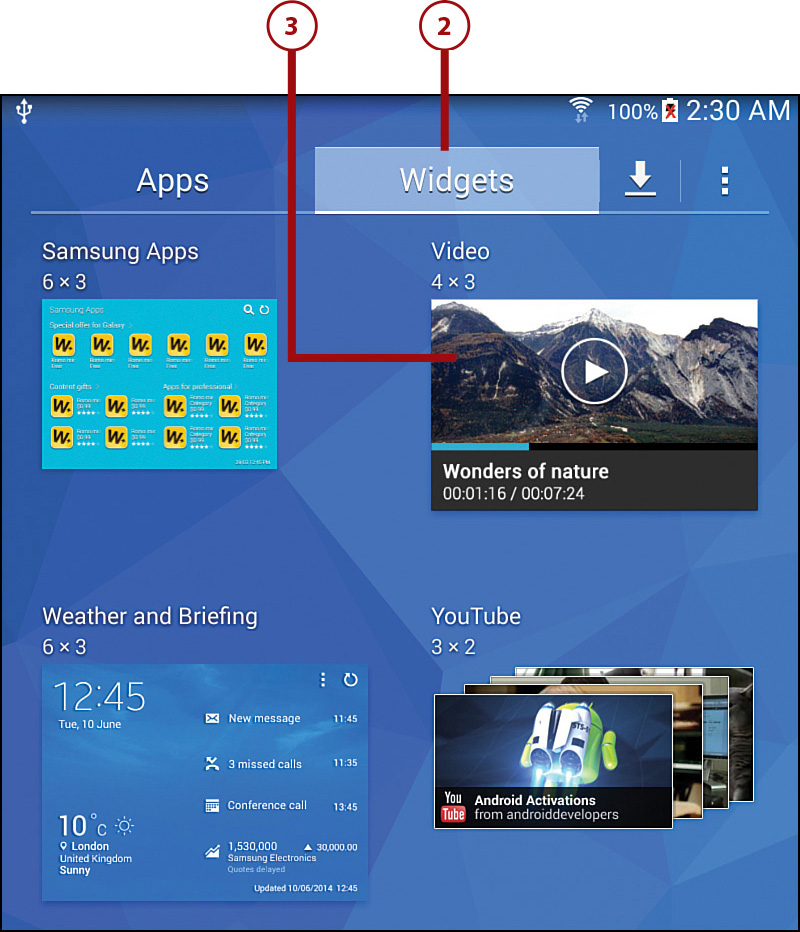
3. Swipe from right to left to view the Email and Gmail widgets on Page 3 of the Widgets screen.

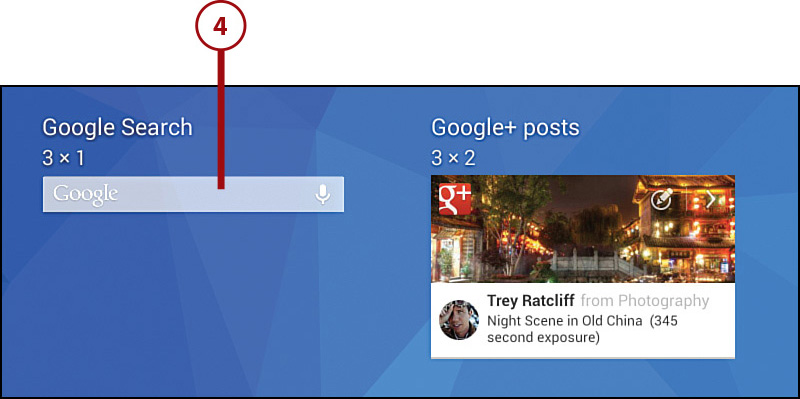
4. Swipe from right to left to view the Google Search widget on Page 4 of the Widgets screen. This widget is on the primary Home screen by default.
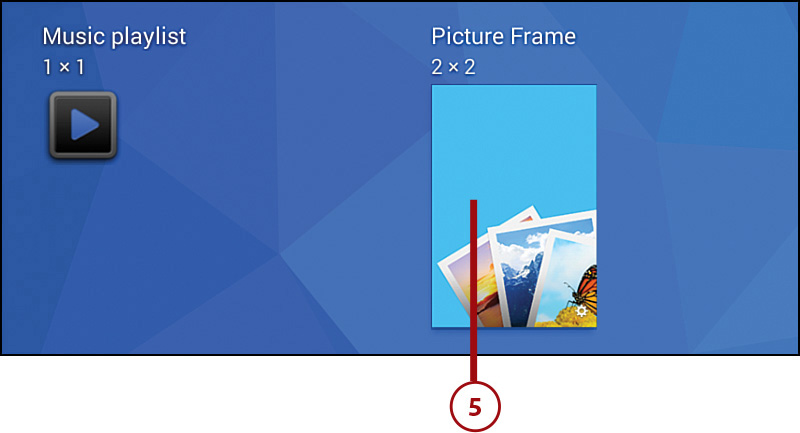
5. Swipe from right to left to view Page 6 in the Widgets screen that contains the Picture Frame widget.
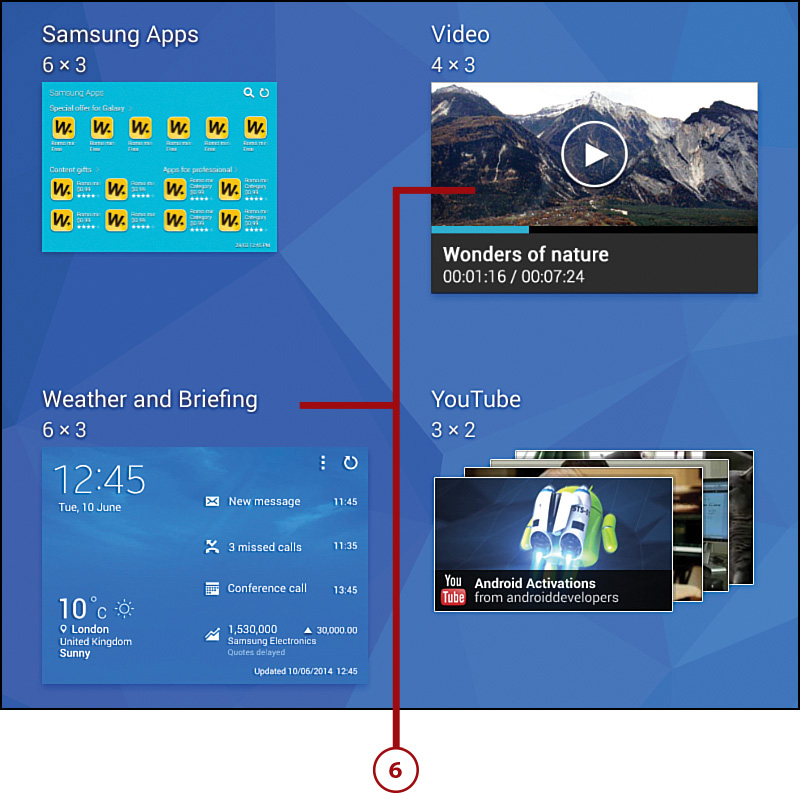
6. Swipe from right to left to view Page 7, the last page in the Widgets screen. The Video and the Weather and Briefing widgets appear on this page.
Using the Widgets
All widgets enable you to open the related app on the screen to view more information and make changes to the app. Some widgets have controls contained within the widget to update and/or change information you view in the widget.
Let’s begin by viewing the widget that appears on the primary Home screen: the Weather and Briefing widget.
Learn What It’s Like Outside with the Weather and Briefing Widget
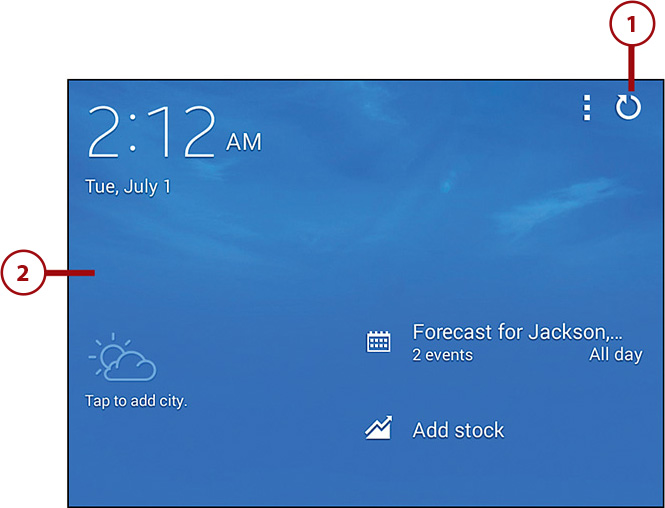
1. On the Home screen, update the current temperature and sky conditions for your area by tapping the Refresh icon. After a few seconds, the sky conditions image and text as well as the current temperature appear on the screen. The time and date of your last refresh appear to the left of the Refresh icon.
2. Open the Weather and Briefing app by tapping a blank area inside the widget.
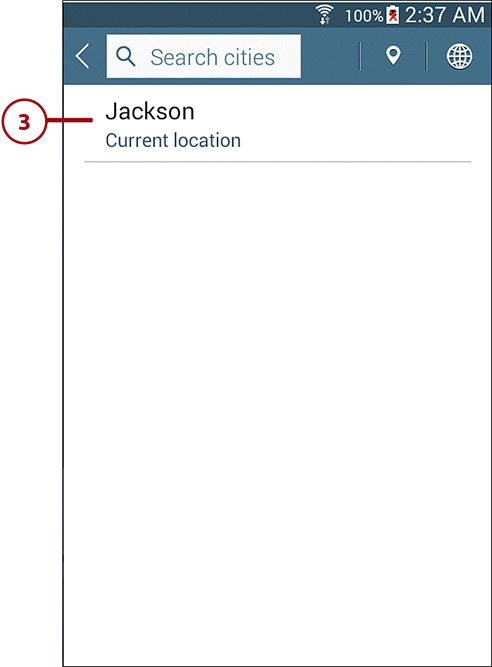
3. Select the city for which you want to display weather information by tapping the city in the search window.
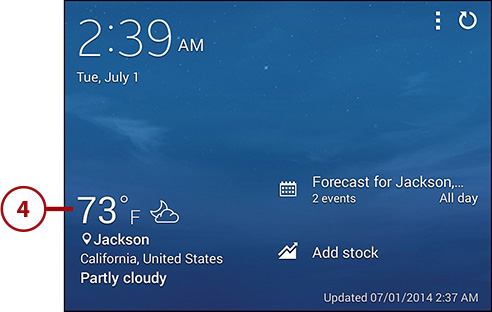
4. The current weather conditions appear in the lower-left corner of the widget. Open the Weather app by tapping the weather conditions text.
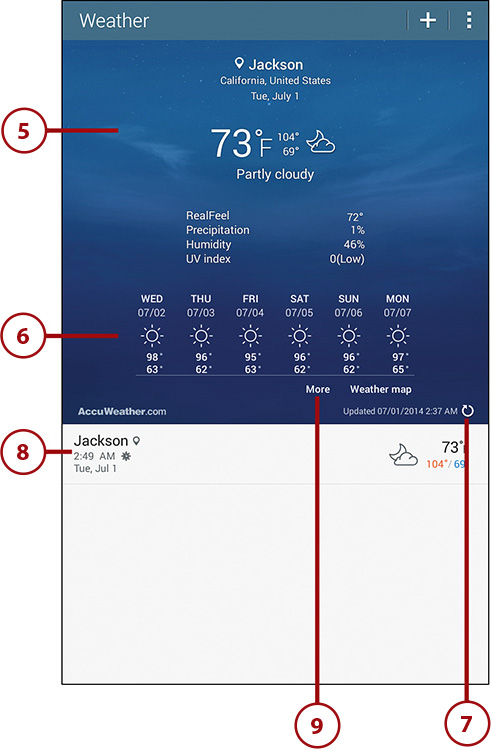
5. Four areas comprise the report section at the top of the Weather screen. The top of the screen displays current weather information including the current sky conditions for your area, the current temperature, the forecast high and low temperatures for the day, and information about precipitation, humidity, and the ultraviolet (UV) index.
6. The middle of the section includes an extended weather forecast for the next six days.
7. Check the bottom of the section to see the date and time the information was last updated. Tap the Refresh icon to get the most current weather information that appears at the top of the screen.
8. Below the report section you see a list of all cities you’re tracking; tap the city name in the list to view the current weather in the report section.
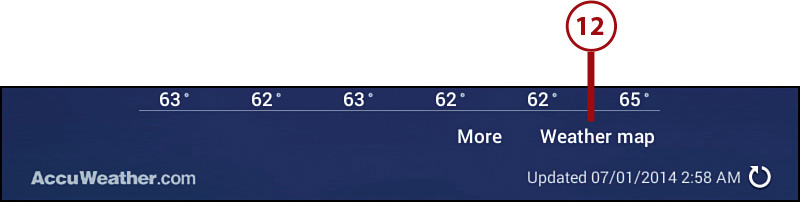
9. Tap More to view more weather information for your area in either the Internet or Chrome app.
10. The AccuWeather.com page appears and displays current information for your area. Swipe up and down the screen to view the current wind speed, humidity level, and the amount of cloud cover in the sky.
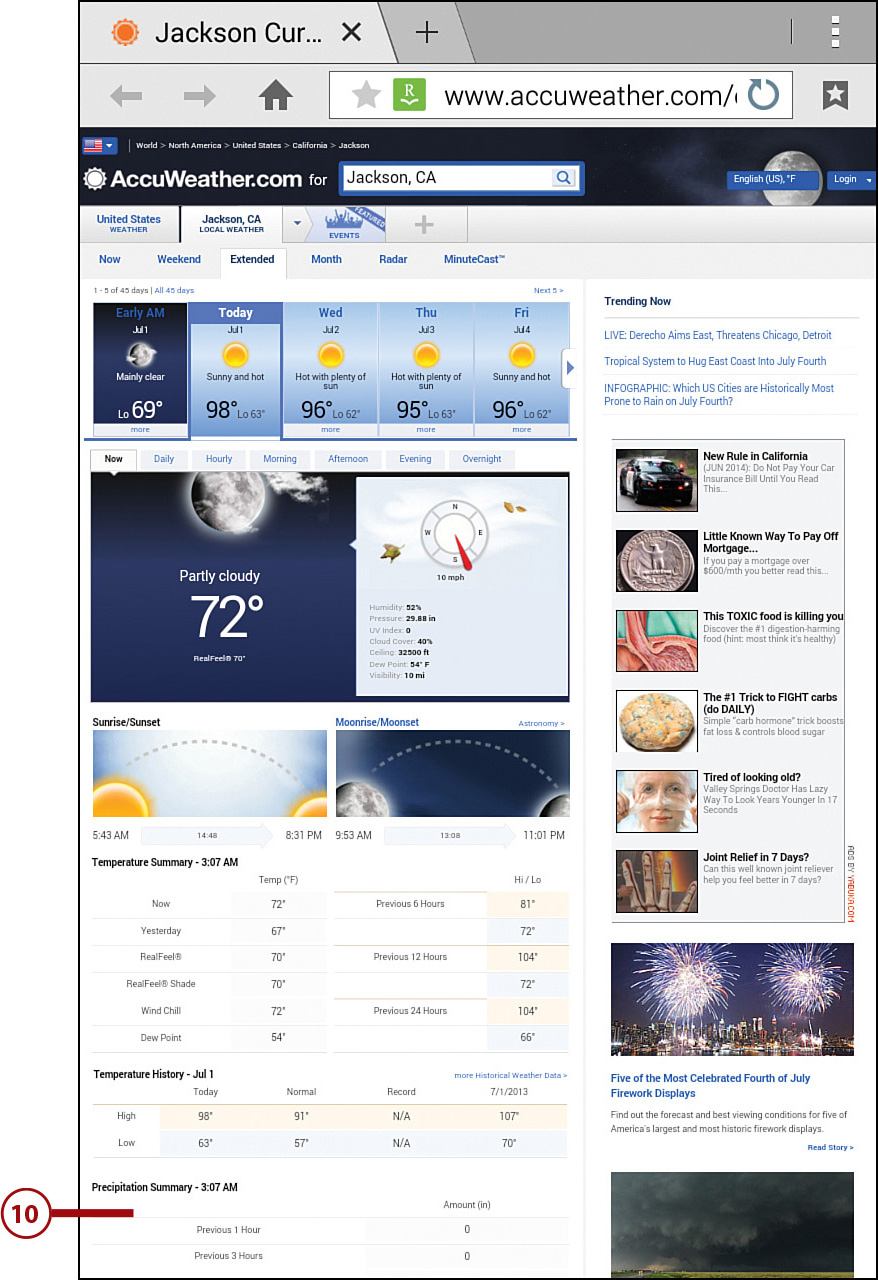
11. Return to the Weather widget screen by tapping the Back touch button.
12. View a current weather map by tapping Weather Map.
13. A Google map of the larger area around your location appears on the screen. Your current location appears in the center of the map; in this example it’s Jackson, California.

14. Return to the Weather widget screen by tapping the Back touch button.

Add Videos to the Video Widget
If you want to view videos without having to open the Video app in the Apps screen, you can view videos directly from within the Video widget on a Home screen. The most recent video you viewed appears within the widget, but if the Video app can’t find a video then the widget invites you to tap the widget to add a video.
1. Tap the Apps icon on the Home screen.
2. Tap Widgets.
3. Swipe from right to left to view the Video widget on Page 7 of the Widgets screen.
4. Add the Video widget to the main Home screen under the Weather and Briefing widget. Refer to Chapter 5 if you need more information about how to add widgets to a Home screen.
5. Swipe to the Home screen that contains the Video widget.
6. Tap anywhere in the widget.
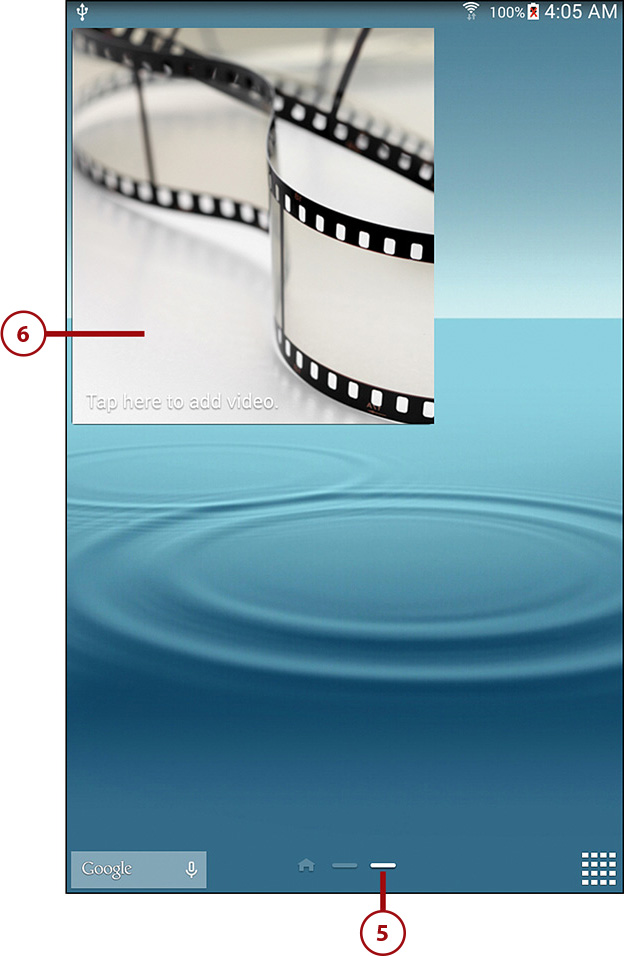
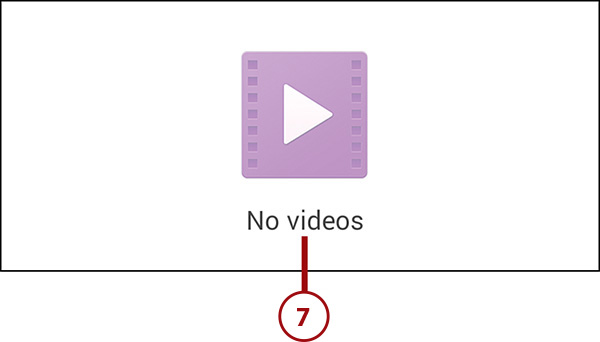
7. When you start the Video app, the screen tells you that there are no videos. You can drag and drop videos from your computer using Windows Media Player or another media player that you learned about in Chapter 3, “Setting Up the Galaxy Tab 4,” or you can record a video with the Camera app. (Find out how to record video in Chapter 12, “Playing Music and Video.”)
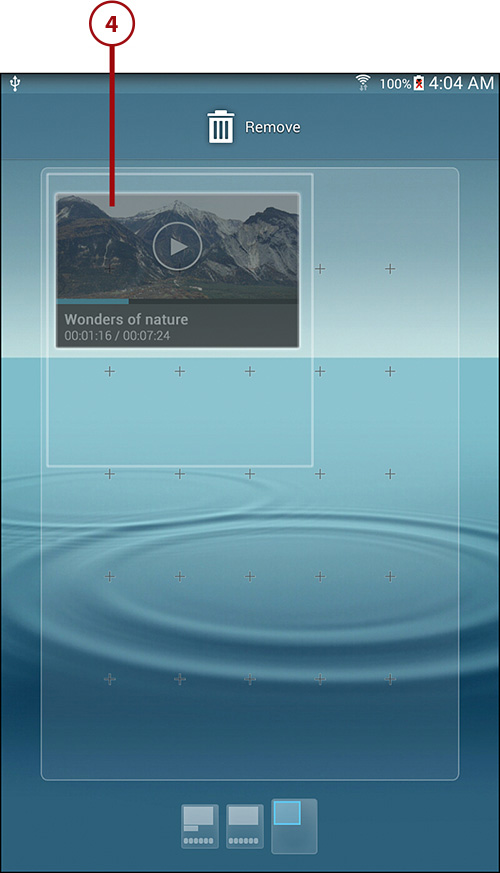
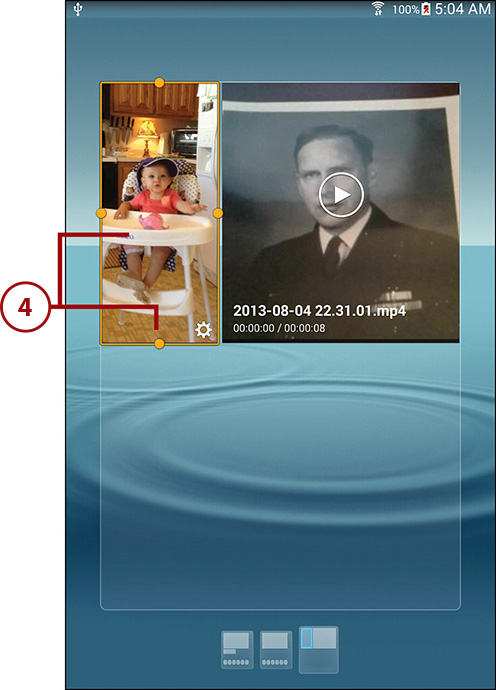
8. For this example, Eric opened his Dropbox account to view a brief video of his grandfather, a U.S. Navy Commander who was the Commander of a naval base in Kodiak, Alaska, in the early 1950s. When Eric opened the Video widget again, he tapped the thumbnail image in the list to play the video.
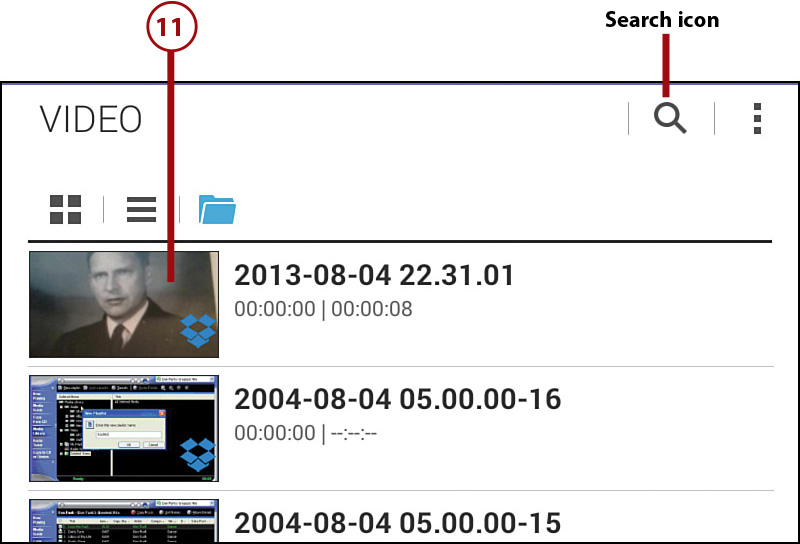
9. Tap the List icon in the menu bar to view a list of videos that shows a thumbnail image of the photo as well as file information, view a list of videos along with the folder in which the file is contained, and scan for videos on connected devices such as a smartphone.
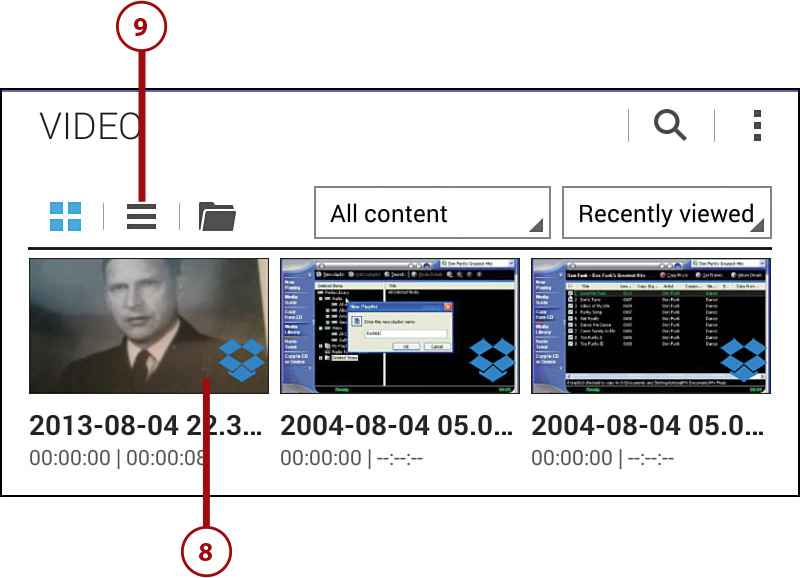
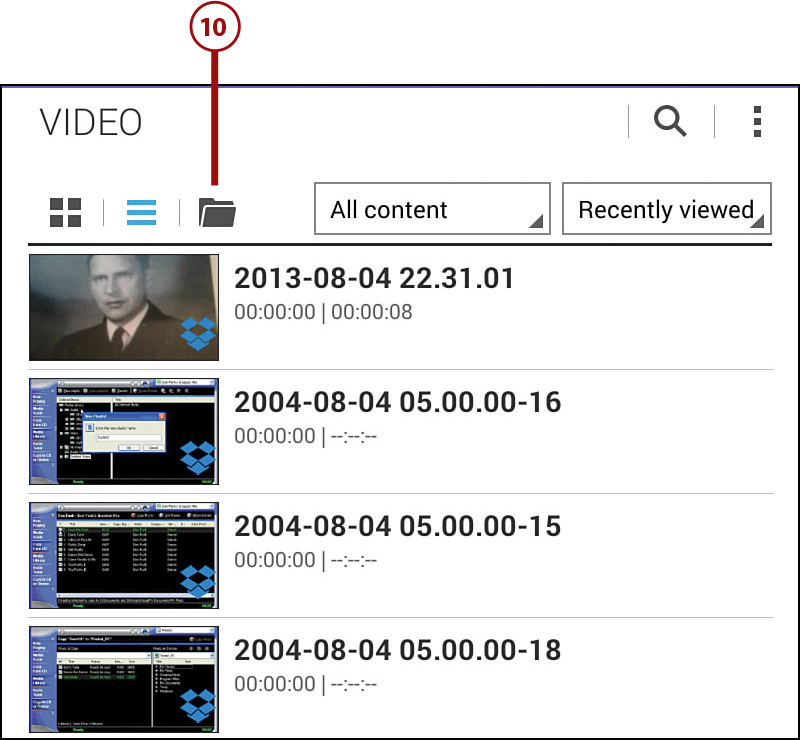
11. The video thumbnail image and file information appear within the Dropbox folder. View the video by tapping the thumbnail image.
View Pictures in the Picture Frame
The Picture Frame widget enables you to view one or more pictures stored on your Tab 4 within the widget area on a Home screen.
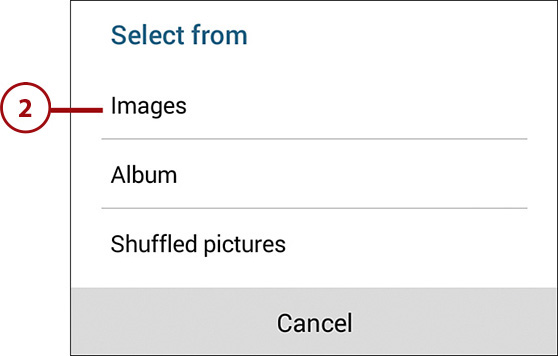
1. Add the Picture Frame widget to your desired Home screen if you haven’t done so already. The Select From window opens as soon as you add the widget to the Home screen.
2. In the window you can select from images stored on your device, an album file that contains images, or shuffled pictures that you view within the widget as a slideshow. For this example, tap Images. In the Gallery window, images in various folders display on the screen.
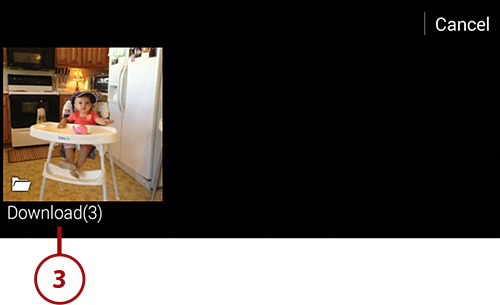
3. Tap the folder with the images you want to add to the Picture Frame app. This example uses the Download folder.
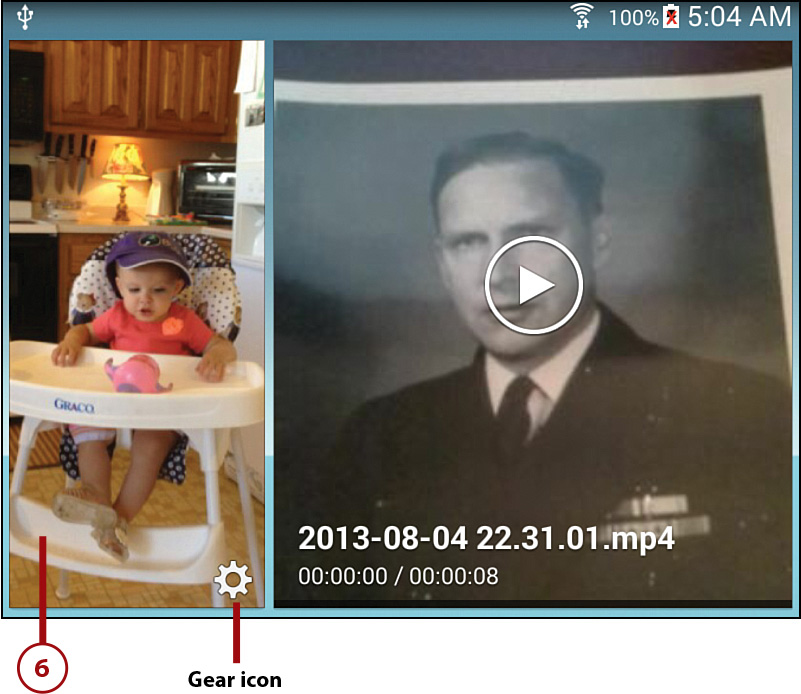
4. The Picture Frame widget appears on the Home screen’s Setup screen so you can see how the Picture Frame will look on the screen. If more than one image appears in the widget, you see the slideshow of photos. You can move the widget around on the screen and you can resize the widget by tapping, holding, and dragging one of the four resizing handles on the sides of the widget box.
5. Tap the Back touch button.
6. The Picture Frame widget appears in your desired location on the Home screen.
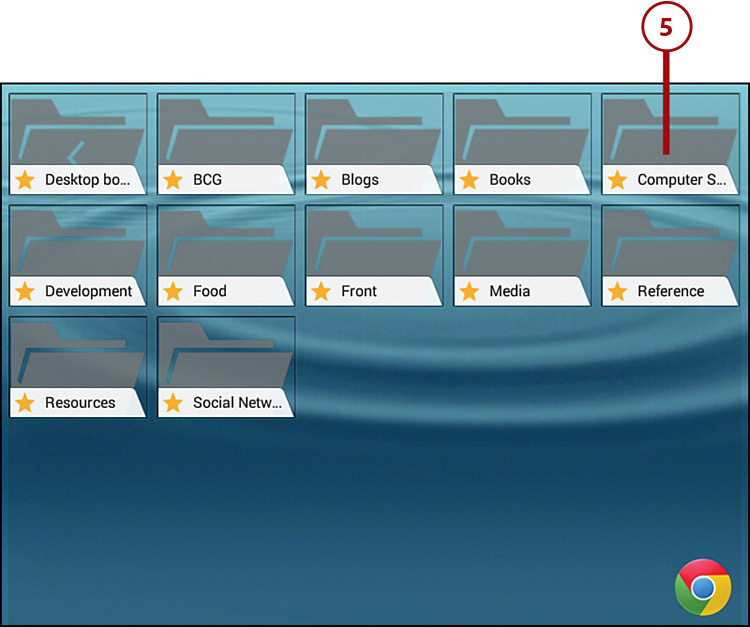
Access Chrome Bookmarks Quickly Using Bookmarks
The Bookmarks widget enables you to store bookmarks within the Chrome browser app. After you set up the Bookmarks widget, you can browse for bookmarks directly within the widget and open the bookmarked website in the Internet or Chrome app.
1. Add the Bookmarks widget to your desired Home screen if you haven’t done so already.
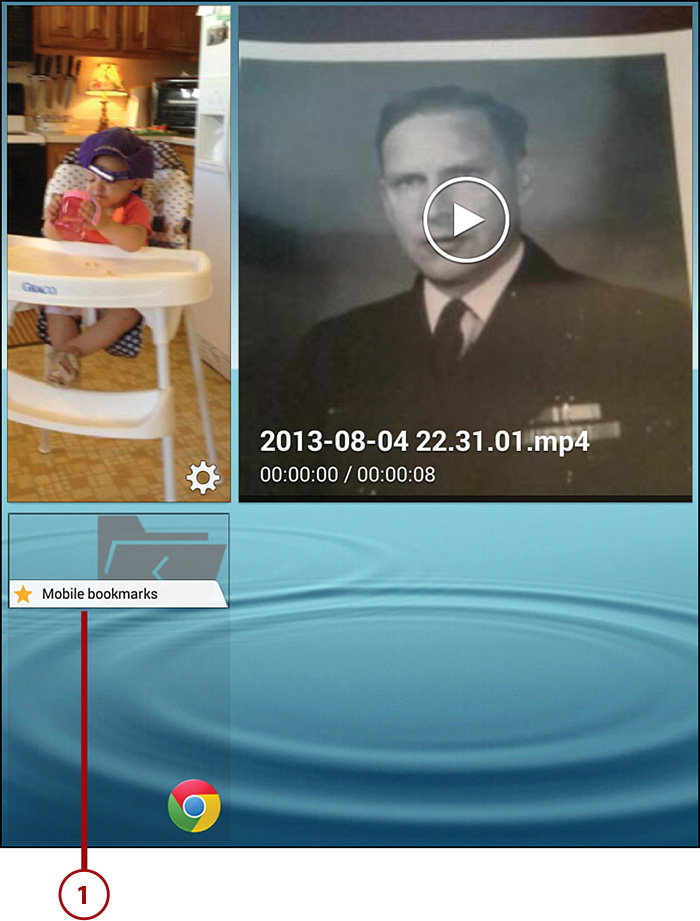
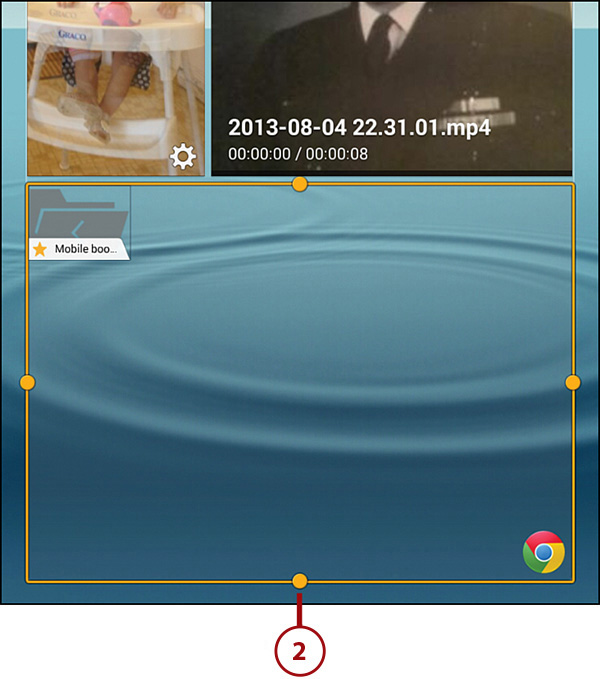
2. The Bookmarks widget appears on the Home screen’s Setup screen so you can see how the widget will look on the screen. You can move the widget around on the screen and you can resize the widget by tapping, holding, and dragging one of the four resizing handles on the sides of the widget box. For this example I resized the widget so it takes up the bottom half of the Home screen.
3. Tap the Back touch button.
4. Swipe your finger up and down within the widget (if necessary) to view all the folders that contain your bookmarks.
5. Tap the folder that contains the bookmarked website you want to view.
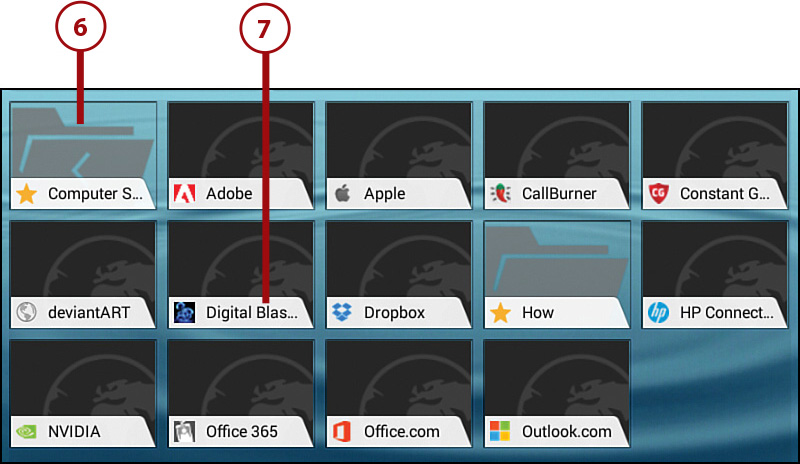
6. Swipe your finger up and down within the widget to view all the bookmarks (and any subfolders) contained with the folder. Go back to the previous folder by tapping the folder name at the top of the folder list.
7. Tap the bookmark that contains the website you want to view.
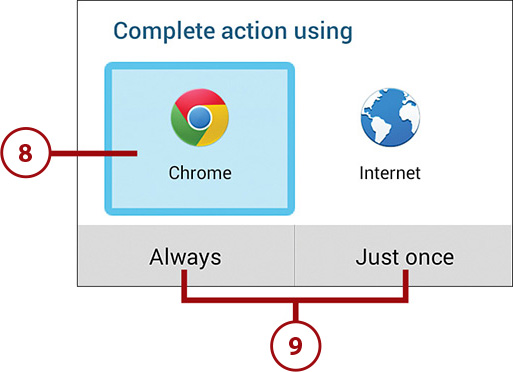
8. If you see the Complete Action Using window, tap the browser app icon to view the website within that browser app. This example uses the Chrome app.
9. Tap the Always button to open websites from the widget using the selected browser app. If you want the app to ask you to select your browser app each time you open a bookmarked website, tap the Just Once button.
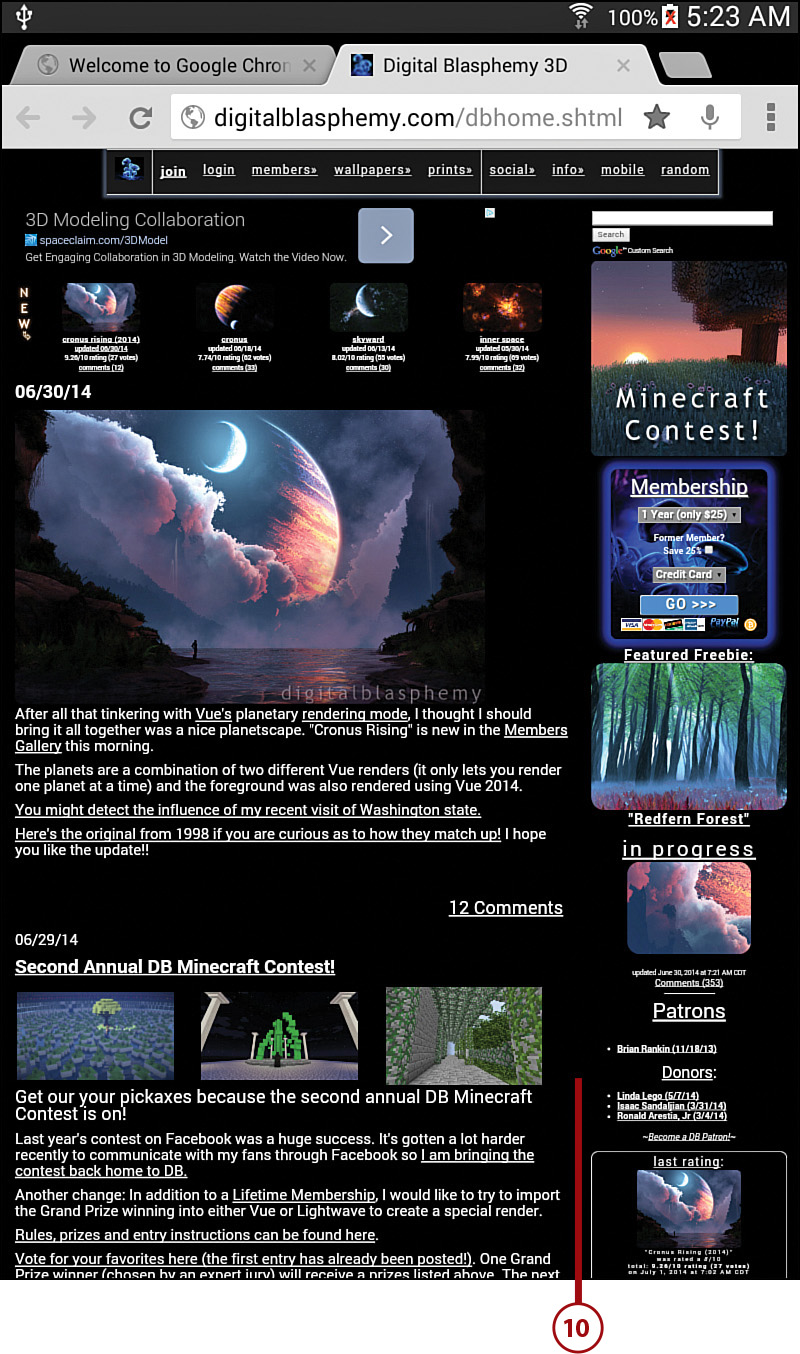
10. The website appears in your desired browser app.
11. Tap the Back touch button to return to the Home screen that contains the Bookmarks app.
See Your Calendar at a Glance Using the Calendar Widgets
There are two Calendar widgets: the Mini Today widget that shows you the appointments you have for the current day and the Month widget that shows all your events for the current month.
Calendar (Mini Today) Widget
You can view events on dates other than the current date and you can also add an event for the current date within the Mini Today widget.
1. After you add the widget to your desired Home screen, the widget appears at your desired location on that Home screen.
2. Tap the left arrow icon to see events on the previous day.
3. Tap the right arrow icon to see events on the following day.
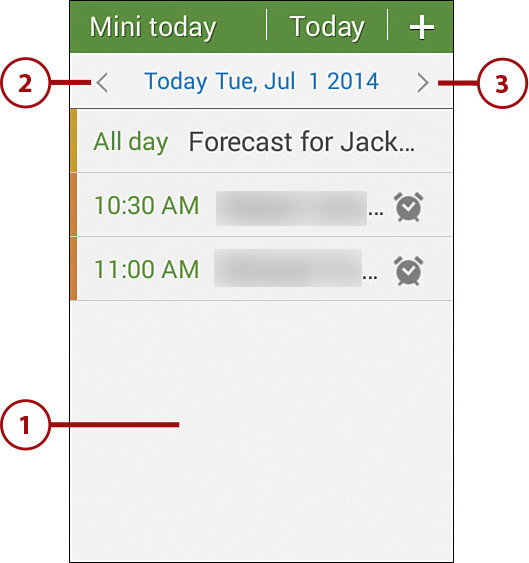
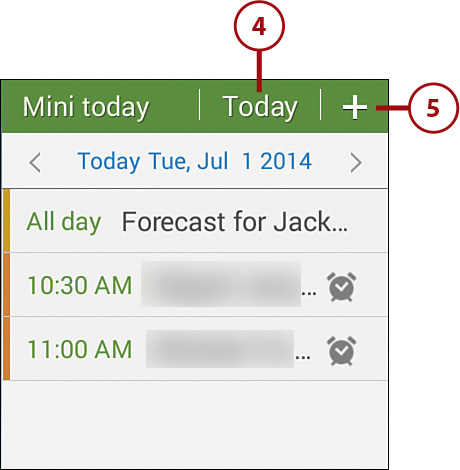
4. If you’re viewing events on a day other than the current day, return to appointments on the current day by tapping Today.
5. Tap the plus icon to add a new event.
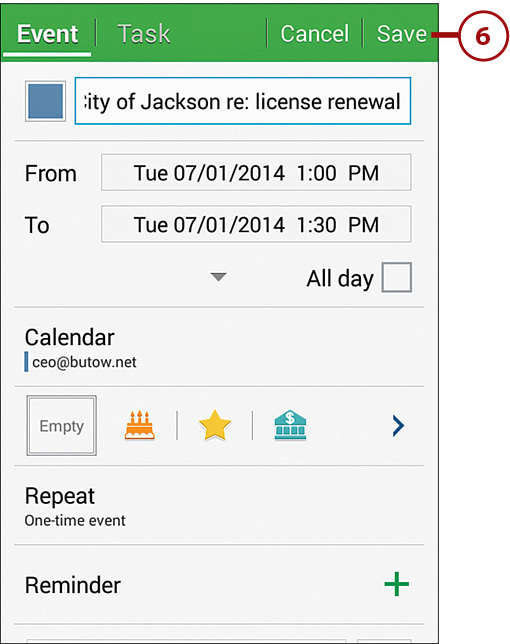
6. The Event window opens so you can add a new event to your calendar. Read Chapter 14, “Using Productivity Apps to Simplify Your Life,” to see how to add an event to your calendar. Tap Save after you’ve entered the details of your appointment.
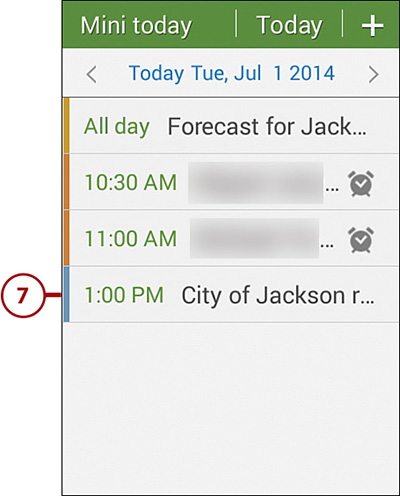
7. The new appointment appears in the Mini Today widget.
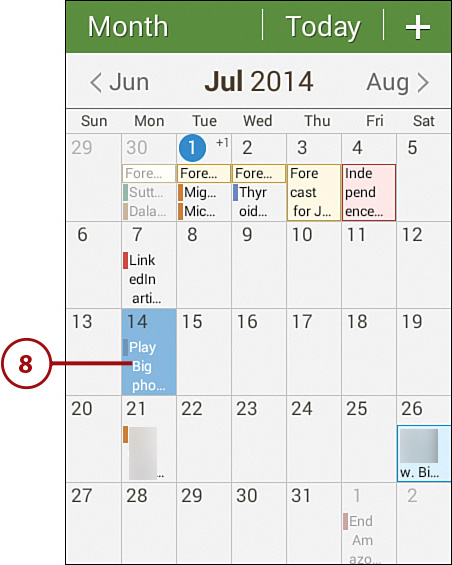
Calendar (Month) Widget
You can view events for the current month stored in S Planner by adding the Month widget to a Home screen.
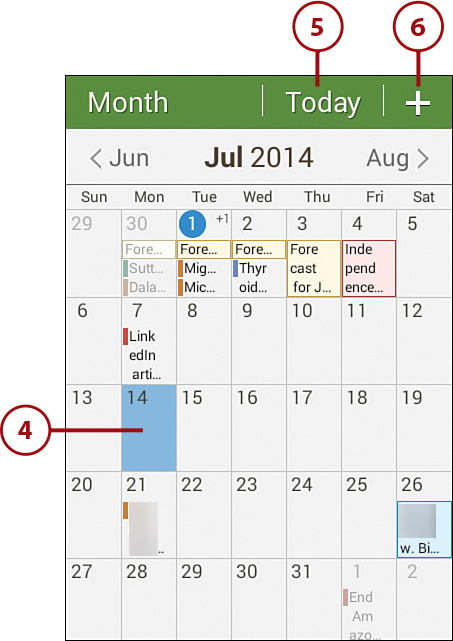
1. After you add the widget to your desired Home screen, the widget appears at your desired location on that Home screen. The current date is highlighted in blue and the date is circled.
2. Tap the left arrow icon to see events for the previous month. The three-letter abbreviation for the previous month appears to the right of the icon. In this example, June is the previous month and it has the abbreviation Jun.
3. Tap the right arrow icon to see events for the following month. The three-letter abbreviation for the following month appears to the left of the icon. In this example, August is the next month and it has the abbreviation Aug.
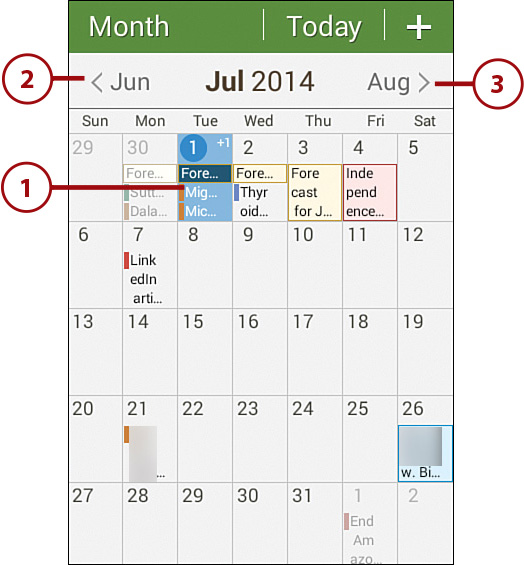
4. Tap another date to highlight that date and also to add an event for that date.
5. If you’re viewing events on a day other than the current day, highlight the current day by tapping Today.
6. Add a new event by tapping the plus icon.
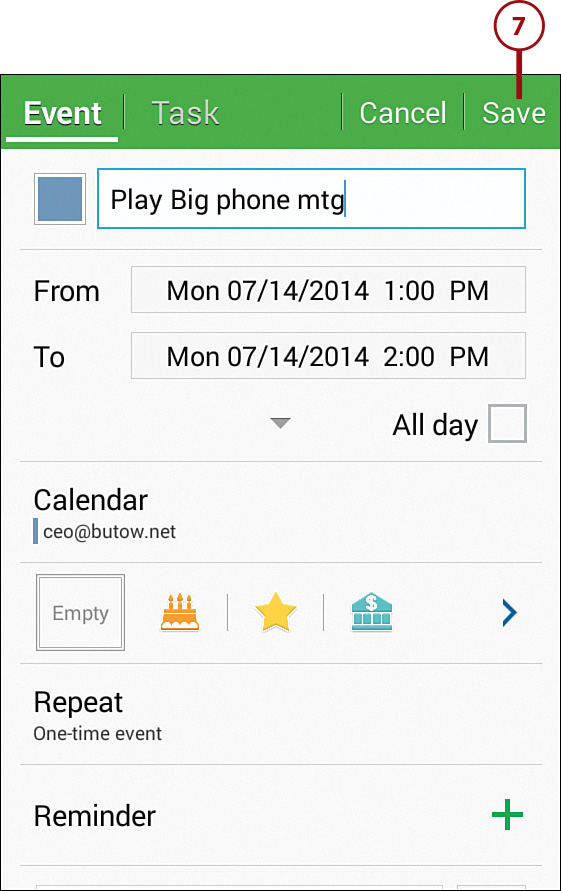
7. The Event window opens so you can add a new event to your calendar. Read Chapter 14 for details about how to add an event. Tap Save.
8. The new appointment appears in the Month widget.