14. Using Productivity Apps to Simplify Your Life
In this chapter, you find out how to organize your daily schedule, news, and information. You also see how to add and search contacts and calendar events. Topics in this chapter include:
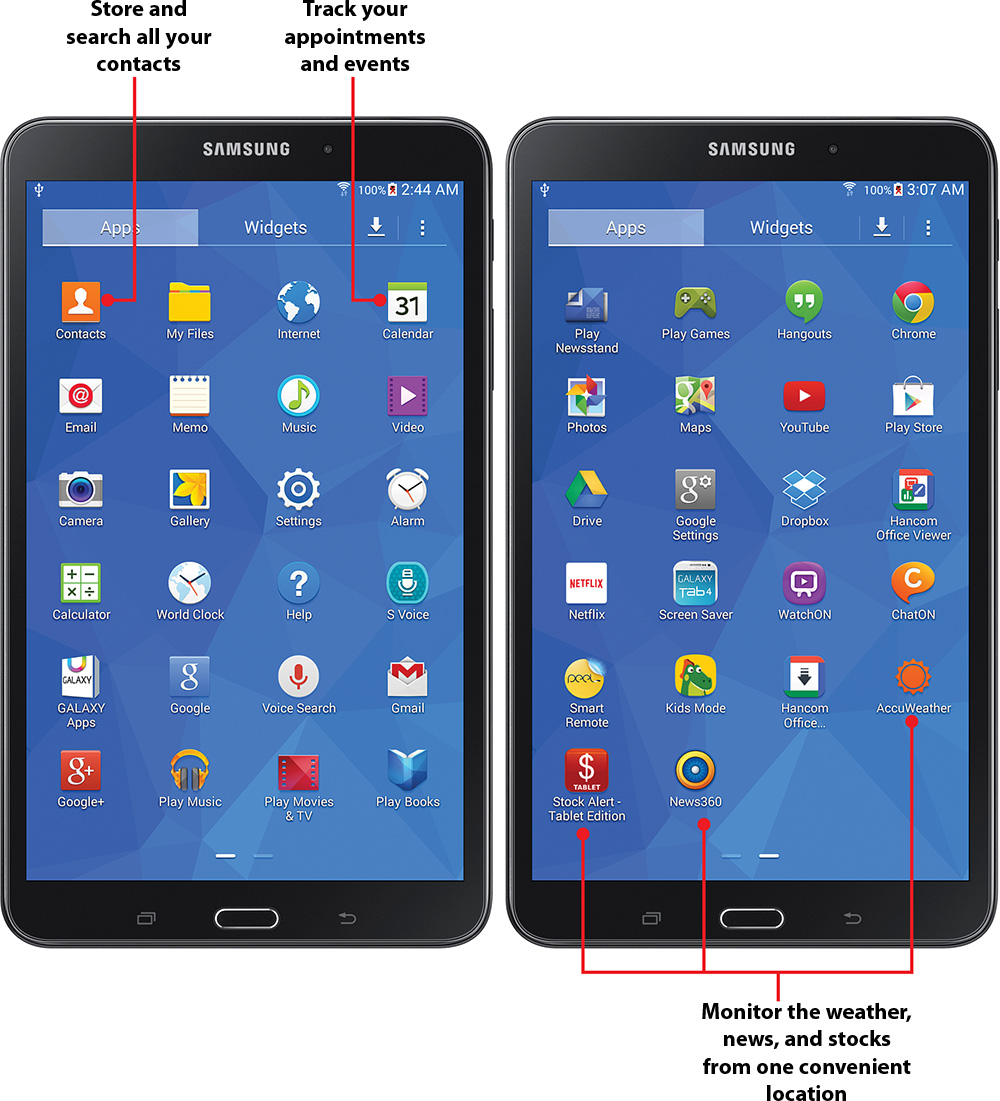
![]() Choosing a weather forecast for your briefing
Choosing a weather forecast for your briefing
![]() Checking and adding to your personal schedule
Checking and adding to your personal schedule
Your Galaxy Tab 4 is highly capable of helping you organize your busy life. The preinstalled Contacts and Calendar widgets help you improve your daily efficiency by enabling you to manage personal contacts and schedule important appointments. You can also download free productivity apps from the Google Play Store to get the latest weather forecast, learn what’s happening on the stock market, and view the latest news stories. This chapter takes a close look at what these productivity apps, as well as the Contacts and Calendar widgets, can do for you.
Staying Up to Date
If you want to stay up to date with news, weather, and stock information, there are several well-reviewed free apps available in the Google Play Store.
• AccuWeather, which is an app that enables you to get up-to-the-minute weather conditions and forecasts for your area.
• The Stock Alert Tablet Edition app enables you to view all sorts of information about stocks.
• If you’re looking for news, search for News360 for Tablets.
This section gives you a brief look at these three apps so you can get the information you’re looking for on your Galaxy Tab 4. Start by downloading the apps. (You can find out how to download apps in Chapter 16, “Finding and Managing Apps.”) You can also explore the Google Play Store to see what other apps might meet your needs.
Choose a Weather Forecast
Follow these steps to display the forecast for a specific city in AccuWeather:
1. On the Home screen, tap Play Store.
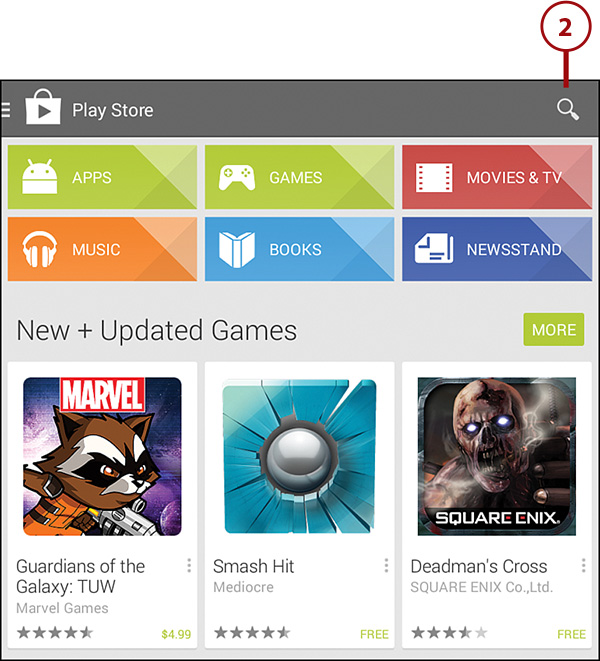
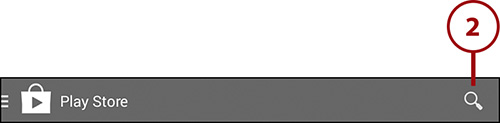
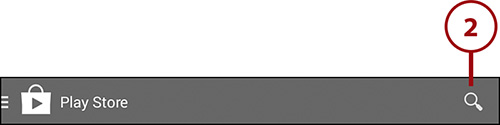
2. Tap the Search icon.
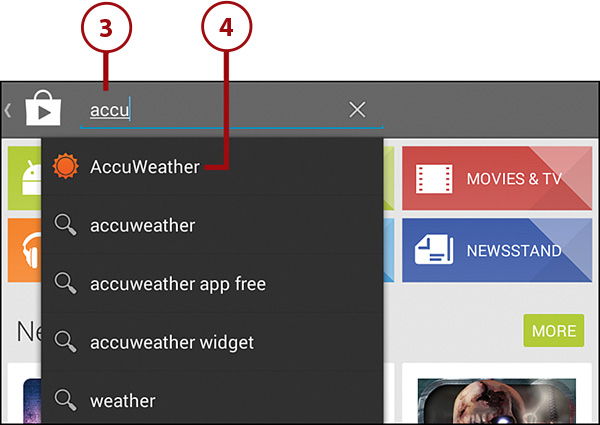
3. Start typing AccuWeather in the Address field.
4. Tap AccuWeather in the search list.
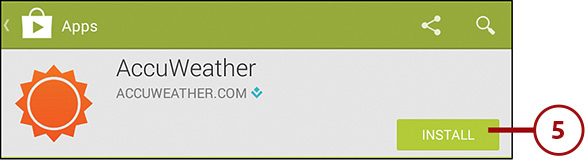
5. Tap Install.
6. Tap Accept.

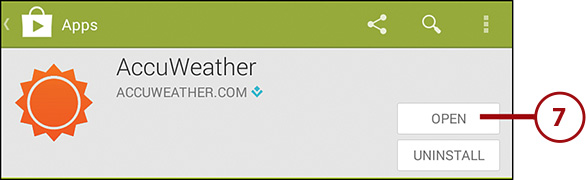
7. After the Galaxy Tab 4 downloads and installs the app, tap Open. Tap I Agree on the Terms of Use page.
8. Tap Next in each of the three steps within the introductory slideshow.
9. Tap No Thanks on the Quick Setup screen.
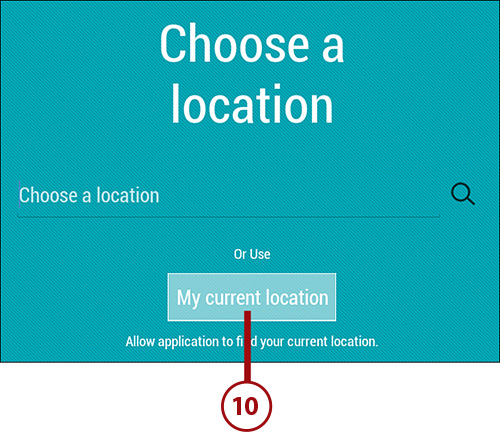
10. Tap My Current Location in the Choose a Location screen.
11. The current conditions appear on the screen.
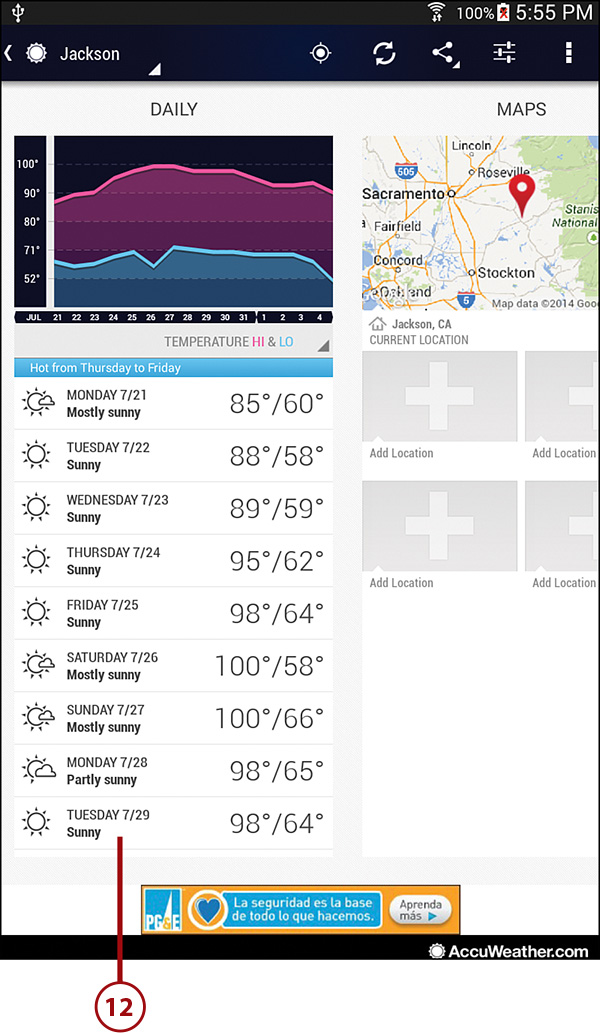
12. Swipe from right to left to view the 15-day forecast in the Daily column. Within the list of forecast dates and temperatures, you can scroll down the days to see the forecasted conditions for the next 15 days.
Track Stocks
You can configure the Stock Alert Tablet app so that you can monitor a desired stock for a company.
1. Tap Play Store on the Home screen.
2. Tap the Search icon.
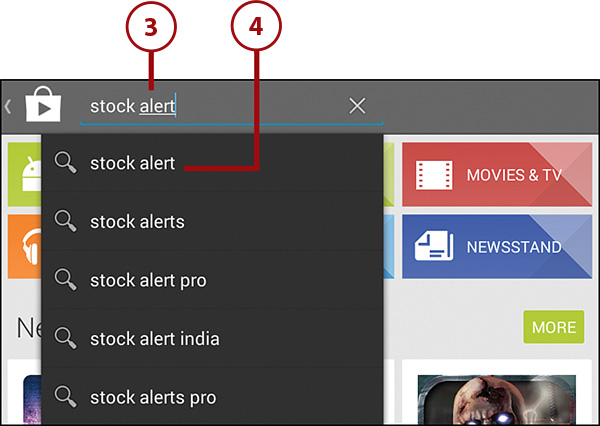
3. Type Stock Alert in the Search field.
4. Tap Stock Alert in the list.
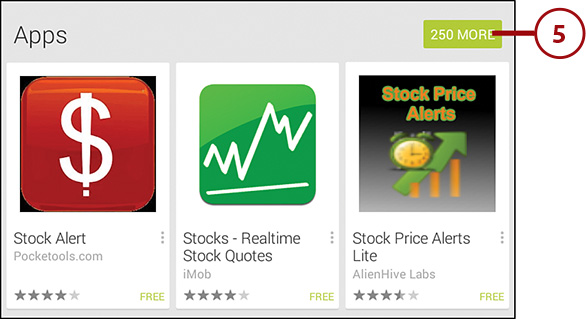
5. Tap More on the Apps screen.
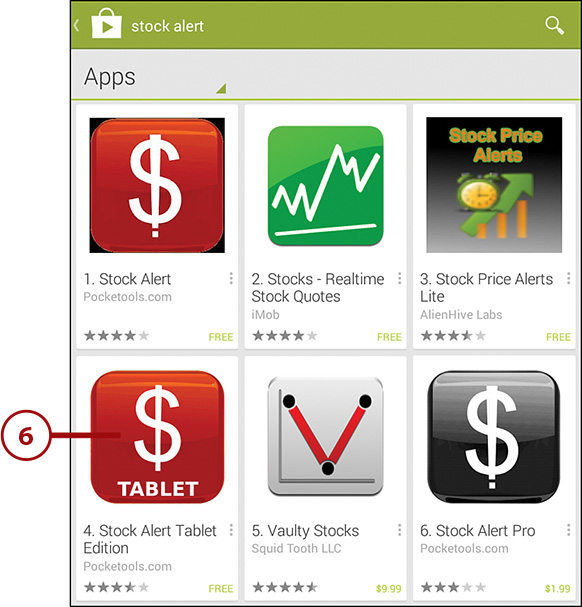
6. Tap Stock Alert Tablet Edition.
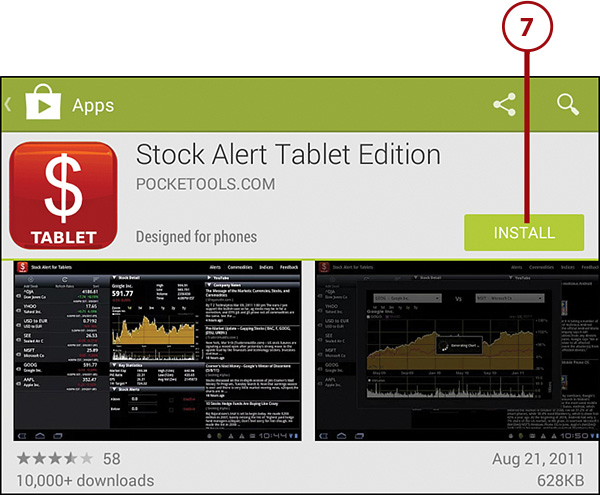
8. Tap Accept. The Galaxy Tab 4 downloads and installs the Stock Alert Tablet Edition app automatically.

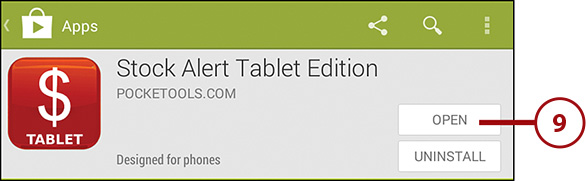
9. After the Galaxy Tab 4 downloads and installs the app, tap Open.
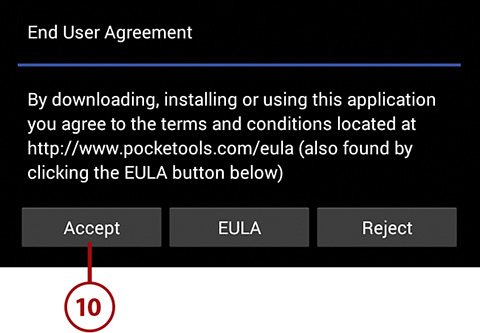
10. If this is your first time starting Stock Alert Tablet, tap Accept to accept the End User agreement.
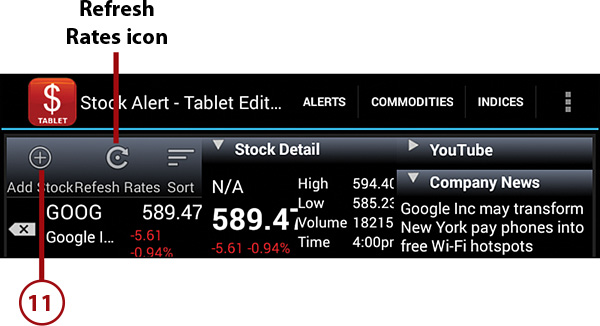
11. Tap the Add Stock icon to add a stock.
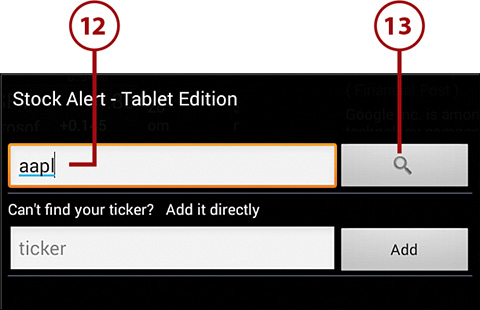
12. Type the name of the company with the stock that you want to track. You can also type the stock ticker name.
13. Tap Search to view a list of results for the stock.
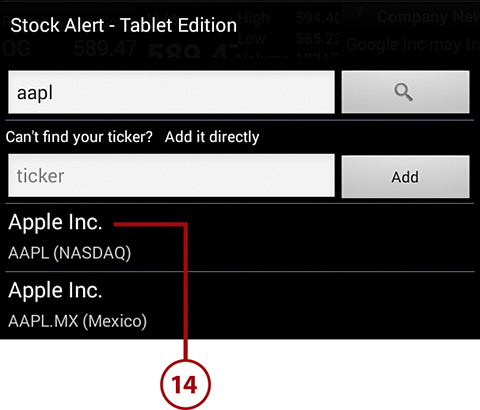
14. Scroll down the stock list in the window if necessary. Tap the name of the stock that you just added to view the stock summary.
Select Your News Settings
You can browse the latest world, national, and local news stories by customizing your news settings in News360. However, before you can do so you need to create a News360 account.
1. Tap Play Store on the Home screen.
2. Tap the Search icon.
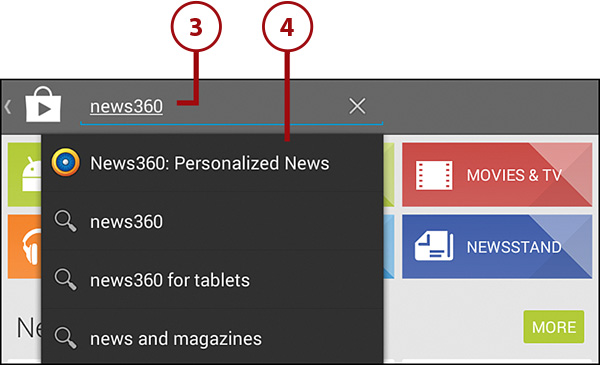
3. Type News360 in the Search field.
4. Tap News360: Personalized News in the list.
5. Tap Install.
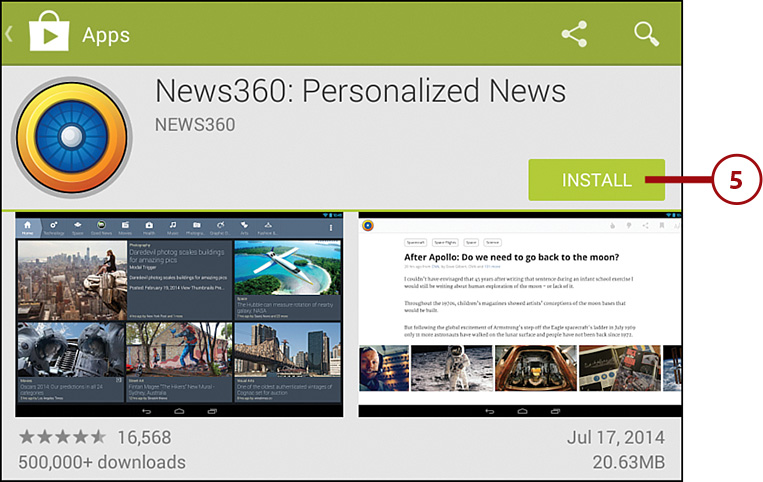
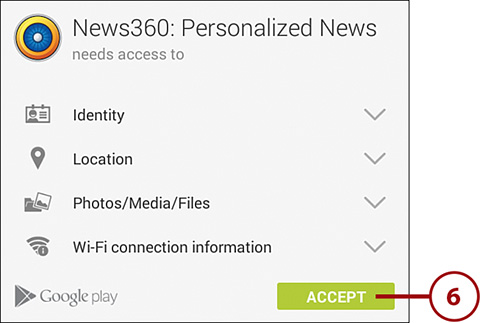
6. Tap Accept. The Galaxy Tab 4 downloads and installs the News360 for Tablets app automatically.
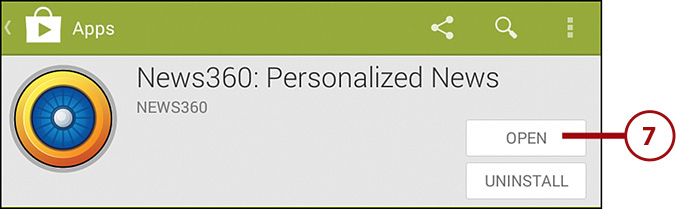
7. After the Galaxy Tab 4 downloads and installs the app, tap Open.
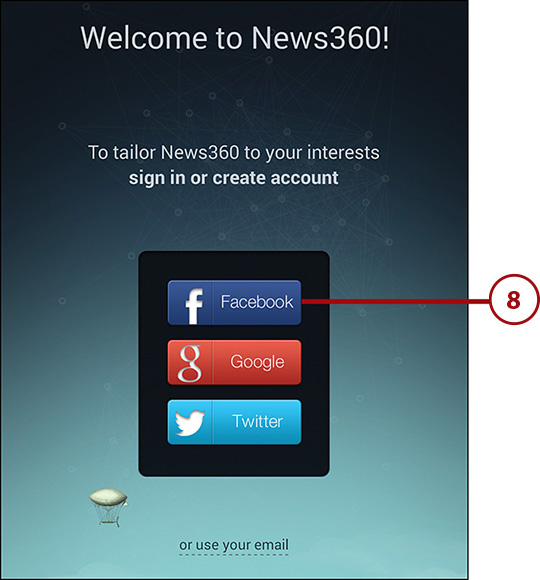
8. Choose how you want to authenticate with News360 by tapping the appropriate social networking icon. You can use your Facebook, Google, Twitter, or email account information. This example uses a connection through a Facebook account.
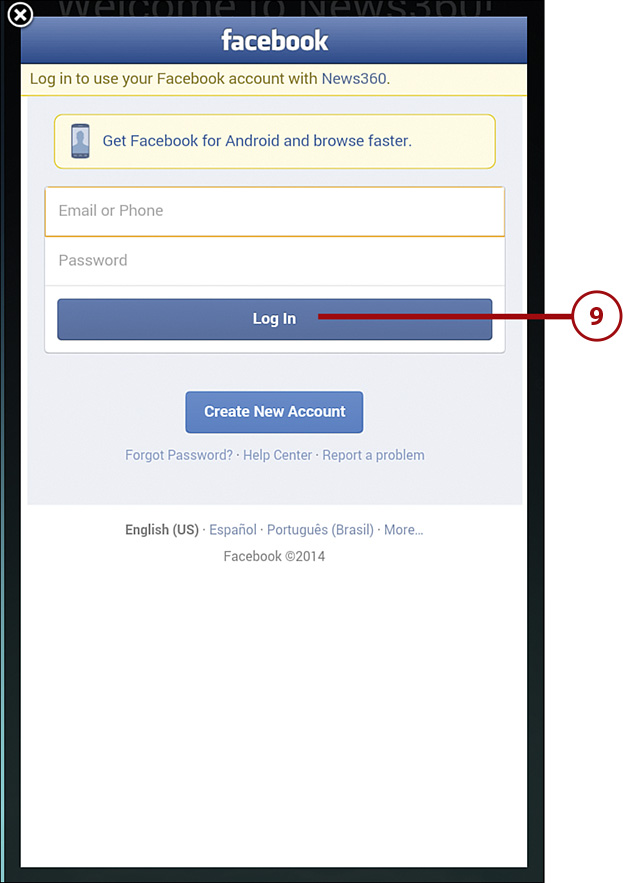
9. In the Facebook window, type your email account and password, and then tap Log In.
10. Tap OK to give News360 access to your public profile and friend list on Facebook.
11. The opening screen shows you some important features of the News360 screen and how to use the app. Tap Got It, Continue. After you review the information on the screen, tap Start Using News360.
12. Above the default list of stories on the home page, the list of your interest categories appears in the category bar. Swipe left and right within the bar to view all categories in the list. Tap one of the categories to make stories within that category display under the category bar. If there are no stories in the category, News360 invites you to return later.
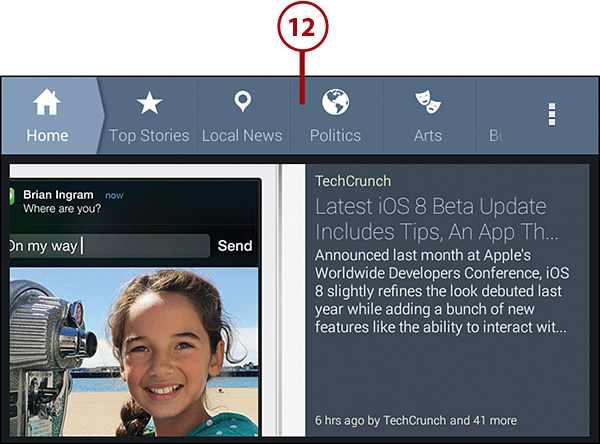
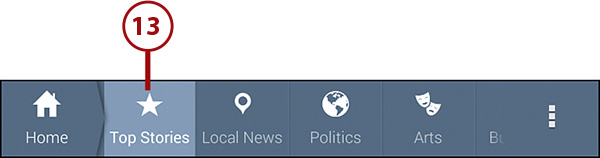
13. Swipe from left to right in the category bar if necessary and then tap Top Stories.
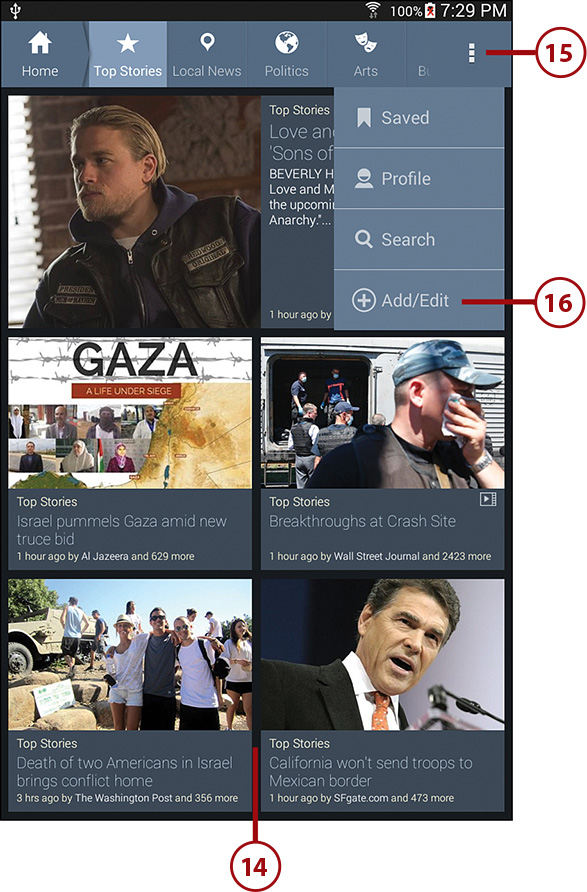
14. The list of top stories appears. You can scroll up and down the list and tap a story title to read it.
15. You can search for articles or topics by tapping the Menu icon at the right side of the menu bar and then tapping Search.
16. Tap Add/Edit to open the settings page.
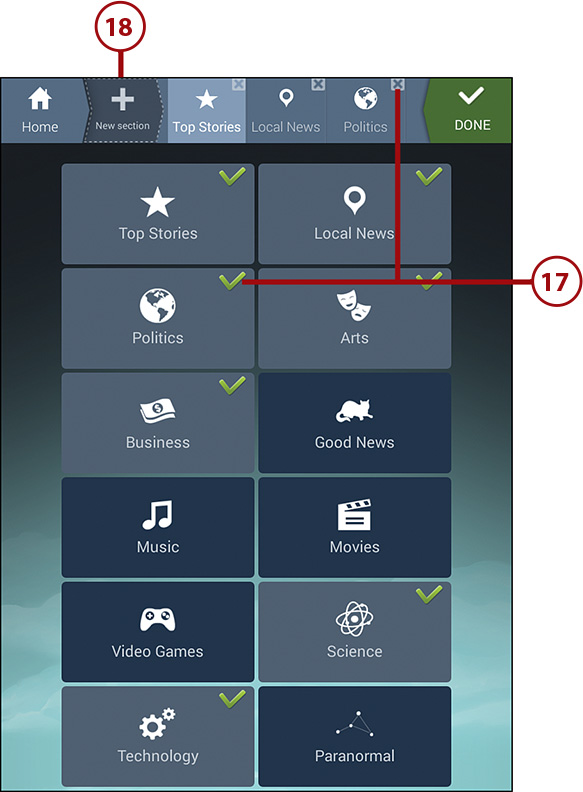
17. Remove one of your existing categories by tapping the X button to the upper right of the category icon or by tapping a gray topic tile that has a green check mark in the upper-right corner of the tile.
18. Add a new section by tapping New Section.
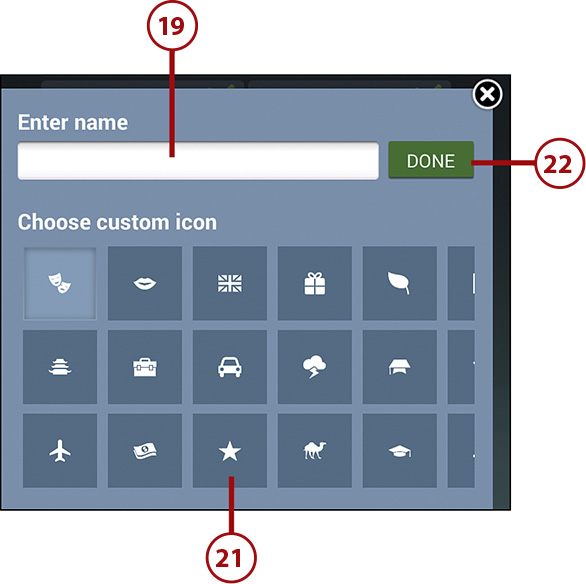
19. Type the category name in the Enter Name box.
20. Hide the keyboard by tapping the Back touch button below the screen.
21. In the Choose Custom Icon section, swipe to the left and right to view all the icons and then tap the icon tile that you want to associate with the category name.
22. Tap Done.
23. Swipe back and forth to view a list of categories you can add to the section, and then tap the category tile you want to add. After you add the category tile, a green check mark appears in the upper-right corner of the tile.
24. After you add all the categories you want to add to the section, tap Done.

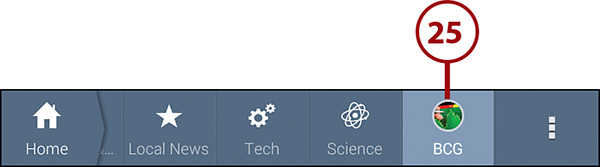
25. Your new section with the category (or categories) you added appears in the category bar, although you might need to swipe to the left within the bar to see it.
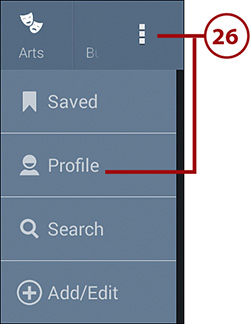
26. Tap the Menu icon in the menu bar and then tap Profile.
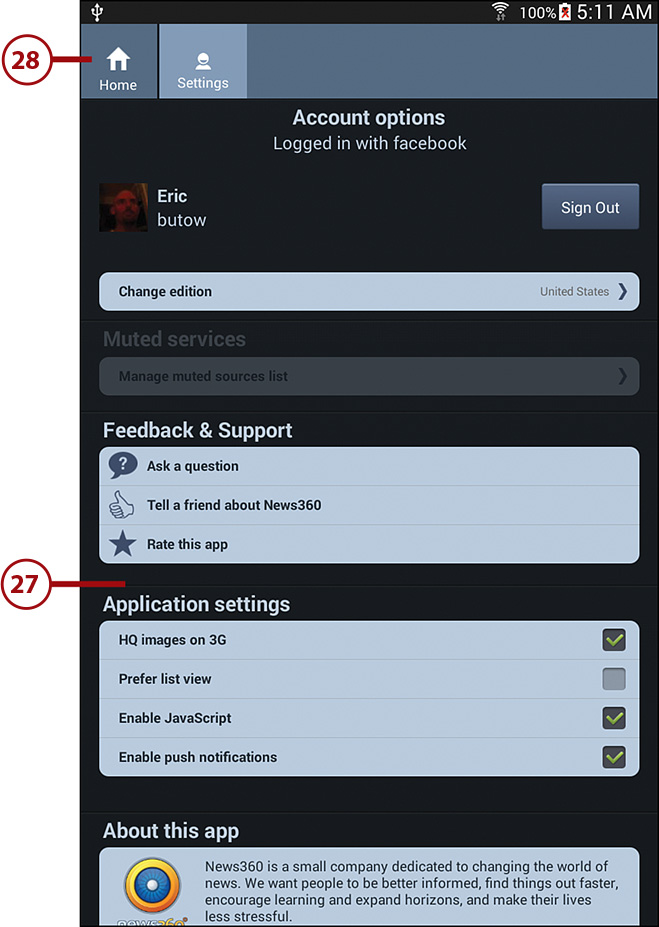
27. Swipe up and down if necessary to view your account information, sign out of News360, change application settings, and learn more about the app. These settings include showing or hiding high-quality images when you’re connected to the Internet using a 3G connection and displaying stories in list view instead of as tiles.
28. Return to the News360 home page by tapping Home.
Managing Contacts
The Contacts widget enables you to manage all the important information you receive from colleagues, friends, and prospective business associates. Think of your Galaxy Tab 4 as a virtual filing cabinet or Rolodex where you can store contact information such as names, addresses, emails, and notes. If you collect contacts with other social networking services, you can also configure Contacts to sync information between accounts.
Set Up Contacts Accounts
The Galaxy Tab 4 can synchronize its contacts information with multiple accounts, such as Google, Corporate Exchange, other email providers, and sites such as Facebook and Google+. Information on your Galaxy Tab 4 is updated when you make changes to information in your accounts. Setting up a contacts account is quite easy.
1. Tap the Apps icon on the Home screen.
2. Tap Settings.
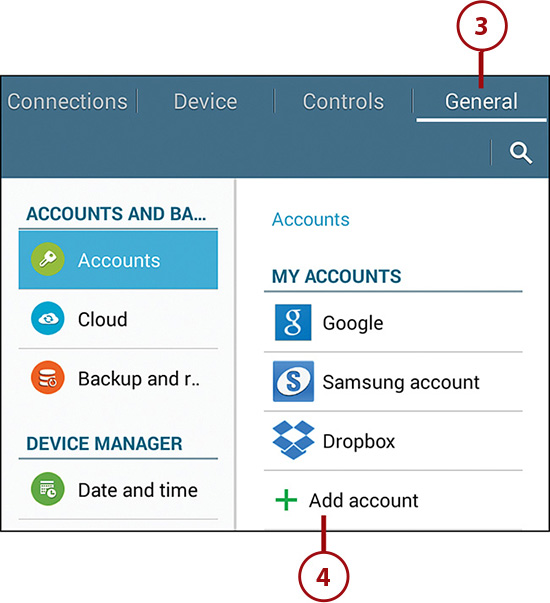
3. Tap General in the menu bar.
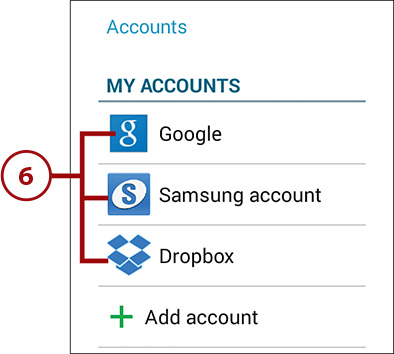
4. Tap Add Account.
5. Tap an account that you would like to set up.
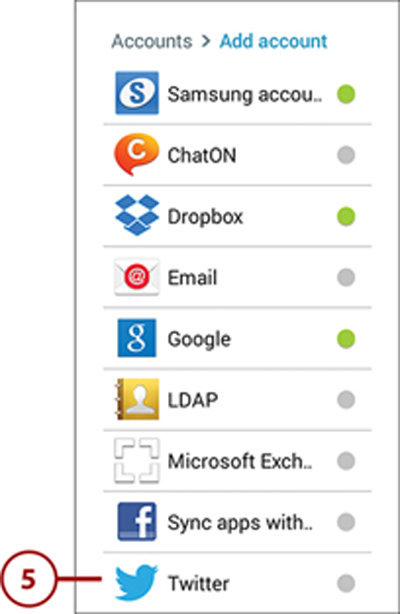
6. Follow the prompts to set up each account that you would like to add. The accounts you add appear in the Accounts area within the Settings list.
Add Contacts
Using the Contacts widget, you can store contact information for family, friends, and colleagues for quick access and to send messages.
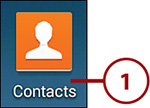
1. Tap Contacts on the Home screen.
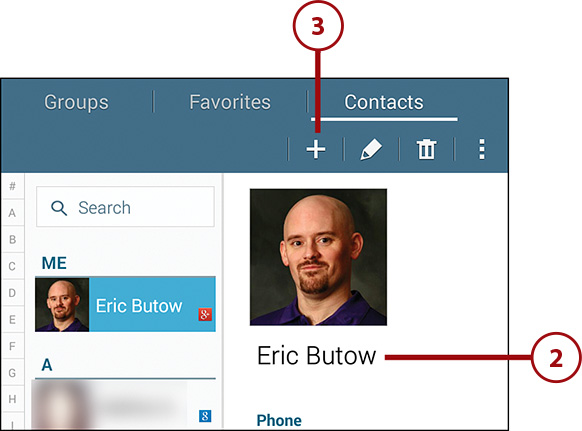
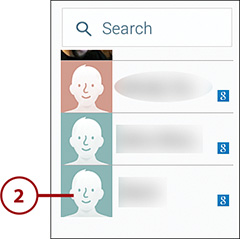
2. A list of all contacts appears. Your own contact information appears listed by default.
3. Tap the New icon to open the Create Contact form window.
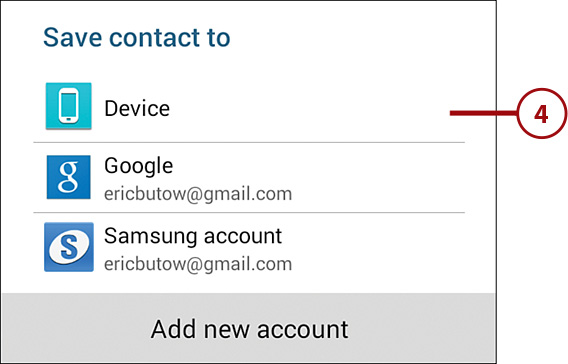
4. Tap Device to change the account for which you want to add a contact. For example, you can add a contact in your Google account.
5. In the Attention window, tap OK to close it and ensure that you will not see the message about sync being unavailable for contacts you add to your device.
6. Type the first and last name in the Name field.
7. If you want to add the first and last name in different fields, tap the arrow icon located to the right of the Name field to add a Name Prefix, First Name, Middle Name, Last Name, and Name Suffix to the contact. There is no need to use the Shift key on the keyboard to capitalize the name because the Galaxy Tab 4 does this automatically.

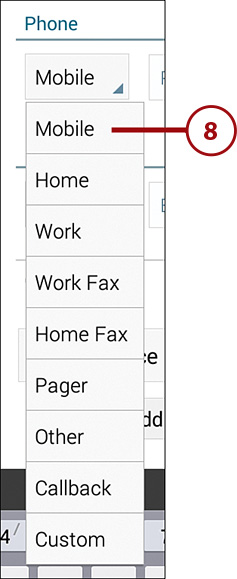
8. Tap the labels within fields to reveal a pop-up menu with other labels to choose from. For example, tap Mobile to the left of the phone number to open the pop-up menu so you can add other phone numbers such as the person’s home phone number.
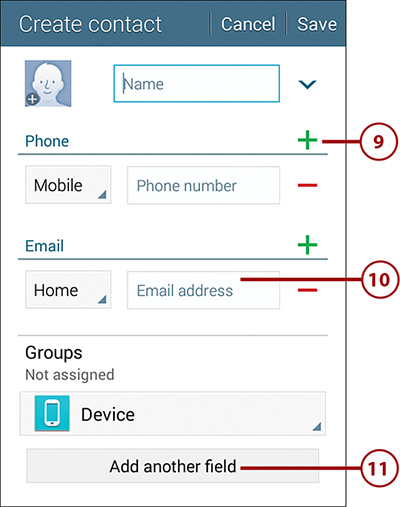
9. Tap the plus icon in the Phone field to add an additional field, or tap the minus icon to remove a field.
10. Add information in the Email section as you did in the Phone section.
11. Add another field to the contact by tapping Add Another Field. You can add the user’s phonetic name, organization, instant messaging address, physical address, any notes about the user, the user’s nickname, website, Internet phone number, events related to the contact, and the contact’s relationship to you.
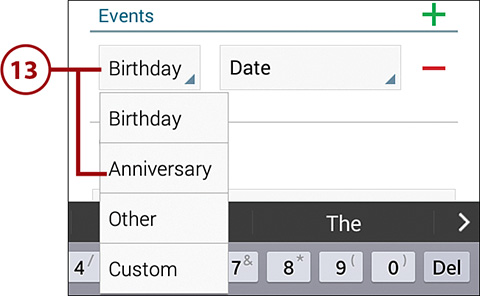
12. Tap Events to add events related to the contact, such as the person’s birthday, and then tap OK.

13. Tap the Birthday label to choose the type of event you want to add.
14. Add another field to the form by repeating Step 11.
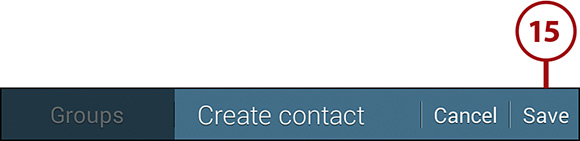
15. Tap Save to complete the new contact.
Search for Contacts
Your list of contacts is sure to grow the longer you have your Galaxy Tab 4. So how do you search your large list of contacts for a specific contact?
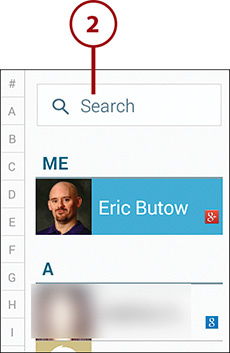
1. Tap Contacts on the Home screen.

2. Tap the Search field and use the keyboard to type the name of the contact you are looking for. As soon as you begin to type, the screen displays the contact that most closely reflects what you’ve typed into the field. Continue typing until you have narrowed the search.
3. View the contact in its entirety by tapping the Back touch button to close the keyboard.
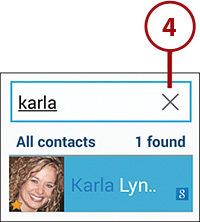
4. Tap the X located in the Search field to clear the Search field of your term. The contact that appears from your search remains visible in the Contacts screen.
Link Contacts
When you synchronize the contacts on your Galaxy Tab 4 with multiple accounts, such as Facebook, Twitter, and Google, you can have varying numbers and address information for a single contact. You can see all the contacts’ numbers and addresses in a single contact entry by linking contacts. Linking contacts can help you keep your contact information up to date.
1. Tap Contacts on the Home screen. Your contact information appears on the screen.
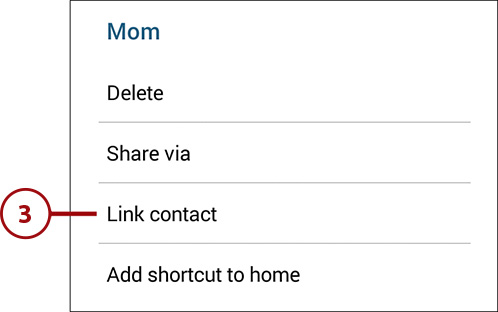
2. Scroll down the contact list until you find the contact to which you want to join another contact. Tap and hold your finger on the contact name in the list until a pop-up menu appears.
3. Tap Link Contact in the menu.
4. In the Link Contact window, scroll down the list until you see the name of the contact you want to join to the contact you selected in Step 2. The contacts are now joined and the information for both entries in each account has merged.

Use Contacts
After you have entered a contact in your Galaxy Tab 4, you can utilize a few functions and displays directly from the Contacts page. Start by opening a contact’s record.
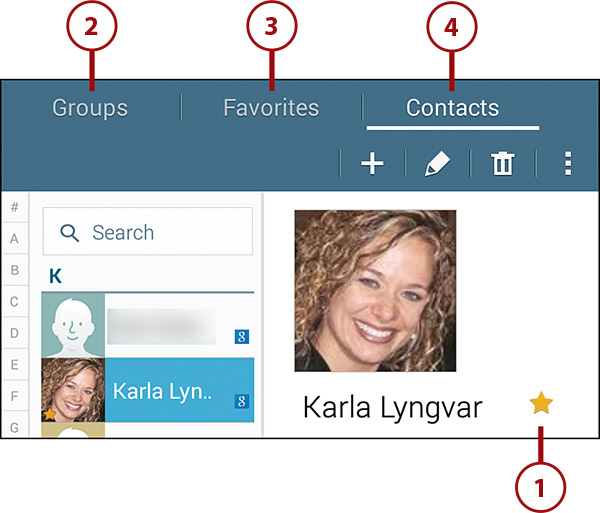
1. Tap the star icon to the left of the contact name to set that contact as a favorite.
2. Tap the Groups tab to view the list of contacts you have assigned to a group.
3. Tap the Favorites tab to view the list of contacts you have designated as favorites.
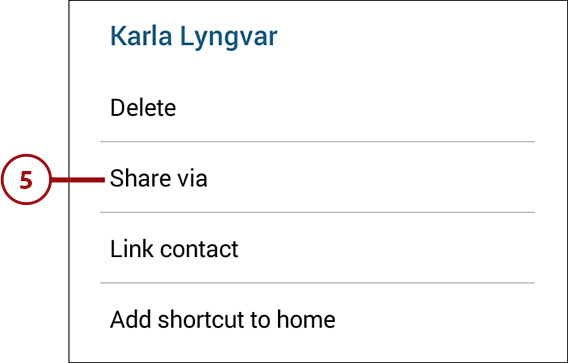
4. Tap the Contacts tab, and then press and hold your finger on a contact’s name in the contact list.
5. Tap Share Via.
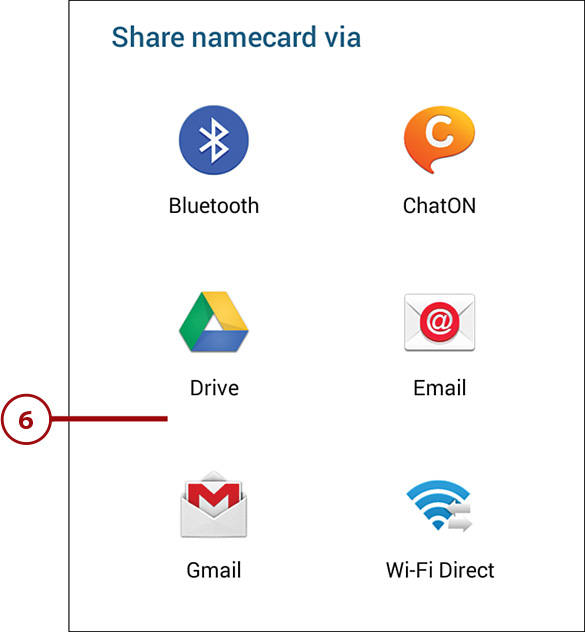
6. In the Share Namecard Via window, share a namecard via Bluetooth, the ChatON messaging service, Google Drive, email, Gmail, or Wi-Fi Direct. Think of a namecard as an electronic business card.
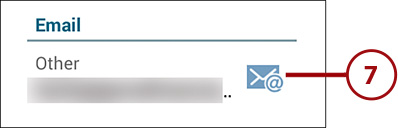
7. Compose a new email to your contact by scrolling down the Contact screen until you reach the Email section and then tap the email icon to the right of the contact’s email address.
Managing Your Busy Schedule
The Calendar app enables you to manage all your appointments and events from one convenient location. Calendar enables you to view a busy schedule in multiple views such as Day, Week, Month, and List. You can also instruct Calendar to send you a little reminder, in the form of an alert, before an event to help ensure that you never miss a meeting and are always on time.
Create Calendar Events
Your Galaxy Tab 4 was designed for you to be mobile while still enabling you to manage the important stuff, such as doctor appointments, business meetings, and anniversaries. The Calendar enables you to add important event dates to calendars to help ensure that you do not overlook them.
1. Swipe on the Home screen from right to left to move to the second page on the Home screen. Tap Calendar.
2. By default, the calendar opens to the Month view. The current date displays a blue circle around the date.
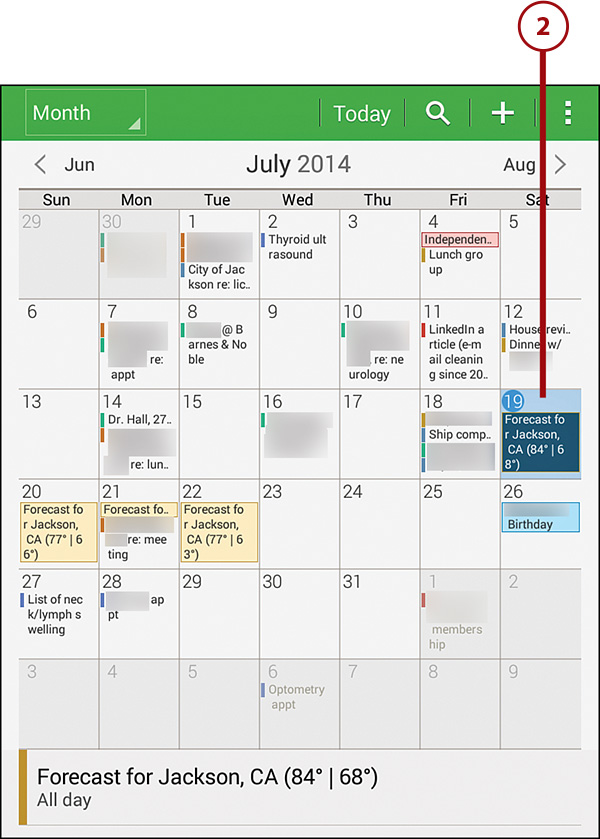
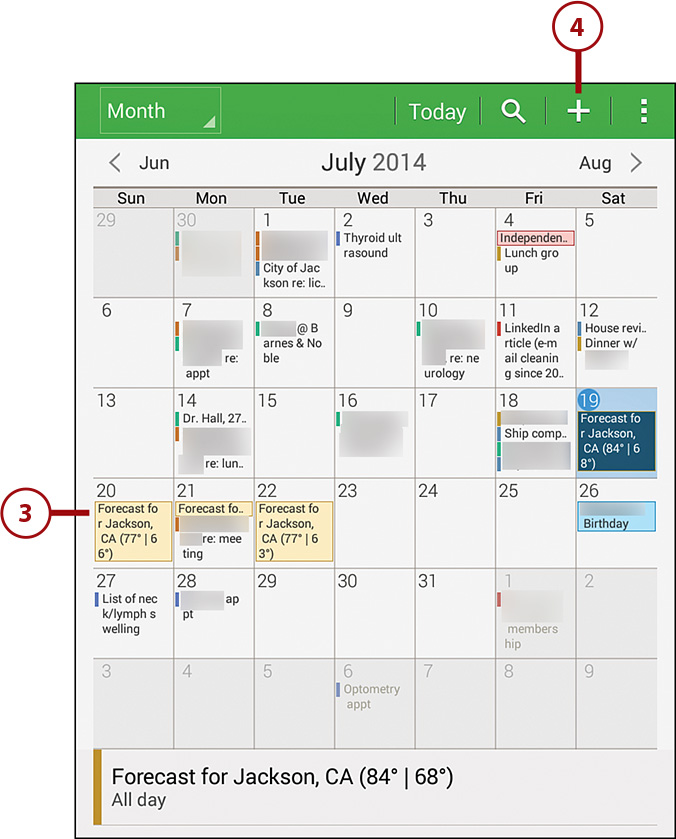
3. Tap the date for which you want to add an event. The date becomes highlighted.
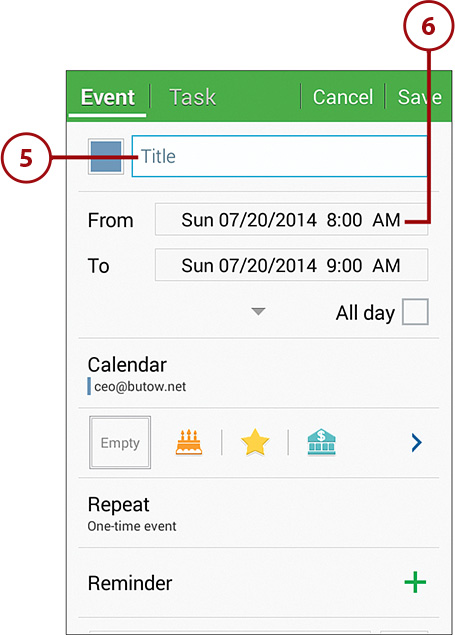
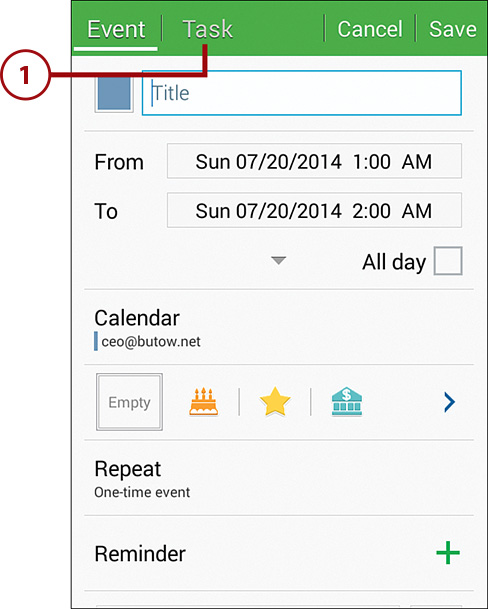
4. Tap the + button at the top-right corner of the screen. Note that if you see the New Event window informing you that the calendar cannot sync with Samsung Kies, tap the Do Not Show Again check box and then tap Done.
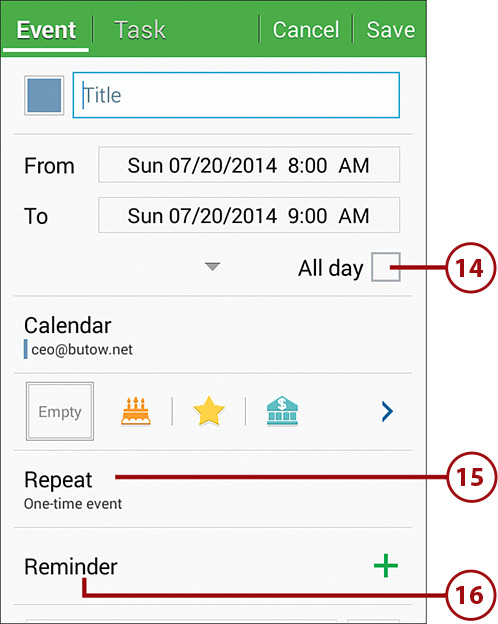
5. The Title field is selected by default. Type a title for the event in the field.
6. Tap the date and time in the From field to enter the start date and time of the event. You can also use the controls in the Set Date and Time window to designate an event for a future date and not just the date you specified in Step 3. When you tap the date and time in the From field, a calendar opens, enabling you to select a future date and time.
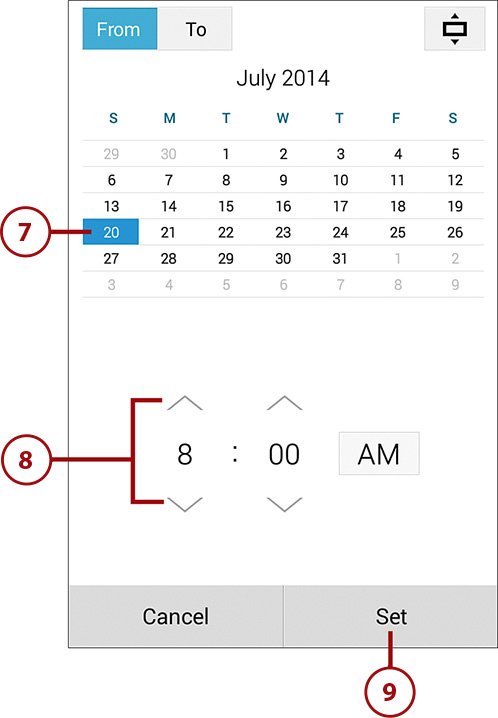
7. The current month appears in the calendar and the date you set for the event in Step 3 is highlighted in the calendar. Change the event date by swiping up and down within the calendar to view months and dates and then tap the date for the event.
8. Tap the controls to enter the start time for the event.
9. Tap Set.
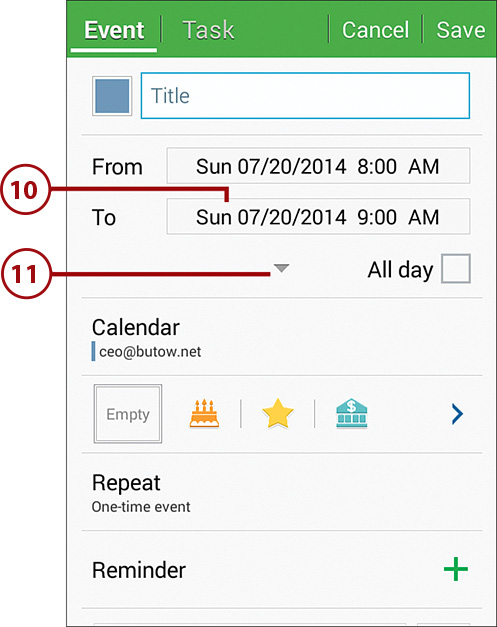
10. Tap the date and time in the To field to bring up the controls and set the date and time for the event as you did when you set the date in the From field.
11. Tap the down arrow icon underneath the To field.
12. Tap the Time Zone button to change the time zone for the event.
13. Tap the up arrow icon to hide the Time Zone button.
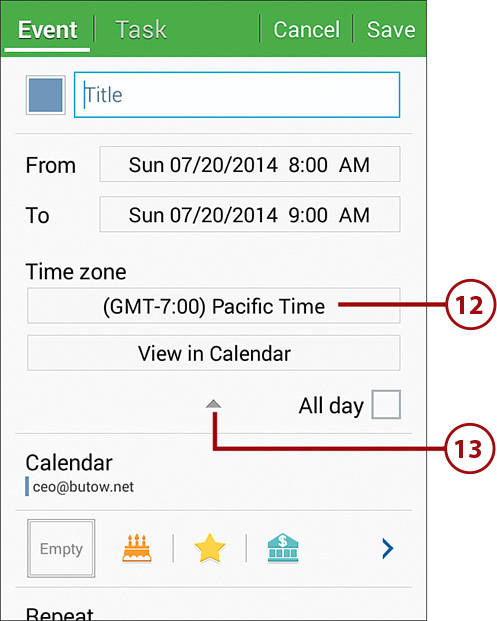
14. Tap the All Day check box if the event will happen all day.
15. Tap Repeat if you need to set a repeating cycle for the event. Scroll down to see more options you can set.
16. Tap Reminder to choose an alarm time for the event. You can choose the time you want the reminder to appear as a notification in the Notification bar or you can send the notification to your email account. Tap the plus button at the right of the Reminder field to add another notification that will appear at a different time and/or be delivered in a different manner.
17. View more fields in the window by swiping upward within the window.
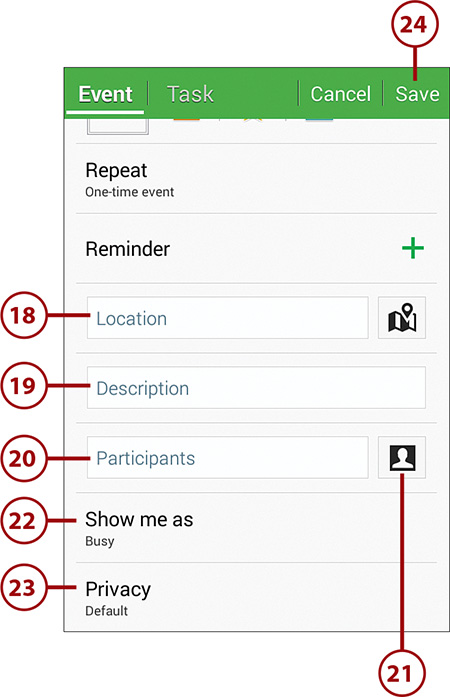
18. Tap the Location field to add a location for the event. If you want to find the location in the Maps app, tap the Maps button to the right of the field. You find out more about using the Maps app in Chapter 10, “Using Maps.”
19. Tap the Description field to type a description for the event.
20. Tap the Participants field to add names from your contacts.
21. Tap the Contact button to the right of the field if you want to select names from the Contacts app. In the pop-up window that appears, select one or more contacts by tapping the check box to the left of the contact name.
22. Tap the Show Me As field if you want others to see that you’re available even during the event. Otherwise, the calendar shows you as busy and blocks out that time so anyone else who views your calendar sees that you’re unavailable. Scroll down to set more options.
23. Tap the Privacy field and then tap Private in the menu. Otherwise, the event is public so anyone who sees your calendar can view the event.
24. Tap Save to complete the event and save it to your calendar.
Use Calendar Views
There are five views in which you can view the contents of your calendar: Year, Day, Week, Month, and Agenda. This section examines each view.
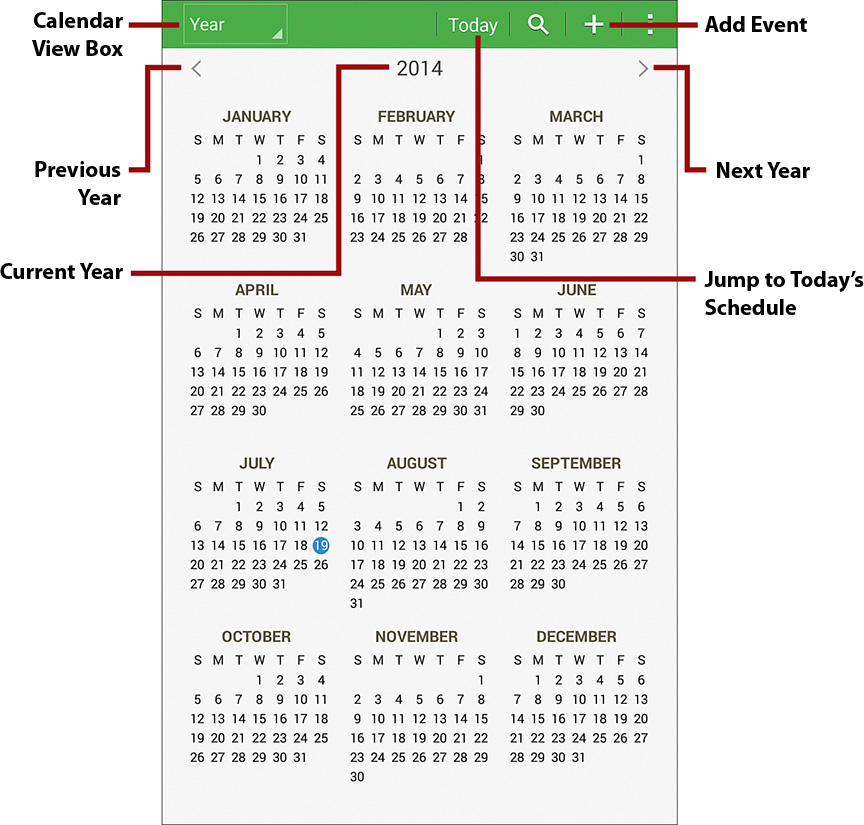
Year View
The Year view shows the entire calendar year. Open the Year view by tapping the calendar view box at the left side of the menu bar and then tap Year in the list.
The current year appears above the calendar. Tap the left arrow to the left of the year or the right arrow icon to the right of the current year to view a calendar for the previous or following year, respectively. When you change the year, your selected year appears highlighted in the center. Tap Today in the menu bar to highlight the current date in the calendar.
Day View
The Day view is composed of a list of events blocked for each half hour, with a section at the bottom that enables you to scroll through days and jump to the next or previous month. Open the Day view by tapping the calendar view box at the left side of the menu bar and then tap Day in the list.
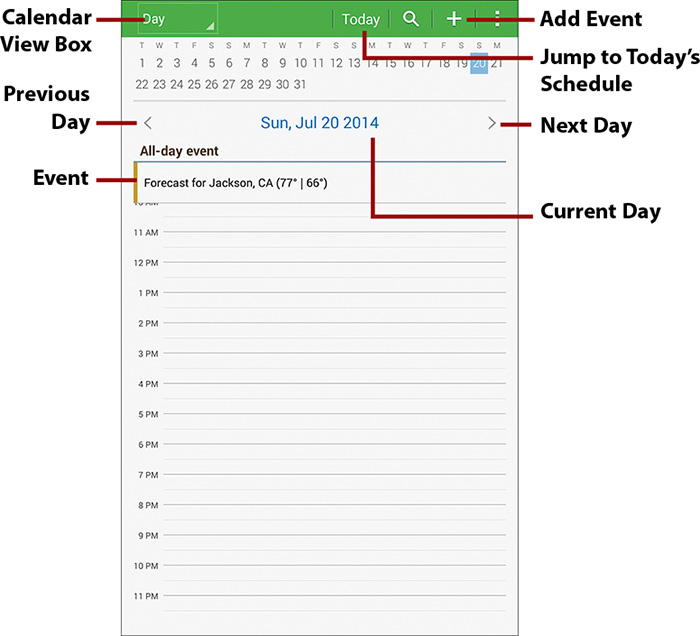
You can press your finger to the list and flick up or down to scroll through the list of events. All events scheduled with duration of All Day are located at the very top of the list.
Tap Today in the menu bar to open the calendar for the current date. The timeline located just under the menu enables you to tap specific days during the month. Tap the arrows located at each end of the current date to jump to the previous or next day. Tap Today in the menu bar to return to the current day’s schedule no matter where you are in the calendar.
You can tap an event in the list to view notes, edit the entry, delete the event, or send it via Bluetooth, the ChatON messaging service, the Dropbox or Google Drive online file storage services, email, Gmail, or Wi-Fi.
Week View
The week view is arranged into seven day parts. Open the Week view by tapping the calendar view box at the left side of the menu bar and then tap Week in the list.
Tap the left arrow to the left of the current week or the right arrow to the right of the current week to view the previous and following week, respectively. Tap Today in the menu bar to highlight the current date.
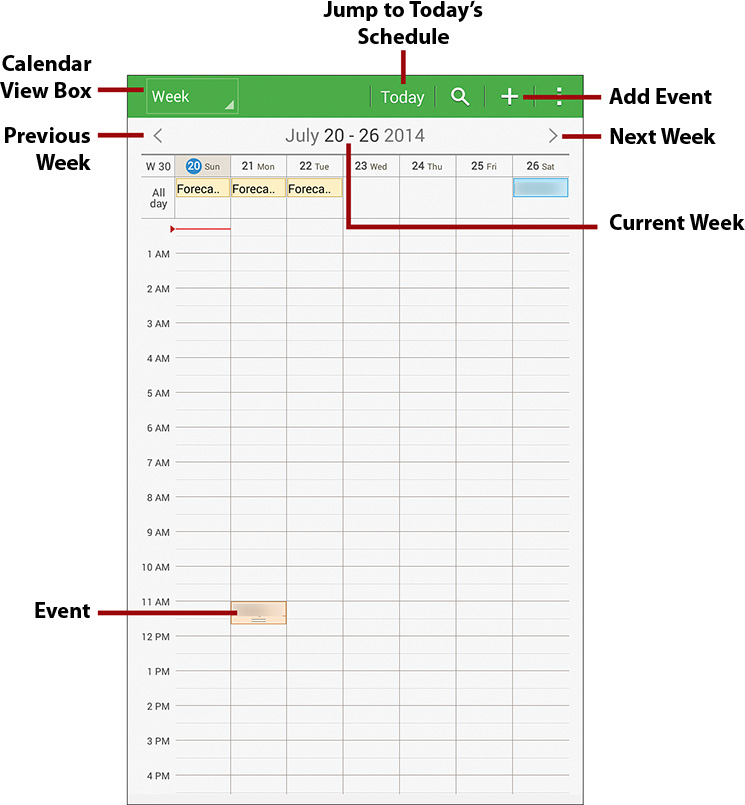
Each event for that week is found in its respective scheduled day block. You can tap an event for any date to view notes, edit the entry, delete the event, or send it via Bluetooth, the ChatON messaging service, the Dropbox or Google Drive online file storage services, email, Gmail, or Wi-Fi.
Month View
The Month view provides a broad view of events for a given month. Month view is composed of two sections: the monthly calendar and the day’s event schedule. Open the Month view by tapping the calendar view box at the left side of the menu bar and then tap Month in the list.
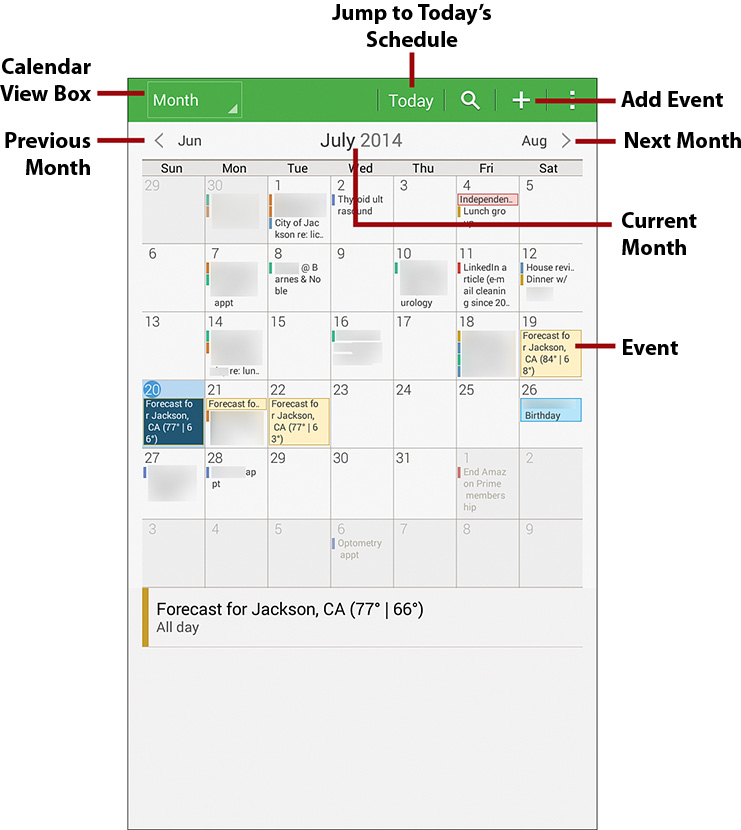
Each section lists the events scheduled for that particular month. The current day block you are viewing is highlighted within the calendar section. Any event designated as an All Day Event is highlighted in the day block of the Calendar view.
Tap Today in the menu bar to highlight the current date in the calendar. The current month appears above the calendar. Tap the previous month name, which appears to the left of the current month, to view the previous month. View the following month by tapping the following month name to the right of the current month.
You can tap an event to view notes, edit the entry, delete the event, or send it via Bluetooth, the ChatON messaging service, the Dropbox or Google Drive online file storage services, email, Gmail, or Wi-Fi.
Agenda View
The Agenda view provides a comprehensive view of all scheduled events for an entire year in one list. You can also tap the All button to filter the list by events, tasks, and special occasions. Open the Agenda view by tapping the calendar view box at the left side of the menu bar and then tap Agenda in the list.
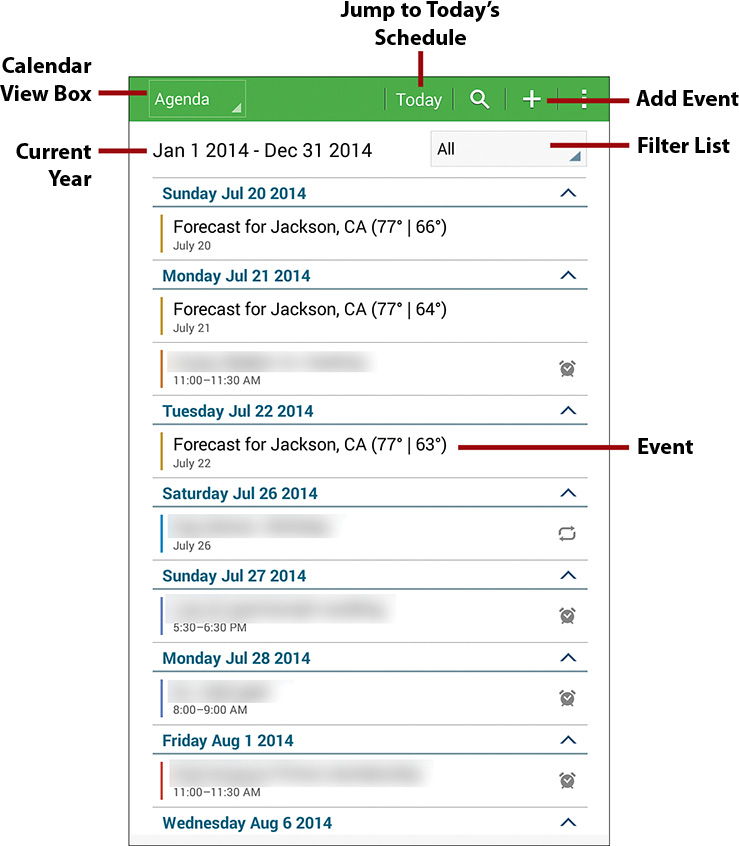
Events for the current date or the date with the next event appears at the top of the list. You can tap an event to view notes, edit the entry, delete the event, or send it via Bluetooth, the ChatON messaging service, the Dropbox or Google Drive online file storage services, email, Gmail, or Wi-Fi.
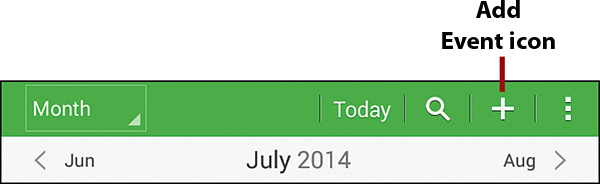
Add a Task to Your Calendar
You can add a task to your calendar by tapping the Add Event icon in any calendar view. After you tap the icon, note that if you see the New Event window informing you that the calendar cannot sync with Samsung Kies, tap the Do Not Show Again check box and then tap Done.
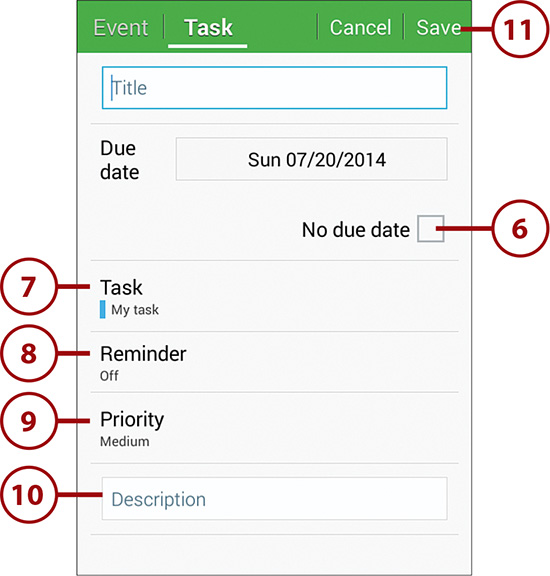
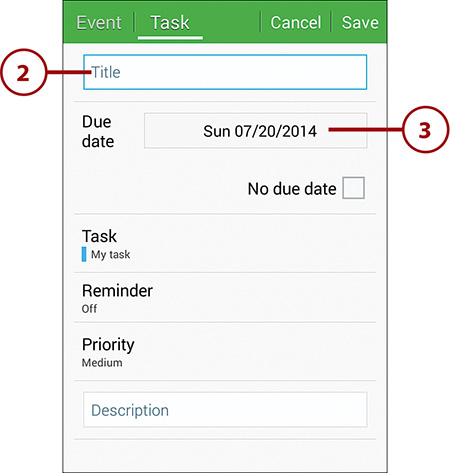
1. In the window, tap Task in the menu bar.
2. The Title field is selected by default. Type a title for the event in the field.
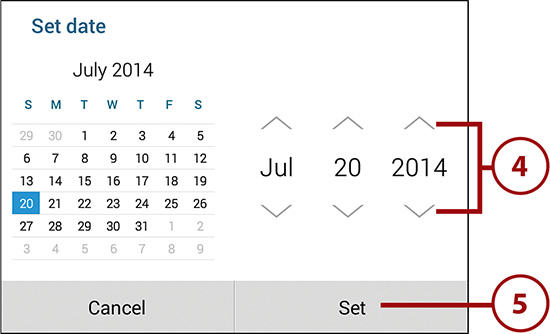
3. Tap the date in the Due Date field to enter the due date for the task. When you tap the date button, a calendar opens in the Set Date window, enabling you to select a due date.
4. Tap the controls to enter the due date for the event.
5. Tap Set.
6. Tap the No Due Date check box if there is no due date.
7. Tap the Task field to open the Task window and save your task to the device or to the Samsung Tasks app. The default selection is to the device.
8. Tap the Reminder field to open the Reminder window and set a reminder type. You can set a reminder on the due date or set a customized reminder, which is on a date of your choosing. The default selection is Off, which means there is no reminder.
9. Tap the Priority field to change the priority level in the menu to High, Medium, or Low. The default priority is Medium.
10. Tap the Description field to type a description for the event.
11. Tap Save to complete the task and save it to your calendar. The task appears on the date within the calendar.