
NGINX can be downloaded from http://nginx.org/. The site provides a stable package and a mainline version package. Both versions are quite stable, and either of them can be used to build NGINX for production environments. The mainline version contains all active development. This essentially means that all new features and noncritical bug fixes are developed here. At times, this may also cause certain third-party modules to break due to a change in the internal APIs. The stable version only gets the critical bug fixes. New features and noncritical bug fixes are not ported to the stable version. NGINX has a well-maintained documentation available at http://nginx.org/en/docs/. The documentation is a great source of information related to NGINX features, internals, and recipes.
Before we start building NGINX, we need to make sure that your system meets the requirements mentioned in the following pages.
As NGINX is written in C, GNU C Compiler (GCC) is recommended to build this. So, make sure you have gcc installed on your box. In addition to this, make sure that PATH contains essential build tools, such as make.
NGNIX provides options to customize/optimize the compilation and linking done by the C compiler. You could also specify a C compiler and preprocessor that is not in PATH:
--with-cc: This specifies an alternative C compiler location to the one in PATH.--with-cpp: This provides the C preprocessor's location.--with-cc-opt: This specifies the additional options that are passed to the C compiler. You can pass options to include libraries, for example,-I /usr/local/include.--with-ld-opt: This specifies additional options that are passed to Linker. You can pass options to link libraries, for example,-L /usr/local/lib.--with-cpu-opt: This platform argument can be specified so that a build can be optimized for a specific architecture.
NGINX can use libatomic_ops for memory update operations. The library allows atomic updates, thus removing the lock handling involved in accessing shared memory. You can install the required package and use it with the --with-libatomic configuration parameter. Optionally, you can also download the library from https://github.com/ivmai/libatomic_ops and point to it using the --with-libatomic configuration parameter.
Linux offers asynchronous I/O (AIO). This allows applications to overlap I/O operations with other processing, thus enabling better utilization of resources. NGINX can use this by using the --with-file-aio configuration parameter.
NGINX-embedded Perl (ngx_http_perl_module) requires Perl to be installed on your box. The module can be used to build Perl-based configurations in NGINX configuration files. You could also download/build the Perl binary from http://www.perl.org/ and point to it using the --with-perl parameter. Perl modules, used in configurations, can be located with --with-perl modules configuration parameters.
The NGINX HTTP rewrite (ngx_http_rewite_module) module requires the support of the Perl
Compatible Regular Expressions (PCRE) library. You could install the package, or you could download the sources from http://www.pcre.org/ and point to it using the --with-pcre configuration parameter. Additional parameters can be passed with the --with-pcre-opt argument; they are passed to the PCRE library.
NGINX provides strong cryptography using SSL and TLS protocols. This requires the OpenSSL package to be available on your box. Optionally, you could download the OpenSSL source from http://www.openssl.org/ and point to it using the --with-openssl option. Additional parameters can be passed with the --with-openssl-opt argument; they are passed to the OpenSSL library.
NGINX, by default, does not enable the SSL module. It can be enabled using the –with-http_ssl_module configuration.
NGINX can compress HTTP responses in gzip. In order to do this, it requires the support of the Zlib library. You could either install the package or download the sources from http://www.zlib.net/ and point to it using the --with-zlib configuration parameter.
Download and extract the NGINX src package .tar.gz archive from http://nginx.org/en/download.html. Use the following command:
$ wget http://nginx.org/download/nginx-1.7.9.tar.gz
Next, configure NGINX in the following manner:
$ cd nginx-1.7.9
$ ./configure
The configure command will generate a default NGINX configuration in the form of Makefile. The following output shows the generated configuration of the NGINX binary:
 Configuration summary
 + using PCRE library: ../pcre-8.35
 + OpenSSL library is not used
 + md5: using system crypto library
 + sha1: using system crypto library
 + using system zlib library

 nginx path prefix: "/usr/local/nginx"
 nginx binary file: "/usr/local/nginx/sbin/nginx"
 nginx configuration prefix: "/usr/local/nginx/conf"
 nginx configuration file: "/usr/local/nginx/conf/nginx.conf"
 nginx pid file: "/usr/local/nginx/logs/nginx.pid"
 nginx error log file: "/usr/local/nginx/logs/error.log"
 nginx http access log file: "/usr/local/nginx/logs/access.log"
 nginx http client request body temporary files: "client_body_temp"
 nginx http proxy temporary files: "proxy_temp"
 nginx http fastcgi temporary files: "fastcgi_temp"
 nginx http uwsgi temporary files: "uwsgi_temp"
 nginx http scgi temporary files: "scgi_temp"
The configuration step provides loads of options to alter default paths and enable/disable all kinds of modules available with NGINX. Using these, you can configure NGINX as per your requirements. This step requires some thought as, once NGINX binaries are built for a configuration, they cannot be altered for default paths or for the support of disabled modules.
NGINX provides options to change default paths, configuration filenames, log files, and so on. It is not mandatory to provide these options. They have a default value, which is used if the option is not specified:
--prefix : /usr/local/nginx: This specifies the path where NGINX will be installed. All other paths are relative to this location.--sbin-path : prefix/sbin/nginx: This specifies the name of the NGINX executable binary file.--conf-path : prefix/conf/nginx.conf: NGINX can run a configuration file using the-cfilename runtime arguments. If that is not specified, NGINX tries to load a default configuration specified by this option.--pid-path : prefix/logs/nginx.pid: The NGINX runtime configuration can specify a PID file, the location to store the process ID of the main process. If thepiddirective is missing from the configuration file, NGINX stores the information at the location specified by this option.--lock-path : prefix/logs/nginx.lock: NGINX maintains a lock for shared access to resources. The runtime configuration can specify the lock file. If thelockdirective is missing from the configuration file, NGINX stores the information at the location specified by this option.--error-log-path : prefix/logs/error.log: An error log path can be specified in the NGINX runtime configuration. If theerror_logdirective is missing in the specified configuration, then NGINX writes the log at the location specified by this option.--http-log-path : prefix/logs/access.log: TheHTTP-accesslog paths can be specified in the NGINX runtime configuration. If theaccess_logdirective is missing in the specified configuration, NGINX writes logs at the location specified by this option.--with-debug: This option enables a detailed debug log in NGINX. This option is not enabled by default.--user : nobody: The NGINX runtime configuration can specify an unprivileged user run NGINX worker processes.--group : nobody: The NGINX runtime configuration can specify a group that will own NGINX worker processes.--build: This option assigns a name to the generated binary. The name would be available in the NGINX-vcommand.
NGINX has an extensive set of features. It can be used as a web server, a web cache, a load balancer, an e-mail proxy, and so on. All these features of NGINX are compiled and configured as modules. Certain modules are enabled by default, while some need to be enabled. Modules should be carefully selected when building a high-performance system to keep a low memory footprint.
NGINX, by default, installs the HTTP module. The HTTP server can be disabled using the --without-http configuration parameter. Along with the HTTP module, NGINX also enables the following modules by default. The modules can be disabled selectively using the specified configuration parameter. Here is a list of a few parameters:
--without-http_access_module: This module allows us to control access from a limited set of IP addresses.--without-http_autoindex_module: This module builds the index file, which can generate a directory listing for requests ending with a forward slash (/).--without-http_auth_basic_module: This module allows access control using the basic authentication protocol.--without-http_browser_module: This module enables us to create variables based on the value of the User-Agent request header field.--without-http_charset_module: This module enables the conversion of the response data between different character encodings and the setting of the Content-Type response header field.--without-http_empty_gif_module: This module allows NGINX to serve a 1 x 1 transparent GIF from memory.--without-http_fastcgi_module: This module allows NGINX to send requests to the FastCGI server.--without-http_geo_module: This module allows us to set up configuration variables based on the client IP address. The variables can then be used in other modules for certain actions.--without-http_gzip_module: This module allows us to compress responses in thegzipformat, thus reducing the amount of bytes transferred.--without-http-cache: NGINX is capable of using the HTTP cache, that is, setting the correct request headers to enable content caching. This can be used when NGINX is set up as a proxy to an upstream content provider. The option can disable the cache, but it is not advisable as the cache is quite handy in most setups.--without-http_limit_conn_module: This module allows us to control the number of concurrent connections from a single IP. Post limits, it sends the 503 error response.--without-http_limit_req_module: This module allows us to define the request processing rate for particular keys. It keeps track of requests from a single IP, queuing them if the request rate exceeds the defined processing rate. After the maximum queue size has been reached, it sends a 503 error response.--without-http_map_module: This module allows us to set up configuration variables that derive value from other existing variables.--without-http_memcached_module: This module allows NGINX to serve requests directly from a memcached server. The memcached server should contain the response in advance by means external to NGINX.--without-http_proxy_module: This module enables NGINX to send requests to other servers.--without-http_referer_module: This module allows NGINX to filter requests based on the values in the Referrer header field.--without-http_rewrite_module: This module allows NGINX to manipulate URLs, using regular expressions, based on certain conditions.--without-http_scgi_module: This module allows NGINX to send requests to the SCGI server.--without-http_split_clients_module: This module allows NGINX to configure variables for A/B testing.--without-http_ssi_module: This module enables NGINX to process SSI commands--without-http_upstream_ip_hash_module --without-http_upstream_keepalive_module --without-http_upstream_least_conn_moduleThese modules enable load-balancing capabilities in NGINX. A number of servers can be grouped together to provide upstream content to NGINX. The upstream group can distribute requests between them using any of the following methods:
client IP address hashkeep-alive parametersnumber of connected clients
NGINX has separate modules depending on the method selected for request distribution.
--without-http_userid_moduleThis module allows NGINX to use cookies for client identification.
--without-http_uwsgi_moduleThis module allows NGINX to send requests to the uWSGI server.
Besides the preceding modules, which are enabled by default, the NGINX catalog has modules that can offer a range of features, such as SSL support, streaming media, and so on. These modules are disabled by default and need to be enabled at compile time. The following is the list of modules that can be enabled at compile time.
--with-http_addition_module: This module can modify the response returned for a given request. It adds a response from another subrequest before and after the actual response.--with-http_auth_request_module: The module can enable client authorization based on the subrequest. The client accesses protected resources, which trigger a subrequest for authorization. Depending on the response code received, access is allowed (2xx) or denied (401 error/403 error).--with-http_degradation_module: This module allows us to return either the 444 error or the 204 error in low-memory conditions. This module is not available on Linux platforms.--with-http_perl_module: This module allows you to insert Perl code into your NGINX configuration files and to make Perl calls from SSI.--with-http_flv_module: This module provides support to stream Flash media files.--with-http_geoip_module: This module allows us to use Maxmind GeoIP-Databases to build custom variables based on client IP addresses.--with-http_google_perftools_module: This module allows you to use Google's performance tools (http://code.google.com/p/gperftools/) to profile NGINX workers.--with-http_gzip_static_module: This module enables NGINX to serve precompressed static content in the.gzform.--with-http_image_filter_module: This module allows image transformation using thelibgdlibrary.--with-http_mp4_module: This module enables the streaming of MP4 files.--with-http_random_index_module: This module enables NGINX to randomly select and serve any file in a directory as the index file.--with-http_realip_module: This module can be used to correctly determine the client IP. If NGINX is used behind a proxy or a load balancer, then the module can extract the client IP from the correct header field.--with-http_secure_link_module: This module is used to access control of locations by generating checksums.--with-http_spdy_module: This module enables support for the SPDY protocol.--with-http_ssl_module: This module enables HTTPS support in NGINX.--with-http_stub_status_module: This module builds basic server statistics.--with-http_sub_module: This module modifies the generated response by replacing certain search strings with replacement strings.--with-http_dav_module: This module extends support for the WebDAV protocol over HTTP.--with-http_xslt_module: This module modifies the generated response using XSLT transformations.
NGINX has the capability to serve as an e-mail proxy. It supports POP3, IMAP, and SMTP protocols along with SSL capabilities. The e-mail modules are disabled by default. They need to be configured with the following parameters:
--with-mail: This module enables e-mail capabilities. It enables POP3, IMAP, and SMTP modules.--with-mail_ssl_module: This module enables the support for the SSL/TLS protocols for e-mail services.--without-mail_pop3_module: This module enables the support for the POP3 protocol. The module is enabled by the e-mail module.--without-mail_imap_module: This module enables the support for the IMAP protocol. This module is enabled by the e-mail module.--without-mail_smtp_module: This module enables the support for the SMTP protocol. The module is enabled by the e-mail module.
NGINX is completely modular in nature, which essentially means that you can build your own modules to extend its existing capabilities. The NGINX community has built a large number of third-party modules that can perform various tasks. If you want to use a few of these modules, you need to compile them with the NGINX source. Download the module source and point to the source using the --add-module configure parameter. You can add as many modules as you want.
Now that you know how to configure the available modules in NGINX, you may want to customize the binary as per your needs. While you are enabling/disabling modules, do make a note of all the libraries that NGINX will rely on. For the modules available from the NGINX catalog, it may be a good idea to download the required sources and point to them using correct parameters. The following command configures an NGINX binary:
$ ./configure
   --prefix=/etc/nginx
   --user=www-data
   --group=www-data
   --without-http_uwsgi_module
   --without-http_scgi_module
   --without-http_fastcgi_module
   --without-http_geo_module
   --without-http_browser_module
   --without-http_upstream_keepalive_module
   --without-http_browser_module
   --without-http_ssi_module
   --with-openssl=../openssl-1.0.2a
   --with-pcre=../pcre-8.36
   --with-http_ssl_module
   --with-http_realip_module
   --with-http_sub_module
   --with-http_gzip_static_module
   --with-http_secure_link_module
   --with-http_stub_status_module
   --with-libatomic=../libatomic_ops-7.2
   --with-file-aio
The following output summary lists the libraries used and the NGINX defaults generated. Makefile, which is generated as a result of the preceding code, can be used to build and install the NGINX binary. Here's the output summary of the preceding command:
Configuration summary
 + using PCRE library: ../pcre-8.36
 + using OpenSSL library: ../openssl-1.0.2a
 + md5: using OpenSSL library
 + sha1: using OpenSSL library
 + using system zlib library
 + using libatomic_ops library: ../libatomic_ops-7.2

 nginx path prefix: "/etc/nginx"
 nginx binary file: "/etc/nginx/sbin/nginx"
 nginx configuration prefix: "/etc/nginx/conf"
 nginx configuration file: "/etc/nginx/conf/nginx.conf"
 nginx pid file: "/etc/nginx/logs/nginx.pid"
 nginx error log file: "/etc/nginx/logs/error.log"
 nginx http access log file: "/etc/nginx/logs/access.log"
 nginx http client request body temporary files: "client_body_temp"
 nginx http proxy temporary files: "proxy_temp"
The configure command generated Makefile for the specified configuration. Makefile can now be used to install NGINX in the following manner:
$ make
$ sudo make install
The preceding command shows the output listing the locations of installation:
test -d '/etc/nginx' || mkdir -p '/etc/nginx'
test -d '/etc/nginx/sbin'          || mkdir -p '/etc/nginx/sbin'
test ! -f '/etc/nginx/sbin/nginx'     || mv '/etc/nginx/sbin/nginx'      '/etc/nginx/sbin/nginx.old'
cp objs/nginx '/etc/nginx/sbin/nginx'
test -d '/etc/nginx/conf'         || mkdir -p '/etc/nginx/conf'
cp conf/koi-win '/etc/nginx/conf'
cp conf/koi-utf '/etc/nginx/conf'
cp conf/win-utf '/etc/nginx/conf'
test -f '/etc/nginx/conf/mime.types'          || cp conf/mime.types '/etc/nginx/conf'
cp conf/mime.types '/etc/nginx/conf/mime.types.default'
test -f '/etc/nginx/conf/fastcgi_params'      || cp conf/fastcgi_params '/etc/nginx/conf'
cp conf/fastcgi_params    '/etc/nginx/conf/fastcgi_params.default'
test -f '/etc/nginx/conf/fastcgi.conf'         || cp conf/fastcgi.conf '/etc/nginx/conf'
After installation, NGINX is available in the specified prefix directory. You can go to the specified location and run it with the sudo command. Alternatively, you can add it to PATH using update-alternatives and then run it. The following command shows this:
$ sudo update-alternatives --install /usr/bin/nginx nginx /etc/nginx/sbin/nginx 1
$ sudo nginx
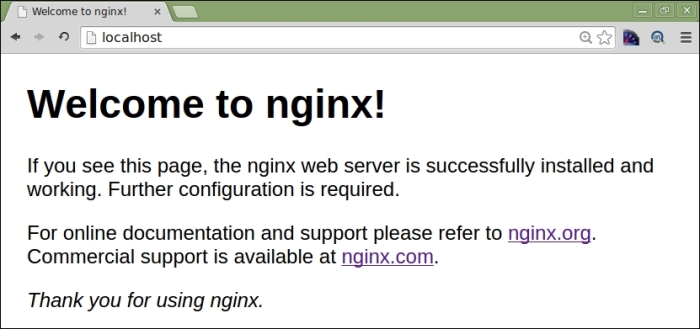
You can check this by loading http://localhost in your browser. It should display the following NGINX page:
Now that we have successfully installed NGINX, we want to try out some deployments in NGINX.
In this section, we have a Hello world! web page that we will deploy in NGINX. The code uses the Bootstrap library, which needs to be packaged with the code. The complete package has the following structure:
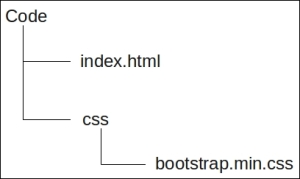
The following is the HTML markup of index.html:
<!DOCTYPE html>
<html lang="en">
 <head>
  <title>Using Nginx</title>
  <link href="css/bootstrap.min.css" rel="stylesheet">
 </head>
 <body>
  <div class="container">
   <div class="jumbotron">
   <h1>Hello world!</h1>
   <p>Deploying in Nginx<p>
   </div>
  </div>
 </body>
</html>
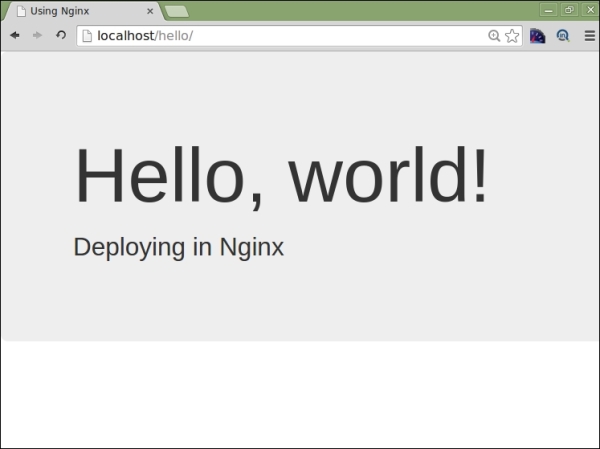
In this HTML markup, we will display the heading "Hello, world!" and a bit of text on the web page, which has the title Using Nginx. The Bootstrap CSS has been used to style the content. You can download it from http://getbootstrap.com/getting-started/ or use the wget command from a CDN and add it to the css folder:
$ wget https://maxcdn.bootstrapcdn.com/bootstrap/3.3.2/css/bootstrap.min.css
Details of the HTML source code will not be covered here as they are beyond the scope of the book. The purpose of this code is to deploy a simple web page in NGINX.
We want to load the page created previously at the location http://localhost/hello. In order to do so, we need to write a configuration block using the following directives:
location: This defines a configuration for a URI. The location URI can be a prefix or a regular expression.alias: This defines the directory path for the specified location directive. This is the location from where all the files are served.include: This allows the inclusion of the configuration blocks defined in one file in another file.
NGINX, by default, loads the deployment from nginx.conf in the installation directory.
Tip
In the preceding section, NGINX was installed in /etc/nginx, thus nginx.conf should be available in /etc/nginx/conf/nginx.conf.
NGINX allows us to write configurations across multiple files as logical units. We can include these files in a main file to define the complete configuration. Rather than writing configuration blocks in nginx.conf, we will create new files and then include them in the required locations in nginx.conf.
For our purposes, we will create nginx-localhost-server.conf in the /etc/nginx/conf directory with the following configuration block:
location /hello {
      alias "$ABSOLUTE_PATH_TO_CODE";
 }
Here, we have defined the /hello location and set it to serve from index.html at $ABSOLUTE_PATH_TO_CODE. When the page is loaded, it tries to load the CSS from /hello/css/bootstrap.min.css. The location directive successfully matches the /hello prefix and serves the CSS from the $ABSOLUTE_PATH_TO_CODE/css path.
The /hello prefix needs to available in the localhost server's name; thus, we need to include nginx-localhost-server.conf in the block, which defines the localhost server in nginx.conf. The following code shows this:
server_name localhost;

# include the hello location
include nginx-localhost-server.conf;

location / {
   root  html;
   index index.html index.htm;
}
Now, all that is left for us to do is reload NGINX. It is always a good idea to test the NGINX configuration before loading. Testing can flag up possible errors arising from invalid configurations, which would be discovered while loading NGINX. Use the -t switch to test the configuration, as shown in the following code:
$ sudo nginx -t
If the test is successful, the command will print the following output; otherwise, it will print the errors found, if any:
nginx: the configuration file /etc/nginx/conf/nginx.conf syntax is ok
nginx: configuration file /etc/nginx/conf/nginx.conf test is successful
Once we have verified the configuration, reload NGINX with the following configuration:
$ sudo nginx -s reload
Verify the page at http://localhost/hello. It should show the following content:
Tip
Downloading the example code
You can download the example code files for all Packt books you have purchased from your account at http://www.packtpub.com. If you purchased this book elsewhere, you can visit http://www.packtpub.com/support and register to have the files e-mailed directly to you.