CHAPTER 3
BOTANICAL BREADS
Whether a novice or an experienced home baker, you will be blown away by the joy and sense of gratification brought by baking bread botanically. This chapter is dedicated to my favorite bread recipes, from my very first botanical bread, The Floral Loaf—originally made with magnolia petals from my garden—to the Root Vegetable Foodbank Loaf I created to utilize wonky root vegetables in wholesome, nutritious loaves of bread.

THE FLORAL LOAF
500 g (1 pound 11/2 ounces) strong white bread flour
10 g (1/3 ounce) salt
200 g (7 ounces) magnolia petal botanical culture
330 g (111/2 ounces) magnolia petal botanical water
Flour and ground rice mixture, for dusting
This magnolia petal loaf was the first botanical bread I ever made. I used magnolia petals from my garden as we have a few well-established trees, and every May we get a wonderful display of white and purple flowers. The lovely short-lived display quickly ends up as a slippery carpet of decaying blossoms. Because of their abundance, magnolia petals became my first venture into botanical fermentation. This baked loaf has a subtle floral aroma and a crispy golden crust with a soft, moist crumb. You will amaze your friends and family when you explain how you made this loaf.
1. Weigh the dry ingredients separately and place them in a large plastic bowl in the following order: flour first and then the salt.
2. Add the botanical culture, botanical water, and tap water, and combine until a dough starts to form and the sides of the bowl are clean.
3. Remove the dough from the bowl and knead on a dry work surface until it becomes smooth and elastic, approximately 15 minutes.
4. Use the windowpane test (see here) to check if the dough is fully developed.
5. Divide the dough into two 500 g (1 pound 11/2 ounce) pieces and gently shape into round balls.
6. Place the dough balls into a lidded plastic container and leave to bulk ferment for 30 minutes.
7. Remove the dough balls from the container and gently reshape.
8. Place back into the container for another 30 minutes.
9. Remove the dough balls from the container and once again gently reshape.
10. Place back into the container for another 30 minutes.
11. Remove the dough balls from the container and form them into cylindrical shapes.
12. Place these shapes into two small proving baskets, predusted with a flour and ground rice mixture.
13. Place the proving baskets into a large, lidded plastic storage box and leave to fully prove. This could take from 2 to 4 hours, depending on the activity of the botanical culture and botanical water.
14. When fully proved, generously sprinkle some ground rice or semolina on a pizza peel or flat thin baking tray and then turn out the dough from the proving baskets.
15. Score the top with a lame or sharp knife (see here).
16. Slide the dough onto a baking stone or heavy baking tray in a preheated oven and steam the oven (see here).
17. Bake at 425°F (220°C, or gas mark 7) until golden brown, approximately 25 minutes.
18. Remove the baked loaves from the oven and place on a cooling rack.
Yield: 2 small loaves
Place plenty of freshly picked magnolia petals in a jar, add some honey (approximately 5 percent of the weight of the petals), fill the jar with water, and close the lid. Allow 2 to 3 weeks for an active fermentation. You may need to add more honey to the magnolia petals during this period. You can also add more petals during this period as they will compact and turn brown during fermentation.

CASSIOBURY FARM WATERCRESS LOAF
750 g (1 pound 101/2 ounces) white bread flour
15 g (1/2 ounce) salt
300 g (101/2 ounces) watercress botanical culture
225 g (8 ounces) watercress botanical water
225 g (8 ounces) tap water
A handful of roughly chopped watercress, as desired
Flour and ground rice mixture, for dusting
Located in Watford, England, Cassiobury Farm is a local customer at Cinnamon Square. A working farm with animals, it is best known for growing watercress for over 150 years. They grow the variety Nasturtium officinale, which delivers a strong flavor and aroma. When fermented, the watercress releases a wonderful peppery aroma that will carry through into your baked loaf. I recommend adding clumps of roughly chopped watercress to your dough, which will look stunning when you cut through the baked loaf. If this variety of watercress in unavailable in your region, simply use another variety.
1. Weigh the dry ingredients separately and place them into a large plastic bowl in the following order: flour first and then the salt.
2. Add the watercress botanical culture, watercress botanical water, tap water, and some watercress and combine until a dough starts to form and the sides of the bowl are clean.
3. Remove the dough from the bowl and knead on your work surface until it becomes smooth and elastic, approximately 15 minutes.
4. Use the windowpane test (see here) to check if the dough is fully developed.
5. Divide the dough into three 500 g (1 pound 11/2 ounce) pieces and gently shape each into a round ball.
6. Place the dough balls into a lidded plastic container and leave to bulk ferment for 30 minutes.
7. Remove the dough balls from the container and gently reshape.
8. Place the dough back into the container for another 30 minutes.
9. Remove the dough balls from the container and once again gently reshape.
10. Place the dough back into the container for another 30 minutes.
11. Remove the dough balls from the container and form into cylindrical shapes.
12. Place into three small proving baskets, predusted with a flour and ground rice mixture.
13. Place the proving baskets into a large, lidded plastic storage box and leave to fully prove. This could take from 2 to 4 hours, depending on the activity of the botanical culture and botanical water.
14. When fully proved, generously sprinkle some ground rice or semolina on a pizza peel or flat thin baking tray and then turn out the dough from the proving baskets.
15. Score the top with a lame or sharp knife (see here).
16. Slide the dough onto a baking stone or heavy baking tray in a preheated oven and steam the oven (see here).
17. Bake at 425°F (220°C, or gas mark 7) until golden brown, approximately 25 minutes.
18. Remove the baked loaves from the oven and place on a cooling rack.
Yield: 3 small loaves
Place plenty of freshly picked watercress into your jar, add some honey (approximately 5 percent of the weight of the watercress), fill the jar with water, and close the lid. Allow 2 to 3 weeks for an active fermentation. You may need to add more honey to the watercress during this period. You may also need to add more watercress as it compacts during fermentation. This will give the fermentation a boost too.
TIP:
The added watercress will contain a lot of water, so hold back some recipe water if you do not like your dough too wet.

FRENCH BAGUETTES
395 g (14 ounces) French baguette flour
10 g (1/3 ounce) salt
355 g (121/2 ounces) apple botanical culture
110 g (4 ounces) apple botanical water
110 g (4 ounces) tap water
Rye flour, for dusting
French bakers spend years mastering the technique to make the perfect baguette. The beautiful sight of the inside dough bursting through the crispy outer cuts and an internal crumb structure containing large open pockets of air woven together with a silky mesh of dough—that is their reward. Follow my recipe, and with a little practice, you too can bring a little bit of France into your kitchen. This recipe uses apples, which are probably the simplest and most versatile ingredients to ferment.
1. Weigh the dry ingredients separately and place them into a large plastic bowl in the following order: flour first and then the salt.
2. Add the apple botanical culture, apple botanical water, and tap water and combine until a dough starts to form and the sides of the bowl are clean.
3. Remove the dough from the bowl and knead on your work surface until it becomes smooth and elastic, approximately 12 to 15 minutes.
4. Gently shape the dough into a round ball.
5. Place the dough into a lidded plastic container and leave to bulk ferment for 30 minutes.
6. Remove the dough from the container. Very gently stretch the dough and fold it into thirds.
7. Place back into the container and let it rest for another 30 minutes.
8. Remove the dough from the container and divide it into three 320 g (111/3 ounce) pieces. Gently form them into cylindrical shapes without squashing all the bubbles inside the dough.
9. Place smooth-side up in the container and leave for 20 minutes to allow the dough to relax before shaping the baguette.
10. Elongate the dough to the length of your choice, but remember that it needs to fit into your oven. I like to generously dust the top of the baguette with rye flour, as this gives a lovely rustic look to the baked baguette.
11. Line a baking sheet with a tea towel. Place a strip of baking paper (the length of the baguette and twice the width) on the tea towel and then place the baguette on the paper. Fold the tea towel so it cradles the baguette for support as it proves. Place the other two baguettes on the tray in the same manner next to each other.
12. Place the tray into a large, lidded plastic storage box and leave to reach three-quarter proof. This could take from 2 to 4 hours, depending on the activity of your ferment.
13. When three-quarter proved, score the top surface with a sharp knife (or lame) diagonally 4 or 5 times, approximately 1/4 inch (6 mm) deep. After the first cut, start cutting the remaining slashes halfway down from the start of the previous cut (see here).
14. Carefully lift each baguette out of the tea towel by grabbing both ends of the baking paper and pulling it taut. Place the dough and baking paper into the preheated oven onto a hot baking stone or upturned baking tray. Steam the oven (see here).
15. Bake at 425°F (220°C or gas mark 7) until golden brown, approximately 20 to 25 minutes.
16. Remove from the oven and place on a cooling rack.
Yield: 3 small baguettes
TIP:
After the final feed of the botanical culture, leave it for 12 hours before using in the dough. The longer time will allow the botanical culture to impart extensibility to the dough, which is helpful when shaping into long baguettes.
TIP:
Domestic oven-size fluted baking trays are ideal for proving the dough pieces, as they provide support to the expanding dough.
TIP:
To make the cutting of your proved baguette dough easier when using a lame, I recommend refrigerating the dough pieces beforehand. This will also help you achieve the wonderful bursting (referred to as the eyebrows) through the cuts. The proved dough can be baked straight from your fridge.

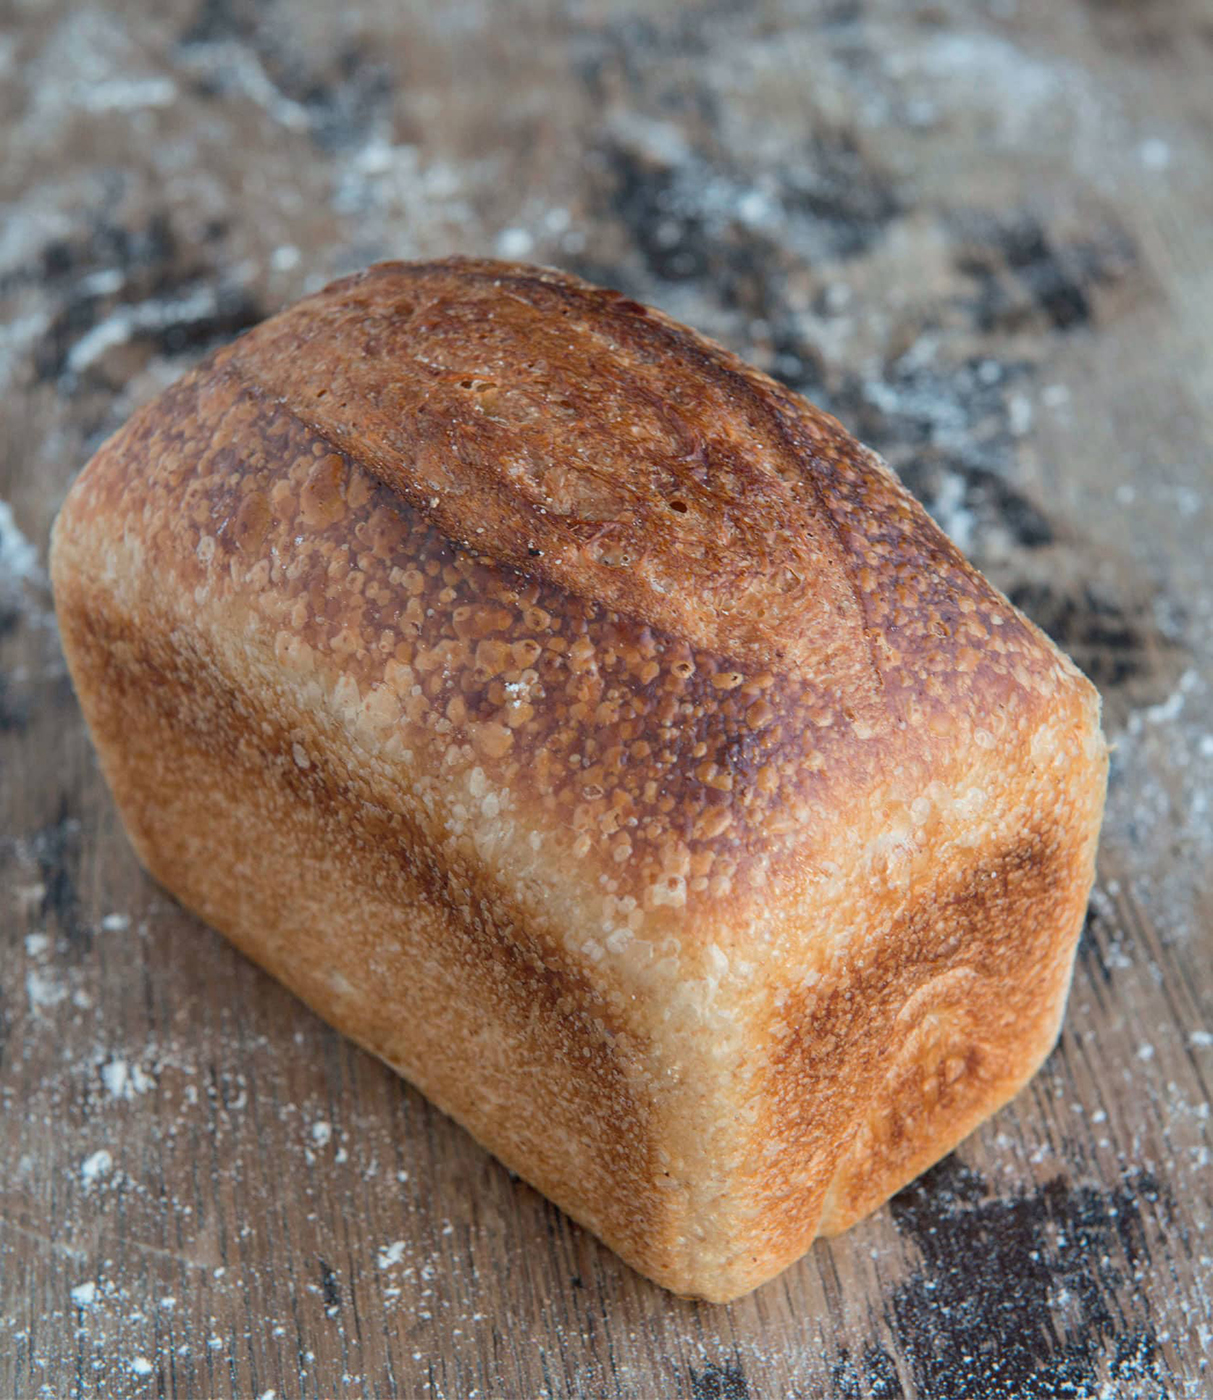
FIG AND FENNEL FARMHOUSE LOAF
500 g (1 pound 11/2 ounces) white bread flour
10 g (1/3 ounce) salt
200 g (7 ounces) fig and fennel botanical culture
166 g (6 ounces) fig and fennel botanical water
100 g (31/2 ounces) tap water
100 g (31/2 ounces) chopped soft ready-to-eat figs
White vegetable shortening, for greasing loaf pans
Whole wheat flour, for dusting
This is one of my favorite flavored breads, which is strange, considering I do not generally eat figs or fennel. When these two ingredients are fermented together, however, they produce a delightful, sweet, mild aniseed aroma that transfers exquisitely to the bread made from it. The botanical water tastes stunning too.
I like to add chopped, soft ready-to-eat figs to the dough, to give random bursts of intense flavor and visual appeal to the cut bread slices.
1. Weigh the dry ingredients separately and place them into a large plastic bowl in the following order: flour first and then the salt.
2. Add the botanical culture, botanical water, and tap water and combine until a dough starts to form and the sides of the bowl are clean.
3. Remove the dough from the bowl and knead on a dry work surface until it becomes smooth and elastic, approximately 15 minutes.
4. Flatten the dough and sprinkle a layer of the figs on top. Roll up the dough and gently knead until the figs are evenly dispersed. Be careful not to damage the figs or their sugar will leach out into the dough, causing your bread to bake very dark.
5. Divide the dough into two 550 g (191/2 ounce) pieces and gently shape into round balls.
6. Place into a lidded plastic container and leave to bulk ferment for 30 minutes.
7. Remove the dough balls from the container and gently reshape.
8. Place the dough back into the container for another 30 minutes.
9. Remove the dough balls from the container and once again gently reshape.
10. Place the dough back into the container for another 30 minutes.
11. Remove the dough balls from the container and form into cylindrical shapes.
12. Place the dough into two small farmhouse loaf pans, lightly greased with white vegetable shortening.
13. Place the loaf pans inside a large, lidded plastic storage box and leave to fully prove. This could take from 2 to 4 hours, depending on the activity of your botanical culture and botanical water.
14. When fully proved, generously sprinkle some whole wheat flour on top of the loaves.
15. Cut down the center of both dough pieces (see here).
16. Place both loaf pans into your preheated oven and steam the oven (see here).
17. Bake at 425°F (220°C, or gas mark 7) until golden brown, approximately 25 minutes.
18. Remove the baked loaves from their pans and place on a cooling rack.
Yield: 2 farmhouse loaves
To build my ferment, I use fresh ripe figs chopped into quarters and fresh fennel chopped into thick slices. Place the figs and fennel in a fermenting jar, cover with water, and close the lid. This should not require the addition of honey as there should be enough sugar available for the yeast to enjoy.
ROOT VEGETABLE FOODBANK LOAF
1500 g (3 pounds 5 ounces) white bread flour
30 g (1 ounce) salt
600 g (1 pound 51/4 ounces) root vegetable botanical culture
450 g (1 pound) root vegetable botanical water
450 g (1 pound) tap water
White vegetable shortening, for greasing loaf pans
I make loaves of this root vegetable botanical bread weekly and donate them to our local foodbank. Root vegetables such as potatoes, sweet potatoes, and carrots ferment easily and do not impart significant flavor to the baked loaf, making the final product more palatable for children. I bake these in small loaf pans as the resulting loaves have a soft golden crust and a wonderfully moist crumb, ideal for sandwiches and toast. This recipe will provide you with a batch of wholesome white loaves perfect for your everyday use, or you too could drop a few down at your local foodbank.
1. Weigh the dry ingredients separately and place them into a large plastic bowl in the following order: flour first and then the salt.
2. Add the botanical culture, botanical water, and tap water and combine until a dough starts to form and the sides of the bowl are clean.
3. Remove the dough from the bowl and knead on a dry work surface until it becomes smooth and elastic, approximately 15 minutes.
4. Use the windowpane test (see here) to check if the dough is fully developed.
5. Divide the dough into six 500 g (1 pound 11/2 ounce) pieces and gently shape these into round balls.
6. Place the dough balls into a lidded plastic container and leave to bulk ferment for 30 minutes.
7. Remove the dough balls from the container and gently reshape.
8. Place the dough back into the container for another 30 minutes.
9. Remove the dough balls from the container and once again gently reshape.
10. Place the dough back into the container for another 30 minutes.
11. Remove the dough balls from the container and form them into cylindrical shapes.
12. Place each dough ball into a small loaf pan, lightly greased with white vegetable shortening.
13. Place the six loaf pans into a large, lidded plastic storage box and leave them to fully prove. This could take from 2 to 4 hours, depending on the activity of your botanical culture and botanical water.
14. When fully proved, spray water on top of the dough and, using a sharp knife, cut an incision lengthwise down the center of each of the loaves (see here).
15. Place the loaf pans into your preheated oven and steam the oven (see here).
16. Bake at 425°F (220°C, or gas mark 7) until golden brown, approximately 25 minutes.
17. Remove the baked loaves from their pans and place on a cooling rack.
Yield: 6 small split tin loaves
To build my ferment, I use old or less than perfect root vegetables (potato, carrot, and sweet potato) cut into thick slices. As these are grown in the ground, the vegetables must be washed to remove any dirt. Place the cut vegetables in a jar, cover them with water, and close the lid. This should not require the addition of honey as there should be enough sugars available for the yeast to enjoy.
VINE-RIPENED TOMATO AND BASIL PIZZA
500 g (1 pound 11/2 ounces) white bread flour
10 g (1/3 ounce) salt
160 g (53/4 ounces) vine-ripened tomato and basil botanical culture
170 g (6 ounces) vine-ripened tomato and basil botanical water
170 g (6 ounces) tap water
Semolina or ground rice, for dusting
Tomato sauce
Mozzarella cheese (or grated cheese of choice)
Pizza toppings of your choice
Extra-virgin olive oil, for brushing on dough (optional)
The key to a good pizza base is to make a long fermented, high hydration (wet) dough that is baked directly on solid stone in a very hot oven. Leave the outer edge of the pizza dough free from toppings so it will puff up in the oven to produce a delicately light and crispy pizza that would make any Italian baker proud. From this pizza base recipe, you could make a simple classic margherita pie using tomato, mozzarella, and basil, or you could create your own flavorful and colorful combination using your favorite ingredients and toppings.
1. Weigh the dry ingredients separately and place them into a large plastic bowl in the following order: flour first and then the salt.
2. Add the botanical culture, botanical water, and tap water and combine until a dough starts to form and the sides of the bowl are clean.
3. Remove the dough from the bowl and knead on a dry work surface until the dough becomes smooth and elastic, approximately 12 to 15 minutes.
4. Use the windowpane test (see here) to check if the dough is fully developed. This should stretch more than usual, as it will be a soft dough.
5. Gently shape the dough into a round ball.
6. Place the dough into a lidded plastic container and leave for 3 hours. Remove the dough from the container once every hour to reshape, stretch, and fold before returning to the container.
7. After the 3 hours of resting and reshaping, place the container in the fridge for approximately 12 hours to mature.
8. Remove the dough from the container and divide into four or five pieces of dough, 200 to 250 g (7 to 83/4 ounces) each.
9. Gently shape into round balls.
10. Place smooth-side up in a large, lidded plastic storage box for 2 to 4 hours at room temperature to double in size.
11. Gently shape each dough piece into a round on a bed of semolina or ground rice to stop it from sticking. Leave the outer edge thicker to puff up when baked.
12. Place each round of dough onto a piece of baking paper. This will help you transfer the dough to the oven.
13. Top your pizza with a layer of thick tomato sauce and grated cheese (leaving the outer edge free from any toppings) and your choice of toppings. For extra crispiness, brush the outer edge of the dough with extra-virgin olive oil before baking.
14. Slide the topped pizza dough (still on the baking paper) into the oven onto a pizza stone or an upturned heavy baking tray (both preheated in your oven) and bake at 500°F (250°C, or gas mark 10).
15. The baking time will depend on the thickness of your pizza and temperature of your oven. It may be as little as 4 to 5 minutes, so keep an eye on it.
Yield: 4 or 5 crispy pizzas
VINE-RIPENED TOMATO AND BASIL FERMENT:
To build my ferment, I use vine-ripened sweet tomatoes cut in half and freshly picked basil leaves. Place the tomatoes and basil leaves into a fermenting jar, cover them with water, and close the lid. This will usually ferment very quickly.

POSH CUCUMBER BURGER BUNS
400 g (14 ounces) strong white bread flour
8.5 g (1/3 ounce) salt
24 g (3/4 ounce) caster sugar
60 g (2 ounces) white vegetable shortening, plus more for greasing
165 g (53/4 ounces) cucumber botanical culture
180 g (61/3 ounces) cucumber botanical water
Beaten egg, for brushing
Sesame seeds or mixed seeds (optional)
You will be fermenting cucumbers in preparation for making these burger buns. You’ll also need some real top-quality steak burgers to complement these beauties. Alternatively, a homemade vegan patty will also feel at home nestled inside them. These buns will be strong enough to hold together when filled with a prime juicy burger but still tender when eaten. They have a slight sweetness and really excel once toasted. An equal quantity of butter can replace the white vegetable shortening, if you prefer. These buns can be baked on a flat tray, but if you can bake them in Yorkshire pudding trays, your burger buns will have a deeper shape when baked.
1. Weigh all the dry ingredients separately and place them into a large plastic bowl in the following order: flour first and then the salt, caster sugar, and vegetable shortening in separate piles on top.
2. Add the botanical culture, botanical water, and tap water, and combine until a dough starts to form and the sides of the bowl are clean.
3. Remove the dough from the bowl and knead on a dry work surface until it becomes smooth and elastic, approximately 12 to 15 minutes.
4. Use the windowpane test (see here) to check if the dough is fully developed.
5. Divide the dough into eight 105 g (33/4 ounce) pieces and gently shape them into round balls.
6. Place the dough balls into a lidded plastic container and leave to bulk ferment for 40 minutes.
7. Remove the dough balls from the container and gently reshape.
8. Place them back into the container for another 10 minutes.
9. Remove the dough balls again from the container and, using a rolling pin, gently roll them into circles slightly smaller than the indentation of the Yorkshire pudding tray or about 31/2 inches (9 cm) in diameter if using a baking paper-lined flat baking tray. Lightly grease the Yorkshire pudding tray by using a little white vegetable shortening on a paper towel.
10. Place the tray(s) into a large, lidded plastic storage box and leave to fully prove. This could take from 2 to 4 hours, depending on the activity of your ferment.
11. When fully proved, gently brush the tops with beaten egg (or use a handheld water spray containing egg).
12. Either leave plain or sprinkle some sesame seeds on top of the egg wash. Alternatively, use a multiseed blend (for example, sunflower, millet, flax, poppy, and pumpkin seeds) to give a real posh look to them.
13. Place the tray(s) into a preheated oven and bake at 400°F (200°C, or gas mark 6) until golden brown, approximately 12 to 15 minutes.
14. Remove the tray(s) from the oven and place on a cooling rack.
Yield: 8 burger buns
To build my ferment, I use homegrown cucumbers, but you can use store-bought instead. Use Kirby, Persian, or American cucumbers rather than the English variety. Chop the cucumber into small pieces, approximately 1 inch (2.5 cm) in size, place them into a fermenting jar, cover them with water, and close the lid. This will usually ferment easily, but you can add some honey to help it along.
TIP:
You can easily purchase Yorkshire pudding trays online. Look for trays that have four indentations, approximately 4 inches (10 cm) in diameter.
TIP:
Turn them into finger buns by rolling the dough pieces into finger shapes approximately 4 inches (10 cm) long (in step 9). This makes them ideal for holding sausages straight off the barbecue.

DATE AND WALNUT LOAF
400 g (14 ounces) strong white bread flour
8 g (1/4 ounce) salt
10 g (1/3 ounce) white vegetable shortening
162 g (53/4 ounces) date and walnut botanical culture
112 g (4 ounces) date and walnut botanical water
100 g (31/2 ounces) tap water
80 g (23/4 ounces) dates, chopped and presoaked in water, or (optionally) in Port
80 g (23/4 ounces) walnuts, broken into smaller pieces
This date and walnut loaf provides a lovely accompaniment to cheese and wine, making it a perfect addition to your next dinner party. This recipe makes a firm dough that can be proved on a tray without the support of a loaf pan or a banneton. The baked loaf will have a light sweetness imparted from the dates and crunchy bites from the walnuts. I recommend eating this with strong blue cheese and some juicy red grapes—oh, and a glass of your favorite wine, of course.
1. Weigh all the dry ingredients separately and place them into a large plastic bowl in the following order: flour first and then the salt and vegetable shortening in separate piles on top.
2. Add the botanical culture, botanical water, and tap water, and combine until a dough starts to form and the sides of the bowl are clean.
3. Remove the dough from the bowl and knead on a dry work surface until it becomes smooth and elastic, approximately 12 to 15 minutes.
4. Use the windowpane test (see here) to check if the dough is fully developed.
5. Flatten the dough, sprinkle a layer of dates and walnuts over the surface, roll up the dough, and gently knead to start evenly distributing these additions within the dough. Try not to damage the dates because the sugar within the dates will leach out into the dough and cause the bread to darken as it bakes.
6. Gently shape the dough into a round ball.
7. Place into a lidded plastic container and leave to bulk ferment for 30 minutes.
8. Remove the dough from the container and gently reshape.
9. Place back into the container for another 30 minutes.
10. Remove the dough from the container and once again gently reshape.
11. Place back into the container for another 30 minutes.
12. Remove the dough from the container and once again gently reshape, knocking out any large bubbles.
13. Place back into the container for 10 minutes to allow the dough to relax before shaping.
14. Remove the dough from the container and shape it to make a tight, round ball with a smooth top. Place seam-side down onto a baking paper-lined baking tray.
15. Place the tray into a large, lidded plastic storage box and leave to fully prove. This could take from 2 to 4 hours, depending on the activity of the ferment. Rounded balls of dough generally take slightly longer to prove than cylindrical shapes.
16. When fully proved, carefully cut a cross into the top surface (see here)and place into a preheated oven and steam the oven (see here).
17. Bake at 425°F (220°C, or gas mark 7) until golden brown, approximately 25 minutes. This bread may obtain a dark crust quickly due to the sugars in the dates.
18. Remove the baked loaf from your oven and place on a cooling rack.
Yield: 1 large round loaf
DATE AND WALNUT FERMENT:
To build my ferment, I use good-quality ready-to-eat dates and walnut pieces. Chop the dates into small pieces and break any whole walnuts. Place them into a fermenting jar, cover them with water, and close the lid. This will usually ferment quickly due to the sugars within the dates.
TIP:
If the crust is getting too dark, lay a sheet of baking paper over the top of the loaf for the remainder of the baking time.
TIP:
Try soaking the dates in Port before adding them to the dough. This will add juicy pockets of flavor to the baked bread.

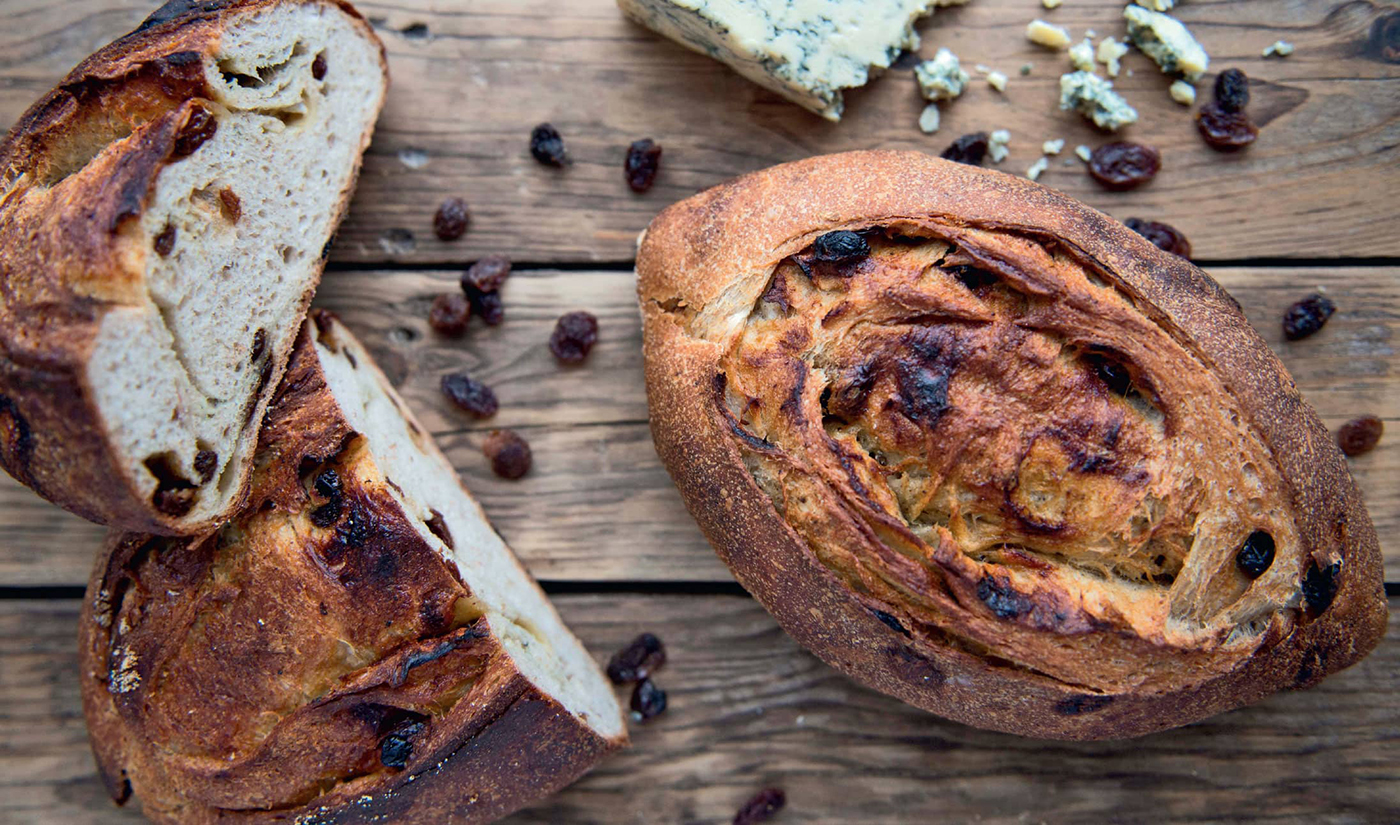
STILTON AND RAISIN LOAF
400 g (14 ounces) strong white bread flour
8 g (1/4 ounces) salt
10 g (1/3 ounces) white vegetable shortening
170 g (6 ounces) raisin botanical culture
115 g (4 ounces) raisin botanical water
100 g (31/2 ounces) tap water
90 g (31/4 ounces) raisins, soaked and drained to soften after weighing
90 g (31/4 ounces) Stilton cheese, broken up into small chunks
I normally eat only strong cheeses, but I’m not so keen to eat chunks Stilton on their own. However, when dispersed within this baked loaf, their flavor becomes a bit more rounded. The addition of raisins imparts random juicy bursts, making this loaf one of my favorite breads to share with you.
You can swap the cheese for other strong hard cheeses if you prefer or if Stilton is not available in your area. This recipe makes a firm dough that can be proved on a tray without the support of a loaf pan or a banneton.
1. Weigh all the dry ingredients separately and place them into a large plastic bowl in the following order: flour first and then the salt and vegetable shortening in separate piles on top.
2. Add the botanical culture, botanical water, and tap water, and combine until a dough starts to form and the sides of the bowl are clean.
3. Remove the dough from the bowl and knead on a dry work surface until the dough becomes smooth and elastic, approximately 12 to 15 minutes.
4. Use the windowpane test (see here) to check if the dough is fully developed.
5. Flatten the dough, sprinkle a layer of raisins over the surface, roll up the dough, and gently knead to start evenly distributing the raisins within the dough, trying not to damage the raisins. When nearly completely mixed, add the chunks of Stilton cheese and start to blend them into the dough. It is good to have random-size chunks of cheese.
6. Divide the dough into two equal pieces, approximately 365 g (13 ounces) each, and gently shape each into a round ball.
7. Place into a lidded plastic container and leave to bulk ferment for 30 minutes.
8. Remove the dough from the container and gently reshape.
9. Place back into the container for another 30 minutes.
10. Remove the dough from the container and once again gently reshape.
11. Place the dough back into the container for another 30 minutes.
12. Remove the dough from the container and once again gently reshape, knocking out any large bubbles.
13. Place back into the container for 10 minutes to allow the dough to relax before shaping.
14. Form each ball of dough into a tapered cylindrical shape (thicker in the middle and thinner at the ends).
15. Place seam-side down onto a baking paper–lined baking tray.
16. Place the tray into a large, lidded plastic storage box and leave to fully prove. This could take from 2 to 4 hours, depending on the activity of the ferment.
17. When fully proved, score the tops of both loaves (see here). Place them into a preheated oven and steam the oven (see here).
18. Bake at 425°F (220°C, or gas mark 7) until golden brown, approximately 20 minutes. This bread will obtain a dark crust quickly due to the cheese, and burnt cheese may erupt from the dough as it expands and bakes.
19. Remove the loaves from the oven and place them on a cooling rack.
Yield: 2 small loaves
RAISIN FERMENT:
To build my ferment, I use good-quality, ready-to-eat raisins. Place the raisins into a fermenting jar, cover them with water, and close the lid. This will usually ferment quickly due to the sugars within the raisins.
TIP :
Try soaking the raisins in Port before adding them to the dough. This will add juicy pockets of flavor to the baked bread.
KALAMATA OLIVE CIABATTA
620 g (22 ounces) strong white bread flour
15 g (1/2 ounce) salt
275 g (93/4 ounces) Kalamata olive botanical culture
195 g (7 ounces) Kalamata olive botanical water
195 g (7 ounces) tap water
Extra-virgin olive oil, for greasing
Ground rice, for dusting
Ciabatta is made from a very soft, sticky dough that requires a different method of kneading. The soft dough is instrumental in producing the characteristic large-holed internal structure and crispy crust for this classical Italian bread. This recipe starts with a flour hydration of 70 percent to help you get used to kneading a soft dough. Normally, ciabatta would be made with at least 75 percent hydration.
The addition of Kalamata olives (see Tip on shown here) to the dough complements the botanical ferment and looks attractive throughout the baked ciabatta.
1. Weigh the dry ingredients separately and place them into a large plastic bowl in the following order: flour first and then the salt.
2. Add the botanical culture, botanical water, and tap water. Then, using one hand, bring the ingredients together until a very wet, sticky dough is just formed.
3. Turn out the wet mixture onto the table and knead, using the slap-and-fold method (see here), until it is smooth and elastic. Continue kneading for at least 10 minutes.
4. Use the windowpane test (see here) to check if the dough is fully developed. This should stretch way more than a regular lower hydration dough stretches.
5. At the point when the dough feels smooth and extensible, form it into a cylindrical shape.
6. Place into a lidded, plastic rectangular container, approximately 12 x 7 inches (30.5 x 18 cm), whose bottom and sides have been lightly greased with extra-virgin olive oil, and leave to bulk ferment for 30 minutes.
7. Remove the dough from the plastic container. Gently stretch and fold it into thirds. Then gently flatten it to fit the base of the container. You can use a rolling pin to give a neater shape as you flatten it.
8. Place the dough back into the container and leave it for another 30 minutes.
9. Sprinkle a generous layer of the Flour and Rice Dressing (see note) on your work surface large enough for the dough to sit on.
10. Carefully turn out the dough from the container onto the bed of Flour and Rice Dressing.
11. Sprinkle a generous layer of the Flour and Rice Dressing over the top of the dough.
12. Using a metal scraper, cut the dough into rectangles approximately 2 x 6 inches (5 x 15 cm). Quickly and firmly pressing the metal scraper through the dough to the work surface, rather than using a sawing action, to cause minimal damage and degassing of the dough.
13. Gently pick up and place each dough rectangle onto a baking paper–lined baking tray generously sprinkled with ground rice (to prevent the dough from sticking). Leave room for the dough to expand without touching.
14. Place the tray into a large, lidded plastic storage box and leave to fully prove. This could take from 2 to 4 hours, depending on the activity of the ferment.
15. When fully proved, place the dough into a preheated oven onto a hot baking stone or upturned baking tray and steam the oven (see here).
16. Bake at 425°F (220°C, or gas mark 7) until golden brown, approximately 15 minutes.
17. Remove from the oven and place on a cooling rack.
Yield: 6 to 8 ciabatta rolls
FLOUR AND RICE DRESSING
This mixture is used a lot in Italian baking as a dressing for bread and as a nonstick material for wet doughs. It is also used to dust proving baskets before placing the high hydration soft dough inside to prove. Make more than you need and keep it in a jar ready to use.
200 g (7 ounces) strong white bread flour
200 g (7 ounces) ground rice
Stir together with a spoon until thoroughly blended.
KALAMATA OLIVE FERMENT:
To build my ferment, I use good-quality, dark purple Kalamata olives. Place the Kalamata olives into a fermenting jar, cover them with water, and close the lid. This will usually ferment without needing any honey.
TIP :
You can add olives to the dough for extra flavor and visual appeal. Add 260 g (9 ounces) of olives chopped in half or quarters. Drain them thoroughly and only add them once the dough is thoroughly kneaded. Fold them into the dough until they are evenly dispersed.
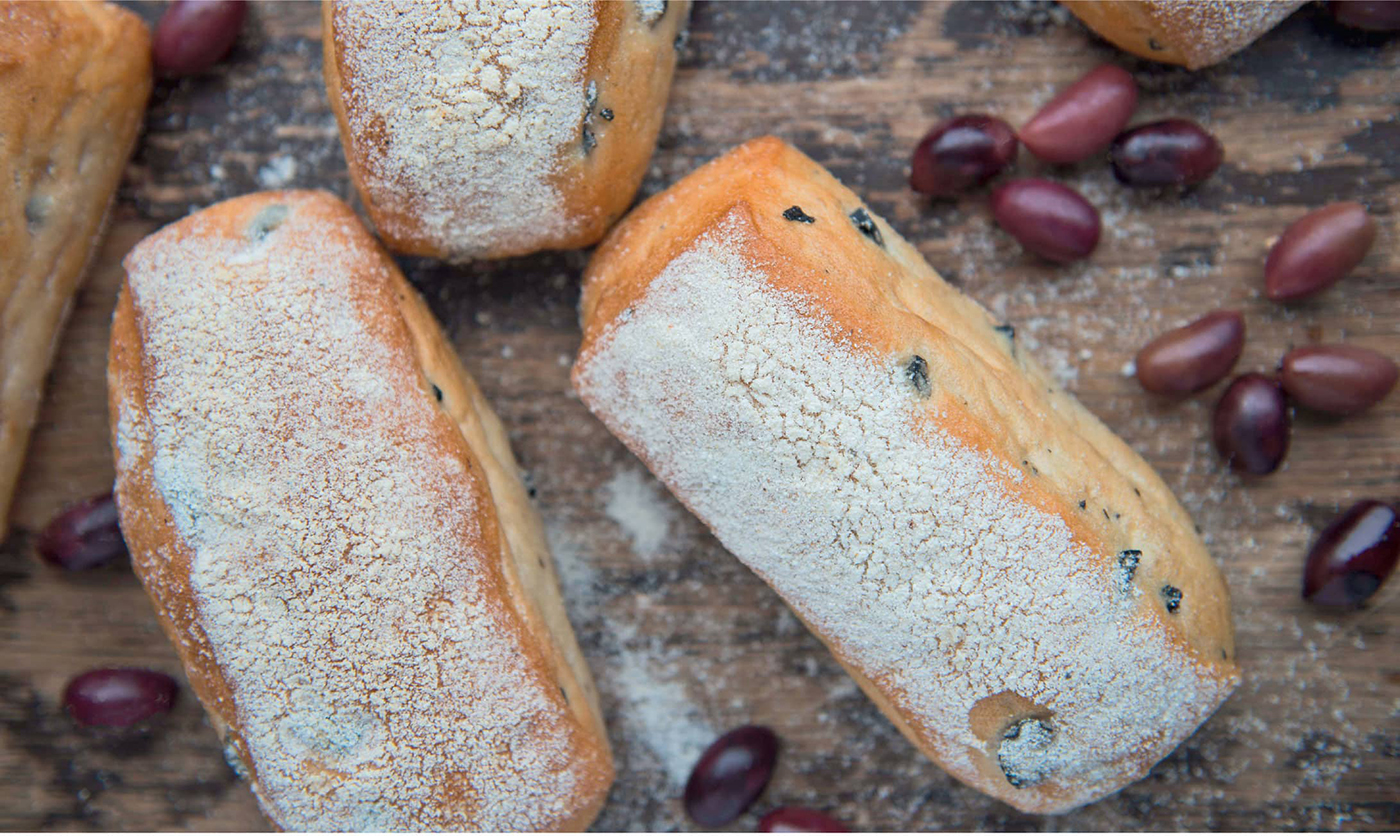
ROSEMARY, SULTANA, AND ROCK SALT FOCACCIA
335 g (113/4 ounces) strong white bread flour , plus more for dusting
8 g (1/4 ounce) salt
28 g (1 ounce) extra-virgin olive oil , plus more for brushing
135 g (43/4 ounces) rosemary and sultana botanical culture
90 g (31/4 ounces) rosemary and sultana botanical water
90 g (31/4 ounces) tap water
Chopped fresh rosemary, for topping
Flaky sea salt, for topping
This authentic Italian focaccia recipe makes the most wonderfully soft, cake-like textured bread. The dough will be very soft, like ciabatta, but not as sticky due to the high quantity of oil used. Preparing the dough for baking is unlike any other bread dough because you liberally apply a layer of water followed by copious amounts of extra-virgin olive oil. Then, you randomly press your fingers through the proved dough before generously scattering rosemary and flaky sea salt on top. You may be thinking that it sounds messy. It is! But in a fun way.
In Italy, focaccia is often made in large trays and are then cut and sold by weight. With this recipe, you could make either one whole baking tray or two focaccia rounds.
1. Weigh the dry ingredients separately and place them into a large plastic bowl in the following order: flour first and then the salt.
2. Add the extra-virgin olive oil, botanical culture, botanical water, and tap water. Then, using one hand, bring together until an extremely wet, sticky dough is just formed.
3. Turn out the wet mixture onto the table and knead, using the slap-and-fold method (see here), until it is smooth and elastic. Continue kneading for at least 10 minutes.
4. Use the windowpane test (see here) to check if the dough is fully developed. This should stretch way more than a regular lower hydration dough stretches.
5. When the dough feels smooth and extensible, divide it into two pieces of equal weight, approximately 325 g (111/2 ounces) each, and gently shape them into round balls.
6. Place the dough balls into a lidded plastic rectangular container and leave to bulk ferment for 30 minutes.
7. Remove from the container and gently stretch and fold the dough back into round balls.
8. Place the dough balls back into the container for another 30 minutes.
9. Remove from the container and, using a rolling pin and a little flour for dusting, roll out each piece to approximately 10 inches (25.5 cm) round and place on a baking paper-lined baking tray.
10. Place the tray into a large, lidded storage box and leave to fully prove. This could take from 2 to 4 hours, depending on the activity of your ferment.
11. Remove the tray from the storage box and generously brush the top of each dough round with water and then apply another generous layer of extra-virgin olive oil.
12. Randomly press a finger vertically through the top of the dough through to the tray, approximately 10 times across the dough.
13. Place the tray back into the storage box for another 30 minutes.
14. Remove the tray from the storage box and sprinkle the top of the dough with rosemary and flaky sea salt.
15. Bake at 425°F (220°C, or gas mark 7) until golden brown, approximately 15 minutes.
16. Remove from the oven, immediately brush the top of each focaccia with more extra-virgin olive oil, and leave them on the tray to cool. The oil imparts a richer color to the baked focaccia and makes them even softer to eat.
Yield: 2 focaccia rounds
ROSEMARY AND SULTANA FERMENT:
To build my ferment, I use good-quality ready-to-eat sultanas, or golden raisins, and freshly picked rosemary. Place the sultanas and rosemary into a fermenting jar, cover them with water, and close the lid. This will usually ferment quickly due to the sugars within the sultanas.
TIP:
Try other topping combinations like vine-ripened cherry tomato and oregano, roasted red and yellow peppers, or black and green olives.

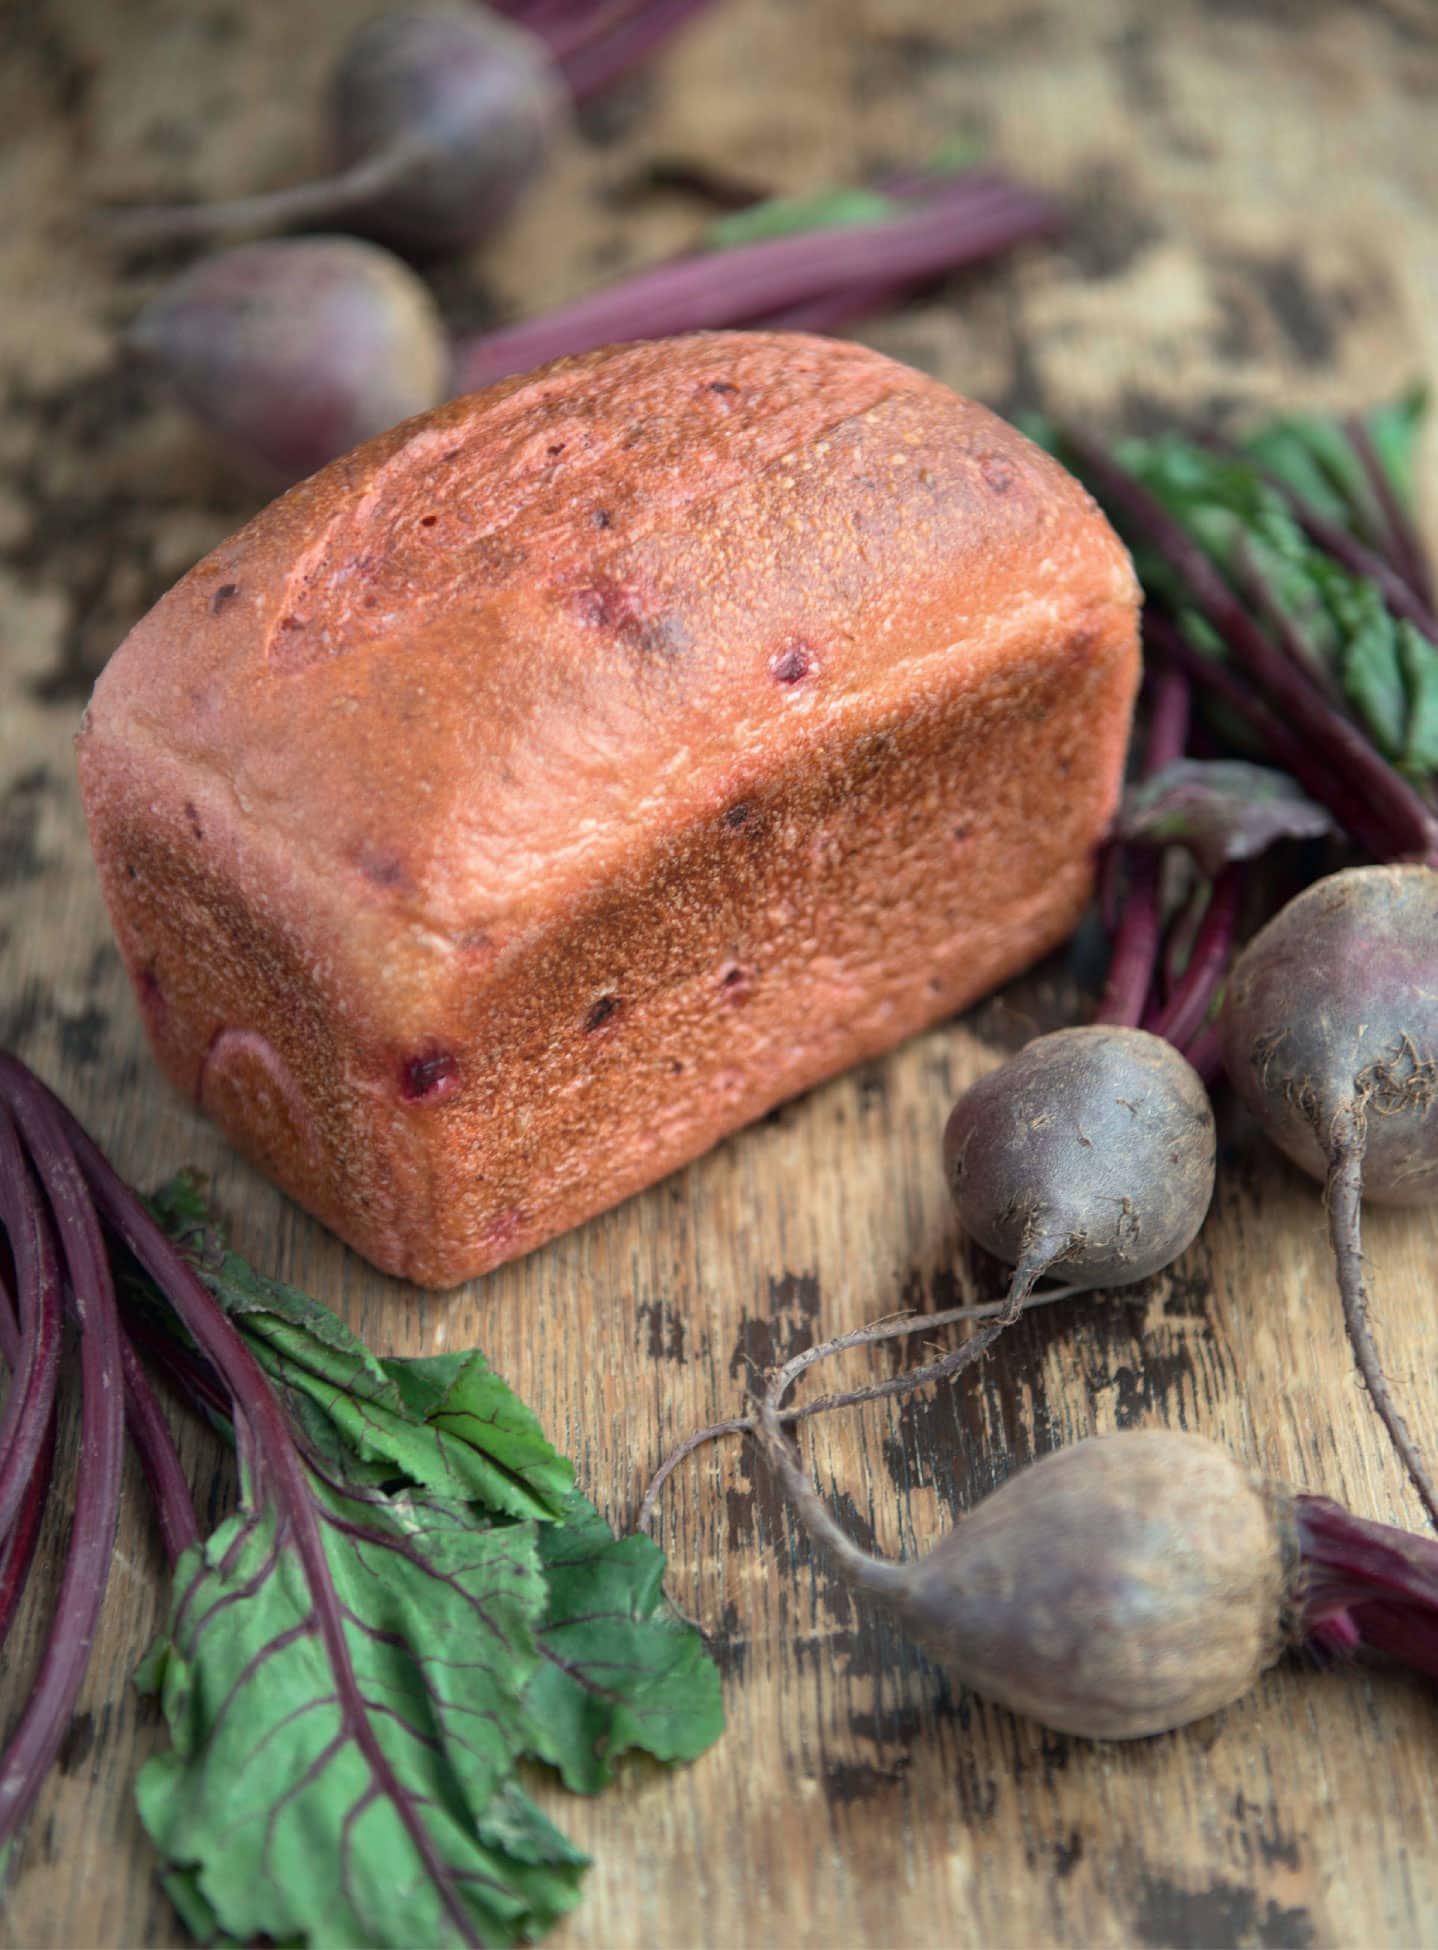
BEET AND LEMON LOAF
125 g (41/3 ounces) beets
500 g (1 pound 11/2 ounces) white bread flour
10 g (1/3 ounce) salt
200 g (7 ounces) beet and lemon botanical culture
130 g (41/2 ounces) beet and lemon botanical water
100 g (31/2 ounces) tap water
30 g (1 ounce) lemon juice
White vegetable shortening, for greasing loaf pans
The addition of beets produces the most vibrant colorful dough, but retaining this color is another matter. Betanin is the pigment responsible for producing the red-violet color in beets. It is difficult to retain this original color because it disappears or turns yellow when baked. To counteract this, create a very acidic dough (sourdough) or add lemon juice or vinegar to the dough and then bake the bread for the shortest time possible. The loaf you bake from this recipe will be beautifully moist and flavorful and contain little red bursts of beet, plus some extra zing from the added lemon juice. And each time you make it, you will have that moment of anticipation when you cut the first slice: what color will it be inside?
1. Wash and peel the beets and then chop them into small pieces.
2. Using a blender, blitz the beets into a pulp, leaving some small pieces intact. Set aside for use in step 7.
3. Weigh the dry ingredients separately and place them into a large plastic bowl in the following order: flour first and then the salt.
4. Add the botanical culture, botanical water, tap water, and lemon juice and combine until a dough starts to form and the sides of the bowl are clean.
5. Remove the dough from the bowl and knead on a dry work surface until it becomes smooth and elastic, approximately 15 minutes. The dough will be slightly firm until the beet pulp is added.
6. Use the windowpane test (see here) to check if the dough is fully developed.
7. Flatten the dough, spread the beet pulp on top, and roll up the dough.
8. Gently knead the dough until the beet pulp is fully dispersed and the dough has reformed. The dough will now feel very soft.
9. Divide the dough into two 500 g (1 pound 11/2 ounce) pieces and gently shape into round balls.
10. Place into a lidded plastic container and leave to bulk ferment for 30 minutes.
11. Remove the dough balls from the container and gently reshape.
12. Place back into the container for another 30 minutes.
13. Remove the dough balls from the container and once again gently reshape.
14. Place back into the container for another 30 minutes.
15. Remove the dough balls from the container and form into cylindrical shapes.
16. Place into small baking pans, lightly greased with white vegetable shortening.
17. Place the baking pans into a large, lidded plastic storage box and leave to fully prove. This could take from 2 to 4 hours, depending on the activity of the ferment.
18. When fully proved, spray water on the top of each and, using a sharp knife, cut an incision lengthwise down the center of the dough (see here).
19. Place the baking pans into a preheated oven and steam the oven (see here).
20. Bake at 425°F (220°C, or gas mark 7) until golden brown, approximately 25 minutes.
21. Remove the baked loaves from their pans and place on a cooling rack.
Yield: 2 small loaves
BEET AND LEMON FERMENT:
To build my ferment, I use organic beets and unwaxed lemons. The beets must be washed to remove any dirt. Cut the beets into quarters and the lemons in half. Place them in your fermenting jar, cover them with water, and close the lid. This should not require the addition of honey as there should be enough sugars available for the yeast to enjoy.