5
YEAR-ROUND
NATURE PLAY
Nature play can happen in every season. With ample time outside, children become attuned to subtle changes that occur throughout the year. For most people, dramatic natural events like a thunderstorm or an influx of cicadas calling is impossible to miss. But a more nuanced understanding of nature’s inner workings happens in many small moments of wonder. The greater the frequency of outdoor play—in all seasons—the more likely children are to develop a deeper nature connection.
THE SUN COMES UP
inspired by Elizabeth Mitchell’s “Sunny Day,” adapted by Karen Madigan and Monica Wiedel-Lubinski
The sun comes up (the sun comes up)
The rain comes down (the rain comes down)
The flowers bloom (the flowers bloom)
All around (all around)
The animals eat (the animals eat)
The children play (the children play)
The sun comes up (the sun comes up)
Another day.


COLLECTING NATURAL TREASURES
NATURE PLAY EXPERIENCE
Go on an outdoor walk. Observe the natural setting with a wide view, taking in the larger landscape. Notice features farthest away from you such as clouds, mountain tops, rock formations, trees, or cityscapes along the horizon. Gradually zoom in on smaller objects closer in your view. Freely explore and play in this habitat. If there are plentiful natural objects, use a small pail or egg carton to gather some of the treasures that have fallen to the ground. Do these objects make a sound? Or have a scent? Are the objects heavy or light in your hand?
Thoughtfully collect bits of natural materials that speak to you. These special collections can help you learn about the plants, animals, land, and seasons as they change.
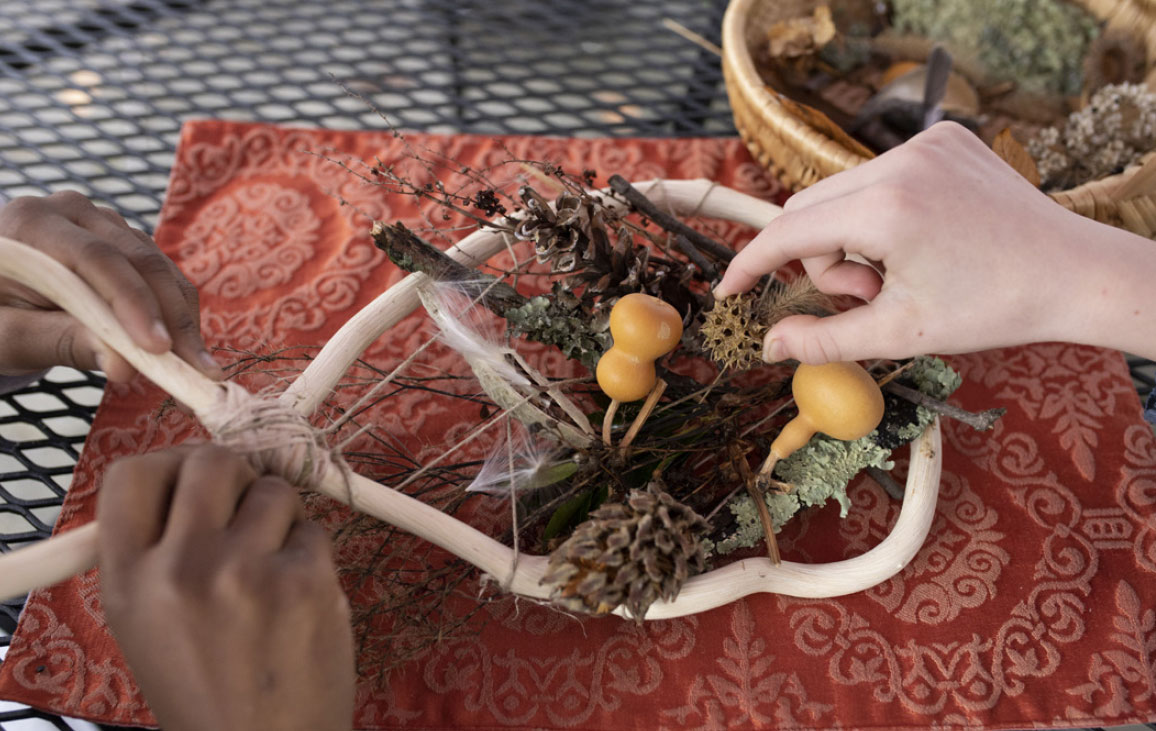
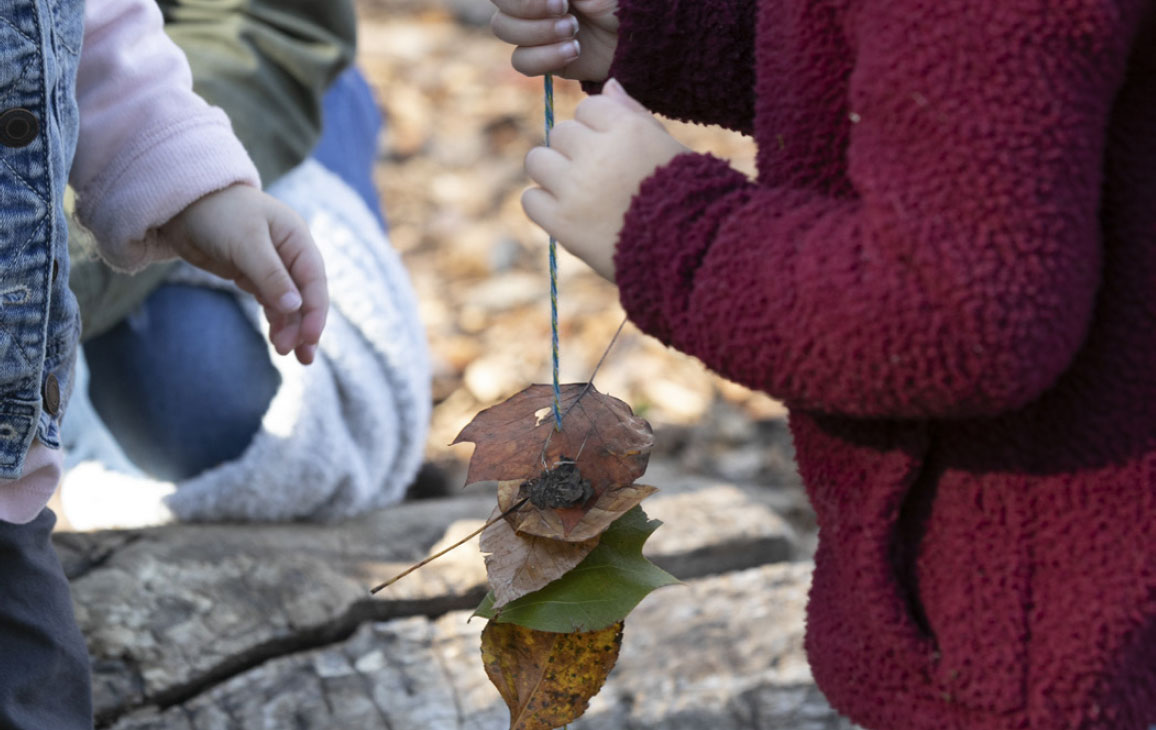
MAKE IT WILD: TREASURE VINE
Gathered treasures can become records of time spent in nature. Whether it be a wilted flower, blade of dried grass, or delicate twig, follow your instincts about what to place in a keepsake treasure vine.
MATERIALS
〉 2–3 feet (60–90 cm) harvested wisteria vine or other type of vine such as bittersweet, honeysuckle, or grapevine (you can use a Y-shaped branch in place of a vine if needed)
〉 Twine or other natural cordage
〉 Natural objects
PROCESS
1. Peel the outer layer of bark off the wisteria vine.
It will come off in long strips that can also be used for cordage. Set aside the outer bark to work with the smooth vine.
2. Once peeled, bring the ends of the vine together to overlap and form a raindrop shape with the vine.
3. Use twine or cordage to securely tie the ends in place.
4. Tie off another length of twine at the top and begin wrapping it back and forth across the raindrop shape to create a freeform weave.
5. Gently tuck your objects into the weave.
6. Display and add to the treasure vine as often as you like!


KEEP IT WILD
Collecting feathers without a permit is prohibited by the US Migratory Bird Treaty Act. This law protects birds and prevents commercial trade in feathers, regardless of how they were obtained. Federally recognized Native American tribes have special permission to gather plants for traditional purposes. You can gather feathers for study but return them to nature when you are finished.
 EXTENDING THE EXPERIENCE
When looking back at the found treasures, jot down where you found each item in your nature journal. You could snap a picture to glue in or draw the items while reminiscing about your day.

LOOSE-PARTS AND SMALL-WORLDS PLAY
NATURE PLAY EXPERIENCE
Loose-parts play has been a star in the spotlight of early childhood education in recent years. However, the idea that children are actually learning by playing with random items goes back to the early 1970s, when an architect named Simon Nicholson wrote the article “How NOT to Cheat Children: The Theory of Loose Parts” and opened the minds of educators all over the world. We owe him a great deal of thanks for placing value on allowing children to investigate, explore, and experiment in any environment. Loose parts play offers endless possibilities for creativity, imagination, and invention.
Put on your collecting hat, grab a basket or bag, and head out in search of natural loose parts! Create a “loose-parts cache” outside where you can use these treasures.
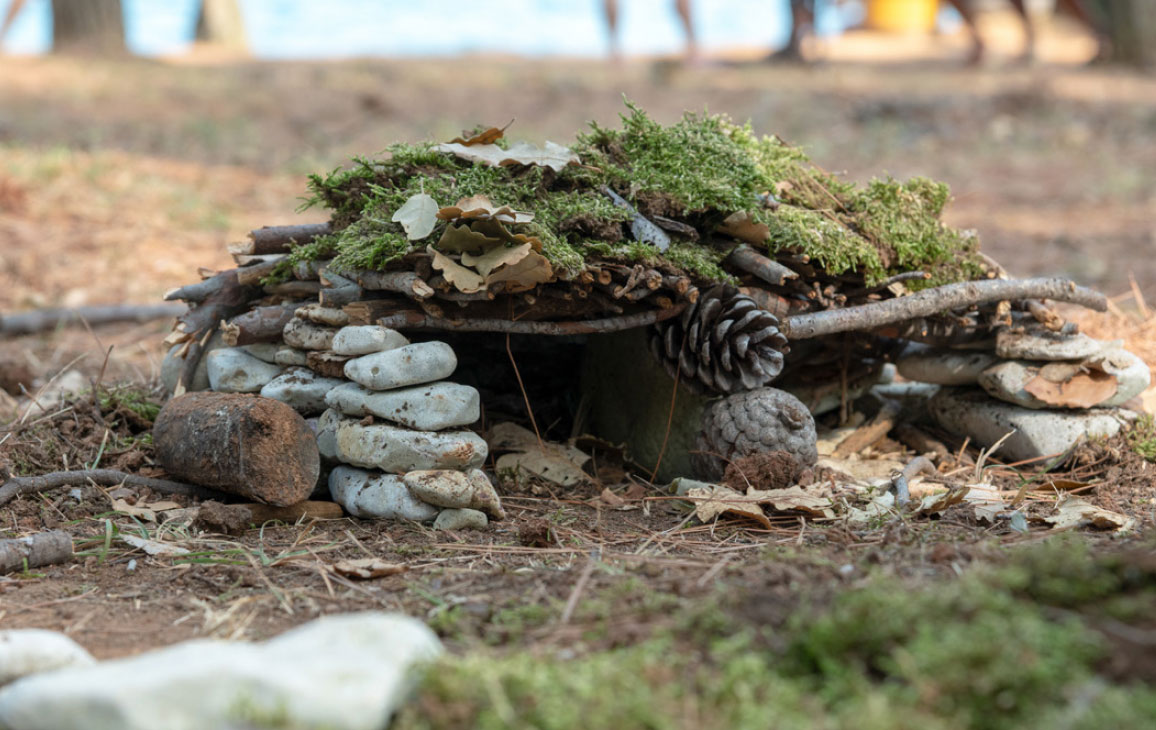
MAKE IT WILD: FAIRY HOUSE
Using your natural loose parts, your child can create small worlds to use in imaginative play. Small-worlds play refers to the common practice of building miniature shelters or habitats. The small scale helps children playfully process much larger settings and ideas about the world. One type of small-worlds play is building a fairy house.
MATERIALS
〉 Sticks
〉 Mud
〉 Bark
〉 Stones
〉 Pinecones
〉 Acorn caps
〉 Moss
〉 Berries
PROCESS
1. Find a spot near the base of a tree, among ferns, or near other tall plants. Poke sticks into the ground to build the frame of your fairy house. Add mud and bark for siding, carpet it with moss, and use stones to make a walkway.
2. Embellish with pinecones, acorn caps, and more. Enjoy your fairy house with your favorite fairy dolls!


KEEP IT WILD
Fairies, also called faeries or fay, are magical creatures referenced in folklore all over the world. What special habitats or plants might fairies visit near you? Dream up and draw fairies in your nature journal or tell a story about a magical fairy adventure.
EXTENDING THE EXPERIENCE
Abundant natural items are ideal for loose parts play, but just about anything can be used in building a collection of parts. Bottle caps, lids, corks, coffee cans, keys, and CDs are just some of the interesting things you can collect. Visit your local hardware store for items such as carpet and tile samples or paint swatches, which are usually free.
ROCKS
NATURE PLAY EXPERIENCE
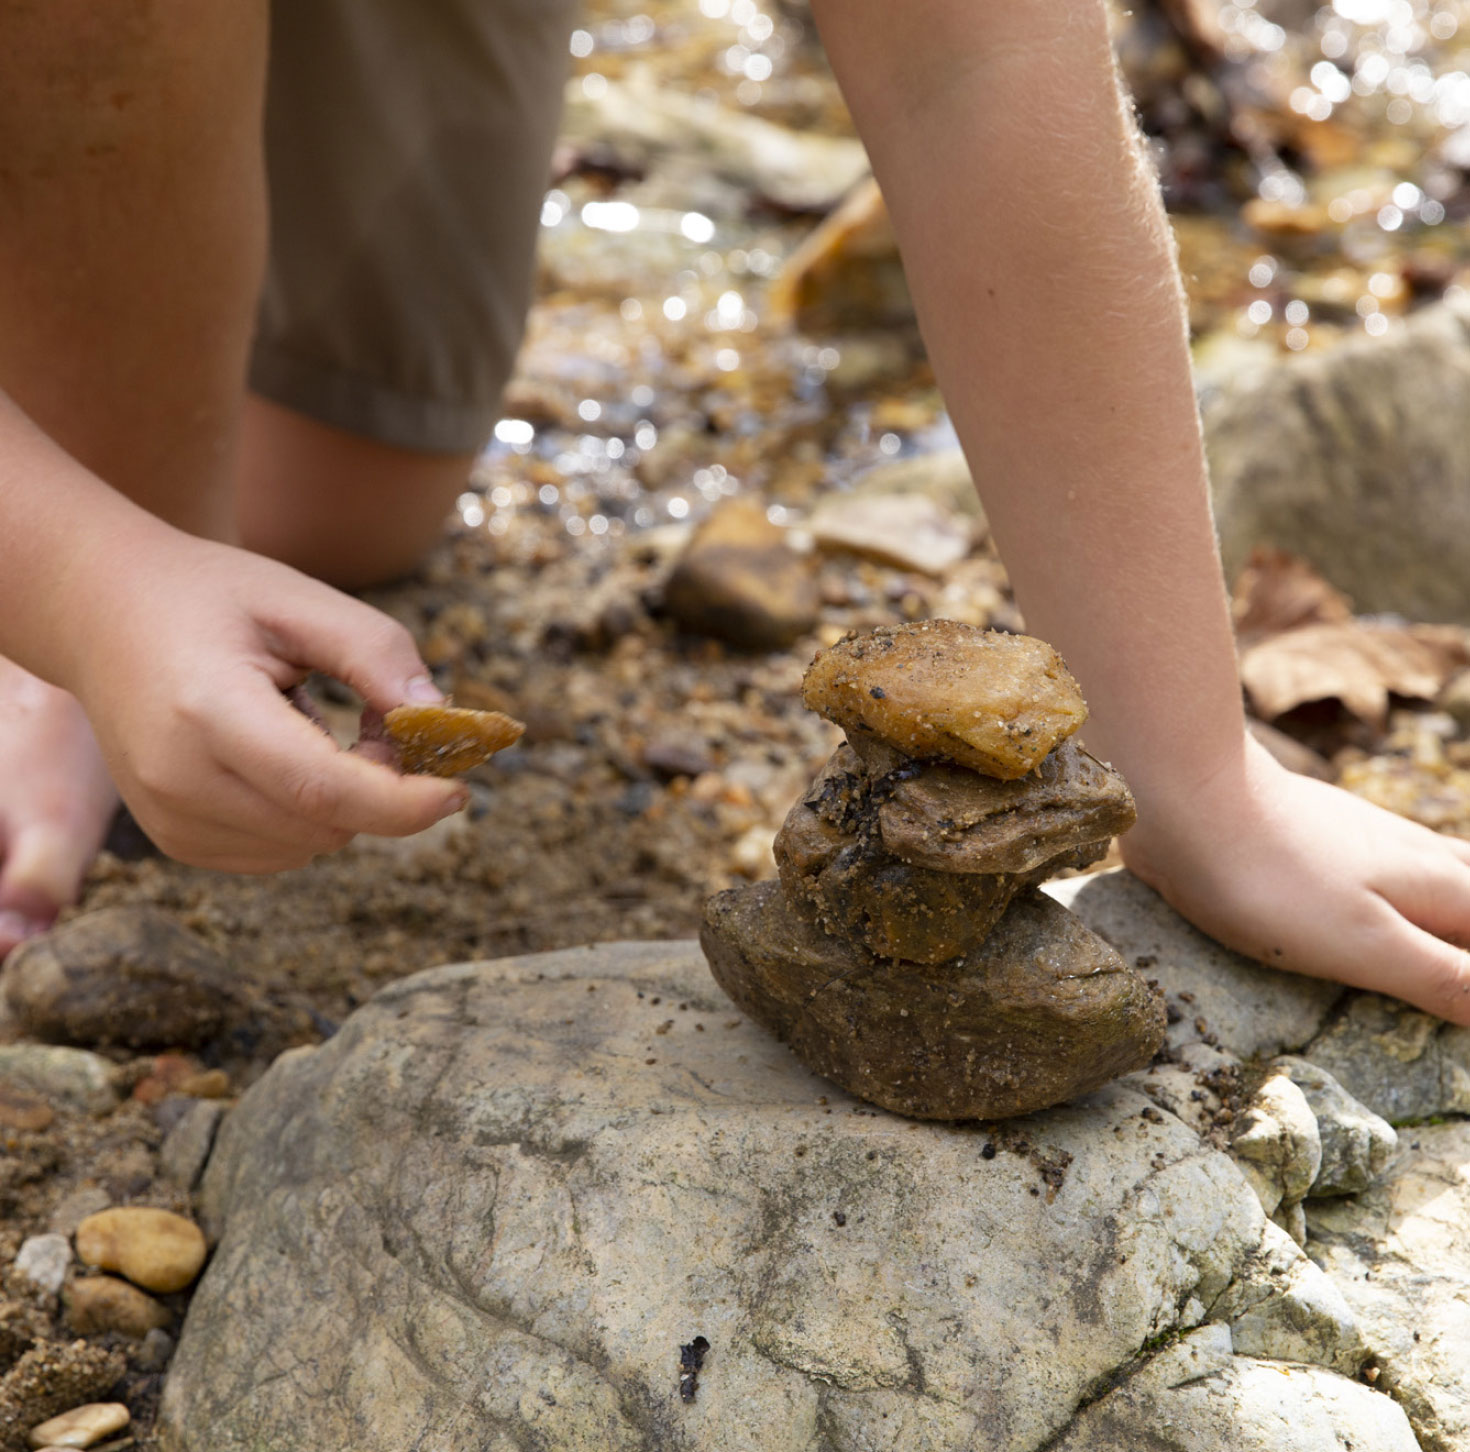
Rocks seem to invite little hands to touch and play with them. Nature play with rocks can enhance physical development as children pick up tiny stones with fingers or carry around and pile up larger rocks. The colors, sizes, and textures of individual rocks are intriguing. Careful study of rocks can reveal what minerals or crystals are present, or if you have come upon a fossil. Perhaps you have a future geologist in your midst!
Visit a stream, beach, or other waterway where rocks and stones are plentiful and you can freely explore. Look under the rocks for insect larvae, snails, and other aquatic critters. You might even see salamanders or crayfish.
Note: The best rock hounds examine their finds in person with other experts. Visit your local natural science museum, gem and mineral club, or university geology department for help identifying your rocks.
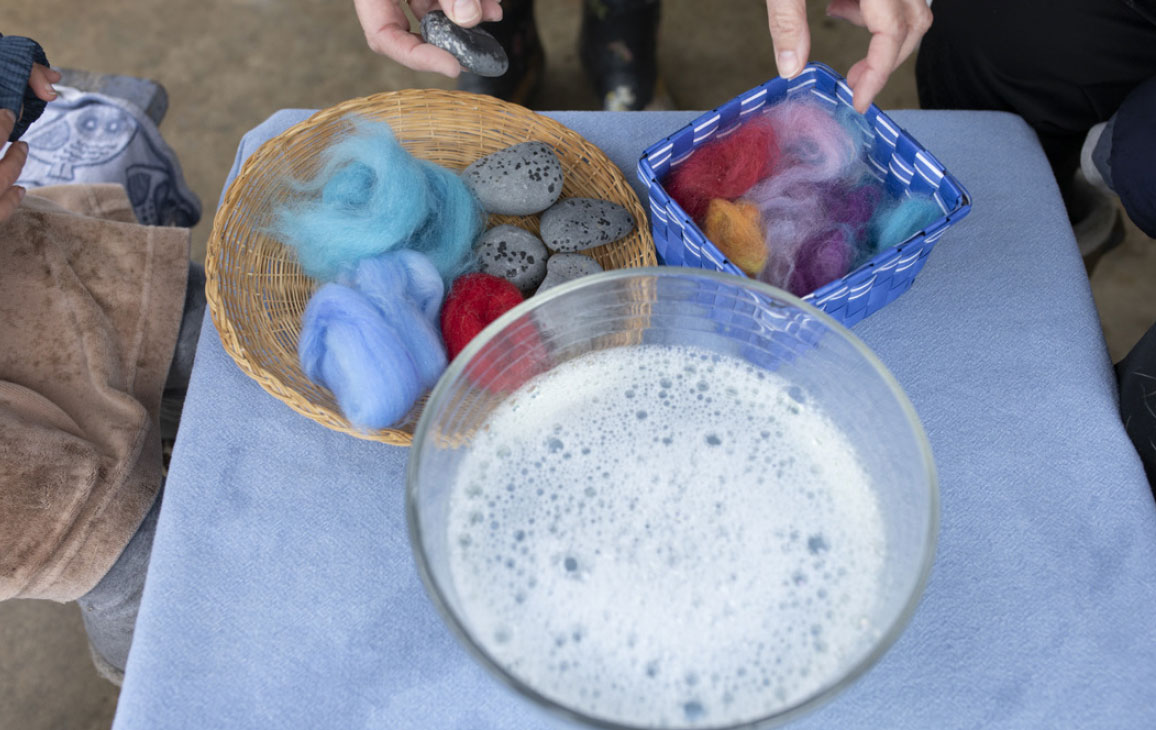
MAKE IT WILD: WOOL FELTED ROCKS
Are there any rocks that look like they are wearing moss sweaters? Did you know you can make a sweater for a rock?
MATERIALS
〉 Wool roving
〉 River rocks or other smooth stones
(such as from your local garden center)
〉 2 large bowls or tubs
〉 Dish soap
〉 Warm water
〉 Cold water
PROCESS
1. Choose the perfect rock (it should feel good in your hand).
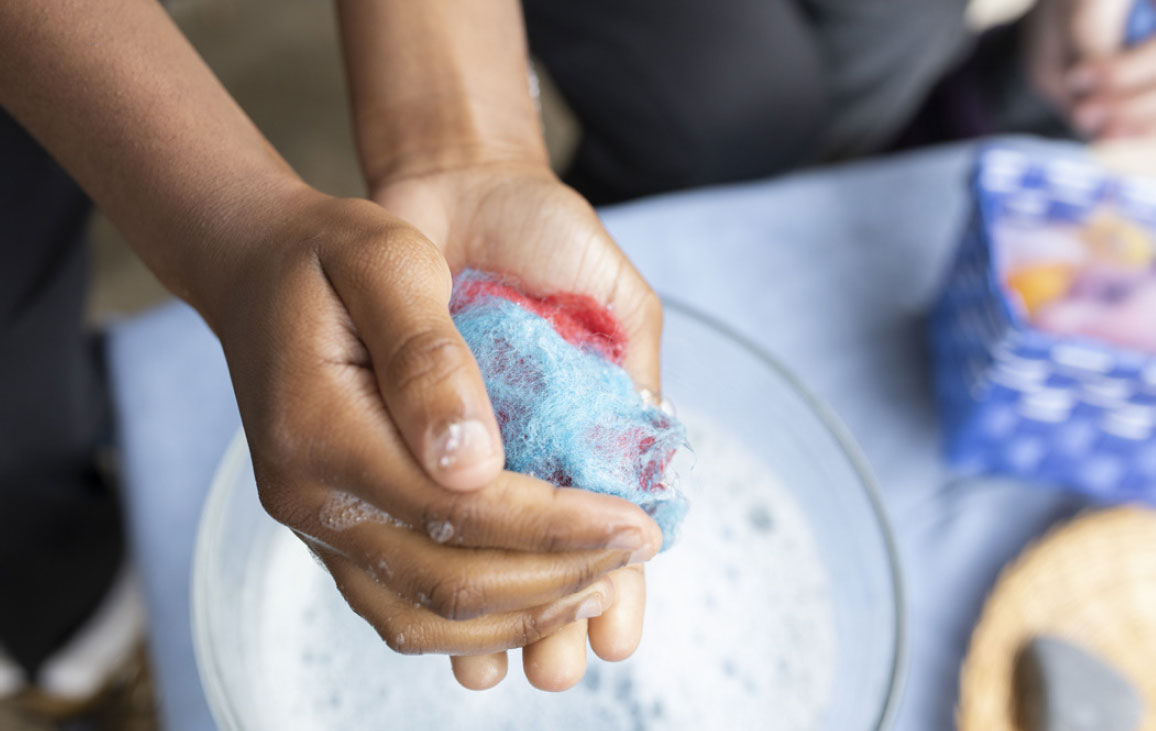
2. Wrap the rock thoroughly with wool roving in two layers (as shown). Do not leave any rock showing.
3. Fill a bowl or tub with warm water, add several drops of soap, and stir. Fill a separate bowl with cold water.
4. Gently cup the rock in both hands and dip it in the warm, soapy water.
5. Squeeze and pat the rock very lightly for several minutes until the wool begins to cling to the rock, dipping it back into the warm water occasionally.
6. Once the wool begins to cling and shrink around the rock, start to rub it between your hands, gently at first and becoming more vigorous as the wool tightens around the rock.
7. Continue to dip the rock in the warm water, then in cold water. Repeat dipping in both warm and cold water for several minutes while continuing to rub the wool between your hands.
8. When the wool has fully shrunken around the rock, rinse in cold water until the water runs clear.
9. Let the rock dry in the sun.
10. Enjoy your cozy sweater-wearing rock!
KEEP IT WILD
Be mindful of creatures that make their homes under stones in streams. If you lift a rock to look underneath, carefully place it back where you found it.
EXTENDING THE EXPERIENCE
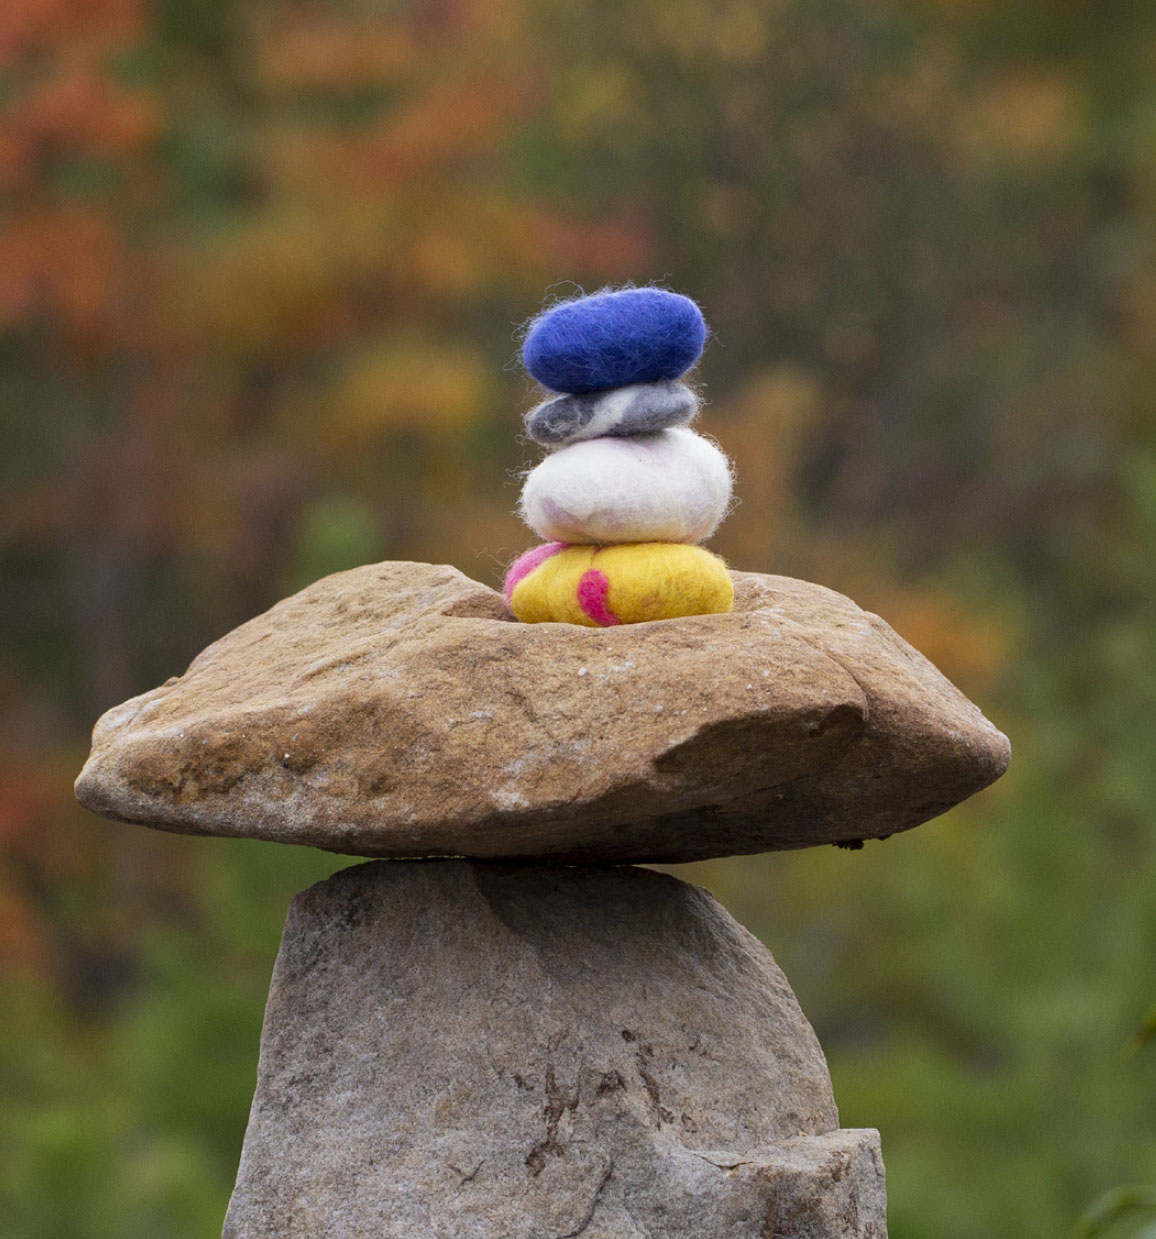
Use your felted rocks to build a totem or cairn. Turn it into a family game by taking turns stacking one rock at a time until the stack tumbles down. How many rocks were you able to stack?
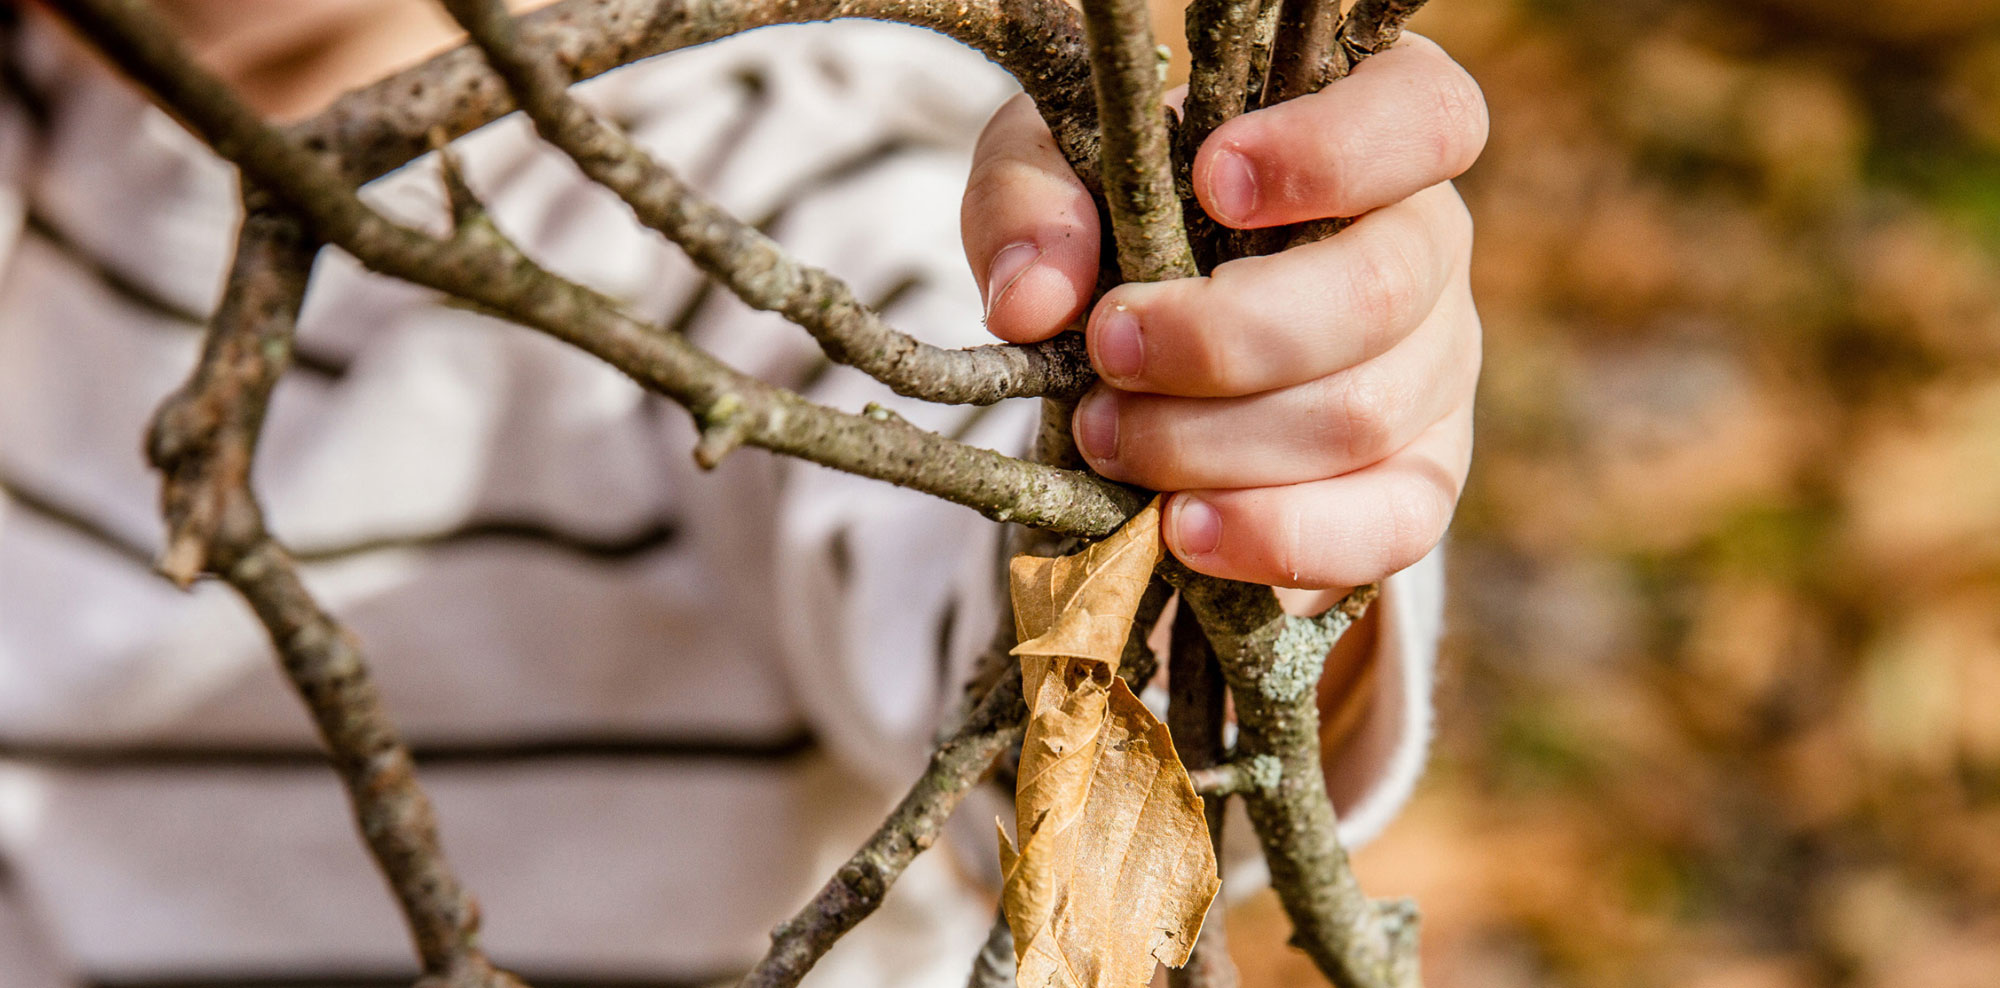
STICKS
NATURE PLAY EXPERIENCE
Trees naturally lose limbs because of wind, insects, or disease. They replenish nutrients in the soil as they fall and decompose. They're also a reliable source of food and shelter for animals. When you take a walk, compare the sizes of branches on the ground. Notice the array of colors the bark can be. Challenge yourself to find ten different sticks of various sizes and colors. When you slow down to look closely, you may be surprised by the variety of sticks around you!
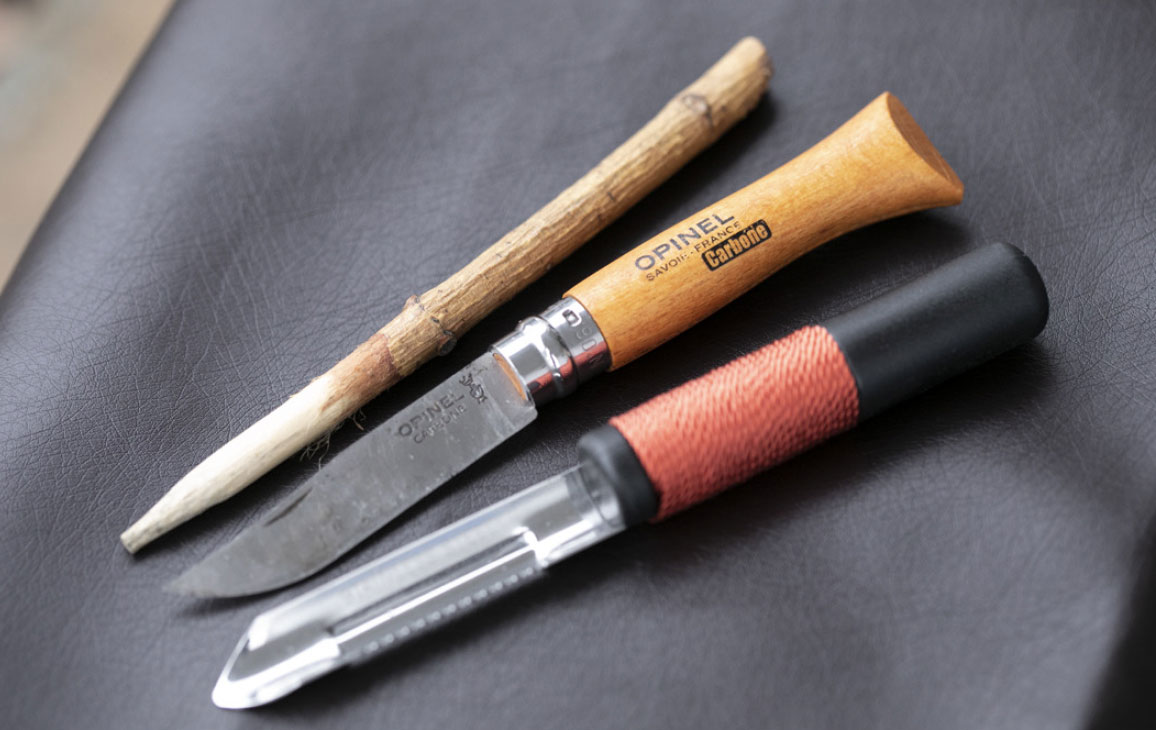
MAKE IT WILD: WHITTLED WOOD SCRIBE
Because sticks are plentiful, you might try your hand at whittling a scribe to use in your nature journal.
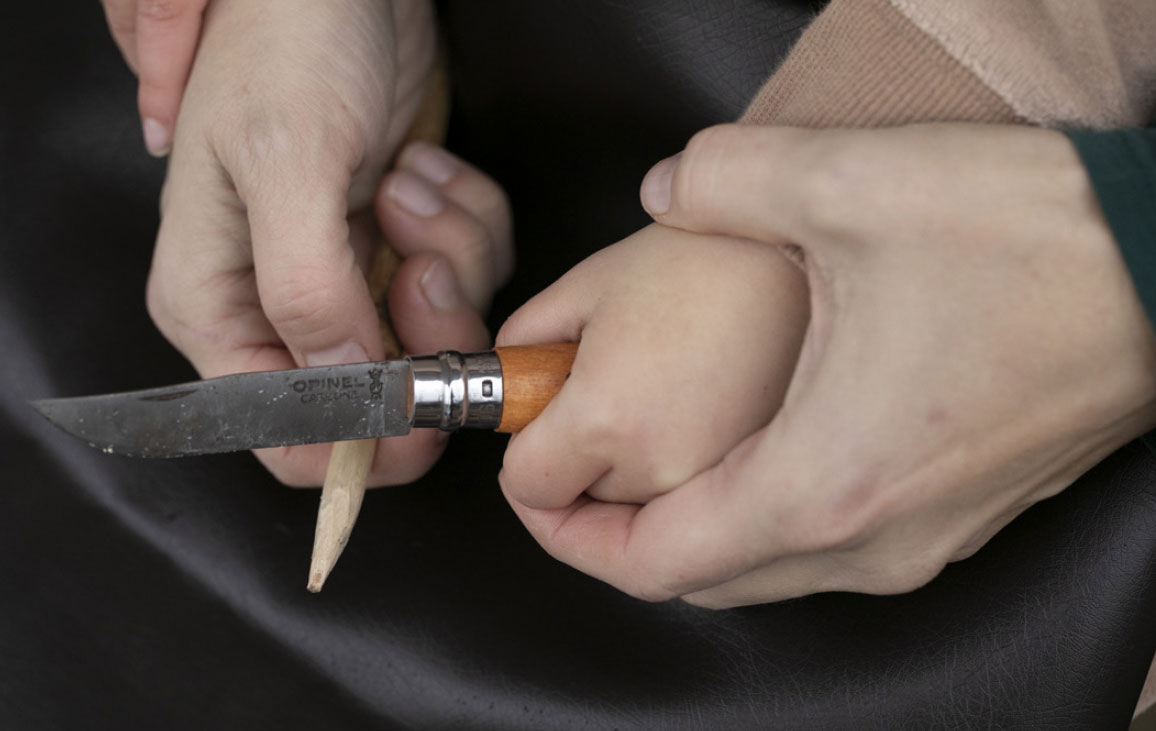
Note: An adult should closely supervise the use of sharp tools.
MATERIALS
〉 Sharp knife
〉 Sharpening stone
〉 Branch of soft wood such as pine, cedar, basswood, or spruce
〉 Scrap board or thick leather mat to protect your lap
〉 Gloves or a thumb guard
PROCESS
1. Select a suitable branch made of soft wood.
2. Establish a safe space (or “blood circle”) that no one will enter while cutting.
3. Place a scrap board or mat on your lap. Wear gloves or a thumb guard.
4. Sharpen your knife on a sharpening stone (a dull knife is dangerous!).
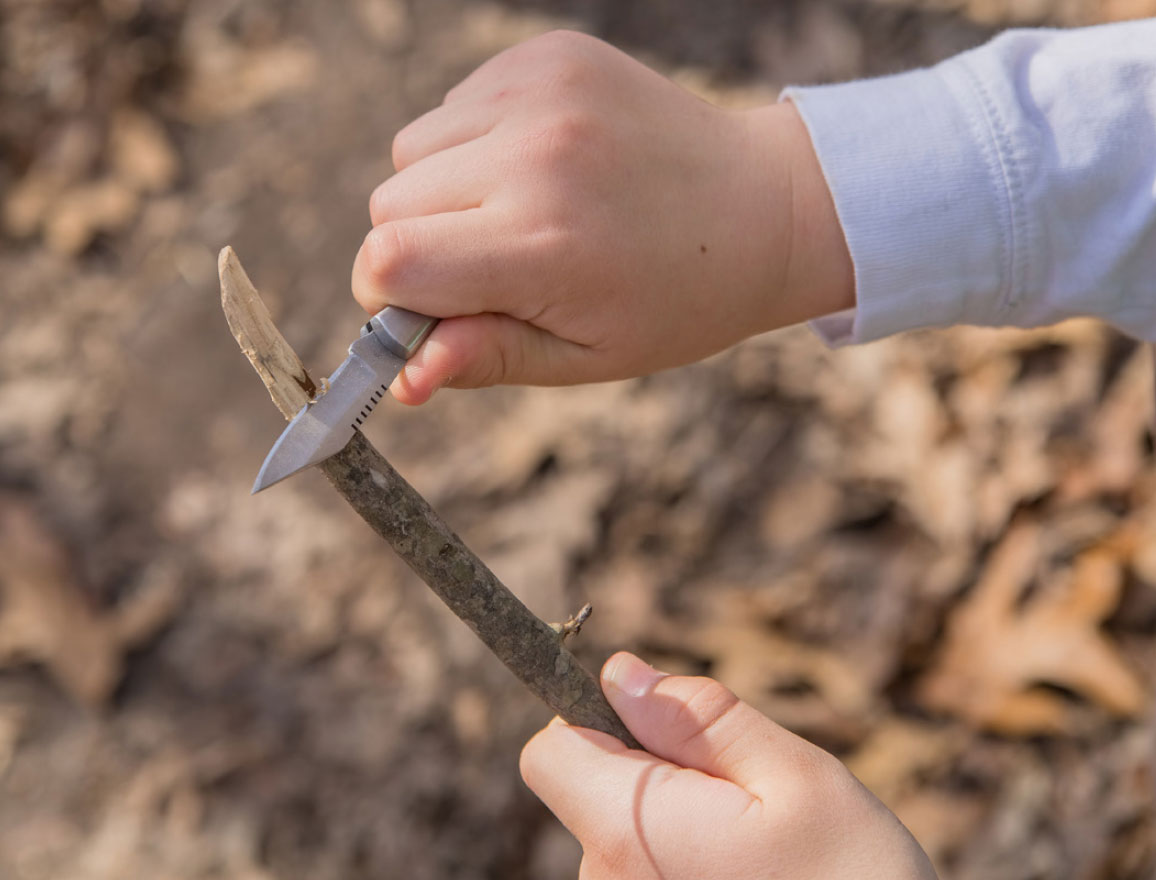
5. Whittle one end of your branch until you create a pointed tip.
WHITTLING TIPS
〉 Whittle along the grain of the wood.
〉 Stroke the knife blade away from your body with shallow, repetitive cuts.
〉 Remove the wood gradually, without making deep cuts.
KEEP IT WILD
Save the wood shavings, as they are useful kindling for campfires.
EXTENDING THE EXPERIENCE
Dip the scribe into homemade paint, mud, or ink and draw with it in your journal.
TREES
NATURE PLAY EXPERIENCE
Climbing a tree, like splashing in puddles and wishing on dandelion seeds, is a rite of passage. Climbing trees is risky play for sure, but with the freedom to try, and perhaps fail, and try again, we grow determined to navigate obstacles. Climbing trees builds perseverance and confidence as we rise to the challenge and succeed. It is exhilarating to perch in a tree!
Head to a park or nature center where there are trees ideal for climbing. You may want to start out by climbing on fallen logs first. Practice balancing and moving your body in different ways to scramble over logs. When you feel ready, select a tree to climb. You can do it! Trust your body and move slowly with each step. Don’t ask a grown-up to put you up in a tree—it’s important that you take time training your muscles for tree climbing on your own so that you’ll be able to climb back down too.
What’s it like up there? Can you see things you can’t usually see from the ground? Is there anything in the tree, like a bird’s nest, or even a bird?
Great Climbing Trees
〉 Beech
〉 Oak
〉 Weeping willow
〉 Mulberry
〉 Fruit trees such as crabapple, apple, cherry,
and pear
Safe Climbing Tips
〉 Wear sturdy shoes with gripping soles and comfortable clothing.
〉 Scope out the tree with an adult ahead of time to ensure it is safe for climbing.
〉 Always have two hands on the tree and at least one foot.
〉 Take your time.
〉 Ask for help when you need it.
MAKE IT WILD: THROW A TREE PARTY!
Being among trees is a joyful and often magical experience. Trees give us such amazing gifts; why not celebrate these special living things? Invite your friends and family members to a tree party. After some fun tree climbing, make a leaf garland and decorate your favorite spot in the woods. Enjoy a picnic with snacks and tea, then dance around while singing to the treetops! Make notes about your day in your nature journal and remember to hug the trees!
MATERIALS
〉 Leaves
〉 Yarn or embroidery floss
〉 Embroidery needles
〉 Tablecloth or quilt
〉 Favorite snacks and tea
〉 Tea set


KEEP IT WILD
Scientists have been studying the phenomenon that trees can communicate with each other. They send underground signals through mycorrhizal networks. How cool!
EXTENDING THE EXPERIENCE
Invite friends and family to your tree party with handmade invitations. Perhaps you are inspired by the trees to make recycled paper (see paper-making instructions shown here).
MUD
NATURE PLAY EXPERIENCE
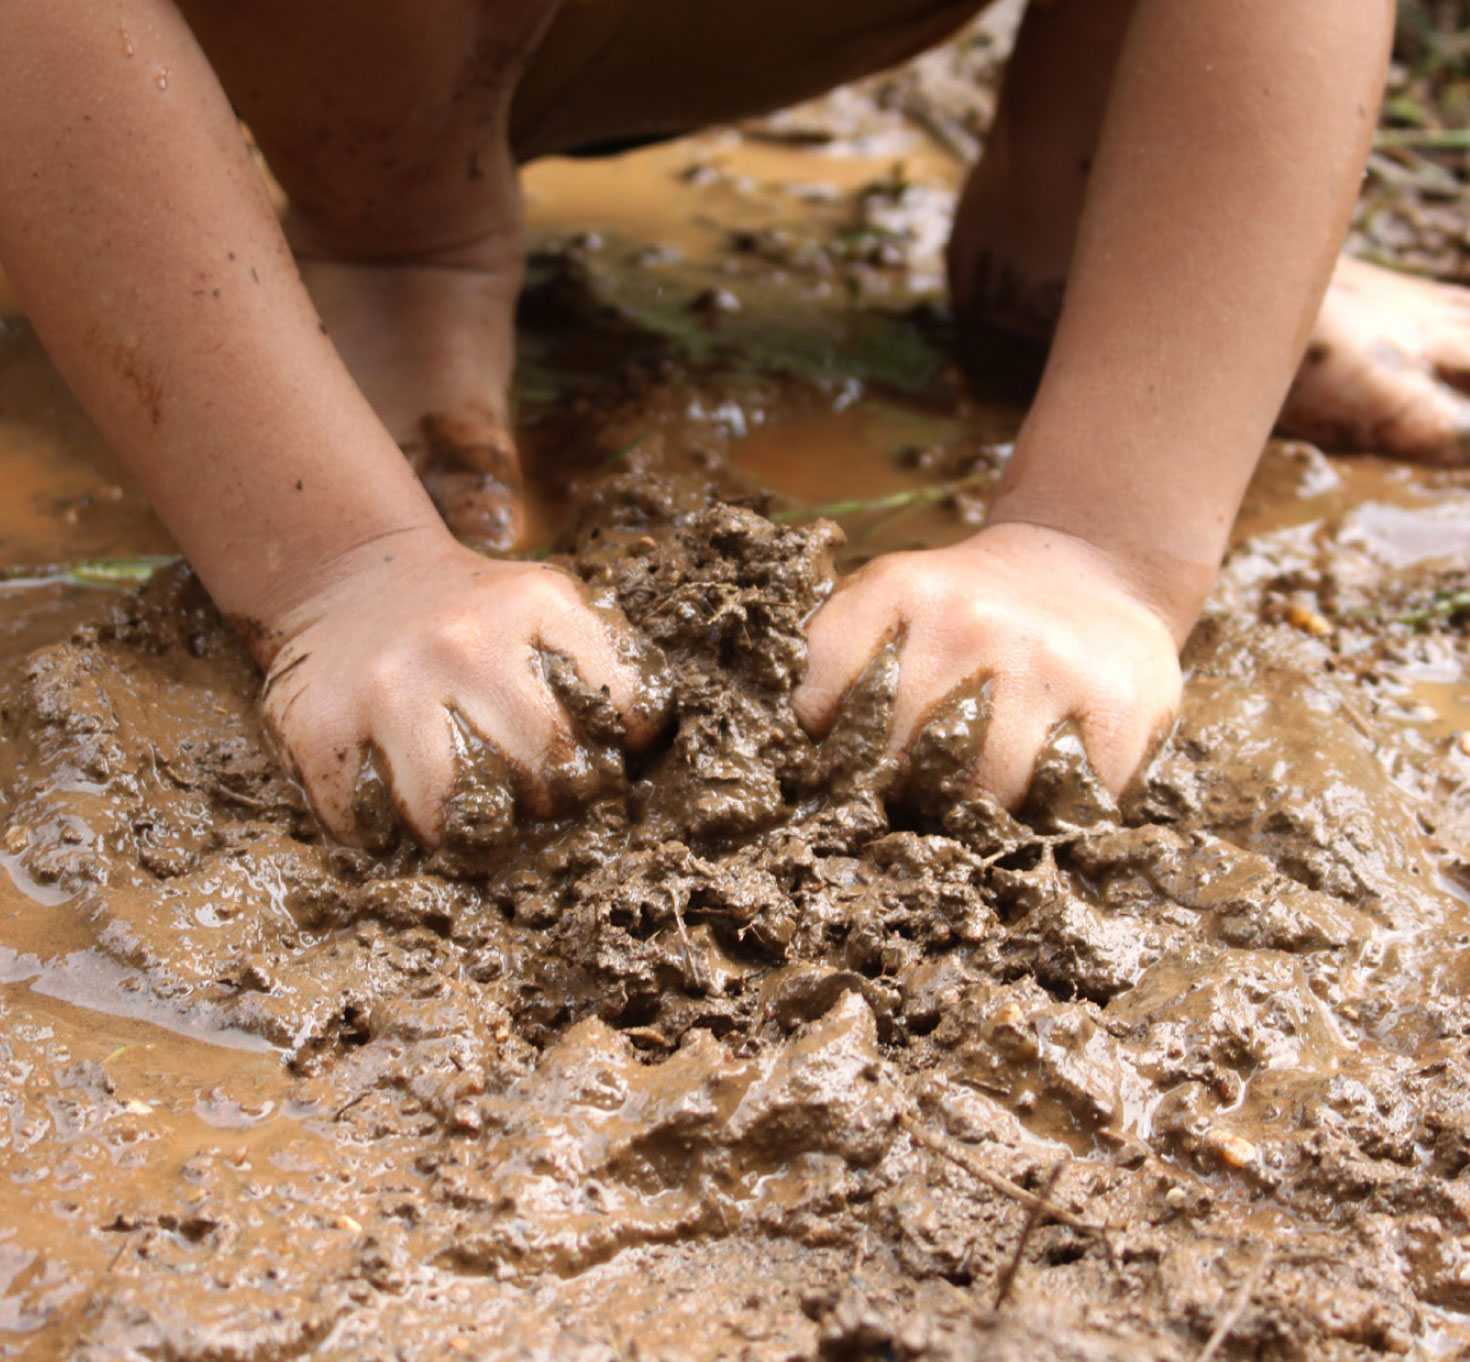
What’s more alluring than mud? It’s wet, squishy, sloshy, and fun! Whether your child is a cautious observer or explores mud with his or her whole body, muddy nature play guarantees an adventure. Mud can be the medium for projects such as hand-rolled snakes or pinch pots. It can be the glue that binds projects engineered from natural materials like sticks and leaves. It can be painted to create thick, luscious works of art. Mud is also the magic ingredient in all sorts of “treats.” Pies, muffins, cookies, and cakes are often baking in a mud-pie kitchen. Mud is a diverse art medium and is perfect for small-worlds play too.
Rainy-day walks mean splashing in puddles, playing in mud, and, if you’re lucky, finding worms or other slimy creatures. Head out on a wet day outfitted with your rain gear in search of a muddy patch in the woods. Even without rain, mud is easy to make—you only need soil, water, and something to dig with.
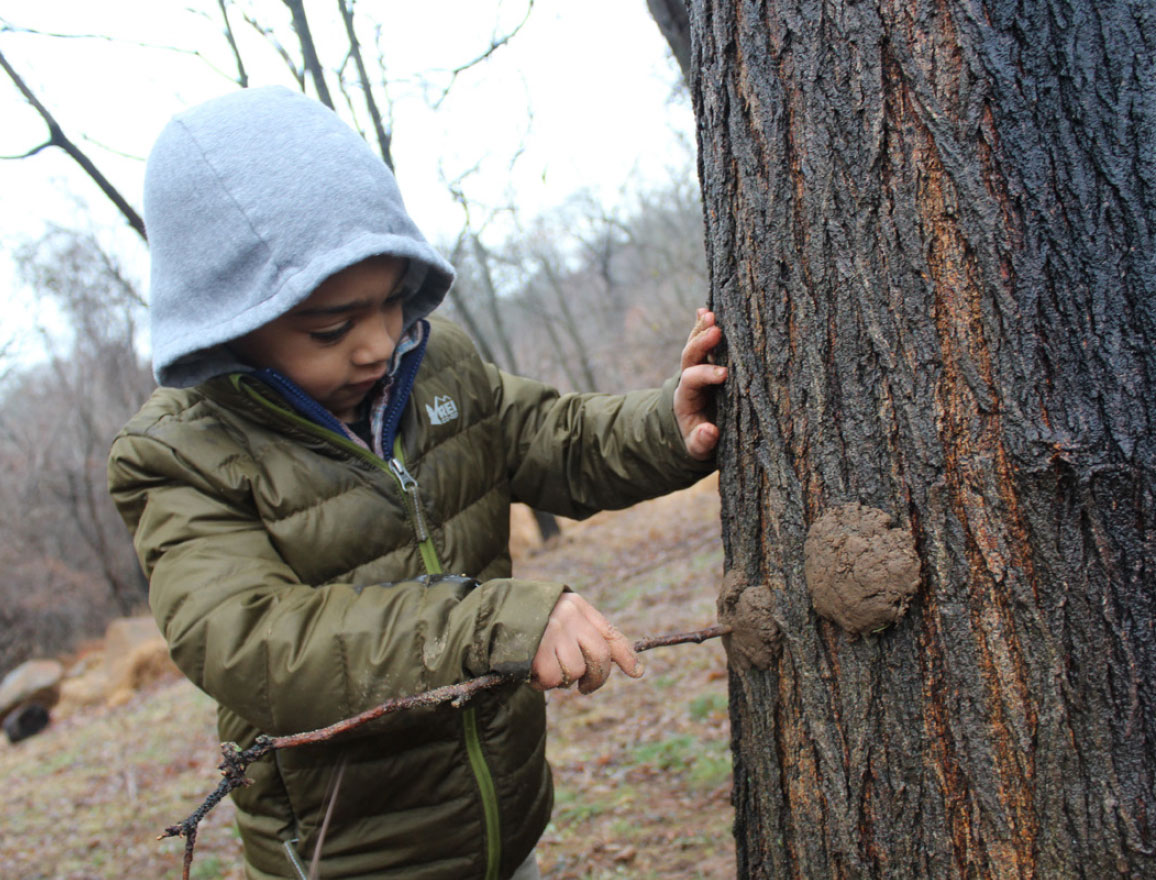
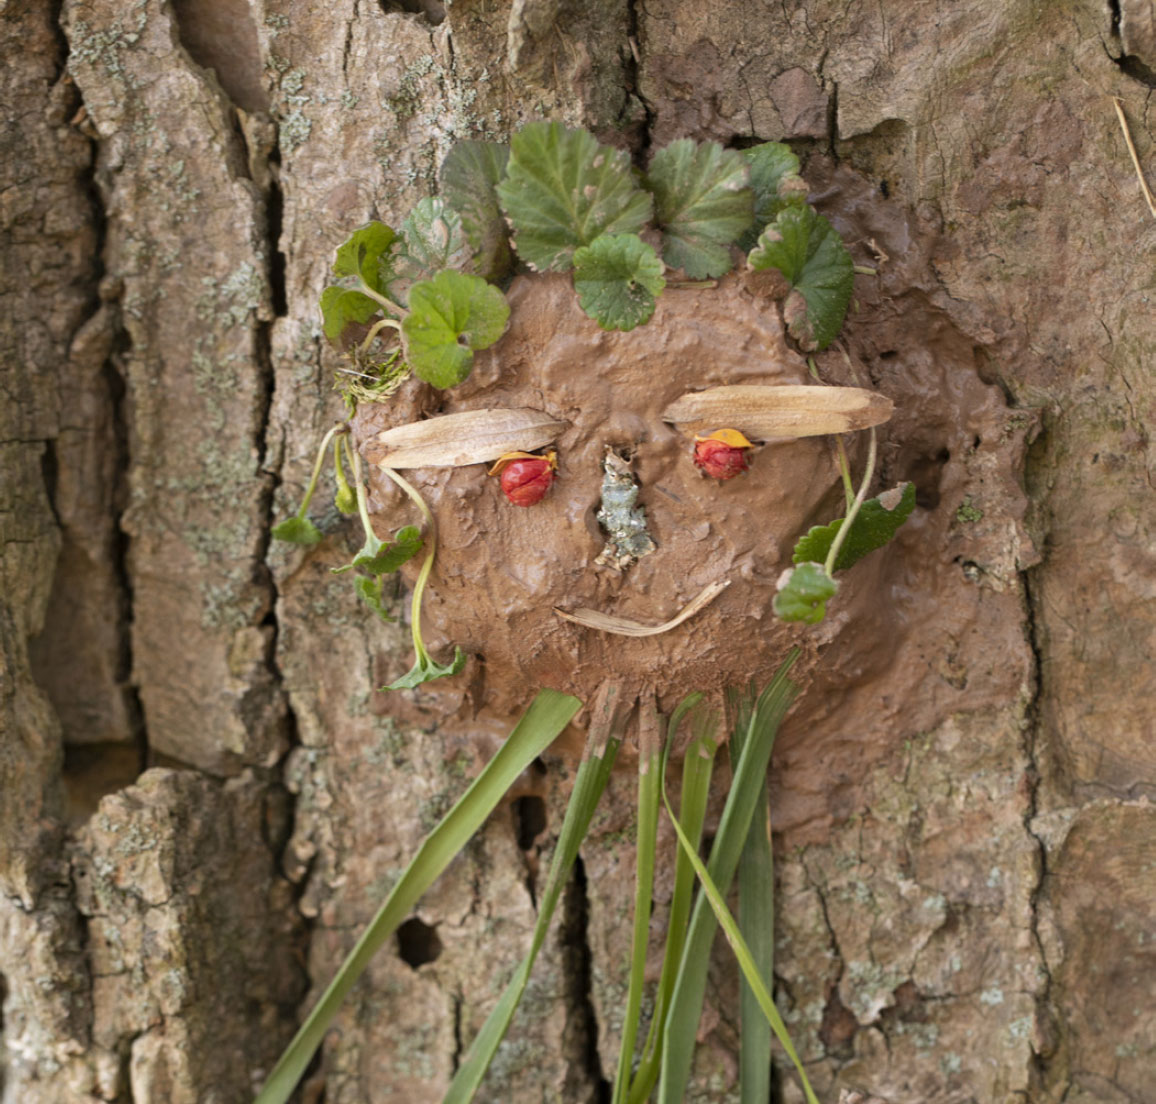
MAKE IT WILD: NATURE FACES
Press mud onto tree bark, then sculpt a face with nearby natural materials. These nature faces can welcome forest visitors or be mysterious guardians in your neck of the woods.
MATERIALS
〉 Mud
〉 Trowel
〉 Small pails or containers
〉 Tree
〉 Various natural objects (acorns, seeds, berries, leaves, twigs)
PROCESS
1. Find a muddy spot where digging is allowed.
2. With trowel, collect some mud or soil in pails.
3. If necessary, mix in a little water to create a pliable consistency.
4. Use your hands to press mud onto a tree.
5. Form the mud into a rounded face shape.
6. Add natural items to make facial features.

KEEP IT WILD
Natural clays form along streambeds, riverbanks, and other sites where raw earth is exposed. With permission, you can gather clay for some sculpting fun. You can shape natural clay into functional or artistic creations, then let it bake in the sun or oven.
EXTENDING THE EXPERIENCE
Why does mud dry out? Experiment with dried mud by soaking it in water. How long does it take for dry clumps of earth to return to soft, squishy mud? Experiment with different kinds of mud to see which dries out the quickest. You can also try painting with thin, watered-down mud. You’ll be amazed at the range of colors mud paint can be. Add some natural dyes to expand your palette.

RECORDING NATURAL EVENTS
NATURE PLAY EXPERIENCE
The more you are outdoors, the more you will notice seasonal changes and interactions in the natural environment where you live. As a keen observer, recording these changes is a way to document what happens and compare your records from day to day, month to month, or even year to year. As you explore nature together, be on the lookout for these natural occurrences.
TEN NATURAL EVENTS TO LOOK FOR
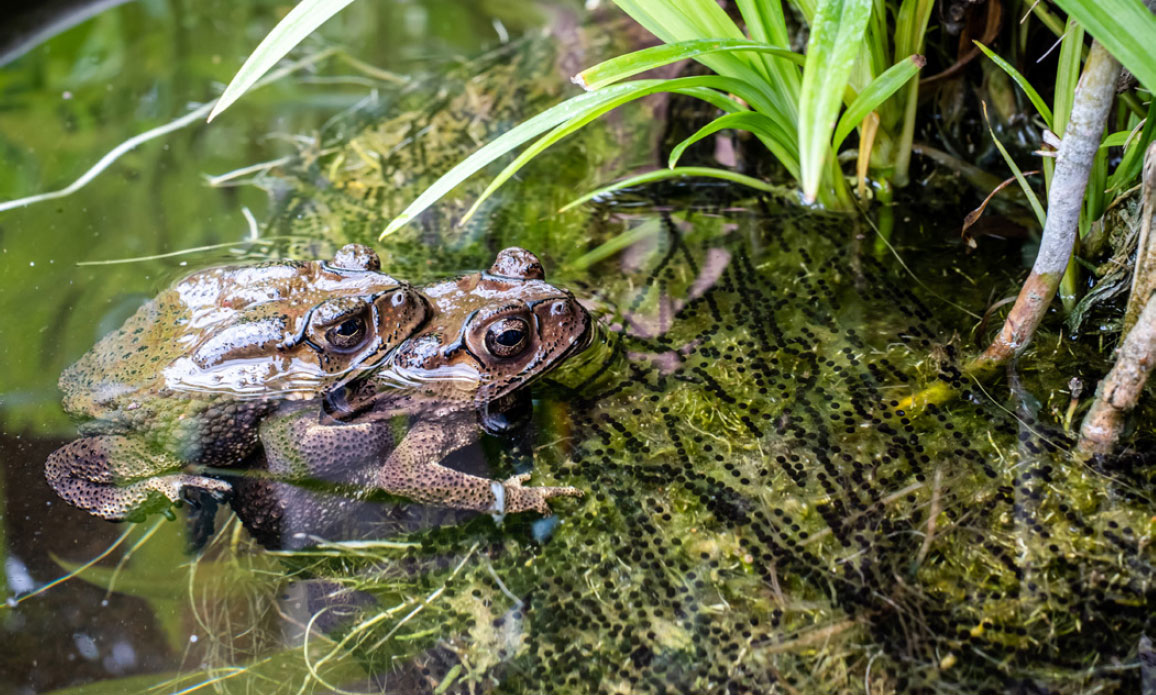
〉 When do the frogs start to call in spring?
Which ones?
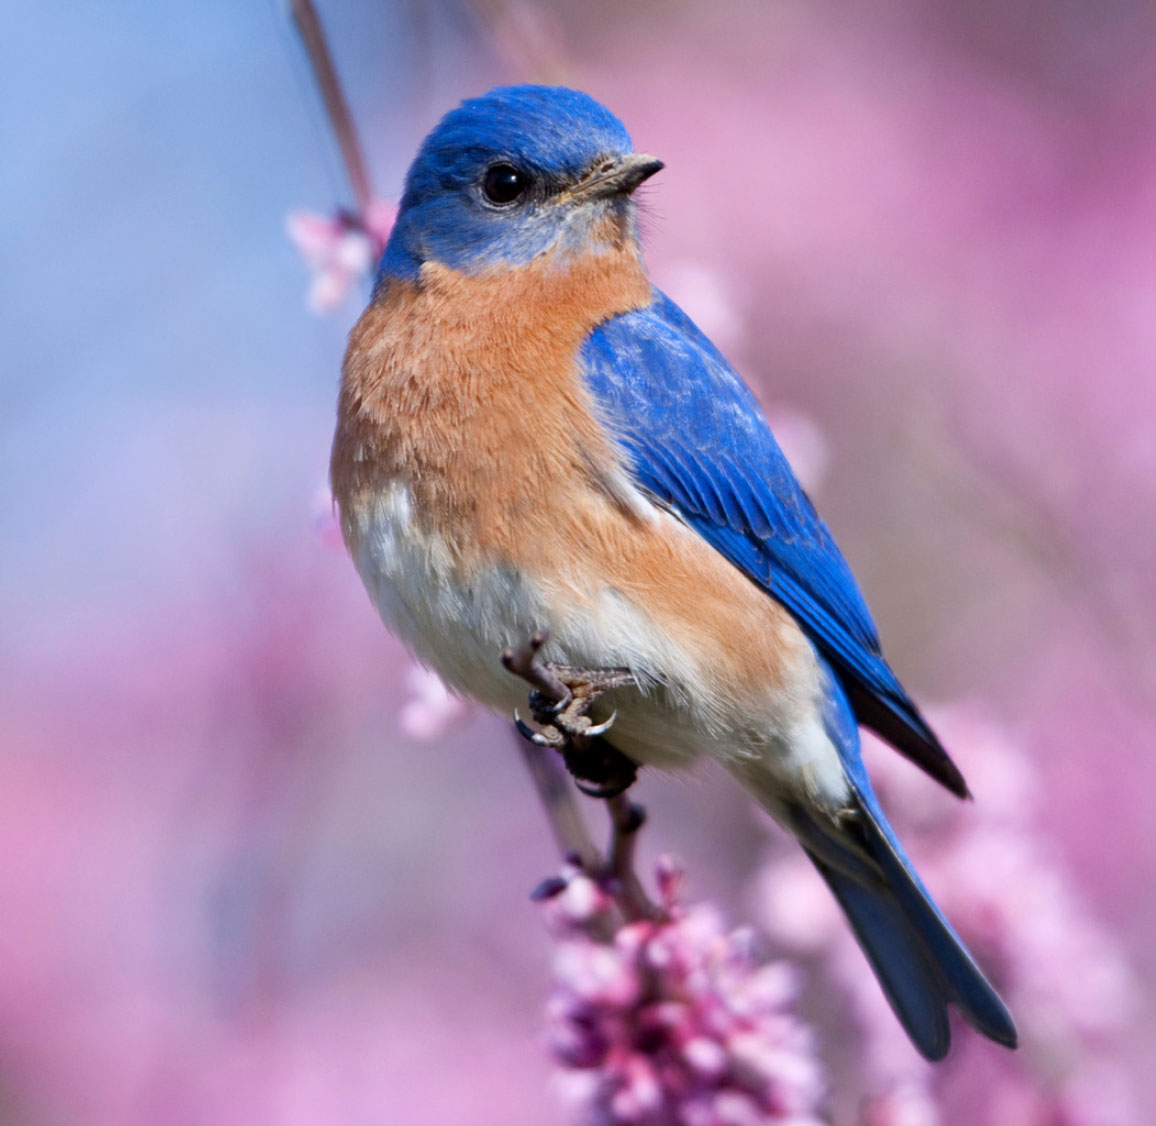
〉 When does a particular bird species return from migration or begin to nest?
〉 What day does Jack Frost arrive?
〉 When does the first snowflake fall or a blizzard take place?
〉 When do you wear your mittens for the first time as the weather turns cold?
〉 Do salamanders or fish spawn at the same time and place predictably?
〉 When does a favorite wild berry ripen or wildflower bloom?
〉 When is the first barefoot warm day?
〉 Which butterfly is the first to emerge in spring?
〉 What surprising plant or animal did you discover on a given day?
MAKE IT WILD: NATURAL EVENTS CALENDAR
Use the template in chapter 7 to record your events. You can choose from either a monthly or yearly approach to your observations.
KEEP IT WILD
There are four astronomical seasons (summer, autumn, winter, and spring) that begin on a solstice or equinox. Consult the Farmer’s Almanac to see how farmers rely on seasonal observations.
EXTENDING THE EXPERIENCE
The science of phenology is the study of cycles of plants and animals and the interconnected way that timing of these cycles relates to seasons and climate. Phenology is arguably the oldest branch of environmental science with records dating to 705 CE noting bloom times of cherry trees in Japan. Patterns of migration, spawning, bloom times, hibernation, rainfall, and more help us utilize natural resources (for example, farming and gardening) and better understand human impact on climate change. You can learn more about phenology through the writings of Aldo Leopold, Henry Thoreau, and Rachel Carson.

USING A NATURE JOURNAL
NATURE PLAY EXPERIENCE
Journaling is a personal way for people to express themselves. For some, journals are used to express thoughts and emotions by writing about a meaningful experience. Others jot down sentence fragments, capture fleeting ideas, or write poetry. Drawing, painting, and collage can also capture memories, especially of nature experiences.
For young children, the latter may be all they can do until they acquire the skills to write letters and words and begin to show interest in writing. Long before children are able to form letters or shapes, they can make marks. Mark making is an important part of children’s motor development, eye-hand coordination, and spatial awareness.
Nature journaling is a creative way to encourage expression and reflection with or without the use of written words. Each nature experience is an opportunity to notice shapes, colors, patterns, textures, symmetry, and more! Below are some unique ways to use a nature journal:
〉 Trace or make rubbings of leaves, feathers,
bark, and grasses.
〉 Glue dried leaves, seeds, moss, or flower petals inside.
〉 Press natural objects like flowers and leaves.
〉 Smoosh berries to find seeds or experiment with color.
〉 Paint with natural dyes and paintbrushes.
〉 Draw or paint with sticks or feathers dipped in mud, paint, or dye.
〉 Draw with charcoal from a cooled campfire or fireplace.
MAKE IT WILD: RECYCLED NATURE JOURNAL
There are some fantastic journals out there that can be purchased but making your own journal from recycled paper is easy and fun! It’s also an opportunity to clue children in to where paper comes from and the importance of recycling. Not to mention this is a messy, sensory, and highly rewarding process! With just a few household items, you can make sheets of paper to bind together into a journal. Head outside with your materials and get busy.
MATERIALS
〉 Paper scraps such as newspaper, construction paper, and tissue paper
〉 Large tub
〉 Water
〉 Manual handheld mixer
〉 Framed screen (or a piece of screen with edges covered by duct tape)
〉 Bath towels
〉 Piece of felt slightly smaller than screen
PROCESS
1. Place the paper in the tub and tear it into small pieces.
2. Pour warm water over the paper until just covered.
3. Let it soak for several hours or overnight.
4. Have fun smooshing the paper with your hands and blending it with a hand-mixer to make a pulp. It should be a milkshake consistency.
5. Add enough warm water to allow the framed screen to be dipped into the tub.
6. Stir the pulp and water gently.
7. Dip the screen into tub and allow the pulp to settle on the screen.
8. Lift the screen out of tub and allow the water to drain.
9. Set the screen on a towel, place the felt on top of the pulp, and gently press to squeeze out water.
10. Flip the screen over and gently peel the paper off.
11. Place the paper on a dry towel and leave overnight.
12. Repeat for the number of pages you’d like in your journal.
When you have your sheets of paper, assemble them together into a book using a hole punch and twine, raffia, ribbon, or cordage. Decorate as desired!
Note: Dark-colored scraps will yield darker paper. The size of your screen will determine the size of the paper.
KEEP IT WILD
Paper is made from plant fibers, most often from softwood conifers including spruce, balsam fir, Eastern white pine, or hemlocks because they have long, strong fibers. Other plants like bamboo, hemp, eucalyptus, and cotton can also be used.
EXTENDING THE EXPERIENCE
Jazz up your handmade paper by adding flower petals, small leaves, liquid watercolors, or tiny shape cutouts before lifting out the pulp. If you embed seeds into your paper, you can make notecards that can be planted.