Making the Bichromate Solution
Tips for Making the Bichromate Solution
Tips for Making a Casein Print


11.1a and 11.1b Christina Z. Anderson, two images from the series, Past Lives, 2012, each picture: Tricolor Casein Print. Left: Ditchley Window, 5.5 × 7 in. (14 × 17.8 cm). ©Christina Z. Anderson. Right: Mother’s Closet, 7.25 × 7.25 in. (18.4 cm). © Christina Z. Anderson Anderson authored The Experimental Photography Workbook; Gum Printing and Other Amazing Contact Printing Process; Handcrafted: The Art and Practice of the Handmade Print; and Gum Printing, A Step by Step Manual Highlighting Artists and Their Creative Practice (Focal Press, 2017). This casein series Past Lives is a visual reconciliation of place, being, memory, and loss. All prints were created, layer by layer, in milk protein (casein), a fitting metaphor for childhood memories of shelters the artist had known. Anderson used pigment powders in the historic colors that were common at the time of the oldest home in the project (1752). They are raw sienna, red iron oxide, and ultramarine blue mixed with cottage cheese casein and coated on PVA-sized Fabriano paper.
This method, also known as the casein bichromate printing process, utilizes curdled milk dissolved in ammonia to bind the component materials and was patented in various forms starting in the 1870s, as a technique to use with other photo-printmaking methods, such as over Van Dyke brown printing (see Chapter 8) and cyanotype (Chapter 7). Used by itself, however, casein printing can yield nuanced, colorful results similar to the watercolor or gouache paints that make up part of the emulsion. The translucency of each color coating permits a new hue in a new layer of emulsion to combine and change the pigment color in the developed coating underneath. One of the least expensive of the hand-applied emulsions, casein printing is closely related to gum bichromate printing (see Chapter 10), and a reading of that chapter is highly recommended. Casein usually requires much less ultraviolet exposure to yield stronger and slightly more distinct colors than the gum bichromate process.
Bichromate (also called dichromate) can cause skin and eye irritations and even burns upon repeated exposure. Wear protective gloves and goggles at all times when mixing and coating, as well as when washing a bichromate-sensitized print. Wear a respirator with toxic dust filters when handling bichromate powder or crystals to avoid sore throat, cough, labored breathing, and more serious difficulties. Once dry, the print should not be a problem to your health if the unused bichromate is washed thoroughly during the development step.
Bichromates can be poisonous when ingested, even in small quantities, so keep containers labeled, and store chemically contaminated materials away from your mouth and out of the reach of children and pets. Do not eat, drink, or smoke during work. Wash hands and skin that might have come in contact with chemicals, especially before eating, even if you wore gloves.
In the European Union, the dichromates (sodium and potassium) are classified as SVHC (substance of very high concern), and the use of it will be forbidden or strongly regulated and only approved with authorization from ECHA (European Chemicals Agency) after September 9, 2017. After this date “the placing on the market and the use of the substance shall be prohibited unless an authorisation is granted.”
Wear an apron or lab coat, which stays in your studio. Wash it separately from your regular laundry.
Make sure your workspace is properly ventilated. Ilfordphoto.com states: “Ensure darkroom areas are adequately ventilated: there is no hard and fast rule as the required ventilation depends on the duration and type of work, but an extraction fan mounted on an external wall to provide 10—15 changes of air per hour will normally produce a safe working environment.”
Dispose of excess solution or chemicals by flushing it down the drain with a large volume of water, not in a wastepaper basket. Bichromates are not combustible but do enhance combustion of flammable and combustible substances. Store both dry and diluted bichromate in their own fireproof cabinet. (See Chapter 10 for more suggestions on how to neutralize bichromate.)
Certain pigments, such as emerald green, cobalt violet, true Naples yellow, all cadmium pigments, flake white, chrome yellow, manganese blue and violet, Verona brown and burnt umber, raw umber, Mars brown, lamp black, and vermillion, can lead to poisoning and other complications if they are ingested or inhaled frequently. Wearing a respirator and gloves, working in a ventilated area, and carefully washing hands and cleaning fingernails after using these pigments can prevent accidentally carrying them to the mouth and swallowing them.
Bichromate is carcinogenic to humans after long-term or repeated exposure, and it may cause asthma. Carefully respecting precautions and prevention methods and, depending on the degree of exposure, periodic medical examination, is suggested.
1. Paper or fabric is preshrunk, sized, and dried.
2. Under subdued light, the paper or fabric is coated with casein pigment emulsion and allowed to dry.
3. The coated surface is placed in contact with a negative or object, and ultraviolet light is shone through the negative.
4. The negative is removed. The paper or fabric is developed in water, where unexposed areas of the color are dissolved, leaving a reversed image to dry and harden.
5. One coating must dry before a new layer may be applied, exposed, and processed.
More detailed descriptions of materials are given in Chapter 4, Creating the Photo-Printmaking Studio. In addition, please read Chapter 10, Gum Bichromate Printing, as the two techniques have similar requirements and a method for making color separated negatives is explained.
1. Applicators. Try fine flat-bristle brushes or nylon paint brushes about 1 in. (2.5 cm) or more wide, a sponge brush (better for “buffing” the coating after it is applied with a bristle brush because sponge brushes have a tendency to take up too much wet emulsion), or a foam print roller from the hardware store. A small, soft brush for coaxing the development of the print in water can be handy. Keep the metal part of the brush out of the bichromate solution and protect it from corroding by coating with clear finger nail polish. If you use an atomizer or airbrush, be sure to wear a respirator and to work in a well-ventilated area.
2. Brown or opaque bottle. Since one of the emulsion’s components, diluted potassium dichromate, is light sensitive, it should be stored in a dark bottle, such as a clean, used fruit juice, mouth wash, or vitamin pill jar.
3. Cheese cloth and mesh food strainer or nylon stocking and large plastic drinking cup. Inexpensive cheesecloth, purchased at a hardware or grocery store, is used to line a good strainer when cleaning the casein base. Do not use these materials to cook with later.
4. Chemicals. You will need either potassium or ammonium bichromate, which can be purchased in 1 lb. (0.5 kg) or smaller quantities from merchants listed in Supply Sources at the end of this book. I used to use ammonium bichromate, but I found that the exposures were too fast, so I changed to the less light-sensitive potassium bichromate, which offered more control over making tests for the accurate exposure time. Meanwhile, overexposure can be difficult to correct because the emulsion is so completely hardened that even development in hot water and scrubbing only slightly affect the image. Photographers’ Formulary, listed in Supply Sources at the back of this book, sells a casein printing kit with potassium dichromate, ammonium caseinate, and sodium benzoate along with red, yellow, and blue watercolors to make approximately 20 8 × 10 in. (20.3 × 25.4 cm) tri-color gum prints.
Either instant powdered non-fat milk or fat-free cottage cheese, both of which are available at a grocery store, are combined with a few drops of thymol (optional), a preservative available at health food grocery stores, to provide the casein binder. Undiluted lemon juice or 28 percent acetic acid, sold as stop bath in photo stores, curdles the milk.
A bath of clear, non-sudsy ammonia from a grocery store (usually 3 percent), stronger janitorial ammonia, or ammonium hydroxide diluted with water to a 10 percent strength, helps clear a muddy print and also is one of the elements in the emulsion. Ammonia fumes are particularly strong and unpleasant, so make sure you wear a fumes mask and use the product in a well-ventilated area.
Steve Salniker e-mailed me with good advice: casein should look like a semi-transparent glue, similar to gum arabic solution. His recipe is 400 ml (13 ½ oz.) distilled water to 60 grams (2 oz.) non-fat dried milk. He mixes this combination together and heats it in a double boiler until it begins to steam. He then adds 6 oz. (177 ml) of white vinegar to curdle it. Strained curds are put into cheesecloth to squeeze out remaining moisture, then the ball of curd is torn into bits and put into a wide-mouthed jar (about 59 grams or 2 oz. of curd is yielded this way). Afterwards, Steve heats 4 oz. (118 ml) of distilled water in the microwave for about 25 seconds, then stirs in 8 grams (¼ oz.) of borax. This solution is poured into the curd jar. Within a few hours the curds dissolve and begin making a cloudy emulsion—by 8 hours you›re left with casein glue. There's still some goopy stuff on the bottom that can be mixed further into the solution, and then strained. You make about 100 ml (3 ¼ oz.) of casein through this method—maybe way more than the beginner needs. He has noticed no odor or spoilage if the solution is left out at room temperature for a week—though now he refrigerates it at my suggestion. He slightly thins the emulsion and uses the same proportions of pigment, dichromate solution, and casein as suggested in gum printing. Steve got the formula from D. B. Clemmons and upped the amounts of the basic ingredients proportionally to get more casein. See his work at http://www.seacoastnh.com/arts/photossalniker/.
5. Distilled water. Sometimes tap water is fine for making the bichromate solution, but the use of distilled water eliminates the frustration of possibly mixing bad solution.
6. Image. Black and white negatives, described in Chapters 5 and 6, of low density, low contrast, and the same size as the print you wish to make, offer the possibility of full tonal range after one exposure to casein pigment emulsion. More often, though, the density of the negative exceeds the range of the emulsion, requiring multiple exposures to build up highlights, middle tones, and shadows. Posterized negatives, described on page 86 or color separation negatives explained in depth in Chapter 6, Making Negatives: Digital Method, and Chapter 10, Gum Bichromate Prints, offer versatility. Or use a pinhole camera as in Chapter 5, which also offers a variety of other creative ideas. High contrast negatives also work quite well. If more than one printing is desired, negatives will need to be registered as described later in this chapter and in Preparation for Light-Sensitive Methods section, and Chapter 10 on gum printing.
Try stencils, found objects and old black and white transparencies, torn paper, lace, drawings, and photocopies on acetate. Remember: these items usually are positives, not negatives, and photo processes reverse the highlights and shadows.
7. Measuring cup or beaker and stirring rod. You will need a cup or beaker that measures 16 oz. (455 cc) in ½ oz. (14 cc) increments. Glass is easier to keep clean.
8. Measuring spoons. Cooking utensils, never reused in the kitchen, are fine. Small, clear 4 oz. (102 ml) medicine measuring cups, available at pharmacies and sometimes packaged in cough syrup, are useful.
9. Newspaper or newsprint paper to protect your work surface; hair dryer with cool setting.
10. Pigments. Professional-grade watercolors or gouache in tubes work well. Liquid casein color have been used with some success, as has powdered pigments (mixed with a few drops of photographic wetting agent, such as Photo-Flo, to the powder and water mixture). Make sure that the pigment you use is not metallic, such as nickel azo (brownish yellow) or chromium yellow, because the metal will eventually react negatively with the bichromate.
11. Printing frame. Use a new or antique printing frame, glass with Masonite underneath, plate glass on top or another sheet of glass or follow the instructions for building a frame on page 80.
12. Protective gloves and respirator.
13. Receiver. Practice prints can be made on lighter weight and less-expensive printmaking paper, but finished prints should be produced on rag paper of medium absorbency for longevity, such as 145 GSM (grams per square meter) medium weight Arches Platine, 140 lb. (pounds) Fabriano Artistico, 140 lb. Lana Aquarelle Hot Press, or 250 GSM/110 lb. Stonehenge in cream white, fawn (pale tan), pale blue, pearl gray, and warm white. Heavier papers include Arches Aquarelle, Magnani Prescia (which is deliciously soft, comes in both soft white and what I call “regular” white, cream, light blue, and gray, but shows finger and tongs prints, so use a piece larger than your coating!), 310 GSM Arches Platine (the whitest white without artificial buffering agents) and Bergger Cot320. All paper should be sized (page 89) and preshrunk for more than one coating. In addition, if you are doing this process on top of cyanotype or Van Dyke brown, those prints should be sized beforehand. Once the paper is dry, use a pencil to outline the borders of the image. James R. Collins, author of “The Gum Print” in Darkroom Photography (Oct. 1986), suggests the following method, which I often use: size the paper, then air dry it, apply the emulsion to an area about 1 in. (2.5 cm) larger on all sides than the image, and hang the paper in front of a cold-air fan to dry. When the emulsion is just barely tacky to the touch, put two pencil dots 12 in. (30.5 cm) apart and about ⅛ in. (5 mm) inside the emulsion edge. Hold a hair dryer about a foot (30.5 cm) from the paper and evenly blow warm air over the paper until it has shrunk the paper by ⅛ in. (5 mm) and the pencil dots measure 11 ![]() in. (30.25 cm) apart. Make the exposure, develop the image, and repeat this preshrinking (without resizing) procedure with each coating.
in. (30.25 cm) apart. Make the exposure, develop the image, and repeat this preshrinking (without resizing) procedure with each coating.
Preshrink synthetic or natural fabrics as described above. Practice making prints on paper first, because working on fabric is more difficult. A good method is described at the end of the Cyanotypes, Chapter 7, page 166.
14. A small glass bowl atop a piece of white paper or a white china bowl or plate becomes the palette for mixing the emulsion. You can either build up layers of different colors in order to make new hues, or you can pre-mix two colors to make a coating of a specific hue.
15. Sizing. Because sizing paper and fabric is necessary, messy, and time-consuming, you will find it more practical to size several pieces at once. The acrylic-polymer medium method (page 91) works well. It is easy, but it stiffens the paper and yet will not allow for shrinkage described in Item 13 above. Todd Walker’s alum sizing also is appropriate and is also explained in Chapter 4, Creating a Photo-Printmaking Studio, Item 4, sizing, page 89.
16. Spray nozzle for sink hose and kitchen blender (optional). The spray helps with development of a print that is not clearing in the highlights while the blender makes the job of mixing the casein and dichromate easier. Do not use the blender for preparing food afterwards.
17. Timer, watch, or clock.
18. Two registration pins and punch or push pins, masking sheets, masking tape, ½ in. (1 ¼ cm) heavy black tape, ruler, scissors, stencil knife (optional). If you are using more than one negative or more than one coating, and you want the layers of the image to line up repeatedly, follow the instruction in Chapter 10 and/or Chapter 4.
19. Two trays or tubs. You will need trays larger than the print when you develop the image and fix it. I use a glass baking dish because it more easily washes clean.
20. Ultraviolet light. The exposure does not cause a color change, as with cyanotype or Van Dyke brown printing, so artificial lights, such as sunlamps, photofloods, or black light fluorescents (see detailed explanation, page 82) are recommended because the exposure can be exactly timed. However, indirect sunlight can be used; avoid direct sunlight, where bright radiant heat output can cause the emulsion to fog with exposure.
MAKING THE BICHROMATE SOLUTION

11.2 Equipment You Will Need

EQUIPMENT YOU WILL NEED
Ammonium or potassium bichromate crystal
Measuring cup or beaker
Bowl or tub
Stirring rod
1 oz. (30 ml) measuring cup
Distilled water
Label and permanent marker
16 oz. (473 ml) Brown Bottle
Thermometer
PROCEDURE

11.3 Procedure
1. Pour water into measuring cup to make ¼ cup plus 1 tablespoon (43.5 ml, 2 ½ fl. oz.).
2. Adjust water temperature to 90°F (32°C).
3. With constant stirring, add 1 tablespoon (14.5 ml, 0.5 fl. oz.) bichromate crystals.
4. Add more bichromate until crystals will not mix in but precipitate to the bottom of the liquid.
5. Adjust water temperature to 68°F (20°C).
6. Stirring constantly, add water to make 1½ cups (355 ml, 12 oz).
7. Pour the bichromate solution into a labeled brown bottle.
TIPS FOR MAKING THE BICHROMATE SOLUTION
Should the crystals separate from the water, they will reblend when warmed to 90°F (32.2°C) and stirred.
You must thoroughly mix the pigment with the casein and bichromate solution, or the emulsion coating will be streaked.
Because the casein curd will dissolve three hours after adding the other chemicals to it, plan on doing multiple coatings during one print session.
The pure casein can be refrigerated and preserved for a few days.
Numerous other recipes for casein emulsions are detailed in Christina Z. Anderson’s Gum Printing and Other Amazing Contact Printing Processes (christinaZanderson.com).

11.4 Curdle the Milk
1. Curdle the milk
In a measuring cup, thoroughly mix 1 oz. (30 ml) instant powdered non-fat milk with 7 oz. (199 cc) hot water. By adding a few drops of 28 percent acetic acid or lemon juice to the mixture, patiently curdle the milk. Arrange two layers of the cheesecloth in a strainer, pour the curdled milk through it, catching the curd in the cheesecloth, and rinse the curd with cold water. Squeeze the cheesecloth and curd, getting out excess liquid.
Or, place 2 oz. (59 ml) fat-free cottage cheese in a strainer, rinse in cold water, and press off extra liquid.

11.5 Mix the Emulsion
2. Mix the emulsion
Crumble the curd or cottage cheese into a measuring cup, add 2 oz. (50 cc) of 1 percent ammonia, and mix well with a fork or electric blender. Thoroughly mix ½ teaspoon (2.5 ml) of the casein or curd mixture with ½ teaspoon of the dichromate solution and ¼ teaspoon (1.25 ml) watercolor pigment.

11.6 Coat the Paper
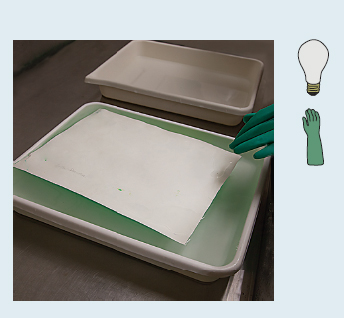
3. Coat the paper
Use the emulsion to coat one 8 × 10 in. (20.25 × 25.5. cm) piece of paper by pouring it from the cup onto the sized paper and quickly working the emulsion on evenly with a brush to an area beyond the image area. The emulsion will not look like the water-color pigment at this point but may have a yellow-orange tint to it. Lightly buff the coating with a clean, dry foam brush.

11.7 Expose the Print
4. Expose the print
Use a hair dryer on the cool setting, and when the emulsion is dry, make a sandwich with the backing board on bottom, paper with emulsion facing up next, negative reading correctly on the paper, and clean glass on top.
Place the loaded print frame in shade for 5–15 minutes, under a sunlamp for 2–30 minutes, or photoflood bulb 3 ft. (1 m) away for 3–12 minutes, or under ultraviolet fluorescent bulbs 6 in. (15.25 cm) away for ½–10 minutes. Exposure times vary according to the light source, pigment color (blue requires the shortest exposures, while yellow and black take the longest, and violet and green are in-between with similar exposure times and red and orange a little more, but similar times) and density, and emulsion thickness. You will have to experiment and keep notes.
11.8 Develop the Paper
5. Develop the paper
The reaction that occurred during exposure continues after the emulsion has been removed from light. Therefore, immediately place the paper face down in a tray of warm water for 2–5 minutes. Move the print face up to a tray of warm water. If the image is not clearing where you want, place it face up in a tray containing 2 oz. (59 ml) of 3 percent ammonia or a little baking soda and 32 oz. (946 ml) room temperature water for 2–5 minutes. Development may take several dips back and forth; it is complete when the unexposed areas (highlight) of the emulsion dissolve and float off the paper, the exposed areas (shadows, middle tones, and highlights with detail) are the same color as the pigment you used, and no orange dichromate stain is visible. When I am using more than one coating, I often start with a slightly underexposed (pale) Paine’s gray image so that it is easier to line up negatives later for other colors.
6. Fix the print

Transfer the print, face down, to a final tray of gently running cool water for 15 minutes, remove the print, and air dry it face-up and flat or use a hair dryer. Resize the print if you want to add another layer of emulsion.
TIPS FOR MAKING A CASEIN PRINT
If the emulsion seems not to be going on smoothly, brush many times and in different directions. Next time, make sure that all the ingredients are thoroughly blended.
After coating the emulsion, be sure to immediately wash your brush or temporarily leave it in water while you work. Then, wipe off fluids before you use the brush again.
Exposure times for casein printing must be determined by testing, so before you start on an actual print, you can lower the frustration level by running the following test: Coat with emulsion and dry a sheet of sized 8 × 10 in. (20 × 25 cm) paper. Cut the sheet into 4 × 5 in. (10 × 12 ½ cm) strips, marking each strip with a pencil to indicate the emulsion color and formula used. Using a different strip for each exposure, make tests of different lengths of time, being sure to note the exposure time and light source on the strip. Make sure the same part of the negative and grayscale are used for each test. Develop, dry, and evaluate each test for each emulsion used, and keep a notebook with these test strips for future reference.
If the negative is too thin, the image is overexposed, or the light source is too hot, the emulsion will harden and will not wash off where you want.
If the negative is too dense or the image is underexposed, the emulsion will float off, and if you use too much pigment when mixing the emulsion or the emulsion is too thick, the color will flake off.
While the print is developing, you can lighten areas by rubbing gently with a soft brush or cotton swab, but be careful, because the emulsion is fragile and severe agitation can remove the image all together unless you have greatly overexposed. A bath of hot water also will speed up development. A gentle spray of warm water in a specific area can coax the pigment off.
In the Jan./Feb. 2000 issue of Photo Techniques Magazine, Bob Whitefield describes “a new process: gelatin acrylic.” He uses posterized high-contrast positives with semi gloss house paint on paper sized with gelatin and coated with bichromate.
See Tips, page 216, in the Gum Bichromate Printing chapter for more trouble-shooting advice.

11.9 Laura Blacklow, Untitled, from Territories, casein print and pencils, 6 ¾ × 4 ![]() in. (17.145 × 11.75 cm), © 1978.
in. (17.145 × 11.75 cm), © 1978.
I chose casein printing for this image because it is an inexpensive process, which creates subtle colors and forces me to slow down as I work. Some of the colors have been made by building up casein coatings of different hues, each of which was printed with the same negative. Some of the color has been achieved with casein coatings and no negative, while other hues come from colored pencils applied to the dry print.