
The Formatting Palette doesn’t say anything about section formatting. In fact, most people have never even heard of it.
Still, section formatting is important in a few special circumstances, such as these:
Sections allow you to divide a document into chapters, each with its own headers or footers.
Sections let you change from, say, a one-column format for your opening paragraph to a three-column format for the body of the article. They also let you insert a landscape-orientation page or two into a paper that’s primarily in portrait orientation.
Sections give you flexibility in printing. You can print your title page on colored paper from a different paper tray on your printer, for example.
You can set different margins for each section of your document. This might come in handy if your training manual includes multiple choice quizzes for which you could really use narrower page margins.
The bottom line: A section is a set of pages in your document that can have its own independent settings for page numbering, lines, footnotes, and endnotes. It can also have its own layout features, such as page borders, margins, columns, alignment, text orientation, and even page size. Finally, it can have its own printer settings, such as orientation and paper source.
To start a new section, choose Insert → Break, then choose one of the Section Break types—depending upon where you want the new section to begin (relative to the current page). For instance, to change the number of columns in the middle of a page, choose Section Break (Continuous); to start the next chapter on a new page, choose Section Break (Next Page). If you’re self-publishing a novel, remember that new chapters usually begin on a right-hand page; choose Section Break (Odd Page).
You’ll see the change reflected right away. In Normal view, a section break shows up as two finely dotted lines labeled “Section Break (Next Page)” or whatever kind you inserted (see Figure 3-17). In Page Layout view, you see only the effect of the page break; if you chose the “Next Page” type, your text abruptly stops in the middle of one page and picks up again on the next. But if you click the Show (¶) button on the Standard toolbar, the breaks appear as double lines, just as in Draft view.
Choosing a section type may sound like a big commitment, but don’t fret—you can always go back and change it. To do so, click anywhere in the section you want to change—that is, just after the section break itself—and then choose Format → Document → Layout tab. Choose a new section type from the “Section start” menu. (This menu has an additional section-break option: New column, which is useful solely if you’re designing your document with multiple columns, as described on Working with Columns. To make an existing column start at the top of the page, click it and choose “New column.”)
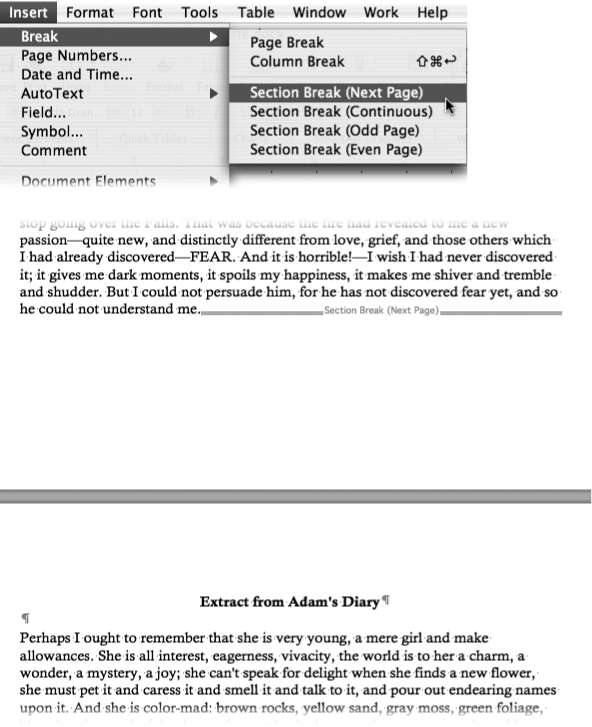
Figure 3-17. Top: Create a section break by choosing from the Insert menu (there’s no dialog box for it). Bottom: An example of a “Next page” section break, shown here separating one chapter from another. You see the handy guides automatically in Draft view; in Print Layout view, turn on the Show/Hide ¶ button in the Standard toolbar to make them appear.
To remove a section break (in either Normal or Page Layout view) click the double dotted line and press Del (forward delete) on extended keyboards, or fn-Delete for PowerBooks. Or you can select the section break by clicking before it and dragging through it, and then pressing Delete.
Warning
Deleting a section break, or the last paragraph marker in a section (click ¶ to see it), also deletes its formatting. The section before the break will take on the formatting of the section after it. The sudden appearance of 24 pages of a two-column layout, for example, can be disconcerting if you’re not prepared for it.
To change formatting or other settings within a section, such as page numbering or headers and footers, just click in the section and use the commands in Word’s dialog boxes and toolbars. Settings like margins, alignment, columns, and page orientation, plus any feature involving numbering, such as page and line numbering, headers and footers, and so on, operate independently of the other sections in the document.
When you use a header or footer and page numbers in your document, you can either number each section independently or number the document continuously from beginning to end. For example, suppose you’ve written a term paper with an introduction in its own section, which you want to number with Roman numerals. (You want regular Arabic numerals for the body of the paper.) Here’s how you’d set things up:
Click at the end of the introduction and choose Insert → Break → Section Break (Next Page).
The double lines appear, assuming you’re in Draft view (click the Show button if you don’t see them).
Click anywhere in the introduction (above the section break) and choose View → “Header and Footer”.
The header and footer areas of your page appear, as described on Headers and Footers. The “Header and Footer” pane appears in the Formatting Palette, too.
Scroll down to the footer on one of the pages in the introduction and click in it, or click the Switch Between Header and Footer “Go To” button in the “Header and Footer” pane of the Formatting Palette.
The footer is labeled “Footer–Section 1.”
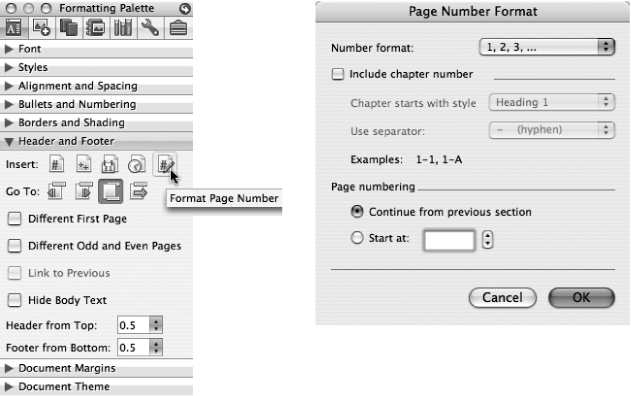
In the “Header and Footer” pane of the Formatting Palette, click Insert Page Number (the # icon), then click the Format Page Number icon (shown in Figure 3-18).
The Page Number Format dialog box opens, also shown in Figure 3-18.
From the “Number format” pop-up menu, choose “i, ii, iii…”; click the “Start at” radio button. Click OK.
The number i appears in the box, which is right where the numbering for most introductions begin. (Type a different number if you want to use a different numbering system.)
Figure 3-18. Left: The “Header and Footer” pane of the Formatting Palette. Clicking the Format Page Number button opens a dialog box where you can tell Word exactly how you want the numbering to work. You can’t do these kinds of edits directly in the document. Right: Turning on the “Continue from previous section” radio button carries over the page numbering from the section before. You can start a section at any page number you choose by clicking “Start at” and entering a number in the box.
In the Headers and Footers pane of the Formatting Palette, click the Show Next button (you’ve just done the same thing as clicking in one of the footers in the second section), then turn off the “Link to Previous” checkbox.
With Link to Previous turned off, you can format headers and footers—and therefore a page numbers—separately for each section.
Back in the Headers and Footers pane of the Formatting Palette, click Format Page Number.
The Page Number Format dialog box appears once more.
This time, choose the Arabic numerals (1, 2, 3, …) from the “Number format” pop-up menu. Click the “Start at” radio button; make sure 1 appears in the box. Click OK.
Now, no matter how you add material to, or remove material from, the introduction and the body of your paper, the introduction will be numbered starting on page i. The numbering of the main body, meanwhile, will start over with 1. Should you change your mind and decide to number your paper consecutively from the intro to the end, you won’t have to remove the section break. Just click one of the footers after the section break, click Format Page Number, and select the “Continue from previous section” radio button.