
Both Word’s Clip Art Gallery and the Web itself are brimming with images that you can use to adorn your Web pages. You can also use any of Word’s drawing tools, such as AutoShapes, SmartArt Graphics, and WordArt (see AutoShapes and WordArt), in the Web pages you create. When you save the Web page, Word saves the graphic in the Web page’s folder as a GIF file (see the sidebar box on Photos).
Graphics do enhance your Web page’s appearance. Keep in mind, however, that pictures take much longer to download than the text surrounding them. Try to strike a balance, only using a couple pictures per page for the typical information-focused Web site. Remember, about 20 percent of Web denizens are still using dial-up, narrow-band (56 kpbs) connections.
When you see a picture you love on a Web site, you can easily download it and use it on your own Web site—but be aware that much of what you find on the Web is covered by copyright and you may need permission to use it (see the Note below). If you’re certain it’s okay to use the image, you can download it in one of the following ways:
Drag the image from your browser window directly into an open Word document.
Drag the image out of the browser window and onto your desktop or into the folder where you’re keeping downloaded images. Let go of the mouse button when the outline of the image appears on the desktop or when the destination folder appears highlighted.
Control-click (or right-click) and hold the hand cursor on the image that you’d like to copy. From the shortcut menu, choose Save Image to the Desktop (Safari). In Firefox, choose Save Image As and in the resulting dialog box, select the folder on your hard drive where you like to keep downloaded images. Click Save.
Note
You may be able to legally use certain copyrighted materials under the fair-use doctrine; for example when used for criticism, comment, news reporting, teaching, scholarship, or research. Often, you can find out whether images are copyrighted, free to use as long as you give credit, or whatever, right on the Web site. If you see the words “Creative Commons,” then you can usually use the image for any purpose, with credit. When in doubt, ask permission from the copyright owner before using a photograph or other artwork.
Wrapping text around images on Web pages works the same way as in other Word documents, as described on Wrapping. If you’re using a table to lay out your Web page, you can even use text wrapping within a table cell.
The instructions for wrapping text around a graphic image are exactly as described on Wrapping—with one difference. In HTML, you can place graphics over text, behind text, with text above and below it, or wrapped around either side of it. What you can’t do, however, is wrap text around both sides of a centered graphic. Thus, in Web Layout view, that option is grayed out on the Wrapping section of the Formatting Palette. To activate the choices on the “Wrap to” menu, drag the graphic to either side of the table, cell, or page.
Clip art gives you an effective way of “punctuating” your Web page and keeping its layout organized. Large, uninterrupted blocks of text make for difficult reading on the Web, so you can prevent eyestrain by using small graphic elements to break up your text—a benefit for both you and your readers.
Word now features two methods for finding and inserting clip art: the traditional Clip gallery, and Word 2008’s new—and easier—Object Palette. Click the Toolbox button (if the Toolbox window’s not showing) and then click the second button from the left at the top of the Toolbox window to reveal the Object Palette (see Figure 9-6). Click the ClipArt tab and use the scroll bar to see all the available clip art. Narrow your choices by using the category pop-up menu to select, for example, people, or animals. When you find the one that strikes your fancy, drag it into your document window.
Or you can use Word’s traditional Clip Gallery. Either way you’re accessing the same collection of clip art.
Choose Insert→ Picture→ ClipArt.
The Clip Gallery appears. (See The Clip Gallery for more on this feature.)
In the Category list in the Clip Gallery, scroll down to find the category you desire.
Use the scroll bar in the thumbnail pane to see all images in the category.
Click the image you want, and then click Insert.
You return to your document, where the newly placed graphic appears.
Whichever method you use to insert clip art, once it appears in your document, you can resize it by clicking once to select it, and then dragging one of the corner handles. Use the corner handles to maintain the image’s proportions—use the side handles if you want to stretch or squish the image.
Web pages can be a dreary place without photos. Most people would rather see a picture than read a thousand words. As your potential readers click their way through cyberspace, it’s often the pictures that catch their eye and make them want to hang around your site a bit longer.
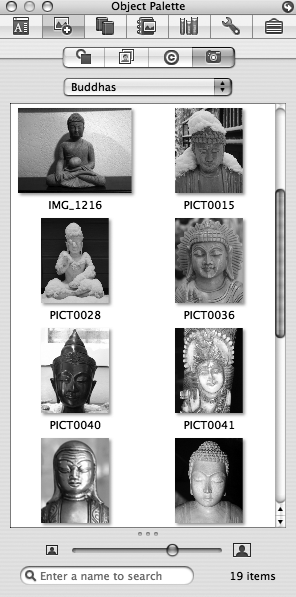
Indeed, many of the images in the Clip Gallery are photos. But Word 2008 now gives you access to your entire iPhoto library—and any other folder full of pictures on your computer—via the Object Palette. Open the Toolbox and click the Object Palette button—the second from the left. Then click the Photo tab, the rightmost of the four tabs. Word immediately starts filling in the palette with your images. The first time you use it, it displays the contents of your iPhoto library. (Subsequently, it shows you the picture folder you used the last time you opened the Photo tab.) Use the pop-up menu to choose which photos it displays (see Figure 9-6).
Photos displays your entire iPhoto library.
Albums displays photos from one of your iPhoto albums when you choose its name from the submenu.
Rolls displays photos from one of your iPhoto rolls—or photo-importing sessions—when you choose its name or date from the submenu.
Figure 9-6. When you click the Object Palette’s Photos tab, Word opens a wormhole directly into your iPhoto library—or any other folder containing images. You can use the zoom slider at the bottom of the window to control the size of the thumbnails—helpful when you need to zoom in for a quick preview before selecting an image. When you find the perfect picture, drag it directly into your document.
Other Library or Folder displays an “Open Library or Folder” dialog box, so you can choose any other folder of pictures on your computer or network. If you have more than one iPhoto library, click the “Show iPhoto libraries” button at the bottom of the dialog box, navigate to that folder, and then click Choose. For any other folder, click the “Show image folders” button, navigate to the folder, and then click Choose.
Note
The Object Palette can display photos in jpeg, .tiff, and .png formats, but not those in Photoshop (.psd), pdf, or RAW format.
The Object Palette’s Photos pop-up menu remembers the last five folders you visited, making it easy to return to one of them by choosing its name from the menu. If you know the file name—or even just part of it—type it in the search box, and Word narrows down your selection of images as you type. Once you locate the image you want to use, just drag it into your document. (See The Toolbox Redux for more on using photos in Word documents.)
Inserting a horizontal line between sections is another great way to break up text on a Web page. If you started your Web page by choosing a theme, then Word has a line in a coordinating color and pattern already picked out for you. To insert one, proceed as follows:
Choose View → Toolbars → “Tables and Borders”.
The “Tables and Borders” toolbar opens.
Click the arrow button next to the Borders button on the “Tables and Borders” toolbar. Choose Horizontal Line from the pop-up menu (see Figure 9-7).
Word inserts the line for your theme at the document’s insertion point.
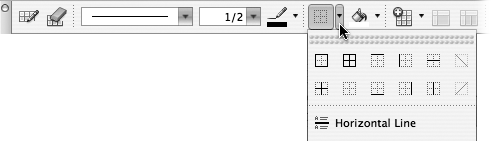
Figure 9-7. Click the tiny arrow button next to the Borders button on the “Tables and Borders” toolbar to access the horizontal line command. When the line appears in your document, you can use its corner handles to resize it or even make it thinner or thicker.
You can also insert a horizontal line in any Web page by choosing Insert → Picture → Horizontal Line. The “Choose a Picture” dialog box opens, showing you the contents of your Mac’s Applications → Microsoft Office 2008 → Office → Media → Clipart → Lines folder. Select a line (based on what you see in the preview window) and click Insert. Word places the line across your Web page document at the insertion point. When you choose a line in this fashion, it overrides your Theme line style, so the next time you insert a line using the “Tables and Borders” toolbar as described above, Word uses this new line style.
Web pages created in Word can store and play digital movies in any of several formats: QuickTime, QuickTime VR, MPEG, and some AVI files. (Word converts AVI to QuickTime when you save the Web page.) You can use any such movie that you have on your Mac—whether you downloaded it or made it yourself—in a Web page you create in Word.
To use a movie from the Web in your Web page, you need to download it onto your Mac. If you just click a link to watch a movie, that doesn’t necessarily download a copy for you. You have to Control-click (or right-click) the link and then, from the shortcut menu, choose either Download Linked File (Safari), or Save Link As (Firefox). Either way, you’ll get a chance to name the file and choose a folder location for it on your Mac, such as the desktop or your Documents folder.
Then:
Choose Insert→ Movie.
You have to be in a Word document, not an .htm document, and you should be in Print Layout or Web Layout view. The Open File dialog box appears. (If you use the Insert → Movie command in Draft view, Word automatically switches to Print Layout view.)
Note
If you can’t find the Movie command on your Insert menu, see the sidebar on Inserting Sounds for a workaround.
In the Insert Movie dialog box, navigate to the movie file on your hard drive and double-click it.
The movie appears on your page, where you can drag it anywhere on your Web page, wrap text around it, and resize it just like any Word picture—all using the Formatting Palette.
Note
Word 2004 gave you the ability to set a poster frame—a still picture shown when the movie’s not playing. Unfortunately, during the transition to the new XML file format, Office 2008 has lost this ability. When they’re not playing, movies display their first frame—which is often black. Until Microsoft patches things up, the workaround is to purchase QuickTime Pro for $30 (www.quicktime.com) and use it to set a poster frame before bringing the movie into Word.
Deleting a movie is easy: Click the icon or poster frame to select it and press the Delete key.
Tip
Your movie won’t play on the Web unless each visitor to your page has installed the QuickTime plug-in. Not all Mac people have the most recent version, and Windows types may not have it at all. You can help them by giving them a link to the Web site where Apple gives downloads of a free version for both Windows and Mac. For example, you might add this text somewhere on your Web page: “You need the free QuickTime plug-in for Mac or Windows to view the movies on this Web page. Download it at www.apple.com/quicktime/download/.” (See Hyperlinks for more on inserting hyperlinks.)
If your movies, background pictures, and animated text aren’t enough multimedia to satisfy your need to annoy your visitors’ and stall out their modems, don’t give up—Word also comes with a library of sounds that play as your reader views your Web page. You can use one of them, or any sound you’ve downloaded in the WAV, AIFF, or MIDI format.
Note
Word’s Web pages viewed in Safari or Firefox don’t play their sounds. It’s apparently another victim of the XML file format transition—and perhaps a blessing in disguise. Good ol’ Internet Explorer, however, has taken no such vow of silence.
Choose Insert→ HTML Object→ Background Sound.
The Background Sound dialog box appears.
Click Select; navigate to the sound file and double-click it.
The standard installation of Office has a starter set of sound effects in the Microsoft Office 2008 → Office → Media → Sounds folder.
Choose the number of times you’d like the sound to play from the Loop menu, and then click OK.
When your viewer opens the Web page, the background sound plays the number of times you chose to loop it.
To remove a sound, choose Insert → HTML Object → Background Sound. The name of the current background sound file is shown at the top of the dialog box. Click Clear to remove it from your Web page.