
Clip art refers to a canned collection of professionally drawn, cartoon-like illustrations designed for use in a wide variety of documents. Designing a birthday card for a child? You can count on finding a soccer ball or kite in any self-respecting clip-art collection. Need a sketch of people at the office for a newsletter article about business travel? Off you go to the clip-art collection.
Fortunately, Office comes with hundreds of pieces of ready-to-use art in a collection called the Clip Gallery. And they’re not all cartoonlike graphics either. You’ll find 86 stock photographs you can use in your documents without having to worry about securing copyright permissions—everything from flowers, cute animals, and babies to businesspeople, landscapes, and athletes. To review them, choose Insert → Picture → Clip Art. The Clip Gallery opens, as shown in Figure 19-1. (Or click the Clip Art button near the middle of the Drawing toolbar.) The Object Palette gives another portal to your Clip Art collection (see Ditching the Project Gallery). From there you can simply drag thumbnails to your document, however, it doesn’t have the searching or importing features of the Clip Gallery.
Note
In Entourage, you get a “Choose a File” dialog box instead of the Clip Gallery. You have to actually navigate over to the Applications → Microsoft Office 2008 → Office → Media → Clipart folder in order to select your clip art.
The Categories button in the Clip Gallery window opens a dialog box where you can delete categories from, or add categories to, the Clip Gallery. Neither process deletes or adds any actual pictures; they stay where they always were—in the Applications → Microsoft Office 2008 → Office → Media → Clipart folder. You’re just deleting or adding category names into which the pictures can reside.
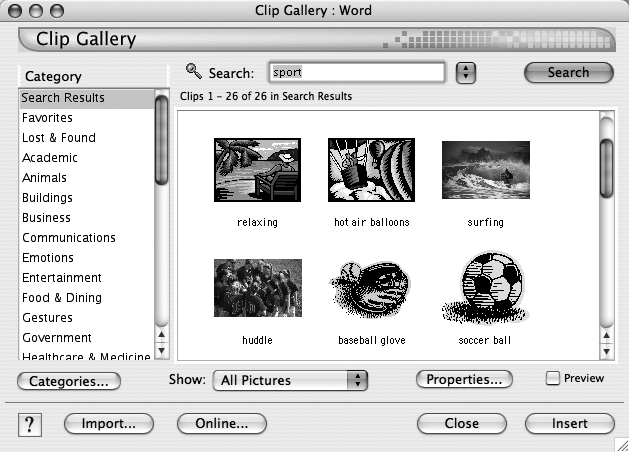
Figure 19-1. Click a category in the list at the left to see thumbnails of the available clips. After you’ve done a keyword search, as shown here, your results appear in the Search Results category. Click a thumbnail and then click Insert (or just double-click the thumbnail) to place the full-size version in your document at the insertion point. (Turn on the Preview box to see the full-size image in a separate window.) When you’ve finished adding pictures, click Close to make the dialog box vanish.
If you click the Online button, Office launches your Web browser and connects to the Microsoft Office Online Clip Art and Media page, which offers thousands of additional clip art files in a searchable database. You can download them individually or in groups by turning on their checkboxes and clicking the “Download (number of) items” link. After doing so you’ll end up with a .cil file on your desktop; double-click it to add the images to the Clip Gallery, where they’ll appear in the Favorites category.
You’re not limited to clip art from Microsoft. Not only can you transfer your own images into any Word document with the Insert → Picture → From File command, but you can also make them part of the Clip Gallery. This gives you the opportunity to use the Clip Gallery’s search function and organizing features and see thumbnails of your own clip art, too. (iPhoto it ain’t, but this feature can be handy.)
To do so, choose Insert → Picture → Clip Art to open the Clip Gallery, and then click Import. Use the Import dialog box to navigate to the graphics file you want to bring into the Clip Gallery. (Make sure the Enable menu shows “Clip Gallery Images”; the kinds of images you can import are JPEG, TIFF, PICT, GIF, PNG, or Photoshop files, as well as clip art from Microsoft.) Use the three buttons at the bottom of the window to copy, move, or create an alias for the image in the clip Gallery; then click Import.
The Properties window appears; you can give the image a new name to display in the Clip Gallery (instead of the file name) and assign categories or keywords. When you click OK, you’ll find yourself back at the Clip Gallery, with your newly added image in its window.
If you want a clip out of your life forever, click it in the Clip Gallery and choose Edit → Clear. Word asks for confirmation before expunging it.
When you enter a word in the Search box at the top of the Clip Gallery and click Search, Clip Gallery finds all the clips that match (or are related to) that keyword. For instance, if you type in automobile, Clip Gallery pulls up all the clips that have “automobile” as a keyword. Cooler yet, it also finds clips with “car” or “vehicle” as keywords—it relies on the Office 2008 Thesaurus to figure out which possible keywords mean the same thing as what you typed!
After placing a piece of clip art into your document, you can click it to produce eight blue handles at its perimeter and one green stalk sprouting from its top. By dragging these handles, you can resize the illustration in a variety of ways:
Drag a side handle to resize the figure in that dimension—drag the top one to make it taller, a side one to make it wider, and so on.
Dragging a corner handle keeps an object in its original proportions as you resize it.
Option-drag a side handle to resize the object from the center outward in the direction you’re dragging.
Option-drag a corner handle to resize an object from the center outward and maintain its proportions.
Drag the green stalk to rotate the object (see Rotating drawing objects).
⌘-dragging any handle overrides the drawing grid (see The Drawing grid).
You can also move a graphic around the screen by dragging it freely.