
If you’ve installed a recent version of Office, you may have used Microsoft’s super-simple drag-and-drop installation—which is no more. Office 2008 now uses Apple’s Installer technology.
The Installer walks you gently through the installation process as it checks to see if your computer is up to snuff, looks for other copies of Office, and asks you if you’d like to install the entire package or just individual programs.
WORKAROUND WORKSHOP: Figuring Out the Formatting
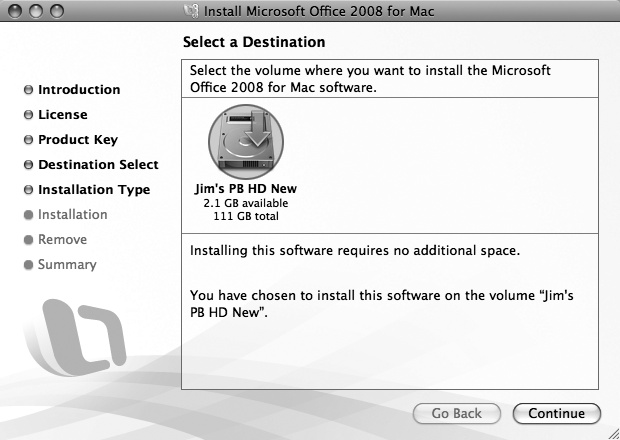
Microsoft recommends that you install Office on a hard drive that’s been formatted using Mac OS Extended (HFS +), the default format for Mac OS X. If your Mac came with OS X preinstalled, chances are excellent that your disk is already formatted in this way.
If you inherited this Mac from your cousin and aren’t sure how Mac OS X made its way onto your hard disk, check your disk’s format by running Apple System Profiler. Choose ![]() → About This Mac and click the More Info button to summon the Apple System Profiler. Choose ATA in the Hardware section of the Contents pane on the left, and look for your hard drive on the right. Highlight the hard drive model name—it may be something like ST3320620A—and look in the bottom pane for the more familiar hard drive name you’re used to seeing on your computer. Finally, beneath that, you’ll find an indication of the File System—which should say something similar to Journaled HFS+.
→ About This Mac and click the More Info button to summon the Apple System Profiler. Choose ATA in the Hardware section of the Contents pane on the left, and look for your hard drive on the right. Highlight the hard drive model name—it may be something like ST3320620A—and look in the bottom pane for the more familiar hard drive name you’re used to seeing on your computer. Finally, beneath that, you’ll find an indication of the File System—which should say something similar to Journaled HFS+.
If it turns out that your disk uses the wrong format, but you’re not sure how to proceed, be aware that you are treading firmly on power-user territory. See Mac OS X: The Missing Manual for more information about disk formatting— or call in your cousin.

Figure A-1. When you open the Office 2008 installation disk, you’ll see this simple window with but a single choice. Double-click the Office Installer to begin the installation process.
Start by quitting all of your running programs—especially Office programs. The Office installer makes changes to your font collection, which could confuse other running programs.
Insert the Microsoft Office 2008 DVD in your computer and double-click the Microsoft Office 2008 disk icon.
When the golden, Office: Mac 2008 installer window appears (Figure A-1), double-click the Office Installer icon to get this show on the road.
A small dialog box appears that says, “This package contains a program that determines if the software can be installed. Are you sure you want to continue?” This step checks your processor and operating system to make sure they meet Office’s minimum requirements.
Click Continue.
When the installer launches, you see a Welcome screen. This screen suggests that you turn off any antivirus software you’re using and, more ominously, asks whether you’re an administrator. In Mac OS X, only people with Administrator accounts can do important stuff like install new software. If you’re not sure, you can check in
 → System Preferences → Accounts. If you don’t have “Admin” listed under your user name, ask someone who does for help. (You can learn more about all this account business in Mac OS X: The Missing Manual.
)
→ System Preferences → Accounts. If you don’t have “Admin” listed under your user name, ask someone who does for help. (You can learn more about all this account business in Mac OS X: The Missing Manual.
)Click Continue.
The Software License Agreement appears, which you may read in any of 11 languages. Don’t worry, you’re not signing your life away. (Well, probably not…no one’s ever read all the way through to find out.)
Click Continue again, and a software license agreement dialog box appears. Click Agree to move on.
Fill in your name and (if you like) your email address and other basic information for Office’s use. Click Next when you’re done.
Microsoft uses this as your registration name and address, and puts it in your Entourage Address Book as your “Me” contact, which means that it automatically shows up in all kinds of places in Office (as your return address in envelopes in Word, for example). In other words, entering your information now will save you loads of time later. (You can always change any of this info, even your name, in Office’s preferences.)
Type the 25-digit Product Key that came with Office.
You’ll find this number on the back of the CD case in the Microsoft Office box.
Click Finish when you’re done. (If you make a typo, try, try again.)
Once you’ve typed the code correctly, the assistant shows your unique Office 2008 product ID. You’ll be asked for it when you register your software with Microsoft for call its help line. Truth is, though, you don’t actually need to remember it; you can always retrieve it by choosing the About command from the Word, Excel, PowerPoint, or Entourage menu.
Click Continue.
The Standard Install window appears. To install the entire Office package, just click Install.
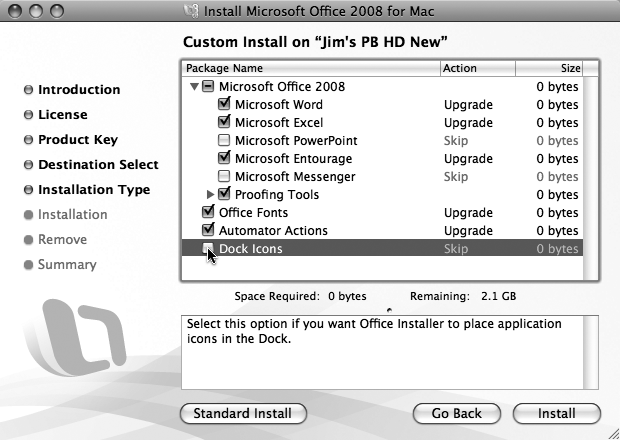
If you’d like some say about exactly what is about to be installed, click Customize.
The Custom Install window appears, bearing checkboxes for the various office components (Figure A-3). Click the Flippy triangle next to Microsoft Office 2008 in order to turn off any individual programs.
The Standard installation gives you a full installation of all four Office programs described in this book, plus Microsoft Messenger and Proofing Tools. This set of options is what Microsoft thinks most people want, without littering your hard drive with extras…sort of. If you click the flippy triangle next to Proofing Tools, you’ll see that you’re getting all kinds of foreign language spelling dictionaries. Click the checkboxes to turn off any languages you don’t plan on writing. You’ll save about a megabyte of hard drive space for each language you eliminate.
Click the flippy triangles to see everything that’s available. If you’ll never in a million years create a PowerPoint presentation, for example, you can turn it off now and save a ton of space. You can always pop the DVD in and install it later if you change your mind. If you’re stuck on iChat, you may as well turn off Microsoft Messenger.
If you have a change of heart while you’re picking and choosing, click Standard Install to revert to installing the whole shebang. This puts everything you paid for on your Mac—it also eats up one and a half gigabytes of space.
When you’re happy with what you’ve decided to install, click Install.
The installer gets to work. (It may ask you to type your password again. Just do it.)
Soon, the Remove Office window appears, alerting you that it will search for and—at your option—remove earlier versions of Office. If you have room on your hard drive there’s no problem keeping earlier versions of Office. (If you have an Office Test Drive, though, you have to remove it.)
Click Continue to begin the search.
“Search finished” appears when the installer’s done poking through all your files, and tells you how many versions of Office it found.
Click Continue, turn on the checkboxes for the versions you wish to remove, and click Continue again.
The next message alerts you to how many versions of Office it moved to the Trash.
Click Continue one last time.
The “Installation completed successfully” window appears, congratulating you on a successful installation, and advising you that the Office Setup Assistant is about to open to help you complete the setup process.
Click Close to exit the Installer and launch the Office Setup Assistant.
The Microsoft Office Setup Assistant appears and first asks if you’d like to participate in Microsoft’s Customer Experience Improvement Program. You can read a short description about how the program automatically and anonymously collects information about your hardware setup and how you use Office and other Microsoft services. It doesn’t collect any personal information, but it does gather an incredible amount of data about how you use Office: how frequently you use various commands, which keyboard shortcuts you use, how many mail folders you have, how much time you spend in the Calendar, and so on. These juicy tidbits end up in a massive database that helps Microsoft software engineers figure out how people actually use the program. There’s a link to a Microsoft Web site that explains it all in great detail.
After reading Microsoft’s plea for information, you can click the Yes button to participate, or else leave it set on No and click Continue.
The final assistant screen gives you three options:
Learn More. Launches your Web browser and takes you to www.microsoft.com/mac/help.mspx, where you can search Microsoft’s Help and How-To sections, or click links for each of the Office programs to learn more about them.
Register. Opens your Web browser and starts the online registration process. Registering Office, like any software, is a good idea, because it lets you take advantage of a limited amount of free support from Microsoft. On the down side, Microsoft makes you create a Windows Live account (you may already have one; it’s the same as an MSN Hotmail, Microsoft Messenger, or Passport account), offers to sign you up for bulk email that you may not want, and asks other nosy questions.
Check for Updates. Launches Microsoft AutoUpdate (see the box on page xxxi). If there are any updates, you’ll want to install them right away, since they fix bugs that always appear when software first hits the shelves.
Click Finish. The Setup Assistant vanishes, and you find yourself staring once again at the Microsoft Office 2008 DVD installer window. Eject the DVD, and head to your Dock or Applications folder and start using Office 2008.
When you install Office, you’re actually installing thousands of pieces of software in all kinds of places other than your Applications folder. If you want Office off your Mac and out of your life, you’d never be able to track down and trash them all. Fortunately, you’ve already installed a program that does just that.
Go to your Applications → Microsoft Office 2008 → Additional Tools → Remove Office folder. Double-click the Remove Office icon. The uninstaller searches for all versions of Office on your Mac and lets you choose which ones you want to remove. You can also choose to remove the programs, or just the preference files (sometimes a handy troubleshooting move). To back out, click Go Back or just quit Remove Office.
Click Remove on the final screen to do the deed. The uninstaller asks for an administrator name and password; when you enter them, it moves all selected versions of Office to the Trash. Emptying the Trash yourself is the final step in removing Office.