
Chapter 4
Making Your Presentations Livelier
IN THIS CHAPTER
![]() Looking at ways to make a presentation livelier
Looking at ways to make a presentation livelier
![]() Slapping a transition or animation on a slide
Slapping a transition or animation on a slide
![]() Playing sound and video during a presentation
Playing sound and video during a presentation
![]() Recording your own voice narration for a presentation
Recording your own voice narration for a presentation
The purpose of this chapter is to make your presentation stand out in a crowd. It suggests ways to enliven your presentation with pictures, charts, slides, and tables. It shows how transitions and animations can make a presentation livelier. Finally, you discover how to play sound and video during a presentation.
Suggestions for Enlivening Your Presentation
Starting on the Insert tab, you can do a lot to make a presentation livelier. The Insert tab offers buttons for putting pictures, tables, charts, diagrams, and shapes on slides:
- Pictures: Everyone likes a good graphic or photo, but more than that, audiences understand more from words and pictures than they do from words alone. A well-chosen photo or image reinforces the ideas that you’re trying to put across in your presentation. (See Book 8, Chapter 3.)
- Tables: A table is a great way to plead your case or defend your position. Raw table data is irrefutable — well, most of the time, anyway. Create a table when you want to demonstrate how the numbers back you up. (See “Presenting Information in a Table,” later in this chapter.)
- Charts: Nothing is more persuasive than a chart. The bars, pie slices, or columns show the audience instantaneously that production is up or down, or that sector A is outperforming sector B. The audience can compare the data and see what’s what. (See Book 8, Chapter 1.)
- Diagrams: A diagram is an excellent marriage of images and words. Diagrams allow an audience to literally visualize a concept, idea, or relationship. You can present an abstract idea such that the audience understands it better. (See Book 8, Chapter 2.)
- Shapes: Lines and shapes can also illustrate ideas and concepts. You can also use them as slide decorations. (See Book 8, Chapter 4.)
Presenting Information in a Table
The purpose of a table is to present information for comparison purposes — to see which car gets the best gas mileage, which company made the most money, or who shucked the most corn. Tables on slides can’t be used for reference purposes because they appear briefly onscreen; viewers can’t refer to them later on. Nevertheless, a table is a great way to present a quick summary of the bare facts.
PowerPoint offers no fewer than four ways to create a table. The best slide layout for creating tables is Title and Content because it offers space for a title and provides the Table icon, which you can click to create a table. Create your table with one of these techniques:
- Dragging on the Table menu: On the Insert tab, click the Table button, point on the drop-down list to the number of columns and rows you want, as shown in Figure 4-1, and let go of the mouse button.
- Clicking the Table icon: Click the Table icon in a content placeholder frame. You see the Insert Table dialog box, shown in Figure 4-1. Enter the number of columns and rows you want for your table and click OK.
- Using the Insert Table dialog box: On the Insert tab, click the Table button and choose Insert Table on the drop-down list. The Insert Table dialog box shown in Figure 4-1 appears. Enter the number of columns and rows you want and click OK.
- Drawing a table: On the Insert tab, click the Table button and choose Draw Table on the drop-down list. The pointer changes into a pencil. Use the pencil to draw the table borders. On the (Table Tools) Design tab, you can click the Draw Table button and draw the columns and rows for the table.

FIGURE 4-1: Declare how many columns and rows you want for your table.
 After you create a table, PowerPoint places two Table Tools tabs on the Ribbon, one called Design and one called Layout. The (Table Tools) Design tab offers commands for changing the look of the table; the (Table Tools) Layout tab is for changing around the rows and columns.
The techniques for working with tables in Word and PowerPoint are terribly similar. I suggest going to Book 2, Chapter 4 if your aim is to create a really, really nice table.
Exploring Transitions and Animations
In PowerPoint-speak, a transition is a little bit of excitement that occurs as one slide leaves the screen and the next slide climbs aboard. An animation is movement on the slide. For example, you can animate bulleted lists such that the bullet points appear on a slide one at a time when you click the mouse rather than all at one time.
 Before you know anything about transitions and animations, you should know that they can be distracting. The purpose of a presentation is to communicate with the audience, not display the latest, busiest, most dazzling presentation technology. For user-run, kiosk-style presentations, however, eye-catching transitions and animations can be useful because they draw an audience. (A user-run presentation plays on its own, as I explain in Chapter 5 of this minibook.) For audiences that enjoy high-tech wizardry, transitions and animations can be a lot of fun and add to a presentation.
Showing transitions between slides
Transitions include the Morph, Fade, and Push. Figure 4-2 shows how a transition works. For the figure, I chose the Clock transition. This slide doesn’t so much arrive onscreen as it does sweep onto the screen in a clockwise fashion. You get a chance to test-drive these transitions before you attach them to slides.

FIGURE 4-2: The Clock transition in action.
Assigning transitions to slides
To show transitions between slides, select the slide or slides that need transitions, go to the Transitions tab, and select a transition in the Transition to This Slide gallery. (To apply the same transition to all the slides in a presentation, click the Apply To All button after you select a transition.) The names and images in the gallery give you an idea of what the transitions are, and you can click the Preview button on the Transitions tab at any time to watch a transition you chose.
The Transitions tab offers these tools for tweaking a transition:
- Effect Options: Click the Effect Options button and choose an effect on the drop-down list. For example, choose From Top or From Bottom to make a transition arrive from the top or bottom of the screen. Not all transitions offer effect options.
- Sound: Open the Sound drop-down list and choose a sound to accompany the transition. The Loop Until Next Sound option at the bottom of the drop-down list plays a sound continuously until the next slide in the presentation appears.
- Duration: Enter a time period in the Duration box to declare how quickly or slowly you want the transition to occur.
As I mention earlier, you can click the Apply To All button to assign the same transition to all the slides in your presentation.
Altering and removing slide transitions
In Slide Sorter view and in the Slides pane in Normal view, the transition symbol, a flying star, appears next to slides that have been assigned a transition. Select the slides that need a transition change, go to the Transitions tab, and follow these instructions to alter or remove transitions:
- Altering a transition: Choose a different transition in the Transition to This Slide gallery. You can also choose different effect options and sounds, and change the duration of the transition.
- Removing a transition: Choose None in the Transition to This Slide gallery.
Animating parts of a slide
When it comes to animations, you can choose between animation schemes, the prebuilt special effects made by the elves of Microsoft, or customized animations that you build on your own. Only fans of animation and people with a lot of time on their hands go the second route.
Choosing a ready-made animation scheme
Follow these steps to preview and choose an animation scheme for slides:
- Go to the Animations tab.
Click to select the element on the slide that you want to animate.
For example, select a text frame with a bulleted list. You can tell when you’ve selected an element because a selection box appears around it.
In the Animation Styles gallery, choose an animation effect, as shown in Figure 4-3.
You can choose Entrance, Emphasis, Motion Paths, and Exit animation effects. As soon as you make your choice, the animation springs to life, and you can click the Preview button at any time to see your animation in all its glory.
Click the Effect Options button and experiment with choices on the drop-down list to tweak your animation.
Which options are available depends on the animation you chose.
If you choose a text-box or text-frame element with more than one paragraph in Step 2, click the Effect Options button and tell PowerPoint whether to animate all the text or animate each paragraph separately from the others.
- As One Object or All at Once: All the text is animated at the same time.
- By Paragraph: Each paragraph is treated separately and is animated on its own. For example, each item in a bulleted list is treated as a separate element — each item fades, wipes, or flies in after the one before it, not at the same time as the one before it.
Very briefly, you see a preview of the animation choice you made. To get a good look at the animation you just chose for your slide, click the Preview button on the Animations tab.

FIGURE 4-3: Apply effects in the Animation gallery.
To remove an animation, return to the Animation Styles gallery and choose None.
Fashioning your own animation schemes
To fashion your own animation scheme, go to the Animations tab and click the Animation Pane button. You see the Animation pane, as shown in Figure 4-3. It lists, in order, each animation that occurs on your slide (if animations occur). Select an element on the slide and follow these general instructions to animate it:
- Click the Add Animation button and choose an animation.
- On the Start drop-down list, declare whether the animation begins when you click your slide (On Click), at the same time as the previous animation (With Previous), or after the previous animation (After Previous).
- In the Duration box, enter how long you want the animation to last.
- In the Delay box, enter a time period to declare how soon after the previous animation in the Animation pane you want your animation to occur.
- Select an animation in the task pane and click a Re-Order button to change the order in which animations occur, if more than one element is animated on your slide.
Making Audio Part of Your Presentation
Especially in user-run, kiosk-style presentations, audio can be a welcome addition. Audio gives presentations an extra dimension. It attracts an audience. PowerPoint offers two ways to make audio part of a presentation:
- As part of slide transitions: A sound is heard as a new slide arrives onscreen. On the Transitions tab, open the Sound drop-down list and choose a sound. (See “Showing transitions between slides,” earlier in this chapter.)
- On the slide itself: The means of playing audio appears on the slide in the form of an Audio icon, as shown in Figure 4-4. By moving the mouse over this icon, you can display audio controls, and you can use these controls to play audio. You can also make audio play as soon as the slide arrives onscreen.

FIGURE 4-4: Making audio part of a presentation.
Inserting an audio file on a slide
Follow these steps to insert an audio file in a slide:
- Go to the Insert tab.
- Click the Audio button.
Choose Audio on My PC.
The Insert Audio dialog box appears.
- Locate and select a sound file.
- Click Insert.
An Audio icon appears on the slide to remind you that audio is supposed to play when your slide is onscreen. You can change the size of this icon by selecting it and dragging a corner handle or going to the (Audio Tools) Format tab and entering new Height and Width measurements. You can also drag the icon into an out-of-the-way corner of your slide.
To quit playing a sound file on a slide, select its Audio icon and then press the Delete key.
Telling PowerPoint when and how to play an audio file
To tell PowerPoint when and how to play an audio file, start by selecting the Audio icon and going to the (Audio Tools) Playback tab, as shown in Figure 4-5. From there, you can control when and how audio files play:
- Controlling the volume: Click the Volume button and choose an option on the drop-down list to control how loud the audio plays.
- Playing the audio file automatically in the background: Click the Play in Background button. Clicking this button tells PowerPoint to play the audio automatically, across slides, until you or another presenter clicks the Pause button to stop the audio from playing.
- Deciding when and how to play audio: Click the No Style button. Then select these options:
- Start: Choose Automatically to make the audio play as soon as the slide appears; choose When Clicked On to play the audio when you click the Audio icon on your slide. (The In Click Sequence option is for playing an audio as art of an animation.)
- Play Across Slides: Play the audio file throughout a presentation, not just when the slide with the audio file appears.
- Loop Until Stopped: Play the audio file continuously until you or another presenter clicks the Pause button.
- Hiding and unhiding the Audio icon: Select the Hide During Show check box. If you hide the Audio icon, the file must play automatically; otherwise, you won’t see the icon and be able to click it and view the audio controls.
- Rewind After Playing: Starts replaying the audio file from the beginning after it is finished playing.

FIGURE 4-5: Visit the (Audio Tools) Playback tab to control when and how sounds play.
Click the Play button on the (Audio Tools) Playback tab to play an audio file.
Playing audio during a presentation
While an audio file is playing during a presentation, controls for starting, pausing, and controlling the volume appear onscreen (refer to Figure 4-4). They appear onscreen, I should say, if the Audio icon appears on your slide. (If you’ve hidden the Audio icon, you’re out of luck because you can’t see the Audio icon or use its audio controls.)
Follow these instructions to start, pause, and control the volume of an audio recording during a presentation:
- Starting an audio file: Move the pointer over the Audio icon, and when you see the Audio controls, click the Play/Pause button (or press Alt+P).
- Pausing an audio file: Click the Play/Pause button (or press Alt+P). Click the button again to resume playing the audio file.
- Muting the volume: Click the Mute/Unmute icon (or press Alt+U).
- Controlling the volume: Move the pointer over the Mute/Unmute icon to display the volume slider and then drag the volume control on the slider.
Playing Video on Slides
If a picture is worth a thousand words, what is a moving picture worth? Ten thousand? To give your presentation more cachet, you can play video on slides and in so doing, turn your presentation into a mini-movie theater.
Inserting a video on a slide
Follow these steps to insert a video on a slide:
- On the Insert tab, click the Video button.
Choose an option on the drop-down list.
You can play a video file stored on your computer or play a video stored on YouTube, the online video repository.
- Online Video: The Insert Video dialog box appears (you can also open this dialog box by clicking the Insert Video icon on some slide layouts). Select a video from YouTube or embed a video by pasting its URL into the dialog box.
- Video on My PC: You see the Insert Video dialog box. Select a video and click Insert.
The video appears on your slide. If I were you, I would find out how (or whether) the video plays. To do that, click the Play/Pause button (or press Alt+P) or click the Play button on the (Video Tools) Playback or (Video Tools) Format tab.
Fine-tuning a video presentation
As shown in Figure 4-6, select the video and go to the (Video Tools) Playback tab to fine-tune a video presentation. The Playback tab offers all kinds of commands for making a video play the way you want it to play. Here are different ways to fine-tune a video presentation:
- Adding a bookmark: Add a bookmark to be able to skip ahead or backward to a place in the video when you play it. To add a bookmark, play the video to the place where you want the book mark to be and then stop playing the video. Next, click the Add Bookmark button. The bookmark appears in the form of a circle. You can click this circle to go to the bookmark while you play the video. To remove a bookmark, select it on the timeline and click the Remove Bookmark button.
- Trimming the video: To trim from the start and or end of a video, click the Trim Video button. Then, in the Trim Video dialog box, drag the green slider to trim from the start of the video; drag the red slider to trim from the end.
- Fading in and out: Enter time measurements in the Fade In and Fade Out text boxes to make the video fade in or out.
- Controlling the volume: Click the Volume button and choose Low, Medium, High, or Mute to control how loud the video sound is.
- Playing the video automatically or when you click the Play/Pause button: Open the Start drop-down list and choose Automatically or On Click to tell PowerPoint when to start playing the video.
- Playing the video at full screen: Make a video fill the entire screen by selecting the Play Full Screen check box. Be careful of this one. Videos can look terribly grainy when they appear on the big screen.
- Hiding the video when it isn’t playing: You can hide the video until you start playing it by selecting the Hide While Not Playing check box. Be sure to choose Automatically on the Start drop-down list if you select this check box.
- Continuously playing, or looping, the video: Play a video continuously or until you go to the next slide by selecting the Loop Until Stopped check box.
- Rewinding the video when it’s finished playing: Rewind a video if you want to see the first frame, not the last, when the video finishes playing. Select the Rewind After Playing check box to make the start of the video appear after the video plays; deselect this option to freeze-frame on the end of the video when it finishes playing.

FIGURE 4-6: Visit the (Video Tools) Playback tab to fine-tune a video presentation.
Experimenting with the look of the video
Want to make your video look a little sharper? If so, you are hereby invited to experiment with the commands on the (Video Tools) Format tab and Format Video pane shown in Figure 4-7.
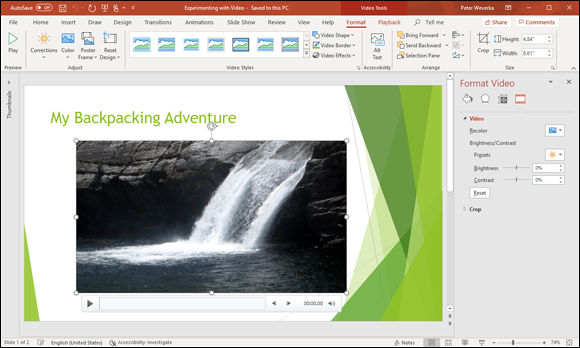
FIGURE 4-7: You can change the look of a video.
To open the Format Video pane, go to (Video Tools) Format tab and do one of the following:
- Click the Corrections button and choose Video Corrections Options on the drop-down list.
- Click the Video Styles group button.
When you’re in an experimental mood, select your video and try these techniques for changing its appearance:
- Recolor the video. Click the Color button (on the Format tab) or the Recolor button (in the Format Video pane) and select a color or black-and-white option.
- Change the brightness and contrast. Click the Corrections button and choose a setting in the gallery, or change the Brightness and Contrast settings in the Format Video pane.
Recording a Voice Narration for Slides
A voice narration in a PowerPoint presentation is sophisticated indeed. A self-playing, kiosk-style presentation can be accompanied by a human voice such that the narrator gives the presentation without actually being there. To narrate a presentation, a working microphone must be attached or built in to your computer. You record the narration for slides one slide at a time or all at one time, and the recording is stored in the PowerPoint file, not in a separate audio file.
The best way to record voice narrations is to do it on a slide-by-slide basis. You can record across several slides, but getting your voice narration and slides to be in sync with one another can be a lot of trouble.
Place your script on your desk and follow these steps to record a voice narration for a slide:
- Select the slide that needs a voice narration.
- Go to the Insert tab.
Open the drop-down list on the Audio button and choose Record Audio.
You see the Record Sound dialog box shown in Figure 4-8.
Click the Record button and start reading your script.
Click the Stop button when you want to pause recording; click the Record button to resume recording.
You can click the Play button at any time to play back what you have recorded so far. Notice that the dialog box notes how many seconds your recording lasts.
Click the OK button in the Record Sound dialog box when you have finished recording the narration for your slide.
The Audio icon appears on your slide to show that your slide is accompanied by an audio file.

FIGURE 4-8: Recording in PowerPoint.
Your next task is to select the Audio icon, go to the (Audio Tools) Playback tab, and tell PowerPoint when to play the audio recording, at what volume to play it, and whether you want it to loop. See “Telling PowerPoint when and how to play an audio file,” earlier in this chapter.
To play voice narrations during a presentation, make sure that the Play Narrations check box is selected on the Slide Show tab.