![]()
Understanding PHP: Language Basics
So far, you’ve bypassed the old, cumbersome method of creating a development environment, and you’re now ready to start writing code.
But where do you start? In this chapter, I’ll cover the steps you need to follow to start using PHP in the creation of powerful, dynamic web applications. You’ll also begin to develop the basic skills you need to create your blog. In addition, you’ll learn how to accomplish several tasks, including how to do the following:
- Embed PHP in web pages
- Send data as output to the browser
- Add comments in your code
- Use variables
- Work with PHP errors
- Create an HTML5 template
- Use objects
- Concatenate strings
- Access URL variables with the $_GET superglobal
- Declare a class definition
- Embed dynamic CSS
By the end of this chapter, you will have seen some basic PHP that will allow you to create, store, manipulate, and output data. You will have used those skills to develop a bare-bones version of a personal portfolio web site.
![]() Note This chapter discusses basic aspects of the PHP language, but not in complete detail. For clarification, more examples, or for concept reinforcement, visit the PHP manual at www.php.net/manual/en/ and search the function in the field where it says “search for _______ in the function list.” Alternatively, you can access information about many PHP functions by navigating to http://php.net/function_name. Don’t forget to read the comments, because many of your fellow programmers offer insight, tips, and even additional functions in their commentary.
Note This chapter discusses basic aspects of the PHP language, but not in complete detail. For clarification, more examples, or for concept reinforcement, visit the PHP manual at www.php.net/manual/en/ and search the function in the field where it says “search for _______ in the function list.” Alternatively, you can access information about many PHP functions by navigating to http://php.net/function_name. Don’t forget to read the comments, because many of your fellow programmers offer insight, tips, and even additional functions in their commentary.
In Chapter 1, when I talked about Apache and web servers in general, I mentioned how a server will process PHP in a file before sending that file to the browser. But you might be curious as to how the server knows where to look for PHP.
By default, servers look for PHP only in files that end with the .php extension. But a .php file can contain elements that aren’t part of your PHP script, and searching the entire file for potential scripts is confusing and resource-intensive. To solve this issue, all PHP scripts need to be contained with PHP delimiters. To begin a PHP script, you include the opening delimiter <?php and start coding. To finish, you simply add ?> to the end of the script. Anything outside of these delimiters will be treated as HTML or plain text.
You can see this in action. Start by creating a new folder ch2 in /xampp/htdocs/. Next, create a new file, test.php, with Komodo Edit. Write the following code:
<p>Static Text</p>
<?php
echo "<p>This text was generated by PHP!</p>";
?>
<p>This text was not.</p>
Save the file, navigate to http://localhost/ch2/test.php in your browser, and you should see the following output in your browser:
Static Text
This text was generated by PHP!
This text was not.
As you can see, the text inside the PHP delimiters , was handled as a script, but the text outside was rendered as regular HTML. There is no limit to how many blocks of PHP you can include in a page, so the following snippet is completely valid:
<?php
echo "<p>This is some text.</p>";
?>
<p>Some of this text is static, <?php echo "but this sure isn't!"; ?></p>
<?php echo "<p>"; ?>
This text is enclosed in paragraph tags that were generated by PHP.
<?php echo "</p>"; ?>
The preceding code snippet outputs the following to the browser:
This is some text.
Some of this text is static, but this sure isn't!
This text is enclosed in paragraph tags that were generated by PHP.
If you write a PHP script that holds nothing but PHP, you don’t have to end the PHP delimiter. You only have to mark the ending of a PHP code block, if you are going to write something that is not PHP in the file.
Using echo
Take an extra look at the use of echo in the preceeding code examples. PHP’s echo is a so-called language construct—the basic syntactic units PHP is made of. The echo statement is probably the most common approach for outputting text from PHP to the browser. That is all echo does. It sends output to the browser.
Notice that the output strings are delimited with double quotes in the preceding code example. The initial double quote indicates the beginning of a string of characters. The second double quote marks the end of the string to output. In PHP, you must delimit any strings you are using in your code. The string delimiters tell PHP when a string of characters begin and end, something PHP needs to know in order to process your code.
![]() Note String is a geeky word for “text.” Because computers are not human, they don’t really see texts, much less words. They see strings of characters.
Note String is a geeky word for “text.” Because computers are not human, they don’t really see texts, much less words. They see strings of characters.
What Is a Variable?
A variable is a keyword or phrase that acts as an identifier for a value stored in a system’s memory. This is useful, because it allows us to write programs that will perform a set of actions on a variable value, which means you can change the output of the program simply by changing the variable, rather than changing the program itself.
Storing Values in a Variable
It is quite straightforward to store a value in a variable. In one single line, you can declare a new variable and assign a value to it:
<?php
$myName = "Thomas";
$friendsName = "Brennan";
echo "<p>I am $myName and I have a friend called $friendsName.</p>";
If you type the preceding lines into your test.php file and load it in your browser, you should see an output such as the following:
I am Thomas and I have a friend called Brennan.Perhaps you will notice that the preceding code holds nothing but PHP. Consequently, there is no need to mark the end of the PHP block with a PHP delimiter. You can add ?> at the end, if you like; it’ll make no difference.
A Variable Is a Placeholder
Variables are used extensively in programming. It is a basic concept you must come to understand. There is an important lesson to be learned from the example preceding. When you read the PHP code, you see variable names:
echo "<p>I am $myName and I have a friend called $friendsName.</p>";
You can see the output from PHP in the browser. You can see that PHP replaces the variable names with string values. For example, when you see $myName, PHP sees Thomas. When you see $friendsName, PHP sees Brennan.
A variable is a placeholder for a specific value. PHP doesn’t even notice the variable; it sees the value stored inside. Metaphorically, you could understand a variable as a container—a cup, for example. I have a cup right next to my computer, and I can put all sorts of things inside it: coffee, a pencil, or some loose change. PHP variables are like that. PHP sees what is contained, not the container.
![]() Note In technical terms, PHP variables are passed by value, as opposed to passed by reference.
Note In technical terms, PHP variables are passed by value, as opposed to passed by reference.
Valid PHP Variable Names
In PHP, all variables must begin with a dollar sign character ($). There are some further restrictions on valid variable names, but if you simply use alphabetical characters only, you will encounter no problems with invalid variable names. So, avoid whitespace characters, numbers, and special characters such as !”#€%&/.
![]() Note You can actually use numbers in variable names but not in initial positions. So, $1a is an invalid variable name, whereas $a1 is perfectly valid.
Note You can actually use numbers in variable names but not in initial positions. So, $1a is an invalid variable name, whereas $a1 is perfectly valid.
Displaying PHP Errors
On your journey toward learning PHP, you are bound to produce some errors. It is easy to think that you have done something bad when you have written some erroneous PHP. In a sense, it is, of course, bad. You would probably prefer to write perfect PHP from the very start.
In another sense, errors are a very good thing. Many such errors present a learning opportunity. If you really understand the cause of an error, you are less likely to repeat it, and even if you do repeat it, you can easily correct the error if you understand it.
PHP error messages are not always displayed—it depends on how your development environment is set up. If you write the following two lines of PHP at the beginning of your scripts, all error messages will be displayed. Let’s produce an error:
<?php
//these two lines tell PHP to show errors in the browser
error_reporting( E_ALL );
ini_set( "display_errors", 1 );

//here comes the error
echo "This string never ends;
Do you see the error? There is only one string delimiter. To write valid PHP, you must wrap your strings in string delimiters, for example, double quotes. In the preceding example, the end delimiter is missing, so PHP cannot see where the output ends. If you run the code, you will see an error message in your browser, as follows:
Parse error:syntax error, unexpected $end, expecting T_VARIABLE or T_DOLLAR_OPEN_CURLY_BRACES or T_CURLY_OPEN in/Applications/XAMPP/xamppfiles/htdocs/ch2/test.php on line4Error messages are friendly but not always as precise as you might prefer. When PHP is unable to process your code, an error is triggered. PHP will make an educated guess about what the problem might be. In the preceding example, PHP has encountered an “unexpected end” on line 4. There is a “bug” in your script. Please debug the script by adding the missing double quote.
I recommend you make a habit of forcing error messages to display and try to read all error messages you come across. If you encounter an error message you don’t understand, you can always search the Internet for an explanation. A site such as www.stackoverflow.com is very likely to have an explanation for your particular error message.
Creating an HTML5 Page with PHP
PHP is a wonderful language for creating dynamic HTML pages. With a tiny bit of PHP, you can create a valid HTML5 page with variable content in memory and have PHP output the created page to the browser. Let’s make a bare-bones skeleton for a personal portfolio site. Create a new PHP file called index.php in XAMPP/htdocs/ch2:
<?php
error_reporting( E_ALL );
ini_set( "display_errors", 1 );

$title = "Test title";
$content = "<h1>Hello World</h1>";
$page = "
<!DOCTYPE html>
<html>
<head>
<title>$title</title>
<meta http-equiv='Content-Type' content='text/html;charset=utf-8'/>
</head>
<body>
$content
</body>
</html>";
echo $page;
If you save and load http://localhost/ch2/index.php in your browser, you should see a well-formed HTML5 page with a title and a heading. It’s a good habit to inspect the source code of your PHP-generated HTML pages. Do it, and you should see that the variables have been replaced by their corresponding values by PHP. The HTML source code should look like the following:
<!DOCTYPE html>
<html>
<head>
<title>Test title</title>
<meta http-equiv='Content-Type' content='text/html;charset=utf-8' />
</head>
<body>
Hello World</h1>
</body>
</html>
Including a Simple Page Template
Creating a valid HTML5 page with PHP is a very, very common task. You should have few problems understanding the preceding code. Let’s try to create the same output in a way that’s easier to reuse in other projects. If you can reuse your code in other projects, you can develop solutions faster and more efficient. Let’s keep the HTML5 page template in a separate file.
Create a new folder called templates in your existing PHP project. Create a new PHP file called page.php in the templates folder, as follows:
<?php
return "<!DOCTYPE html>
<html>
<head>
<title>$title</title>
<meta http-equiv='Content-Type' content='text/html;charset=utf-8'/>
</head>
<body>
$content
</body>
</html>";
Returning Values
The return statement in PHP is very useful. It simply stops execution of the script. Any value indicated immediately after the return statement will be returned. In the preceding example, a valid HTML5 page will be returned.
Including the Template
To use the template from your index, you will have to load the script into PHP’s memory. You can do that with another PHP statement: include_once. Update your index.php file, as follows:
<?php
//complete code for index.php
error_reporting( E_ALL );
ini_set( "display_errors", 1 );
$title = "Test title";
$content = "<h1>Hello World</h1>";
//indicate the relative path to the file to include
$page = include_once "templates/page.php";
echo $page;
The output of the preceding code will be identical to that you had when you first created the page. There are no functional changes, but there are some aesthetic changes in code architecture. A reusable page template is now kept in a separate file. The template is included into index.php, when needed. We’re really splitting different parts of the code into different files. The result is that more of the code becomes readily reusable in other projects. This process of separating different parts is also known as separation of concerns.
Commenting Your Code
It can be very helpful for your learning process to write comments in your code. Such comments should remind you what the code does and why. Explaining the code to yourself in your own terms will speed up your learning process. Also, should you ever find yourself working with a team of developers, code comments will help you collaborate effectively, because you can write notes to your codevelopers as code comments.
Block and Single-Line Comments
You can write comments in your code. Comments can remind you, and anybody else reading your code, what different parts of the code does. You have to clearly delimit comments, so PHP will not try to interpret comments as if they were actual production code. You should know two ways of writing code comment in PHP: block and single-line comments.
<?php
//this is a single-line comment
/*
This is a comment block
It may span across
several lines
*/
Avoiding Naming Conflicts
You will soon find yourself writing PHP projects with hundreds of lines of code. You will need many variables, and each one must be named uniquely and meaningfully. You must avoid naming conflicts, as in the following example:
<?php
$title = "Welcome to my blog";
/*
hundreds lines of code later
*/
$title = "Web developer";
See the problem? Initially, a variable named $title is used to indicate the value of an HTML page’s <title> element. Much later in the same system, a variable also named $title is used to store a job title. A system with such variable names is vulnerable. You are likely to see unwanted system behavior when you use that variable. A better solution would be to clearly indicate the context of the $title. One approach is to use an object.
<?php
$pageData = new StdClass();
$pageData->title = "Welcome to my blog";
/*
hundreds lines of code later
*/
$jobData = new StdClass();
$jobData->title = "Web developer";
You can create a new standard PHP object by using PHP’s native StdClass. A PHP object is just like a variable in that it can store values. One normal PHP variable can store one value. One object can store as many values as you need. Each individual value can be stored as a unique object property.
In the preceding code example, you can see two different objects, each with a title property. It should be clear that the $pageData->title is different from $jobData->title, even if both properties are named title.
The object provides a context, and that will make it easier for you to use the right title in the right place in your code. You can use objects to organize your code into meaningful units that belong together. You could say that an object and its properties are much like a folder and the files inside.
![]() Note There is more to objects than this—a lot more. Using objects in your code is a de facto standard for dealing with complexity in systems, without introducing unnecessary complexity in your code. You will learn much more about programming with objects throughout the book.
Note There is more to objects than this—a lot more. Using objects in your code is a de facto standard for dealing with complexity in systems, without introducing unnecessary complexity in your code. You will learn much more about programming with objects throughout the book.
The Object Operator
Objects can be used as namespaces for properties, to avoid naming conflicts, by providing a clear context. To get values from an object property, you have to specify two things: which object and which of its properties to get. To that end, you use PHP’s object operator. The general syntax is like the following:
$objectName->propertyName;
PHP’s object operator looks like an arrow. It indicates that you are getting a particular property inside a specific object.
Using a StdClass Object for Page Data
Let’s refactor index.php and the page template with an object, to prevent annoying naming conflicts. Here are some changes for index.php:
<?php
//complete code for index.php
error_reporting( E_ALL );
ini_set( "display_errors", 1 );
$pageData = new stdClass();
$pageData->title = "New, object-oriented test title";
$pageData->content = "<h1>Hello from an object</h1>";
$page = include_once "templates/page.php";
echo $page;
You will also have to update templates/page.php, so it uses the newly created object and its properties in the right places:
<?php
return "<!DOCTYPE html>
<html>
<head>
<title>$pageData->title</title>
<meta http-equiv='Content-Type' content='text/html;charset=utf-8' />
</head>
<body>
$pageData->content
</body>
</html>";
Save the files and reload index.php in your browser. Expect to see the changed values in the <title> and <body> elements.
Object Properties Are Like Variables
Plain PHP variables are simple placeholders for values. Objects are clearly more complex, in that one object can hold several values. The preceding StdClass object holds two separate values. Each value is stored in a unique object property. Object properties behave like PHP variables. They are simple placeholders for values. One object can have many properties. Each property can contain one value. In the preceding example, you can see that you have to specify both object and property, in order to get to the value.
PHP properties can be understood as cups. Their contained values can be understood as the coffee (or whatever) inside a cup. Metaphorically, you could see an object as a tray and its properties as a few cups standing on the tray. To get your coffee, you have to get the right cup from the right tray.
In the preceding code example, you can see that you use the title property of the $pagedata object inside the <title>, and you use the content property of the $pageData object inside the <body> element.
Page Views
A personal portfolio site is likely to have a few different pages. Perhaps one page about your skills and educational background, and another page with links to examples of your work.
Because you’re making a dynamic web site, you don’t have to create two complete HTML pages. You can use your page template to display two different page views. A page view is something that looks like an individual page. One page view may be composed of several smaller views. You could think of a page view as a Lego house and a view as a Lego brick: the smaller parts are combined to build something bigger.
Let’s keep all views in one folder. Create a new folder called views inside your existing project folder. Create a new file, views/skills.php.
<?php
return "<h1>Skills and educational background</h1>
<p>Read all about my skills and my formal training</p>
";
That is the complete file. It is a quite small view at this point. It is often a good idea to begin small, when you are developing code. Any error that might creep in will be easier to spot in fewer lines of code. You need another small view in views/projects.php.
<?php
return "<h1>Projects I have worked on</h1>
<ul>
<li>Ahem, this will soon be updated</li>
</ul>";
Making a Dynamic Site Navigation
You have to show the right view at the right time. You can make a global, persistent site navigation, i.e., a navigation that will be the same on every page of the web site. Because PHP can include files, you can simply keep the code for the navigation in one file and include it in every script that needs it. An obvious advantage is that you can change the navigation in one file, and that change will be reflected on every site page, however many there are. Create a new file in views/navigation.php.
<?php
return "
<nav>
    <a href='index.php?page=skills'>My skills and background</a>
    <a href='index.php?page=projects'>Some projects</a>
</nav>
";
Notice that the entire navigation string is delimited with double quotes. use single quotes to delimit the href attribute values Because of that, you cannot use double quotes inside the navigation string. A third double quote would trigger a PHP error. So, you.
To see the navigation on the index page, you must include it from index.php.
<?php
//complete code for index.php
error_reporting( E_ALL );
ini_set( "display_errors", 1 );
$pageData = new stdClass();
//changes begin here
$pageData->title = "Thomas Blom Hansen: Portfolio site";
$pageData->content = include_once "views/navigation.php";
//end of changes
$page = include_once "templates/page.php";
echo $page;
Save and run this code, and you should see a page with a navigation. Don’t expect to see any of the views just yet.
Passing Information with PHP
Passing data is what separates dynamic web pages from static ones. By customizing an experience based on the user’s choices, you’re able to add an entirely new level of value to a web site. You can pass information to PHP through URL variables. A URL variable is simply a variable declared in the URL. You can see two URL variables in the navigation. Take a close look at the href attributes in the navigation <a> elements.
index.php?page=skills
index.php?page=projects
The href indicates that clicking the navigation item will load index.php and encode a URL variable named page. If you click one link, the URL variable named page will get a value of skills. If you click the other link, page will get a value of projects.
PHP can access URL variables and use them, for example, to load the right page view at the right time. URL variables are the lifeblood of dynamic sites.
Accessing URL Variables
To access URL variables, you use the $_GET superglobal array. Here’s how you might use it in index.php:
<?php
error_reporting( E_ALL );
ini_set( "display_errors", 1 );
$pageData = new stdClass();
$pageData->title = "Thomas Blom Hansen: Portfolio site";
$pageData->content = include_once "views/navigation.php";
//changes begin here
$navigationIsClicked = isset($_GET['page']);
if ($navigationIsClicked ) {
    $fileToLoad = $_GET['page'];
    $pageData->content .= "<p>Will soon load $fileToLoad.php</p>";
}
//end of changes
$page = include_once "templates/page.php";
echo $page;
That was quite a mouthful! PHP can access URL variables through $_GET. To access the value of the URL variable named page, you write $_GET['page']. There will be a URL variable named page only when a user has clicked a navigation item.
Using isset( ) to Test If a Variable Is Set
If you try to use a variable that does not exist, you will trigger a PHP error. So, before you try to access a variable, you have to be sure that the variable is set. PHP has a language construct to that end. You have already seen it in action.
$navigationIsClicked = isset($_GET['page']);
The isset() function will return TRUE, if the variable inside the parentheses is set. So, if a user has clicked a navigation item, $navigationIsClicked will be TRUE; if not, it will be FALSE.
If $navigationIsClicked is TRUE, then declare a PHP variable named $fileToLoad, to store the value of the URL variable named page. Next, add a string to the $pageData->content property, to display the value of the URL variable named page. Save and run the code. Once loaded in your browser, click the “My skills” navigation item. That should produce the following output in your browser:
Will soon load skills.phpIf you click the other navigation item, you can see the output change. You are seeing that output changes dynamically, according to how the user interacts with the site.
$_GET, a Superglobal Array
PHP can access URL variables through a so-called superglobal array called $_GET. PHP has a few other superglobal arrays for other purposes. With $_GET, you can access URL variables by their name. In the navigation, you have two <a> elements. Clicking either one will encode a unique value for a URL variable named page.
You can see a URL variable in the browser’s address bar in Figure 2-1. Notice how the value of the URL variable page is represented in the output? To get the value of a URL variable with PHP you write
$_GET['the name of the url variable'];
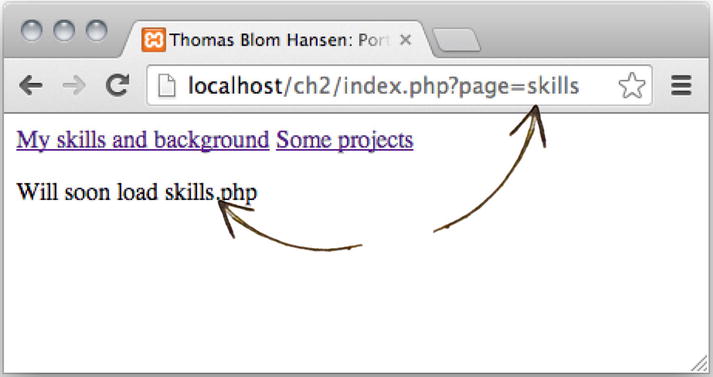
Figure 2-1. A URL variable in action
Including Page Views Dynamically
The dynamic site navigation is nearly complete. It works perfectly, except that page views are not loaded when navigation items are clicked. Let’s change that, by updating the code in index.php, as follows:
<?php
error_reporting( E_ALL );
ini_set( "display_errors", 1 );
$pageData = new stdClass();
$pageData->title = "Thomas Blom Hansen: Portfolio site";
$pageData->content = include_once "views/navigation.php";
$navigationIsClicked = isset($_GET['page']);
if ($navigationIsClicked ) {
    $fileToLoad = $_GET['page'];
    //change one line to load page views dynamically
    $pageData->content .=include_once "views/$fileToLoad.php";
}
$page = include_once "templates/page.php";
echo $page;
Save the changes and reload index.php in your browser. You will see that the output changes when you click a navigation item. The corresponding page view will be loaded and displayed. It is your index.php file that dynamically changes how it looks. The URL variable named page will determine which file is loaded.
That is it! That is a basic, dynamic site with a persistent, global navigation.
Concatenation
Did you notice the .= in the code above? It is PHP’s incremental concatenation operator, and it is a little different from =, the basic assignment operator.
Here’s an example to illustrate the differences:
<?php
$test = "<p>Hello ";
$test = "world</p>";
echo $test;
$concatenationTest = "<p>Hello ";
$concatenationTest .= "world</p>";
echo $concatenationTest;
The HTML source code output from the above example would clearly show the difference between assignment and incremental concatenation.
world</p>
<p>Hello world</p>
The assignment operator assigns a new string value to a variable and overwrites any previous strings in the process. So, the initial "<p>Hello " in the variable $test is overwritten.
The incremental concatenation operator merges the existing string in $concatenationTest with a new string. Incremental concatenation adds the new string at the end of the existing one.
Strict Naming Convention
It is great to see your first dynamic site working, isn’t it? It works, and it depends on a strict naming convention. The navigation items encode different values for a URL variable named page. The corresponding page view file must be named identically and be saved inside the views folder.
href |
URL variable |
view file |
|---|---|---|
| index.php?page=skills | page=skills | views/skills.php |
| index.php?page=projects | page=projects | views/projects.php |
Displaying a Default Page
The dynamic navigation works wonderfully, but it has one flaw: there is no default page view displayed when a user navigates to index.php, in which case, the URL variable named page does not have a value. It is easy to change in index.php. You simply have to change the if statement a tiny bit.
//partial code for index.php
if ($navigationIsClicked ) {
    $fileToLoad = $_GET['page'];
} else {
    $fileToLoad = "skills";
}
$pageData->content .=include_once "views/$fileToLoad.php";
The significant change is that $fileToLoad gets its value from the URL variable page, if that is set. If it is not set, $fileToLoad will have a default value of skills. Once $fileToLoad has a value, you can use it to load either the page view requested by a user or the default page view about “My skills.”
Validating Your HTML
The process of generating HTML pages is a bit abstract. It is easy to assume that everything is perfect, if the right page view is displayed at the right time. If you see the right action, your PHP scripts works perfectly. But that does not mean your HTML is perfectly valid. Dynamic web pages should conform to web standards, just as static HTML pages should. You should validate the generated HTML just as you would normally validate any other HTML.
![]() Note You could load a dynamic page in your browser and view the generated HTML source code through your browser. When you see the generated HTML source code, you can select it all, copy it, and paste it into an online HTML validation service. I usually use http://validator.w3.org/#validate_by_input.
Note You could load a dynamic page in your browser and view the generated HTML source code through your browser. When you see the generated HTML source code, you can select it all, copy it, and paste it into an online HTML validation service. I usually use http://validator.w3.org/#validate_by_input.
Styling the Site with CSS
When the HTML of all page views validates, you can start styling your site with CSS. You do it exactly as you would normally style a static HTML site: create an external style sheet with style rules for the visual design of your site. To do that for the portfolio site, you could create a new folder, called css, in your project folder. Create a new file called layout.css in the css folder:
nav {
    background-color: #CCCCDE;
    padding-top: 10px;
}
nav a{
    display:inline-block;
    text-decoration:none;
    color: #000;
    margin-left: 10px;
}
nav a:hover{text-decoration: underline;}
You can change or add any style rules you prefer. The preceding css is just to get you started. You will probably want to style all your dynamic HTML pages, so why don’t you build this functionality into the page template? You simply have to add one new placeholder for <link> elements pointing to external style sheets. Let’s update templates/page.php:
<?php
return "<!DOCTYPE html>
<html>
<head>
<title>$pageData->title</title>
<meta http-equiv='Content-Type' content='text/html;charset=utf-8' />
$pageData->css
</head>
<body>
$pageData->content
</body>
</html>";
Notice that the new property is used as placeholder for <link> elements referencing external style sheets. To use the updated page template, you must update index.php and declare a value for the new property:
<?php
//partial code listing for index.php
error_reporting( E_ALL );
ini_set( "display_errors", 1 );
$pageData = new stdClass();
$pageData->title = "Thomas Blom Hansen: Portfolio site";
$pageData->content = include_once "views/navigation.php";
//one line of code added here
$pageData->css = "<link href='css/layout.css' rel='stylesheet' />";
Save your files and load index.php in your browser. Expect to see your style rules take effect.
Declaring a Page_Data Class
Sometimes, it can be quite useful to use an internal, embedded style sheet to supplement your external style sheets. You can easily update the page template with a placeholder for a <style> element. Update templates/page.php.
<?php
return "<!DOCTYPE html>
<html>
<head>
<title>$pageData->title</title>
<meta http-equiv='Content-Type' content='text/html;charset=utf-8' />
$pageData->css
$pageData->embeddedStyle
</head>
<body>
$pageData->content
</body>
</html>";
It would be equally easy to declare a property value from index.php, but let’s do something different. The problem is that sometimes you don’t need any embedded <style> element and sometimes you do.
Now that your template has a placeholder for embedded CSS, that property must always have a value. You don’t want to waste time declaring a value for a redundant <style> element, so let’s make a more intelligent solution. Let’s take the next step toward object-oriented programming and create a custom class for page data. Create a new folder, called classes, in your project folder. Create a new file, called Page_Data.class.php, in the classes folder.
<?php
class Page_Data {
    public $title = "";
    public $content = "";
    public $css = "";
    public $embeddedStyle = "";
}
That’s it—a custom-made class with predefined empty string values for those properties required by the page template. The keyword class indicates that the name following is a custom class name.
PHP class names can begin with letters or an underscore. It is conventional to begin with an uppercase letter. If the class name is a compound word, it is common to separate individual words with an underscore character and begin the next word with an uppercase letter, for example, My_Custom_Class_Name.
I usually keep each of my custom PHP class definitions in a separate file named like the class name. I also like to end the file name with an optional suffix of .class.php. So, the file for My_Custom_Class_Name would be called My_Custom_Class_Name.class.php.
Following the class name comes a set of curly braces, to delimit a code block for the class definition. Take a look at the code block for Page_Data. Inside the curly braces, four properties are declared, using the public keyword. The effect is that the Page_Data class will be born with four default properties, each with a default value declared.
Classes Make Objects
You can use the new class definition from index.php. It will be a tiny change. Update index.php as follows:
//Partial code listing for index.php
include_once "classes/Page_Data.class.php";
$pageData = new Page_Data();
//delete or comment out the previous object
//$pageData = new stdClass();
//no changes below this point
Load http://localhost/ch2/index.php in your browser, to test your code. Your site should work exactly as before. You know you have made some changes to the code, but these changes are not visible to ordinary users. You have refactored the code.
To use a custom-made class, you must first include the class definition. Next, you must use the new keyword to create a new object with the class definition. The Page_Data class enables us to keep a placeholder for embedded styles in the page template and only assign an actual value to that property whenever you need a page with an embedded <style> element.
Highlighting Current Navigation Item with a Dynamic Style Rule
You have a page template and a Page_Data object, and they are prepared to work with embedded styles. You would usually want to keep your style rules in an external style sheet. With dynamic web sites, this convention still applies, but because you can embed styles into index.php, you can quite easily work with dynamic styles. Most of the time, good ole external style sheets do the job just fine. But there are a few cases in which dynamic styles are quite powerful. You can use a dynamic style rule to highlight the current navigation item. It’s really quite simple, once you get the idea. Update index.php as follows:
<?php
//complete code listing for index.php
error_reporting( E_ALL );
ini_set( "display_errors", 1 );
include_once "classes/Page_Data.class.php";
$pageData = new Page_Data();
$pageData->title = "Thomas Blom Hansen: Portfolio site";
$pageData->content = include_once "views/navigation.php";
$pageData->css = "<link href='css/layout.css' rel='stylesheet' />";
$navigationIsClicked = isset($_GET['page']);
if ($navigationIsClicked ) {
    $fileToLoad = $_GET['page'];
} else {
    $fileToLoad = "skills";
}
$pageData->content .=include_once "views/$fileToLoad.php";

//new code below: dynamic style added below
$pageData->embeddedStyle =  "
<style>
nav a[href *= '?page=$fileToLoad']{
    padding:3px;
    background-color:white;
    border-top-left-radius:3px;
    border-top-right-radius:3px;
}
</style>";
$page = include_once "templates/page.php";
echo $page;
Save your work and load the index into your browser. You should see a simple, tabbed navigation with the current navigation item clearly highlighted. In the following example, I have clicked the “Some projects” navigation item. Users can clearly see which page is displayed, because of the highlighted navigation tab. You can see my example in Figure 2-2.
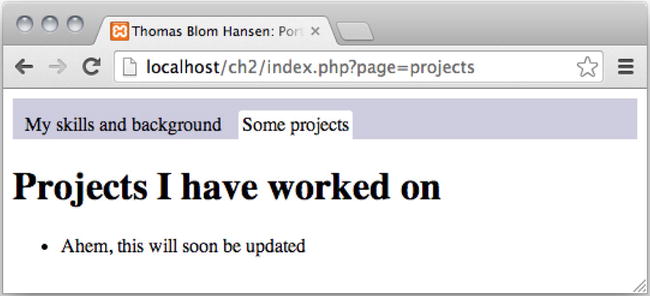
Figure 2-2. Current navigation item highlighted with a dynamic style rule
You know some PHP, so you know all this happened because the URL variable named page has a value of skills. It may not be much of a visual design just yet, but it should be enough for you to apply all your CSS skills to design a beautiful user interface.
Taking a Closer Look at the Dynamic CSS
The used CSS attribute selector is not so commonly used. Let’s take a closer look at it.
nav a[href *= '?page=$fileToLoad']
First of all, notice the PHP variable $fileToLoad. It is a placeholder for an actual value. For example, when a user clicks the “Some projects” navigation item, $fileToLoad will have a value of projects, because the URL variable named page has a value of projects. You can see it in the address bar on the browser screenshot in the preceding figure. So when the browser interprets the CSS, it really sees the following:
nav a[href *= '?page=projects']
The selector tells the browser something such as “look for a <nav> element inside which you find an <a> element with an href attribute that contains the string ?page=projects.”
Pretend you are the browser. Look in your <nav> element. Look for an <a> element that has an href attribute that contains ?page=projects.
You—and the browser—will find only one such <a> element. The browser will apply a special style rule to that <a> element that will essentially highlight it.
Summary
Now you have seen how to use a little basic PHP to build a very dynamic site. Your learning process will probably benefit from a bit of experimenting at this point.
You could try to complete a personal portfolio site. Add however many page views you see fit and update your navigation accordingly.
You could try to create some more comprehensive page views. In the process, you will gradually become more comfortable with the dynamic site structure where page views are returned to be displayed on index.php.
You could use your existing CSS skills to develop a consistent web site design for your portfolio. It will be a very good exercise to use your existing HTML and CSS skills in this new context of dynamic sites. It will probably be relatively easy for you, because the portfolio site is quite simple. It is a good idea to get this exercise while the site you are working on is simple. The kinds of dynamic sites you develop will soon be anything but simple.
When you feel ready for it, flip the page to learn about HTML forms, PHP functions, and conditional statements, all of which you will encounter in Chapter 3.