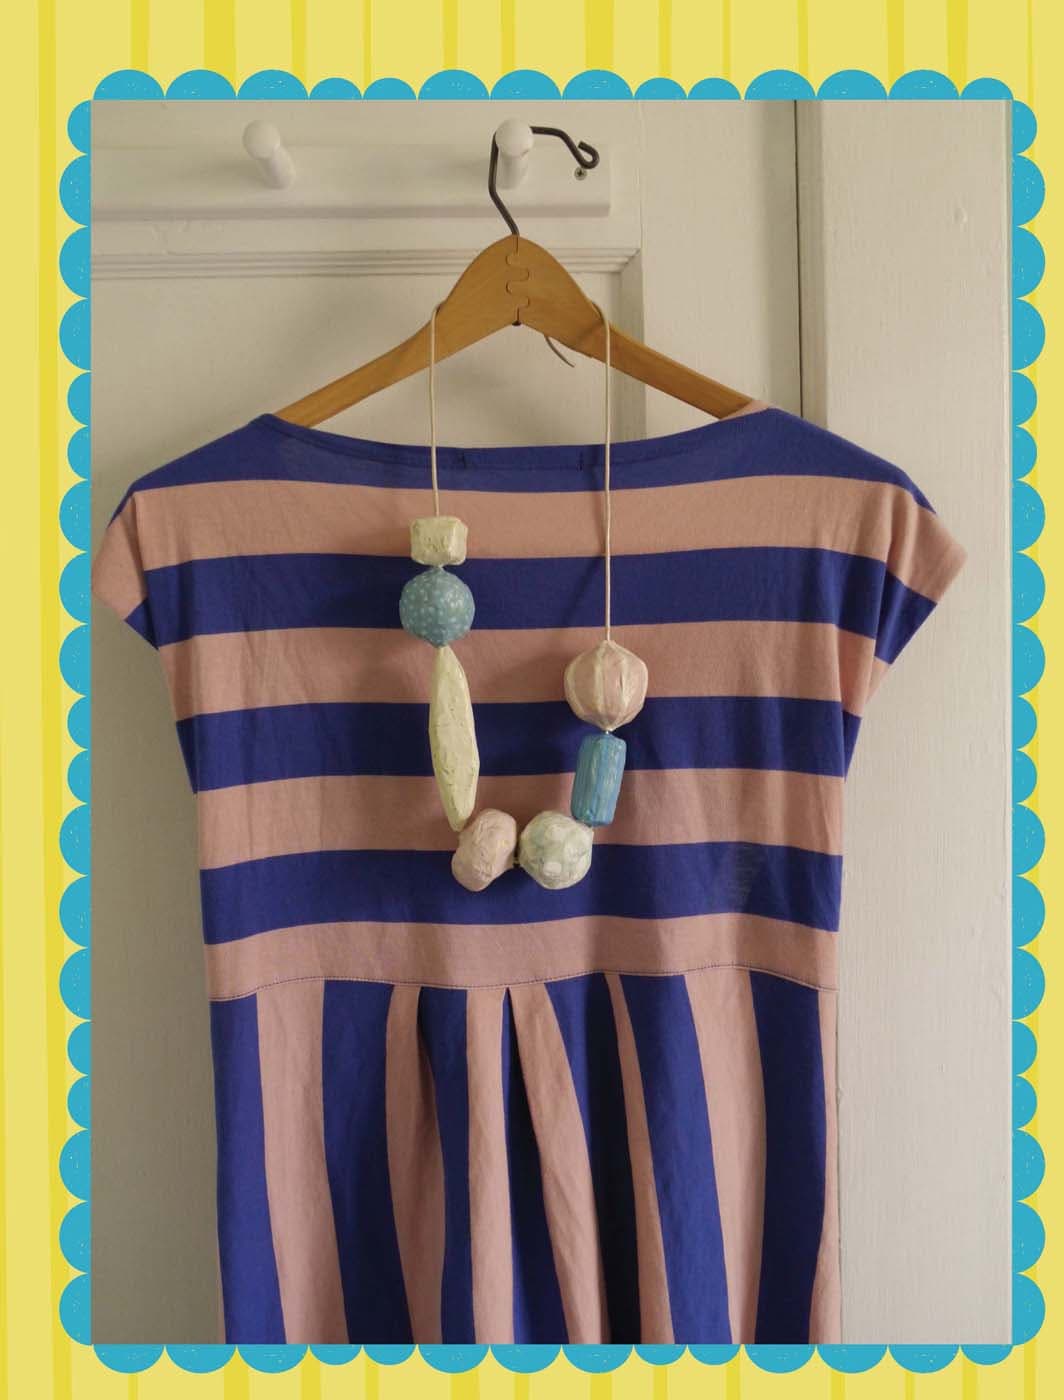

Chunky Beaded Necklace
If you like dramatic jewelry, this project is for you. Simple shapes and layered, textured paint make this necklace super fun to create and even better to wear.
STEP 1
Begin by doodling a few shapes for your beads. Plan to make a handful of beads so that you have options and can play with their configuration when you string them.

STEP 2
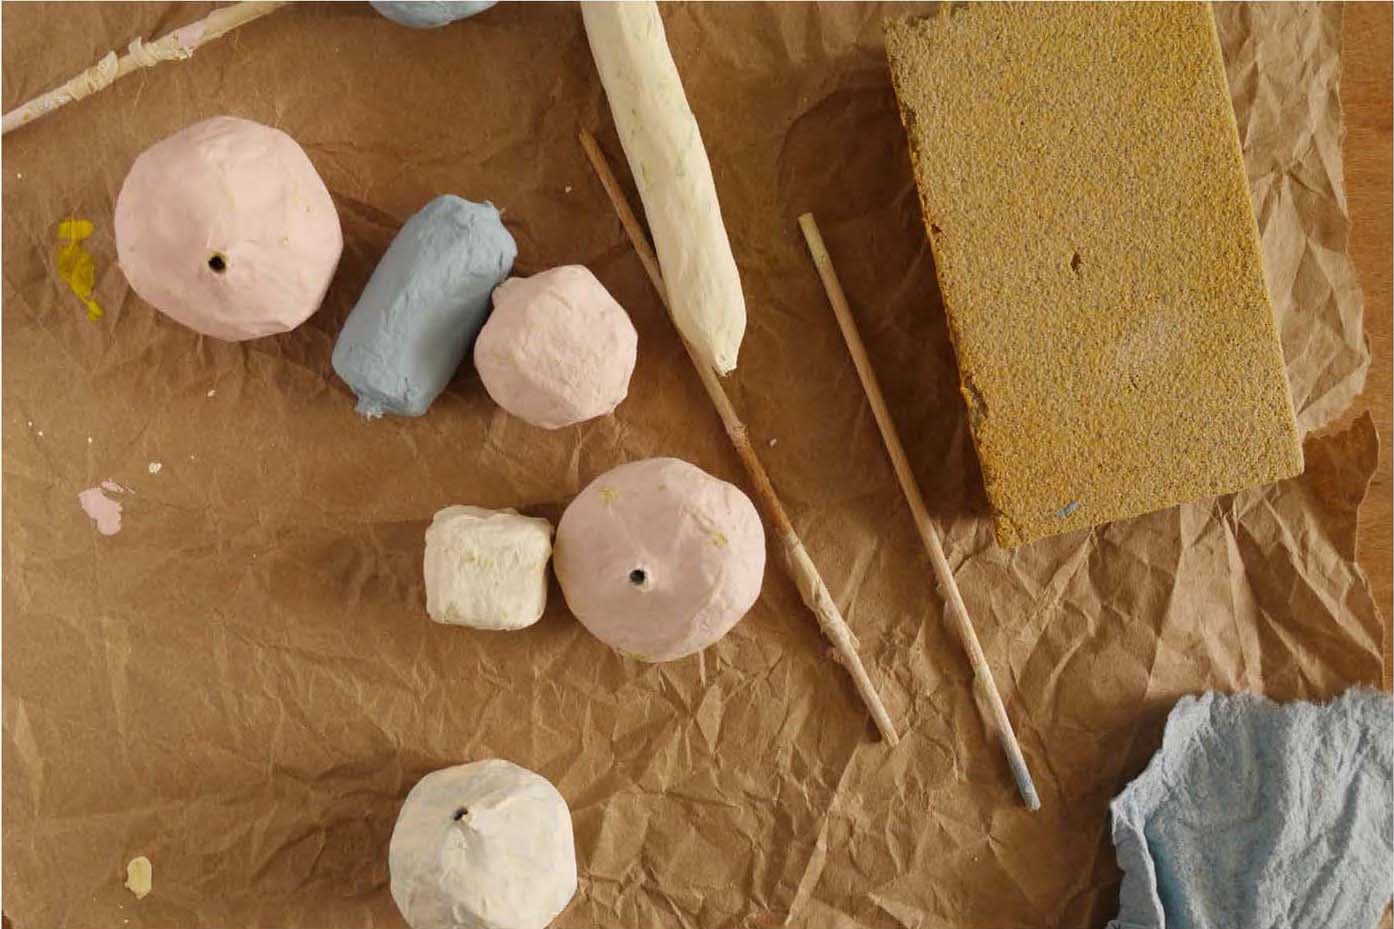
Easy to shape, strong, and lightweight for wearing, aluminum foil will form the base of these beads. Tear a piece of foil and crumple it in the middle to divide it in half. Very lightly tape a dowel to the center of the foil, ensuring that the dowel hangs off both sides of the foil. Repeat for each bead.

STEP 3
Squish and pinch the foil into the bead shapes you want, working with half of each bead at a time. You can roll the beads on a hard surface to compress and shape the foil. Make sure to keep the dowels in the centers of the beads.

STEP 4
Place masking tape around each bead, ensuring that a bit of tape is stuck to each dowel as well so that the beads don’t move around as you work on them.

STEP 5
Once you’re happy with your beads, it’s time to papier-mâché them! Make your paste and tear up some paper. Use small pieces of paper so that they adhere to the beads. Go slow and really rub down the paper as you place at least two layers on each bead. Cover the whole area of each bead so that the foil doesn’t show. Let the beads dry.

STEP 6
Sand off any sharp bits or lumps that need smoothing; then wipe off the dust with a paper towel.

STEP 7
Gesso the beads and let them dry. They will dry best if standing. You can stick the dowels in a piece of Styrofoam, set them in a jar if they’re long enough, or prop them up so that the bead doesn’t rest on the table.

STEP 8
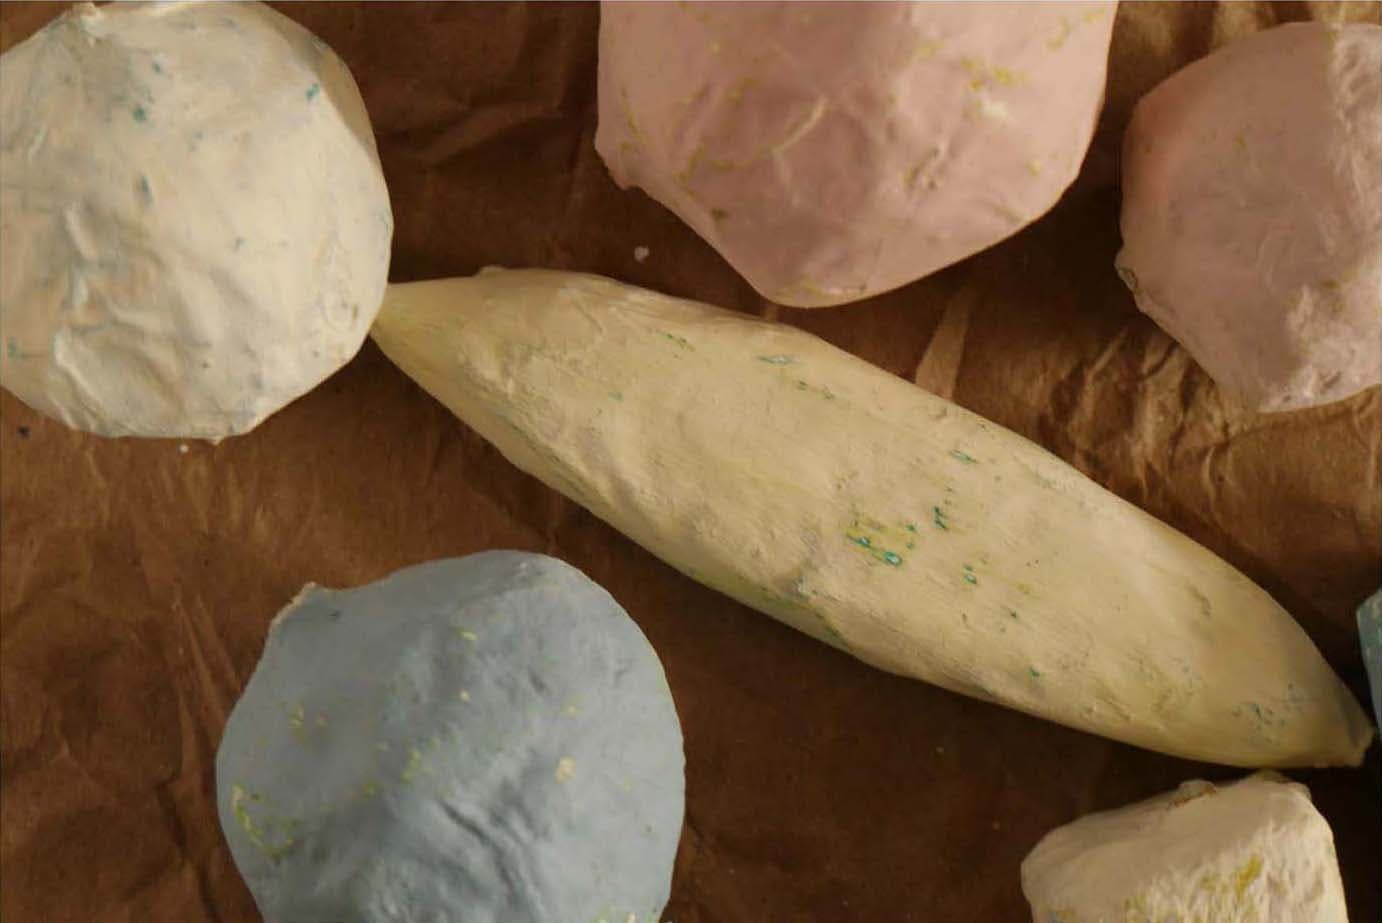
Add paint! These beads are big and bold, so choose a pleasing color scheme. Let’s add a bit of texture to the beads too.
Begin by underpainting each bead; then let this layer dry completely. I've used shades of green and then added my final color scheme of light pinks, blues, ivory, and white. Let this layer dry thoroughly as well.

STEP 9
Remove the dowels to prepare for the next step. Hold a bead gently but firmly in one hand and use the other hand to twist each dowel to loosen the bead.
STEP 10
This step is optional, but weathering the paint will give the beads added interest and depth. Take your sanding sponge and, with a light touch, scuff the beads so that elements of the underpainting are revealed. You can choose to weather them very lightly or take a lot of the outer paint layer off. If you don’t like how it looks, just repaint and let dry! Wipe off the scuffed paint with soft paper towel.
STEP 11
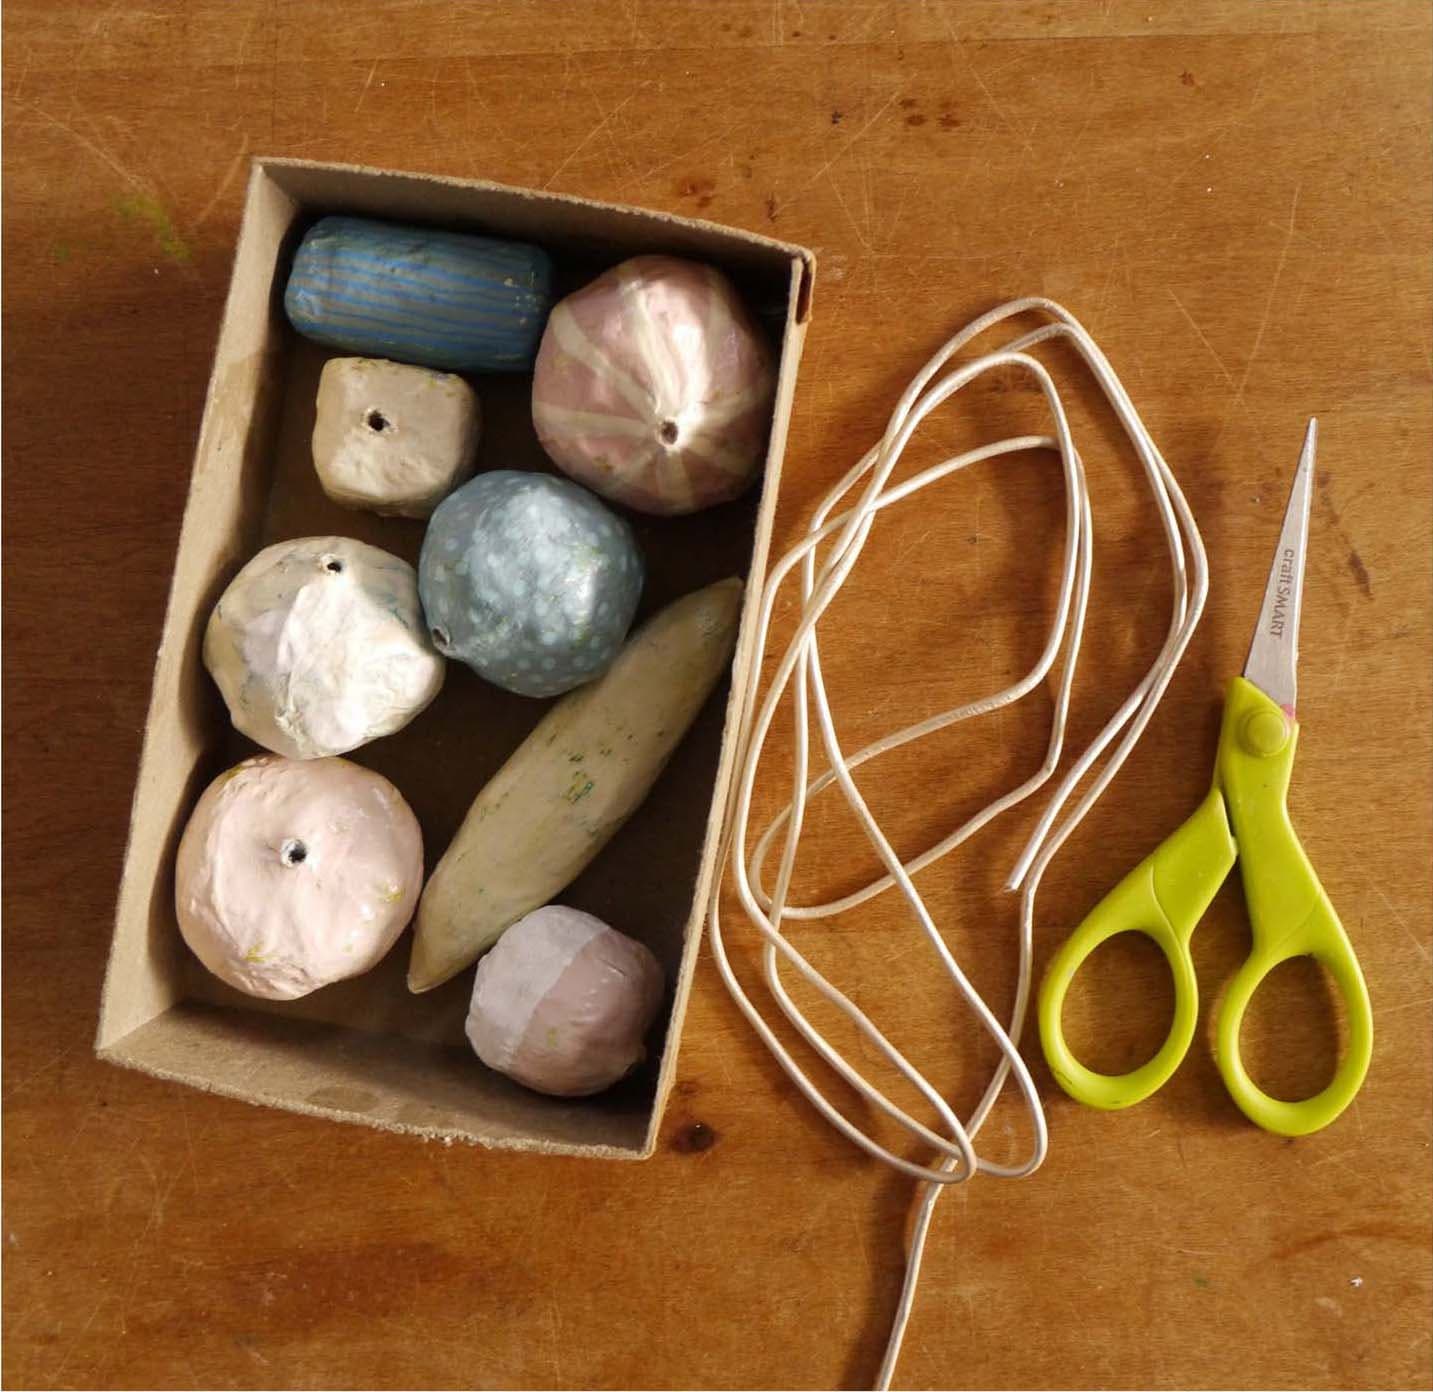
If you want to add patterns to your beads, now is the time. You can use paint pens or a fine paintbrush with paint. Take your time with small details. Dots and stripes make excellent choices, but you can experiment with anything!

STEP 12
Seal those baubles! Extra layers of sealer are important here to keep your necklace durable and the paint from chipping with wear. Let each layer dry before adding another one—three layers are ideal!

STEP 13
Play around with the arrangement of the beads to decide on their configuration. Then cut a piece of leather cord, fabric, or ribbon long enough for stringing the beads, knotting, and fitting over your head.
Now, string the beads. If you use leather cord, you can slide it through the holes in the beads, but you will need a large needle with a big eye if you use fabric or ribbon.
STEP 14
Make a simple knot in the string and pop the necklace over your head. Be the envy of everyone you know!