
As we have discussed, backend testing is pretty much web application testing, however, there are a few things we need to set up, to be able to see HTTP/HTTPS traffic in our favorite proxy, Burp Suite.
In order to test server-side vulnerabilities present in mobile apps, a proxy is an indispensable tool in a tester's arsenal. There are quite a few ways to configure the proxy based on what network you are using and the availability of an emulator/physical device. In this section, we will explore two such options to configure Burp Suite via Wi-Fi and APNs.
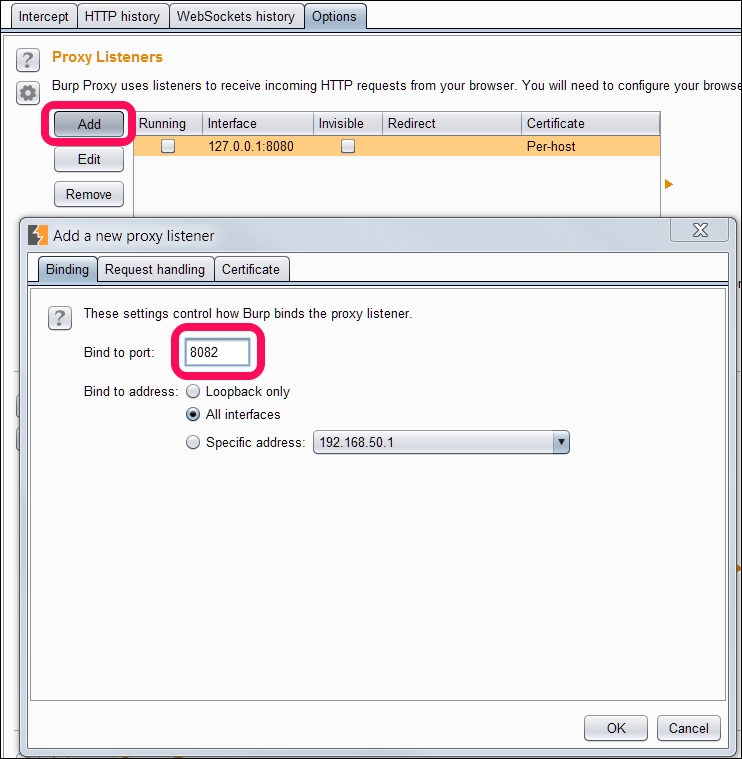
First step in this process is to make our proxy listen on a port, in our case it's 8082:
- Go to Proxy | Options from the context tabs.
- Click on the Add button.
- Fill in the port to bind and select All interfaces as shown in the following screenshot:
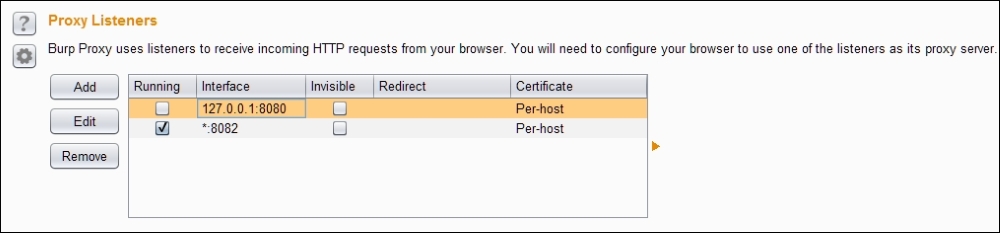
- Make sure that the Alerts tab shows Proxy service started on port 8082.
- If everything goes well, you should see a screen similar to the following:
Now that we have started our proxy, let's configure our emulator/device to proxy all the requests/responses via our proxy to see what's going on behind the scenes.
We can enable our proxy for all the communication between the Android device and backend by following the steps below:
- Click on the Menu button.
- Click on the Settings button.
- Under Wireless & Networks, select More.
- Select Cellular Networks.
- Go to Access Point Names (APNs):
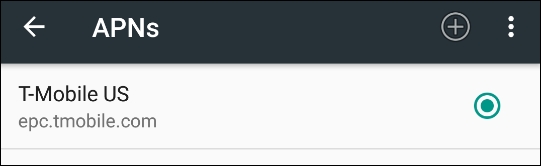
- Select the Default Mobile service provider:
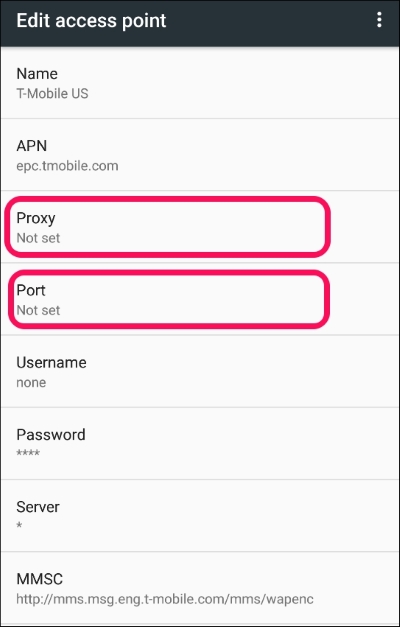
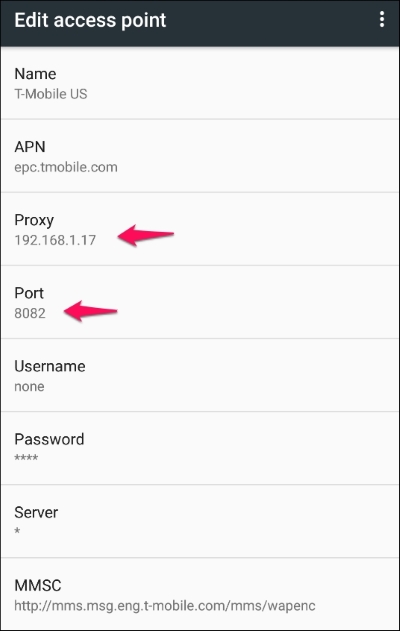
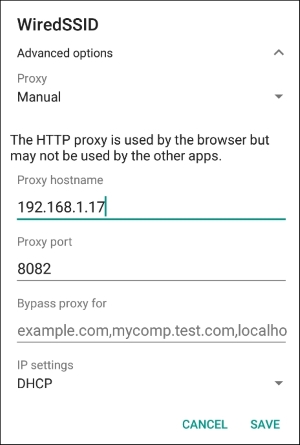
- Under the Edit access point section, fill in your proxy and port, in our case it's
192.168.1.17and8082respectively. - We should see the following screen once the proxy is set up:
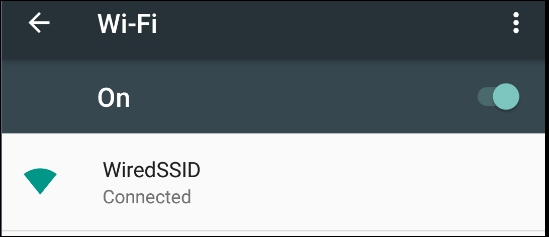
The easiest way to configure a proxy is via Wi-Fi and it is recommended as it's easy to set up and test. Before we continue to set up the proxy, we need to connect to Wi-Fi and authenticate. Check if you are able to access any Internet resource like www.google.com:
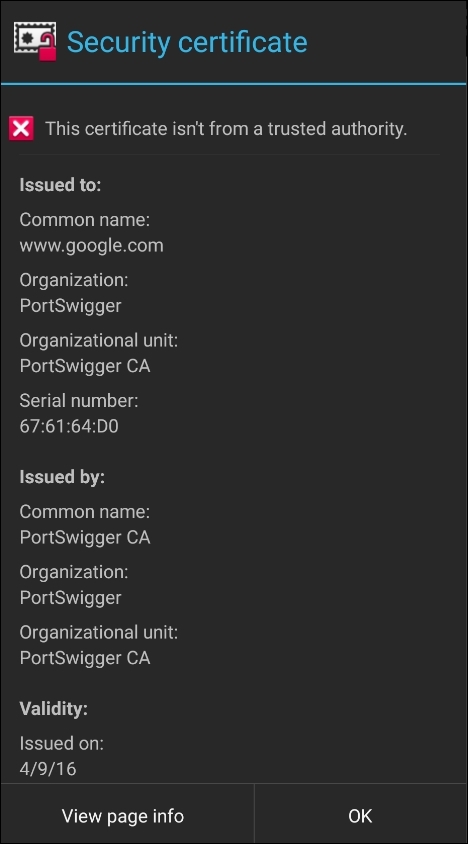
Let's check if our proxy settings are working fine, by visiting www.google.com. To our surprise, we see an SSL certificate warning:

Click the Continue button to see a HTTP(S) request in Burp Proxy:
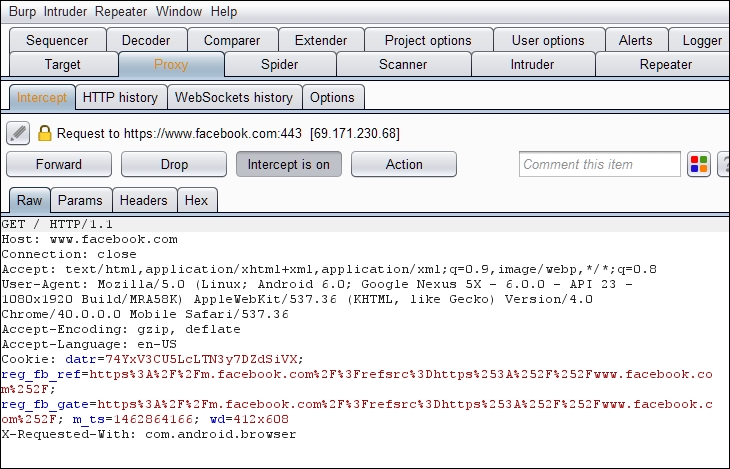
For curious souls, the security warning is because Burp Suite is behaving as a man in the middle and our browser can't authenticate the certificate issuer and so raises a certificate warning.
If we click on the View Certificate button, we will see the Certifying Authority is PortSwigger CA, but it should be Google Internet Authority G2:
To avoid this popup every time, we need to install Burp's certificate to the Android device. By adding the cert into the device's trusted store, we are deceiving the app to consider Burp's certificate as trusted.
Please follow the instructions below to install the certificate:
- Open the browser on your computer (here, Firefox) and configure the proxy settings by following the path Tools | Options |Advanced | Network |Connection | Settings:
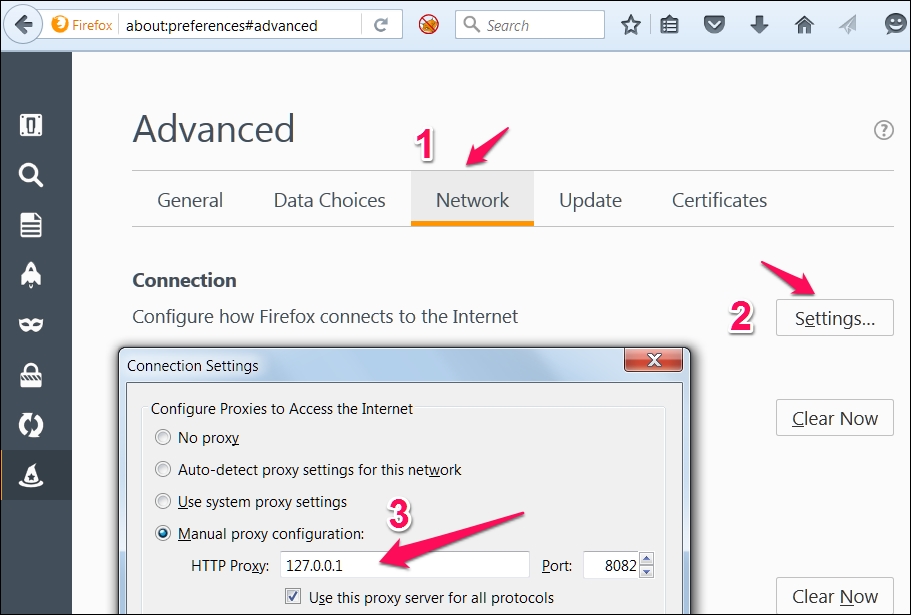
- In the context menu, fill in the hostname or IP address of your proxy and port number.
- Visit
http://burp/and download the CA certificate and save it onto the file system: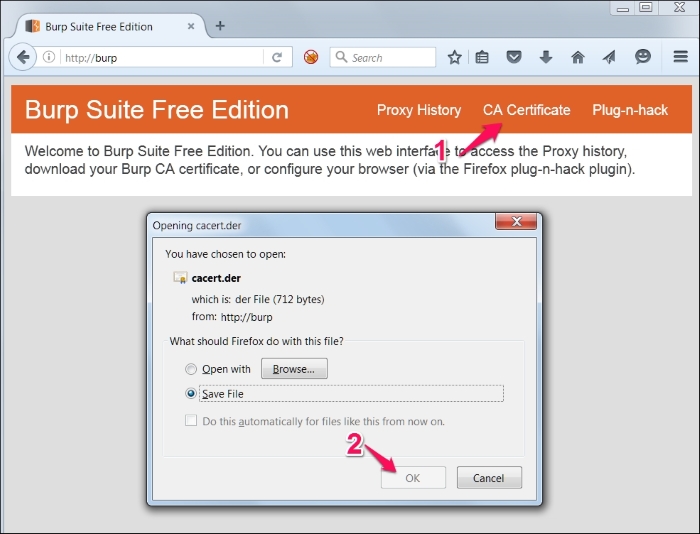
Or you can also go to Proxy | Options and export the certificate in der format as shown below:
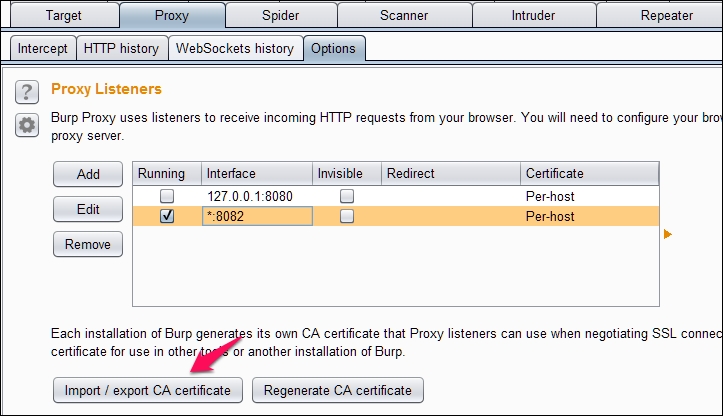
- After clicking Import/export CA certificate in the previous step, we should see the following window:
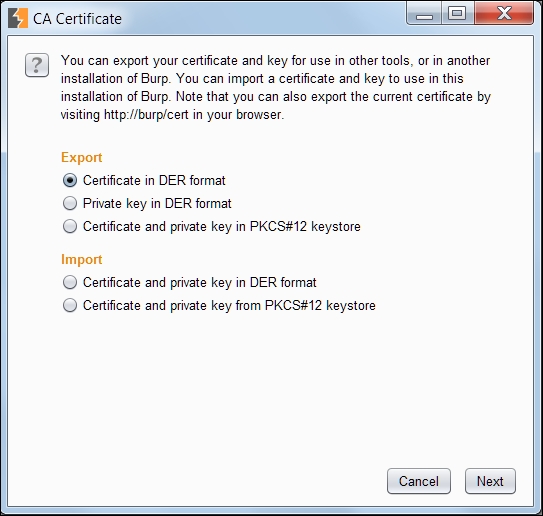
- Rename the
.derto.cerby changing the extension, we will transfer this file onto the Android file system and install it on the device using the following commands as discussed in previous chapters:C:> adb push cacert.cer /mnt/sdcardOr we can just drag and drop the certificate into the device. The directory where the certificate is copied might vary according to your device and android version:
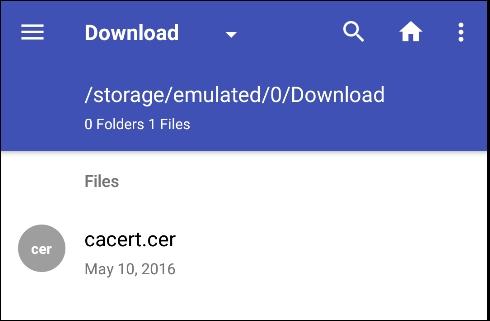
- To install the certificate, navigate to Settings | Personal | Security | Credential storage | Install from Storage go to
.cerfile.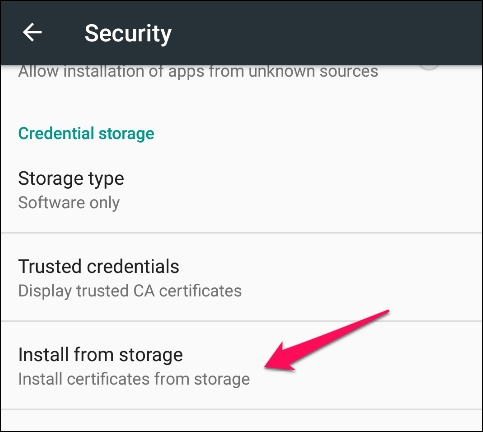
- Fill in any name of your choice for the CA. You need to set the PIN if you are not already using it for certificate storage:

- We will receive a BurpProxy is Installed message, if everything went well.
- We can verify the certificate by going to Trusted credentials:
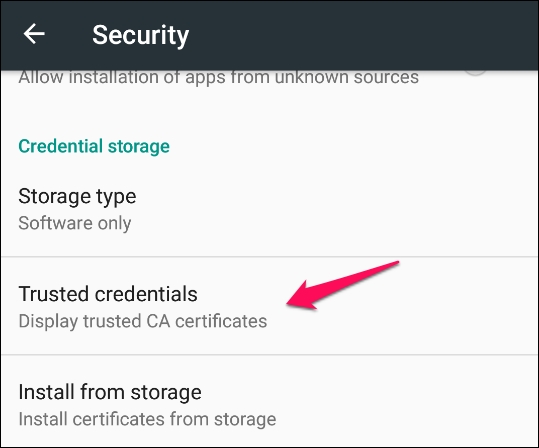
- The following screen will appear after tapping on the Trusted credentials option:
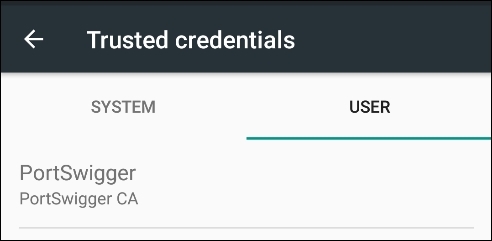
- We can see that the PortSwigger CA certificate is installed and we can say goodbye to the certificate warnings.
Installing the Burp CA certificate gets rid of the annoying popups and helps to save some time for testers.
HSTS policy helps supported clients in avoiding cookie stealing and protocol downgrade attacks. When a user tries to access a website HTTP, HSTS policy automatically redirects the client to https connection and if the server's certificate is untrusted it doesn't let the user accept the warning and continue. HSTS is enabled by using the following header:
Strict-Transport-Security: max-age=31536000
By adding the CA certificate into a trusted store, the redirection doesn't raise a certificate warning, thereby helping testers save some time.
In the previous section, we learnt how to intercept SSL traffic of Android applications. This section shows how to bypass a special scenario called SSL/Certificate Pinning where apps perform an additional check to validate the SSL connection. In the previous section, we learnt that Android devices come with a set of trusted CAs and they check if the target server's certificate is provided by any of these trusted CAs. Though this increases the security of data in transit to prevent MITM attacks, it is very easy to compromise the device's trust store and install a fake certificate and convince the device to trust the servers whose certificates are not provided by a trusted CA. The concept of Certificate Pinning is introduced to prevent this possibility of adding a certificate to the device's trust store and compromising the SSL connections.
With SSL pinning, it is assumed that the app knows which servers it communicates with. We take the SSL certificate of this server and add it to the application. Now the application doesn't need to rely on the device's trust store, rather it makes its own checks verifying if it is communicating with the server whose certificate is already stored inside this application. This is how SSL pinning works.
Twitter is one of the very first popular apps that has implemented SSL pinning. Multiple ways have been evolved to bypass SSL pinning in Android apps. One of the easiest ways to bypass SSL pinning is to decompile the app binary and patch SSL validation methods.
It is suggested to read the following paper written by Denis Andzakovic, to achieve this:
Additionally, a tool called AndroidSSLTrustKiller is made available by iSecPartners to bypass SSL pinning. This is a Cydia Substrate extension which bypasses SSL pinning by setting up breakpoints at HttpsURLConnection.setSocketFactory() and modifying the local variables. The original presentation is available at the following link:
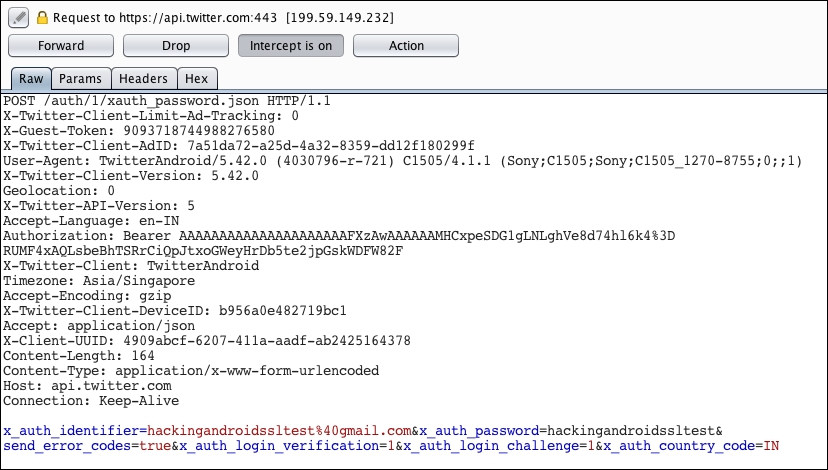
This section demonstrates how to use AndroidSSLTrustKiller to bypass SSL Pinning in the Twitter Android app (version 5.42.0). AndroidSSLTrustKiller can be downloaded from https://github.com/iSECPartners/Android-SSL-TrustKiller/releases.
When SSL Pinning is enabled in the Android app, Burp Suite doesn't intercept any traffic from the application since the certificate that is pinned inside the app doesn't match with the one we have at the Burp proxy. Now install Cydia Substrate in the Android device and install the AndroidSSLTrustKiller extension. You need to reboot the device for the changes to take place. After rebooting the device, we can check out the traffic from the Twitter application once again and we should be able to see it as shown in the following screenshot:
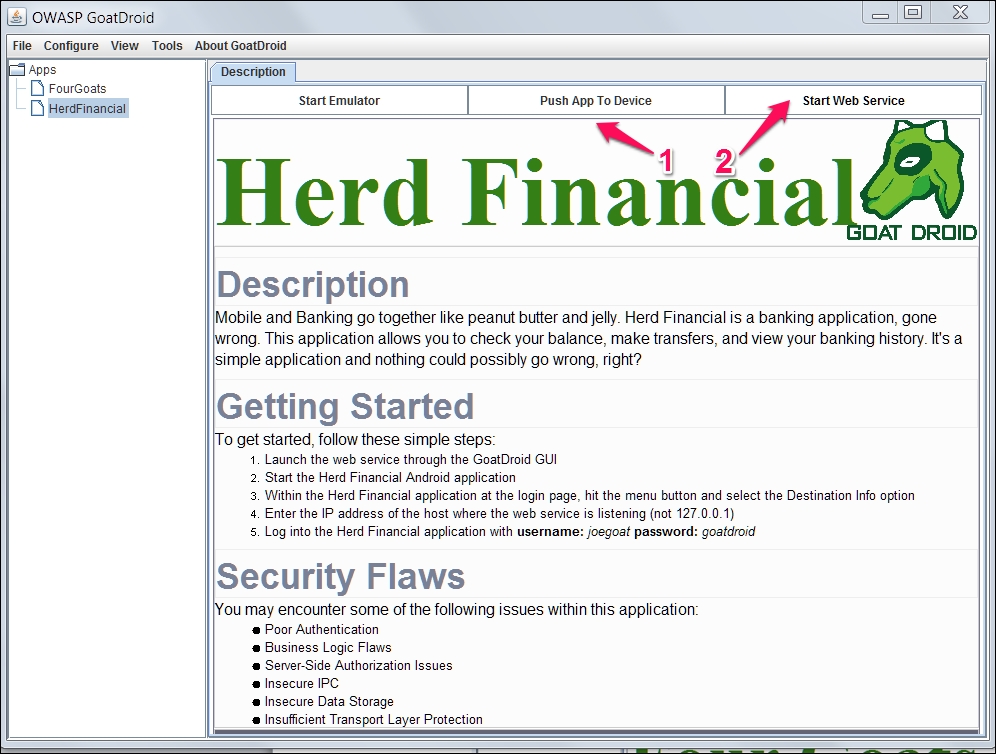
We are going to use OWASP GoatDroid vulnerable app for our demos to showcase server side vulnerabilities as there is nothing new from a server side attack perspective.
There are two apps in GoatDroid, FourGoats and Herd Financial, we will be using Herd Financial, a fictitious bank app in this chapter.
Following are the steps to the GoatDroid installation:
- Installation of the mobile app (client) onto the mobile device.
- Running of the GoatDroid web service (server).
We can download GoatDroid from the following URL:
https://github.com/downloads/jackMannino/OWASP-GoatDroid-Project/OWASP-GoatDroid-0.9.zip
- After extracting the ZIP, we should start the backend service app by running the following command. Click the Start Web Service button to start the web service under HerdFinancial as shown below:
C:OWASP-GoatDroid-Project>java –jar goatdroid-0.9.jar - Next, we also need to install the mobile app on the device, that is, GoatDroid Herd Financial app by using the following command:
C:OWASP-GoatDroid-Project goatdroid_appsFourGoatsandroid_app>adb install "OWASP GoatDroid- Herd Financial Android App.apk" - Alternatively, you can push the app from the web service screen as shown in following screenshot:
We need to configure the server IP address and port number (9888) under Destination Info at the home screen of the mobile app. We then need to set up the proxy as discussed in previous sections to capture the request.
Web services (SOAP/RESTful) are services which run on HTTP/HTTPs and are pretty much similar to web applications. All the web applications attacks can be possible with mobile backend as well. We will now discuss some common security issues that we see in APIs.
We will try to relate our discussion on server side issues with OWASP mobile top 10 risks to provide another angle to look at these issues. However, we will not discuss the client side attacks as we have already discussed these attacks in previous chapters.
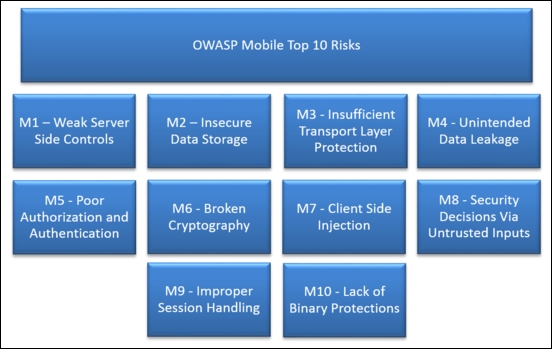
Among OWASP mobile top 10 risks, the following risks are associated with the server side, we will use these as a legend going forward:
- M1: Weak Server-Side Controls
- M2: Insecure Data Storage
- M3: Insufficient Transport Layer Protection
- M5: Poor Authorization and Authentication
- M6: Broken Cryptography
- M8: Security Decisions via Untrusted Inputs
- M9: Improper Session Handling
Most web services use custom authentication to authenticate to APIs, usually the token is stored at the client side and reused for every request. Apart from testing the security of token storage we have to make sure of the following:
- Secure transmission of the credentials over TLS
- Using strong TLS algorithm suites
- Proper authorization is being done at the server side
- Securing of login page/endpoint from brute force vulnerability
- Use of strong session identifier
You can find more information about the authentication and authorization attacks in the OWASP testing guide and cheat sheets.
We will now see a demo of a few authentication and authorization vulnerabilities using the OWASP GoatDroid app.
Mobile Top 10 related risks: M5, M1
As we can see below, this app lets users login, register an account, and retrieve a forgotten password:
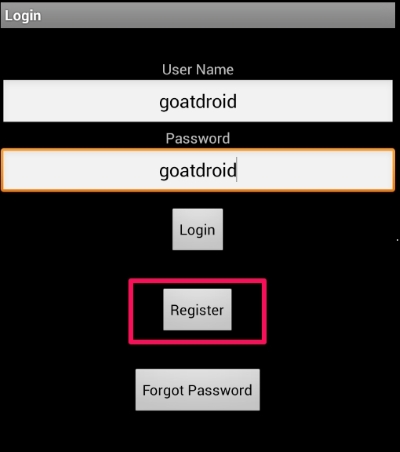
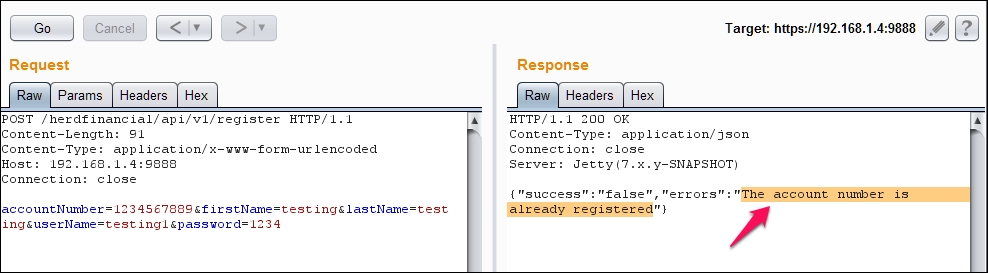
Let's try registering an account and see what request is being fired to the API:
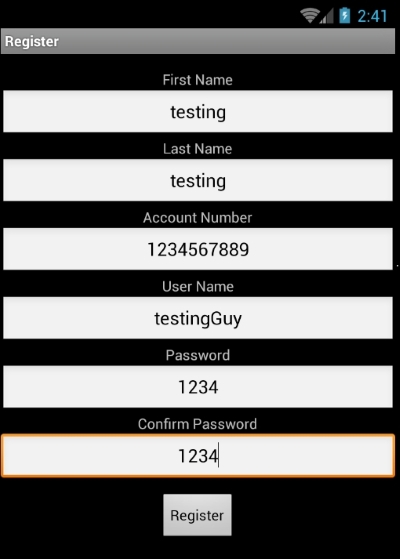
What happens if we try to register another account with the same account number or same user name?
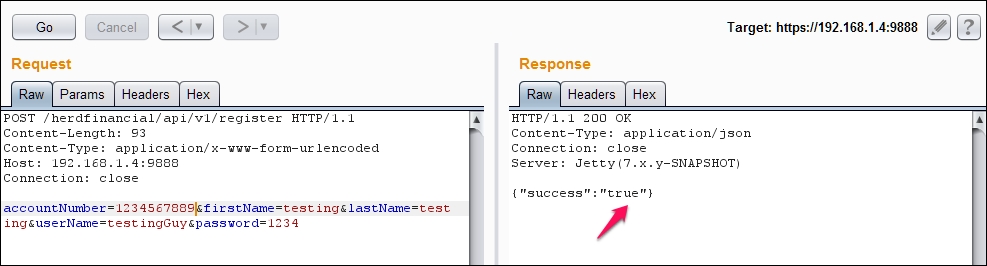
Interestingly, we can find out usernames and bank account numbers:
As we can see, we can try different scenarios related to authentication and authorization. Attack vectors are limited to how creative an attacker can get.
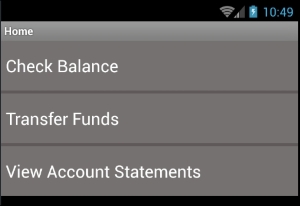
As we can see below, this app lets you check balance, transfer funds, and view account statements:
I have configured the burp suite as discussed in previous sections to capture HTTP/HTTPS requests.
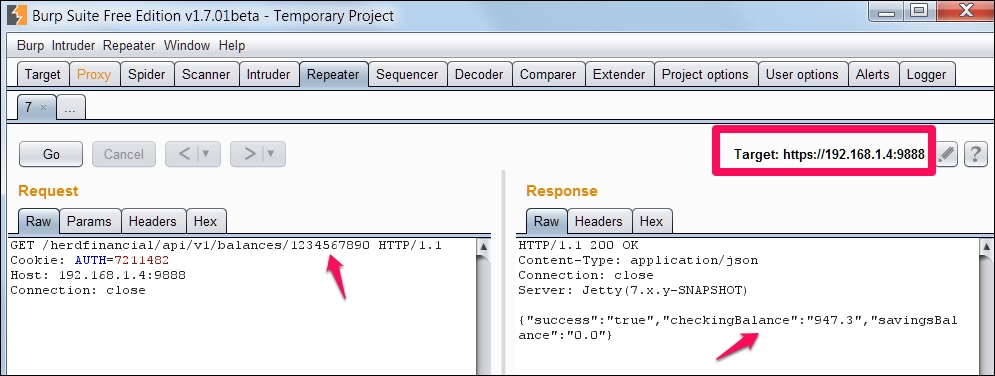
Let's click on the
Check Balance button to ask the server our account balance, as we can see a request is fired to the server on /balances endpoint. Please note the account number 1234567890, and session ID, AUTH=721148.
As we can see below, this particular account has a balance of 947.3.
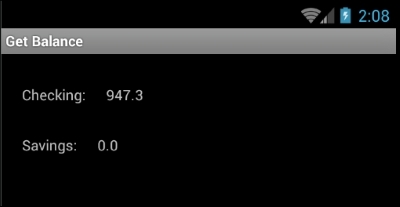
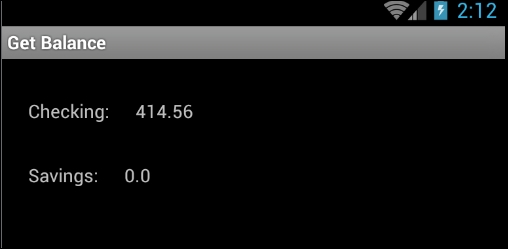
We can see the same balance displayed on the mobile app as well:
We can change our account number to any account number and see their balance as there is no proper authorization check being performed at the backend:
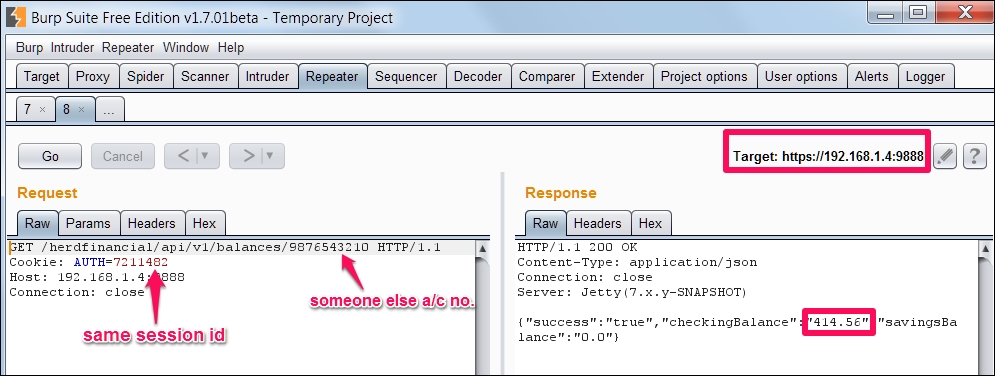
We can see the same balance, 414.56, of someone else's account displayed on the mobile app as well:
Session management is how you maintain state in mobile applications and as discussed previously, is typically done using an authentication token. Some of the common issues related to session management are as follows:
- Weak session token generation with insufficient length, entropy, and so on
- Insecure transmission of the session token post authentication
- Lack of proper session termination at the server end
You can find more information about the session management attacks in OWASP Testing Guide and Cheat Sheets.
Mobile Top 10 related risks: M3, M1
As we have seen in the Authentication and Authorization section, the AUTH session token uses a cryptographically weak token. We should at least use a tried and tested random number to create the token:

Even though use of SSL/TLS is not costly as it used to be, we see many applications still don't use TLS and if they do it's configured pretty badly. MITM attacks are pretty serious threats to mobile apps, we have to make sure android apps check at least the following few security checks:
- Data is transferred only on SSL/TLS by using HSTS
- Use a CA issued certificate to communicate to the server
- Use certificate pinning for certificate chain verification
Our demo app doesn't use any of the best practices like CA issued certificate, HSTS, Certificate pinning, and so on, as we are able to use burp proxy without any issues.
Mobile Top 10 related risks: M5, M1
Input fields are gateways to applications and this holds true even for mobile applications. It's not rare to see vulnerabilities like SQL injection, Command Injection, and Cross Site Scripting vulnerabilities if there are no input validation controls implemented at the server side.
Mobile Top 10 related risks: M5, M1, M8
Attackers can glean lots of important information from error messages. If error handling is not properly done, the application will end up helping attackers in compromising the security of the service.
Mobile Top 10 related risks: M1
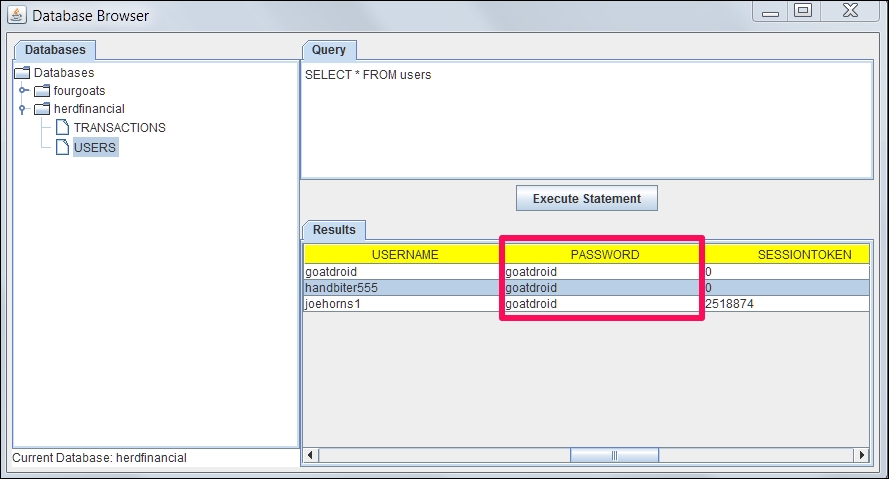
We have already covered the client side data storage security, so we will only consider insecure data storage from a server side perspective. If the data stored at the server is stored in clear text, an attacker who gained access to backend can readily make use of this information. It's paramount to store all passwords in a hashed format and wherever possible, the data at rest should be encrypted including data backups.
Mobile Top 10 related risks: M2, M1
As we can see in the following screenshot, the Herd financial demo app stores the user credentials in clear text. If an attacker gets hold of this information, he can login into every account and transfer the money to an offshore account:
It is also important to notice that attackers may get unauthorized access to the database directly. For example, it is possible for an attacker to gain unauthorized access to the database console such as phpmyadmin if it is not secured with strong credentials. Another example would be access to unauthenticated MongoDB console, as the default installation of MongoDB doesn't require any authentication to access its console.
Mobile Top 10 related risks: M1
We have discussed different server side vulnerabilities, how to configure burp suite for testing server side issues, and we have also discussed techniques to bypass HSTS, certificate pinning.