
Appendix A. Troubleshooting
Photos for Mac is a brand-new program, and while it’s based on an app that’s been around awhile—Photos for iOS—it has to deal with the far more complicated interaction of OS X apps, automation, upgrading two kinds of libraries (iPhoto and Aperture), and more. Photos for Mac also has to support all the devices you connect to it, such as old iPhones, iPads, digital cameras, hard drives, and the like.
So it’s no wonder that Apple focused on getting all the pieces and parts to work, rather than including every feature of iPhoto and Aperture. Thankfully, that makes this troubleshooting appendix less about soothing you because nothing is working, and more about how to work around a missing feature that you formerly relied on.
That said, apps and the brainy engineers who make them aren’t perfect. Alas, from time to time, bugs sneak into the mix and weird stuff just happens (especially when you’re in a hurry). Whether it’s Photos for Mac or Photos for iOS that’s gone rogue, this appendix teaches you how to handle the most common problems you’re likely to encounter.
The Big Takeaway
If you’ve used a new Apple app before, you know that a bug (or three) are fairly common. When this happens, the Apple community at large rises up and makes the bugs known by assaulting the support section on Apple.com with fiery posts or, if it’s really bad, they take to the phone lines. Apple’s engineers then spring into action and fix the problem(s), and a few weeks later the Mac App Store notifies you of a software update. That’s just how it goes with new apps. (Of course, there’s no excuse for a company to release bug-riddled software, but that’s never really been the case with Apple. Aside from a few glitches here and there, Apple software is solid.)
The big takeaway here is to always use the latest version of Photos. That’s it. If the Mac App Store notifies you of an update, for Thor’s sake, save yourself some stress and install it. If you’re not sure whether you’re running the latest version, choose ![]() →App Store and, in the Mac App Store window that opens, click the Updates tab. If you see a Photos update, click Update. Doing so may fix whatever the trouble you’re experiencing.
→App Store and, in the Mac App Store window that opens, click the Updates tab. If you see a Photos update, click Update. Doing so may fix whatever the trouble you’re experiencing.
Upgrading and Importing
Overall, most people report a smooth upgrade process from iPhoto or Aperture to Photos—aside from grieving over the loss of some features, that is. But if “overall” means “everyone but you,” this section has suggestions for dealing with a library that stubbornly refuses to open or upgrade, and tells you why Photos won’t let you see some of the stuff you had in those other libraries.
Note
Most of the troubleshooting advice for importing and upgrading iPhoto and Aperture libraries to work with Photos is covered in Chapter 1. So if your particular problem isn’t listed in this section, flip back to that chapter for help.
Should I remove duplicate images from iPhoto or Aperture before I upgrade to Photos?
No. Photos is smart enough not to import multiple copies of a picture or video. Even if you combine Photos libraries using the technique on Merging Libraries, duplicates shouldn’t appear. But if you insist upon tidying up your iPhoto or Aperture library, check out the $8 Duplicate Annihilator for iPhoto (www.brattoo.com/propaganda). They also have an $8 version for Photos, in case you accidentally import duplicates later on.
Photos says it’s unable to upgrade my photo library. Why?
If this happens, there may be locked files somewhere inside your iPhoto or Aperture library. If something’s somehow gotten locked, Photos can’t convert it to the latest format in order to open it.
Rather than trying to find the locked needle in a haystack, you can use a Unix command in your Mac’s Terminal app to unlock your files. Yes, this is scary territory, but as long as you’re careful and type the commands exactly as they’re listed below, everything will be just fine (better than fine, actually, because Photos will be able to open your library!).
First, make sure you’re logged into your Mac as an administrator (see https://support.apple.com/kb/PH18891 for help on that). Next, open your Applications→Utilities folder, and then double-click Terminal. The resulting command console may look completely alien, but just take a deep breath and type the following, exactly as it appears here:
sudo chflags -R nouchg
—and add a space at the end (after “nouchg”). Don’t press Return yet!
Switch to the Finder. Open your Pictures folder and drag the offending iPhoto or Aperture library icon into the Terminal window to add its directory to the command you just entered. You now see a command that looks something like this:
sudo chflags -R nouchg /Users/Spock/Pictures/iPhoto Library/
Press Return to run the command. When prompted, enter your Mac’s password, and then press Return again. Now try using Photos to open your old library again; it should open right up without a hitch.
Photos says I don’t have enough storage space on my Mac to import my iPhoto or Aperture library, but I have plenty!
Unfortunately, Spotlight—OS X’s search feature—has been known to calculate available storage space incorrectly, leading Photos to refuse to upgrade an iPhoto or Aperture library. Don’t panic; the problem is easy to fix.
To perform your own storage-space check, open a Finder window and choose View→Show Status Bar. At the bottom of the Finder window, you see a line of text that tells you how much free space you have on your hard drive. Next, choose ![]() →About This Mac and click the Storage tab. If the amount of free space shown there doesn’t match what the Finder window indicates, try resetting Spotlight. To do that, choose
→About This Mac and click the Storage tab. If the amount of free space shown there doesn’t match what the Finder window indicates, try resetting Spotlight. To do that, choose ![]() →System Preferences→Spotlight. In the Spotlight preference pane, click the Privacy tab, and then drag the hard drive icon from your Mac’s desktop into its list. (If you don’t see a hard drive icon on your desktop, click the + icon at lower left of Spotlight’s preference pane and in the resulting pane, select your hard drive and click Choose. In the confirmation message that appears, click OK.) This disables indexing for that drive.
→System Preferences→Spotlight. In the Spotlight preference pane, click the Privacy tab, and then drag the hard drive icon from your Mac’s desktop into its list. (If you don’t see a hard drive icon on your desktop, click the + icon at lower left of Spotlight’s preference pane and in the resulting pane, select your hard drive and click Choose. In the confirmation message that appears, click OK.) This disables indexing for that drive.
Hopefully, Photos will now agree to import your iPhoto or Aperture library. When Photos is finished doing that, go back to the Spotlight preference pane, click Privacy, and then select your hard drive in the list. Click the - icon at lower left to remove your hard drive from the Privacy list, and Spotlight resumes indexing the drive’s content.
If you really do lack hard drive space, then you’ve got a great excuse to go shopping for a bigger hard drive. If you’ve got the money, spring for a solid-state drive (SSD)—they’re a lot faster than their spinning-platter brethren, as the Note on Note explains.
After upgrading to Photos, some items have a gray, black, or empty thumbnail preview. What happened?
This particular problem has several possible causes:
You didn’t empty your iPhoto or Aperture trash, or the Finder’s trash, before you upgraded to Photos. If you converted an iPhoto or Aperture library to Photos, but didn’t empty the trash in those apps—or the Finder’s trash—before doing so, some of the items you thought were deleted may mysteriously reappear in Photos with gray boxes in lieu of thumbnail previews. Think of these resurrected goodies as image zombies—images you thought you had deleted but that sprang back to life in Photos.
You can double-click any of these gray boxes to be sure they’re photos you want to delete, and then delete them by pressing the Delete key on your keyboard. Just be aware that after you view one of these images, Photos generates a thumbnail preview for it and you lose that gray-box reminder of its zombie status.
One of your iPhoto projects—a card, book, or calendar—uses a downloadable theme that you haven’t yet used in Photos. A gray project preview indicates that the project uses a theme that Photos hasn’t downloaded yet. The fix is to double-click the project’s thumbnail to make Photos grab the theme from Apple’s servers.
Videos display black rectangles instead of preview thumbnails. If, while perusing your video collection, you see some with black rectangles instead of thumbnails, it means that Photos hasn’t yet generated a thumbnail for them. To force Photos into action, select the video, press the spacebar on your keyboard to open the clip, and then press the spacebar again to close it. (Or double-click the video to open it, and then close it.) When you close the video, the proper thumbnail should appear.
If you have a mountain of movies to generate thumbnails for, a quicker way is to open the first one, and then look for black thumbnails in the Split View pane on the left. (If the Split View pane isn’t showing, choose View→Show Split View.) Click one of the black thumbnails to display it in the preview window. When its thumbnail changes from black to the first frame in the clip, click another black rectangle in the Split View pane. Rinse and repeat until all the black rectangles are replaced by happy thumbnails.
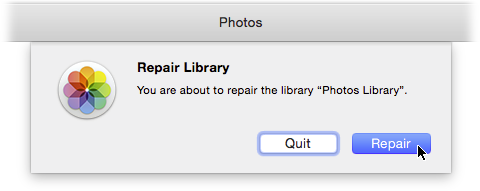
You can also coax the program into generating new thumbnails by repairing your Photos library. To do that, quit Photos by pressing ⌘-Q, and then relaunch it while holding down the ⌘ and Option keys. Keep holding down these keys until you see the sheet shown in Figure A-1.
Some image thumbnails are gray. This can be caused by anything, but the fix is to force Photos to generate new thumbnails by repairing your Photos library, as explained in the previous bullet point.
iPhoto disappeared after I upgraded to Photos and I want to open my old iPhoto library in iPhoto. What can I do?
Don’t panic—you can use the Mac App Store to download iPhoto. Choose ![]() →App Store, and then click the Purchases tab. Scroll down until you see iPhoto. If there’s a button labeled Install, click it. If the button says Open, click it and, if iPhoto launches successfully, it’s still available to use. If iPhoto refuses to launch, locate it in your Applications folder, put it in the Finder’s trash, and then empty the trash. Next, Quit and relaunch the App Store, click the Purchases tab, and then scroll down to iPhoto. Now the button should say Install. Click it and your Mac downloads the latest OS X Yosemite-compatible version of iPhoto.
→App Store, and then click the Purchases tab. Scroll down until you see iPhoto. If there’s a button labeled Install, click it. If the button says Open, click it and, if iPhoto launches successfully, it’s still available to use. If iPhoto refuses to launch, locate it in your Applications folder, put it in the Finder’s trash, and then empty the trash. Next, Quit and relaunch the App Store, click the Purchases tab, and then scroll down to iPhoto. Now the button should say Install. Click it and your Mac downloads the latest OS X Yosemite-compatible version of iPhoto.
Unfortunately, this technique won’t work if you never downloaded or upgraded iPhoto using the Mac App Store. If your Mac is older than 2011 and you never upgraded iPhoto using Software Update or the Mac App Store, you may need to find an iPhoto installer on a DVD and install it from there. Once you’ve done that, the technique described above should work to update it to the current, Yosemite-friendly version. Alternatively, if you have another Mac that uses your same Apple ID, you can drag its copy of iPhoto onto a removable storage device such as a flash drive or external hard drive, and then copy iPhoto from that device into the Applications folder on your Mac. Just be sure to update iPhoto to the latest version before copying it to the removable storage device. Or, if you have an Apple store nearby, you can pack up your Mac and beg the wizards at the Genius Bar to install a functioning copy of iPhoto for you.
I upgraded to Photos and I want to open my old iPhoto library in iPhoto, but iPhoto won’t launch. What can I do?
You need to delete and reinstall iPhoto as explained in the previous section.
I tried updating iPhoto to the newest version after I upgraded to Photos, but the App Store’s Update button doesn’t seem to work. What can I do?
Unfortunately, you need to delete and reinstall iPhoto as explained two sections ago.
The file size of the Photos app is a fraction of the size of the iPhoto app. Is Photos that much more efficient than iPhoto, or is it because there are fewer features?
You’re right, the file size of the two apps is vastly different: 1,700 million bytes for iPhoto versus 50 million bytes for Photos. This is likely due to a combination of efficiency and fewer features.
The plug-ins I used in iPhoto don’t work in Photos, and I can’t use my external editor. Am I destined to a life of Photos-imposed limitations?
Your pain is shared by thousands of formerly happy plug-in and external editor users. While Apple hinted that Photos would support plug-ins, it hasn’t happened as of this writing. But keep your eyes peeled for a Photos updates that allows plug-ins, as Apple may add that feature soon.
As for external editors, there’s a (clunky) workaround: You can export images from Photos, edit them in another program, and then import the edited version back into Photos. While it’s not as seamless as iPhoto’s ability to simply hand images off to other programs when you click the Edit button, it still works. Here again, keep your fingers crossed that Apple adds this ability in future versions of Photos.
Photos doesn’t recognize my camera. What do I do?
Photos generally works with any recent camera model, including iOS devices. If you don’t see the Import screen (Chapter 3) even though the camera is connected, try the following steps in order:
Make sure the camera is turned on and confirm that the USB cable is securely plugged in at both ends.
Unplug the USB cable from the port it’s in and plug it into a different one. If the cable was previously plugged into a USB hub with multiple plugs and that hub has other stuff plugged into it, try plugging it into a USB port on your Mac instead.
If you’re using an old camera that has a special PC mode for connecting to a computer, set the Mode dial to that.
Unplug the USB cable, turn the camera off, plug the USB cable into a port on your Mac, and then turn the camera back on.
Turn the camera off and then on again, while it’s plugged in.
If all else fails, remove the memory card from the camera and plug it into a memory-card reader (Importing from a Camera or Card Reader) or the SD card slot on your Mac (if it has one).
Where there’s a will, there’s a way.
Organizing Troubles
Photos is good at keeping track of all your images, but occasionally problems crop up. Here are some of the most common ones related to organizing your goodies.
I want to delete a picture but Photos won’t let me.
You may be trying to use the Delete key on your keyboard to delete a picture in a smart album, which you can’t do. The fix is to Control-click the thumbnail, and then choose “Delete 1 Photo” from the shortcut menu that appears.
I deleted a photo, but it came back!
That’s doubtful. You probably removed the image from an album or project instead of deleting it from your library. As Removing Files from an Album describes, pictures and videos in albums and projects are merely aliases that point to the actual files in your library. Removing a thumbnail from an album or project doesn’t affect the original file. If you really want to delete an item from your library while you’re viewing its thumbnail in an album or project, Control-click the thumbnail and choose “Delete 1 Photo” from the shortcut menu.
When I delete a photo from my library and then switch to a slideshow that used that image, the photo is still in the Photos drawer at the bottom of the window.
As of this writing, this is a real, live bug. Although the thumbnail is visible in the Photos drawer, it doesn’t appear in the slideshow when you play it. But if seeing the image in the Photos drawer bugs you, close the slideshow project and then reopen it; the rogue thumbnail should be gone. If not, then let’s hope that Apple fixes this in the next Photos update.
I created a new album but don’t see it in Photos’ sidebar or in Albums view.
As Using Folders explains, Photos lets you stash albums into folders in order to organize them. It’s likely that your new album ended up inside a folder. If a folder is selected in the sidebar or in Albums view when you create an album—or a folder, for that matter—then the new album or folder lands inside the selected folder. To get it out of the folder, double-click the folder to open it, and then Control-click the album’s icon. Choose “Move Album Out Of [folder name]” and the album appears as an icon in Albums view just like the others.
Faces isn’t correctly identifying the people in my pictures.
The Faces feature merely wants your attention. By following the instructions on Tagging Faces, you can train Photos and greatly improve its facial-recognition accuracy. By telling Faces when it’s right and wrong, it gets better at identifying the people in your photographic life.
One of my photos isn’t with the others I took at the same time.
If you upgraded your iPhoto or Aperture library, some items may not appear in their correct chronological order in the All Photos album. As of this writing, the problem appears to be a bug. If you want to ensure you’re seeing all your pictures and videos taken within a specific timeframe, switch from Albums view to Photos view, and then find the date you’re looking for using Moments, Collections, or Years view.
When I’m in an album and choose View→Keep Sorted By Date, I can still reorder the items. What gives?
In an album, you can drag photos into an arbitrary order, or choose View→Keep Sorted By Date to revert to the oldest-to-newest order. Even then, you can drag photos into any order, so the word “Keep” in the name of that command is misleading. Apparently in Apple’s world “Keep Sorted” means “Temporarily Sort.”
Items that I added location tags to in iPhoto don’t have them in Photos. What happened?
While some people experienced the loss of any manually added locations tags, most didn’t. Happily, you can always add a location tag using the Info panel (see Adding Location Tags).
Sharing and Syncing
Photos offers many methods for sharing and syncing your digital goodies (see Chapter 8), including a few methods that were adopted from iPhoto. Here are a few problems you may run into in Photos’ sharing and syncing realm.
Where’s the export-to-web-page option in Photos? I used it in iPhoto all the time.
While Photos doesn’t have a feature like the one in iPhoto, you can create a web gallery in Photos by setting up a Shared album and then turning on its Public Website option. Publishing a Shared Album on the Web has the scoop.
I turned on iCloud Photo Library three days ago, and it’s still uploading files to Apple’s server. My other Internet activity has slowed to a crawl, and now my Internet service provider is threatening to pull the plug on me because I’m using too much bandwidth. Can I slow down the data transfer so I don’t get slammed with extra charges or receive slower service from my ISP?
This is an ugly problem indeed, and one that Apple really needs to fix. When Photos first syncs with iCloud, it tries to do so immediately and as quickly as possible. As you noticed, this can slow your other Internet usage to a crawl. You can turn the process off and on in Photos’ iCloud Preferences or pause it for one day (iCloud Photo Library). Ideally, your Mac should sense when you’re using it and throttle down the upload speed, but Apple doesn’t offer this feature (yet!).
iCloud Photo Library ruined My Photo Stream, and now I can’t see it on my Mac.
The most important thing to remember about iCloud Photo Library is that if you turn it on on one device, you need to do so on all your devices. Otherwise, you won’t see photos from one device on the other. To turn iCloud Photo Library or My Photo Stream on or off on your iOS device, tap Settings, and then scroll down to Photos & Camera and tap it. iCloud Photo Library has details.
My Photo Stream isn’t syncing!
My Photo Stream only syncs across your devices when you’re on a WiFi connection; it doesn’t work over a cellular network. You can also encounter syncing problems if the Camera app is open on your iOS device—you have to close it before pictures will upload to iCloud. Or you may just have a low battery: If your iOS device has less than 50% power left and isn’t plugged into a power outlet, the syncing comes to a screeching halt.
I’ve got iCloud Photo Library turned on, but the changes I make in Photos for Mac aren’t showing up in Photos for iOS (or vice versa).
Depending on how many changes you make or pictures you take, it may take awhile for all that to be reflected on the other device. If nothing happens for a really long time, make sure your iOS device has WiFi turned on and that it’s connected to the same network as your Mac. If that doesn’t do the trick, try the following:
Quit and then relaunch the Photos app on your Mac and iOS device. In iOS, double-click the Home button, and all the apps currently running appear in a swipeable row across the screen. Swipe left or right until you see the Photos app, and then swipe the miniature screen above the app’s icon upward toward the top of your device. When it disappears, you’ve successfully quit the app. Now relaunch Photos.
Restart both your Mac and the iOS device, and then launch Photos.
Turn iCloud Photo Library off and back on again (Importing from iCloud).
A little patience goes a long way when dealing with iCloud Photo Library; though if it still seems stuck, try signing out of and back into your iCloud account on each device.
Multiple users (accounts) in my family shared the same iPhoto library on our shared Mac. But I can’t seem to let multiple users share one Photos library. Is there a way to do that?
Alas, no. The ability to share a library is a casualty of Apple’s introducing iCloud Photo Library, and it’s not a feature that’s likely to return. Photos’ concept of a library is one per user. That way, you can have all your pictures and videos available to you on all your devices—not everyone else’s photos. The solution is to set up a Family Group, as explained on Family Sharing, and then use the Shared Family Album. The box on Got PICTs? has more on using Photos in a family situation.
I stored my Photos library on a network drive and now I can’t use iCloud Photo Library to sync my photos with my iOS devices.
To use iCloud Photo Library, the drive you’re using on your network must be in Mac OS Extended format, also known as HFS+. (Photos’ method of keeping track of your stuff requires complex file-management features that aren’t in other formats.) There are two solutions to this problem: You can buy a Mac-formatted network drive and then copy your Photos library to it, or you can back up your library to another storage device and reformat your network drive to Mac OS Extended format. To erase and reformat your drive, make triple sure your files are backed up on another drive (just to be safe), and then launch Disk Utility; it’s in your Applications→Utilities folder. Choose your drive from the list on the left, and then click the Erase tab on the right. Finally, from the Format menu, choose Mac OS Extended (Journaled), and then click Erase.
Before upgrading to Photos, I created albums in iPhoto and then used iTunes to copy some of them to my iPad. After upgrading to Photos, this is no longer an option in iTunes. Can I continue using my old approach, or do I need to do something different?
You can continue with your old habit if you wish. The thing to remember is that if iCloud Photo Library is turned on on your iOS device(s) and your Mac, iCloud Photo Library takes over all photo-syncing duties so you can see all your Photos albums on your iOS device—not just the albums you pick in iTunes. To continue using iTunes to sync only selected albums to your iOS device, turn off iCloud Photo Library on the iOS device. To do that, tap Settings, scroll to Photos & Camera, tap it, and then on the resulting screen, make sure the iCloud Photo Library button is white (off) not green (on). If it’s green, tap it to turn it white. You should then be able to synchronize albums using iTunes as you always have. For more on iCloud Photo Library, see Meet the iCloud Photo Library and 19.
I’m using Photos on two Macs, and accessing the same library on both. Why don’t I see my projects or Faces on the second Mac?
While you can sign into iCloud on the second Mac using the same Apple ID you use on your primary Mac, Photos limits what’s available to you on the second Mac. After you sign in, the following items appear in the Photos app on all of your Macs (see https://support.apple.com/en-us/HT204486 for details): All original photos and videos, all folders and albums, smart albums, keywords, searchable keywords based on Faces tags, and key photo selections.
The following goodies are available only on the Mac on which they were created: Books, cards, and calendars; slideshows; keyword shortcuts; unused keywords; the Last Import album (this album contains photos you most recently imported on that specific Mac); and Faces tags and Faces data.
In addition, your pictures and videos need to be stored inside the Photos library for them to be accessible through iCloud Photo Library. See Copied vs. Referenced photos for more on copying items into your Photos library versus referencing them externally.
Help! iCloud Photo Library doesn’t work and also, I can’t view images on my AppleTV!
As explained on What Gets Uploaded, both iCloud Photo Library and the AppleTV work with the System Photo Library only.
Editing Woes
Fortunately, there’s not a whole lot that can go wrong when you’re editing images or videos in Photos. After all, you can always revert to the original version. Nevertheless, here are a few problems and their solutions.
I messed up a picture while editing it, and now it’s ruined!
Open the offending thumbnail in Edit mode (Editing Basics), and then click “Revert to Original” at the upper right, or choose Image→“Revert to Original.” Photos restores your image to its original state, using a backup it keeps squirreled away in its library (Dealing With Duplicates).
Photos crashes when I double-click a thumbnail to edit it.
The culprit here is usually a referenced file that you changed the name of in the Finder. For example, if you imported the file as a referenced file (Copied vs. Referenced photos) instead of letting Photos copy it into its library, and then you changed the name of the file in your Mac’s Finder, Photos won’t be able to find the file anymore. Alternatively, the file may have gotten corrupted somehow. Either way, the solution is to delete the file in Photos (Deleting Pictures and Videos), and then reimport it.
If the problem persists—and you’ve kept your paws off the file’s name in the Finder—try opening it in Preview (it’s in your Applications folder) and then using its File→Save As command to create a new version of the file that you import into Photos.
Printing Problems
Most printing problems have to do with your printer itself, in which case turning it off and back on solves most troubles. However, there are a few settings in Photos that can frustrate you and waste precious paper and ink.
I can’t print more than one picture per page and it’s awfully wasteful to use a whole sheet of paper for one little 4 x 6-inch print.
Agreed. Photos is perfectly happy to put multiple pictures onto a single page, so try the following fixes:
Make sure you picked a paper size that’s larger than the prints you want. See Printing from Photos for more on this topic.
Confirm that you’ve selected more than one photo before triggering the printing process. Selecting and Hiding Files tells you how to select multiple items in Photos for Mac.
My picture doesn’t fit properly on 4 x 6-, 5 x 7-, or 8 x 10-inch paper.
As you learned in the box on When Aspect Ratios Collide, most digital cameras produce photos in a 4:3 width-to-height ratio, which means they don’t quite fit standard print sizes. The fix is to crop your images to the appropriate aspect ratio (How to Crop, Straighten, and Flip a Photo), or use the zoom slider in the Print pane to change the crop just before you hit print (Printing from Photos tells you how).
General Questions
Last but not least, here’s a handful of miscellaneous problems.
If I’m using iCloud Photo Library, do I need to back up my Photos library elsewhere?
Absolutely! Things go wrong, even on Apple’s servers. Apple recommends that if you use iCloud Photo Library, you should also use Time Machine to back up your Mac, which includes your Photos library. Be sure to keep your Photos library and Time Machine backups on different disks, too, so that when that disk fails—and it will—you won’t lose everything. Just keep your Photos library in your Pictures folder and set Time Machine to back up to an external drive, to a disk on your network, or to a Time Capsule.
See the box on A Super-Awesome Backup Strategy for a simple backup strategy.
All my pictures are gone and I’m freaking out!
or
The library starts to open but it never does and I’m freaking out!
You have just two options when these extreme problems occur: You can repair the library or replace it with a backup copy. (You might think that you could use iCloud Photo Library to restore a library file, but that would take forever.) Here’s how:
Repair the library. The quickest solution is to let Photos repair the library. To do that, press ⌘-Q to quit Photos, and then reopen it while holding down the Option and ⌘ keys. Click Repair in the message box that appears. Photos then analyzes every image and every album, inspecting them for damage and repairing them if it can. Feel free to run some errands or compose a novel, because this process takes a while. Finally, you end up with a fresh new library.
Recover from a Time Machine backup. If you (wisely) turned on Time Machine for backups (see the box on A Super-Awesome Backup Strategy), you can use it to restore your Photos library to the state it was in at a given moment in the past. (Sadly, you can’t use Time Machine to restore individual items inside your Photos library.) First, locate your Photos Library file in the Finder; it’s normally in your Pictures folder (see Visiting Your Photos Library). If you don’t know where it is, choose File→Find, and type Photos Library in the search field that appears. After a moment, an alphabetical list of items appears that (hopefully) includes your Photos library. Control-click the Photos Library file in the list, and choose “Show in Enclosing Folder” from the shortcut menu. This opens a Finder window set to that location. Next, click the Time Machine icon in your menu bar or Dock and choose Enter Time Machine (you can also double-click its icon in your Applications folder). When you do that, your desktop fades away and you see the currently open Finder window with dozens of matching windows layered behind it that seem to extend into outer space. Each window is a snapshot of how that Finder window looked when a Time Machine backup occurred. Here’s how to navigate through your backups to find the time when your Photos library was fat and happy:
— Drag your cursor through the timeline on the right side of the screen. It looks likes a vertical ruler that sails through the Finder windows so you can see how they looked in the past.
— Click one of the small arrows pointing up or down to the right of the Finder window stack. Each click takes you backward or forward to the next time that folder was backed up by Time Machine.
— Use the search box at the upper right of any Finder window. If you get lost or want to find a different file, enter its name here and Time Machine displays results exactly like the Finder does when you use its search box.
Once you find the backup from which you want to restore your Photos Library file, select that Finder window, and then click Restore beneath the Finder window stack. The OS X desktop reappears and asks if you want to replace your current version of the file with the recovered version or keep both versions. Choose Replace and your troubles should be over.