Photoshop CS4 Volume 2: Visual QuickStart Guide
![]()
Photoshop CS4, volume 2: Visual QuickStart Guide
Elaine Weinmann and Peter Lourekas
Peachpit Press
1249 Eighth Street
Berkeley, CA 94710
510/524-2178
510/524-2221 (fax)
Find us on the Web at: www.peachpit.com
To report errors, please send a note to [email protected]
Peachpit Press is a division of Pearson Education
Copyright © 2010 by Elaine Weinmann and Peter Lourekas
Cover Design: Peachpit Press
Interior Design: Elaine Weinmann
Production: Elaine Weinmann and Peter Lourekas
Photographs: Elaine Weinmann and Peter Lourekas, except as noted
Notice of Rights
All rights reserved. No part of this book may be reproduced or transmitted in any form by any means, electronic, mechanical, photocopying, recording, or otherwise, without the prior written permission of the publisher. For information on getting permission for reprints and excerpts, contact [email protected].
Notice of Liability
The information in this book is distributed on an “As Is” basis without warranty. While every precaution has been taken in the preparation of the book, neither the authors nor Peachpit shall have any liability to any person or entity with respect to any loss or damage caused or alleged to be caused directly or indirectly by the instructions contained in this book or by the computer software and hardware products described in it.
Trademarks
Visual QuickStart Guide is a registered trademark of Peachpit Press, a division of Pearson Education.
Adobe and Photoshop are registered trademarks of Adobe Systems Incorporated in the United States and/or other countries. All other trademarks are the property of their respective owners
Many of the designations used by manufacturers and sellers to distinguish their products are claimed as trademarks. Where those designations appear in this book, and Peachpit was aware of a trademark claim, the designations appear as requested by the owner of the trademark. All other product names and services identified throughout this book are used in editorial fashion only and for the benefit of such companies with no intention of infringement of the trademark. No such use, or the use of any trade name, is intended to convey endorsement or other affiliation with this book.
ISBN-13: 978-0-321-63503-7
ISBN-10: 0-321-63503-5
9 8 7 6 5 4 3 2 1
Printed and bound in the United States of America
Acknowledgments
Nancy Aldrich-Ruenzel, publisher, supports the core strengths of Peachpit Press while cultivating new subject areas and technologies. This book was in the idea stage for many years, and we’re grateful for her help in nurturing it to fruition.
Victor Gavenda, our technical editor at Peachpit, ever so carefully tested the book in Windows, with a great sense of humor.
Lisa Brazieal, expert production editor at Peachpit, ironed out the preflight kinks in our files as she readied them for press, then sent them to Courier Printing.
Nancy Davis, editor-in-chief; Gary-Paul Prince, promotions manager; Keasley Jones, associate publisher; and many other terrific, hardworking people at Peachpit contribute their respective talents.
Elaine Soares, photo research manager, and Lee Scher, photo research coordinator, of the Image Resource Center at Pearson Education, the parent company of Peachpit Press, quickly procured the stock graphics from Shutterstock.com that we requested.
Rebecca Pepper did a thorough and thoughtful job of copy editing.
Steve Rath generated the index.
Scout Festa did the final round of proofreading.
Krista Behrend of Datacolor provided us with technical and product support for our Spyder3Elite display calibrator.
For creating a great product that’s a pleasure to use and write about, and for helping beta testers like ourselves untangle the mysteries of Photoshop by way of the online forum, kudos to John Nack, senior product manager for Adobe Photoshop; Vishal Khandpur, senior prerelease program associate for Adobe Photoshop; and other members of the Adobe Photoshop CS4 beta team.
Most important, our love and gratitude to Alicia and Simona, for just being who they are (a great pleasure!).
— Elaine Weinmann and Peter Lourekas
Introduction
Why another book on Photoshop?
Adobe Photoshop has so many features, we couldn’t stuff all the topics we wanted to cover into volume 1 of our Visual QuickStart Guide on the subject. Such a robust application deserves a sequel. In this second volume, we cover many topics that are too complex for beginning users to tackle, and expand on topics that we only touched upon in the first one, such as Camera Raw, retouching, and advanced techniques for creating selections and layer masks—to name but a few. We’ll show you not only how individual features work (e.g., the mechanics of creating selections and masks), but how they work in the context of executing real-world, multistep tasks.
Is there a prerequisite to using this book?
This book is geared for users who have a basic proficiency and working knowledge of Photoshop. If you want to brush up on some of your basic skills or incorporate more shortcuts into your workflow, see Chapter 4: Using Photoshop, as well as the lists of shortcuts and Quick Summary reference guides to essential tasks that are located in various chapters throughout the book. For example, you’ll find a guide to choosing colors on page 94, and a summary of Layers panel features on pages 96–97 (for more summaries, refer to the table of contents; for shortcuts, see “shortcuts” in the index).
How this book is organized
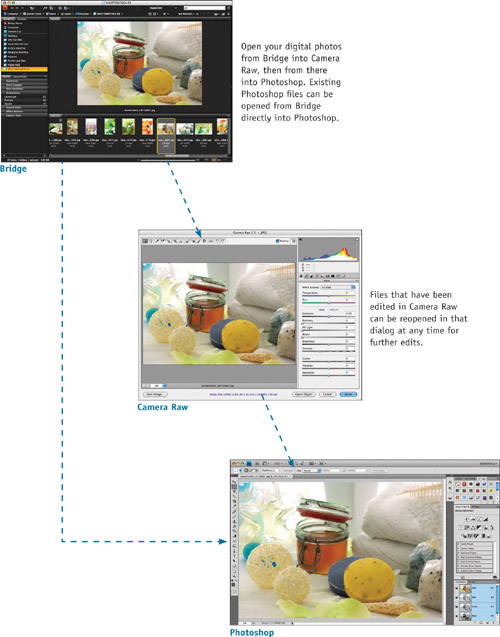
The following breakdown will give you a bird’s-eye view of how the Adobe Photoshop application and its pals, Adobe Bridge and the Adobe Camera Raw plug-in (both of which ship with Photoshop), fit into the “bigger picture.” It will also give you an idea of how this book is organized, from calibrating your display to choosing color settings to using Bridge and Camera Raw, and then, of course, to the many image-editing and image-processing controls in Photoshop. The chapter topics progress in a natural order, from essential skills to specialized techniques.
Chapter 1: Color Management
To ensure that the color in your digital images remains consistent, from its initial input through its various editing phases onscreen to its final output, be sure to calibrate your display and choose color management settings. Don’t skip this chapter!
Chapter 2: Bridge
Adobe Bridge serves as a conduit among the programs in the Adobe Creative Suite. In addition to being the most convenient vehicle for opening files into Camera Raw or Photoshop, Bridge also lets you rate, sort, examine, and compare your image thumbnails; assign keywords and other metadata to your files; locate your files by their current rating or other criteria; and create photo galleries for the Web. If you want to streamline your work sessions, set aside some time to learn more about Bridge—it will be time well spent.
Chapter 3: Camera Raw
Raw files from a digital camera must be converted by the Camera Raw plug-in (“Camera Raw” for short) before they can be opened and edited in Photoshop. But the ever-improving Camera Raw is more than just a converter; it’s also a powerful adjustment tool. We’ll show you how to use it to crop and straighten your photos; correct under- and overexposure, color casts, and chromatic distortion; remove noise, dust marks, and red-eye; and apply sharpening—among many other tasks—and then open your photos into Photoshop. You should take advantage of the Camera Raw plug-in, not just because it has a user-friendly interface and a smorgasbord of controls, but also because the settings you apply remain editable and the original digital photos remain unaltered (akin to traditional film negatives). If you shoot digital photos, you should use Camera Raw.
Chapters 4 to 15: Photoshop
From Chapter 4, which is a reference guide to the fundamental features of Photoshop, through the last chapter in the book, you’ll be immersed in Photoshop, in all its power and glory. Among the many topics covered are color and tonal corrections; in-depth montaging, masking, tinting, retouching, and filtering techniques; creating type and vector shapes; saving and loading presets; recording and playing actions; and finally, executing output-related tasks, such as applying output sharpening and choosing print settings.
How this book can help you
The feature set of Photoshop has grown with each upgrade of the program, from its first release by Adobe Systems Incorporated in 1990 to its current incarnation. The sheer number of tools and commands can be intimidating—not to mention the wealth of settings that can be chosen for them. It can be a challenge for even an experienced user to sort out the most useful features from the rest. And to add to the confusion, some features overlap or are downright redundant. To perform a simple process like cropping, for example, should you use the Crop tool in Camera Raw or Photoshop, or the Crop, Trim, or Crop and Straighten command in Photoshop? Or suppose you want to lift a figure or object from its background and put it on a new background. Should you isolate it with a selection tool or command, or by using a Quick Mask?
When you’re faced with a particular task, one command might help you get the job done efficiently and easily, whereas another might be tedious to use or marginally successful. What makes one method or sequence superior to another? Speed, power, accuracy, and flexibility. Whether you want to refine a photograph (such as correct for under- or overexposure) or be adventurous with filters and creative montaging, with some forethought and planning—and some new skills garnered from this book—you will be able to accomplish your goals.
You can have it your way
Every photographer has a unique sense of aesthetics, and from a practical standpoint, every photography or design project poses unique challenges. We suggest you follow our step-by-step instructions to the letter the first time around, as you might follow recipes in a cookbook. Once you’ve mastered the techniques, feel free to concoct your own “technique recipes” as needed, to suit the images or assignments that you’re working on.
Our photos or yours?
One approach, when following the step-by-step instructions in this book, is to use the low-resolution practice photos that we’ve made available for you to download (see the sidebar on page x and the directory on pages xi–xiv). An advantage of this approach is that you’ll be able to monitor your progress closely by following the sequence of figures in the book.
Another approach is to use photos from your own inventory or that you download from a stock house. This offers the advantage of enabling you to practice on high-resolution files. Our instructions are generic enough to apply to different photos, provided you have access to a reasonably diverse assortment of subjects (e.g., landscapes, still lifes, portraits), and to some imperfect photos that need correction.
Stick with it
Although learning software is often fun, at times it can also be maddeningly confusing or frustrating. Not only do you need to learn how commands and features work (no easy accomplishment in itself), but to become really proficient, you need to learn when, for what purpose, and in what sequence it’s best to use them. With patience, practice, and perseverance, fundamental editing steps and sequences will become second nature, and you will evolve into a pro user of Photoshop. You’ll even experience occasional moments of clarity (between moments of cursing under your breath!) when a feature that had been trying your patience becomes comprehensible and everything, well... clicks.
Whether you want to become more technically proficient in Photoshop to give your photos a more professional edge or you want to explore it further to discover new creative avenues and tools, we hope this book helps you reach your personal goals. Equally important, we hope it makes your experience of using the program more enjoyable and rewarding.
— Elaine Weinmann and Peter Lourekas
Chapters at a glance
Contents
Setting your camera to the Adobe RGB color space
Choosing a color space for Photoshop
Choosing a workspace for Bridge
Resetting the Bridge workspace
Developing a workflow for managing digital photos in Bridge
Creating and using collections
Choosing preferences for Bridge
Choosing preferences for Camera Raw
Cropping and straightening photos
Using the Lens Corrections tab
Using the Adjustment Brush tool
Using the Graduated Filter tool
Processing multiple photos via Camera Raw
Working with photos as Smart Objects
Using the main application features
Choosing a bits per channel mode
QUICK SUMMARY: Choosing Colors
QUICK SUMMARY: Using the Swatches panel
QUICK SUMMARY: Using the Layers panel
Limiting the effect of an adjustment layer
Merging and deleting adjustment layers
Applying content-aware scaling
Choosing a mode for the History panel
Making snapshots of history states
Working with nonlinear histories
Using the Quick Selection tool
Selecting furry or feathered critters
Putting masked imagery on a new background
Using the Shadows/Highlights command
Simulating a neutral density filter
Creating dramatic lights and darks
Correcting a color cast in a portrait
Creating a soft-focus portrait
Using Liquify to trim or tighten
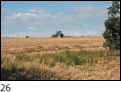
Aligning and blending shots of the same scene
Using the Background Eraser tool
Blending imagery via layer masks
QUICK SUMMARY: Using the Move tool
Using the Vanishing Point filter
Sharpening a whole image with the Unsharp Mask filter
Enhancing details with the High Pass filter
Using the Smart Sharpen filter
Selecting edges for sharpening
Desaturating colors selectively
QUICK SUMMARY: Shortcuts for changing tool settings
QUICK SUMMARY: Painting techniques
Creating brush tips from imagery
Creating a sketch by using filters
Turning a photo into a painting
Applying layer effects to type
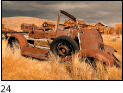
Making type look like rusted metal
Cutting up a rasterized type layer
Transforming type to fit onto a perspective plane
Putting screened-back type on a bar
Using shapes to create pixel areas
Saving and loading actions sets
Preparing a file for print output
Preparing a file for commercial printing
Exporting Photoshop files to Adobe InDesign and Adobe Illustrator
Exporting a silhouetted image from Photoshop
Saving files in the TIFF format
Saving files in the Adobe PDF format
Saving files in the EPS format
Downloadable images