
Working with the Sort Command
WHEN YOU NEED TO GO beyond a single field sort, the Sort command (also found on the Data tab) is your ticket to multiple-field sorting. It’s also a great way to lay the groundwork for a Subtotal report, which you’ll read about in the last section of this chapter.
So why would you want to sort by more than one field? Well, sticking with the list of cities, imagine that you wanted to sort them by state and by city, so that all the cities are in state order, and within each group of states that that sort creates, the cities would be in alphabetical order. Figure 7-3 shows that sort in place.
Figure 7-3. You can sort by more than one field to put your list in a more usable order.

Using Sort to Create GroupsWhat do I mean about the Sort command creating groups? Well, if you sort the cities list by state, because there are multiple cities in individual states, each state becomes a group—Arizona, then California, then Colorado, and so on. Each state’s cities can then be placed in order within the state-based groups—to provide an even more useful, easily-understood list. |
To use the Sort dialog box, shown in Figure 7-4, simply click the Sort button and begin choosing the fields by which you want to sort, in the order you want to sort by them. The dialog box gives you the opportunity to choose the fields to sort by, as well as to set each one to its own sort order.

To use the Sort dialog box, follow these steps:
1. | Click in any cell in the database/list. Unlike using the A-Z or Z-A sort buttons, it doesn’t matter which column you’re in—you just have to be in a cell that contains data. | |
2. | ||
3. | Choose your first field to sort on by clicking the Sort by drop-down menu, as shown in Figure 7-5. All of the fields in your database should appear in this list. Figure 7-5. Choose from your list of field names and pick the field you’ll sort by first.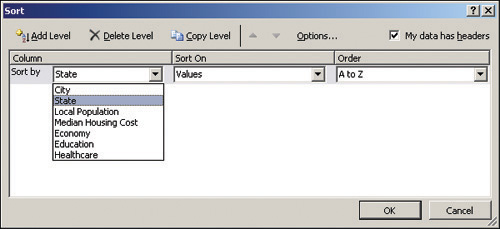
Tip The best field to sort by first is the one with the most duplicate entries. This creates groups (as explained in the note, “Using Sort to Create Groups”), and makes it easier to choose second- and third-level fields to sort by within those groups. Using the Cities list, a good choice for first field is State, then perhaps by economy or healthcare rating, and then by city. The State groups are then broken down by their ratings, and then for each group of ratings within a state, the cities will be in alphabetical order. The last field in your multiple-field sort should be one with few or no duplicates. | |
4. | Click the Sort On drop-down menu to choose from alternatives to Values (the default), as shown in Figure 7-6. You can choose to sort on the color of the cell (if you’ve applied fills to certain cells), by font color, or by cell icon. As most of the time you’ll only want to deal with the value in the cells, you don’t have to change from the default here. Figure 7-6. Sort by the values in the selected field, or perhaps by the color of the cells or their content.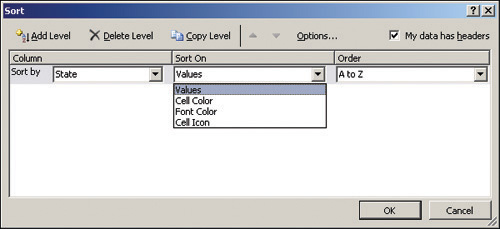
| |
5. | Choose the order to sort by. You can choose from A to Z, Z to A (as shown in Figure 7-7), or Custom List. The last choice opens the Custom Lists dialog box, which contains the built-in and user-created custom lists that are typically used to speed up data entry of frequently used lists of names, numbers, and values like days of the week or months of the year. Your most useful choice? A to Z or Z to A, depending on which values (largest or smallest) you want to see first. | |
6. | Add another level by clicking the Add Level button. The Then By drop-down menu appears, as shown in Figure 7-8, from which you can choose the second level of your sort. | |
7. | Repeat Steps 4 and 5 for the new field, deciding what to sort on and what order the sorted records should appear in. | |
8. | Continue adding sort levels until you have all the fields you want to sort by listed, in the order they should be sorted, in the dialog box. | |
9. | Click OK to apply the sort to your list. Figure 7-9 shows a completed sort instruction, which sorts by state, then by healthcare rating, then by city. Figure 7-9. Sort by as many fields as you want—although sorting by too many fields can reduce the usability and ease of use of the resulting sorted list.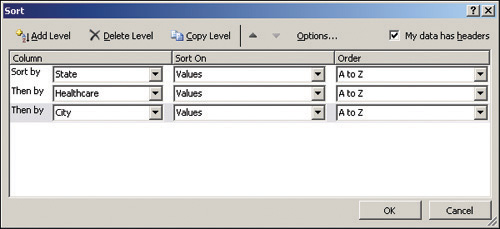
|


Tip
Use the Copy Level button to duplicate a selected level in the Sort dialog box. When to use it? Because you wouldn’t sort on the same field twice, use it when you want to sort by the same Sort On and Order values, and then just change the Column designation. This shortcut saves you two of the three steps involved in establishing a new level for your sort.
To get rid of a sort level you created by mistake or no longer want, simply click the Delete Level button while your mouse is in any of the options for the unwanted level. The level is gone, and you can continue creating levels or click OK to perform the sort as you’ve set it up.
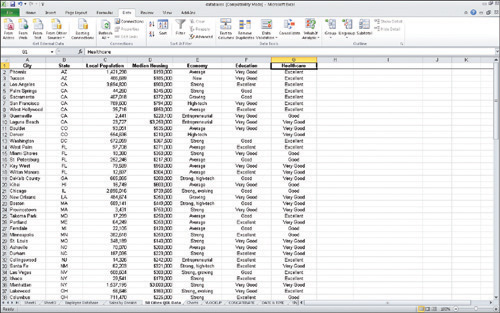
As you can see in Figure 7-10, the resulting sorted list makes it easy to see which cities in which states have the best healthcare rating. The groups created by sorting on fields with duplicate records—State and Healthcare—make it easy to interpret the data. Instead of Healthcare, the Economy or Education fields could have been used (one or the other), depending on what’s of interest to you or those who’ll be viewing the list. Sorting by two of the ratings would make it harder to use the list in an “at a glance” way, however, as it would break up the groups created by duplicate entries in just one of the rating fields.
Figure 7-10. The list of cities, sorted by their healthcare rating, within each state. The cities are alphabetized.
Tip
If you need to look at a list from more than one perspective—using fields which might not have a lot of duplicate entries by which to create sorted groups—consider creating a PivotTable report (check out Chapter 15, “Using PivotTables”) to create a more flexible, powerful report than a simple sort can give you.