![]()
Setting up Node.js and Other Essentials
As with many technologies, it’s vital to have the proper foundation set up first, before moving on to solving more complex problems. In this chapter, we cover the following:
- Node.js and (NPM) Node Package Manager installation
- Node.js script launches
- Node.js syntax and basics
- Node.js integrated development environments (IDEs) and code editors
- Awareness of file changes
- Node.js program debugging
Installing Node.js and NPM
Although your operating system (OS) might have Node.js installed on it already, you should update to at least 0.10.x. In the following subsection, we examine a few different approaches to installing Node.js:
- One-click installers: probably the easiest and fastest way to get started with the platform
- Installing with HomeBrew or MacPorts: straightforward installation for Max OS X users
- Installing from a tar file: an alternative installation from an archive file
- Installing without sudo: the best way to avoid needing sudo (admin rights) when using the node and npm commands
- Installing from a Git repo: an option for advanced developers who need the latest version and/or contribute to the project
- Multiversion setup with Nave: a must-have for developers contributing to projects that use different Node.js versions
- Multiversion setup with Node Version Manager (NVM): alternative to Nave (see previous entry)
One-Click Installers
First, let’s go to http://nodejs.org and download a one-click installer for your OS (Figure 1-1) by clicking on the Install button. Don’t choose binaries or source code unless you know what to do with them or your OS is not present there (i.e., not Windows or Mac).

Figure 1-1. One-click installers for Node.js
The installers come with NPM (Node Package Manager)— an important tool for managing dependencies.
If there’s no installer for your OS (page http://nodejs.org/download/), you can get the source code and compile it yourself (Figure 1-2).
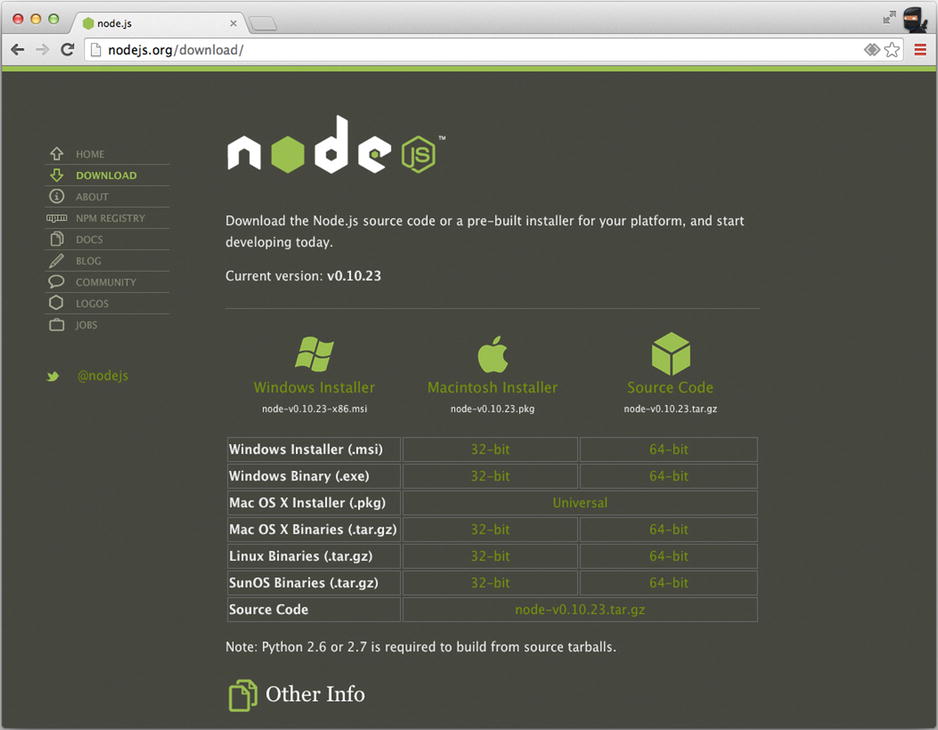
Figure 1-2. Multiple options for downloading
![]() Note For older Mac OS X machines, you can pick 32-bit versions.
Note For older Mac OS X machines, you can pick 32-bit versions.
Installing with HomeBrew or MacPorts
If you already have HomeBrew (brew) installed, run the following in a straightforward manner:
$ brew install node
$ brew install npm
Similarly, for MacPorts, run
$ sudo port install nodejs
If your Mac OS X does not have HomeBrew, go to http://brew.sh/ or install it with the following command:
$ ruby -e "$(curl -fsSL https://raw.github.com/Homebrew/homebrew/go/install)"
Installing from a Tar File
To install from a tar file (which is type of archive), set up a folder for the latest Node.js as follows:
$echo 'export PATH=$HOME/local/bin:$PATH'>> ~/.bashrc
$. ~/.bashrc
$mkdir ~/local
$mkdir ~/node-latest-install
$cd ~/node-latest-install
![]() Note Advanced users who choose to make their own Node.js builds need to have certain compilers installed first. For more information, refer to the official documentation (https://github.com/joyent/node/wiki/Installation).
Note Advanced users who choose to make their own Node.js builds need to have certain compilers installed first. For more information, refer to the official documentation (https://github.com/joyent/node/wiki/Installation).
Download the tar file with CURL and unpack it:
$ curl http://nodejs.org/dist/node-latest.tar.gz | tar xz --strip-components=1
$ ./configure --prefix=~/local
Build Node.js and install it:
$ make install
$ curl https://npmjs.org/install.sh | sh
![]() Tip If you find yourself getting errors when trying to install the module globally via NPM ($ npm install -g <packagename>), reinstall Node.js and NPM with the “Installing Without sudo” solution below to eliminate the need to use sudo with the installation command. For more solutions for advanced users, there’s a Gist from Isaac Z. Schlueter: https://gist.github.com/isaacs/579814.
Tip If you find yourself getting errors when trying to install the module globally via NPM ($ npm install -g <packagename>), reinstall Node.js and NPM with the “Installing Without sudo” solution below to eliminate the need to use sudo with the installation command. For more solutions for advanced users, there’s a Gist from Isaac Z. Schlueter: https://gist.github.com/isaacs/579814.
Installing Without sudo
Sometimes, depending on your configuration, NPM asks users for sudo— root user permissions. To avoid using sudo, advanced developers can use the following::
$ sudo mkdir -p /usr/local/{share/man,bin,lib/node,include/node}
$ sudo chown -R $USER /usr/local/{share/man,bin,lib/node,include/node}
![]() Note Please be sure you are comfortable with the functionality of the chown command before you run it.
Note Please be sure you are comfortable with the functionality of the chown command before you run it.
Then, proceed with a normal installation:
$ mkdir node-install
$ curl http://nodejs.org/dist/node-v0.4.3.tar.gz | tar -xzf - -C node-install
$ cd node-install/*
$ ./configure
$ make install
$ curl https://npmjs.org/install.sh | sh
Installing from a Git Repo
If you want to use the latest core Node.js code, and maybe even contribute to the Node.js and NPM projects, it’s possible to build the installation from the cloned Git repo. (This step requires Git. To install it, go to http://git-scm.com/ and click Download.) For basic Git commands, refer to Chapter 11, where we explore deployment; otherwise, do the following:
- Make the folders and add the path:
$ mkdir ~/local
$ echo 'export PATH=$HOME/local/bin:$PATH' >> ~/.bashrc
$ . ~/.bashrc
To clone the original Node.js repo from Joyent (alternatively, you can fork it and clone your own repository), do the following:
$ git clone git://github.com/joyent/node.git
$ cd node
$ ./configure --prefix=~/local - Make the build:
$ make install
$ cd .. - Repeat for NPM:
$ git clone git://github.com/isaacs/npm.git
$ cd npm
$ make install
For a more cutting-edge NPM version, use
$ make link
Multiversion Setup with Nave
If you plan to run multiple versions of Node.js, use Nave (https://github.com/isaacs/nave), which is a virtual environment for Node.js. First, make a folder:
mkdir ~/.nave
cd ~/.nave
Then, download Nave and set the link to the PATH-ed folder:
$ wget http://github.com/isaacs/nave/raw/master/nave.sh
$ sudo ln -s $PWD/nave.sh /usr/local/bin/nave
An example of switching to Node.js version 0.4.8 with Nave in a virtual environment is as follows:
$ nave use 0.4.8
To use NPM in this particular virtual environment, use
$ curl https://npmjs.org/install.sh | sh
It is now possible to install something via NPM:
$ npm install express
Last, exit the virtual environment with
exit
More approaches to install Node.js and NPM are in gist (https://gist.github.com/isaacs/579814).
Multiversion Setup with NVM
Another option to Nave is NVM—Node Version Manager (GitHub, https://github.com/creationix/nvm). Install NVM as follows:
$ curl https://raw.github.com/creationix/nvm/master/install.sh | sh
or
$ wget -qO- https://raw.github.com/creationix/nvm/master/install.sh | sh
Then, harness NVM’s install:
$ nvm install 0.10
To switch to the 0.10 version, apply the use command. For example:
$ nvm use 0.10
Alternative Multiversion Systems
Alternatives to Nave and NVM include the following:
Checking the Installation
To test your installation, run the following commands in your Terminal app (command line cmd.exe in Windows):
$node -v
$npm -v
You should see the latest versions of Node.js and NPM that you just downloaded and installed, as shown in Figure 1-3.
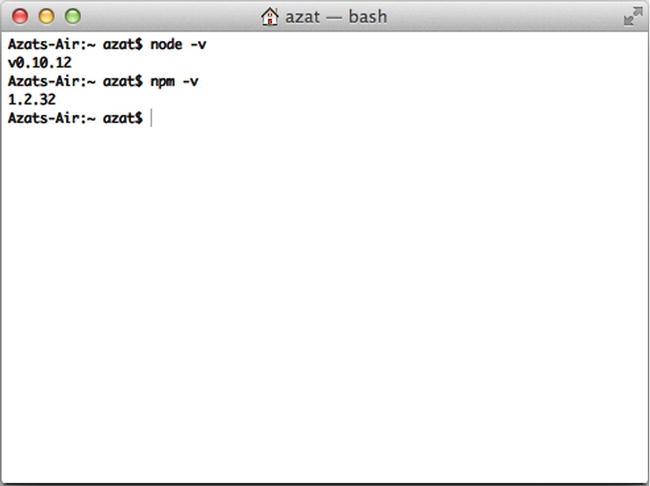
Figure 1-3. Checking Node.js and NPM installations
That’s it! You now have Node.js and NPM installed, and you should be ready to dig deeper into using the platform. The simplest way to run Node.js is through its virtual environment, which is often called read–eval–print–loop , or REPL.
Node.js Console (REPL)
Like most platforms/languages (e.g., Java, Python, Ruby, and PHP), Node.js comes with a virtual environment: REPL. Using this shell program, we can execute pretty much any Node.js/JavaScript code. It’s even possible to include modules and work with the file system! Other REPL use cases involve controlling nodecopters (http://nodecopter.com/) and debugging remote servers (more about this in Chapter 10). To start the console, run the following command in your terminal:
$node
The prompt should change from $ to > (or something else, depending on your shell). From this prompt, we can run any JavaScript/Node.js (akin to the Chrome Developer Tools console) we want. For example:
> 1+1
> "Hello"+" "+"World"
> a=1;b=2;a+b
> 17+29/2*7
> f =function (x) {return x*2}
> f(b)
The result of the previous snippet is shown in Figure 1-4.
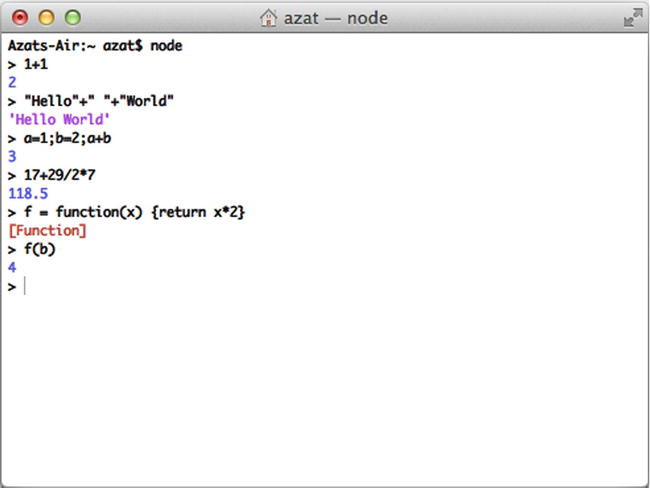
Figure 1-4. Executing JavaScript in Node.js REPL
There are slight deviations in ECMAScript implementations in Node.js and browsers such as the Chrome Developer Tools console. For example, {}+{} is '[object Object][object Object]' in Node.js REPL, whereas the same code is NaN in the Chrome console because of the automatic semicolon insertion (ASI) feature. However, for the most part, Node.js REPL and the Chrome/Firefox consoles are similar.
Launching Node.js Scripts
To start a Node.js script from a file, simply run $ node filename—for example, $ node program.js. If all we need is a quick set of statements, there’s a -e option that allows us to run inline JavaScript/Node.js—for example, $ node -e "console.log(new Date());".
If the Node.js program uses environmental variables, it’s possible to set them right before the node command. For example:
$ NODE_ENV=production API_KEY=442CC1FE-4333-46CE-80EE-6705A1896832node server.js
Preparing your code for production is discussed later in Chapter 10.
Node.js Basics and Syntax
Node.js was built on top of the Google Chrome V8 engine and its ECMAScript, which means most of the Node.js syntax is similar to front-end JavaScript (another implementation of ECMAScript), including objects, functions, and methods. In this section, we look at some of the most important aspects; let’s call them Node.js/JavaScript fundamentals:
- Loose typing
- Buffer—Node.js super data type
- Object literal notation
- Functions
- Arrays
- Prototypal nature
- Conventions
Automatic typecasting works well most of the time. It’s a great feature that saves a lot of time and mental energy! There are only a few types of primitives:
- String
- Number (both integer and real)
- Boolean
- Undefined
- Null
- RegExp
Everything else is an object (i.e., mutable keyed collections, read Stackoverflow on “What does immutable mean?”,1 if in doubt).
Also, in JavaScript, there are String, Number, and Boolean objects that contain helpers for the primitives, as follows:
'a' ===new String('a') //false
but
'a' ===new String('a').toString() //true
or
'a' ==new String('a') //true
By the way, == performs automatic typecasting whereas === does not.
Buffer—Node.js Super Data Type
Buffer is a Node.js addition to four primitives (boolean, string, number, and RegExp) and all-encompassing objects (array and functions are also objects) in front-end JavaScript. Think of buffers as extremely efficient data stores. In fact, Node.js tries to use buffers any time it can, such as when reading from file systems and when receiving packets over the network.
Object Literal Notation
Object notation is super readable and compact:
var obj = {
   color: "green",
   type: "suv",
   owner: {
      ...
   }
}
Remember, functions are objects:
var obj =function () {
   this .color: "green",
   this .type: "suv",
   this .owner: {
      ...
   }
}
Functions
In Node.js (as well as in JavaScript), functions are first-class citizens, and we treat them as variables, because they are objects! Yes, functions can even have properties/attributes. First, let’s learn how to define a function.
Define/Create a Function
The three most common ways to define/create a function are to use a named expression, an anonymous expression assigned to a variable, or both. The following is an example of a named expression:
function f () {
  console.log('Hi'),
  return true ;
}
An anonymous function expression assigned to a variable looks as follows (note that it must precede the invocation, because the function is not hoisted, unlike the previous example):
var f =function () {
   console.log('Hi'),
   return true ;
}
The following is an example of both approaches:
var f = function f () {
  console.log('Hi'),
  return true ;
}
A function with a property (remember, functions are just objects that can be invoked/initialized) is as follows:
var f =function () {console.log('Boo'),}
f.boo = 1;
f(); //outputs Boo
console.log(f.boo); //outputs 1
![]() Note The return keyword is optional. When it is omitted, the function returns undefined on invocation.
Note The return keyword is optional. When it is omitted, the function returns undefined on invocation.
Pass Functions as Parameters
JavaScript treats functions like any other objects, so we can pass them to other functions as parameters (usually, callbacks in Node.js):
var convertNum =function (num) {
 return num + 10;
}

var processNum =function (num, fn) {
   return fn(num);
}

processNum(10, convertNum);
Function Invocation vs. Expression
The function definition is as follows:
function f () {};
On the other hand, the function invocation looks like
f();
Expression, because it resolves to some value (which could be a number, string, object, or boolean), is as follows:
function f() {return false ;}
f();
A statement looks like
function f(a) {console.log(a);}
Arrays
Arrays are also objects that have some special methods inherited from the Array.prototype 2 global object. Nevertheless, JavaScript arrays are not real arrays; instead, they are objects with unique integer (usually 0 based) keys.
var arr = [];
var arr2 = [1, "Hi", {a:2},function () {console.log('boo'),}];
var arr3 =new Array();
var arr4 =new Array(1,"Hi", {a:2},function () {console.log('boo'),});
Prototypal Nature
There are no classes in JavaScript because objects inherit directly from other objects, which is called prototypal inheritance. There are a few types of inheritance patterns in JavaScript:
- Classical
- Pseudoclassical
- Functional
This is an example of the functional inheritance pattern:
var user =function (ops) {
  return { firstName: ops.name || 'John'
         , lastName: ops.name || 'Doe'
         , email: ops.email || '[email protected]'
         , name:function () {return this .firstName +this .lastName}
         }
}

var agency =function (ops) {
  ops = ops || {}
  var agency = user(ops)
  agency.customers = ops.customers || 0
  agency.isAgency =true
  return agency
}
Conventions
It’s important to follow the most common language conventions. Some of them are listed here:
- Semicolons
- camelCase
- Naming
- Commas
- Indentations
- Whitespace
These JavaScript/Node.js conventions (with semicolons being an exception) are stylistic and highly preferential. They don’t impact the execution; however, it’s strongly suggested that you follow one style consistently, especially if you are a developer working in teams and/or on open-source projects. Some open-source projects might not accept pull requests if they contain semicolons (e.g., NPM) or if they don’t use comma-first style (e.g., request).
The use of semicolons is optional, except for two cases:
- In for loop construction: for (var i=0; i++; i<n)
- When a new line starts with parentheses, such as when using an immediately invoked function expression (IIFE): ;(function(){...}())
camelCase
camelCase is the main naming pattern in JavaScript, except for class names, which are CapitalCamelCase. An example follows:
var MainView = Backbone.View.extend({...})
var mainView =new MainView()
Naming
_ and $ are perfectly legitimate characters for literals (jQuery and Underscore libraries use them a lot). Private methods and attributes start with _ (and it does nothing by itself!).
Commas
An example of a comma-first approach is as follows:
var obj = { firstName: "John"
          , lastName: "Smith"
          , email: "[email protected]"
          }
Indentation
Indentation is usually done using either a tab, or four- or two-space indentation, with supporting camps split almost religiously between the two options.
Whitespace
Usually, there is a space before and after the =, +, {, and } symbols. There is no space on invocation (e.g., arr.push(1);), but there’s a space when we define an anonymous function: function () {}.
Node.js Globals and Reserved Keywords
Despite being modeled after one standard, Node.js and browser JavaScript differ when it comes to globals. This was done intentionally because when var is omitted, browser JavaScript leaks variables infamously to the global space, thus polluting it. This has been dubbed as one of the bad parts of JavaScript in the canonical book JavaScript: The Good Parts by Douglas Crockford (2008 O’Reilly).
As you might know, in browser JavaScript we have a window object. However, in Node.js, it is absent (obviously we don’t deal with a browser window), but developers are provided with new objects/keywords:
- process
- global
- module.exports and exports
So, let’s take a look at the main differences between Node.js and JavaScript.
Node.js Process Information
Each Node.js script that runs is, in essence, a process. For example, ps aux | grep 'node' outputs all Node.js programs running on a machine. Conveniently, developers can access useful process information in code with the process object (e.g., node -e "console.log(process.pid)"), as shown in Figure 1-5.
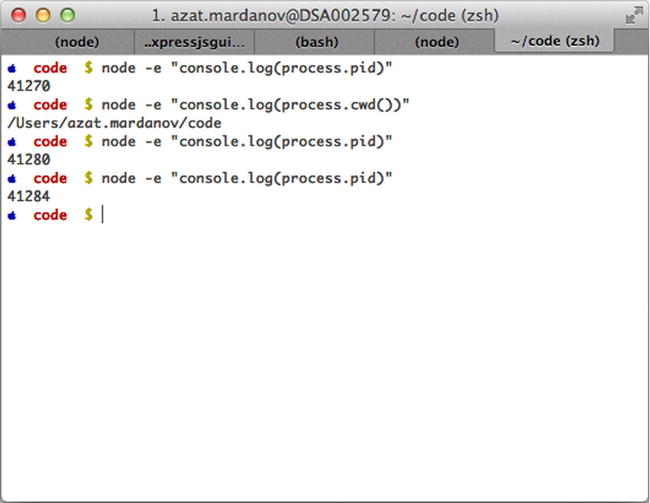
Figure 1-5. Node.js process examples using pid (process ID) and cwd (current working directory)
Accessing Global Scope in Node.js
As you know, browser JavaScript, by default, puts everything into its global scope. On the other hand, Node.js was designed to behave differently, with everything being local by default. In case we need to access globals, there is a global object. And, when we need to export something, we should do so explicitly.
In a sense, the window object from front-end/browser JavaScript metamorphosed into a combination of global and process objects. Needless to say, the document object, which represents the DOM (Document Object Model) of the web page, is nonexistent in Node.js.
Exporting and Importing Modules
Another bad part in browser JavaScript is that there is no way to include modules. Scripts are supposed to be linked together using a different language (HTML), but dependency management is lacking. CommonJS (http://www.commonjs.org/) and RequireJS (http://requirejs.org/) solve this problem with the AJAX-y approach. Node.js borrowed many things from the CommonJS concept.
To export an object in Node.js, use exports.name = object;. An example follows:
var messages = {
  find:function (req, res, next) {
  ...
  },
  add:function (req, res, next) {
  ...
  },
  format: 'title | date | author'
}
exports.messages = messages;
While in the file where we import the aforementioned script (assuming the path and the file name is route/messages.js), write the following:
var messages = require('./routes/messages.js'),
However, sometimes it’s more fitting to invoke a constructor, such as when we attach properties to the Express.js app (which is explained in detail in Express.js FUNdamentals: An Essential Overview of Express.js [2013], http://webapplog.com/express-js-fundamentals/). In this case, module.exports is needed:
module.exports =function (app) {
  app.set('port', process.env.PORT || 3000);
  app.set('views', __dirname + '/views'),
  app.set('view engine', 'jade'),
  return app;
}
In the file that includes the previous sample module, write
...
var app = express();
var config = require('./config/index.js'),
app = config(app);
...
The more succinct code is var = express(); require('./config/index.js')(app);.
The most common mistake when including modules is creating a wrong path to the file. For core Node.js modules, use the name without any path—for example, require('name'). The same goes for modules in the node_modules folder (more on this when we examine NPM later in the chapter).
For all other files (i.e., not modules), use . with or without a file extension. An example follows:
var keys = require('./keys.js'),
  messages = require('./routes/messages.js'),
In addition, for including files, it’s possible to use longer statements with __dirname and path.join()—for example, require(path.join(__dirname, ,'routes', 'messages'));. This is a recommended approach, because path.join() will produce a path with valid slashes (forward or backward depending on your OS).
If require() points to a folder, Node.js attempts to read the index.js file in that folder.
__dirname is an absolute path to the file in which the global variable is called, whereas process.cwd is an absolute path to the process that runs the script. The latter might not be the same as the former if we started the program from a different folder, such as $ node ./code/program.js.
Browser Application Programming Interface Helpers
There are myriad helper functions in Node.js from the browser JavaScript application programming interface (API). The most useful come from String, Array, and Math objects. To make you aware of their existence, or to remind you, here is a list of the most common functions and their meanings:
- Array
- some() and every(): assertions for array items
- join() and concat(): convertion to a string
- pop(), push(), shift(), and unshift(): working with stacks and queues
- map(): model mapping for array items
- filter(): querying array items
- sort(): ordering items
- reduce(), reduceRight(): computing
- slice(): copying
- splice(): removing
- indexOf(): lookups of finding the value in the array
- reverse(): reversing the order
- The in operator: iteration over array items
- Math
- random(): random real number less than one
- String
- substr() and substring(): extracting substrings
- length: length of the string
- indexOf(): index of finding the value in the string
- split(): converting the string to an array
In addition, we have setInterval(), setTimeout(), forEach(), and console methods in Node.js. For the complete list of methods and examples, visit the following sites:
- String (https://developer.mozilla.org/en-US/docs/Web/JavaScript/Reference/Global_Objects/String)
- Array (https://developer.mozilla.org/en-US/docs/Web/JavaScript/Reference/Global_Objects/Array)
- Math (https://developer.mozilla.org/en-US/docs/Web/JavaScript/Reference/Global_Objects/Math)
Node.js Core Modules
Unlike other programming technologies, Node.js doesn’t come with a heavy standard library. The core modules of node.js are a bare minimum, and the rest can be cherry-picked via the NPM registry. The main core modules, classes, methods, and events include the following:
- http (http://nodejs.org/api/http.html#http_http)
- util (http://nodejs.org/api/util.html)
- querystring (http://nodejs.org/api/querystring.html)
- url (http://nodejs.org/api/url.html)
- fs (http://nodejs.org/api/fs.html)
http (http://nodejs.org/api/http.html)
http is the main module responsible for the Node.js HTTP server. The main methods are as follows:
- http.createServer(): returns a new web server object
- http.listen(): begins accepting connections on the specified port and hostname
- http.createClient(): is a client and makes requests to other servers
- http.ServerRequest(): passes incoming requests to request handlers
- data: emitted when a part of the message body is received
- end: emitted exactly once for each request
- request.method(): the request method as a string
- request.url(): request URL string
- http.ServerResponse(): creates this object internally by an HTTP server — not by the user— and is used as an output of request handlers
- response.writeHead(): sends a response header to the request
- response.write(): sends a response body
- response.end(): sends and ends a response body
util (http://nodejs.org/api/util.html)
The util module provides utilities for debugging. One method is as follows:
- util.inspect(): returns a string representation of an object, which is useful for debugging
querystring (http://nodejs.org/api/querystring.html)
The querystring module provides utilities for dealing with query strings. Some of the methods include the following:
- querystring.stringify(): serializes an object to a query string
- querystring.parse(): deserializes a query string to an object
url (http://nodejs.org/api/url.html)
The url module has utilities for URL resolution and parsing. One method is as follows:
- parse(): takes a URL string and returns an object
fs (http://nodejs.org/api/fs.html)
fs handles file system operations such as reading to and writing from files. There are synchronous and asynchronous methods in the library. Some of the methods include the following:
- fs.readFile(): reads files asynchronously
- fs.writeFile(): writes data to files asynchronously
There is no need to install or download core modules. To include them in your application, all you need is to use the following syntax:
var http = require('http'),
A list of noncore modules is found at the following locations:
- npmjs.org (https://npmjs.org): for the NPM registry
- GitHub hosted list (https://github.com/joyent/node/wiki/Modules): for Node.js modules maintained by Joyent
- nodetoolbox.com (http://nodetoolbox.com/): for a registry based on stats
- Nipster (http://eirikb.github.com/nipster/): for NPM search tools for Node.js
- Node tracking (http://nodejsmodules.org): for a registry based on GitHub stats
If you want to know how to code your own modules, take a look at the article “Your First Node.js Module3.”
Handy Node.js Utilities
Although the core of the Node.js platform was, intentionally, kept small, it has some essential utilities, including the following:
- Crypto(http://nodejs.org/api/crypto.html): has randomizer, MD5, HMAC-SHA1, and other algorithms
- Path(http://nodejs.org/api/path.html): handles system paths
- String decoder(http://nodejs.org/api/string_decoder.html): decodes to and from buffer and string types
The method we use throughout is path.join and it concatenates the path using an appropriate folder separator (/ or \).
Reading to and Writing from the File System in Node.js
Reading from files is done via the core fs module (http://nodejs.org/api/fs.html). There are two sets of reading methods: async and sync. In most cases, developers should use async methods, such as fs.readFile:
var fs = require('fs'),
var path = require('path'),
fs.readFile(path.join(__dirname, '/data/customers.csv'), {encoding: 'utf-8'},function (err, data) {
  if (err)throw err;
  console.log(data);
});
To write to the file, execute the following:
var fs = require('fs'),
fs.writeFile('message.txt', 'Hello World!',function (err) {
  if (err)throw err;
  console.log('Writing is done.'),
});
Streaming Data in Node.js
Streaming data is a phrase that means an application processes the data while it’s still receiving it. This feature is useful for extra large datasets such as video or database migrations.
Here’s a basic example of using streams that output the binary file content back:
var fs = require('fs'),
fs.createReadStream('./data/customers.csv').pipe(process.stdout);
By default, Node.js uses buffers for streams. For more immersive instruction, take a look at stream-adventure (http://npmjs.org/stream-adventure) and Stream Handbook (https://github.com/substack/stream-handbook).
Installing Node.js Modules with NPM
NPM comes with the Node.js platform and allows for seamless Node.js package management. The way npm install works is similar to Git in the way it traverses the working tree to find a current project (https://npmjs.org/doc/files/npm-folders.html). For starters, keep in mind that we need either the package.json file or the node_modules folder to install modules locally with $ npm install name. For example, $ npm install superagent; in the program.js write: var superagent = require('superagent'),.
The best thing about NPM is that it keeps all the dependencies local, so if module A uses module B v1.3, and module C uses module B v2.0 (with breaking changes compared with v1.3), both A and C will have their own localized copies of different versions of B. This proves to be a more superior strategy than that of Ruby and other platforms that use global installations by default.
The best practice is not to include a node_modules folder in the Git repository when the project is a module that is supposed to be used in other applications. However, it’s recommended to include node_modules for deployable applications to prevent breakage caused by unfortunate dependency updates.
![]() Note The NPM creator likes to call it npm (lowercase, http://npmjs.org/doc/misc/npm-faq.html).
Note The NPM creator likes to call it npm (lowercase, http://npmjs.org/doc/misc/npm-faq.html).
Taming Callbacks in Node.js
Callbacks (https://github.com/maxogden/art-of-node) are able to make Node.js code asynchronous, yet programmers unfamiliar with JavaScript, who work with Java or PHP, might be surprised when they see Node.js code described on Callback Hell (http://callbackhell.com/):
fs.readdir(source, function(err, files) {
  if (err) {
    console.log('Error finding files: ' + err)
  } else {
    files.forEach(function(filename, fileIndex) {
      console.log(filename)
      gm(source + filename).size(function(err, values) {
        if (err) {
          console.log('Error identifying file size: ' + err)
        } else {
          console.log(filename + ' : ' + values)
          aspect = (values.width / values.height)
          widths.forEach(function(width, widthIndex) {
            height = Math.round(width / aspect)
            console.log('resizing ' + filename + 'to ' + height + 'x' + height)
            this.resize(width, height).write(destination + 'w' + width + '_' + filename, function(err) {
              if (err) console.log('Error writing file: ' + err)
            })
          }.bind(this))
        }
      })
    })
  }
})
There’s nothing to be afraid of here as long as two-space indentation is used. ;-) However, callback code can be rewritten with the use of event emitters or promises, or by using the async library.
Hello World Server with HTTP Node.js Module
Although, Node.js can be used for a wide variety of tasks, it’s used primarily for building web applications. Node.js thrives in the network as a result of its asynchronous nature and built-in modules such as net and http.
Here’s a quintessential Hello World example in which we create a server object, define the request handler (function with req and res arguments), pass some data back to the recipient, and start up the whole thing (hello.js):
var http = require('http'),
http.createServer(function (req, res) {
  res.writeHead(200, {'Content-Type': 'text/plain'});
  res.end('Hello World
'),
}).listen(1337, '127.0.0.1'),
console.log('Server running at http://127.0.0.1:1337/'),
Let’s break it down a bit (if you know this already, skip to the next section). The following loads the core http module for the server (more on the modules later):
var http = require('http'),
This snippet below creates a server with a callback function which contains the response handler code:
var server = http.createServer(function (req, res) {
To set the right header and status code, use the following:
res.writeHead(200, {'Content-Type': 'text/plain'});
To output Hello World with the line end symbol, use
  res.end('Hello World
'),
});
The req and res arguments have all the information about a given HTTP request and response correspondingly. In addition, req and res can be used as streams (see previous section).
To make the server accept requests, use the following:
... listen(1337, '127.0.0.1'),
From the folder in which you have server.js, launch in your terminal the following command:
$node server.js
Open localhost:1337 or 127.0.0.1:1337 or any other address you see in the terminal as a result of the console.log() function and you should see Hello World in a browser. To shut down the server, press Control + c (on Mac OS X).
![]() Note The name of the main file could be different from server.js (e.g., index.js or app.js). In case you need to launch the app.js file, just use $ node app.js.
Note The name of the main file could be different from server.js (e.g., index.js or app.js). In case you need to launch the app.js file, just use $ node app.js.
Debugging Node.js Programs
Modern-day software developers, especially those who use compiled languages such as Java, get accustomed to rich tool sets for debugging purposes. Back in the day, before JavaScript and AJAX apps were starting to gain momentum (~2005–2007), the only way to debug was to put a bunch of alert() statements everywhere. Now, there are amazing environments such as Chrome Developer Tools and Firefox Firebug! Also, because Node.js has a lot of things in common with the browser JavaScript environment, we have plenty of options for debugging in Node.js, including the following:
- Core Node.js Debugger: a nongraphic user interface (non-GUI) minimalistic tool that works everywhere
- Node Inspector: port of Google Chrome Developer Tools
- WebStorm and other IDEs (covered in the next section)
Core Node.js Debugger
The best debugger is console.log(), because it doesn’t break/interrupt the flow, and it is fast and informative. However, to use it, we first need to know where to put it. Sometimes, we just don’t know where to put the logs! Other times, we need to see the call stack and orient ourselves in the async code a bit more. To do this, put debugger statements in your code and use $ node debug program.js to start the debugging process (http://nodejs.org/api/debugger.html).
For example, the Hello World from the previous section can be enhanced with debugger in two places: when an instance is created and when a request is made (hello-debug.js):
var http = require('http'),
debugger;
http.createServer(function (req, res) {
  res.writeHead(200, {'Content-Type': 'text/plain'});
  debugger;
  res.end('Hello World
'),
}).listen(1337, '127.0.0.1'),
console.log('Server running at http://127.0.0.1:1337/'),
Now, if we run the previous snippet (hello-debug.js), just like we did earlier ($ node hello-debug.js), nothing changes, because we need to use $ node debug hello-debug.js. And only then, the execution halts at the first line, and then again on the next debugger statement if we use the cont command.
The main node debug commands are as follows:
- next, n: step to the next statement
- cont, c: continue until the next debugger/break point
- step, s: step inside the function call
- out, o: step outside the function call
- watch(expression): watch the expression
The full list of commands is available through the help command or on the official web site (http://nodejs.org/api/debugger.html).
So, in our example (hello-debug.js), after we start the debugger client and execute cont or c twice (first for the first line and second for our debugger on the second line), the server will be up and running. After that, we can open the browser at (http://localhost:1337/) or execute $ curl "( http://localhost:1337/ )" in the Terminal/Command line, and the debugger client stops inside the request handler (line 5). Now we can use repl and console.log(req) to inspect the HTTP response object dynamically.
Debugging with Node Inspector
The built-in Node.js debugger client is extensive, but it’s not intuitive because of the lack of a GUI. Therefore, for a more developer-friendly interface than the core Node.js debugger provides, node-inspector (https://github.com/node-inspector/node-inspector) comes to the rescue!
To download and install Node Inspector, we use our beloved NPM in the global mode (-g or --global):
$ npm install -g node-inspector
Then, we start Node Inspector with the following (Figure 1-6):
$ node-inspector
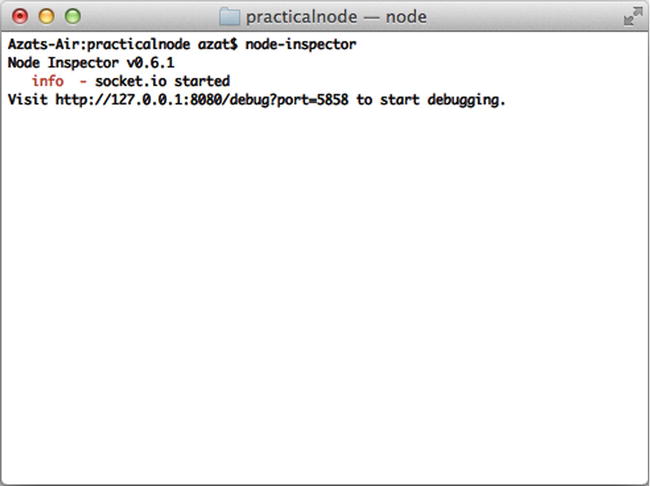
Figure 1-6. Running the Node Inspector tool
Now start the program in a new terminal window/tab/session with --debug or --debug-brk flags (not just debug; Figure 1-7). For example:
$ node --debug-brk hello-debug.js
or
$ node --debug hello-debug.js
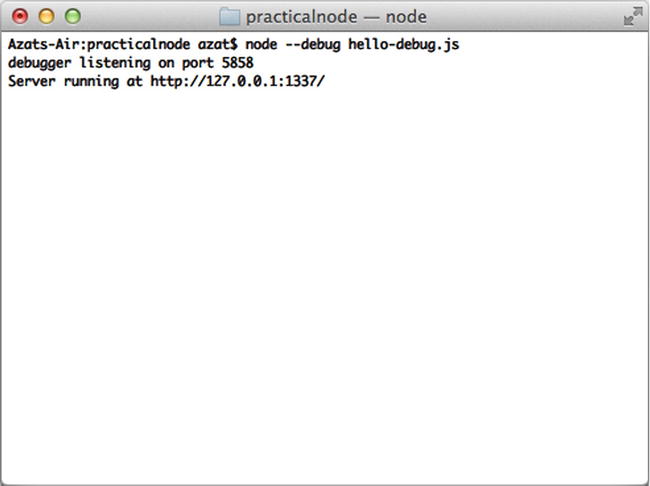
Figure 1-7. Running node server in --debug mode
Open http://127.0.0.1:8080/debug?port=5858 or http://localhost:8080/debug?port=5858 in Chrome (it must be Chrome and not another browser because Node Inspector uses the Web Developer Tools interface). You should be able to see the program halted at a break point. Clicking the blue play button resumes the execution, as shown in Figure 1-8.
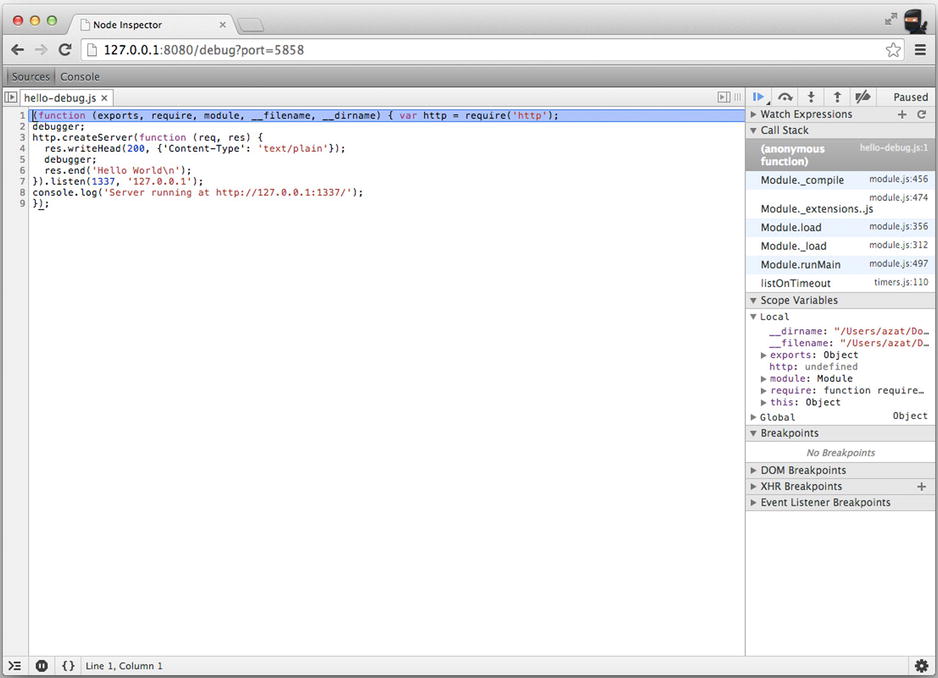
Figure 1-8. Resuming execution in Node Inspector
If we let the server run and open http://localhost:1337/ in a new browser tab, this action pauses the execution on the second break point, which is inside the request handler. From here, we can use Node Inspector’s right GUI and add a res watcher (Figure 1-9), which is way better than the terminal window output!
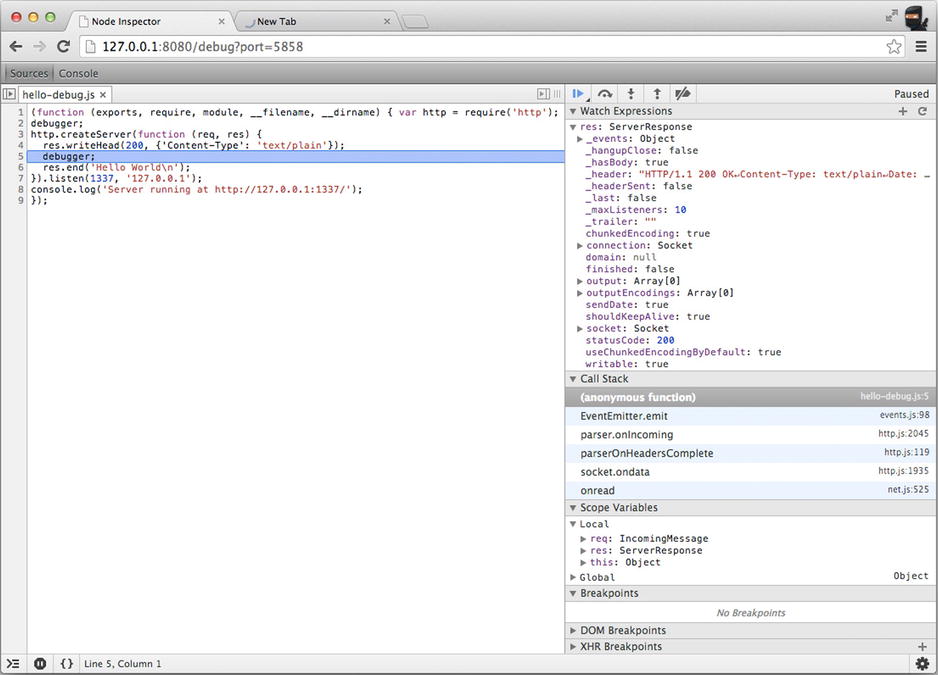
Figure 1-9. Inspecting res object in Node Inspector
In addition, we can follow the call stack, explore scope variables, and execute any Node.js command in the console tab (Figure 1-10)!
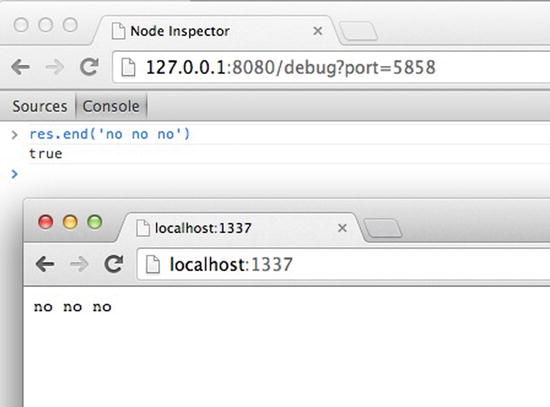
Figure 1-10. Writing to response (i.e., the res object) from the Node Inspector console
Node.js IDEs and Code Editors
One of the best things about Node.js is that you don’t need to compile the code, because it’s loaded into memory and interpreted by the platform! Therefore, a lightweight text editor is highly recommended, such as Sublime Text (Figure 1-11), vs. a full-blown IDE. However, if you are already familiar and comfortable with the IDE of your choice, such as Eclipse (http://www.eclipse.org/), NetBeans (http://netbeans.org/), or Aptana (http://aptana.com/), feel free to stick with it.
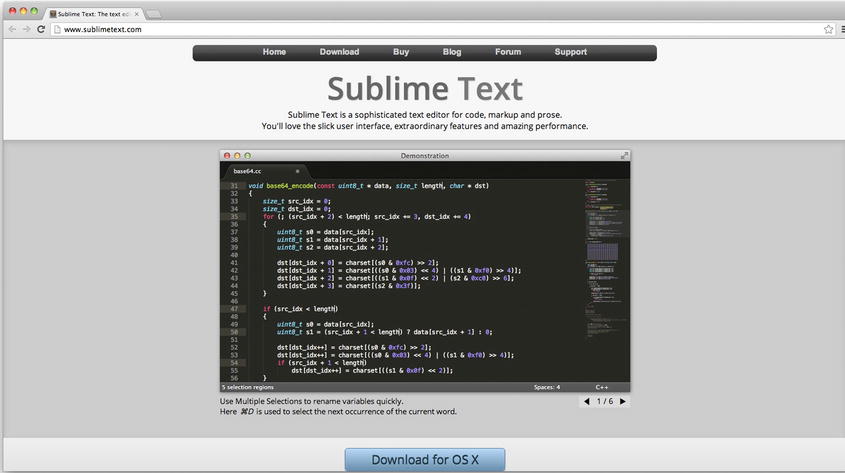
Figure 1-11. Sublime Text code editor home page
The following is a list of the most popular text editors and IDEs used in web development:
- TextMate (http://macromates.com/): Mac OS X version only, free 30-day trial for v1.5, dubbed The Missing Editor for Mac OS X
- Sublime Text (http://www.sublimetext.com/): Mac OS X and Windows versions are available, an even better alternative to TextMate, with an unlimited evaluation period
- Coda (http://panic.com/coda/): an all-in-one editor with an FTP browser and preview, has support for development with an iPad
- Aptana Studio (http://aptana.com/): a full-size IDE with a built-in terminal and many other tools
- Notepad ++ (http://notepad-plus-plus.org/): a free, Windows-only lightweight text editor with the support of many languages
- WebStorm IDE (http://www.jetbrains.com/webstorm/): a feature-rich IDE that allows for Node.js debugging, developed by JetBrains and marketed as “the smartest JavaScript IDE” (Figure 1-12)
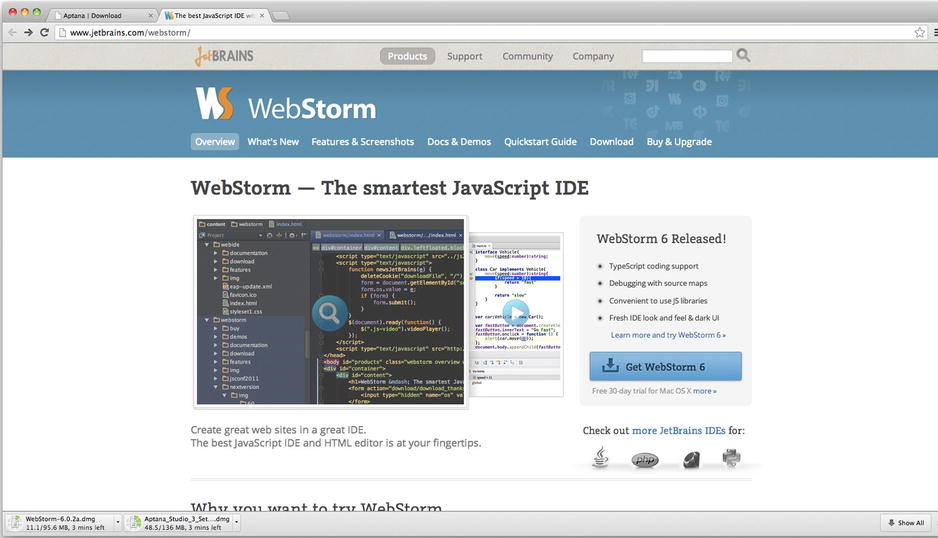
Figure 1-12. WebStorm IDE home page
For most developers, a simple code editor such as Sublime Text 2, TextMate, or Emacs is good enough. However, for programmers who are used to working in IDEs, there’s WebStorm by JetBrains (http://www.jetbrains.com/webstorm). For an example of the WebStorm work space, see Figure 1-13.
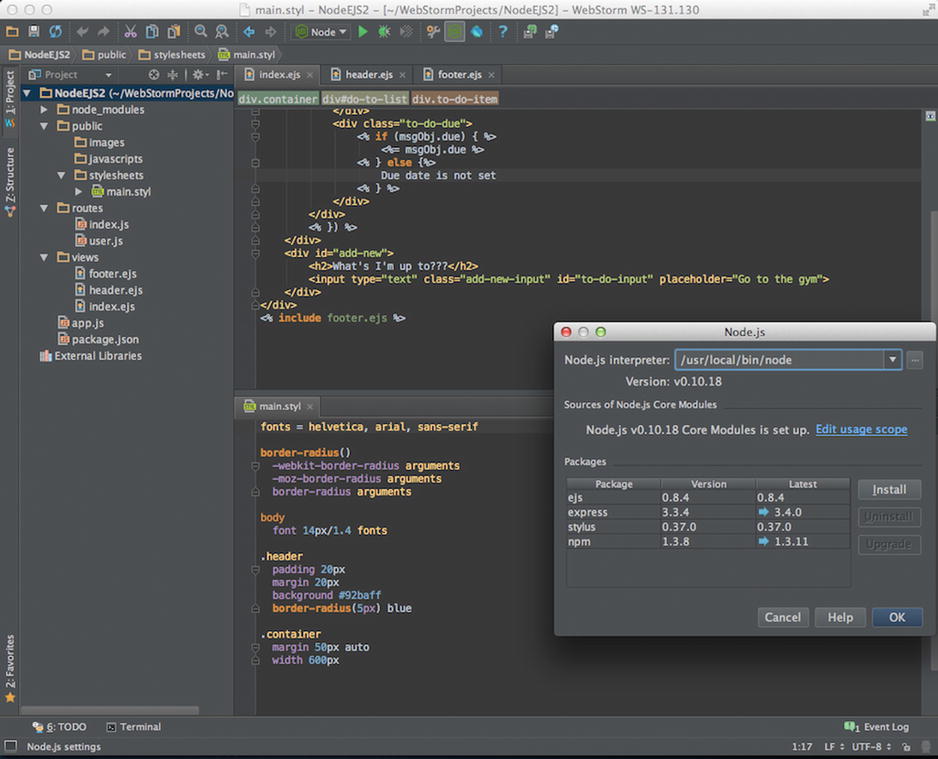
Figure 1-13. Webstorm IDE work space
Watching for File Changes
If you are familiar with watching for file changes or it’s not an issue for you, feel free to skip this section.
Node.js applications are stored in memory, and if we make changes to the source code, we need to restart the process (i.e., node). We do this manually by killing the process and starting a new one (Control + c on Macs and Ctrl + c on Windows). However, it’s faster for development if this constant sequence of restarts is automated. There are brilliant tools that leverage the watch method from the core Node.js fs module and restart servers when we save changes from an editor:
- forever (http://npmjs.org/forever) (GitHub, http://github.com/nodejitsu/forever) usually used in production (we examine this topic in Chapter 11)
- node-dev (https://npmjs.org/package/node-dev) (GitHub, https://github.com/fgnass/node-dev)
- nodemon (https://npmjs.org/package/nodemon) (GitHub, https://github.com/remy/nodemon)
- supervisor (https://npmjs.org/package/supervisor) (GitHub, https://github.com/isaacs/node-supervisor)
- up (https://npmjs.org/package/up) (GitHub, https://github.com/LearnBoost/up), now a deprecated module
Any one of these tools is as easy to use as installing globally with $ npm install -g node-dev, then running the Node.js script with $ node-dev program.js. Just replace node-dev with another module name.☺
For a comparison between these tools, refer to Comparison: Tools to Automate Restarting Node.js Server After Code Changes (http://strongloop.com/strongblog/comparison-tools-to-automate-restarting-node-js-server-after-code-changes-forever-nodemon-nodesupervisor-nodedev/).
![]() Tip It’s good to know that Express.js reloads a template file for every new request by default. So, no server restart is necessary. However, we can cache templates by enabling the view cache setting. For more Express.js setting, take a look at Pro Express.js 4 [2014, Apress].
Tip It’s good to know that Express.js reloads a template file for every new request by default. So, no server restart is necessary. However, we can cache templates by enabling the view cache setting. For more Express.js setting, take a look at Pro Express.js 4 [2014, Apress].
Summary
In this chapter, we explored Installing Node.js and NPM, and launching Node.js scripts from the command line. We also looked at the essential concepts of Node.js syntax and the platform. Last, lists of Node.js IDEs and libraries for development were provided.
In the next chapter, we dive deep into using the most popular Node.js framework for creating web apps.
___________________
1 http://stackoverflow.com/questions/3200211/what-does-immutable-mean
2 https://developer.mozilla.org/en-US/docs/Web/JavaScript/Reference/Global_Objects/Array/prototype
3 http://cnnr.me/blog/2012/05/27/your-first-node-dot-js-module/