
![]()
Building Node.js REST API Servers with Express.js and Hapi
Modern-day web development is moving increasingly toward a structure for which there’s a thick client, usually built with frameworks such as Backbone.js, (http://backbonejs.org/) Anglers JS, (https://angularjs.org/) Ember.js, (http://emberjs.com/) and the like, and a thin back-end layer typically represented by a representational state transfer (REST) web application programing interface (API) service. This model has become more and more popular, and we’ve seen services such as Parse.com and many others pioneer the back end as a service niche. The advantages of this approach are as follows:
- The same back-end REST API can serve multiple client apps/consumers, with web applications being just one of them (mobile and public third-party apps are examples of others).
- There is a separation of concerns, i.e., the clients can be replaced without compromising the integrity of the core business logic, and vice versa.
- User interface / user experience (UI/UX) are inherently hard to test, especially with event-driven, single-page apps, and then there’s an added complexity of cross-browser testing; but, with separation of business logic into the back-end REST API, that logic becomes easy to test in both unit and functional testing.
Therefore, the majority of new projects take the REST API and clients approach. Development teams may take this approach even if they have just one client for the time being which is typically a web app, because they realize that otherwise, when they eventually add more apps, they’ll have to redo their work.
To get started with Node.js REST servers, in this chapter we cover the following:
- RESTful API basics
- Project dependencies
- Test coverage with Mocha (http://visionmedia.github.io/mocha/) and superagent (http://visionmedia.github.io/superagent/)
- REST API server implementation with Express and Mongoskin (https://github.com/kissjs/node-mongoskin)
- Refactoring: Hapi.js (http://hapijs.com/) REST API Server
The REST API server is able to process the creation of objects, retrieval of objects and collections, make changes to objects and remove objects. For your convenience, all the source code is in the ch8 folder in github.com/azat-co/practicalnode (https://github.com/azat-co/practicalnode).
![]() Note In this chapter, our examples use a semicolonless style. Semicolons in JavaScript are absolutely optional (http://blog.izs.me/post/2353458699/an-open-letter-to-javascript-leaders-regarding) except in two cases: in the for loop and before expressions/statements that start with a parenthesis (e.g., immediately invoked function expression (http://en.wikipedia.org/wiki/Immediately-invoked_function_expression) (IIFE)). The reason this style is used, is to give you an alternative perspective. Typing fewer semicolons improves speed, looks better and is more consistent because developers tend to miss semicolons from time to time (perfectly running code allows for such sloppiness). Also, some programmers find semicolonless code more readable.
Note In this chapter, our examples use a semicolonless style. Semicolons in JavaScript are absolutely optional (http://blog.izs.me/post/2353458699/an-open-letter-to-javascript-leaders-regarding) except in two cases: in the for loop and before expressions/statements that start with a parenthesis (e.g., immediately invoked function expression (http://en.wikipedia.org/wiki/Immediately-invoked_function_expression) (IIFE)). The reason this style is used, is to give you an alternative perspective. Typing fewer semicolons improves speed, looks better and is more consistent because developers tend to miss semicolons from time to time (perfectly running code allows for such sloppiness). Also, some programmers find semicolonless code more readable.
RESTful API Basics
RESTful API1 became popular because of the demand in distributed systems in which each transaction needs to include enough information about the state of the client. In a sense, this standard is stateless, because no information about the clients’ states is stored on the server, making it possible for each request to be served by a different system.
Distinct characteristics of RESTful API (i.e., if API is RESTful, it usually follows these principles) are as follows:
- RESTful API has better scalability support because different components can be deployed independently to different servers.
- It replaced the Simple Object Access Protocol (SOAP2) because of the simpler verb and noun structure.
- It uses HTTP methods such as GET, POST, DELETE, PUT, OPTIONS, and so forth.
- JSON is not the only option (although it is the most popular). Unlike SOAP, which is a protocol, the REST methodology is flexible in choosing formats. For example alternative formats might be Extensible Markup Language (XML) or comma-separated values formats (CSV).
In Table 8-1 is an example of a simple create, read, update and delete (CRUD3) REST API for message collection.
Table 8-1. Example of the CRUD REST API Structure
| Method | URL | Meaning |
|---|---|---|
| GET | /messages.json | Return list of messages in JSON format |
| PUT | /messages.json | Update/replace all messages and return status/error in JSON |
| POST | /messages.json | Create a new message and return its ID in JSON format |
| GET | /messages/{id}.json | Return message with ID {id} in JSON format |
| PUT | /messages/{id}.json | Update/replace message with id {id}; if {id} message doesn’t exist, create it |
| DELETE | /messages/{id}.json | Delete message with ID {id}, return status/error in JSON format |
REST is not a protocol; it’s an architecture in the sense that it’s more flexible than SOAP, which we know is a protocol. Therefore, REST API URLs could look like /messages/list.html or /messages/list.xml, in case we want to support these formats.
PUT and DELETE are idempotent methods,4 which means that if the server receives two or more similar requests, the end result is the same.
GET is nullipotent; POST is not idempotent and might affect the state and cause side effects.
More information on REST API5 can be found at Wikipedia and in the article “A Brief Introduction to REST (http://www.infoq.com/articles/rest-introduction).”
In our REST API server, we perform CRUD operations and harness the Express.js middleware (http://expressjs.com/api.html#middleware) concept with the app.param() and app.use() methods. So, our app should be able to process the following commands using the JSON format (collectionName is the name of the collection, typically pluralized nouns, e.g., messages, comments, users):
- POST /collections/{collectionName}: request to create an object; responds with the of newly created object ID
- GET /collections/{collectionName}/{id}: request with ID to retrieve an object
- GET /collections/{collectionName}/: request to retrieve any items from the collection (items); in our example we’ll have this query options: up to 10 items and sorted by ID
- PUT /collections/{collectionName}/{id}: request with ID to update an object
- DELETE /collections/{collectionName}/{id}: request with ID to remove an object
Project Dependencies
To get started with our project, we need to install packages. In this chapter, we use Mongoskin (https://github.com/kissjs/node-mongoskin), a MongoDB library, which is a better alternative to the plain, good-ol’ native MongoDB driver for Node.js (https://github.com/mongodb/node-mongodb-native). In addition, Mongoskin is more lightweight than Mongoose and it is schemaless. For more insights on the library, please check out this Mongoskin comparison blurb, https://github.com/kissjs/node-mongoskin#comparation.
Express.js (http://expressjs.com/) is a wrapper for core Node.js http module (http://nodejs.org/api/http.html) objects. The Express.js framework is built on top of the Connect (https://github.com/senchalabs/connect) middleware library and it provides myriads of convenience. Some people compare the Express.js framework with Ruby’s Sinatra because it’s non-opinionated and configurable.
First, we need to create a ch8/rest-express folder (or download the source code):
$ mkdir rest-express
$ cd rest-express
As mentioned in the previous chapter, Node.js/NPM provides multiple ways to install dependencies, including the following:
- Manually, one by one
- As a part of package.json
- By downloading and copying modules
To keep things simple, let’s just use the package.json approach. You can create the package.json file, or copy the dependencies section or the whole file:
{
  "name": "rest-express",
  "version": "0.0.1",
  "description": "REST API application with Express, Mongoskin, MongoDB, Mocha and Superagent",
  "main": "index.js",
  "directories": {
    "test": "test"
  },
  "scripts": {
    "test": "mocha test -R spec"
  },
  "author": "Azat Mardan",
  "license": "BSD",
  "dependencies": {
    "express": "4.1.2",
    "mongoskin": "1.4.1",
    "body-parser": "1.0.2",
    "morgan": "1.0.1"   },
    "devDependencies": {
      "mocha": "1.16.2",
      "superagent": "0.15.7",
      "expect.js": "0.2.0"
    }
}
Then, simply run this command to install modules for the application:
$ npm install
As a result, the node_modules folder should be created with the superagent, express, mongoskin, and expect libraries. If you change the versions specified in package.json to the later ones, please make sure to update the code according to the packages’ change logs.
Test Coverage with Mocha and Superagent
Before the app implementation, let’s write functional tests that make HTTP requests to our soon-to-be-created REST API server. In a TDD manner, let’s use these tests to build a Node.js free JSON REST API server using the Express.js framework and Mongoskin library for MongoDB.
In this section we walk through the writing of functional tests using the Mocha (http://visionmedia.github.io/mocha/) and superagent 6 libraries. The tests need to perform basic CRUD by posting HTTP requests to our server.
If you know how to use Mocha or just want to jump straight to the Express.js app implementation, feel free to do so. You can use CURL terminal commands for testing, too.
Assuming we already have Node.js, NPM, and MongoDB installed, let’s create a new folder (or, if you wrote the tests, use that folder). Let’s use Mocha as a command-line tool, and Expect.js and superagent as local libraries. To install the Mocha CLI (if it’s not available via $ mocha –V), run this command from the terminal:
$ npm install -g [email protected]
Expect.js and superagent should be available already as part of the installation done in the previous section.
![]() Tip Installing Mocha locally gives us the ability to use different versions at the same time. To run tests, simply point to ./node_modules/mocha/bin/mocha. A better alternative is to use Makefile, as described in Chapter 6.
Tip Installing Mocha locally gives us the ability to use different versions at the same time. To run tests, simply point to ./node_modules/mocha/bin/mocha. A better alternative is to use Makefile, as described in Chapter 6.
Now let’s create a test/index.js file in the same folder (ch8/rest-express), which will have six suites:
- Create a new object
- Retrieve an object by its ID
- Retrieve the whole collection
- Update an object by its ID
- Check an updated object by its ID
- Remove an object by its ID
HTTP requests are a breeze with SuperAgent’s chained functions, which we can put inside each test suite.
So, we start with dependencies:
var superagent = require('superagent')
var expect = require('expect.js')
Then, we write our first test case wrapped in the test case (describe and its callback). The idea is simple. We make an HTTP request to a local instance of the server. When we send the request, we pass some data and, of course, the URL path changes from test case to test case. The main thing happens in the request (made by superagent) callback. There, we put multiple assertions that are the bread and butter (or meat and veggies for paleo readers) of TDD. To be strictly correct, this test suite uses BDD language, but this difference is not essential for our project.
describe('express rest api server', function(){
  var id
  it('post object', function(done){
    superagent.post('http://localhost:3000/collections/test')
      .send({ name: 'John',
        email: '[email protected]'
      })
      .end(function(e,res){
        expect(e).to.eql(null)
        expect(res.body.length).to.eql(1)
        expect(res.body[0]._id.length).to.eql(24)
        id = res.body[0]._id
        done()
      })
  })
As you may have noticed, we’re checking for the following:
- The error object should be null (eql(null))
- The response body array should have one item (to.eql(1))
- The first response body item should have the _id property, which is 24 characters long, i.e., a hex string representation of the standard MongoDB ObjectId type
To finish, we save the newly created object’s ID in the id global variable so we can use it later for retrievals, updates, and deletions. Speaking of object retrievals, we test them in the next test case. Notice that the superagent method has changed to get() and the URL path contains the object ID. You can “uncomment” console.log to inspect the full HTTP response body:
it('retrieves an object', function(done){
  superagent.get('http://localhost:3000/collections/test/'+id)
    .end(function(e, res){
      expect(e).to.eql(null)
      expect(typeof res.body).to.eql('object')
      expect(res.body._id.length).to.eql(24)
      expect(res.body._id).to.eql(id)
      done()
    })
})
The done() callback allows us to test async code. Without it, the Mocha test case ends abruptly, long before the slow server has time to respond.
The next test case’s assertion is a bit more interesting because we use the map() function on the response results to return an array of IDs. In this array, we find our ID (saved in id variable) with the contain method. The contain method is a more elegant alternative to native indexOf(). It works because the results, which are limited to 10 records, come sorted by IDs, and our object was created just moments ago.
it('retrieves a collection', function(done){
  superagent.get('http://localhost:3000/collections/test')
    .end(function(e, res){
      expect(e).to.eql(null)
      expect(res.body.length).to.be.above(0)
      expect(res.body.map(function (item){
        return item._id
      })).to.contain(id)
      done()
    })
})
When the time comes to update our object, we actually need to send some data. We do this by passing an object to superagent’s function. Then, we assert that the operation was completed with (msg=success):
it('updates an object', function(done){
    superagent.put('http://localhost:3000/collections/test/'+id)
      .send({name: 'Peter',
        email: '[email protected]'})
      .end(function(e, res){
        expect(e).to.eql(null)
        expect(typeof res.body).to.eql('object')
        expect(res.body.msg).to.eql('success')
        done()
      })
  })
The last two test cases, which assert retrieval of the updated object and its deletion, use methods similar to those used before. Here is the full source code for the ch8/rest-express/test/index.js file:
var superagent = require('superagent')
var expect = require('expect.js')

describe('express rest api server', function(){
  var id
  it('post object', function(done){
    superagent.post('http://localhost:3000/collections/test')
      .send({ name: 'John',
        email: '[email protected]'
      })
      .end(function(e,res){
        expect(e).to.eql(null)
        expect(res.body.length).to.eql(1)
        expect(res.body[0]._id.length).to.eql(24)
        id = res.body[0]._id
        done()
      })
  })

  it('retrieves an object', function(done){
    superagent.get('http://localhost:3000/collections/test/'+id)
      .end(function(e, res){
        expect(e).to.eql(null)
        expect(typeof res.body).to.eql('object')
        expect(res.body._id.length).to.eql(24)
        expect(res.body._id).to.eql(id)
        done()
      })
  })

  it('retrieves a collection', function(done){
    superagent.get('http://localhost:3000/collections/test')
      .end(function(e, res){
        expect(e).to.eql(null)
        expect(res.body.length).to.be.above(0)
        expect(res.body.map(function (item){
          return item._id
        })).to.contain(id)
        done()
      })
  })

  it('updates an object', function(done){
    superagent.put('http://localhost:3000/collections/test/'+id)
      .send({name: 'Peter',
        email: '[email protected]'})
      .end(function(e, res){
        expect(e).to.eql(null)
        expect(typeof res.body).to.eql('object')
        expect(res.body.msg).to.eql('success')
        done()
      })
  })

  it('checks an updated object', function(done){
    superagent.get('http://localhost:3000/collections/test/'+id)
      .end(function(e, res){
        expect(e).to.eql(null)
        expect(typeof res.body).to.eql('object')
        expect(res.body._id.length).to.eql(24)
        expect(res.body._id).to.eql(id)
        expect(res.body.name).to.eql('Peter')
        done()
      })
  })

  it('removes an object', function(done){
    superagent.del('http://localhost:3000/collections/test/'+id)
      .end(function(e, res){
        expect(e).to.eql(null)
        expect(typeof res.body).to.eql('object')
        expect(res.body.msg).to.eql('success')
        done()
      })
  })
})
To run the tests, we can use the $ mocha test command, $ mocha test/index.js, or npm test. For now, the tests should fail because we have yet to implement the server!
For those of you who require multiple versions of Mocha, another alternative, which is better, is to run your tests using local Mocha binaries: ./node_modules/mocha/bin/mocha ./test. This, of course, assumes that we have installed Mocha locally into node_modules.
![]() Note By default, Mocha doesn’t use any reporters, and the result output is lackluster. To receive more explanatory logs, supply the -R <name> option (e.g., $ mocha test -R spec or $ mocha test -R list).
Note By default, Mocha doesn’t use any reporters, and the result output is lackluster. To receive more explanatory logs, supply the -R <name> option (e.g., $ mocha test -R spec or $ mocha test -R list).
REST API Server Implementation with Express and Mongoskin
Create and open ch8/rest-express/index.js, which will be the main application file.
First things first. Let’s import our dependencies into the application:
var express = require('express'),
  mongoskin = require('mongoskin'),
  bodyParser = require('body-parser'),
  logger = require('morgan')
After version 3.x, Express.js streamlined the instantiation of its app instance so that the following line gives us a server object:
var app = express()
To extract parameters and data from the requests, let’s use bodyParser.urlencoded() and bodyParser.json() middleware. We apply them with app.use(), and the code looks more like configuration statements:
app.use(bodyParser.urlencoded())
app.use(bodyParser.json())
app.use(logger())
express.logger() is optional middleware that allows us to monitor requests. Middleware (in this (http://expressjs.com/api.html#app.use) and other forms (http://expressjs.com/api.html#middleware)) is a powerful and convenient pattern in Express.js and Connect to organize and reuse code.
As with the express.urlencoded() and express.json() methods, which save us from the hurdles of parsing a body object of an HTTP request, Mongoskin makes it possible to connect to the MongoDB database in one effortless line of code:
var db = mongoskin.db('mongodb://@localhost:27017/test', {safe:true})
![]() Note If you wish to connect to a remote database (e.g., MongoHQ (https://www.mongohq.com/home)), substitute the string with your username, password, host, and port values. Here is the format of the uniform resource identifier (URI) string (no spaces): mongodb://[username:password@] host1[:port1][,host2[:port2],... [,hostN[:portN]]] [/[database][?options]]
Note If you wish to connect to a remote database (e.g., MongoHQ (https://www.mongohq.com/home)), substitute the string with your username, password, host, and port values. Here is the format of the uniform resource identifier (URI) string (no spaces): mongodb://[username:password@] host1[:port1][,host2[:port2],... [,hostN[:portN]]] [/[database][?options]]
The next statement is a helper function that converts hex strings into MongoDB ObjectID data types:
var id = mongoskin.helper.toObjectID
The app.param() method is another form of Express.js middleware. It basically says: Do something every time there is this value in the URL pattern of the request handler. In our case, we select a particular collection when a request pattern contains a string collectionName prefixed with a colon (we see this when we examine routes):
app.param('collectionName', function(req, res, next, collectionName){
  req.collection = db.collection(collectionName)
  return next()
})
To be user friendly, let’s include a root route with a message that asks users to specify a collection name in their URLs:
app.get('/', function(req, res, next) {
  res.send('Select a collection, e.g., /collections/messages')
})
Now the real work begins. Here is how we retrieve a list of items sorted by _id that has a limit of 10:
app.get('/collections/:collectionName', function(req, res, next) {
  req.collection.find({},{
    limit:10, sort: [['_id',-1]]
  }).toArray(function(e, results){
    if (e) return next(e)
    res.send(results)
  })
})
Have you noticed a :collectionName string in the URL pattern parameter? This and the previous app.param() middleware are what give us the req.collection object, which points to a specified collection in our database.
The object-creating end point (POST /collections/:collectionName) is slightly easier to grasp because we just pass the whole payload to the MongoDB.
app.post('/collections/:collectionName', function(req, res, next) {
  req.collection.insert(req.body, {}, function(e, results){
    if (e) return next(e)
    res.send(results)
  })
})
This approach, or architecture, is often called free JSON REST API, because clients can throw data structured in any way and the server handles it perfectly (a good example is a back-end as a service called Parse.com, recently acquired by Facebook).
Single-object retrieval functions are faster than find(), but they use a different interface (they return an object directly instead of a cursor—please be aware). We’re also extracting the ID from the :id part of the path with req.params.id Express.js magic:
app.get('/collections/:collectionName/:id', function(req, res, next) {
  req.collection.findOne({
    _id: id(req.params.id)
  }, function(e, result){
    if (e) return next(e)
    res.send(result)
  })
})
The PUT request handler gets more interesting because update() doesn’t return the augmented object. Instead, it returns a count of affected objects. Also, {$set:req.body} is a special MongoDB operator (operators tend to start with a dollar sign) that sets values.
The second {safe:true, multi:false} parameter is an object with options that tell MongoDB to wait for the execution before running the callback function and to process only one (the first) item.
app.put('/collections/:collectionName/:id', function(req, res, next) {
  req.collection.update({
      _id: id(req.params.id)
    }, {$set:req.body}, {safe:true, multi:false},
    function(e, result){
      if (e) return next(e)
      res.send((result === 1) ? {msg:'success'} : {msg:'error'})
    }
  );
})
Last, the DELETE method, which also outputs a custom JSON message (JSON object with msg equals either a success string or the encountered error message):
app.del('/collections/:collectionName/:id', function(req, res, next) {
  req.collection.remove({
      _id: id(req.params.id)
    },
    function(e, result){
      if (e) return next(e)
      res.send((result === 1) ? {msg:'success'} : {msg:'error'})
    }
  );
})
![]() Note app.del() is an alias for app.delete() method in Express.js.
Note app.del() is an alias for app.delete() method in Express.js.
The last line that actually starts the server, on port 3000 in this case, is
app.listen(3000, function(){
  console.log ('Server is running')
})
Just in case something is not working well, here is the full code of the Express.js 4.1.2 REST API server from the ch8/rest-express/index.js file:
var express = require('express'),
  mongoskin = require('mongoskin'),
  bodyParser = require('body-parser'),
  logger = require('morgan')

var app = express()

app.use(bodyParser.urlencoded())
app.use(bodyParser.json())
app.use(logger())

var db = mongoskin.db('mongodb://@localhost:27017/test', {safe:true})
var id = mongoskin.helper.toObjectID

app.param('collectionName', function(req, res, next, collectionName){
  req.collection = db.collection(collectionName)
  return next()
})

app.get('/', function(req, res, next) {
  res.send('Select a collection, e.g., /collections/messages')
})

app.get('/collections/:collectionName', function(req, res, next) {
  req.collection.find({}, {limit: 10, sort: [['_id', -1]]})
    .toArray(function(e, results){
      if (e) return next(e)
      res.send(results)
    }
  )
})

app.post('/collections/:collectionName', function(req, res, next) {
  req.collection.insert(req.body, {}, function(e, results){
    if (e) return next(e)
    res.send(results)
  })
})

app.get('/collections/:collectionName/:id', function(req, res, next) {
  req.collection.findOne({_id: id(req.params.id)}, function(e, result){
    if (e) return next(e)
    res.send(result)
  })
})

app.put('/collections/:collectionName/:id', function(req, res, next) {
  req.collection.update({_id: id(req.params.id)},
    {$set: req.body},
    {safe: true, multi: false}, function(e, result){
    if (e) return next(e)
    res.send((result === 1) ? {msg:'success'} : {msg:'error'})
  })
})

app.del('/collections/:collectionName/:id', function(req, res, next) {
  req.collection.remove({_id: id(req.params.id)}, function(e, result){
    if (e) return next(e)
    res.send((result === 1) ? {msg:'success'} : {msg:'error'})
  })
})

app.listen(3000, function(){
  console.log ('Server is running')
})
Exit your editor and run this command in your terminal:
$ node .
This is equivalent to $ node index.
Then, in a different terminal window (without closing the first one), execute the tests:
$ mocha test
A slightly better execution is as follows (Figure 8-1):
$ mocha test -R nyan
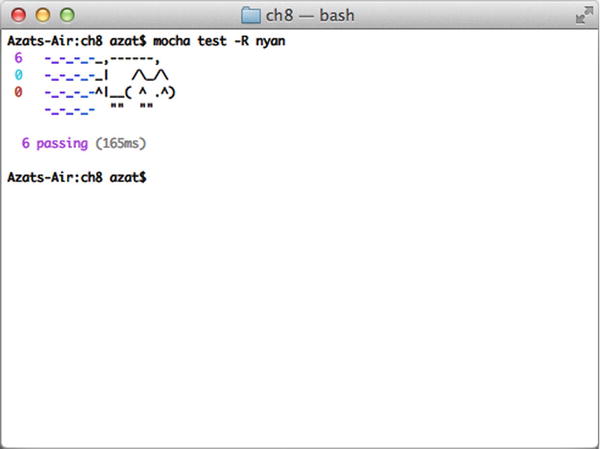
Figure 8-1. Who wouldn’t like a library with Nyan Cat?
If you really don’t like Mocha and/or BDD (and TDD), CURL is always there for you. :-) For example, CURLing is done with the following, as shown in Figure 8-2:
curl http://localhost:3000/collections/curl-test

Figure 8-2. A GET request made with CURL
![]() Note GET requests also work in the browser. For example, open http://localhost:3000/test while your server is running.
Note GET requests also work in the browser. For example, open http://localhost:3000/test while your server is running.
CURLing data to make a POST request is easy (Figure 8-3):
$ curl -d "name=peter&[email protected]"http://localhost:3000/collections/curl-test
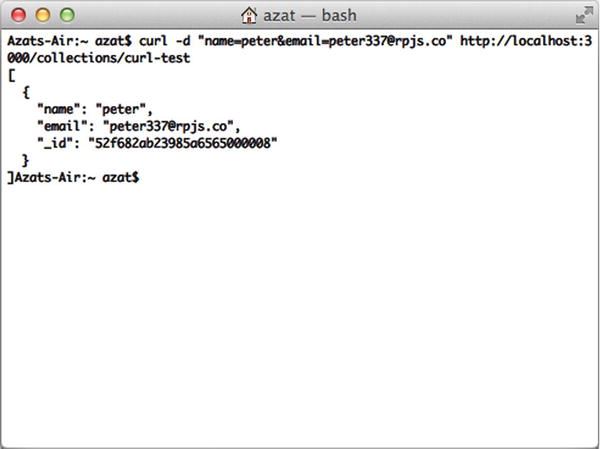
Figure 8-3. The result of sending a POST request via CURL
DELETE or PUT can be sent with --request NAME and the ID in the URL, such as:
$ curl --request DELETE http://localhost:3000/collections/curl-test/52f6828a23985a6565000008
For a short, nice tutorial on the main CURL commands and options, take a look at CURL Tutorial with Examples of Usage (http://www.yilmazhuseyin.com/blog/dev/curl-tutorial-examples-usage/).
In this chapter, our tests are longer than the app code itself, so abandoning TDD might be tempting, but believe me, the good habits of TDD save you hours and hours of work during any serious development, when the complexity of the application on which you are working is high.
You might wonder: Why spend time on TDD in the chapter about REST APIs? The answer is mainly because REST APIs don’t have UIs in the form of web pages. APIs are intended for consumption by other programs (i.e., consumers or clients). We, as developers, don’t have much choice when it comes to using APIs. We either have to write a client application, or manually send execute CURLs (or jQuery $.ajax() calls from the browser console). But, the best way is to use tests, which act as small client apps, if we think categorically!
However, this is not the whole story. TDD is great when it comes to refactoring. The next section is spent changing from Express.js to Hapi. And after we’re done, we can rest assured, by running the same tests, that the functionality isn’t broken or changed.
Refactoring: Hapi RESP API Server
Hapi (http://spumko.github.io/) (NPM (https://www.npmjs.org/package/hapi) and GitHub (https://github.com/spumko/hapi)) is an enterprise-grade framework. It’s more complex and feature rich than Express.js, and it’s easier to develop in large teams (http://hueniverse.com/2012/12/hapi-a-prologue/). Hapi is maintained by Eran Hammer (http://hueniverse.com/) of Walmart Labs.
The goal of this section is to show you alternative patterns in implementing the REST API server in Node.js. Now, because we have Mocha tests, we can refactor our code with peace of mind. Here’s the package.json for this project:
{
  "name": "rest-hapi",
  "version": "0.0.1",
  "description": "REST API application with Express, Mongoskin, MongoDB, Mocha and Superagent",
  "main": "index.js",
  "directories": {
    "test": "test"
  },
  "scripts": {
    "test": "mocha test -R spec"
  },
  "author": "Azat Mardan",
  "license": "BSD",
  "dependencies": {
    "good": "2.0.0",
    "hapi": "2.1.2",
    "mongoskin": "1.4.1"
  },
  "devDependencies": {
    "mocha": "1.16.2",
    "superagent": "0.15.7",
    "expect.js": "0.2.0"
  }
}
You can either use package.json with $ npm install or, for Hapi installation only, simply run $ npm install [email protected] [email protected] --save from the ch8/rest-hapi folder. hapi is the framework’s module and good is its logger. This downloads the modules and unpacks them in the node_modules folder. Next, we need to create a hapi-app.js file and open it in the editor.
As usual, at the beginning of a Node.js program (ch8/rest-hapi/hapi-app.js), we import dependencies:
var hapi = require('hapi'),
  mongoskin = require('mongoskin'),
Then, we create the Hapi server object:
server = hapi.createServer('localhost', 3000),
and the database (just like in the Express.js example):
var db = mongoskin.db('mongodb://@localhost:27017/test', {safe:true})
var id = mongoskin.helper.toObjectID
This function loads the database collection asynchronously based on the provided name argument. Note that loadCollection takes the URL param and gives us the corresponding database collection:
var loadCollection = function(name, callback) {
  callback(db.collection(name))
}
This part is the most distinct compared with Express.js. Developers use properties for methods and paths, and instead of res (or response) we use reply inside of the handler property. Every route is an item in the array passed to server.route(). The first such route is for the home page (“/”):
server.route([
  {
    method: 'GET',
    path: '/',
    handler: function(req, reply) {
      reply('Select a collection, e.g., /collections/messages')
    }
  },
Next item in the array, that is the argument to the route method, is the route that returns a list of items as a response to a GET /collection/:collectionName request. The main logic happens in the handler function again, where we call the loadCollection method, find any objects (find({})), and output limited (up to 10 items) and sorted results:
  {
  method: 'GET',
  path: '/collections/{collectionName}',
  handler: function(req, reply) {
    loadCollection(req.params.collectionName, function(collection) {
      collection.find({}, {
        limit:10,
        sort: [['_id', -1]]}).toArray(function(e, results){
          if (e) return reply(e)
          reply(results)
        }
      )
    })
  }
},
The third route handles the creation of new objects (POST /collections/collectionName). Again, we use loadCollection and then call the insert method with a request body (req.paylod):
  {
  method: 'POST',
  path: '/collections/{collectionName}',
  handler: function(req, reply) {
    loadCollection(req.params.collectionName, function(collection) {
      collection.insert(req.payload, {}, function(e, results){
        if (e) return reply(e)
        reply(results)
      })
    })
  }
},
Please note that each URL parameter is enclosed in {}, unlike the :name convention that Express.js uses. This is, in part, because : is a valid URL symbol, and by using it as a parameter identifier, we eliminate it from our URL addresses.
The next route is responsible for getting a single record by its ID (/collection/collectionName/id). The main logic of using the findOne method is the same as in the Express.js server example:
  {
  method: 'GET',
  path: '/collections/{collectionName}/{id}',
  handler: function(req, reply) {
    loadCollection(req.params.collectionName, function(collection) {
      collection.findOne({
        _id: id(req.params.id)}, function(e, result){
          if (e) return reply(e)
          reply(result)
        }
      )
    })
  }
},
This route updates documents in the database and, again, most of the logic in the handler remains the same, as in the Express.js example, except that we call loadCollection to get the right collection based on the URL parameter collectionName:
  {
  method: 'PUT',
  path: '/collections/{collectionName}/{id}',
  handler: function(req, reply) {
    loadCollection(req.params.collectionName, function(collection) {
      collection.update(
        {_id: id(req.params.id)},
        {$set:req.payload},
        {safe:true, multi:false},
        function(e, result){
          if (e) return reply(e)
          reply((result === 1) ? {msg:'success'} : {msg:'error'})
        }
      )
    })
  }
},
The last route handles deletions. First, it gets the right collection via the URL parameter (collectionName). Then, it removes the object by its ID and sends back the message (success or error):
    {
    method: 'DELETE',
    path: '/collections/{collectionName}/{id}',
    handler: function(req, reply) {
      loadCollection(req.params.collectionName, function(collection) {
        collection.remove({
          _id: id(req.params.id)}, function(e, result){
            if (e) return reply(e)
            reply((result === 1) ? {msg:'success'} : {msg:'error'})
          }
        )
      })
    }
  }
])
The next configuration deals with logging and is optional:
var options = {
  subscribers: {
    'console': ['ops', 'request', 'log', 'error']
  }
};

server.pack.require('good', options, function (err) {
  if (!err) {
      // Plugin loaded successfully
  }
});
The last line of hapi-app.js starts the server with the server.start() method:
server.start()
The following summarizes what we did differently while switching from Express.js to Hapi:
- Defined routes in an array.
- Used method, path, and handler properties of the route object.
- Used the loadCollection method instead of middleware.
- Used {name} instead of :name for defining URL parameters.
For your convenience, here’s the full source code of ch8/rest-hapi/hapi-app.js:
var hapi = require('hapi'),
  server = hapi.createServer('localhost', 3000)
  mongoskin = require('mongoskin')

var db = mongoskin.db('mongodb://@localhost:27017/test',
  {safe:true})
var id = mongoskin.helper.toObjectID

var loadCollection = function(name, callback) {
  callback(db.collection(name))
}

server.route([{
    method: 'GET',
    path: '/',
    handler: function(req, reply) {
      reply('Select a collection, e.g., /collections/messages')
    }
  }, {
    method: 'GET',
    path: '/collections/{collectionName}',
    handler: function(req, reply) {
      loadCollection(req.params.collectionName,
        function(collection) {
          collection.find({}, {
            limit: 10,
            sort: [['_id', -1]]
          }).toArray(function(e, results){
            if (e) return reply(e)
            reply(results)
          })
        }
      )
    }
  }, {
    method: 'POST',
    path: '/collections/{collectionName}',
    handler: function(req, reply) {
      loadCollection(req.params.collectionName,
        function(collection) {
          collection.insert(req.payload, {}, function(e, results){
            if (e) return reply(e)
            reply(results)
          }
        )
      })
    }
  }, {
    method: 'GET',
    path: '/collections/{collectionName}/{id}',
    handler: function(req, reply) {
      loadCollection(req.params.collectionName,
        function(collection) {
          collection.findOne({_id: id(req.params.id)},
            function(e, result){
              if (e) return reply(e)
              reply(result)
            }
          )
        }
      )
    }
  }, {
    method: 'PUT',
    path: '/collections/{collectionName}/{id}',
    handler: function(req, reply) {
      loadCollection(req.params.collectionName,
        function(collection) {
        collection.update({_id: id(req.params.id)},
          {$set: req.payload},
          {safe: true, multi: false}, function(e, result){
          if (e) return reply(e)
          reply((result === 1) ? {msg:'success'} : {msg:'error'})
        })
      })
    }
  }, {
    method: 'DELETE',
    path: '/collections/{collectionName}/{id}',
    handler: function(req, reply) {
      loadCollection(req.params.collectionName,
        function(collection) {
          collection.remove({_id: id(req.params.id)},
            function(e, result){
              if (e) return reply(e)
              reply(
                (result === 1) ? {msg:'success'} : {msg:'error'}
              )
            }
          )
        }
      )
    }
  }
])

var options = {
  subscribers: {
    'console': ['ops', 'request', 'log', 'error']
  }
};

server.pack.require('good', options, function (err) {
  if (!err) {
    // Plugin loaded successfully
  }
});

server.start()
If we run the newly written Hapi server with $ node hapi-app, and then run tests in a separate tab/window, the tests pass! If they don’t, for some reason, the source code is in the GitHub repository github.com/azat-co/practicalnode (http://github.com/azat-co/practicalnode).
Summary
The loosely coupled architecture of REST API servers and clients (mobile, web app, or front end) allows for better maintenance and works perfectly with TDD/BDD. In addition, NoSQL databases such as MongoDB are good at handling free REST APIs. We don’t have to define schemas, and we can throw any data at it and it is saved!
The Express.js and Mongoskin libraries are great when you need to build a simple REST API server using a few lines of code. Later, if you need to expand the libraries, they also provide a way to configure and organize your code. If you want to learn more about Express.js, take a look at Pro Express.js [2014, Apress]. Also, it’s good to know that, for more complex systems, the Hapi server framework is there for you!
In this chapter, in addition to Express.js, we used MongoDB via Mongoskin. We also used Mocha and SuperAgent to write functional tests that, potentially, save us hours in testing and debugging when we refactor code in the future. Then, we easily flipped Express.js for Hapi and, thanks to the tests, are confident that our code works as expected! The differences between the Express and Hapi frameworks that we observed are in the way we defined routes and URL parameters, and output the response.
___________________
1http://en.wikipedia.org/wiki/Representational_state_transfer#Applied_to_web_services.
2http://en.wikipedia.org/wiki/SOAP.
3http://en.wikipedia.org/wiki/Create,_read,_update_and_delete.
4http://en.wikipedia.org/wiki/Hypertext_Transfer_Protocol#Idempotent_methods_and_web_application.
5http://en.wikipedia.org/wiki/Representational_state_transfer.