
Chapter 3. Creating Your First Synthesised Data
This chapter introduces synthesis, the second pillar of this book, as discussed in Chapter 1. Here, the focus is on the tools and process you’ll be using to synthesise data for machine learning, and how it ties into the work you’ve done so far for simulation, and how it’s quite different.
By the end of this chapter, you’ll be generating the world’s most disappointing synthesised data! But you’ll be prepared to make far more interesting data in future chapters. We promise. Stick with us.
As we mentioned in “Unity”, the primary tool we’ll be using for our initial foray into Synthesis, is a Unity package called Perception.
Unity Perception
Unity’s Perception package turns the Unity game engine into a tool for generating synthetic datasets—primarily images—for use in ML workflows that are, primarily, outside of Unity.
Perception provides an array of useful tools, ranging from dataset capture, to object labeling, image capture, and beyond. Using Perception, you can create straightforward object-label associations and have them fed directly to whatever other part of an ML toolchain you require. It can even help you generate bounding boxes and semantic segmentation masks, as well as secene generation, and beyond. It’s really powerful
Unity perception is an open source project, and is freely available via its GitHub project. An example of its features is shown in Figure 3-1.
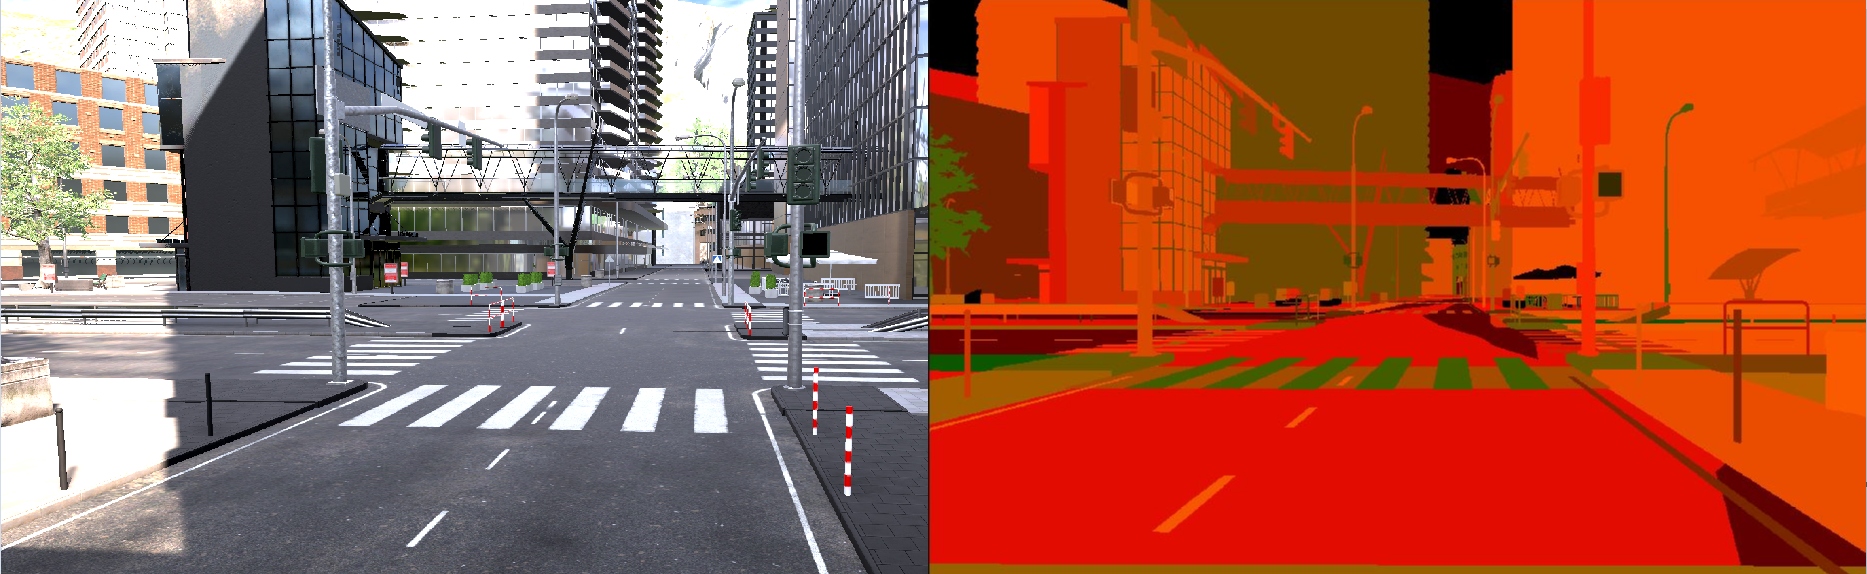
Figure 3-1. Unity’s Perception framework
The Process
The overall workflow we’ll use for most of the synthetic data we generate through the examples in this book is as follows:
-
We’ll determine a scenario that requires a large volume of data, typically for training
-
We’ll create a scene, or a number of scenes in Unity, laying out the objects that we want to be involved in our simulated data
-
We’ll use randomizers to alter the parameters of the scene, in order to greata data as needed
-
Finally, we’ll specify ground-truth and labels for our data, and generate the data.
In this chapter, we’ll be working through the setup for generating data, and the first two steps of the above workflow.
Using Unity Perception
To explore the use of Unity’s Perception package, we’re going to make a simple example that goes through this workflow.
Eventually, we’ll be generating images of dice, with the camera at different angles, the background at different colours, and the dice in different colour combinations. An example of the sort of images we’ll be generating is shown in Figure 3-2.

Figure 3-2. Examples of the Dice images we’ll be generating
For now, however, we’ll be setting up a scene, and preparing to add randomisation. We won’t be adding actual randomisers yet, though. That will come next.
Creating the Unity Project
As with many of our practical scenarios, the first step to creating synthetic data with Unity is to create a brand new Unity project:
-
Open the Unity Hub, and create a new “Universal Render Pipeline” project. As shown in Figure 3-3, we’ll name ours “Dice with Perception”, but the name isn’t important for the functionality.

Figure 3-3. Creating a URP project in Unity Hub
Warning
We’re not going to create a “3D Project”, as we have in the previous chapters, because we need to use Unity’s Universal Render Pipeline. The Universal Render Pipeline (URP) is a scriptable graphics pipeline, which creates a different workflow for game developers. Because one of the core things we need to do, as part of generating our synthetic data, is output images, we’re going to use the URP. Perception uses an event that the URP generates when a frame has completed rendering, at a project-wide level, and we’ll be using that event to output an image. Don’t want to think about it? Don’t worry about it! Just remember, you’ll likely want to use the URP when you’re building projects around Unity’s Perception features, and the easiest way to do that is to start from the provided URP template in the Unity Hub.
-
Once the project has loaded, you’ll want to delete the example assets that are addded by the URP template, as shown in Figure 3-4.
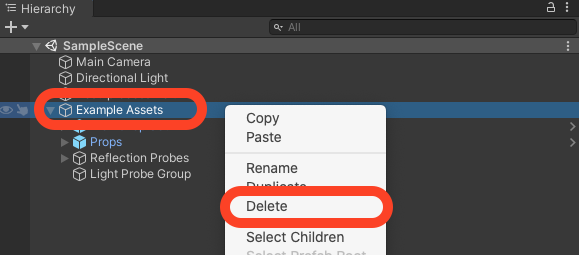
Figure 3-4. Deleting the Example Assets
-
Next, we want to install the Perception package. Select the Window menu → Package Manager, and use the Unity Package Manager to install the Perception package by choosing the + menu → Add package from git URL… and entering
com.unity.perception, as shown in Figure 3-5 and Figure 3-6.

Figure 3-5. Adding a Package from Git

Figure 3-6. The package name for the Unity Perception package
Note
By the time this book is out, the Package is likely to be normally accessible in the Package Manager. This would be a TODO for the authors to update at that time.
It might take a few moments for the package to download and install, so be patience. Once it’s finished downloading, you’ll see Unity import it, as shown in Figure 3-7. You can then close the Package Manager window.

Figure 3-7. The Unity Perception package being loaded by Unity
Your project is largely ready to go at this point. This is a good, clean starting point for all your work using Unity’s Perception framework, so we recommend pushing it to some sort of source control, or duplicating it, so you have a fresh starting point each time.
Creating a Scene
Sometimes it’s good to create a scene! This is one of those times.
Getting the Dice Models
First, we’ll need the dice models that we’re going to use. You could make your own, if you wanted, but in the book’s resources at TODO, you can download a unitypackage that contains dice models we made for you:
-
Download the
Dice.unitypackagefile from TODO, and import it into Unity by double clicking in on it, then clicking Import All in Unity. -
Once the models are imported, verify that they’re visible in the Project pane of the Unity Editor, as shown in Figure 3-8.
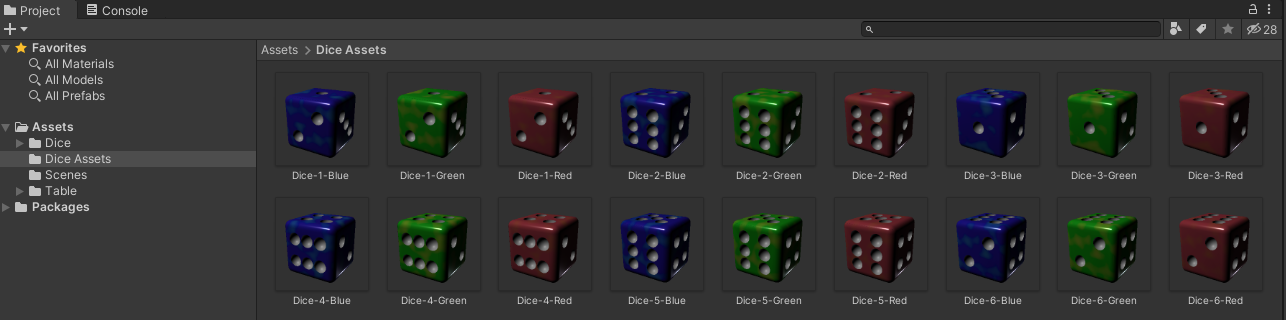
Figure 3-8. The Dice assets in the Unity editor
That’s it! You’re ready to make a scene.
A Very Simple Scene
First, we need to add a floor, and some dice:
-
Create a floor, by adding a Plane to the scene, and renaming it to Floor, as shown in Figure 3-9.

Figure 3-9. The initial scene, with Floor
-
Drag some of the dice from the Project pane into the Scene or Hierarchy view, and position them on the floor. The absolute specifics don’t hugely matter right now, but if you’d like to duplicate our scene you can see it in Figure 3-10.
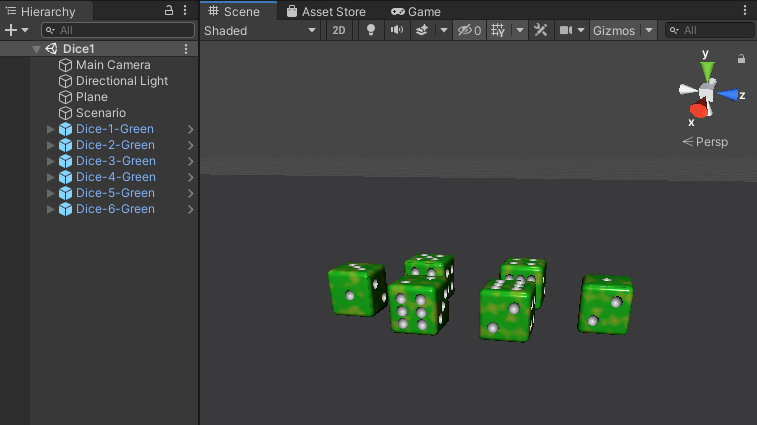
Figure 3-10. The dice in the scene
-
Position the camera so that it’s showing the dice from a slightly elevated angle. You can verify this by looking at the Game view while you reposition the camera. Ours is shown Figure 3-11.

Figure 3-11. A good perspective on the Dice
-
Use the dropdown menu at the top of the game view, as shown in Figure 3-12, to add a named resolution (ours is called Perception) and set the resolution of the camera to
480by480. Because we’ll be using the Main Camera (which is the only camera) to render the images, the resolution here controls the size of the images we’ll be rendering and saving to disk.

Figure 3-12. Setting the resolution
Next, we need to create a means to control our synthesis scenario:
-
Create a new empty GameObject in the Hierarchy view, and name it Scenario, or similar.
-
Add a Fixed Length Scenario component to this new GameObject.
-
Set the parameters as shown in <<>>. We’ll be coming back to this later.
Note
If you don’t have a Fixed Length Scenario component available, review the steps listed above for importing the Perceptin package. This asset comes from the Perception package.
The Fixed Length Scenario is used to control the execution flow of the scene by coordinating all the random elements necessary.
Now, we need to modify the Main Camera to allow it to be used for Perception:
-
Select the Main Camera, and add a Perception Camera component.
-
Change the parameters of the Perception Camera to be as shown in Figure 3-13. We’ll come back to the specifics of this shortly.
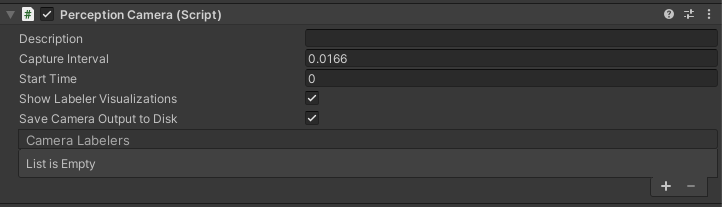
Figure 3-13. A new Perception Camera component
Warning
If you start seeing errors or warnings related to asychronous shader compilation in the Unity Editor’s Console pane when you add the Perception Camera component. If this occurs, select the Edit menu → Project Settings… → Editor, and in the Shader Compilation settings, find and disable Asynchronous Shader Compilation.
The Perception Camera component allows us to modify and control the parametres of the synthetic frames that are being captured from the camera, as well as how they’re annotated, and how the labels we’ll ultimately provide relate to ground truth.
Preparing for Synthesis
When you generate a synthesised frame, you can also generate different kinds of ground-truth with it. Perception provides a range of different labellers, which control the types of ground-truth y ou can generate alongside each captured frame:
-
3D bounding boxes
-
2D bounding boxes
-
object counts
-
object metadata/information
-
semantic segmentation maps
Because we’re going to be generating images of dice with different numbers facing up, the one we’re interested in in this case is the Object Metadata/Information Labeller—Unity refers to this in the Unity Editor as a Rendered Object Info Labeler.
To add a labeler for this project:
-
Select the Main Camera in the Hierarchy pane, and find the Perception Camera component attached to it.
-
Click the + button in the Camera Labelers section of the Perception Camera, as shown in Figure 3-14.
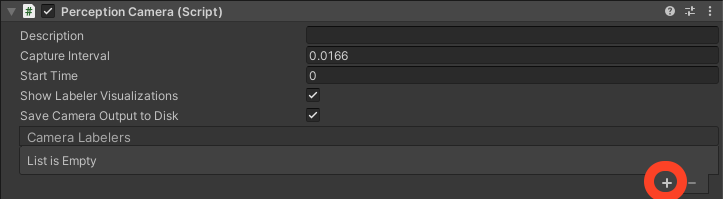
Figure 3-14. The add button on the Perception Camera
-
Using the list that appears, select Rendered Object Info Labeler, as shown in Figure 3-15.
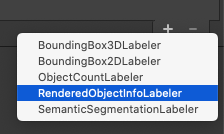
Figure 3-15. Adding a Rendered Object Info Labeler
-
Verify that a labeler has been added, as shown in Figure 3-16.
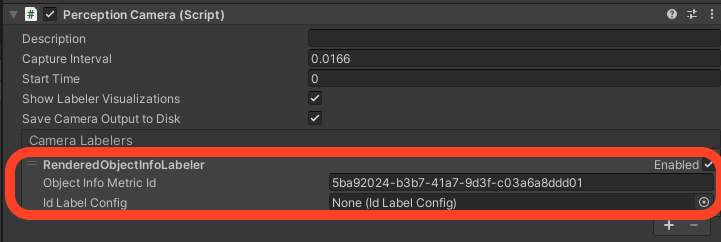
Figure 3-16. The Rendered Object Info Labeler on our Perception Camera, which is on our Main Camera
To use a labeler, we need to create some labels:
-
In the Project pane, right click and choose Create → Perception → Id Label Config, as shown in Figure 3-17.

Figure 3-17. Creating a new Id Label Config
-
Find the new asset that was created (it will likely be named
IdLabelConfigor similar) and rename it toDiceLabels, or something similarly obvious. -
Select this asset, and use the + button Inspector pane to create 6 total labels. When you’re done your list of labels should resemble ours, shown in Figure 3-18.
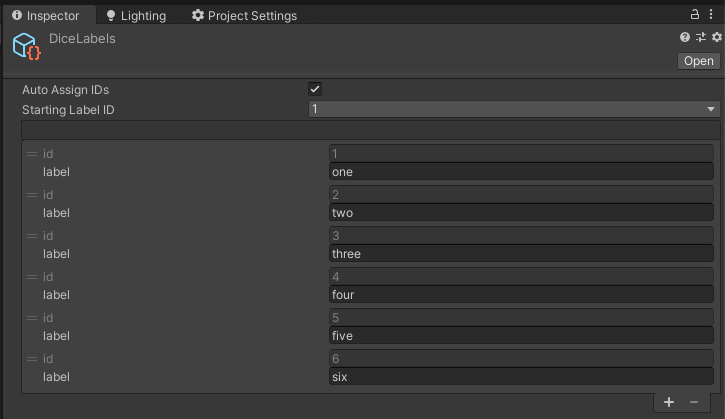
Figure 3-18. The 6 labels have been created
-
Select the Main Camera, and find the Id Label Config field in the Camera Labelers section of the Perception Camera component attached to it, and either drag the
DiceLabelsasset you just made from the Project pane to the field, or click the field and select the asset. It should look like Figure 3-19 once it’s in in place.
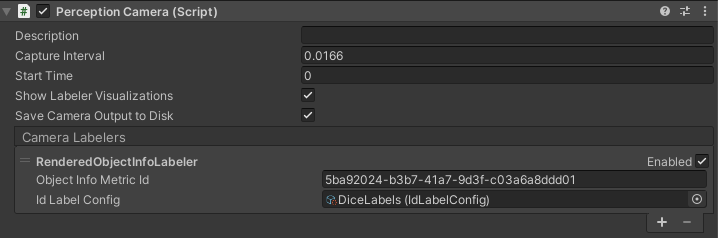
Figure 3-19. The Perception Camera is setup
Test the Scenario
It’s now a good time to test your scenario, without any random elements applied. To test the scenario, and check that everything we’ve done so far is working correctly:
-
Run the scene using Unity’s Play button.
-
The scene should generate as many pictures as are specified in the Total Iterations parametger of the Fixed Lenght Scenario component that we added to the Scenario GameObject and then exit play mode automatically.
-
To verify this, open the local file system on your computer and navigate to one of the following locations, depending on your operating system:
For macOS: ~/Library/Application Support/DefaultCompany/`
For Windows: TODO
For Linux: TODO
You should find a folder with 100 pictures generated from the scene’s camera. They’ll all be identical, as shown in Figure 3-20. If you’ve made it this far, and everything’s working, you’re ready to continue!
Figure 3-20. The dice images
What’s next?
At this point, you’ve actually synthesised some data——it just so happens that every image you’ve synthesised is the same, and there’s no change each time an image is saved.
In the next chapter, we’ll learn more about using Unity’s Perception framework to synthesis data, and add a random element to the images generated from our dice.