
Touch Screens
Many Android devices incorporate touch screens. When a device does not have a physical keyboard, much of the user input must come through the touch screen. Therefore your applications will often need to be able to deal with touch input from the user. You’ve most likely already seen the virtual keyboard that displays on the screen when text input is required from the user. We used touch with mapping applications in Chapter 19. The implementations of the touch screen interface have been hidden from you so far, but now we’ll show you how to take advantage of the touch screen.
This chapter is made up of three major parts. The first section will deal with MotionEvent objects, which is how Android tells an application that the user is touching a touch screen. We’ll also cover the VelocityTracker. The second section will deal with multitouch, where a user can have more than one finger at a time on the touch screen. Finally, we will include a section on gestures, a specialized type of capability in which touch sequences can be interpreted as commands.
Understanding MotionEvents
In this section, we’re going to cover how Android tells applications about touch events from the user. For now, we will only be concerned with touching the screen one finger at a time (we’ll cover multitouch in a later section).
At the hardware level, a touch screen is made up of special materials that can pick up pressure and convert that to screen coordinates. The information about the touch is turned into data, and that data is passed to the software to deal with it.
When a user touches the touch screen of an Android device, a MotionEvent object is created. The MotionEvent contains information about where and when the touch took place, as well as other details of the touch event. The MotionEvent object gets passed to an appropriate method in your application. This could be the onTouchEvent() method of a View object. Remember that the View class is the parent of quite a few classes in Android, including Layouts, Buttons, Lists, Clocks, and more. This means we can interact with all of these different types of View objects using touch events. When the method is called, it can inspect the MotionEvent object to decide what to do. For example, a GoogleMap could use touch events to move the map sideways to allow the user to pan the map to other points of interest. A virtual keyboard object could receive touch events to activate the virtual keys to provide text input to some other part of the user interface (UI).
Receiving MotionEvent Objects
A MotionEvent object is one of a sequence of events related to a touch by the user. The sequence starts when the user first touches the touch screen, continues through any movements of the finger across the surface of the touch screen, and ends when the finger is lifted from the touch screen. The initial touch (an ACTION_DOWN action), the movements sideways (ACTION_MOVE actions), and the up event (an ACTION_UP action) of the finger all create MotionEvent objects. You could receive quite a few ACTION_MOVE events as the finger moves across the surface before you receive the final ACTION_UP event. Each MotionEvent object contains information about what action is being performed, where the touch is taking place, how much pressure was applied, how big the touch was, when the action occurred, and when the initial ACTION_DOWN occurred. There is a fourth possible action, which is ACTION_CANCEL. This action is used to indicate that a touch sequence is ending without actually doing anything. Finally, there is ACTION_OUTSIDE, which is set in a special case where a touch occurs outside of our window but we still get to find out about it.
There is another way to receive touch events, and that is to register a callback handler for touch events on a View object. The class to receive the events must implement the View.OnTouchListener interface, and the View object’s setOnTouchListener() method must be called to set up the handler for that View. The implementing class of the View.OnTouchListener must implement the onTouch() method. Whereas the onTouchEvent() method takes just a MotionEvent object as a parameter, onTouch() takes both a View and a MotionEvent object as parameters. This is because the OnTouchListener could receive MotionEvent objects for multiple views. This will become clearer with our next example application.
If a MotionEvent handler (either through the onTouchEvent() or onTouch() method) consumes the event and no one else needs to know about it, the method should return true. This tells Android that the event does not need to be passed to any other views. If the View object is not interested in this event or any future events related to this touch sequence, it returns false. The onTouchEvent() method of the base class View doesn’t do anything and returns false. Subclasses of View may or may not do the same. For example, a Button object will consume a touch event, because a touch is equivalent to a click, and therefore returns true from the onTouchEvent() method. Upon receiving an ACTION_DOWN event, the Button will change its color to indicate that it is in the process of being clicked. The Button also wants to receive the ACTION_UP event to know when the user has let go, so it can initiate the logic of clicking the button. If a Button object returned false from onTouchEvent(), it would not receive any more MotionEvent objects to tell it when the user lifted a finger from the touch screen.
When we want touch events to do something new with a particular View object, we can extend the class, override the onTouchEvent() method, and put our logic there. We can also implement the View.OnTouchListener interface and set up a callback handler on the View object. By setting up a callback handler with onTouch(), MotionEvents will be delivered there first before they go to the View’s onTouchEvent() method. Only if the onTouch() method returned false would our View’s onTouchEvent() method get called. Let’s get to our example application where this should be easier to see.
Note We will give you a URL at the end of the chapter which you can use to download projects of this chapter. This will allow you to import these projects into your IDE directly.
Setting Up an Example Application
Listing 22-1 shows the XML of a layout file. Create a new Android project starting with this layout.
Listing 22-1. XML Layout File for TouchDemo1
<?xml version="1.0" encoding="utf-8"?>
<!-- This file is res/layout/main.xml -->
<LinearLayout xmlns:android="http://schemas.android.com/apk/res/android"
    android:layout_width="match_parent"
    android:layout_height="match_parent"
    android:orientation="vertical" >

  <RelativeLayout  android:id="@+id/layout1"
    android:tag="trueLayoutTop"  android:orientation="vertical"
    android:layout_width="match_parent"
    android:layout_height="wrap_content"
    android:layout_weight="1" >

    <com.androidbook.touch.demo1.TrueButton android:text="Returns True"
    android:id="@+id/trueBtn1"  android:tag="trueBtnTop"
    android:layout_width="wrap_content"
    android:layout_height="wrap_content" />

    <com.androidbook.touch.demo1.FalseButton android:text="Returns False"
    android:id="@+id/falseBtn1"  android:tag="falseBtnTop"
    android:layout_width="wrap_content"
    android:layout_height="wrap_content"
    android:layout_below="@id/trueBtn1" />

  </RelativeLayout>
  <RelativeLayout  android:id="@+id/layout2"
    android:tag="falseLayoutBottom"  android:orientation="vertical"
    android:layout_width="match_parent"
    android:layout_height="wrap_content"
    android:layout_weight="1"  android:background="#FF00FF" >

    <com.androidbook.touch.demo1.TrueButton android:text="Returns True"
    android:id="@+id/trueBtn2"  android:tag="trueBtnBottom"
    android:layout_width="wrap_content"
    android:layout_height="wrap_content" />

    <com.androidbook.touch.demo1.FalseButton android:text="Returns False"
    android:id="@+id/falseBtn2"  android:tag="falseBtnBottom"
    android:layout_width="wrap_content"
    android:layout_height="wrap_content"
    android:layout_below="@id/trueBtn2" />

  </RelativeLayout>
</LinearLayout>
There are a couple of things to point out about this layout. We’ve incorporated tags on our UI objects, and we’ll be able to refer to these tags in our code as events occur on them. We’ve used custom objects (TrueButton and FalseButton). You’ll see in the Java code that these are classes extended from the Button class. Because these are Buttons, we can use all of the same XML attributes we would use on other buttons. Figure 22-1 shows what this layout looks like, and Listing 22-2 shows our button Java code.
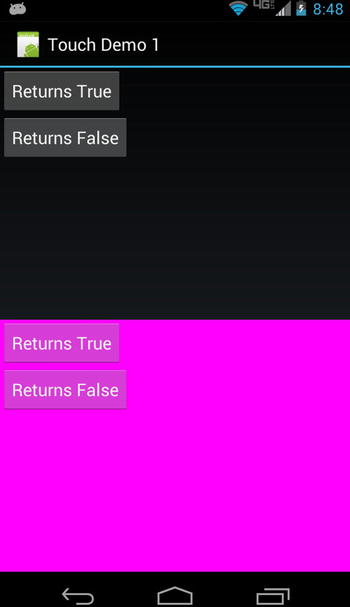
Figure 22-1. The UI of our TouchDemo1 application
Listing 22-2. Java Code for the Button Classes for TouchDemo1
// This file is BooleanButton.java
public abstract class BooleanButton extends Button {
    protected boolean myValue() {
        return false;
    }

    public BooleanButton(Context context, AttributeSet attrs) {
        super(context, attrs);
    }

    @Override
    public boolean onTouchEvent(MotionEvent event) {
        String myTag = this.getTag().toString();
        Log.v(myTag, "-----------------------------------");
        Log.v(myTag, MainActivity.describeEvent(this, event));
        Log.v(myTag, "super onTouchEvent() returns " +
                super.onTouchEvent(event));
        Log.v(myTag, "and I'm returning " + myValue());
        return(myValue());
    }
}

// This file is TrueButton.java
public class TrueButton extends BooleanButton {
    protected boolean myValue() {
        return true;
    }

    public TrueButton(Context context, AttributeSet attrs) {
        super(context, attrs);
    }
}

// This file is FalseButton.java
public class FalseButton extends BooleanButton {

    public FalseButton(Context context, AttributeSet attrs) {
        super(context, attrs);
    }
}
The BooleanButton class was built so we can reuse the onTouchEvent() method, which we’ve customized by adding the logging. Then, we created TrueButton and FalseButton, which will respond differently to the MotionEvents passed to them. This will be made clearer when you look at the main activity code, which is shown in Listing 22-3.
Listing 22-3. Java Code for Our Main Activity
// This file is MainActivity.java
import android.view.MotionEvent;
import android.view.View.OnTouchListener;
public class MainActivity extends Activity implements OnTouchListener {
    /** Called when the activity is first created. */
    @Override
    public void onCreate(Bundle savedInstanceState) {
        super.onCreate(savedInstanceState);
        setContentView(R.layout.main);

        RelativeLayout layout1 =
                (RelativeLayout) findViewById(R.id.layout1);
        layout1.setOnTouchListener(this);
        Button trueBtn1 = (Button)findViewById(R.id.trueBtn1);
        trueBtn1.setOnTouchListener(this);
        Button falseBtn1 = (Button)findViewById(R.id.falseBtn1);
        falseBtn1.setOnTouchListener(this);

        RelativeLayout layout2 =
                (RelativeLayout) findViewById(R.id.layout2);
        layout2.setOnTouchListener(this);
        Button trueBtn2 = (Button)findViewById(R.id.trueBtn2);
        trueBtn2.setOnTouchListener(this);
        Button falseBtn2 = (Button)findViewById(R.id.falseBtn2);
        falseBtn2.setOnTouchListener(this);
    }

    @Override
    public boolean onTouch(View v, MotionEvent event) {
        String myTag = v.getTag().toString();
        Log.v(myTag, "-----------------------------");
        Log.v(myTag, "Got view " + myTag + " in onTouch");
        Log.v(myTag, describeEvent(v, event));
        if( "true".equals(myTag.substring(0, 4))) {
        /*  Log.v(myTag, "*** calling my onTouchEvent() method ***");
            v.onTouchEvent(event);
            Log.v(myTag, "*** back from onTouchEvent() method ***"); */
            Log.v(myTag, "and I'm returning true");
            return true;
        }
        else {
            Log.v(myTag, "and I'm returning false");
            return false;
        }
    }

    protected static String describeEvent(View view, MotionEvent event) {
        StringBuilder result = new StringBuilder(300);
        result.append("Action: ").append(event.getAction()).append("
");
        result.append("Location: ").append(event.getX()).append(" x ")
                 .append(event.getY()).append("
");
        if(    event.getX() < 0 || event.getX() > view.getWidth() ||
               event.getY() < 0 || event.getY() > view.getHeight()) {
            result.append(">>> Touch has left the view <<<
");
        }
        result.append("Edge flags: ").append(event.getEdgeFlags());
        result.append("
");
        result.append("Pressure: ").append(event.getPressure());
        result.append("   ").append("Size: ").append(event.getSize());
        result.append("
").append("Down time: ");
        result.append(event.getDownTime()).append("ms
");
        result.append("Event time: ").append(event.getEventTime());
        result.append("ms").append("  Elapsed: ");
        result.append(event.getEventTime()-event.getDownTime());
        result.append(" ms
");
        return result.toString();
    }
}
Our main activity code sets up callbacks on our buttons and the layouts so we can process the touch events (the MotionEvent objects) for everything in our UI. We’ve added lots of logging, so you’ll be able to tell exactly what’s going on as touch events occur. One other good idea is to add the following tag to your manifest file so Google Play Store will know your application requires a touch screen to work: <uses-configuration android:reqTouchScreen="finger" />. For example, Google TVs don’t have touch screens, so it wouldn’t make sense to try to run this app there. When you compile and run this application, you should see a screen that looks like Figure 22-1.
Running the Example Application
To get the most out of this application, you need to open LogCat in your IDE (Eclipse or Android Studio) to watch the messages fly by as you touch the touch screen. This works in the emulator as well as on a real device. We also advise you to maximize the LogCat window, so you can more easily scroll up and down to see all of the generated events from this application. To maximize the window, just double-click the LogCat tab. Now, go to the application UI, and touch and release on the topmost button marked Returns True (if you’re using the emulator, use your mouse to click and release the button). You should see at least two events logged in LogCat. The messages are tagged as coming from trueBtnTop and were logged from the onTouch() method in MainActivity. See MainActivity.java for the onTouch() method’s code. As you view the LogCat output, see which method calls are producing the values. For example, the value displayed after Action comes from the getAction() method. Listing 22-4 shows a sample of what you might see in LogCat from the sample application.
Listing 22-4. Sample LogCat Messages from TouchDemo1
trueBtnTop        -----------------------------
trueBtnTop        Got view trueBtnTop in onTouch
trueBtnTop        Action: 0
trueBtnTop        Location: 42.8374 x 25.293747
trueBtnTop        Edge flags: 0
trueBtnTop        Pressure: 0.05490196   Size: 0.2
trueBtnTop        Down time: 24959412ms
trueBtnTop        Event time: 24959412ms  Elapsed: 0 ms
trueBtnTop        and I'm returning true
trueBtnTop        -----------------------------
trueBtnTop        Got view trueBtnTop in onTouch
trueBtnTop        Action: 2
trueBtnTop        Location: 42.8374 x 25.293747
trueBtnTop        Edge flags: 0
trueBtnTop        Pressure: 0.05490196   Size: 0.2
trueBtnTop        Down time: 24959412ms
trueBtnTop        Event time: 24959530ms  Elapsed: 118 ms
trueBtnTop        and I'm returning true
trueBtnTop        -----------------------------
trueBtnTop        Got view trueBtnTop in onTouch
trueBtnTop        Action: 1
trueBtnTop        Location: 42.8374 x 25.293747
trueBtnTop        Edge flags: 0
trueBtnTop        Pressure: 0.05490196   Size: 0.2
trueBtnTop        Down time: 24959412ms
trueBtnTop        Event time: 24959567ms  Elapsed: 155 ms
trueBtnTop        and I'm returning true
Understanding MotionEvent Contents
The first event has an action of 0, which is ACTION_DOWN. The last event has an action of 1, which is ACTION_UP. If you used a real device, you might see more than two events. Any events in between ACTION_DOWN and ACTION_UP will most likely have an action of 2, which is ACTION_MOVE. The other possibilities are an action of 3, which is ACTION_CANCEL, or 4, which is ACTION_OUTSIDE. When using real fingers on a real touch screen, you can’t always touch and release without a slight movement on the surface, so expect some ACTION_MOVE events.
Notice the Location values. The location for a MotionEvent has an x and y component, where x represents the distance from the left-hand side of the View object to the point touched and y represents the distance from the top of the View object to the point touched.
In the emulator, pressure is likely 1.0 and size is likely 0.0. For a real device, the pressure represents how hard the finger pressed down, and size represents how large the touch is. If you touch lightly with the tip of your pinky finger, the values for pressure and size will be small. If you press hard with your thumb, both pressure and size will be larger. Pressing lightly with your thumb should result in a small value for pressure but a large value for size. The documentation says that the values of pressure and size will be between 0 and 1. However, due to differences in hardware, it may be very difficult to use any absolute numbers in your application for making decisions about pressure and size. It would be fine to compare pressure and size between MotionEvents as they occur in your application, but you may run into trouble if you decide that pressure must exceed a value such as 0.8 to be considered a hard press. On that particular device, you might never get a value above 0.8. You might not even get a value above 0.2.
The down time and event time values operate in the same way between the emulator and a real device, the only difference being that the real device has much larger values. The elapsed times work the same.
The edge flags are for detecting when a touch has reached the edge of the physical screen. The Android SDK documentation says that the flags are set to indicate that a touch has intersected with an edge of the display (top, bottom, left, or right). However, the getEdgeFlags() method may always return zero, depending on what device or emulator it is used on. With some hardware, it is too difficult to actually detect a touch at the edge of the display, so Android is supposed to pin the location to the edge and set the appropriate edge flag for you. This doesn’t always happen, so you should not rely on the edge flags being set properly. The MotionEvent class provides a setEdgeFlags() method so you can set the flags yourself if you want to.
The last thing to notice is that our onTouch() method returns true, because our TrueButton is coded to return true. Returning true tells Android that the MotionEvent object has been consumed and there is no reason to give it to someone else. It also tells Android to keep sending touch events from this touch sequence to this method. That’s why we got the ACTION_UP event, as well as the ACTION_MOVE event in the case of the real device.
Now touch the Returns False button near the top of the screen. Listing 22-5 shows a sample LogCat output for your Returns False touch.
Listing 22-5. Sample LogCat from Touching the Top Returns False Button
falseBtnTop        -----------------------------
falseBtnTop        Got view falseBtnTop in onTouch
falseBtnTop        Action: 0
falseBtnTop        Location: 61.309372 x 44.281494
falseBtnTop        Edge flags: 0
falseBtnTop        Pressure: 0.0627451   Size: 0.26666668
falseBtnTop        Down time: 28612178ms
falseBtnTop        Event time: 28612178ms  Elapsed: 0 ms
falseBtnTop        and I'm returning false
falseBtnTop        -----------------------------------
falseBtnTop        Action: 0
falseBtnTop        Location: 61.309372 x 44.281494
falseBtnTop        Edge flags: 0
falseBtnTop        Pressure: 0.0627451   Size: 0.26666668
falseBtnTop        Down time: 28612178ms
falseBtnTop        Event time: 28612178ms  Elapsed: 0 ms
falseBtnTop        super onTouchEvent() returns true
falseBtnTop        and I'm returning false
trueLayoutTop        -----------------------------
trueLayoutTop        Got view trueLayoutTop in onTouch
trueLayoutTop        Action: 0
trueLayoutTop        Location: 61.309372 x 116.281494
trueLayoutTop        Edge flags: 0
trueLayoutTop        Pressure: 0.0627451   Size: 0.26666668
trueLayoutTop        Down time: 28612178ms
trueLayoutTop        Event time: 28612178ms  Elapsed: 0 ms
trueLayoutTop        and I'm returning true
trueLayoutTop        -----------------------------
trueLayoutTop        Got view trueLayoutTop in onTouch
trueLayoutTop        Action: 2
trueLayoutTop        Location: 61.309372 x 111.90039
trueLayoutTop        Edge flags: 0
trueLayoutTop        Pressure: 0.0627451   Size: 0.26666668
trueLayoutTop        Down time: 28612178ms
trueLayoutTop        Event time: 28612217ms  Elapsed: 39 ms
trueLayoutTop        and I'm returning true
trueLayoutTop        -----------------------------
trueLayoutTop        Got view trueLayoutTop in onTouch
trueLayoutTop        Action: 1
trueLayoutTop        Location: 55.08958 x 115.30792
trueLayoutTop        Edge flags: 0
trueLayoutTop        Pressure: 0.0627451   Size: 0.26666668
trueLayoutTop        Down time: 28612178ms
trueLayoutTop        Event time: 28612361ms  Elapsed: 183 ms
trueLayoutTop        and I'm returning true
Now you’re seeing very different behavior, so we’ll explain what happened. Android receives the ACTION_DOWN event in a MotionEvent object and passes it to our onTouch() method in the MainActivity class. Our onTouch() method records the information in LogCat and returns false. This tells Android that our onTouch() method did not consume the event, so Android looks to the next method to call, which in our case is the overridden onTouchEvent() method of our FalseButton class. Because FalseButton is an extension of the BooleanButton class, refer to the onTouchEvent() method in BooleanButton.java to see the code. In the onTouchEvent() method, we again write information to LogCat, we call the parent class’s onTouchEvent() method, and then we also return false. Notice that the location information in LogCat is exactly the same as before. This should be expected because we’re still in the same View object, the FalseButton. We see that our parent class wants to return true from onTouchEvent(), and we can see why. If you look at the button in the UI, it should be a different color from the Returns True button. Our Returns False button now looks like it’s partway through being pressed. That is, it looks like a button looks when it has been pressed but has not been released. Our custom method returned false instead of true. Because we again told Android that we did not consume this event, by returning false, Android never sends the ACTION_UP event to our button, so our button doesn’t know that the finger ever lifted from the touch screen. Therefore, our button is still in the pressed state. If we had returned true like our parent wanted to, we would eventually have received the ACTION_UP event, so we could change the color back to the normal button color. To recap, every time we return false from a UI object for a received MotionEvent object, Android stops sending MotionEvent objects to that UI object, and Android keeps looking for another UI object to consume our MotionEvent object.
You might have realized that when we touched our Returns True button, we didn’t get a color change in the button. Why is that? Well, our onTouch() method was called before any actual button methods got called, and onTouch() returned true, so Android never bothered to call the Returns True button’s onTouchEvent() method. If you add a v.onTouchEvent(event); line to the onTouch() method just before returning true, you will see the button change color. You will also see more log lines in LogCat, because our onTouchEvent() method is also writing information to LogCat.
Let’s keep going through the LogCat output. Now that Android has tried twice to find a consumer for the ACTION_DOWN event and failed, it goes to the next View in the application that could possibly receive the event, which in our case is the layout underneath the button. We called our top layout trueLayoutTop, and we can see that it received the ACTION_DOWN event.
Notice that our onTouch() method got called again, although now with the layout view and not the button view. Everything about the MotionEvent object passed to onTouch() for trueLayoutTop is the same as before, including the times, except for the y coordinate of the location. The y coordinate changed from 44.281494 for the button to 116.281494 for the layout. This makes sense because the Returns False button is not in the upper-left corner of the layout, it’s below the Returns True button. Therefore the y coordinate of the touch relative to the layout is larger than the y coordinate of the same touch relative to the button; the touch is further away from the top edge of the layout than it is from the top edge of the button. Because onTouch() for the trueLayoutTop returns true, Android sends the rest of the touch events to the layout, and we see the log records corresponding to the ACTION_MOVE and the ACTION_UP events. Go ahead and touch the top Returns False button again, and notice that the same set of log records occurs. That is, onTouch() is called for falseBtnTop, onTouchEvent() is called for falseBtnTop, and then onTouch() is called for trueLayoutTop for the rest of the events. Android only stops sending the events to the button for one touch sequence at a time. For a new sequence of touch events, Android will send to the button unless it gets another return of false from the called method, which it still does in our sample application.
Now touch your finger on the top layout but not on either button, and then drag your finger around a bit and lift it off the touch screen (if you’re using the emulator, just use your mouse to make a similar motion). Notice a stream of log messages in LogCat, where the first record has an action of ACTION_DOWN, and then many ACTION_MOVE events are followed by an ACTION_UP event.
Now, touch the top Returns True button, and before lifting your finger from the button, drag your finger around the screen and then lift it off. Listing 22-6 shows some new information in LogCat.
Listing 22-6. LogCat Records Showing a Touch Outside of Our View
[ ... log messages of an ACTION_DOWN event followed by some ACTION_MOVE events ... ]

trueBtnTop        Got view trueBtnTop in onTouch
trueBtnTop        Action: 2
trueBtnTop        Location: 150.41768 x 22.628128
trueBtnTop        >>> Touch has left the view <<<
trueBtnTop        Edge flags: 0
trueBtnTop        Pressure: 0.047058824   Size: 0.13333334
trueBtnTop        Down time: 31690859ms
trueBtnTop        Event time: 31691344ms  Elapsed: 485 ms
trueBtnTop        and I'm returning true

[ ... more ACTION_MOVE events logged ... ]

trueBtnTop        Got view trueBtnTop in onTouch
trueBtnTop        Action: 1
trueBtnTop        Location: 291.5864 x 223.43854
trueBtnTop        >>> Touch has left the view <<<
trueBtnTop        Edge flags: 0
trueBtnTop        Pressure: 0.047058824   Size: 0.13333334
trueBtnTop        Down time: 31690859ms
trueBtnTop        Event time: 31692493ms  Elapsed: 1634 ms
trueBtnTop        and I'm returning true
Even after your finger drags itself off of the button, we continue to get notified of touch events related to the button. The first record in Listing 22-6 shows an event record where we’re no longer on the button. In this case, the x coordinate of the touch event is to the right of the edge of our button object. However, we keep getting called with MotionEvent objects until we get an ACTION_UP event, because we continue to return true from the onTouch() method. Even when you finally lift your finger off of the touch screen, and even if your finger isn’t on the button, our onTouch() method still gets called to give us the ACTION_UP event because we keep returning true. This is something to keep in mind when dealing with MotionEvents. When the finger has moved off of the view, we could decide to cancel whatever operation might have been performed and return false from the onTouch() method, so we don’t get notified of further events. Or we could choose to continue to receive events (by returning true from the onTouch() method) and only perform the logic if the finger returns to our view before lifting off.
The touch sequence of events got associated to our top Returns True button when we returned true from onTouch(). This told Android that it could stop looking for an object to receive the MotionEvent objects and just send all future MotionEvent objects for this touch sequence to us. Even if we encounter another view when dragging our finger, we’re still tied to the original view for this sequence.
Exercising the Bottom Half of the Example Application
Let’s see what happens with the lower half of our application. Go ahead and touch the Returns True button in the bottom half. We see the same thing as happened with the top Returns True button. Because onTouch() returns true, Android sends us the rest of the events in the touch sequence until the finger is lifted from the touch screen. Now, touch the bottom Returns False button. Once again, the onTouch() method and onTouchEvent() methods return false (both associated with the falseBtnBottom view object). But this time, the next view to receive the MotionEvent object is the falseLayoutBottom object, and it also returns false. Now, we’re finished.
Because the onTouchEvent() method called the super’s onTouchEvent() method, the button has changed color to indicate it’s halfway through being pressed. Again, the button will stay this way, because we never get the ACTION_UP event in this touch sequence, because our methods return false all the time. Unlike before, even the layout is not interested in this event. If you were to touch the bottom Returns False button and hold it down and then drag your finger around the display, you would not see any extra records in LogCat, because no more MotionEvent objects are sent to us. We returned false, so Android won’t bother us with any more events for this touch sequence. Again, if we start a new touch sequence, we can see new LogCat records showing up. If you initiate a touch sequence in the bottom layout and not on a button, you will see a single event in LogCat for falseLayoutBottom that returns false and then nothing after that (until you start a new touch sequence).
So far, we’ve used buttons to show you the effects of MotionEvent events from touch screens. It’s worth pointing out that, normally, you would implement logic on buttons using the onClick() method. We used buttons for this sample application, because they’re easy to create and they are subclasses of View that can therefore receive touch events just like any other view. Remember that these techniques apply to any View object in your application, be it a standard or customized view class.
You may have noticed the recycle() method of the MotionEvent class in the Android reference documentation. It is tempting to want to recycle the MotionEvents that you receive in onTouch() or onTouchEvent(), but don’t do it. If your callback method is not consuming the MotionEvent object and you’re returning false, the MotionEvent object is likely to be handed to some other method or view or our activity, so you don’t want Android recycling it yet. Even if you consumed the event and returned true, the event object doesn’t belong to you, so you should not recycle it.
If you look at MotionEvent documentation, you will see a few variations of a method called obtain(). This is either creating a copy of a MotionEvent or a brand new MotionEvent. Your copy, or your brand-new event object, is the event object that you should recycle when you are done with it. For example, if you want to hang onto an event object that is passed to you via a callback, you should use obtain() to make a copy, because once you return from the callback, that event object will be recycled by Android, and you may get strange results if you continue to use it. When you are finished using your copy, you invoke recycle() on it.
Using VelocityTracker
Android provides a class to help handle touch screen sequences, and that class is VelocityTracker. When a finger is in motion on a touch screen, it might be nice to know how fast it is moving across the surface. For example, if the user is dragging an object across the screen and lets go, your application probably wants to show that object flying across the screen accordingly. Android provides VelocityTracker to help with the math involved.
To use VelocityTracker, you first get an instance of a VelocityTracker by calling the static method VelocityTracker.obtain(). You can then add MotionEvent objects to it with the addMovement(MotionEvent ev) method. You would call this method in your handler that receives MotionEvent objects, from a handler method such as onTouch(), or from a view’s onTouchEvent(). The VelocityTracker uses the MotionEvent objects to figure out what is going on with the user’s touch sequence. Once VelocityTracker has at least two MotionEvent objects in it, we can use the other methods to find out what’s happening.
The two VelocityTracker methods—getXVelocity() and getYVelocity()—return the corresponding velocity of the finger in the x and y directions, respectively. The value returned from these two methods will represent pixels per time period. This could be pixels per millisecond or per second or really anything you want. To tell the VelocityTracker what time period to use, and before you can call these two getter methods, you need to invoke the VelocityTracker’s computeCurrentVelocity(int units) method. The value of units represents how many milliseconds are in the time period for measuring the velocity. If you want pixels per millisecond, use a units value of 1; if you want pixels per second, use a units value of 1000. The value returned by the getXVelocity() and getYVelocity() methods will be positive if the velocity is toward the right (for x) or down (for y). The value returned will be negative if the velocity is toward the left (for x) or up (for y).
When you are finished with the VelocityTracker object you got with the obtain() method, call the VelocityTracker object’s recycle() method. Listing 22-7 shows a sample onTouchEvent() handler for an activity. It turns out that an activity has an onTouchEvent() callback, which is called whenever no views have handled the touch event. Because we’re using a stock, empty layout, we have no views consuming our touch events.
Listing 22-7. Sample Activity That Uses VelocityTracker
import android.view.MotionEvent;
import android.view.VelocityTracker;

public class MainActivity extends Activity {
    private static final String TAG = "VelocityTracker";

    /** Called when the activity is first created. */
    @Override
    public void onCreate(Bundle savedInstanceState) {
        super.onCreate(savedInstanceState);
        setContentView(R.layout.main);
    }

    private VelocityTracker vTracker = null;

    public boolean onTouchEvent(MotionEvent event) {
        int action = event.getAction();
        switch(action) {
            case MotionEvent.ACTION_DOWN:
                if(vTracker == null) {
                    vTracker = VelocityTracker.obtain();
                }
                else {
                    vTracker.clear();
                }
                vTracker.addMovement(event);
                break;
            case MotionEvent.ACTION_MOVE:
                vTracker.addMovement(event);
                vTracker.computeCurrentVelocity(1000);
                Log.v(TAG, "X velocity is " + vTracker.getXVelocity() +
                       " pixels per second");
                Log.v(TAG, "Y velocity is " + vTracker.getYVelocity() +
                       " pixels per second");
                break;
            case MotionEvent.ACTION_UP:
            case MotionEvent.ACTION_CANCEL:
                Log.v(TAG, "Final X velocity is " + vTracker.getXVelocity() +
                       " pixels per second");
                Log.v(TAG, "Final Y velocity is " + vTracker.getYVelocity() +
                       " pixels per second");
                vTracker.recycle();
                vTracker = null;
                break;
        }
        return true;
    }
}
Obviously, when you’ve only added one MotionEvent to a VelocityTracker (the ACTION_DOWN event), the velocities cannot be computed as anything other than zero. But we need to add the starting point so that the subsequent ACTION_MOVE events can calculate velocities then.
VelocityTracker is somewhat costly in terms of performance, so use it sparingly. Also, make sure that you recycle it as soon as you are done with it. There can be more than one VelocityTracker in use in Android, but they can take up a lot of memory, so give yours back if you’re not going to continue to use it. In Listing 22-7, we also use the clear() method if we’re starting a new touch sequence (that is, if we get an ACTION_DOWN event and our VelocityTracker object already exists) instead of recycling this one and obtaining a new one.
Multitouch
Now that you’ve seen single touches in action, let’s move on to multitouch. Multitouch has gained a lot of interest ever since the TED conference in 2006 at which Jeff Han demonstrated a multitouch surface for a computer user interface. Using multiple fingers on a screen opens up a lot of possibilities for manipulating what’s on the screen. For example, putting two fingers on an image and moving them apart could zoom in on the image. By placing multiple fingers on an image and turning clockwise, you could rotate the image on the screen. These are standard touch operations in Google Maps, for instance.
If you think about it, though, there is no magic to this. If the screen hardware can detect multiple touches as they initiate on the screen, notify your application as those touches move in time across the surface of the screen, and notify you when those touches lift off of the screen, your application can figure out what the user is trying to do with those touches. Although it’s not magic, it isn’t easy either. We’re going to help you understand multitouch in this section.
The Basics of Multitouch
The basics of multitouch are exactly the same as for single touches. MotionEvent objects get created for touches, and these MotionEvent objects are passed to your methods just like before. Your code can read the data about the touches and decide what to do. At a basic level, the methods of MotionEvent are the same; that is, we call getAction(), getDownTime(), getX(), and so on. However, when more than one finger is touching the screen, the MotionEvent object must include information from all fingers, with some caveats. The action value from getAction() is for one finger, not all. The down time value is for the very first finger down and measures the time as long as at least one finger is down. The location values getX() and getY(), as well as getPressure() and getSize(), can take an argument for the finger; therefore, you need to use a pointer index value to request the information for the finger you’re interested in. There are method calls that we used previously that did not take any argument to specify a finger (for example, getX(), getY()), so which finger would the values be for if we used those methods? You can figure it out, but it takes some work. Therefore, if you don’t take into account multiple fingers all of the time, you might end up with some strange results. Let’s dig into this to figure out what to do.
The first method of MotionEvent you need to know about for multitouch is getPointerCount(). This tells you how many fingers are represented in the MotionEvent object but doesn’t necessarily tell you how many fingers are actually touching the screen; that depends on the hardware and on the implementation of Android on that hardware. You may find that, on certain devices, getPointerCount() does not report all fingers that are touching, just some. But let’s press on. As soon as you’ve got more than one finger being reported in MotionEvent objects, you need to start dealing with the pointer indexes and the pointer IDs.
The MotionEvent object contains information for pointers starting at index 0 and going up to the number of fingers being reported in that object. The pointer index always starts at 0; if three fingers are being reported, pointer indexes will be 0, 1, and 2. Calls to methods such as getX() must include the pointer index for the finger you want information about. Pointer IDs are integer values representing which finger is being tracked. Pointer IDs start at 0 for the first finger down but don’t always start at 0 once fingers are coming and going on the screen. Think of a pointer ID as the name of that finger while it is being tracked by Android. For example, imagine a pair of touch sequences for two fingers, starting with finger 1 down, and followed by finger 2 down, finger 1 up, and finger 2 up. The first finger down will get pointer ID 0. The second finger down will get pointer ID 1. Once the first finger goes up, the second finger will still be pointer ID 1. At that point, the pointer index for the second finger becomes 0, because the pointer index always starts at 0. In this example, the second finger (pointer ID 1) starts as pointer index 1 when it first touches down and then shifts to pointer index 0 once the first finger leaves the screen. Even when the second finger is the only finger on the screen, it remains as pointer ID 1. Your applications will use pointer IDs to link together the events associated to a particular finger even as other fingers are involved. Let’s look at an example.
Listing 22-8 shows our new XML layout plus our Java code for a multitouch application. This is the application called MultiTouchDemo1. Figure 22-2 shows what it should look like.
Listing 22-8. XML Layout and Java for a Multitouch Demonstration
<?xml version="1.0" encoding="utf-8"?>
<!-- This file is /res/layout/main.xml -->
<RelativeLayout  xmlns:android="http://schemas.android.com/apk/res/android"
    android:id="@+id/layout1"
    android:tag="trueLayout"  android:orientation="vertical"
    android:layout_width="match_parent"
    android:layout_height="wrap_content"
    android:layout_weight="1"
    >

    <TextView android:text="Touch fingers on the screen and look at LogCat"
    android:id="@+id/message"
    android:tag="trueText"
    android:layout_width="wrap_content"
    android:layout_height="wrap_content"
    android:layout_alignParentBottom="true" />

</RelativeLayout>

// This file is MainActivity.java
import android.view.MotionEvent;
import android.view.View.OnTouchListener;

public class MainActivity extends Activity implements OnTouchListener {
    /** Called when the activity is first created. */
    @Override
    public void onCreate(Bundle savedInstanceState) {
        super.onCreate(savedInstanceState);
        setContentView(R.layout.main);

        RelativeLayout layout1 =
                (RelativeLayout) findViewById(R.id.layout1);
        layout1.setOnTouchListener(this);
    }

    public boolean onTouch(View v, MotionEvent event) {
        String myTag = v.getTag().toString();
        Log.v(myTag, "-----------------------------");
        Log.v(myTag, "Got view " + myTag + " in onTouch");
        Log.v(myTag, describeEvent(event));
        logAction(event);
        if( "true".equals(myTag.substring(0, 4))) {
            return true;
        }
        else {
            return false;
        }
    }

    protected static String describeEvent(MotionEvent event) {
        StringBuilder result = new StringBuilder(500);
        result.append("Action: ").append(event.getAction()).append("
");
        int numPointers = event.getPointerCount();
        result.append("Number of pointers: ");
        result.append(numPointers).append("
");
        int ptrIdx = 0;
        while (ptrIdx < numPointers) {
            int ptrId = event.getPointerId(ptrIdx);
            result.append("Pointer Index: ").append(ptrIdx);
            result.append(", Pointer Id: ").append(ptrId).append("
");
            result.append("   Location: ").append(event.getX(ptrIdx));
            result.append(" x ").append(event.getY(ptrIdx)).append("
");
            result.append("   Pressure: ");
            result.append(event.getPressure(ptrIdx));
            result.append("   Size: ").append(event.getSize(ptrIdx));
            result.append("
");

            ptrIdx++;
        }
        result.append("Down time: ").append(event.getDownTime());
        result.append("ms
").append("Event time: ");
        result.append(event.getEventTime()).append("ms");
        result.append("  Elapsed: ");
        result.append(event.getEventTime()-event.getDownTime());
        result.append(" ms
");
        return result.toString();
    }

    private void logAction(MotionEvent event) {
        int action = event.getActionMasked();
        int ptrIndex = event.getActionIndex();
        int ptrId = event.getPointerId(ptrIndex);

        if(action == 5 || action == 6)
            action = action - 5;

        Log.v("Action", "Pointer index: " + ptrIndex);
        Log.v("Action", "Pointer Id: " + ptrId);
        Log.v("Action", "True action value: " + action);
    }
}

Figure 22-2. Our multitouch demonstration application
If you only have the emulator, this application will still work, but you won’t be able to get multiple fingers simultaneously on the screen. You’ll see output similar to what we saw in the previous application. Listing 22-9 shows sample LogCat messages for a touch sequence like we described earlier. That is, the first finger presses on the screen, and then the second finger presses, the first finger leaves the screen, and the second finger leaves the screen.
Listing 22-9. Sample LogCat Output for a Multitouch Application
trueLayout       -----------------------------
trueLayout       Got view trueLayout in onTouch
trueLayout       Action: 0
trueLayout       Number of pointers: 1
trueLayout       Pointer Index: 0, Pointer Id: 0
trueLayout          Location: 114.88211 x 499.77502
trueLayout          Pressure: 0.047058824   Size: 0.13333334
trueLayout       Down time: 33733650ms
trueLayout       Event time: 33733650ms  Elapsed: 0 ms
Action           Pointer index: 0
Action           Pointer Id: 0
Action           True Action value: 0
trueLayout       -----------------------------
trueLayout       Got view trueLayout in onTouch
trueLayout       Action: 2
trueLayout       Number of pointers: 1
trueLayout       Pointer Index: 0, Pointer Id: 0
trueLayout          Location: 114.88211 x 499.77502
trueLayout          Pressure: 0.05882353   Size: 0.13333334
trueLayout       Down time: 33733650ms
trueLayout       Event time: 33733740ms  Elapsed: 90 ms
Action           Pointer index: 0
Action           Pointer Id: 0
Action           True Action value: 2
trueLayout       -----------------------------
trueLayout       Got view trueLayout in onTouch
trueLayout       Action: 261
trueLayout       Number of pointers: 2
trueLayout       Pointer Index: 0, Pointer Id: 0
trueLayout          Location: 114.88211 x 499.77502
trueLayout          Pressure: 0.05882353   Size: 0.13333334
trueLayout       Pointer Index: 1, Pointer Id: 1
trueLayout          Location: 320.30692 x 189.67395
trueLayout          Pressure: 0.050980393   Size: 0.13333334
trueLayout       Down time: 33733650ms
trueLayout       Event time: 33733962ms  Elapsed: 312 ms
Action           Pointer index: 1
Action           Pointer Id: 1
Action           True Action value: 0
trueLayout       -----------------------------
trueLayout       Got view trueLayout in onTouch
trueLayout       Action: 2
trueLayout       Number of pointers: 2
trueLayout       Pointer Index: 0, Pointer Id: 0
trueLayout          Location: 111.474594 x 499.77502
trueLayout          Pressure: 0.05882353   Size: 0.13333334
trueLayout       Pointer Index: 1, Pointer Id: 1
trueLayout          Location: 320.30692 x 189.67395
trueLayout          Pressure: 0.050980393   Size: 0.13333334
trueLayout       Down time: 33733650ms
trueLayout       Event time: 33734189ms  Elapsed: 539 ms
Action           Pointer index: 0
Action           Pointer Id: 0
Action           True Action value: 2
trueLayout       -----------------------------
trueLayout       Got view trueLayout in onTouch
trueLayout       Action: 6
trueLayout       Number of pointers: 2
trueLayout       Pointer Index: 0, Pointer Id: 0
trueLayout          Location: 111.474594 x 499.77502
trueLayout          Pressure: 0.05882353   Size: 0.13333334
trueLayout       Pointer Index: 1, Pointer Id: 1
trueLayout          Location: 320.30692 x 189.67395
trueLayout          Pressure: 0.050980393   Size: 0.13333334
trueLayout       Down time: 33733650ms
trueLayout       Event time: 33734228ms  Elapsed: 578 ms
Action           Pointer index: 0
Action           Pointer Id: 0
Action           True Action value: 1
trueLayout       -----------------------------
trueLayout       Got view trueLayout in onTouch
trueLayout       Action: 2
trueLayout       Number of pointers: 1
trueLayout       Pointer Index: 0, Pointer Id: 1
trueLayout          Location: 318.84656 x 191.45105
trueLayout          Pressure: 0.050980393   Size: 0.13333334
trueLayout       Down time: 33733650ms
trueLayout       Event time: 33734240ms  Elapsed: 590 ms
Action           Pointer index: 0
Action           Pointer Id: 1
Action           True Action value: 2
trueLayout       -----------------------------
trueLayout       Got view trueLayout in onTouch
trueLayout       Action: 1
trueLayout       Number of pointers: 1
trueLayout       Pointer Index: 0, Pointer Id: 1
trueLayout          Location: 314.95224 x 190.5625
trueLayout          Pressure: 0.050980393   Size: 0.13333334
trueLayout       Down time: 33733650ms
trueLayout       Event time: 33734549ms  Elapsed: 899 ms
Action           Pointer index: 0
Action           Pointer Id: 1
Action           True Action value: 1
Understanding Multitouch Contents
We’ll now discuss what is going on with this application. The first event we see is the ACTION_DOWN (action value of 0) of the first finger. We learn about this using the getAction() method. Please refer to the describeEvent() method in MainActivity.java to follow along with which methods produce which output. We get one pointer with index 0 and pointer ID 0. After that, you’ll probably see several ACTION_MOVE events (action value of 2) for this first finger, even though we’re only showing one of these in Listing 22-9. We still only have one pointer and the index and ID are still both 0.
A little later we get the second finger touching the screen. The action is now a decimal value of 261. What does this mean? The action value is actually made up of two parts: an indicator of which pointer the action is for and what action that pointer is doing. Converting decimal 261 to hexadecimal, we get 0x00000105. The action is the smallest byte (5 in this case), and the pointer index is the next byte over (1 in this case). Note that this tells us the pointer index but not the pointer ID. If you pressed a third finger onto the screen, the action would be 0x00000205 (or decimal 517). A fourth finger would be 0x00000305 (or decimal 773) and so on. You haven’t seen an action value of 5 yet, but it’s known as ACTION_POINTER_DOWN. It’s just like ACTION_DOWN except that it’s used in multitouch situations.
Now, look at the next pair of records from LogCat in Listing 22-9. The first record is for an ACTION_MOVE event (action value of 2). Remember that it is difficult to keep fingers from moving on a real screen. We’re only showing one ACTION_MOVE event, but you might see several when you try this for yourself. When the first finger is lifted off of the screen, we get an action value of 0x00000006 (or decimal 6). Like before, we have pointer index 0 and an action value that is ACTION_POINTER_UP (similar to ACTION_UP but for multitouch situations). If the second finger was lifted in a multitouch situation, we would get an action value of 0x00000106 (or decimal 262). Notice how we still have information for two fingers when we get the ACTION_UP for one of them.
The last pair of records in Listing 22-9 shows one more ACTION_MOVE event for the second finger, followed by an ACTION_UP for the second finger. This time, we see an action value of 1 (ACTION_UP). We didn’t get an action value of 262, but we’ll explain that next. Also, notice that once the first finger left the screen, the pointer index for the second finger has changed from 1 to 0, but the pointer ID has remained as 1.
ACTION_MOVE events do not tell you which finger moved. You will always get an action value of 2 for a move regardless of how many fingers are down or which finger is doing the moving. All down finger positions are available within the MotionEvent object, so you need to read the positions and then figure things out. If there’s only one finger left on the screen, the pointer ID will tell you which finger it is that’s still moving because it’s the only finger left. In Listing 22-9, when the second finger was the only one left on the screen, the ACTION_MOVE event had a pointer index of 0 and a pointer ID of 1, so we knew it was the second finger that was moving.
Not only can a MotionEvent object contain move events for more than one finger, but it can also contain multiple move events per finger. It does this using historical values contained within the object. Android should report all history since the last MotionEvent object. See getHistoricalSize() and the other getHistorical...() methods.
Going back to the beginning of Listing 22-9, the first finger down is pointer index 0 and pointer ID 0, so why don’t we get 0x00000005 (or decimal 5) for the action value when the first finger is pressed to the screen before any other fingers? Unfortunately, this question doesn’t have a happy answer. We can get an action value of 5 in the following scenario: press the first finger to the screen and then the second finger, resulting in action values of 0 and 261 (ignoring the ACTION_MOVE events for the moment). Now, lift the first finger (action value of 6), and press it back down on the screen. The pointer ID of the second finger remained as 1. For the moment when the first finger was in the air, our application knew about pointer ID 1 only. Once the first finger touched the screen again, Android reassigned pointer ID 0 to the first finger and gave it pointer index 0 as well. Because now we know there are multiple fingers involved, we get an action value of 5 (pointer index of 0 and the action value of 5). The answer to the question, therefore, is backward compatibility, but it is not a happy answer. The action values of 0 and 1 are pre-multitouch.
When only one finger remains on the screen, Android treats it like a single-touch case. So we get the old ACTION_UP value of 1 instead of a multitouch ACTION_UP value of 6. Our code will need to consider these cases carefully. A pointer index of 0 could result in an ACTION_DOWN value of 0 or 5, depending on which pointers are in play. The last finger up will get an ACTION_UP value of 1 no matter which pointer ID it has.
There is another action we haven’t mentioned so far: ACTION_SCROLL (value of 8), introduced in Android 3.1. This comes from an input device like a mouse, not a touch screen. In fact, as you can see from the methods in MotionEvent, these objects can be used for lots of things other than touch screen touches. We won’t be covering these other input devices in this book.
Gestures are a special type of a touch screen event. The term gesture is used for a variety of things in Android, from a simple touch sequence like a fling or a pinch to the formal Gesture class. Flings, pinches, long presses, and scrolls have expected behaviors with expected triggers. That is, it is pretty clear to most people that a fling is a gesture where a finger touches the screen, drags somewhat quickly off in a single direction, and then lifts up. For example, when someone uses a fling in the Gallery application (the one that shows images in a left-to-right chain), the images will move sideways to show new images to the user.
In the following sections, you will learn how to implement a pinch gesture, from which you can easily implement the other common gestures. The formal Gesture class refers to gestures drawn by a user on a touch screen, so that an application can react to those gestures. The typical example includes drawing letters of the alphabet which the application can understand as letters. The formal Gesture class is not covered in this book. Let's learn to pinch!
The Pinch Gesture
One of the cool applications of multitouch is the pinch gesture, which is used for zooming. The idea is that if you place two fingers on the screen and spread them apart, the application should respond by zooming in. If your fingers come together, the application should zoom out. The application is usually showing images, which could be maps.
Before we get to the pinch gesture’s native support, we first need to cover a class that’s been around from the beginning—GestureDetector.
GestureDetector and OnGestureListeners
The first class to help us with gestures is GestureDetector, which has been around from the very beginning of Android. Its purpose in life is to receive MotionEvent objects and tell us when a sequence of events looks like a common gesture. We pass all of our event objects to the GestureDetector from our callback, and it calls other callbacks when it recognizes a gesture, such as a fling or long press. We need to register a listener for the callbacks from the GestureDetector, and this is where we put our logic that says what to do if the user has performed one of these common gestures. Unfortunately, this class does not tell us if a pinch gesture is taking place; for that, we need to use a new class, which we’ll get to shortly.
There are a few ways to build the listener side. Your first option is to write a new class that implements the appropriate gesture listener interface: for example, the GestureDetector.OnGestureListener interface. There are several abstract methods that must be implemented for each of the possible callbacks.
Your second option is to pick one of the simple implementations of a listener and override the appropriate callback methods that you care about. For example, the GestureDetector.SimpleOnGestureListener class has implemented all of the abstract methods to do nothing and return false. All you have to do is extend that class and override the few methods you need to act on those few gestures you care about. The other methods have their default implementations. It’s more future-proof to choose the second option even if you decide to override all of the callback methods, because if a future version of Android adds another abstract callback method to the interface, the simple implementation will provide a default callback method, so you’re covered.
We’re going to explore ScaleGestureDetector, plus the corresponding listener class, to see how to use the pinch gesture to resize an image. In this example, we extend the simple implementation (ScaleGestureDetector.SimpleOnScaleGestureListener) for our listener. Listing 22-10 has the XML layout and the Java code for our MainActivity.
Listing 22-10. Layout and Java Code for the Pinch Gesture Using ScaleGestureDetector
<?xml version="1.0" encoding="utf-8"?>
<LinearLayout xmlns:android="http://schemas.android.com/apk/res/android"
    android:id="@+id/layout"  android:orientation="vertical"
    android:layout_width="match_parent"
    android:layout_height="match_parent" >

  <TextView  android:text=
        "Use the pinch gesture to change the image size"
    android:layout_width="match_parent"
    android:layout_height="wrap_content" />

  <ImageView android:id="@+id/image"  android:src="@drawable/icon"
    android:layout_width="match_parent"
    android:layout_height="match_parent"
    android:scaleType="matrix" />

</LinearLayout>

// This file is MainActivity.java
public class MainActivity extends Activity {
    private static final String TAG = "ScaleDetector";
    private ImageView image;
    private ScaleGestureDetector mScaleDetector;
    private float mScaleFactor = 1f;
    private Matrix mMatrix = new Matrix();
    @Override
    public void onCreate(Bundle savedInstanceState) {
        super.onCreate(savedInstanceState);
        setContentView(R.layout.main);

        image = (ImageView)findViewById(R.id.image);
        mScaleDetector = new ScaleGestureDetector(this,
                new ScaleListener());
    }

    @Override
    public boolean onTouchEvent(MotionEvent ev) {
        Log.v(TAG, "in onTouchEvent");
        // Give all events to ScaleGestureDetector
        mScaleDetector.onTouchEvent(ev);

        return true;
    }

    private class ScaleListener extends
            ScaleGestureDetector.SimpleOnScaleGestureListener {
        @Override
        public boolean onScale(ScaleGestureDetector detector) {
            mScaleFactor *= detector.getScaleFactor();

            // Make sure we don't get too small or too big
            mScaleFactor = Math.max(0.1f, Math.min(mScaleFactor, 5.0f));

            Log.v(TAG, "in onScale, scale factor = " + mScaleFactor);
            mMatrix.setScale(mScaleFactor, mScaleFactor);

            image.setImageMatrix(mMatrix);
            image.invalidate();
            return true;
        }
    }
}
Our layout is straightforward. We have a simple TextView with our message to use the pinch gesture, and we have our ImageView with the standard Android icon. We’re going to resize this icon image using a pinch gesture. Of course, feel free to substitute your own image file instead of the icon. Just copy your image file into a drawable folder, and be sure to change the android:src attribute in the layout file. Notice the android:scaleType attribute in the XML layout for our image. This tells Android that we’ll be using a graphics matrix to do scaling operations on the image. Although a graphics matrix can also do movement of our image within the layout, we’re only going to focus on scaling for now. Also notice that we set the ImageView size to as big as possible. As we scale the image, we don’t want it clipped by the boundaries of the ImageView.
The code is also straightforward. Within onCreate(), we get a reference to our image and create our ScaleGestureDetector. Within our onTouchEvent() callback, all we do is pass every event object we get to the ScaleGestureDetector’s onTouchEvent() method and return true so we keep getting new events. This allows the ScaleGestureDetector to see all events and decide when to notify us of gestures.
The ScaleListener is where the zooming happens. There are actually three callbacks within the listener class: onScaleBegin(), onScale(), and onScaleEnd(). We don’t need to do anything special with the begin and end methods, so we didn’t implement them here.
Within onScale(), the detector passed in can be used to find out lots of information about the scaling operation. The scale factor is a value that hovers around 1. That is, as the fingers pinch closer together, this value is slightly below 1; as the fingers move apart, this value is slightly larger than 1. Our mScaleFactor member starts at 1, so it gets progressively smaller or larger than 1 as the fingers move together or apart. If mScaleFactor equals 1, our image will be normal size. Otherwise, our image will be smaller or larger than normal as mScaleFactor moves below or above 1. We set some bounds on mScaleFactor with the elegant min/max function combination. This prevents our image from getting too small or too large. We then use mScaleFactor to scale the graphics matrix, and we apply the newly scaled matrix to our image. The invalidate() call forces a redraw of the image on the screen.
To work with the OnGestureListener interface, you’d do something very similar to what we’ve done here with our ScaleListener, except that the callbacks will be for different common gestures such as single tap, double tap, long press, and fling.
References
Here are some helpful references to topics you may wish to explore further.
- www.androidbook.com/proandroid5/projects: Downloadable projects related to this book. For this chapter, look for a zip file called ProAndroid5_Ch22_Touchscreens.zip. This zip file contains all projects from this chapter, listed in separate root directories. There is also a README.TXT file that describes exactly how to import projects into your IDE from one of these zip files.
- www.ted.com/talks/jeff_han_demos_his_breakthrough_touchscreen.html: Jeff Han demonstrates his multitouch computer user interface at TED in 2006—very cool.
- http://android-developers.blogspot.com/2010/06/making-sense-of-multitouch.html: An Android blog post about multitouch offers yet another way to implement a GestureDetector inside an extension of a view.
Summary
Let’s conclude this chapter by quickly enumerating what you have learned about touch screens so far:
- MotionEvent as the foundation on which touch handling is done
- Different callbacks that handle touch events on a View object and through an OnTouchListener
- Different types of events that occur during a touch sequence
- How touch events travel through an entire view hierarchy, unless handled along the way
- Information that a MotionEvent object contains about touches, including for multiple fingers
- When to recycle a MotionEvent object and when not to
- Determining the speed at which a finger drags across a screen
- The wonderful world of multitouch, and the internal details of how it works
- Implementing the pinch gesture, as well as other common gestures