
If you’ve made it to this chapter, then you have read about all the command-line options and how to use Oracle GoldenGate from the command line. If you are a graphical interface person, you might be thinking that GoldenGate is a great tool, but you do not want to work from the command line. If that is you, then you are in luck. Oracle has recently released a new tool that provides a graphical interface for Oracle GoldenGate, Oracle GoldenGate Studio.
Oracle GoldenGate Studio comes bundled in a new suite of tools called GoldenGate Foundation Suite. This suite of tools comprises the best tools used to work with GoldenGate, including the following:
Oracle GoldenGate Studio
Oracle Veridata
Oracle GoldenGate Management Pack
With the addition of GoldenGate Studio, Oracle now provides an offering that will allow you to design and build Oracle GoldenGate architectures, validate data between environments, and monitor these environments from a central location. This is a huge step forward for the growing popularity of Oracle GoldenGate.
This chapter introduces you to Oracle GoldenGate Studio and some of the basic features that it provides.
Downloading Oracle GoldenGate Studio
Oracle GoldenGate Studio comes bundled with the OUI, which will walk you through installation. Before you can start installing Studio, you will have to download the software from OTN ( http://otn.oracle.com ) or from eDelivery ( https://edelivery.oracle.com ). Figure 11-1 shows you where you can find the GoldenGate Studio software on OTN .

Figure 11-1. OTN location of Oracle GoldenGate Studio
You will notice that there are two files to download. These files are Java Archive (JAR) files that are compressed for download purposes. Both of these files are required for the installation. After you download the files, they need to be extracted in a location from which you want to run the installation.
Note
For the installation to work, there is a Java JDK 1.8 requirement. Java JDK 1.7 and earlier versions will not work with the JAR files for Studio. Java JDK 1.8 can be downloaded here at http://www.oracle.com/technetwork/java/javase/downloads/jdk8-downloads-2133151.html .
Once the files are extracted, you are ready to install Oracle GoldenGate Studio.
Installing Oracle GoldenGate Studio
To begin installing Oracle GoldenGate Studio, you need Oracle Java JDK 1.8. Java JDK 1.8 should be in your path so the Java command can be called without issue. After you have access to the correct version of Java, starting the Oracle GoldenGate Studio installer is quite simple. Listing 11-1 shows you how to start the installer from the command line.
Listing 11-1. Starting the Installer
[email protected]:/home/oracle/Downloads >cd ggstudio/[email protected]:/home/oracle/Downloads/ggstudio >ls -ltrtotal 2035480-rw-rw-r--. 1 oracle oracle 9023463 Dec 23 09:07 fmw_12.2.1.0.0_oggstudio_generic2.jar-rw-rw-r--. 1 oracle oracle 2075303807 Dec 23 09:08 fmw_12.2.1.0.0_oggstudio_generic.jar[email protected]:/home/oracle/Downloads/ggstudio >java -jar ./fmw_12.2.1.0.0_oggstudio_generic.jarLauncher log file is /tmp/OraInstall2016-01-23_01-11-27PM/launcher2016-01-23_01-11-27PM.log.Extracting files.........................................Starting Oracle Universal InstallerChecking if CPU speed is above 300 MHz. Actual 3192.107 MHz PassedChecking monitor: must be configured to display at least 256 colors. Actual 16777216 PassedChecking swap space: must be greater than 512 MB. Actual 12287 MB PassedChecking if this platform requires a 64-bit JVM. Actual 64 Passed (64-bit not required)Checking temp space: must be greater than 300 MB. Actual 35476 MB PassedPreparing to launch the Oracle Universal Installer from /tmp/OraInstall2016-01-23_01-13-56PMLog: /tmp/OraInstall2016-01-23_01-13-56PM/install2016-01-23_01-13-56PM.log
Note
The java –jar command automatically combines the two JAR files to start the installer.
Once the installer performs a few prerequisite checks, the graphical portion of the installation will begin. If the graphical portion is unable to open the display, if you are using X-Term, then you will have to restart the secure shell session. If your display variable is correct, then you will see the initial load screen, which is displayed in Figure 11-2.

Figure 11-2. Installer initial screen
With the installer started, you are presented with an eight-step wizard for installing Oracle GoldenGate Studio. This wizard walks you through all the steps required to successfully install Studio.
Figure 11-3 shows the first page of the Installation Wizard. This page is just a general welcome screen that provides general information related to Studio. Click Next to move forward.

Figure 11-3. Welcome page in Installation Wizard
The next step in the wizard (Figgure 11-4) is to tell Oracle if you want to check for any updates to the software being installed. With this being the first release of Studio, you can select Skip Auto Updates and click Next.

Figure 11-4. Software update
In the third step (Figure 11-5), you are presented with the opportunity to specify the location where you want to install Studio. This will be the Oracle Home directory of Studio. Specify the location as needed. There is a Browse button if needed, along with a button to show you the feature sets that are installed in that Home directory. With this being a new home, there will be no feature sets.

Figure 11-5. Oracle Home location
The fourth step in the wizard (Figure 11-6) provides you with the installation type. There is not much to pick from at this point. The only type of installation that can be performed is a complete install, which includes both the Studio software and the most recent version of the OPatch features.

Figure 11-6. Installation Type page
The fifth step of the installer (Figure 11-7) checks for prerequisites, which include checking the operating system and the version of Java used to run the installer. In Figure 11-7, you will notice that Java 1.8 is throwing a warning due to the version of Java that Studio is certified against. In installing this software, I’m using Java 1.8.0_40. When Studio was made generally available, it was certified against Java 1.8.0_51. This is not a huge difference, and it is something that should be corrected at a later time, after installation.

Figure 11-7. Prerequsite Checks page
After the prerequisites are checked, the wizard gives you a summary, as shown in Figure 11-8, of all the information you provided during installation. This page lists what will be installed, where it is installed, and how much disk space is required for the installation.

Figure 11-8. Installation Summary page
After you review the installation summary, click Install.The installer will begin to install Oracle GoldenGate Studio where specified (Figure 11-9). During the installation, you can keep track of the progress of the installation.

Figure 11-9. Installation Progress page
After completion of the installation, the wizard provides you with additional information needed to finish setting up Studio (Fiure 11-10). This information is listed in the Next Steps section on the Installation Complete page. Out of the two next steps, the most important one involves repository creation.

Figure 11-10. Installation Complete page
At this point, the Oracle GoldenGate Studio is installed, but you still need to create the repository that will be used for Studio. Let’s take a look at that now.
Configuring Studio Repository
Before Oracle GoldenGate Studio is completely installed, there is one last step that is required. This is the installation of the repository that will hold all the models, connections, mappings, and other resources that are used within Studio. This repository can be configured against an Oracle database, Oracle MySQL database, IBM DB2, or a Microsoft SQL Server database. The end result is that it just needs a database in which to store the repository information.
If you have been around the data integration side of Oracle products, you might be thinking to yourself that this seems familiar. That would be a good assumption, because Oracle GoldenGate Studio was built using the Oracle Data Integrator (ODI) framework . Both Oracle GoldenGate Studio and ODI use a repository to store mappings and other resources. Because they are related products, you can use the one repository for both products. In this section, you look at how to install the repository for only Oracle GoldenGate Studio.
To begin installing the repository, you have to use the Repository Creation Utility (RCU) . The RCU is located in the $OGGS_HOME/oracle_common/bin directory and is executed from the command line.
Note
If you are on a Microsoft Windows machine, RCU will be in the same location and executed by double-clicking.
From a command prompt, you just need to be in the $OGGS_HOME/oracle_common/bin directory and execute rcu. This starts the graphical utility for creating the repository. Listing 11-2 provides a sample of the commands needed to execute the RCU.
Listing 11-2. Run Repository Creation Utility
[email protected]:/u01/app/oracle/product/oggstudio/oracle_common >cd bin[email protected]:/u01/app/oracle/product/oggstudio/oracle_common/bin >./rcu
Much like the installation of Studio, the RCU starts off with a welcome page (Figure 11-11) that highlights what is about to be installed. On the welcome page, you can see there are eight steps that have to be performed before the repository is built.

Figure 11-11. RCU Welcome page
The next step is to create the repository for Studio. On this page, shown in Figure 11-2, there are a few options for creating a repository. Because this is a simple installation, the default selections are fine; however, if you have additional requirements, you can use the other two options to have a DBA build the repository. Finally, if you need to delete a repository, this is the page where you can select that. If you delete a repository, the wizard will change a bit; because you are building a repository do not worry about that here.

Figure 11-12. Create Repository page
The next step in creating the repository is to provide the connection to the database where the repository will be built (Figure 11-13). In the first drop-down list, Database Type, you can select the type of database that the repository will be built in. As mentioned previously, the repository can be built in Oracle Database, Oracle MySQL, IBM DB2, and Microsoft SQL Server databases.

Figure 11-13. Database Connection Details page
After selecting the type of database where the repository is to be built, you will need to provide all the connection information for that database. For an Oracle database, this information would be hostname, port number, service name, username, password, and the role to which the user has access. Figure 11-13 shows what this screen would look like for an Oracle Database connection.
Note
By using service names, you can build out the repository in a pluggable database.
After clicking Next, you will see a dialog box about checking prerequisites (Figure 11-14). This is normal, and anything that will prevent the building of the repository will be presented at this time. Once the checks are done, click OK to proceed.

Figure 11-14. Prerequisites check
The next step in creating the repository is to select the components needed within the repository (Figure 11-15). These components will have a prefix associated with them so you can keep track of what is created for the repository. This prefix can be changed on this page as well. Select the Oracle GoldenGate check box. As you can see in Figure 11-15, there is an option for Repository to specify the repository for Studio. This will create associated schemas called DEV_STB and DEV_OGGSTUDIO_REPO within the database.

Figure 11-15. Select Components page
After you click Next, the Select Components page will run through a prerequisites check (Figure 11-16). This usually returns normal results and you just need to click OK to move forward with repository creation.

Figure 11-16. Prerequisites check
As with any schema being built inside a database, you will need to provide a password. The next step in the creation of the repository is to provide a password or define different passwords for all the schemas. To keep things simple in a test environment, it is best to use the same password for all schemas. Figure 11-17 illustrates this screen.

Figure 11-17. Provide password
After providing the password you would like to use for the schemas associated with the studio, the wizard will ask you for a supervisor password. The supervisor password is the password that you will use to access the repository for Oracle GoldenGate Studio. This is very similar to the supervisor configuration that you would use in Oracle Data Integrator. On the Custom Variables page shown in Figure 11-18, you need to provide the password you want to use for the supervisor in the first two fields. The field for Encryption Algorithm should remain blank.

Figure 11-18. Provide a supervisor password
Note
If you provide an encryption algorithm value, you will break the installation. This is a known bug that was identified during beta testing.
The next step in repository creation is to map the tablespaces that are needed to store all the objects for Oracle GoldenGate Studio. By default, the utility adds predefined names for tablespaces. This information can be changed if desired. Figure 11-19 shows what the default settings look like using the schemas DEV_STB and DEV_OGGSTUDIO_USER.

Figure 11-19. Create tablespaces
When you click Next, the wizard will check to see if the tablespaces you want for the schemas exist. If they do not exist, the wizard prompts you to verify the creation of the tablespace or to cancel and make other selections.
If you choose to create the tablespaces, then the utility provides a dialog box, shown in Figure 11-20, that will return the status of how long it takes to build the associated tablespaces.

Figure 11-20. Tablespace creation
Once you reach the Summary page (Figure 11-21) in the utility, you can see all the information you provided before creating the repository. Once you click Create, the utility creates the repository needed for Oracle GoldenGate Studio.

Figure 11-21. Repository Creation Utility Summary page
The creation of the repository (Figure 11-22) will take some time, depending on the database type and size of the hardware where the database is hosted. Once this step is finished, the repository will be completed and you will be able to access the repository from Oracle GoldenGate Studio.

Figure 11-22. Repository Creation Utility progress
The last thing the utility will provide once the repository is created is a summary of the events that were performed. On the Completion Summary page (Figure 11-23), you can clearly see the database details, log file locations, and what components were created. At this point, you can close the utility.

Figure 11-23. Repository Completion Summary page
With the repository created, you can begin working with Oracle GoldenGate Studio in mostly an offline capacity. I say offline because there is still one more component that needs to be installed before you can use Oracle GoldenGate Studio in an online status. Before we talk about that, let’s take a look at Oracle GoldenGate Studio.
Starting Oracle GoldenGate Studio
With the binaries for Oracle GoldenGate Studio installed and the repository that is needed configured, it is now possible to start the Studio interface. To start Oracle GoldenGate Studio, you need to navigate to the $OGGS_HOME/oggstudio/bin directory and execute oggstudio. Listing 11-3 shows how this is done.
Listing 11-3. Directory to Start Oracle GoldenGate Studio
[email protected]:/u01/app/oracle/product/oggstudio >[email protected]:/u01/app/oracle/product/oggstudio >cd oggstudio[email protected]:/u01/app/oracle/product/oggstudio/oggstudio >cd bin[email protected]:/u01/app/oracle/product/oggstudio/oggstudio/bin >lsGG-SplashScreen.png oggstudio64.exe oggstudio.boot oggstudio.exe oggstudioW.exeoggstudio oggstudio64W.exe oggstudio.conf oggstudio-logging-config.xml version.properties[email protected]:/u01/app/oracle/product/oggstudio/oggstudio/bin >./oggstudio
Note
You will notice in this directory there are other versions of Studio. These are for different operating system platforms.
Once Oracle GoldenGate Studio starts, the splash screen (Figure 11-24) will appear on the screen and provide a loading bar to let you know the progress of the application being loaded.
Figure 11-24. Oracle GoldenGate Studio splash screen
On the first use of Oracle GoldenGate Studio, you will be asked if you would like to import previous configurations (Figure 11-25). This is similar to other products provided by Oracle. In this case, because this is a fresh install, you can safely click No.

Figure 11-25. Import preferences
When the application is finished loading, Oracle GoldenGate Studio will start. Figure 11-26 shows you the interface without being connected to the repository.

Figure 11-26. Oracle GoldenGate Studio
Now that Oracle GoldenGate Studio has been started, you can connect to the repository you created earlier in the chapter. Once you are connected to the repository, you can begin to design and build out your Oracle GoldenGate architectures.
Connecting to the Repository
With Oracle GoldenGate Studio running, you will want to connect to the repository database to begin building your diagrams and different architectures. To do this, you need to establish a connection to the repository, which is done simply from within the Studio interface.
On the left side of the Studio interface, you will see an icon that looks like a power plug. You will also see a similar icon just below the menu bar (Figure 11-27). Clicking on either of these icons opens a dialog box where you will need to define a profile for later access to the repository (Figure 11-28). Once you create the profile for accessing the repository, you will also be given the option for storing the password in a secure wallet.

Figure 11-27. Connect to Repository

Figure 11-28. Repository login
After connecting to the repository, the interface for Oracle GoldenGate Studio changes to a more workable interface with windows for different components within the interface (Figure 11-29). At this point, take some time to explore the interface and figure out what you can do within it. Chapter 12 will familiarize you with the different components you can use within Oracle GoldenGate Studio.

Figure 11-29. Oracle GoldenGate Studio connected to the repository
Disconnecting from the Repository
When you are finished working with Oracle GoldenGate Studio, you will want to disconnect from the repository before shutting down Studio. To do this, you need to click the power plug icon again. This time the icon will have a red X on it. Once you click this, you will be disconnected from the repository.
Oracle GoldenGate Monitor Agent
Earlier in the chapter as you were introduced to Oracle GoldenGate Studio, it was mentioned that you could use Studio in an offline fashion. Offline with Oracle GoldenGate Studio means that you have no way to connect your models to an existing GoldenGate environment. So what can you do if you want to work online? The answer is quite simple: You have to install the Oracle GoldenGate Monitor Agent, also known as the Java Agent (JAgent) . This is not the same JAgent that comes bundled with the core Oracle GoldenGate product.
This version of the JAgent is provided with the Oracle GoldenGate Management Pack. Just like Oracle GoldenGate Studio, this product can be downloaded from OTN (Figure 11-30). This version of the JAgent provides more robust monitoring capabilities for Oracle GoldenGate, not only to be used with Studio, but with Oracle Enterprise Manager 12c and 13c as well.
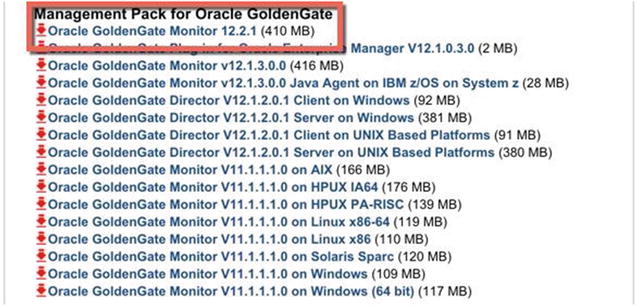
Figure 11-30. Management Pack for Oracle GoldenGate
Next, you will see how to install this version of the JAgent as well as what needs to be configured to make it work with Oracle GoldenGate Studio.
Installing Oracle GoldenGate Monitor Agent
Just like Oracle GoldenGate Studio, the new Monitor Agent has to be installed. The requirements for installing the Monitor Agent include Java JDK 1.8 for the installation. After downloading and extracting the latest Oracle GoldenGate Management Pack, the associated JAR file has to be executed using Java. Listing 11-4 shows you how to execute the command to start the installer for the Monitor Agent.
Listing 11-4. Starting the Agent Installer
[email protected]:/home/oracle/Downloads >unzip ./fmw_12.2.1.0.0_ogg_Disk1_1of1.zip -d ./ggmonitor122Archive: ./fmw_12.2.1.0.0_ogg_Disk1_1of1.zipinflating: ./ggmonitor122/fmw_12.2.1.0.0_ogg.jar[email protected]:/home/oracle/Downloads >cd ggmonitor122/[email protected]:/home/oracle/Downloads/ggmonitor122 >java -jar ./fmw_12.2.1.0.0_ogg.jarLauncher log file is /tmp/OraInstall2016-01-23_04-36-44PM/launcher2016-01-23_04-36-44PM.log.Extracting files....Starting Oracle Universal InstallerChecking if CPU speed is above 300 MHz. Actual 3192.107 MHz PassedChecking monitor: must be configured to display at least 256 colors. Actual 16777216 PassedChecking swap space: must be greater than 512 MB. Actual 12287 MB PassedChecking if this platform requires a 64-bit JVM. Actual 64 Passed (64-bit not required)Checking temp space: must be greater than 300 MB. Actual 37064 MB PassedPreparing to launch the Oracle Universal Installer from /tmp/OraInstall2016-01-23_04-36-44PMLog: /tmp/OraInstall2016-01-23_04-36-44PM/install2016-01-23_04-36-44PM.log
Once the installer is started with the JAR file, you will see the initial splash screen (Figure 11-31) on the screen. Once you see the splash screen, the Installation Wizard will start.
Figure 11-31. Splash screen
You will notice that the splash screen says nothing about the agent. It only references that this is the installer for GoldenGate Monitor and GoldenGate Veridata. This is correct, as the latest Monitor Agent is bundled with these products and not with the core GoldenGate product.
With the installer started, you will be presented with the Welcome page (Figure 11-32). Just like the Oracle GoldenGate Studio installer, this provides you with information related to what you are going to be installing.

Figure 11-32. Agent installation Welcome page
On the Auto Updates page (Figure 11-33), you can select Skip Auto Updates. You should have downloaded the latest version of the Monitor Agent to use with Oracle GoldenGate Studio.

Figure 11-33. Auto Updates page
The next step is the Installation Location page (Figure 11-34), where you will install the Monitor Agent. If you look closely at the Oracle Home location, you will see that I’m still naming it JAgent. This is to keep it simple, but you can name it whatever you wish.

Figure 11-34. Installation Location page
You should now be on the Installation Type page (Figure 11-35). This is where you will select that you want to install the Monitor Agent. When you look at the page, the Monitor Agent is the sixth option down. This means that you will only install the binaries for the Monitor Agent.

Figure 11-35. Installation Type page
After you select the option for installing the Monitor Agent only, the installer will move onto the the prerequisite checks (Figure 11-36). Just like the installer for Oracle GoldenGate Stuido, the installer is looking for Java 8 (1.8.0_51); however you can still install using a lower version of Java 8.

Figure 11-36. Prerequisite Checks page
After the prerequisite checks are done, the Installation Summary page (Figure 11-37) will be shown. On this page, you can see where, what, and how much disk space the installation is going to take.

Figure 11-37. Installation Summary page
When you are satisifed with the installation settings, you can proceed to install the Monitor Agent (Figure 11-38). The installation will not take that long because you are only installing a subset of the binaries that are bundled in the JAR file.

Figure 11-38. Installation Progress page
After the installation is complete, you will see the Installation Complete page (Figure 11-39), which provides all the information pertaining to the installation of the agent.

Figure 11-39. Installation Complete page
Now that the Monitor Agent is installed, you will need to configure it to be used with Oracle GoldenGate Studio. All of the configuration will be done at the command line because the agent is eventually controlled from within the GGSCI.
Configure Oracle GoldenGate Monitor Agent
Before you can start using the Oracle GoldenGate Monitor Agent, you need to configure the agent for the environment. This includes telling the agent where the Oracle GoldenGate installation resides and where you would like to install the actual agent process. To do this, you need to run createMonitorInstance.shfrom the agent directory you created previously.
Create OGG Agent Instance
To execute the createMonitorInstance.sh script, you will need to change directories until you get to the $AGENT_HOME/oggmon/ogg_agent directory. Listing 11-5 illustrates this in my test environment.
Listing 11-5. Running createMonitorInstance.sh
[email protected]:/u01/app/oracle/product/12.2.1.0/jagent >cd oggmon/ogg_agent[email protected]:/u01/app/oracle/product/12.2.1.0/jagent/oggmon/ogg_agent >./createMonitorAgentInstance.shPlease enter absolute path of Oracle GoldenGate home directory : /u01/app/oracle/product/12.2.0/oggcore_1Please enter absolute path of OGG Agent instance : /u01/app/oracle/product/12.2.1.0/jagent/ogg_agentPlease enter unique name to replace timestamp in startMonitorAgent script (startMonitorAgentInstance_20160123171554.sh) :Successfully created OGG Agent instance.
Once this agent is created, you need to assign a password to the agent. This password will be stored in a wallet for later retrieval when needed on startup. This password will also be used to allow Oracle GoldenGate Studio and Oracle Enterprise Manager 12c or 13c to connect to the GoldenGate environment.
Update the Agent Configuration
As has already been established, the Oracle GoldenGate Monitor Agent operates in one of two modes. The first mode is for the Oracle GoldenGate Monitor Server and the second is for Oracle Enterprise Manager 12c or 13c. This is controlled by a setting in the Config.properties file, which resides in the $AGENT_HOME/cfg directory.
When using the Monitor Agent with Oracle GoldenGate Studio, there are a few properties in the Config.properties file that need to be updated. Table 11-1 highlights these properties.
Table 11-1. Properties in the Config.properties File
Property | Definition |
|---|---|
Jagent.host | Value set to either default, hostname, or IP where JAgent is running. |
Jagent.username | Set to JAgent username. |
Jagent.rmi.port | Use default port or change to specific port. |
Agent.type.enabled | Set to either OGGMON or OEM. |
Jagent.backward.compatibility | Set to false. |
Jagent.ssl | Set to false. |
After you edit the Config.properties file, the values of this file would look similar to Listing 11-6.
Listing 11-6. Values Set in Config.properties
Jagent.host=localhostJagent.username=oracleJagent.rmi.port=5559Agent.type.enabled=OEMJagent.backware.compatibility=falseJagent.ssh=fasle
After saving the Config.properties file, you will be able to assign a password for the agent to use. Additionally, when monitoring for GoldenGate is enabled through the GLOBALS file, this information will be used to start the JAgent.
Assign Password to Agent Instance
The agent has to have a password assigned to it for external resources to access the information that is provided through the agent. To assign a password to the agent, you need to execute the pw_agent_util.sh script from the $AGENT_HOME/ogg_agent/bin directory. Listing 11-7 shows how this is done.
Listing 11-7. Setting Monitor Agent Password
[email protected]:/u01/app/oracle/product/12.2.1.0/jagent/ogg_agent/bin >./pw_agent_util.sh -jagentonlyPlease create a password for Java Agent: ********Please confirm password for Java Agent: ********Jan 23, 2016 10:49:38 PM oracle.security.jps.JpsStartup startINFO: Jps initializing.Jan 23, 2016 10:49:38 PM oracle.security.jps.JpsStartup startINFO: Jps started.Wallet is created successfully.
With the password set for the agent, you can now enable monitoring for GoldenGate and start the JAgent from GGSCI.
Enable Monitoring for GoldenGate
With all the settings configured in the Config.properties file and the password established for the JAgent, you need to enable monitoring from within Oracle GoldenGate. To do this, you have to place the parameter ENABLEMONITORING in the GLOBALS files under the $OGG_HOME directory. Once this parameter is in place, log out of GGSCI and start GGSCI again. At this time you should see an entry for JAgent (Listing 11-8).
Listing 11-8. GGSCI with JAgent Enabled
GGSCI (fred.acme.com) 3> info allProgram Status Group Lag at Chkpt Time Since ChkptMANAGER RUNNINGJAGENT RUNNINGEXTRACT RUNNING EGG12C 00:00:10 00:00:04Description 'Integrated Extract'EXTRACT RUNNING PGG12C 00:00:00 00:00:09Description 'Data Pump'
After starting the JAgent, you can confirm that the JAgent has started with the correct properties file by checking the background processes. Once the JAgent is running, it can be used to interact with the GoldenGate environment from Oracle GoldenGate Studio along with Oracle Enterprise Manager 12c or 13c and Oracle GoldenGate Monitor.
Note
Java 8 (jdk1.8.0_51) is the best working version of Java to be used with the JAgent.
Summary
This chapter looked at how to install Oracle GoldenGate Studio, how to create the repository associated with Studio, and how to install the Oracle GoldenGate Monitor Agent. All three of these items are foundational building blocks to using Oracle GoldenGate Studio within any Oracle GoldenGate environment. This chapter should have provided you with the foundational knowledge of what and how to install Oracle GoldenGate Studio and the items needed to get it running. Chapter 12 dives deeper into Oracle GoldenGate Studio by showing you some of the functional tasks that can be done to ease the administration load of an Oracle GoldenGate administrator.