
32.5. Master Pages
A very useful feature of web development in Visual Studio is the ability to create master pages that define sections that can be customized. This enables you to define a single page design that contains the common elements that should be shared across your entire site, specify areas that can house individualized content, and inherit it for each of the pages on the site.
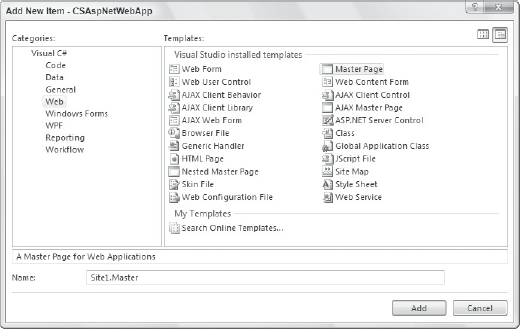
To add a master page to your Web Application project, use the Add New Item command from the web site menu or from the context menu in the Solution Explorer. This displays the Add New Item dialog, shown in Figure 32-34, which contains a large number of item templates that can be added to a web application. You'll notice that besides Web Forms (.aspx) pages and Web User Controls, you can also add plain HTML files, style sheets, and other web-related file types. To add a master page, select the Master Page template, choose a name for the file, and click "Add."
Figure 32.34. Figure 32-34
When a master page is added to your web site, it starts out as a minimal web page template with two empty ContentPlaceHolder components — one in the body of the web page and one in the head. This is where the detail information can be placed for each individual page. You can create the master page as you would any other web form page, complete with ASP.NET and HTML elements, CSS style sheets, and theming.
If your design requires additional areas for detail information, you can either drag a new ContentPlaceHolder control from the Toolbox onto the page, or switch to Source view and add the following tags where you need the additional area:
<asp:ContentPlaceHolder id="aUniqueId" runat="server">
</asp:ContentPlaceHolder>
Once the design of your master page has been finalized, you can use it for the detail pages for new web forms in your project.
Unfortunately, the process to add a form that uses a master page is slightly different depending on whether you are using a Web Application or Web Site project. For a Web Application project, rather than adding a new Web Form you should add a new Web Content Form. This will display the Select a Master Page dialog box shown in Figure 32-35. In a Web Site project, the Add New Item window contains a checkbox titled "Select master page." If you check this, the Select a Master Page dialog will be displayed.
Figure 32.35. Figure 32-35

Select the master page to be applied to the detail page and click "OK." The new web form page that is added to the project will include one or more Content controls, which map to the ContentPlaceHolder controls on the master page.
It doesn't take long to see the benefits of master pages and understand why they have become a very popular feature. However, the one thing that has limited their usefulness has been the lack of support for nested master pages. While it has always been possible to nest master pages in ASP.NET, Visual Studio 2005 did not provide any support for it. Fortunately, this has been fixed in Visual Studio 2008.
Working with nested master pages is not much different from working with normal master pages. To add one, select Nested Master Page from the Add New Item window. You will be prompted to select the parent master page via the Select a Master Page window that was shown in Figure 32-35. When you subsequently add a new content web page, any nested master pages are also shown in the Select a Master Page window.