
52.2. Add-In Wizard
The first step in creating an add-in project, as you might expect, is using the New Project dialog to get started. In this dialog you need to open the Extensibility node located in Other Project Types in order to see Visual Studio templates related to its extensibility (Figure 52-1). Here you will see the Visual Studio Add-in template, which is a built-in template for Visual Studio. You may or may not see some templates that are shown in Figure 52-1, such as the Visual Studio Shell Isolated template. Both the Visual Studio Add-in and Shared Add-in templates are built-in parts of the Visual Studio installation.
Figure 52.1. Figure 52-1

After choosing a name for the project, a wizard dialog appears called the Add-in Wizard. This wizard helps you to get started with your add-in through an initial code that is generated for you. This wizard consists of six pages and a welcome page.
Here you can see a walkthrough of this wizard and read a description about each step. As a general note, you need to know that this wizard has buttons to the next and previous steps and to cancel the wizard. At any step you can go back and forth between steps.
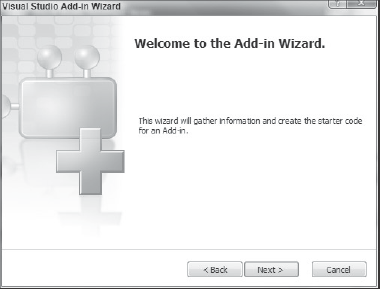
There is a welcome page at the start, which gives a short description of the wizard (Figure 52-2).
Figure 52.2. Figure 52-2
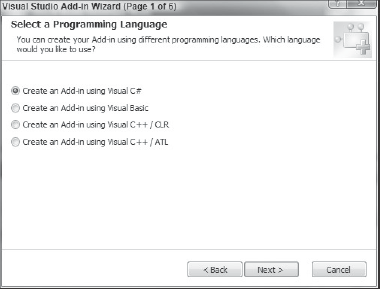
In the first step of the Add-in Wizard (Figure 52-3) you need to choose a development language for your add-in. There are four options for you — Visual C#, Visual Basic, Visual C++ / CLR, and Visual C++ / ATL. Visual Studio generates appropriate code for the language that you choose here.
Figure 52.3. Figure 52-3
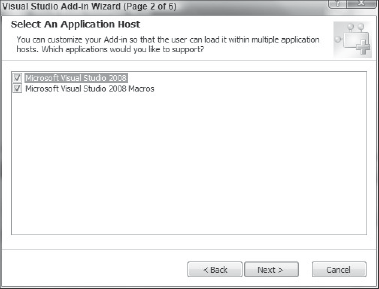
In the second step you choose an application host for your add-in. Two application hosts are available for your add-ins: the Visual Studio IDE and the Visual Studio Macros IDE (Figure 52-4). You can check or uncheck each host to select or deselect it. Your add-in is available to the application host(s) that you choose here.
Figure 52.4. Figure 52-4
Page 3 is where you enter a name and description for your add-in (Figure 52-5). This information is what end users see in the Add-in Manager dialog in Visual Studio for your add-in.
Figure 52.5. Figure 52-5

In the next step you see a page where you can choose some options for your add-in. There are three options that you can check to include in your add-in (Figure 52-6). The first option specifies that your add-in can have a user interface element as an item in the Tools menu. If you check this item, then the item appears in that menu. The second option indicates that you would like to load your add-in when the Visual Studio IDE or Visual Studio Macros IDE starts, and the third option indicates that your add-in doesn't show any modal user interfaces, and thus can be used with command-line builds.
Figure 52.6. Figure 52-6

On Page 5 you can enable an About box for your add-in and enter a text description for it (Figure 52-7). The description appears in the About box for the Visual Studio IDE as a separate product.
Figure 52.7. Figure 52-7

In the last page you just see a summary of what you have chosen in your wizard (Figure 52-8). At this stage, you can go back and change your options or click the Finish button to generate the solution and initial code for your add-in.
Figure 52.8. Figure 52-8

After clicking the Finish button, Visual Studio generates a solution with some files that you can use as a good starting point for your development. In the next sections you'll read more details about the anatomy of an add-in and the structure of these generated files.