
56.1. Web Tests
These tests will simulate web requests and allow you to inspect the responses and evaluate different conditions to determine if the test passes. To create a new Web Test, right-click your Test Project from the Add submenu and select Web Test. This will open Internet Explorer with the Web Test Recorder enabled as shown in Figure 56-1. Point to your site as if you were a normal user and interact with your application. Once done, simply click Stop. This will open the Web Test's designer shown in Figure 56-2. There you can customize your test, adding validation and extraction rules, context parameters, comments, data sources, and calls to other Web Tests, or inserting transactions.
You will often need to run the same set of tests against different web servers; to do this you configure this as a context parameter. From the Web Test Designer you can right-click the main node and select Parameterize Web Servers. Visual Studio will inspect the URLs in each request and determine the context parameters it will need to create.
You can link your requests using the output from one of them as input for the next; to do this you add extraction rules to a specific request. You can extract from fields, attributes, http headers, hidden fields, and text, or even use regular expressions. The result of an extraction will set a context parameter, which can then be used, for example, as a form or query string parameter in further requests. You could add a product and then search for it using the ID in another request.
Figure 56.1. Figure 56-1

Figure 56.2. Figure 56-2
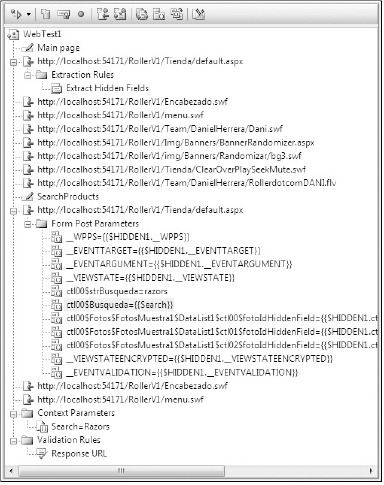
You can add extraction rules and form and query string parameters from the context menu of a request. By selecting a form or query string parameter from the properties window you can set its value to a Context Parameter or bind it to a data source.
No test framework would be complete without validations. When you record a test, a Response URL Validation Rule is added asserting that the response URL is the same as the recorded response URL. This is not enough for most scenarios. From the context menu at a Web Test or request level you can add validation rules. You can check that a form field or attribute has a certain value or that a particular tag is included, find some text, or ascertain that the request doesn't take more than a specified length of time.
Double-clicking the testrunconfig file in Solution Explorer will allow you to further customize how Web Tests are run. There you can choose the number of iterations, the browser and network type, and if the test engine should simulate think times. You can have many Test Run Configurations and from the Test menu select the active one.
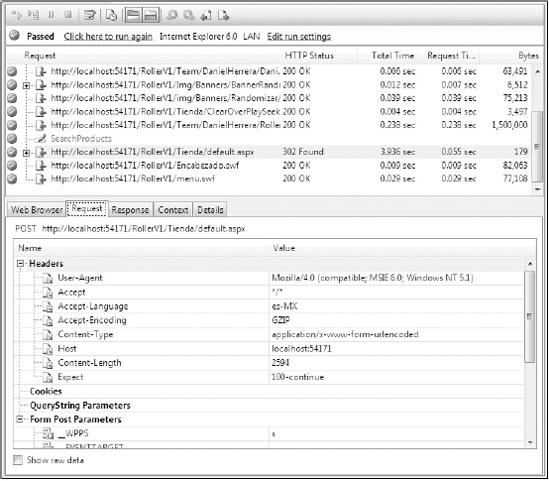
Web Tests as well as any other type of tests will be displayed in the Test List Editor window as you saw in Chapter 20. From there you can run your Web Test and group it inside a particular test list. You can also run it directly from the Web Test Designer. Once a test is run you can see its details by double-clicking it in the Test Results window. To open this window, select Test Results from the Test ![]() Windows menu. There you can see each request's status, total time, and bytes. When you select a request you will see the used request and received response, values of the context parameters, validations and extraction rules, and a web-browser-like view displaying the web page. An example is shown in Figure 56-3.
Windows menu. There you can see each request's status, total time, and bytes. When you select a request you will see the used request and received response, values of the context parameters, validations and extraction rules, and a web-browser-like view displaying the web page. An example is shown in Figure 56-3.
Figure 56.3. Figure 56-3
If you need additional flexibility, you can code the Web Tests using .NET and the Web Testing Framework. The best way to learn how to use the framework and start coding your test is by generating code for a recorded Web Test. You have this option in the Web Test context menu.
Although Team System provides some ASP.NET-specific features, you can use Web Tests for sites built using other technologies.