
In Chapter 10, we wrote a simple thumbnail image viewer that scrolled its thumbnails in a canvas. That program in turn built on techniques and code we developed at the end of Chapter 9 to handle images. In both places, I promised that we’d eventually meet a more full-featured extension of the ideas we deployed.
In this section, we finally wrap up the thumbnail images thread by studying PyPhoto—an enhanced image viewing and resizing program. PyPhoto’s basic operation is straightforward: given a directory of image files, PyPhoto displays their thumbnails in a scrollable canvas. When a thumbnail is selected, the corresponding image is displayed full size in a pop-up window.
Unlike our prior viewers, though, PyPhoto is clever enough to scroll (rather than crop) images too large for the physical display. Moreover, PyPhoto introduces the notion of image resizing—it supports mouse and keyboard events that resize the image to one of the display’s dimensions and zoom the image in and out. Once images are opened, the resizing logic allows images to be grown or shrunk arbitrarily, which is especially handy for images produced by a digital camera that may be too large to view all at once.
As added touches, PyPhoto also allows the image to be saved in a file (possibly after being resized), and it allows an image directory to be selected and opened in the GUI itself, instead of just as a command-line argument.
Put together, PyPhoto’s features make it an image-processing program, albeit one with a currently small set of processing tools. I encourage you to experiment with adding new features of your own; once you get the hang of the Python Imaging Library (PIL) API, the object-oriented nature of PyPhoto makes adding new tools remarkably simple.
In order to run PyPhoto, you’ll need to fetch and install the PIL extension package described in Chapter 9. PyPhoto inherits much of its functionality from PIL—PIL is used to support extra image types beyond those handled by standard Tkinter (e.g., JPEG images) and to perform image processing operations such as resizes, thumbnail creation, and saves. PIL is open source like Python, but it is not presently part of the Python standard library. Search the Web for PIL’s location (http://www.pythonware.com is currently a safe bet).
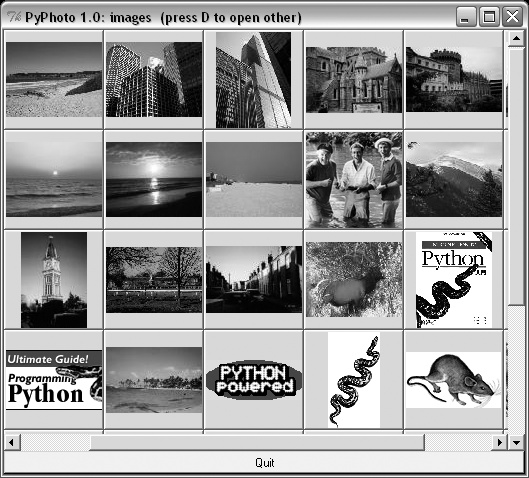
The best way to get a feel for PyPhoto is to run it live on your own machine to see how images are scrolled and resized. Here, we’ll present a few screenshots to give the general flavor of the interaction. You can start PyPhoto by clicking its icon, or you can start it from the command line. When run directly, it opens the images subdirectory in its source directory, which contains a handful of photos. When you run it from the command line, you can pass in an initial image directory name as a command-line argument. Figure 12-4 captures the main thumbnail window when run directly.
Internally, PyPhoto is loading or creating thumbnail images before this window appears, using tools coded in Chapter 9. Startup may take a few seconds the first time you open a directory, but it is quick thereafter—PyPhoto caches thumbnails in a local subdirectory so that it can skip the generation step the next time the directory is opened.
Technically, there are three different ways PyPhoto may start
up: viewing an explicit directory listed on the command line;
viewing the default images directory when no
command-line argument is given and when images
is present where the program is run; or displaying a simple
one-button window that allows you to select directories to open on
demand, when no initial directory is given or present (see the
code’s _ _main_ _ logic).
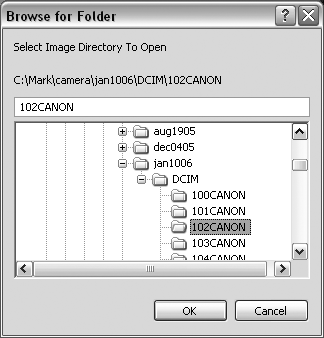
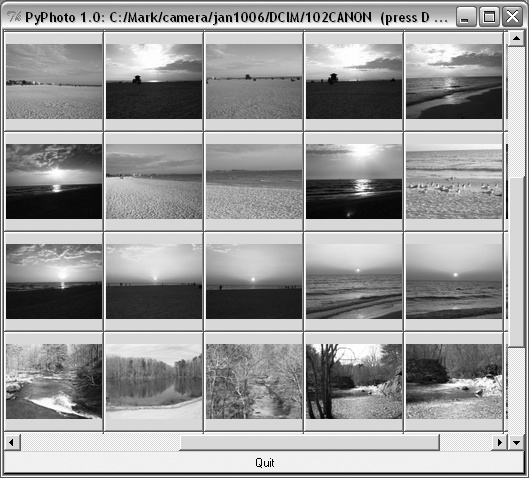
PyPhoto also lets you open additional folders in new thumbnail windows, by pressing the D key on your keyboard in either a thumbnail or an image window. Figure 12-5, for instance, captures the pop-up window produced to select a new image folder, and Figure 12-6 shows the result when I select a directory copied from one of my digital cameras. Figure 12-5 is also opened by the one-button window if no initial directory is available.
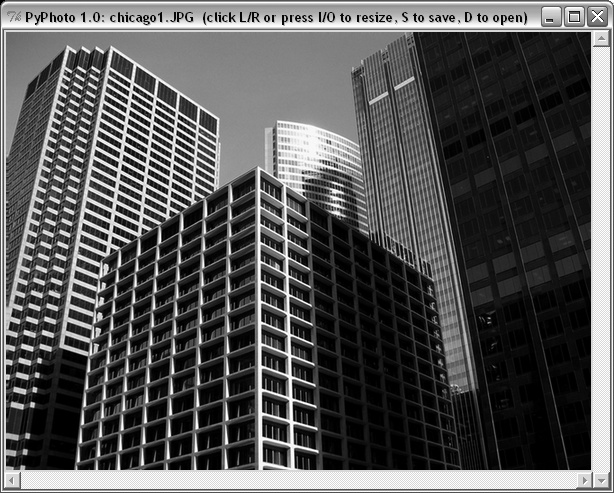
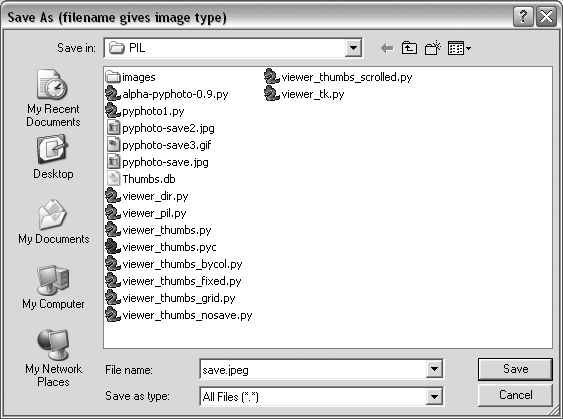
When a thumbnail is selected, the image is displayed in a canvas, in a new pop-up window. If it’s too large for the display, you can scroll through its full size with the window’s scroll bars. Figure 12-7 captures one image after its thumbnail is clicked, and Figure 12-8 shows the Save As dialog issued when the S key is pressed in the image window. Any number of thumbnail and image windows can be open at once.
Beyond the screenshots already shown, this system’s interaction is difficult to capture in a static medium such as this book—you’re better off test-driving the program live.
For example, clicking the left and right mouse buttons will resize the image to the display’s height and width dimensions, respectively, and pressing the I and O keys will zoom the image in and out in 10 percent increments. Both resizing schemes allow you to shrink an image too large to see all at once, as well as expand small photos. They also preserve the original aspect ratio of the photo, by changing its height and width proportionally, while blindly resizing to the display’s dimensions would not (height or width may be stretched).
Once resized, images may be saved in files at their current size. PyPhoto is also smart enough to make windows full size on Windows, if an image is larger than the display.
Because PyPhoto simply extends and reuses techniques and code we met earlier in the book, we’ll omit a detailed discussion of its code here. For background, see the discussion of image processing and PIL in Chapter 9, and the coverage of the canvas widget in Chapter 10.
In short, PyPhoto uses canvases in two ways: for thumbnail
collections and for opened images. For thumbnails, the same sort of
canvas layout code as the thumbnails viewer in Example 10-15 is employed. For
images, a canvas is used as well, but the canvas’s scrollable (full)
size is the image size, and the viewable area size is the minimum of
the physical screen size or the size of the image itself. The
physical screen size is available from the maxsize( ) method of Toplevel windows. The net effect is that
selected images may be scrolled now too, which comes in handy if
they are too big for your display (a common case for pictures
snapped with newer digital cameras).
In addition, PyPhoto binds keyboard and mouse events to
implement resizing and zoom operations. With PIL, this is simple—we
save the original PIL image, run its resize method with the new image size, and
redraw the image in the canvas. PyPhoto also makes use of file open
and save dialog objects, to remember the last directory
visited.
PIL supports additional operations, which we could add as new events, but resizing is sufficient for a viewer. PyPhoto does not currently use threads, to avoid becoming blocked for long-running tasks (opening a large directory the first time, for instance). Such enhancements are left as suggested exercises.
PyPhoto is implemented as the single file of Example 12-5, though it gets
some utility for free by reusing the thumbnail generation function
of the viewer_thumbs module that
we originally wrote near the end of Chapter 9 (see Example 9-44).
As you study this file, pay particular attention to the way it
factors code into reused functions and methods,
to avoid redundancy; if we ever need to change the way zooming
works, for example, we have just one method to change, not two. Also
notice its ScrolledCanvas class—a
reusable component that handles the work of linking scroll bars and
canvases.
Example 12-5. PP3EGuiPILpyphoto1.py
##############################################################
# PyPhoto 1.0: thumbnail image viewer with resizing and saves;
# supports multiple image directory thumb windows - the initial
# img dir is passed in as cmd arg, uses "images" default, or
# is selected via main window button; later directories are
# opened by pressing "D" in image view or thumbnail windows;
#
# viewer also scrolls popped-up images that are too large
# for the screen; still to do: (1) rearrange thumbnails when
# window resized, based on current window size; (2) resize
# images to fit current window size as an option? (3) avoid
# scrolls if image size is less than window max size: use
# Label if imgwide <= scrwide and imghigh <= scrhigh?
#
# New in 1.0: now does a form of (2) - image is resized to
# one of the display's dimensions if clicked, and zoomed in
# or out in 10% increments on key presses; generalize me;
# caveat: seems to lose quality, pixels after many resizes;
#
# the following scaler adapted from PIL's thumbnail code is
# similar to the screen height scaler here, but only shrinks:
# x, y = imgwide, imghigh
# if x > scrwide: y = max(y * scrwide / x, 1); x = scrwide
# if y > scrhigh: x = max(x * scrhigh / y, 1); y = scrhigh
##############################################################

import sys, math, os
from Tkinter import *
from tkFileDialog import SaveAs, Directory

import Image                                  # PIL Image: also in Tkinter
from ImageTk import PhotoImage                # PIL photo widget replacement
from viewer_thumbs import makeThumbs          # developed earlier in book

# remember last dirs across all windows
saveDialog = SaveAs(title='Save As (filename gives image type)')
openDialog = Directory(title='Select Image Directory To Open')
appname = 'PyPhoto 1.0: '


class ScrolledCanvas(Canvas):
    """
    a canvas in a container that automatically makes
    vertical and horizontal scroll bars for itself
    """
    def _ _init_ _(self, container):
        Canvas._ _init_ _(self, container)
        self.config(borderwidth=0)
        vbar = Scrollbar(container)
        hbar = Scrollbar(container, orient='horizontal')

        vbar.pack(side=RIGHT,  fill=Y)                 # pack canvas after bars
        hbar.pack(side=BOTTOM, fill=X)                 # so clipped first
        self.pack(side=TOP, fill=BOTH, expand=YES)

        vbar.config(command=self.yview)                # call on scroll move
        hbar.config(command=self.xview)
        self.config(yscrollcommand=vbar.set)           # call on canvas move
        self.config(xscrollcommand=hbar.set)


class ViewOne(Toplevel):
    """
    open a single image in a pop-up window when created;
    a class because photoimage obj must be saved, else
    erased if reclaimed; scroll if too big for display;
    on mouse clicks, resizes to window's height or width:
    stretches or shrinks; on I/O keypress, zooms in/out;
    both resizing schemes maintain original aspect ratio;
    code is factored to avoid redundancy here as possible;
    """
    def _ _init_ _(self, imgdir, imgfile, forcesize=( )):
        Toplevel._ _init_ _(self)
        helptxt = '(click L/R or press I/O to resize, S to save, D to open)'
        self.title(appname + imgfile + '  ' + helptxt)
        imgpath = os.path.join(imgdir, imgfile)
        imgpil  = Image.open(imgpath)
        self.canvas = ScrolledCanvas(self)
        self.drawImage(imgpil, forcesize)
        self.canvas.bind('<Button-1>', self.onSizeToDisplayHeight)
        self.canvas.bind('<Button-3>', self.onSizeToDisplayWidth)
        self.bind('<KeyPress-i>',      self.onZoomIn)
        self.bind('<KeyPress-o>',      self.onZoomOut)
        self.bind('<KeyPress-s>',      self.onSaveImage)
        self.bind('<KeyPress-d>',      onDirectoryOpen)
        self.focus( )

    def drawImage(self, imgpil, forcesize=( )):
        imgtk = PhotoImage(image=imgpil)                  # not file=imgpath
        scrwide, scrhigh = forcesize or self.maxsize( )   # wm screen size x,y
        imgwide  = imgtk.width( )                         # size in pixels
        imghigh  = imgtk.height( )                        # same as imgpil.size

        fullsize = (0, 0, imgwide, imghigh)              # scrollable
        viewwide = min(imgwide, scrwide)                 # viewable
        viewhigh = min(imghigh, scrhigh)

        canvas = self.canvas
        canvas.delete('all')                             # clear prior photo
        canvas.config(height=viewhigh, width=viewwide)   # viewable window size
        canvas.config(scrollregion=fullsize)             # scrollable area size
        canvas.create_image(0, 0, image=imgtk, anchor=NW)

        if imgwide <= scrwide and imghigh <= scrhigh:    # too big for display?
            self.state('normal')                         # no: win size per img
        elif sys.platform[:3] == 'win':                  # do windows fullscreen
            self.state('zoomed')                         # others use geometry( )
        self.saveimage = imgpil
        self.savephoto = imgtk                           # keep reference on me
        print (scrwide, scrhigh), imgpil.size

    def sizeToDisplaySide(self, scaler):
        # resize to fill one side of the display
        imgpil = self.saveimage
        scrwide, scrhigh = self.maxsize( )                 # wm screen size x,y
        imgwide, imghigh = imgpil.size                     # img size in pixels
        newwide, newhigh = scaler(scrwide, scrhigh, imgwide, imghigh)
        if (newwide * newhigh < imgwide * imghigh):
            filter = Image.ANTIALIAS                      # shrink: antialias
        else:                                             # grow: bicub sharper
            filter = Image.BICUBIC
        imgnew  = imgpil.resize((newwide, newhigh), filter)
        self.drawImage(imgnew)

    def onSizeToDisplayHeight(self, event):
        def scaleHigh(scrwide, scrhigh, imgwide, imghigh):
            newhigh = scrhigh
            newwide = int(scrhigh * (float(imgwide) / imghigh))
            return (newwide, newhigh)
        self.sizeToDisplaySide(scaleHigh)

    def onSizeToDisplayWidth(self, event):
        def scaleWide(scrwide, scrhigh, imgwide, imghigh):
            newwide = scrwide
            newhigh = int(scrwide * (float(imghigh) / imgwide))
            return (newwide, newhigh)
        self.sizeToDisplaySide(scaleWide)

    def zoom(self, factor):
        # zoom in or out in increments
        imgpil = self.saveimage
        wide, high = imgpil.size
        if factor < 1.0:                     # antialias best if shrink
            filter = Image.ANTIALIAS         # also nearest, bilinear
        else:
            filter = Image.BICUBIC
        new = imgpil.resize((int(wide * factor), int(high * factor)), filter)
        self.drawImage(new)

    def onZoomIn(self, event, incr=.10):
        self.zoom(1.0 + incr)
    def onZoomOut(self, event, decr=.10):
        self.zoom(1.0 - decr)

    def onSaveImage(self, event):
        # save current image state to file
        filename = saveDialog.show( )
        if filename:
           self.saveimage.save(filename)


def onDirectoryOpen(event):
    """
    open a new image directory in new pop up
    available in both thumb and img windows
    """
    dirname = openDialog.show( )
    if dirname:
        viewThumbs(dirname, kind=Toplevel)


def viewThumbs(imgdir, kind=Toplevel, numcols=None, height=400, width=500):
    """
    make main or pop-up thumbnail buttons window;
    uses fixed-size buttons, scrollable canvas;
    sets scrollable (full) size, and places
    thumbs at abs x,y coordinates in canvas;
    no longer assumes all thumbs are same size:
    gets max of all (x,y), some may be smaller;
    """
    win = kind( )
    helptxt = '(press D to open other)'
    win.title(appname + imgdir + '  ' + helptxt)
    quit = Button(win, text='Quit', command=win.quit, bg='beige')
    quit.pack(side=BOTTOM, fill=X)
    canvas = ScrolledCanvas(win)
    canvas.config(height=height, width=width)       # init viewable window size
                                                    # changes if user resizes
    thumbs = makeThumbs(imgdir)                     # [(imgfile, imgobj)]
    numthumbs = len(thumbs)
    if not numcols:
        numcols = int(math.ceil(math.sqrt(numthumbs)))  # fixed or N × N
    numrows = int(math.ceil(numthumbs / float(numcols)))

    # thumb=(name, obj), thumb.size=(width, height)
    linksize = max([max(thumb[1].size) for thumb in thumbs])
    print linksize
    fullsize = (0, 0,                                   # upper left  X,Y
        (linksize * numcols), (linksize * numrows) )    # lower right X,Y
    canvas.config(scrollregion=fullsize)                # scrollable area size

    rowpos = 0
    savephotos = []
    while thumbs:
        thumbsrow, thumbs = thumbs[:numcols], thumbs[numcols:]
        colpos = 0
        for (imgfile, imgobj) in thumbsrow:
            photo   = PhotoImage(imgobj)
            link    = Button(canvas, image=photo)
            handler = (lambda savefile=imgfile: ViewOne(imgdir, savefile))
            link.config(command=handler, width=linksize, height=linksize)
            link.pack(side=LEFT, expand=YES)
            canvas.create_window(colpos, rowpos, anchor=NW,
                    window=link, width=linksize, height=linksize)
            colpos += linksize
            savephotos.append(photo)
        rowpos += linksize
    win.bind('<KeyPress-d>', onDirectoryOpen)
    win.savephotos = savephotos
    return win


if _ _name_ _ == '_ _main_ _':
    """
    open dir = default or cmdline arg
    else show simple window to select
    """
    imgdir = 'images'
    if len(sys.argv) > 1: imgdir = sys.argv[1]
    if os.path.exists(imgdir):
        mainwin = viewThumbs(imgdir, kind=Tk)
    else:
        mainwin = Tk( )
        mainwin.title(appname + 'Open')
        handler = lambda: onDirectoryOpen(None)
        Button(mainwin, text='Open Image Directory', command=handler).pack( )
    mainwin.mainloop( )