
PyMailGUI is a multiwindow interface. It consists of the following:
A main mail-server list window opened initially, for online mail processing
One or more mail save-file list windows for offline mail processing
One or more mail-view windows for viewing and editing messages
Text editor windows for displaying the system’s source code
Nonblocking busy state pop-up dialogs
Assorted pop-up dialogs for opened message parts, help, and more
Operationally, PyMailGUI runs as a set of parallel threads, which may overlap in time: one for each active server transfer, and one for each active offline save file load or deletion. PyMailGUI supports mail save files, automatic saves of sent messages, configurable fonts and colors, viewing and adding attachments, main message text extraction, and much more.
To make this case study easier to understand, let’s begin by seeing what PyMailGUI actually does—its user interaction and email processing functionality—before jumping into the Python code that implements that behavior. As you read this part, feel free to jump ahead to the code listings that appear after the screenshots, but be sure to read this section too; this is where some subtleties of PyMailGUI’s design are explained. After this section, you are invited to study the system’s Python source code listings on your own for a better and more complete explanation than can be crafted in English.
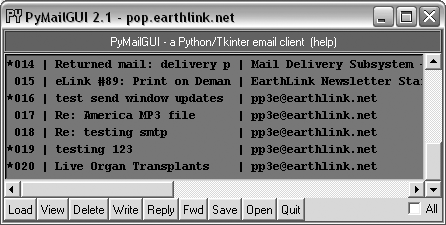
PyMailGUI is a Python/Tkinter program, run by executing its top-level script file, PyMailGui.py. Like other Python programs, PyMailGUI can be started from the system command line by clicking on its filename icon in a file explorer interface, or by pressing its button in the PyDemos or PyGadgets launcher bar. However it is started, the first window PyMailGUI presents is shown in Figure 15-1. Notice the “PY” window icon: this is the handiwork of window protocol tools we wrote earlier in this book.
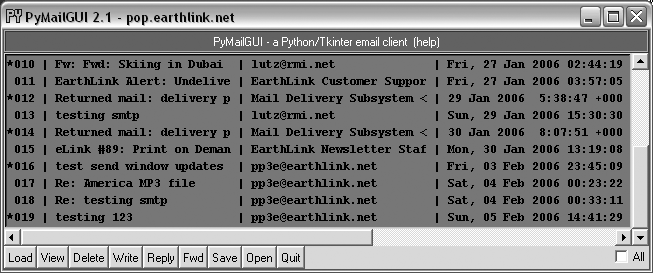
This is the PyMailGUI main window—every operation starts here. It consists of:
A help button (the bar at the top)
A clickable email list area for fetched emails (the middle section)
A button bar at the bottom for processing messages selected in the list area
In normal operation, users load their email, select an email from the list area by clicking on it, and press a button at the bottom to process it. No mail messages are shown initially; we need to first load them with the Load button—a simple password input dialog is displayed, a busy dialog appears that counts down message headers being loaded to give a status indication, and the index is filled with messages ready to be selected.
PyMailGUI’s list windows, such as the one in Figure 15-1, display mail
header details in fixed-width columns, up to a maximum size. Mails
with attachments are prefixed with a “*” in mail index list windows,
and fonts and colors in PyMailGUI windows may be customized by the
user in the mailconfig
configuration file. You can’t tell in this black-and white book, but
by default, mail index lists are Indian red, view windows are a
shade of purple, pop-up PyEdit windows are light cyan, and help is
steel blue; you can change most of these as you like (see Example 9-11 for help with
color definition strings).
List windows allow multiple messages to be selected at once—the action selected at the bottom of the window is applied to all selected mails. For instance, to view many mails, select them all and press View; each will be fetched and displayed in its own view window. Use Ctrl-Click and Shift-Click to select more than one (the standard Windows multiple selection operations apply—try it).
Before we go any further, though, let’s press the help bar at the top of the list window in Figure 15-1 to see what sort of help is available; Figure 15-2 shows the help window popup that appears.
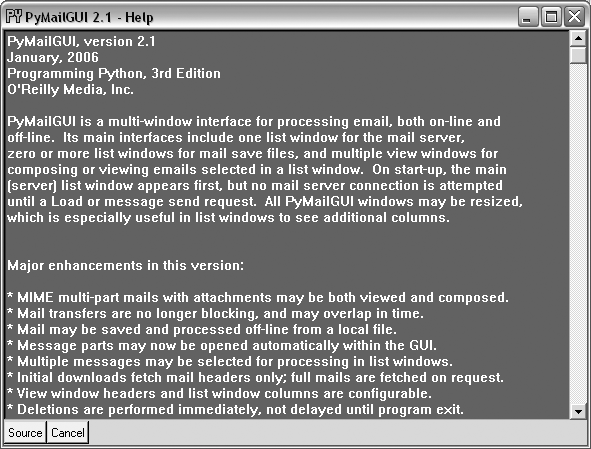
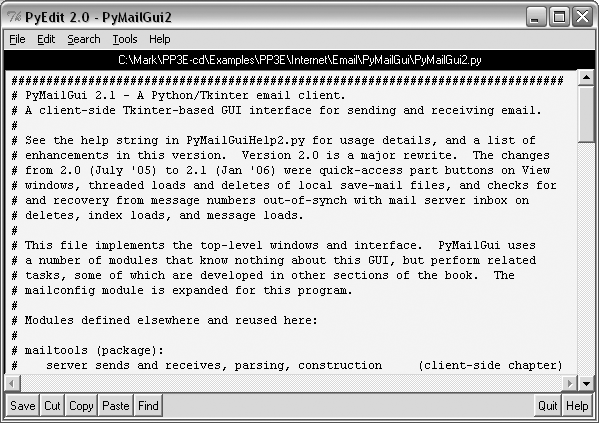
The main part of this window is simply a block of text in a scrolled-text widget, along with two buttons at the bottom. The entire help text is coded as a single triple-quoted string in the Python program. We could get fancier and spawn a web browser to view HTML-formatted help, but simple text does the job here.[*] The Cancel button makes this nonmodal (i.e., nonblocking) window go away; more interestingly, the Source button pops up PyEdit text editor viewer windows for all the source files of PyMailGUI’s implementation; Figure 15-3 captures one of these (there are many—this is intended as a demonstration, not as a development environment). Not every program shows you its source code, but PyMailGUI follows Python’s open source motif.
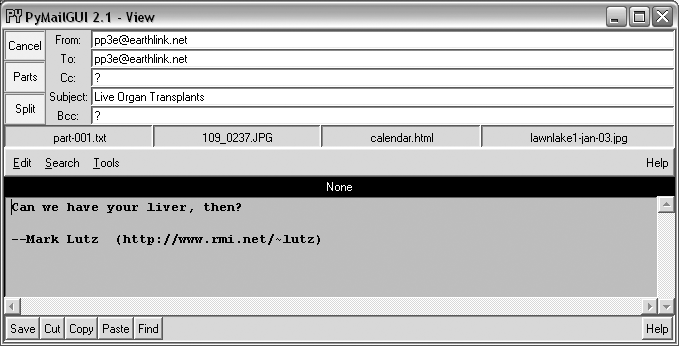
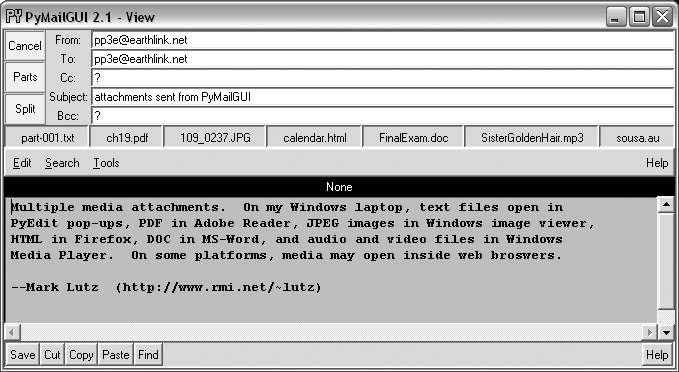
When a message is selected in the mail list window, PyMailGUI downloads its full text (if it has not yet been downloaded in this session), and an email viewer window appears, as captured in Figure 15-4. View windows are built in response to actions in list windows; this is described next.
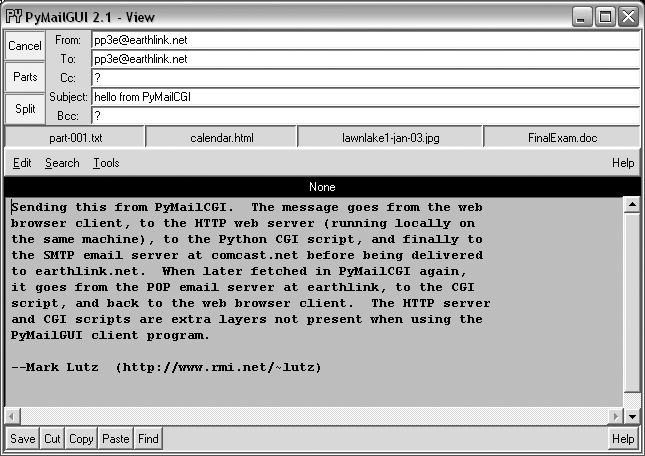
The top portion consists of action buttons (“Parts” to list all message parts, “Split” to save and open parts using a selected directory, and “Cancel” to remove this nonmodal window) along with a section for displaying email header lines (“From:”, “To:”, and so on).
In the middle, a row of quick-access buttons for opening message parts, including attachments, appears. When clicked, PyMailGUI opens known and generally safe parts according to their type (media types may open in a web browser, text parts in PyEdit, Windows document types per the Windows Registry, and so on).
The bulk of this window is just another reuse of the
TextEditorclass object we wrote in Chapter 12 for the PyEdit program—PyMailGUI simply attaches an instance ofTextEditorto every view and compose window in order to get a full-featured text editor component for free. In fact, much on this window is implemented byTextEditor, not by PyMailGUI.
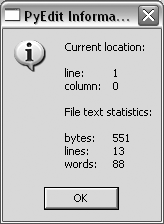
For instance, if we pick the Tools menu of the text portion of
this window and select its Info entry, we get the standard PyEdit
TextEditor object’s file text
statistics box—the same popup we’d get in the standalone PyEdit text
editor and in the PyView image view programs we wrote in Chapter 12 (see Figure 15-5).
In fact, this is the third reuse of TextEditor in this book: PyEdit, PyView,
and now PyMailGUI all present the same text-editing interface to
users, simply because they all use the same TextEditor object and code. PyMailGUI both
attaches instances of this class for mail viewing and editing, and
pops up instances for source-code viewing. For mail views, PyMailGUI
customizes text fonts and colors per its own configuration
module.
To display email, PyMailGUI inserts its text into an attached
TextEditor object; to compose
email, PyMailGUI presents a TextEditor and later fetches all its text
to ship over the Net. Besides the obvious simplification here, this
code reuse makes it easy to pick up improvements and fixes—any
changes in the TextEditor object
are automatically inherited by PyMailGUI, PyView, and PyEdit. In the
current version, for instance, PyMailGUI supports edit undo and
redo, just because PyEdit now does, too.
Now, let’s go back to the PyMailGUI main server list
window, and click the Load button to retrieve incoming email over
the POP protocol. PyMailGUI’s load function gets account parameters
from the mailconfig module listed
later in this chapter, so be sure to change this file to reflect
your email account parameters (i.e., server names and usernames) if
you wish to use PyMailGUI to read your own email.
The account password parameter merits a few extra words. In PyMailGUI, it may come from one of two places:
- Local file
If you put the name of a local file containing the password in the
mailconfigmodule, PyMailGUI loads the password from that file as needed.- Popup dialog
If you don’t put a password filename in
mailconfig(or if PyMailGUI can’t load it from the file for whatever reason), PyMailGUI will instead ask you for your password anytime it is needed.
Figure 15-6 shows
the password input prompt you get if you haven’t stored your
password in a local file. Note that the password you type is not
shown—a show='*' option for the
Entry field used in this popup
tells Tkinter to echo typed characters as stars (this option is
similar in spirit to both the getpass console input module we met
earlier in the prior chapter, and an HTML type=password option we’ll meet in a later
chapter). Once entered, the password lives only in memory on your
machine; PyMailGUI itself doesn’t store it anywhere in a permanent
way.

Also notice that the local file password option requires you
to store your password unencrypted in a file on the local client
computer. This is convenient (you don’t need to retype a password
every time you check email), but it is not generally a good idea on
a machine you share with others; leave this setting blank in
mailconfig if you prefer to
always enter your password in a popup.
Once PyMailGUI fetches your mail parameters and somehow obtains your password, it will next attempt to pull down the header text of all your incoming email from your inbox on your POP email server. On subsequent loads, only newly arrived mails are loaded, if any.
To save time, PyMailGUI fetches message header text only to
populate the list window. The full text of messages is fetched later
only when a message is selected for viewing or processing, and then
only if the full text has not yet been fetched during this session.
PyMailGUI reuses the load-mail tools in the mailtools module of Chapter 14 to fetch message header
text, which in turn uses Python’s standard poplib module to retrieve your
email.
Ultimately, mail fetches run over sockets on relatively slow networks. While the download is in progress, the rest of the GUI remains active—you may compose and send other mails at the same time, for instance. To show its progress, the nonblocking dialog of Figure 15-7 is displayed when the mail index is being fetched.

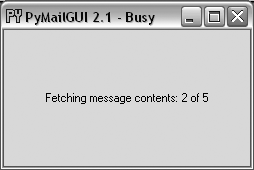
In general, all server transfers display such dialogs. Figure 15-8 shows the busy dialog displayed while a full text download of five selected and uncached mails is in progress, in response to a View action. After this download finishes, all five pop up in view windows.
Such server transfers, and other long-running operations, are run in threads to avoid blocking the GUI. They do not disable other actions from running in parallel, as long as those actions would not conflict with a currently running thread. Multiple mail fetches and sends can overlap in time, for instance, and can run in parallel with the GUI itself—the GUI responds to moves, redraws, and resizes during the transfers.
On systems without threads, PyMailGUI instead goes into a blocked state during such long-running operations (it stubs out the thread-spawn operation to perform a simple function call). Because the GUI is essentially dead without threads, covering and uncovering the GUI during a mail load on such platforms will erase or otherwise distort its contents. Threads are enabled by default on most platforms that Python run (including Windows), so you probably won’t see such oddness on your machine.
One implementation note: as we learned earlier in this book, only the thread that creates windows should generally update them. As a result, PyMailGUI takes care to not do anything related to the user interface within threads that load, send, or delete email. Instead, the main GUI thread continues responding to user interface events and updates, and uses a timer-based event to watch a queue for exit callbacks to be added by threads, using thread tools implemented earlier in the book. Upon receipt, the GUI thread pulls the callback off the queue and dispatches it to modify the GUI (e.g., to display a fetched message, update the mail index list, or close an email composition window).
Because the load operation is really a socket operation, PyMailGUI automatically connects to your email server using whatever connectivity exists on the machine on which it is run. For instance, if you connect to the Net over a modem and you’re not already connected, Windows automatically pops up the standard connection dialog. On a broadband connection, the interface to your email server is normally automatic.
After PyMailGUI finishes loading your email, it populates the main window’s scrolled listbox with all of the messages on your email server and automatically scrolls to the most recently received message. Figure 15-9 shows what the main window looks like after resizing; the text area in the middle grows and shrinks with the window.
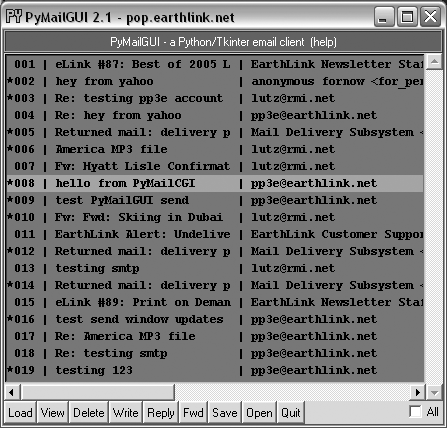
Technically, the Load button fetches all your mail’s header text the first time it is pressed, but it fetches only newly arrived email headers on later presses. PyMailGUI keeps track of the last email loaded, and requests only higher email numbers on later loads. Already loaded mail is kept in memory, in a Python list, to avoid the cost of downloading it again. PyMailGUI does not delete email from your server when it is loaded; if you really want to not see an email on a later load, you must explicitly delete it.
Entries in the main list show just enough to give the user an
idea of what the message contains—each entry gives the concatenation
of portions of the message’s “Subject:”, “From:”, “Date:”, and other
header lines, separated by |
characters and prefixed with the message’s POP number (e.g., there
are 19 emails in this list). Columns are aligned by determining the
maximum size needed for any entry, up to a fixed maximum, and the
set of headers displayed can be configured in the mailconfig module. Use the horizontal
scroll or expand the window to see additional header details.
As we’ve seen, a lot of magic happens when downloading
email—the client (the machine on which PyMailGUI runs) must connect
to the server (your email account machine) over a socket and
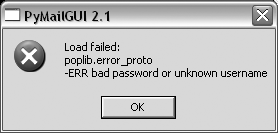
transfer bytes over arbitrary Internet links. If things go wrong,
PyMailGUI pops up standard error dialog boxes to let you know what
happened. For example, if you typed an incorrect username or
password for your account (in the mailconfig module or in the password pop
up), you’ll see the message in Figure 15-10. The details
displayed here are just the Python exception type and exception
data.
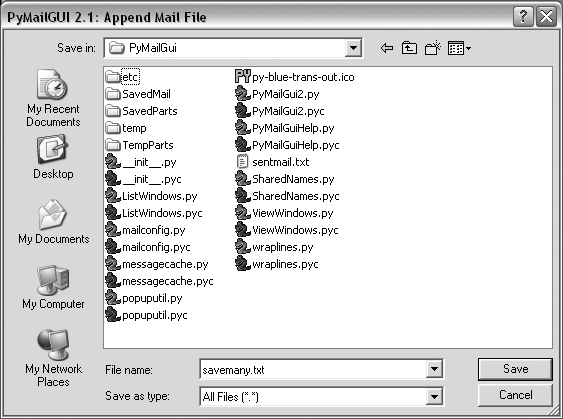
To save mails in a local file for offline processing, select the desired messages in any mail list window and press the Save action button (any number of messages may be selected for saving). A standard file-selection dialog appears, like that in Figure 15-11, and the mails are saved to the end of the chosen text file.
To view saved emails later, select the Open action at the bottom of any list window and pick your save file in the selection dialog. A new mail index list window appears for the save file and it is filled with your saved messages eventually—there may be a slight delay for large save files, because of the work involved. PyMailGUI runs file loads and deletions in threads to avoid blocking the rest of the GUI; these threads can overlap with operations on other open save-mail files, server transfer threads, and the GUI at large.
While a mail save file is being loaded in a parallel thread, its window title is set to “Loading...” as a status indication; the rest of the GUI remains active during the load (you can fetch and delete server messages, view mails in other files, write new messages, and so on). The window title changes to the loaded file’s name after the load is finished. Once filled, a message index appears in the save file’s window, like the one captured in Figure 15-12 (this window also has three mails selected for processing).

In general, there may be one server mail list window and any number of save-mail file list windows open at any time. Save-mail file list windows like that in Figure 15-12 can be opened at any time, even before fetching any mail from the server. They are identical to the server’s inbox list window, but there is no help bar and no Load action button, and all other action buttons are mapped to the save file, not to the server.
For example, View opens the selected message in a normal mail view window identical to that in Figure 15-4, but the mail originates from the local file. Similarly, Delete removes the message from the save file, instead of from the server’s inbox. Deletions from save-mail files are also run in a thread, to avoid blocking the rest of the GUI—the window title changes to “Deleting...” during the delete as a status indicator. Status indicators for loads and deletions in the server inbox window use popups instead, because the wait is longer and there is progress to display (see Figure 15-7).
Technically, saves always append raw message text to the
chosen file; the file is opened in 'a' mode, which creates the file if
needed, and writes at its end. The Save and Open operations are also
smart enough to remember the last directory you selected; the file
dialogs begin navigation there the next time you press Save or
Open.
You may also save mails from a saved file’s window—use Save and Delete to move mails from file to file. In addition, saving to a file whose window is open for viewing automatically updates that file’s list window in the GUI. This is also true for the automatically written sent-mail save file, described in the next section.
Once we’ve loaded email from the server or opened a local save file, we can process our messages with the action buttons at the bottom of list windows. We can also send new emails at any time, even before a load or open. Pressing the Write button in a list window generates a mail composition window; one has been captured in Figure 15-13.
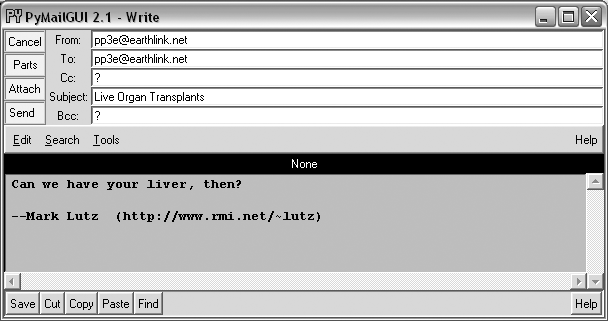
This window is much like the message view window we saw in
Figure 15-4, except
there are no quick-access part buttons in the middle (this window is
a new mail). It has fields for entering header line details, and an
attached TextEditor object for
writing the body of the new email.
For write operations, PyMailGUI automatically fills the
“From:” line and inserts a signature text line (“—Mark...”), from
your mailconfig module settings.
You can change these to any text you like in the GUI, but the
defaults are filled in automatically from your mailconfig. When the mail is sent, an
email.Utils call handles date and
time formatting in the mailtools
module in Chapter 14.
There is also a new set of action buttons in the upper left
here: Cancel closes the window (if verified), and Send delivers the
mail—when you press the Send button, the text you typed into the
body of this window is mailed to the addresses you typed into the
“To:”, “Cc:”, and “Bcc:” lines, using Python’s smtplib module. PyMailGUI adds the header
fields you type as mail header lines in the sent message. To send to
more than one address, separate them with a “;” character in header
fields. In this mail, I fill in the “To:” header with my own email
address in order to send the message to myself for illustration
purposes.
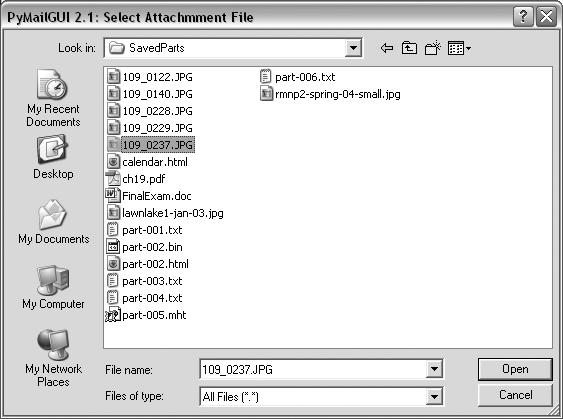
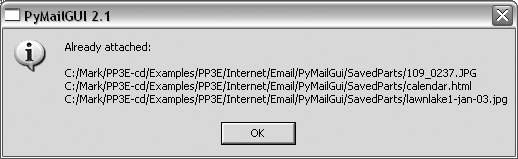
Also in compose windows, the Attach button issues a file selection dialog for attaching a file to your message, as in Figure 15-14. The Parts button pops up a dialog displaying files already attached, like that in Figure 15-15. When your message is sent, the text in the edit portion of the window is sent as the main message text, and any attached part files are sent as attachments properly encoded according to their type.
As we’ve seen, smtplib
ultimately sends bytes to a server over a socket. Since this can be
a long-running operation, PyMailGUI delegates this operation to a
spawned thread, too. While the send thread runs, a nonblocking wait
window appears and the entire GUI stays alive; redraw and move
events are handled in the main program thread while the send thread
talks to the SMTP server, and the user may perform other tasks in
parallel.
You’ll get an error popup if Python cannot send a message to any of the target recipients for any reason, and the mail composition window will pop up so that you may try again or save its text for later use. If you don’t get an error popup, everything worked correctly, and your mail will show up in the recipients’ mailboxes on their email servers. Since I sent the earlier message to myself, it shows up in mine the next time I press the main window’s Load button, as we see in Figure 15-16.
If you look back to the last main window shot, you’ll notice that there is only one new email now—PyMailGUI is smart enough to download only the one new massage’s header text and tack it onto the end of the loaded email list. Mail send operations automatically save sent mails in a save file that you name in your configuration module; use Open to view sent messages in offline mode and Delete to clean up the sent mail file if it grows too large (you can also Save from the sent-mail file to another file).
Now let’s view the mail message that was sent and received. PyMailGUI lets us view email in formatted or raw mode. First, highlight (single-click) the mail you want to see in the main window, and press the View button. After the full message text is downloaded (unless it is already cached), a formatted mail viewer window like that shown in Figure 15-17 appears. If multiple messages are selected, the View button will download all that are not already cached (i.e., that have not already been fetched) and will pop up a view window for each. Like all long-running operations, full message downloads are run in parallel threads to avoid blocking.
Python’s email module is
used to parse out header lines from the raw text of the email
message; their text is placed in the fields in the top right of the
window. The message’s main text is fetched from its body and stuffed
into a new TextEditor object for
display (it is also displayed in a web browser automatically if it
is HTML text). PyMailGUI uses heuristics to extract the main text of
the message to display, if there is one; it does not blindly show
the entire raw text of the mail.
Any other parts of the message attached are displayed and opened with quick-access buttons in the middle. They are also listed by the Parts popup dialog, and they can be saved and opened all at once with Split. Figure 15-18 shows this window’s Parts list popup, and Figure 15-19 displays this window’s Split dialog in action.
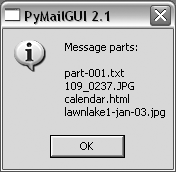
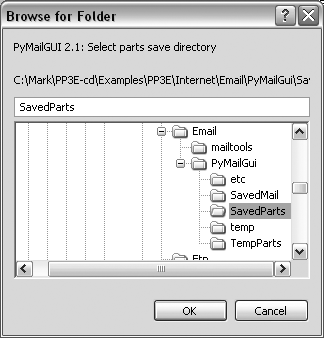
When the Split dialog in Figure 15-19 is submitted, all message parts are saved to the directory you select, and known parts are automatically opened. Individual parts are also automatically opened by the row of quick-access buttons labeled with the part’s filename in the middle of the view window, after being saved to a temporary directory.
For instance, Figure 15-20 shows one of the image parts open on my Windows laptop, in a standard image viewer on that platform; other platforms may open this in a web browser instead. Click the image filename’s quick-access button in Figure 15-17 to view it immediately, or run Split to open all parts at once.
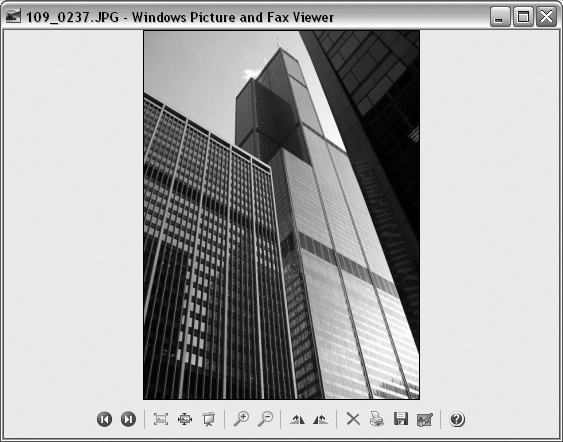
By this point, the photo attachment displayed in Figure 15-20 has really gotten around: it has been encoded, attached, and sent, and then fetched, parsed, and decoded. Along the way, it has moved through multiple machines—from the client to the SMTP server, to the POP server, and back to the client.
In terms of user interaction, we attached the image to the email in Figure 15-13 using the dialog in Figure 15-14 before we sent the email. To access it later, we selected the email for viewing in Figure 15-16 and clicked on its quick-access button in Figure 15-17. PyMailGUI encoded it in base64 form, inserted it in the email’s text, and later extracted and decoded it to get the original photo. With Python email tools, this just works.
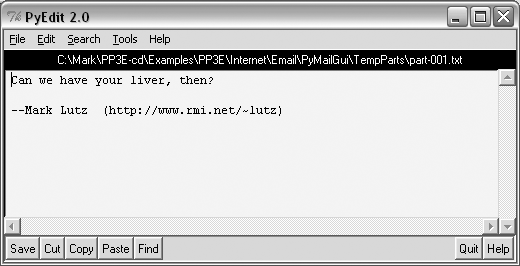
Note that the main message text counts as a mail part, too—when selected, it opens in a PyEdit window, like that captured in Figure 15-21, from which it can be processed and saved (you can also save the main mail text with the Save button in the View window itself). The main part is included, because not all mails have a text part. For messages that have only HTML for their main text part, PyMailGUI displays the HTML text in its window, and opens a web browser to view the mail with its HTML formatting.
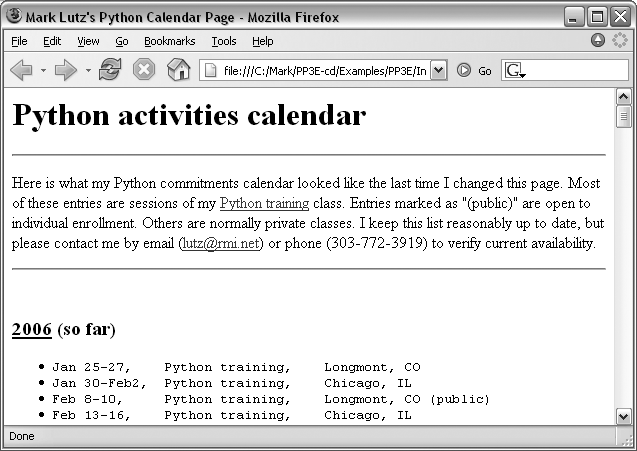
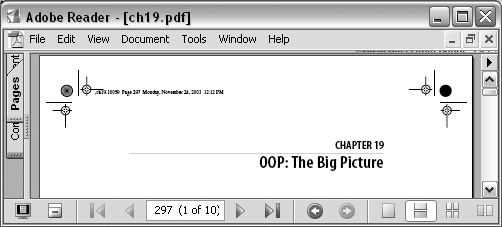
PyMailGUI also opens HTML and XML parts in a web browser and uses the Windows Registry to open well-known Windows document types. For example, .doc, .xls, and .pdf files usually open, respectively, in Word, Excel, and Adobe Reader. Figure 15-22 captures the response to the calendar.html quick-access part button in Figure 15-17 on my Windows laptop (Firefox is my default web browser).
The quick-access buttons in the middle of the Figure 15-17 view window are a more direct way to open parts than Split—you don’t need to select a save directory, and you can open just the part you want to view. The Split button, though, allows all parts to be opened in a single step; allows you to choose where to save parts; and supports an arbitrary number of parts. Files that cannot be opened automatically because of their type can be inspected in the local save directory, after both Split and quick-access button selections (popup dialogs name the directory to use).
After a fixed maximum number of parts, the quick-access row ends with a button labeled “...”, which simply runs Split to save and open additional parts when selected. Figure 15-23 captures one such message in the GUI; this was message 10 in Figure 15-9, if you’re keeping track—a very complex mail, with 5 photos and 12 total parts.
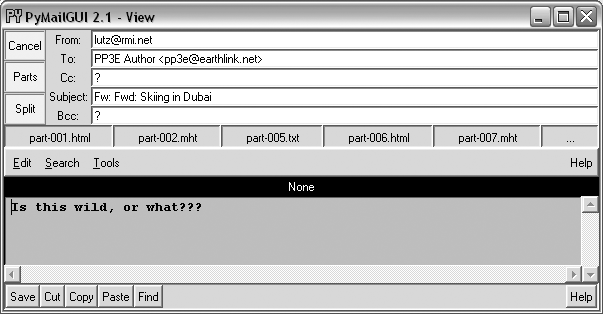
Like much of PyMailGUI’s behavior, the maximum number of part
buttons to display in view windows can be configured in the mailconfig.py user settings module. That
setting specified five buttons in Figure 15-23. Figure 15-24 shows a
different mail with many attachments being viewed; the part buttons
setting has been changed to a maximum of eight (this mail has seven
parts). The setting can be higher, but at some point the buttons may
become unreadable (use Split instead).
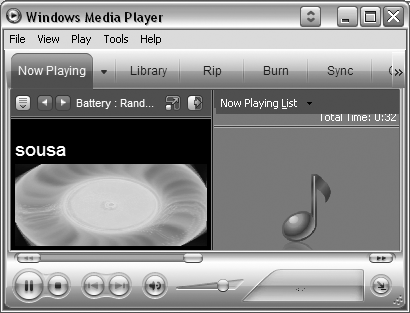
Figures 15-25 and 15-26 show what happens when the sousa.au and ch19.pdf buttons in Figure 15-24 are pressed on my Windows laptop. The results vary per machine; the audio file opens in Windows Media Player, the MP3 file opens in iTunes instead, and some platforms may open such files directly in a web browser.
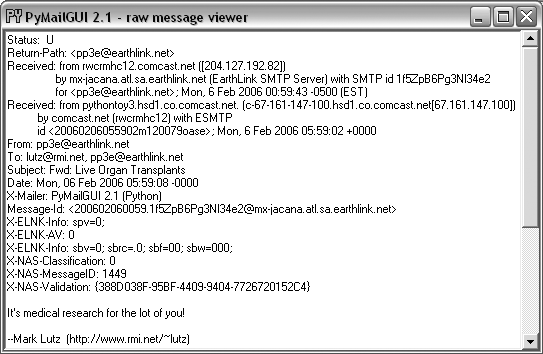
Besides the nicely formatted view window, PyMailGUI also lets us see the raw text of a mail message. Double-click on a message’s entry in the main window’s list to bring up a simple unformatted display of the mail’s raw text (its full text is downloaded in a thread if it hasn’t yet been fetched and cached). The raw version of the mail I sent to myself in Figure 15-17 is shown in Figure 15-27.

This raw text display can be useful to see special mail
headers not shown in the formatted view. For instance, the optional
“X-Mailer:” header in the raw text display identifies the program
that transmitted a message; PyMailGUI adds it automatically, along
with standard headers like “From:” and “To:”. Other headers are
added as the mail is transmitted: the “Received:” headers name
machines that the message was routed through on its way to our email
server, and “Content-Type:” is added and parsed by Python’s email package.
And really, the raw text form is all there is to an email message—it’s what is transferred from machine to machine when mail is sent. The nicely formatted display of the GUI’s view windows simply parses out and decodes components from the mail’s raw text with standard Python tools, and places them in the associated fields of the display.
Besides allowing users to read and write email, PyMailGUI also lets users forward and reply to incoming email sent from others. To reply to an email, select its entry in the main window’s list and click the Reply button. If I reply to the mail I just sent to myself (arguably narcissistic, but demonstrative), the mail composition window shown in Figure 15-28 appears.
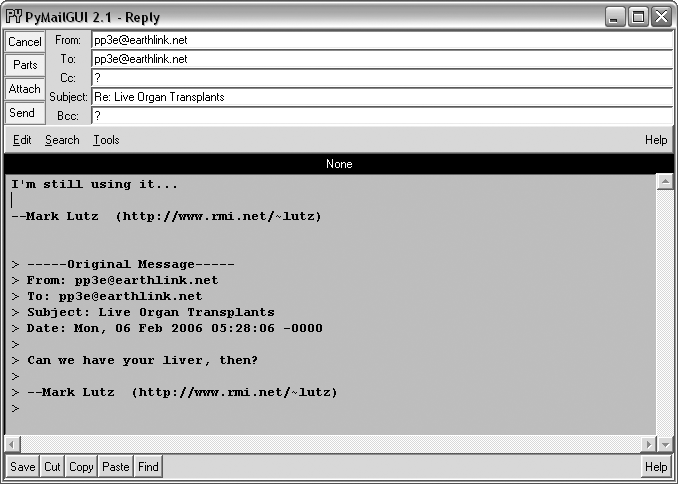
This window is identical in format to the one we saw for the Write operation, except that PyMailGUI fills in some parts automatically:
The “From” line is set to your email address in your
mailconfigmodule.The “To:” line is initialized to the original message’s “From” address (we’re replying to the original sender, after all). An
email.Utilscall processes the “To:”.The “Subject:” line is set to the original message’s subject line, prepended with a “Re:”, the standard follow-up subject line form (unless it already has one).
The body of the reply is initialized with the signature line in
mailconfig, along with the original message’s text. The original message text is quoted with>characters and is prepended with a few header lines extracted from the original message to give some context.
Luckily, all of this is much easier than it may sound.
Python’s standard email module
extracts all of the original message’s header lines, and a single
string replace method call does
the work of adding the >
quotes to the original message body. I simply type what I wish to
say in reply (the initial paragraph in the mail’s text area) and
press the Send button to route the reply message to the mailbox on
my mail server again. Physically sending the reply works the same as
sending a brand-new message—the mail is routed to your SMTP server
in a spawned send-mail thread, and the send-mail wait popup appears
while the thread runs.
Forwarding a message is similar to replying: select the message in the main window, press the Fwd button, and fill in the fields and text area of the popped-up composition window. Figure 15-29 shows the window created to forward the mail we originally wrote and received.
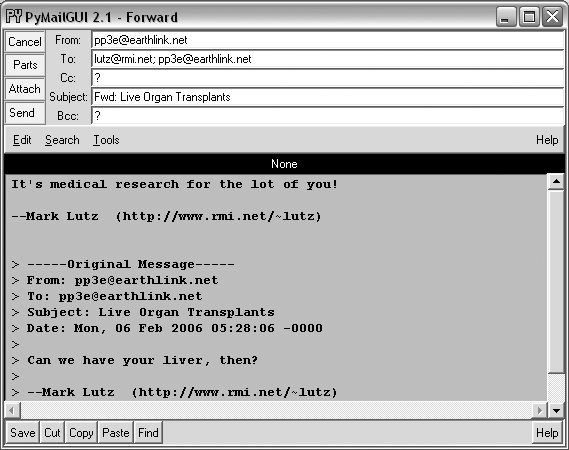
Much like with replies, “From:” is filled from mailconfig, the original text is
automatically quoted in the message body again, and the subject line
is preset to the original message’s subject, prepended with the
string “Fwd:”. I have to fill in the “To:” line manually, though,
because this is not a direct reply (it doesn’t necessarily go back
to the original sender).
Notice that I’m forwarding this message to two different addresses; multiple recipient addresses are separated with a semicolon (;) in the “To:”, “Cc:”, and “Bcc:” header fields. The Send button in this window fires the forwarded message off to all addresses listed in these headers.
I’ve now written a new message, replied to it, and forwarded it. The reply and forward were sent to my email address, too; if we press the main window’s Load button again, the reply and forward messages should show up in the main window’s list. In Figure 15-30, they appear as messages 22 and 21 (the order they appear in may depend on timing issues at your server).

Keep in mind that PyMailGUI runs on the local computer, but the messages you see in the main window’s list actually live in a mailbox on your email server machine. Every time we press Load, PyMailGUI downloads but does not delete newly arrived email from the server to your computer. The three messages we just wrote (20 through 22) will also appear in any other email program you use on your account (e.g., in Outlook, or in a web mail interface). PyMailGUI does not automatically delete messages as they are downloaded, but simply stores them in your computer’s memory for processing. If we now select message 21 and press View, we see the forward message we sent, as in Figure 15-31. This message went from my machine to a remote email server and was downloaded from there into a Python list from which it is displayed.
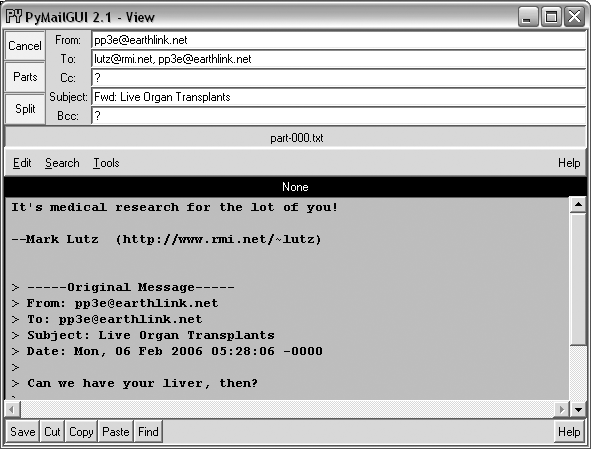
Figure 15-32 shows what the forward message’s raw text looks like; again, double-click on a main window’s entry to display this form. The formatted display in Figure 15-31 simply extracts bits and pieces out of the text shown in the raw display form.
So far, we’ve covered every action button on list windows except for Delete and the All checkbox. The All checkbox simply toggles from selecting all messages at once or deselecting all (View, Delete, Reply, Fwd, and Save action buttons apply to all currently selected messages). PyMailGUI also lets us delete messages from the server permanently, so that we won’t see them the next time we access our inbox.
Delete operations are kicked off the same way as Views and Saves; just press the Delete button instead. In typical operation, I eventually delete email I’m not interested in, and save and delete emails that are important. We met Save earlier in this demo.
Like View, Save, and other operations, Delete can be applied to one or more messages. Deletes happen immediately, and like all server transfers they are run in a nonblocking thread but are performed only if you verify the operation in a popup, such as the one shown in Figure 15-33.
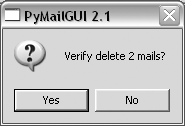
By design, no mail is ever removed automatically: you will see the same messages the next time PyMailGUI runs. It deletes mail from your server only when you ask it to, and then only if verified in the last popup shown (this is your last chance to prevent permanent mail removal). After the deletions are performed, the mail index is updated, and the GUI session continues.
Deletions disable mail loads and other deletes while running and cannot be run in parallel with loads or other deletes already in progress because they may change POP message numbers and thus modify the mail index list. Messages may still be composed during a deletion, however, and offline save files may be processed.
Deletions are complicated by POP’s message-numbering
scheme. We learned about the potential for synchronization errors
between the server’s inbox and the fetched email list in Chapter 14, when studying the
mailtools package PyMailGUI uses
(near Example 14-21). In
brief, POP assigns each message a relative sequential number,
starting from one, and these numbers are passed to the server to
fetch and delete messages. The server’s inbox is normally locked
while a connection is held so that a series of deletions can be run
as an atomic operation; no other inbox changes occur until the
connection is closed.
However, message number changes also have some implications for the GUI itself. It’s all right if new mail arrives while we’re displaying the result of a prior download—the new mail is assigned higher numbers, beyond what is displayed on the client. But if we delete a message in the middle of a mailbox after the index has been loaded from the mail server, the numbers of all messages after the one deleted change (they are decremented by one). As a result, some message numbers might no longer be valid if deletions are made while viewing previously loaded email.
To work around this, PyMailGUI adjusts all the displayed numbers after a Delete by simply removing the entries for deleted mails from its index list and mail cache. However, this adjustment is not enough to keep the GUI in sync with the server’s inbox if the inbox is modified at a time other than after the end, by deletions in another email client (even in another PyMailGUI session) or by deletions performed by the mail server itself (e.g., messages determined to be undeliverable and automatically removed from the inbox).
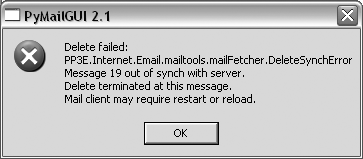
To handle these cases, PyMailGUI uses the safe deletion and
synchronization tests in mailtools. That module uses mail header
matching to detect mail list and server inbox synchronization
errors. For instance, if another email client has deleted a message
prior to the one to be deleted by PyMailGUI, mailtools catches the problem and cancels
the deletion, and an error popup like the one in Figure 15-34 is
displayed.
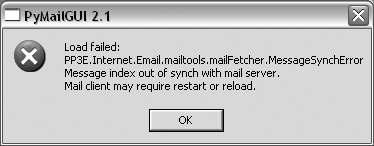
Similarly, index loads and message fetches run a
synchronization test in mailtools, as well. Figure 15-35 captures the
error generated if a message has been deleted in another client
since we last loaded the server index window.
In both error cases, the inbox is automatically reloaded by
PyMailGUI immediately after the error popup is dismissed. This
scheme ensures that PyMailGUI won’t delete or display the wrong
message, in the rare case that the server’s inbox is changed without
its knowledge. See mailtools in
Chapter 14 for more on
synchronization tests.
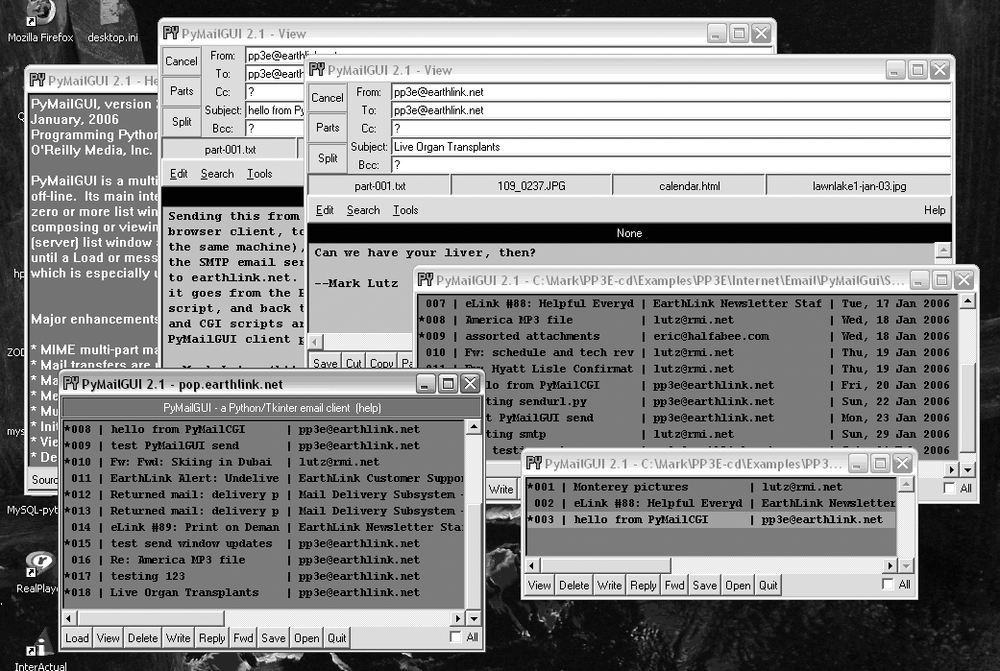
Note that PyMailGUI is really meant to be a multiple- window interface—a detail not made obvious by the earlier screenshots. For example, Figure 15-36 shows PyMailGUI with the main server list window, two save-file list windows, two message view windows, and help. All these windows are nonmodal; that is, they are all active and independent, and do not block other windows from being selected. This interface looks slightly different on Linux and the Mac, but it has the same functionality.
In general, you can have any number of mail view or compose
windows up at once, and cut and paste between them. This matters,
because PyMailGUI must take care to make sure that each window has a
distinct text-editor object. If the text-editor object were a
global, or used globals internally, you’d likely see the same text
in each window (and the Send operations might wind up sending text
from another window). To avoid this, PyMailGUI creates and attaches
a new TextEditor instance to each
view and compose window it creates, and associates the new editor
with the Send button’s callback handler to make sure we get the
right text.
Finally, PyMailGUI prints a variety of status messages as it runs, but you see them only if you launch the program from the system command-line console window (e.g., a DOS box on Windows or an xterm on Linux), or by double-clicking on its filename icon (its main script is a .py, not a .pyw). On Windows, you won’t see these messages when PyMailGUI is started from another program, such as the PyDemos or PyGadgets launcher bar GUIs. These status messages print server information, show mail loading status, and trace the load, store, and delete threads that are spawned along the way. If you want PyMailGUI to be more verbose, launch it from a command line and watch:
C:...PP3EInternetEmailPyMailGui>PyMailGui2.pyuser: pp3e loading headers Connecting... +OK NGPopper vEL_6_10 at earthlink.net ready<[email protected]. earthlink.net> load headers exit synch check Connecting... +OK NGPopper vEL_6_10 at earthlink.net ready <[email protected]. earthlink.net> Same headers text load 16 Connecting... +OK NGPopper vEL_6_10 at earthlink.net ready <[email protected]. earthlink.net> Sending to...['[email protected]'] From: [email protected] To: [email protected] Subject: Fwd: Re: America MP3 file Date: Mon, 06 Feb 2006 07:41:05 -0000 X-Mailer: PyMailGUI 2.1 (Python) --Mark Lutz (http://www.rmi.net/~lutz) > -----Original Message----- > From: [email protected] > Send exit
You can also double-click on the PyMailGui.py filename in your file explorer GUI and monitor the popped-up DOS console box on Windows. Console messages are mostly intended for debugging, but they can also be used to help understand the system’s operation.
For more details on using PyMailGUI, see its help display, or
read the help string in the module PyMailGuiHelp.py, listed in Example 15-9 in the next
section.
[*] The standard library’s webbrowser module would help for
HTML-based help. Actually, the help display started life even
less fancy: it originally displayed help text in a standard
information box pop up, generated by the Tkinter showinfo call used earlier in the
book. This worked fine on Windows (at least with a small amount
of help text), but it failed on Linux because of a default
line-length limit in information pop-up boxes; lines were broken
so badly as to be illegible.