
All the applications examined thus far have involved a character-based user interface, based on characters viewed and typed in a terminal. In this chapter, you will explore using mod_python, an add-on module for the popular open-source Apache web server, to use Python to interact with client users through a web browser.
The Customer Follow-up application will perform two main functions:
It will use the
mod_pythonApache module to present an HTML form to a client user, and enable users to type in their information (including comments) and submit it.It will use the Python
smtplibmodule to connect to an SMTP mail server and send an e-mail message to a predefined "webmaster" e-mail address.For each comment submitted, it will enter a log entry to a
csvfile stored on the web server machine. This log can then be queried and sorted like any other spreadsheet file.
There are basically two user interfaces to the program: the web page that enables a comment to be entered and e-mailed, and the log file, which can be viewed with any spreadsheet (for the screen shots in this chapter, I used the OpenOffice.org Calc program).
Before you can use the application, an Apache web server needs to be running, on which mod_python is installed and configured. mod_python has several different handlers, and in the example for this chapter the Publisher handler is used.
Apache is the most popular web server on the Internet. It is available for multiple operating systems, including Windows and Linux. Although Apache itself is extremely customizable, the installation of the web server is fairly straightforward.
Note
Although the examples in this chapter are all based on Windows (including the installs), installation on Linux/UNIX is fairly straightforward, and the instructions here can still be used as a basic guide to the order of install steps.
Note also that the Apache Server for Windows is supported on Windows 2000, Windows 2003, and Windows XP (with Service Pack 2 applied), but not on Windows 95, ME, or 98.
To install Apache:
Download Apache (the current version is 2.2) from http://httpd.apache.org/download.cgi. When installing on Windows (as in this example), it would be a good idea to review the tips for Windows found at www.hightechimpact.com/Apache/httpd/binaries/win32/README.html.
To actually download, go to www.trieuvan.com/apache/httpd/binaries/. From there, you will get a directory listing showing folders representing different operating systems, as shown in Figure 5-1.

Click the Win32 folder. A page will be presented with a list of possible files to download. Assuming version 2.6 is still the latest version, click the file called apache_2.2.6-win32-x86-no_ssl.msi. This will install the Win32 version of Apache 2.2.6, without SSL support (which we don't need for this chapter's project).
Note
Keep in mind that these instructions are for installing a version of Apache for Windows that will give you the functionality you need to run this chapter's application. Apache is a very robust and configurable web server, and a complete treatment of it is beyond the scope of this book.
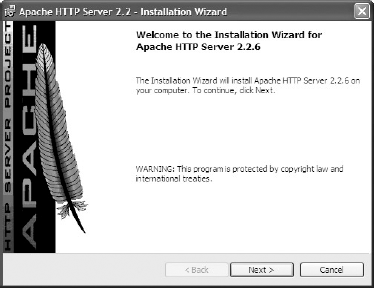
Once you've downloaded the file, simply double-click it in Windows Explorer to start the install process. The first screen displays the Welcome page of the Installation Wizard, as shown in Figure 5-2.
Click the Next button to bring up the next screen, the License Agreement page, as shown in Figure 5-3.
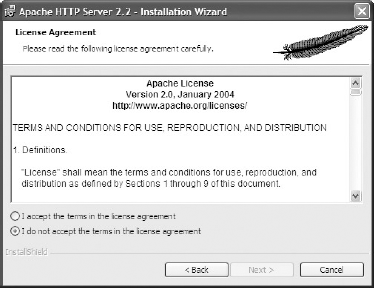
Click the "I accept ..." radio button, and click Next. This will bring up the README information, as shown in Figure 5-4.
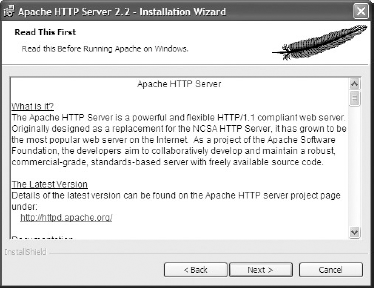
Click Next to bring up the configuration screen. It will look similar to the dialog shown in Figure 5-5.
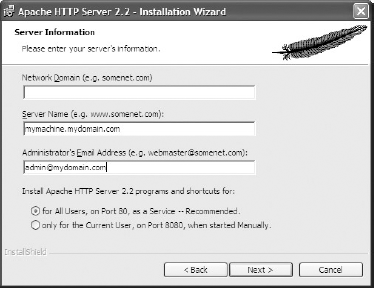
Assuming the Apache server is being set up simply to test the application in this chapter, anything can be entered in the Network Domain field (I typed "www.knowlton.com"). The other fields should be pre-populated, and they can be left alone. Once the fields have been filled in, click Next, which will bring up the Setup Type screen shown in Figure 5-6.
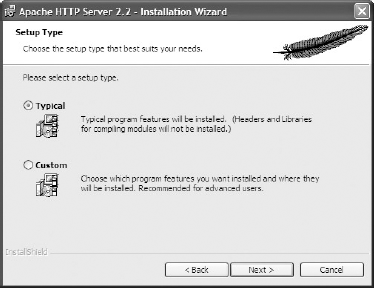
Leave the setup type as Typical and click Next. The Destination Folder window will appear, as shown in Figure 5-7.
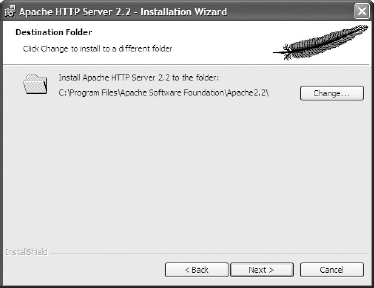
Click Next, and then click Install to begin the install. When the install is finished, the dialog shown in Figure 5-8 will appear, indicating that the install is complete.

Once you have Apache installed, the next step in setting up the system to support Python web applications is to install and configure mod_python.
To install mod_python:
Download mod_python (the current version as of this writing is 3.3.1) from http://httpd.apache.org/modules/python-download.cgi. Click the link on the page called Win32 Binaries and then download the latest version.
With the file downloaded, simply double-click it to start the installer. Figure 5-9 shows the first screen of the Setup Wizard.
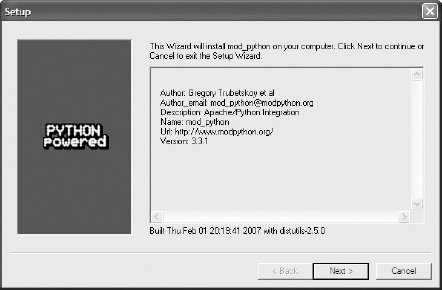
Click Next. The next screen, shown in Figure 5-10, enables you to select the directory where Python is located.
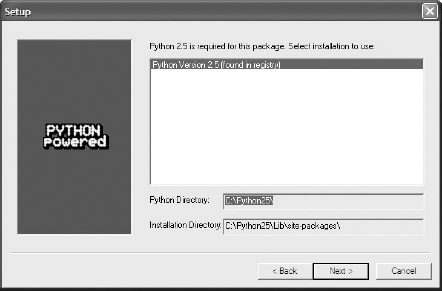
Make sure the install is pointing to your Python program directory (it should be), and click Next.
Click Next again to begin the install.
You will be prompted for the location where Apache is installed, as shown in Figure 5-11.
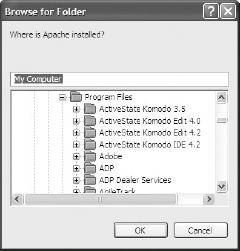
Select the Apache program location and click OK. Figure 5-12 shows the final screen of the Setup Wizard.
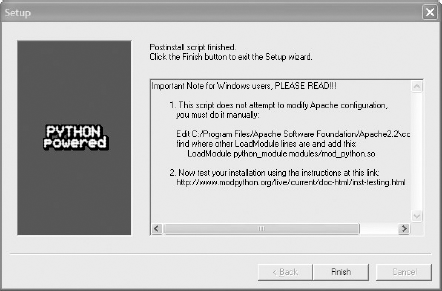
Do not close this last window until you have copied the line in item #1 of the confirmation dialog to the clipboard. Once you have done that, click Finish.
Configuring Apache for mod_python involves two steps:
Open the
<apache dir>confhttpd.conffile and locate the section where the modules are loaded. You can identify this section easily by the group of lines that all start withLoadModule. Paste the line you copied to the clipboard in the preceding section:LoadModule python_module modules/mod_python.so
In the same file, add the following lines (they can be added anywhere in the file):
AddHandler mod_python.py
PythonHandler mod_python.publisher
PythonDebug On
Although there is a significant amount of "under the hood" activity in this application, the interface presented to the user is fairly simple. Basically, users leave comments through their web browser, and the administrator has a CSV log file that can be viewed and sorted.
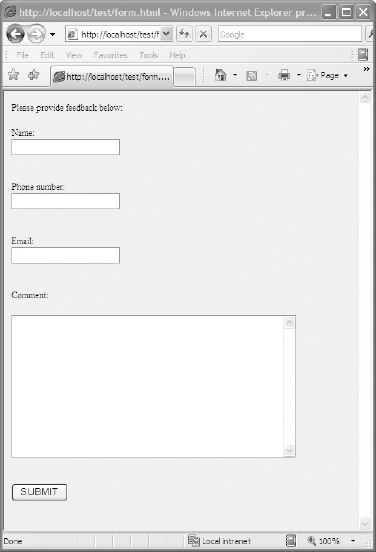
Assuming your Apache web server is running on your local machine, type http://loalhost/test/form.html into the address area of your web browser. Figure 5-13 shows the feedback dialog that appears.
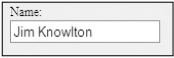
Type a name in the Name field (see Figure 5-14).
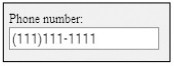
Enter a phone number in the Phone number field, as shown in Figure 5-15.
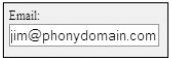
Enter an e-mail address in the Email field, as shown in Figure 5-16.
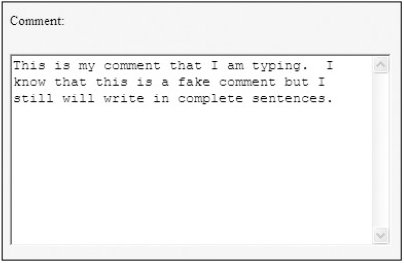
Enter some comments in the Comment field, as shown in Figure 5-17.
Finally, click the Submit button, as shown in Figure 5-18.
Note
The application assumes you have an SMTP server running on the web server machine. If you don't, you'll get an error right at this point, but don't worry about it — we'll modify the script later to point to your SMTP server.
The following status message will now display:
Dear Jim Knowlton,
Thank You for your kind comments, we will get back to you shortly.
If the fields are not all filled in, then the following error message will display when Submit is clicked:
A required parameter is missing, please go back and correct the error
On the web server machine, navigate to the c:logs directory.
In your favorite spreadsheet, retrieve the feedbacklog.csv file. You'll see something similar to the file shown in Figure 5-19 (I have formatted the columns a little for readability).
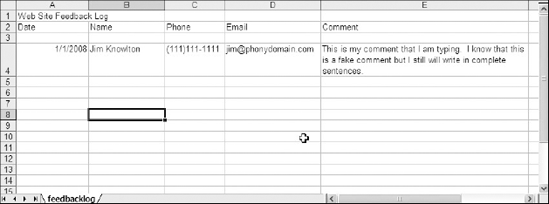
The application has two interfaces: the web page for users to enter and submit comments, and the CSV log file for administrators.
The basic architecture of the program is fairly simple, as shown in Figure 5-20.

The application flows as follows:
The end user connects to the web server to bring up
form.html(which will be in thetestsubdirectory). This HTML file presents the feedback form.When the user clicks the Submit button, the HTML file passes the filled-in form information to
form.py, which it then launches.form.pyconstructs an e-mail message and sends it to the webmaster, using an SMTP server connection defined in the script.form.pyalso writes to a CSV log file, which can then be parsed and sorted.
There is just one module in this program, form.py.
form.py is the module that is launched from the form.html file. It contains two functions. Table 5-1 shows the functions of the form.py module.
Table 5.1. Table 5-1
Function | Return Type | Description |
|---|---|---|
| string | Takes form information from |
| none | Takes comment information passed to it and writes log information to a CSV file, along with the current date |
This application might appear to be simple, since there is only one Python source file, but there are several "moving parts," which we'll cover thoroughly.
In the interests of page space, I've omitted the code headers, but make sure you use them. Your coworkers will thank you.
Although it is not a Python source file, this file is critical to the operation of the program, so it is explored here in its entirety:
<HTML>
<BODY LANG="en-US" BGCOLOR="#ccffff">
<P>Please provide feedback below:
</P>
<FORM ACTION="form.py/email" METHOD="POST">
       <P>Name:<BR> <INPUT TYPE=TEXT NAME="name"><BR><BR><BR>
       </P>
       <P>Phone number:<BR> <INPUT TYPE=TEXT NAME="phone"><BR><BR><BR>
       </P>
       <P>Email:<BR> <INPUT TYPE=TEXT NAME="email"></P>
       <P><BR>Comment:</P>
       <P>
       <TEXTAREA NAME="comment" ROWS=10 COLS=45 STYLE="width: 4in; height:
2in"></TEXTAREA>
       <BR><BR><BR>
       </P>
       <P>INPUT TYPE=SUBMIT VALUE="SUBMIT">
       </P>
</FORM>
</BODY>
</HTML>
The <BODY> tag defines the body of the HTML page, and sets the color:
<BODY LANG="en-US" BGCOLOR="#ccffff">
Next is some text prompting users so that they know what to do:
<P>Please provide feedback below:
</P>
The next line initiates the form, and points to the Python function to run when the form is submitted:
<FORM ACTION="form.py/email" METHOD="POST">
The next part of the file contains the input fields for the name, phone number, e-mail address, and comment:
<P>Name:<BR> <INPUT TYPE=TEXT NAME="name"><BR><BR><BR>
        </P>
        <P>Phone number:<BR> <INPUT TYPE=TEXT NAME="phone"><BR><BR><BR>
        </P>
        <P>Email:<BR> <INPUT TYPE=TEXT NAME="email"></P>
        <P><BR>Comment:</P>
        <P>
        <TEXTAREA NAME="comment" ROWS=10 COLS=45 STYLE="width: 4in;
height: 2in"></TEXTAREA>
        <BR><BR><BR>
        </P>
Next is the HTML code for the Submit button:
<p><INPUT TYPE=SUBMIT VALUE="SUBMIT">
            </p>
The file ends with the closing tags for the different elements in the file:
</FORM>
</BODY>
</HTML>
The form.py file is the main "guts" of the program:
import smtplib, csv, datetime, sys

WEBMASTER = "[email protected]"
SMTP_SERVER = "localhost"

def writeCSVLog(name, phone, email, comment):
    python_exec = sys.executable
    if python_exec.find("exe") != −1:
        dir_root = "c:\logs\"
    else:
        dir_root = "//usr//local//logs//"
    today = datetime.datetime.now().strftime("%m/%d/%Y")
row = [today, name, phone, email, comment]
    try:
        writer = csv.writer(open(dir_root + "feedbacklog.csv", "a"))
        writer.writerow(row)
    except:
        print "There was a problem writing to the logfile!"
        sys.exit
def email(req, name, phone, email, comment):

    # make sure the user provided all the parameters
    if not (name and phone and email and comment):
        return "A required parameter is missing,
               please go back and correct the error"

    # create the message text
    msg = """
From: %s
Subject: feedback
To: %s

I have the following comment:

%s

Thank You,

%s
%s

""" % (email, WEBMASTER, comment, name, phone)

    # send it out
    try:
        conn = smtplib.SMTP(SMTP_SERVER)
        conn.sendmail(email, [WEBMASTER], msg)
        conn.quit()
    except:
        print "There was a problem sending the email!"
        sys.exit

    # provide feedback to the user
    s = """
<html>
<BODY BGCOLOR="#ccffff" DIR="LTR">
Dear %s,<br>
Thank You for your kind comments, we
will get back to you shortly.
</BODY>
</html>""" % name

    writeCSVLog(name, phone, email, comment)
    return s s
First, the needed modules are imported:
import smtplib, csv, datetime
Then variables are declared for the webmaster and the SMTP server:
WEBMASTER = "[email protected]"
SMTP_SERVER = "localhost"
Note
As shown in the preceding code, the program assumes that the SMTP server is running on the same physical machine as the web server. If this is not the case, then you can simply change localhost to the hostname or IP address of your SMTP server.
In order to follow the natural flow of the program, let's move down to the email() function.
The e-mail function is the main function for the program. It takes the parameters from the HTML file, sends the e-mail message, and calls the function to write to the log file. Here is the entire function:
def email(req, name, phone, email, comment):

    # make sure the user provided all the parameters
    if not (name and phone and email and comment):
        return "A required parameter is missing,
               please go back and correct the error"

    # create the message text
    msg = """
From: %s
Subject: feedback
To: %s

I have the following comment:

%s

Thank You,

%s
%s

""" % (email, WEBMASTER, comment, name, phone)
# send it out
try:
conn = smtplib.SMTP(SMTP_SERVER)
conn.sendmail(email, [WEBMASTER], msg)
conn.quit()
except:
print "There was a problem sending the email!"
sys.exit
# provide feedback to the user
s = """
<html>
<BODY BGCOLOR="#ccffff" DIR="LTR">
Dear %s,<br>
Thank You for your kind comments, we
will get back to you shortly.
</BODY>
</html>""" % name
writeCSVLog(name, phone, email, comment)
return sThis function definition takes its parameters from the HTML file:
def email(req, name, phone, email, comment):
Following that is an error-checking routine to ensure that all the parameters have been entered:
# make sure the user provided all the parameters
    if not (name and phone and email and comment):
        return "A required parameter is missing,
               please go back and correct the error"
The next block of code constructs the e-mail message, using information entered into the HTML form by the user:
# create the message text
    msg = """
From: %s
Subject: feedback
To: %s

I have the following comment:

%s

Thank You,
%s %s """ % (email, WEBMASTER, comment, name, phone)
The next logical step is to send the e-mail message, and that's what is done here:
# send it out
    try:
        conn = smtplib.SMTP(SMTP_SERVER)
        conn.sendmail(email, [WEBMASTER], msg)
        conn.quit()
    except:
        print "There was a problem sending the email!"
        sys.exit
The program then writes a message to the user, letting them know the e-mail message was sent:
# provide feedback to the user
    s = """
<html>
<BODY BGCOLOR="#ccffff" DIR="LTR">
Dear %s,<br>
Thank You for your kind comments, we
will get back to you shortly.
</BODY>
</html>""" % name
Finally, the writeCSVLog() function is called to write the information to the log file:
writeCSVLog(name, phone, email, comment)
return sThe writeCSVLog function, as the name implies, writes an entry to the log file. Here is the code:
def writeCSVLog(name, phone, email, comment):
    python_exec = sys.executable
    if python_exec.find("exe") != −1:
        dir_root = "c:\logs\"
    else:
        dir_root = "//usr//local//logs//"
    today = datetime.datetime.now().strftime("%m/%d/%Y")
    row = [today, name, phone, email, comment]
    try:
        writer = csv.writer(open(dir_root + "feedbacklog.csv", "a"))
        writer.writerow(row)
The function definition line accepts the required parameters:
def writeCSVLog(name, phone, email, comment):
It then takes the current date and formats it into a string variable, for use in the log entry:
today = datetime.datetime.now().strftime("%m/%d/%Y")The next line is to define a list with the current date and the supplied parameters:
row = [today, name, phone, email, comment]
Finally, the log file is opened and written to:
try:
        writer = csv.writer(open(dir_root + "feedbacklog.csv", "a"))
        writer.writerow(row)
    except:
print "There was a problem writing to the logfile!"There are many ways to test web applications. Some ideas are as follows:
Test field data. Remember that each entered field is passed as a parameter to the Python function, so one test would be to enter unexpected data (such as digits for a "name") and see what happens.
Enter large amounts of text and make sure the program doesn't crash.
Test the web page UI itself. For example, minimize and maximize it, resize it, or try it in different browsers.
There are several ways this project could be enhanced, including the following:
You could implement an "admin" web UI so that an administrator doesn't have to retrieve the CSV file to view comments entered.
You could store the log information in an XML file or a database so that it is easier to query.
You could create a system to query the log file and send a follow-up e-mail to anyone with comments after a certain number of days.
In this chapter, you built a web form to take user comments and forward those comments to an e-mail server. You also learned how to set up a simple SMTP (e-mail) server in Python. You explored how to use the csv module to log activity to a comma-separated value (CSV) file. Along the way, you learned the following:
How to install Apache's
mod_pythonmoduleHow to configure
mod_pythonfor your Python interpreterHow to create a web form and have it run a Python program in response to user action on the web form
How to send an e-mail message entirely through Python