
In Chapter 3, you learned how to access a database to store and retrieve structured data for use in a Python script, but what about situations where a database is overkill? It is precisely for these kinds of situations that XML exists, and Python is brimming with features to enable you to write to, query, and otherwise manipulate XML.
The test management and reporting system in this chapter shows how you can use XML to store and retrieve structured data in a Python script.
The application will perform the following functions:
Enable a user to run tests and report on the pass or fail results of the tests
Enable a user to list the test runs, by date
Enable a user to show test run results for any previous test run
Enable a user to output the results of any completed test run to an HTML file, so that results can be viewed in a web browser
You can get to the program by navigating to the directory corresponding to this chapter. As in the previous chapters, the files are available for download from www.wrox.com. To run the application, simply go to a command prompt, and from the directory on your system where the Chapter 6 program files are located, type python test_manager.py.
This will bring up a menu like the one shown here:
================================
    TEST MANAGEMENT/REPORTING SYSTEM
    ================================
    1 - Run tests
    2 - List test runs
    3 - Show test results
    4 - Generate HTML test report
    5 - Help
    6 - Exit
    ================================

Enter a choice and press enter:
From here, you can run tests, list all completed test runs, show results for any completed test run, generate an HTML test report, view a help screen, or exit the program. The following sections walk through each of the program features.
Note
You won't be able to do anything with option 2, 3, or 4 until you run tests at least once.
If you choose 1 to run tests, you'll receive the following prompt:
================================
RUN TESTS
================================

    Enter your first name:
The program will prompt for three sets of information. Based on the information supplied by the user, the tests will either pass or fail. Since I wrote the program, I set the "correct" answer for first name to "Jim," so for now, type Jim and press Enter.
When you do, you'll get the next prompt:
================================
RUN TESTS
================================

    Enter your first name: Jim
    Enter your last name:
Type Knowlton and press Enter. After you do, you'll get the final prompt:
================================
 RUN TESTS
 ================================

     Enter your first name: Jim
     Enter your last name: Knowlton
     Prime number test - enter a number:
The final prompt checks an input number to determine whether it is a prime number. If it is, then the test passes. In order to ensure that all the tests will pass (for now), type the number 2 (a prime number) and press Enter. You'll then see the results of the tests:
================================
    TEST RUN RESULTS
    ================================
    Test first name - PASSED
    Test last name - PASSED
    Test prime number - PASSED
    ================================
    Total tests passed:  3
    Total tests failed:  0
    Total tests with errors:  0

Press [Enter] to continue:
As you can see, all the tests passed.
The test report is stored in the test_runs directory under the program directory, and is saved in the format mm-dd-yyyy.xml. In other words, a report of a test run on January 1, 2008 would be stored as 01-01-2008.xml.
If you open the XML file (which you don't have to do to run the program), it will look like this:
<testresult>
    <testfirstname>PASSED</testfirstname>
    <testlastname>PASSED</testlastname>
    <testprimenumber>FAILED - 4 is not a prime number</testprimenumber>
    <testspassed>2</testspassed>
    <testsfailed>1</testsfailed>
    <testserror>0</testserror>
</testresult>If you enter incorrect information in one of the first two prompts and the test fails, the test results indicate a failure and provide troubleshooting information, as shown in the following example:
================================
    RUN TESTS
    ================================

        Enter your first name: Joe
        Enter your last name: Knowlton
        Prime number test - enter a number: 2

    ================================
    TEST RUN RESULTS
    ================================
    Test first name - FAILED - EXPECTED Jim but was Joe
    Test last name - PASSED
    Test prime number - PASSED
    ================================
    Total tests passed:  2
    Total tests failed:  1
    Total tests with errors:  0

Press [Enter] to continue:
If you enter a non-prime number for the third test and the test fails, the program shows a failure and simply tells you it is not a prime number:
================================
    RUN TESTS
    ================================

        Enter your first name: Jim
        Enter your last name: Knowlton
        Prime number test - enter a number: 4

    ================================
    TEST RUN RESULTS
    ================================
Test first name - PASSED
Test last name - PASSED
Test prime number - FAILED - 4 is not a prime number
================================
Total tests passed: 2
Total tests failed: 1
Total tests with errors: 0
Press [Enter] to continue:Press Enter to return to the main menu.
To list test runs, type 2 at the menu and you'll get a screen like the following:
================================
LIST TEST RUNS
================================
01-13-2008
01-14-2008
01-15-2008
================================
Press [Enter] to continue:Press Enter to return to the main menu.
If you type 3 and press Enter to show results for a particular test run, you'll get the following prompt:
================================
SHOW TEST RESULTS
================================
Enter the date of the test run in the
following format: '01-01-2008'
(or type 'today' for today)If you enter a date corresponding to an existing test run (you can check what is existing by choosing option 2 to list test runs, as described previously), the results are output in the following screen:
================================
SHOW TEST RESULTS
================================
Enter the date of the test run in the
following format: '01-01-2008'
(or type 'today' for today)
================================
TEST RUN RESULTS 01-14-2008
================================
Test first name - PASSED
    Test last name - PASSED
    Test prime number - FAILED - 4 is not a prime number
    ================================
    Total tests passed:  2
    Total tests failed:  1
    Total tests with errors:  0

Press [Enter] to continue:If for some reason the program cannot find the test run file, you will get an appropriate error message:
================================
    SHOW TEST RESULTS
    ================================


    Enter the date of the test run in the
    following format: '01-01-2008'
    01-20-2008

        Problem opening test run file!

Press [Enter] to continue:
Press Enter to return to the main menu.
If you type 4 and press Enter to generate an HTML test report, you'll get the following screen:
================================
 GENERATE HTML REPORT
 ================================


 Enter the date of the test run in the
 following format: '01-01-2008'
Type the date of an existing test run and press Enter. After the report is generated, you will see the following status displayed on the screen:
================================
GENERATE HTML REPORT
================================
Enter the date of the test run in the
following format: '01-01-2008'
01-14-2008
-- HTML Report Generated --
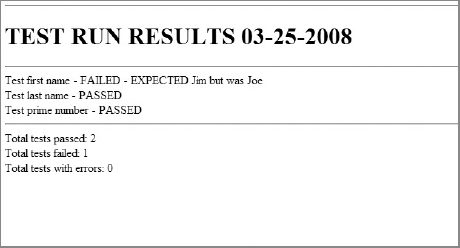
Press [Enter] to continue:The report is stored in the test_report_html directory under the program directory, and is saved as mm-dd-yyyy.html. In other words, an HTML report of a test run on January 1, 2008 would be stored as 01-01-2008.html.
Open the generated HTML file in a browser. It should look something like what is shown in Figure 6-1.
Press Enter to return to the main menu.
If for some reason the program cannot find the test run file, you will get an appropriate error message:
================================
    GENERATE HTML REPORT
    ================================


    Enter the date of the test run in the
    following format: '01-01-2008'
    01-20-2008

        Problem opening test run file!

Press [Enter] to continue:
Press Enter to return to the main menu.
If you type 5 and press Enter to display help, the following screen appears:
================================
    TEST MANAGEMENT/REPORTING SYSTEM
    ================================
    Welcome to the Test Management/Reporting system.
    Using this program, you can run tests, list test
    runs, show test results to the screen, and generate
    HTML reports.

Press [Enter] to continue:
Press Enter to return to the main menu.
No doubt familiar to you by now, this is a text-based, menu-driven program. It essentially runs and tests the data, and then outputs the results both to the screen and to an XML file. It then has options for querying the XML file for data and presenting it, or querying the XML file and then generating HTML from the query.
There are five modules in this application:
test_manager.pyis the main program, and it contains the menu that drives user interaction.test_run.pyruns the tests and stores the results.test_list.pylists existing test runs.test_results.pyshows results on the screen for any test run.test_html.pytakes any existing test run as input and outputs the results to a formatted HTML page.
test_manager.py is the module that a user actually loads. It contains the user menu and has one function. Table 6-1 shows the test_manager module function.
test_run.py is the module that actually runs the tests, writes the results to an XML file, and outputs the results to the screen. It has four functions, described in Table 6-2.
Table 6.2. Table 6-2
Function | Return Type | Description |
|---|---|---|
| string | Takes a first name as an argument, and then asks the user to enter a first name. If the names match, then the test passes; otherwise, the test fails. Test status is returned to the caller. |
| string | Takes a last name as an argument, and then asks the user to enter a last name. If the names match, then the test passes; otherwise, the test fails. Test status is returned to the caller. |
| string | Asks the user to enter a number. If the number entered is a prime number, then the test passes; otherwise, the test fails. Test status is returned to the caller. |
| none | Runs the tests (calling the above functions). Outputs results to an XML file and to the screen. |
test_list.py lists, by date, all test runs. It has one function, described in Table 6-3.
test_results.py is the module that enables the user to enter a date corresponding to a completed test run, displaying the results of the test on the screen. It has one function, described in Table 6-4.
test_html is the module that enables the user to enter a date corresponding to a completed test run, outputting the results to a formatted HTML file. It has one function, described in Table 6-5.
Essentially, this application uses XML files as a database of sorts. This is the strength of XML — it enables you to have structured information that can be queried without the overhead of a database. The following sections look at each code file, so you can see how the application is put together.
In the interests of page space, I've omitted the code headers, but make sure you use them. Your coworkers will thank you.
The test_manager module is the program users actually run. It contains code that's run at the module level, and one function, main():
import os, sys
import test_run, test_list, test_results, test_html

if sys.executable.find("exe") != −1:
    clearscreen = "cls"
    testpath = ".\test_runs\"
else:
    clearscreen = "clear"
    testpath = "./test_runs/"

#MAIN MENU
def menu():
    os.system(clearscreen)
    print """
================================
TEST MANAGEMENT/REPORTING SYSTEM
================================
1 - Run tests
2 - List test runs
3 - Show test results
4 - Generate HTML test report
5 - Help
6 - Exit
================================
"""
choice = raw_input("Enter a choice and press enter: ")
return choice
#TAKE CHOICE AND LAUNCH MODULE
choice = ""
while choice != "6":
choice = menu()
if choice == "1":
os.system(clearscreen)
test_run.run_tests(testpath)
elif choice == "2":
os.system(clearscreen)
test_list.list_tests()
elif choice == "3":
os.system(clearscreen)
test_results.show_test_results(testpath)
elif choice == "4":
os.system(clearscreen)
test_html.test_html_report(testpath)
elif choice == "5":
os.system(clearscreen)
print """
================================
TEST MANAGEMENT/REPORTING SYSTEM
================================
Welcome to the Test Management/Reporting system.
Using this program, you can run tests, list test
runs, show test results to the screen, and generate
HTML reports.
"""
raw_input("Press [Enter] to continue: ")Initially, the program imports modules that will be used:
import os, sys
import test_run, test_list, test_results, test_html
Notice that the user-created modules are on a different line than the standard modules (os and system). This is just to make the program more readable.
Just below the import statements is a block of code to initialize variables based on the operating system the user is running:
if sys.executable.find("exe") != −1:
    clearscreen = "cls"
    testpath = ".\test_runs\"
else:
    clearscreen = "clear"
    testpath = "./test_runs/"
Skipping over the menu() function for now, you can see the main program code:
#TAKE CHOICE AND LAUNCH MODULE
choice = ""
while choice != "6":
    choice = menu()
    if choice == "1":
        os.system(clearscreen)
        test_run.run_tests(testpath)
    elif choice == "2":
        os.system(clearscreen)
        test_list.list_tests()
    elif choice == "3":
        os.system(clearscreen)
        test_results.show_test_results(testpath)
    elif choice == "4":
        os.system(clearscreen)
        test_html.test_html_report(testpath)
    elif choice == "5":
        os.system(clearscreen)
        print """
    ================================
    TEST MANAGEMENT/REPORTING SYSTEM
    ================================
    Welcome to the Test Management/Reporting system.
    Using this program, you can run tests, list test
    runs, show test results to the screen, and generate
    HTML reports.
        """
        raw_input("Press [Enter] to continue: ")
As in previous programs, you initialize the choice variable, and then use a while loop to call the menu() function and assign the return value to the variable choice:
choice = ""
while choice != "6":
    choice = menu()
You then use an if-elif construct to perform different operations based on what the user entered (and what was assigned to the choice variable):
choice = ""
while choice != "6":
    choice = menu()
    if choice == "1":
        os.system(clearscreen)
        test_run.run_tests(testpath)
    elif choice == "2":
        os.system(clearscreen)
        test_list.list_tests()
    elif choice == "3":
        os.system(clearscreen)
        test_results.show_test_results(testpath)
    elif choice == "4":
        os.system(clearscreen)
        test_html.test_html_report(testpath)
    elif choice == "5":
        os.system(clearscreen)
        print """
    ================================
    TEST MANAGEMENT/REPORTING SYSTEM
    ================================
    Welcome to the Test Management/Reporting system.
    Using this program, you can run tests, list test
    runs, show test results to the screen, and generate
    HTML reports.
        """
        raw_input("Press [Enter] to continue: ")
If the user enters 6, then execution falls through the end of the if statement, and the program terminates.
The menu() function displays a user menu, takes a user selection, and returns that choice to the caller:
def menu():
    os.system('cls')
    print """
    ================================
    TEST MANAGEMENT/REPORTING SYSTEM
    ================================
    1 - Run tests
    2 - List test runs
    3 - Show test results
    4 - Generate HTML test report
    5 - Help
    6 - Exit
    ================================
    """
    choice = raw_input("Enter a choice and press enter: ")
    return choice
As shown in the preceding code, this function first clears the screen:
os.system(clarscreen)
After that, a menu is displayed:
print """
    ================================
    TEST MANAGEMENT/REPORTING SYSTEM
    ================================
    1 - Run tests
    2 - List test runs
    3 - Show test results
    4 - Generate HTML test report
    5 - Help
    6 - Exit
    ================================
    """
Finally, the user's selection is assigned to a variable, whose value is returned to the caller:
choice = raw_input("Enter a choice and press enter: ")
return choiceThe test_run.py module is responsible for running tests, displaying the results on the screen, and creating the XML test run file. It is the longest, most complex module in the application:
import datetime, math

def test_firstname(fname):
    fname_input = raw_input("	Enter your first name: ")
    if fname_input == fname:
        return "PASSED"
    else:
        return "FAILED - EXPECTED " + fname + " but was " + fname_input

def test_lastname(lname):
    lname_input = raw_input("	Enter your last name: ")
    if lname_input == lname:
        return "PASSED"
    else:
        return "FAILED - EXPECTED " + lname + " but was " + lname_input

def test_prime_number():
    primes = [2, 3, 5, 7, 11, 13, 17, 19, 23, 29, 31, 37, 41, 43, 47,
              53, 59, 61, 67, 71, 73, 79, 83, 89, 97]
    num = raw_input("	Prime number test - enter a number from 1 to 99: ")
    number = int(num)
    if number in primes:
        return "PASSED"
    else:
        return "FAILED - " + str(number) + " is not a prime number 1 to 99"

def run_tests():

    def testcount(test_results):
    #Compile test results and return them in a list
        tests_passed = 0
        tests_failed = 0
        tests_error = 0
        for test_result in test_results:
            if test_result == "PASSED":
                tests_passed += 1
            elif test_result[0:6] == "FAILED":
                tests_failed += 1
            else:
                tests_error += 1
        results = [tests_passed, tests_failed, tests_error]
        return results
#Run tests
print """
================================
RUN TESTS
================================
"""
result_firstname = test_firstname("Jim")
result_lastname = test_lastname("Knowlton")
result_prime_number = test_prime_number()
total_results = [result_firstname, result_lastname, result_prime_number]
results = testcount(total_results)
#Output test results to screen
print """
================================
TEST RUN RESULTS
================================
Test first name - %s
Test last name - %s
Test prime number - %s
================================
Total tests passed: %i
Total tests failed: %i
Total tests with errors: %i
""" % (result_firstname, result_lastname, result_prime_number,
results[0], results[1], results[2])
#Format XML output for test run
test_output_xml = """<testresult>
<testfirstname>%s</testfirstname>
<testlastname>%s</testlastname>
<testprimenumber>%s</testprimenumber>
<testspassed>%i</testspassed>
<testsfailed>%i</testsfailed>
<testserror>%i</testserror>
</testresult>""" %
(result_firstname, result_lastname, result_prime_number,
results[0], results[1], results[2])
today = datetime.datetime.now().strftime("%m-%d-%Y")
output_filename = ".\test_runs\" + today + ".xml"
test_output = open(output_filename, 'w')
test_output.write(test_output_xml)
test_output.close()
raw_input("Press [Enter] to continue: ")Whew! Yes, there's a lot going on. Let's look at this module function by function.
The first three functions are the tests. Let's look at the first of them:
def test_firstname(fname):
    fname_input = raw_input("	Enter your first name: ")
    if fname_input == fname:
        return "PASSED"
    else:
        return "FAILED - EXPECTED " + fname + " but was " + fname_input
This function simply takes a string parameter fname. It prompts the user to enter a first name and assigns the result to a string variable:
fname_input = raw_input(" Enter your first name: ")It then compares what the user has entered to the string passed as a parameter. If they match, then the string "PASSED" is returned; otherwise, a failure string is returned:
if fname_input == fname:
        return "PASSED"
    else:
return "FAILED - EXPECTED " + fname + " but was " + fname_inputThe second test function looks very similar:
def test_lastname(lname):
    lname_input = raw_input("	Enter your last name: ")
    if lname_input == lname:
        return "PASSED"
    else:
        return "FAILED - EXPECTED " + lname + " but was " + lname_input
This function simply takes a string parameter lname. It prompts the user to enter a last name and assigns the result to a string variable:
lname_input = raw_input(" Enter your last name: ")It then compares what the user has entered to the string passed as a parameter. If they match, then the string "PASSED" is returned; otherwise, a failure string is returned:
if lname_input == lname:
        return "PASSED"
    else:
return "FAILED - EXPECTED " + lname + " but was " + lname_inputThe final test function determines whether a number is a prime number:
def test_prime_number():
    primes = [2, 3, 5, 7, 11, 13, 17, 19, 23, 29, 31, 37, 41, 43, 47,
              53, 59, 61, 67, 71, 73, 79, 83, 89, 97]
    num = raw_input("	Prime number test - enter a number from 1 to 99: ")
    number = int(num)
    if number in primes:
        return "PASSED"
    else:
        return "FAILED - " + str(number) + " is not a prime number 1 to 99"
First, it initializes a list comprising all the prime numbers less than 100. Then it prompts the user to enter a number, assigns the number to a variable, and converts the string entered to its integer equivalent:
num = raw_input("	Prime number test - enter a number from 1 to 99: ")
    number = int(num)
The next block of code tests the number to determine whether it is in the list. If it is, then it returns a "PASSED" string; otherwise, it returns a failure string:
if number in primes:
        return "PASSED"
    else:
return "FAILED - " + str(number) + " is not a prime number 1 to 99"Although this function shows up last in the module sequentially, it drives everything else:
def run_tests(testpath):

    def testcount(test_results):
    #Compile test results and return them in a list
        tests_passed = 0
        tests_failed = 0
        tests_error = 0
        for test_result in test_results:
            if test_result == "PASSED":
                tests_passed += 1
            elif test_result[0:6] == "FAILED":
                tests_failed += 1
            else:
                tests_error += 1
        results = [tests_passed, tests_failed, tests_error]
        return results
#Run tests
print """
    ================================
    RUN TESTS
    ================================
    """
result_firstname = test_firstname("Jim")
    result_lastname = test_lastname("Knowlton")
    result_prime_number = test_prime_number()
total_results = [result_firstname, result_lastname, result_prime_number]
results = testcount(total_results)
#Output test results to screen
    print """
    ================================
    TEST RUN RESULTS
    ================================
    Test first name - %s
    Test last name - %s
    Test prime number - %s
    ================================
    Total tests passed:  %i
    Total tests failed:  %i
    Total tests with errors:  %i
    """ % (result_firstname, result_lastname, result_prime_number,
    results[0], results[1], results[2])
#Format XML output for test run
test_output_xml = """<testresult>
    <testfirstname>%s</testfirstname>
    <testlastname>%s</testlastname>
    <testprimenumber>%s</testprimenumber>
    <testspassed>%i</testspassed>
    <testsfailed>%i</testsfailed>
    <testserror>%i</testserror>
    </testresult>""" %
    (result_firstname, result_lastname, result_prime_number,
        results[0], results[1], results[2])
today = datetime.datetime.now().strftime("%m-%d-%Y")
    output_filename = testpath + today + ".xml"
try:
        test_output = open(output_filename, "w")
        test_output.write(test_output_xml)
        test_output.close()
    except:
        print "Problem writing to file!"
raw_input("Press [Enter] to continue: ")We'll skip over the testcount() function for now, returning to it in a minute.
The first bit of code inside the function displays a menu banner:
print """
================================
RUN TESTS
================================
"""Notice that the first block of code is a nested function. A nice feature of Python is that functions can be nested, enabling you to provide a service to just the functions they are nested inside of.
The next three lines of code actually call the test functions and assign the results to variables:
result_firstname = test_firstname("Jim")
result_lastname = test_lastname("Knowlton")
result_prime_number = test_prime_number()As you can see, I set the correct answers for the first two tests to correspond with my name (naturally). Feel free to change them to your name — or anything else you choose, for that matter.
The next line creates an array with the results for each test that has been run:
total_results = [result_firstname, result_lastname, result_prime_number]
Then, the testcount() function is called, which returns a list containing the cumulative count of passed, failed, and error tests. (We'll look more at that function in a minute). The cumulative counts are assigned to variable results:
results = testcount(total_results)
The next step is to output the results to the screen, in a readable format:
#Output test results to screen
print """
================================
TEST RUN RESULTS
================================
Test first name - %s
Test last name - %s
Test prime number - %s
================================
Total tests passed: %i
Total tests failed: %i
Total tests with errors: %i
""" % (result_firstname, result_lastname, result_prime_number,
results[0], results[1], results[2])Next, the program needs to write the results to an XML file. First, the program creates a string variable and populates it with the XML text to go in the file:
test_output_xml = """<testresult>
<testfirstname>%s</testfirstname>
<testlastname>%s</testlastname>
<testprimenumber>%s</testprimenumber>
<testspassed>%i</testspassed>
<testsfailed>%i</testsfailed>
<testserror>%i</testserror>
</testresult>""" %
(result_firstname, result_lastname, result_prime_number,
results[0], results[1], results[2])Because the filename is based on the date, the next step is to get the system date and then format a string that will be the name of the file:
today = datetime.datetime.now().strftime("%m-%d-%Y")
output_filename = testpath + today + ".xml"Finally, the file is opened, written to using the formatted string (with the XML code), and closed:
try:
test_output = open(output_filename, "w")
test_output.write(test_output_xml)
test_output.close()
except:
print "Problem writing to file!"The testcount() function, which is nested inside of test_run(), takes a list of test results and counts the number of passed, failed, and error tests:
def testcount(test_results):
    #Compile test results and return them in a list
        tests_passed = 0
        tests_failed = 0
        tests_error = 0
        for test_result in test_results:
            if test_result == "PASSED":
                tests_passed += 1
            elif test_result[0:6] == "FAILED":
                tests_failed += 1
            else:
                tests_error += 1
        results = [tests_passed, tests_failed, tests_error]
        return results
The function first initializes the variables for passed, failed, and error tests to zero:
tests_passed = 0
        tests_failed = 0
        tests_error = 0
Following that, the function implements a for loop, which iterates through all the results and increments the count of each category based on the respective results found:
for test_result in test_results:
            if test_result == "PASSED":
                tests_passed += 1
            elif test_result[0:6] == "FAILED":
                tests_failed += 1
            else:
                tests_error += 1
Finally, the results are compiled into a list and returned to the caller:
results = [tests_passed, tests_failed, tests_error]
return resultsThe test_list.py module lists all test runs by simply parsing a directory listing of test run files.
list_tests() is the only function in the module:
import os, glob

def list_tests():
    os.chdir("test_runs")
    filelist = glob.glob("*.xml")

    print """
    ================================
    LIST TEST RUNS
    ================================
    """
    for f in filelist:
        item = f.strip('.xml')
        print "	" + item
    print """
    ================================
    """
    raw_input("Press [Enter] to continue: ")
The function starts by changing the current directory to the directory where the test run files are located:
os.chdir("test_runs")Then it uses the glob module to assign to the list filelist all XML files in the directory:
filelist = glob.glob("*.xml")The next step is to print the menu item banner:
print """
    ================================
    LIST TEST RUNS
    ================================
    """
To print the list of test runs, a for loop is used to iterate through the list that was created. The strip string method is used to strip out the .xml extension from each file, so that it just shows a date for each item:
for f in filelist:
        item = f.strip('.xml')
        print "	" + item
Finally, the bottom bar of the banner is displayed on the screen:
print """
    ================================
"""The test_results.py module enables a user to enter a date corresponding to a test run and retrieve the results from the XML file and display them on the screen:
from xml.dom import minidom
import time

def show_test_results(testpath):

    print """
    ================================
    SHOW TEST RESULTS
    ================================
    """
prompt = """
Enter the date of the test run in the
following format: '01-01-2008'
(or type 'today' for today)
"""
test_date = raw_input (prompt)
if test_date == "today":
test_date == datetime.datetime.now().strftime("%m-%d-%Y")
test_run_file = testpath + test_date + ".xml"
#Get nodes from XML document
try:
test_run = minidom.parse(test_run_file)
except:
print "
Problem opening test run file!
"
raw_input("Press [Enter] to continue: ")
return
test_result_node = test_run.childNodes[0]
test_firstname_node = test_result_node.childNodes[1]
test_lastname_node = test_result_node.childNodes[3]
test_prime_node = test_result_node.childNodes[5]
test_passed_node = test_result_node.childNodes[7]
test_failed_node = test_result_node.childNodes[9]
test_error_node = test_result_node.childNodes[11]
#Get text from relevant nodes
test_firstname_result = test_firstname_node.firstChild.data
test_lastname_result = test_lastname_node.firstChild.data
test_prime_result = test_prime_node.firstChild.data
test_passed_result = test_passed_node.firstChild.data
test_failed_result = test_failed_node.firstChild.data
test_error_result = test_error_node.firstChild.data
#Produce result to screen
print """
================================
TEST RUN RESULTS %s
================================
Test first name - %s
Test last name - %s
Test prime number - %s
================================
Total tests passed: %s
Total tests failed: %s
Total tests with errors: %s
""" % (test_date, test_firstname_result, test_lastname_result,
test_prime_result, test_passed_result, test_failed_result,
test_error_result)
raw_input("Press [Enter] to continue: ")This function starts out by displaying the menu item banner:
print """
    ================================
    SHOW TEST RESULTS
    ================================
    """
Then the user is prompted to enter a date corresponding to a test run, and the user's entry is assigned to a variable:
prompt = """
    Enter the date of the test run in the
    following format: '01-01-2008'
    """
    test_date = raw_input (prompt)
A variable is then created for the path and name of the XML file:
test_run_file = testpath + test_date + ".xml"
Next, it is time to open the XML file and parse it, using the minidom module:
#Get nodes from XML document
    try:
        test_run = minidom.parse(test_run_file)
    except:
        print "
	Problem opening test run file!
"
        raw_input("Press [Enter] to continue: ")
        return
Notice that the opening of the file is enclosed in a try/except block, just in case there is a problem, such as the file not being found.
The next step is to use the node stored in the test_run variable and create variables corresponding to all the nodes from which we need to extract data:
test_result_node = test_run.childNodes[0]
    test_firstname_node = test_result_node.childNodes[1]
    test_lastname_node = test_result_node.childNodes[3]
    test_prime_node = test_result_node.childNodes[5]
    test_passed_node = test_result_node.childNodes[7]
    test_failed_node = test_result_node.childNodes[9]
    test_error_node = test_result_node.childNodes[11]
Once the nodes are assigned to variables, the data from those nodes can be extracted and assigned to variables:
#Get text from relevant nodes
    test_firstname_result = test_firstname_node.firstChild.data
    test_lastname_result = test_lastname_node.firstChild.data
    test_prime_result = test_prime_node.firstChild.data
    test_passed_result = test_passed_node.firstChild.data
    test_failed_result = test_failed_node.firstChild.data
    test_error_result = test_error_node.firstChild.data
Finally, the test results for the retrieved XML file can be displayed on the screen:
#Produce result to screen
    print """
    ================================
    TEST RUN RESULTS %s
    ================================
    Test first name - %s
    Test last name - %s
    Test prime number - %s
    ================================
    Total tests passed:  %s
    Total tests failed:  %s
    Total tests with errors:  %s
    """ % (test_date, test_firstname_result, test_lastname_result,
    test_prime_result, test_passed_result, test_failed_result,
test_error_result)The test_html.py module enables a user to enter a date corresponding to a test run, and generates an HTML report that can be viewed in a web browser:
from xml.dom import minidom

def test_html_report(testpath):
    print """
    ================================
    GENERATE HTML REPORT
    ================================
    """
    prompt = """
    Enter the date of the test run in the
    following format: '01-01-2008'
    """
    test_date = raw_input (prompt)

    test_run_file = testpath + test_date + ".xml"
#Get nodes from XML document
try:
test_run = minidom.parse(test_run_file)
except:
print "
Problem opening test run file!
"
raw_input("Press [Enter] to continue: ")
return
test_result_node = test_run.childNodes[0]
test_firstname_node = test_result_node.childNodes[1]
test_lastname_node = test_result_node.childNodes[3]
test_prime_node = test_result_node.childNodes[5]
test_passed_node = test_result_node.childNodes[7]
test_failed_node = test_result_node.childNodes[9]
test_error_node = test_result_node.childNodes[11]
#Get text from relevant nodes
test_firstname_result = test_firstname_node.firstChild.data
test_lastname_result = test_lastname_node.firstChild.data
test_prime_result = test_prime_node.firstChild.data
test_passed_result = test_passed_node.firstChild.data
test_failed_result = test_failed_node.firstChild.data
test_error_result = test_error_node.firstChild.data
#Produce result to html
html_output = """
<HTML>
<TITLE>Test Report - %s</TITLE>
<HR>
<H1>TEST RUN RESULTS %s</H1>
<HR>
<BODY>
Test first name - %s<br>
Test last name - %s<br>
Test prime number - %s<br>
<HR>
Total tests passed: %s<br>
Total tests failed: %s<br>
Total tests with errors: %s<br>
</BODY>
</HTML>
""" % (test_date, test_date, test_firstname_result, test_lastname_result,
test_prime_result, test_passed_result, test_failed_result, test_error_result)
filename = os.path.join(os.curdir, 'test_report_html', test_date + ".html")
output_file = open(filename, 'w')
output_file.write(html_output)
output_file.close()
print "
-- HTML Report Generated --"
raw_input(" Press [Enter] to continue: ")This function starts out by displaying the menu item banner:
print """
    ================================
    GENERATE HTML REPORT
    ================================
    """
The user is prompted to enter the date associated with a test run, in the appropriate format:
prompt = """
    Enter the date of the test run in the
    following format: '01-01-2008'
    """
    test_date = raw_input (prompt)
The function then has a line of code to construct a string variable with the date input above, adding the path to the test run files and the .XML extension:
test_run_file = testpath + test_date + ".xml"
The XML test run file is then opened and parsed, using the minidom module:
#Get nodes from XML document
    try:
        test_run = minidom.parse(test_run_file)
    except:
        print "
	Problem opening test run file!
"
        raw_input("Press [Enter] to continue: ")
        return
Variables associated with all the nodes to be accessed are then created:
test_result_node = test_run.childNodes[0]
    test_firstname_node = test_result_node.childNodes[1]
    test_lastname_node = test_result_node.childNodes[3]
    test_prime_node = test_result_node.childNodes[5]
    test_passed_node = test_result_node.childNodes[7]
    test_failed_node = test_result_node.childNodes[9]
    test_error_node = test_result_node.childNodes[11]
With the nodes assigned to variables, the data can be extracted from the nodes and assigned to variables:
#Get text from relevant nodes
    test_firstname_result = test_firstname_node.firstChild.data
    test_lastname_result = test_lastname_node.firstChild.data
    test_prime_result = test_prime_node.firstChild.data
    test_passed_result = test_passed_node.firstChild.data
    test_failed_result = test_failed_node.firstChild.data
    test_error_result = test_error_node.firstChild.data
After all the needed data from the XML file is assigned to variables, the HTML text can be constructed:
html_output = """
    <HTML>
    <TITLE>Test Report - %s</TITLE>
    <HR>
    <H1>TEST RUN RESULTS %s</H1>
    <HR>
    <BODY>
    Test first name - %s<br>
    Test last name - %s<br>
    Test prime number - %s<br>
    <HR>
    Total tests passed:  %s<br>
    Total tests failed:  %s<br>
    Total tests with errors:  %s<br>
    </BODY>
    </HTML>
    """ % (test_date, test_date, test_firstname_result, test_lastname_result,
    test_prime_result, test_passed_result, test_failed_result, test_error_result)
The next bit of code is to open the HTML file for writing, and then write the HTML to the file:
filename = os.path.join(os.curdir, 'test_report_html', test_date + ".html")
    output_file = open(filename, 'w')
    output_file.write(html_output)
    output_file.close()
Finally, a status message is displayed, letting the user know that the HTML file has been created:
print "
	-- HTML Report Generated --"
There are several "moving parts" with this application, so there are several potential areas for testing:
The tests in this application are fairly simple and trivial. You could expand on the test suite by testing a "real" application, and see what issues or problems arise. This framework could even be used with the Python
unittestmodule, which is covered in Chapter 10.Examine the XML files that are being created, to verify that the format of the files is consistent and expected.
Create a suite with a large number of tests (which would create a large XML file). Are there any issues with the
minidomparser when working with large files?
There are several ways this project could be enhanced, including the following:
Currently, the application saves test data by date, such that multiple runs on one day overwrite each other. You could change this behavior by having the files use a date-time stamp.
You could have an option to look at "test history," which takes the name of a test as input and then goes through each test run and produces a report of each result, based on the date.
You could create command-line arguments so that, for example, if you just want to execute a test run and don't want to have to see the menu, you can do that.
In this chapter you learned how to build your own "homegrown" framework for testing software, but more important, you learned how to work with XML files, which are a great resource to use as a lightweight source for structured, persistent data. Specifically, you learned how to do the following:
Create XML documents based on input from the user
Query XML documents using the
minidommoduleCreate HTML from XML data
Here are some more interesting things to know about the minidom module:
It supports both byte and Unicode strings, making it useful if your application needs to support multiple languages.
It can also be used to access and manipulate XHTML documents.
There is a
parseString()function that enables you to take an XML string (not from a file) and parse it; this is very useful if you have two programs that are communicating through XML.