
Modify the yValues1 line of code from the previous recipe to use 50 as the third value:
Matplotlib_labels_two_charts_not_scaled.py
axis = fig.add_subplot(111) # 1 row, 1 column
xValues = [1,2,3,4]
yValues0 = [6,7.5,8,7.5]
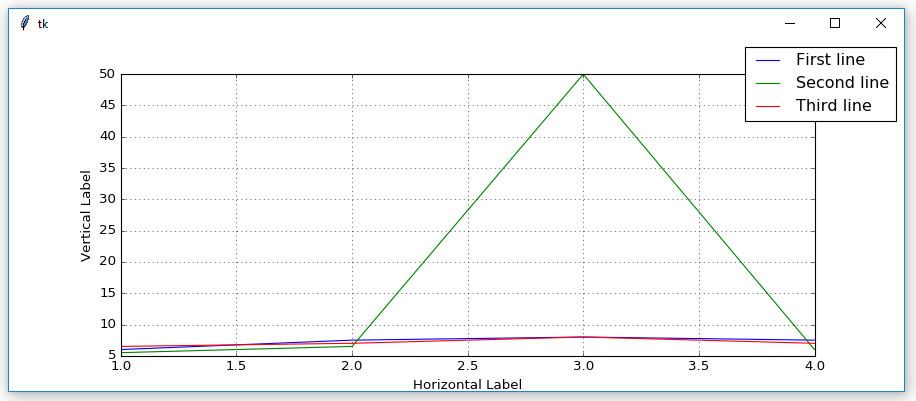
yValues1 = [5.5,6.5,50,6] # one very high value (50)
yValues2 = [6.5,7,8,7]
The only difference to the code that created the chart in the previous recipe is one data value.
By changing one value that is not close to the average range of all the other values for all plotted lines, the visual representation of the data has dramatically changed, we lost a lot of details about the overall data, and we now mainly see one high spike:
So far, our charts have adjusted themselves according to the data they visually represent.
While this is a practical feature of Matplotlib, this is not always what we want. We can restrict the scale of the chart being represented by limiting the vertical y-dimension:
Matplotlib_labels_two_charts_scaled.py
    yValues0 = [6,7.5,8,7.5]
    yValues1 = [5.5,6.5,50,6]           # one very high value (50)
    yValues2 = [6.5,7,8,7]

    axis.set_ylim(5, 8)                 # limit the vertical display
The axis.set_ylim(5, 8) line of code now limits the beginning value to 5 and the ending value of the vertical display to 8.
Now, when we create our chart, the high value peak no longer has the impact it had before:
