When searching online for wxPython, you will probably find the official website at www.wxpython.org:

If you click on the download link for MS Windows, you will see several Windows installers, all of which are for Python 2.x only:

To use wxPython with Python 3.6, we have to install the wxPython/Phoenix library. We can find the installer at the snapshot-builds link: http://wxpython.org/Phoenix/snapshot-builds/
From here, we can select the wxPython/Phoenix version that matches both our versions of Python and our OS. I am using Python 3.6 running on a 64-bit Windows 10 OS.

The Python wheel (.whl) installer package has a numbering scheme.
For us, the most important part of this scheme is that we are installing the wxPython/Phoenix build that is for Python 3.6 (the cp36 in the installer name) and for the Windows 64-bit OS (the win_amd64 part of the installer name).
After successfully downloading the wxPython/Phoenix package, we can now navigate to the directory where it resides and install this package using pip:

We have a new folder named wx in our Python site-packages folder:

We can verify that our installation worked by executing this simple demo script from the official wxPython/Phoenix website. The link to the official website is http://wxpython.org/Phoenix/docs/html/.
Consider the following code:
import wx
app = wx.App()
frame = wx.Frame(None, -1, "Hello World")
frame.Show()
app.MainLoop()
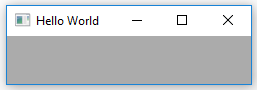
Running the preceding Python 3.6 script creates the following GUI using wxPython/Phoenix:
Hello_wxPython.py