
Chapter 4. Interactions and Transitions in Flash Catalyst
The purpose of converting the artwork into components was to prepare them for executing specific actions and transitions between pages, as we will discuss in this chapter.
I chose to cover both interactions and transitions in the same chapter because they are linked together, as transitions in Flash Catalyst are done through either opening a specific page or clicking a specific button. In this chapter we will start by looking at adding interaction to specific buttons, and after that we will move on to the interaction part.
Interaction in Flash Catalyst is done through the Interaction panel, which allows you to add actions either to the components similar to buttons, or the application itself. You can also add an action that is applied once the page is loaded, such as a special animation or a transition.
When you select a component or the applications stage by clicking on the stage area, the Add Interaction function will be activated.
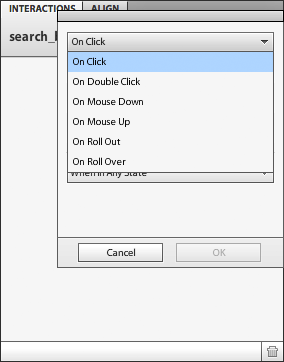
The first drop-down list shows how the action will respond to the mouse action. For example, the On Click action indicates that the action will be executed when the user clicks on the component. The component interaction includes the following events that will trigger the action:
On Click
On Double Click
On Mouse Up
On Mouse Down
On Roll Out
On Roll Over
When you add an action to the application itself without any of the components selected, you will notice that the On Application Start is the only available option.
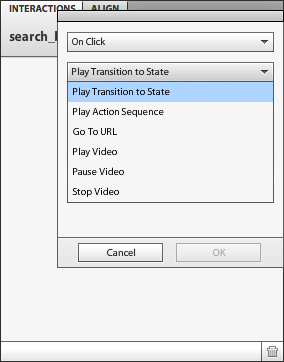
The Actions drop-down list includes the following actions:
Play Transition to State is used for linking pages to each other by animated transitions between them, if applied.
Play Action Sequence lets you play a specific set of actions in the timeline.
The Go to URL opens a URL when the user clicks on it. You can also set how you want the new URL to be opened (for example, in a new page).
Play Video
Pause Video
Stop Video
Each of the actions has its own options, as we will see in the steps below.
In the previous steps, we saw that the project consists of three pages that are linked together by the top menu navigation. Here we will continue adding interaction to this menu so that we can navigate between pages. We will also add interaction to other parts of the design as follows:
If you did not rename the pages already, double-click the first page and name it Home. Repeat this with the second and third pages and name them Gallery and Contact us.
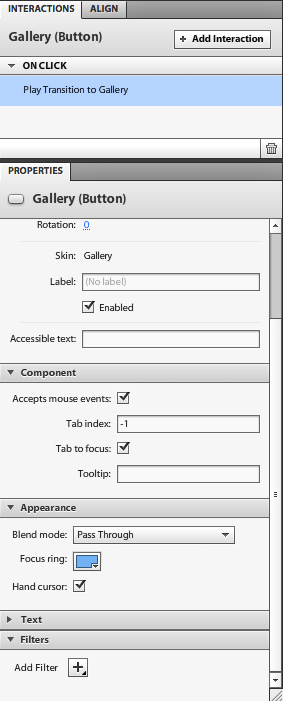
Make sure you are on the first page. Select the first Home button.
Open the Interaction panel and click Add Interaction. From the action trigger, choose On Click.
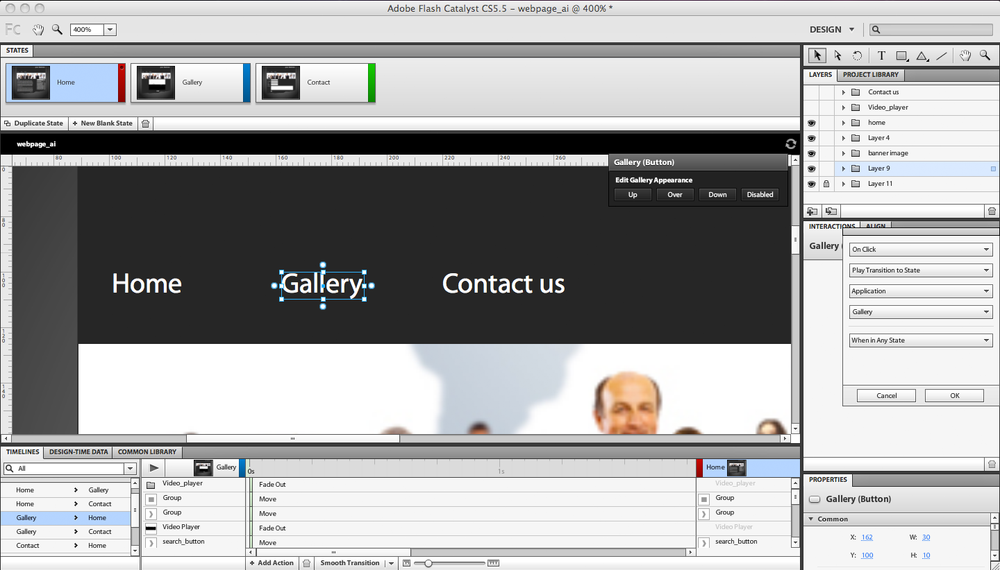
From the Actions drop-down list, choose Play Transition to State and from the Choose state, select the Home page.
From the Appearance section of the Properties panel, choose Hand cursor to display the hand when the mouse hovers over it.
Repeat the above steps with the second and third button and link them to the Gallery and Contact us pages.
Move the Read more link under the text, then choose the Go to URL from the Actions drop-down list in the Interaction panel.
In the URL section, type the web address you would like to access, for example, www.oreilly.com. You do not need to add HTTP://, because Flash Catalyst adds it by default.
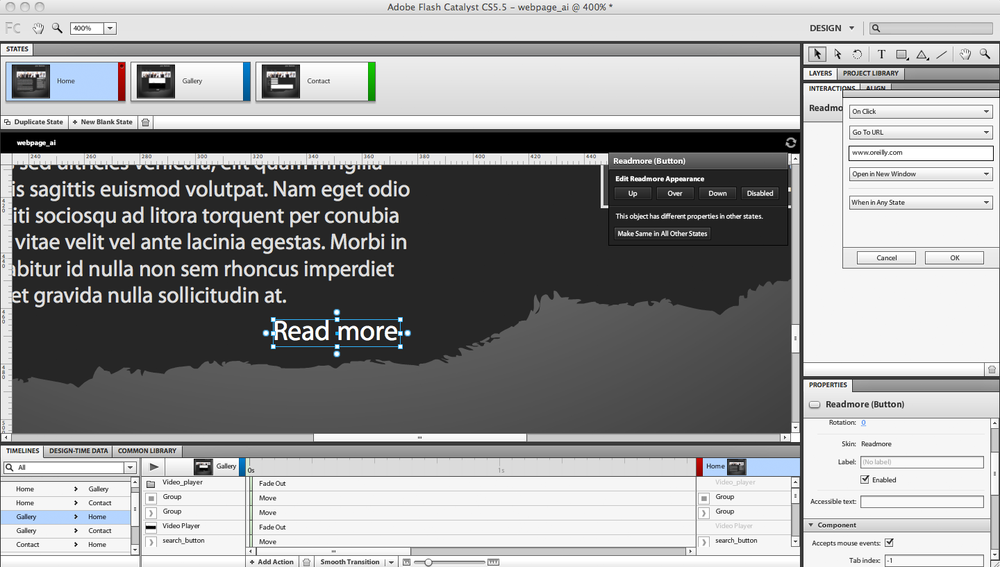
From the next drop-list, choose Open in New Window to open the web page in a new browser window or tab.
Now let’s move on to the second page. On this page, the Gallery button will not be active, and the first button—Home—will interact with the user to return to the first page. Select the Home button and from the Interaction panel, choose Play Transition to State, then select Home from the Choose State drop-down list.
In the Properties panel, choose the Hand cursor to display the hand.
Repeat this action with the Contactus button.
Repeat the same actions in the third page, Contact us.
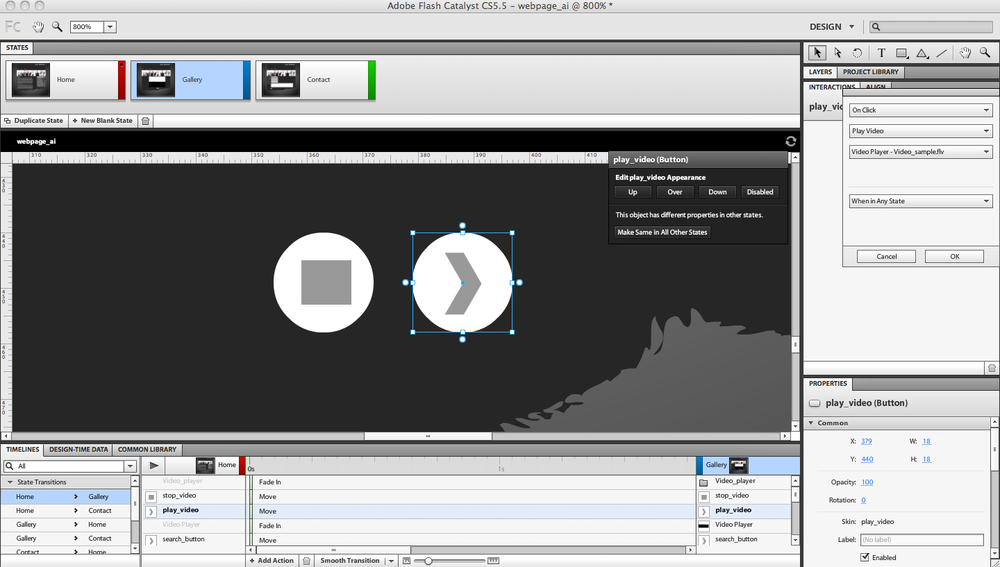
Choose the play button of the video, and from the Interaction panel, choose Play video and then choose the video name from the drop-down list.
Select the video stop button and choose Stop video in the Interaction panel.
Test the project by pressing
Cmd+Enter(Ctrl+Enterin Windows) to check the pages’ navigation between each other.
These steps show an example of the interaction we can create in Flash Catalyst. Both the interactions and the transitions work closely together, since adding transitions and animations between pages and over buttons also improves the interactivity of the design, as we will see in the next part.
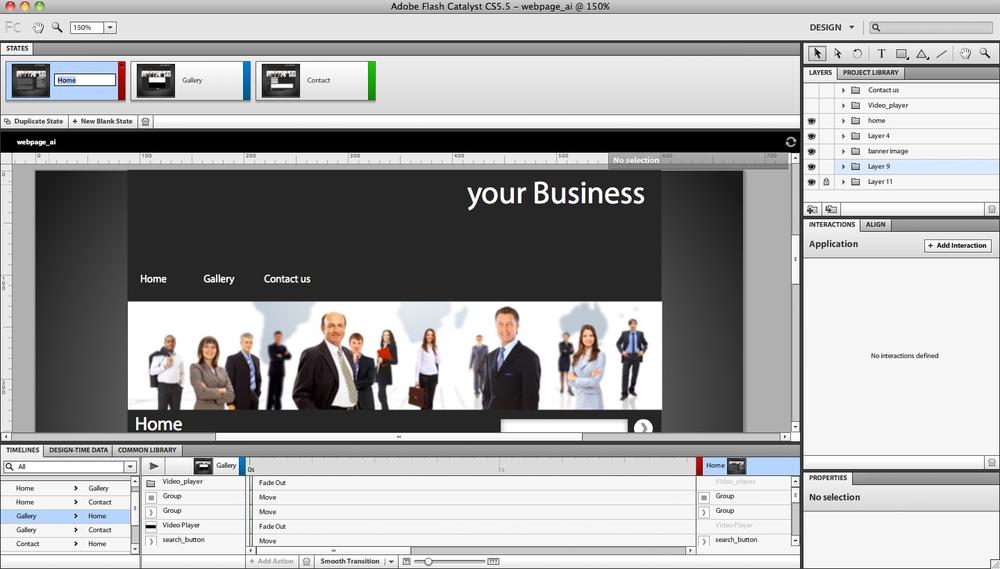
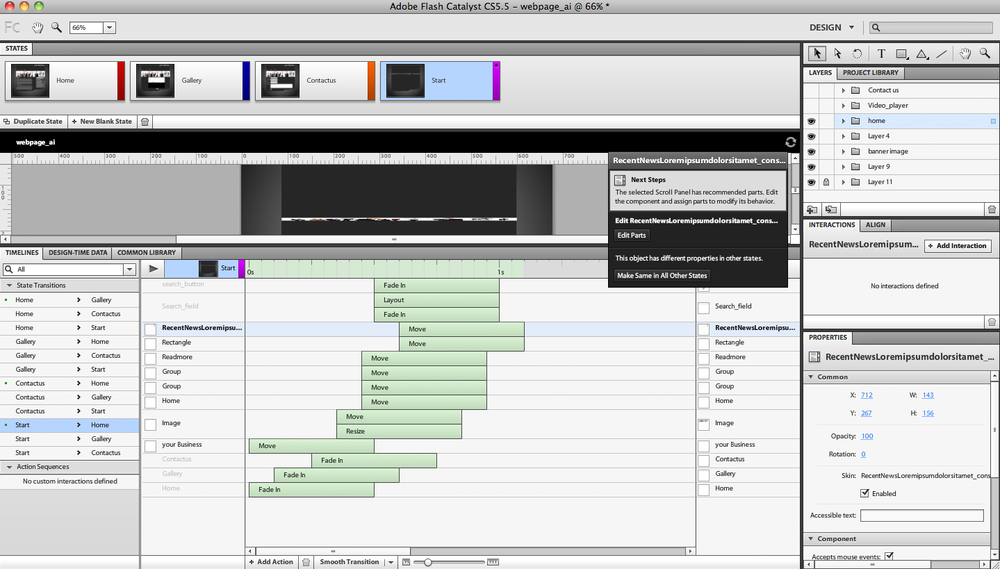
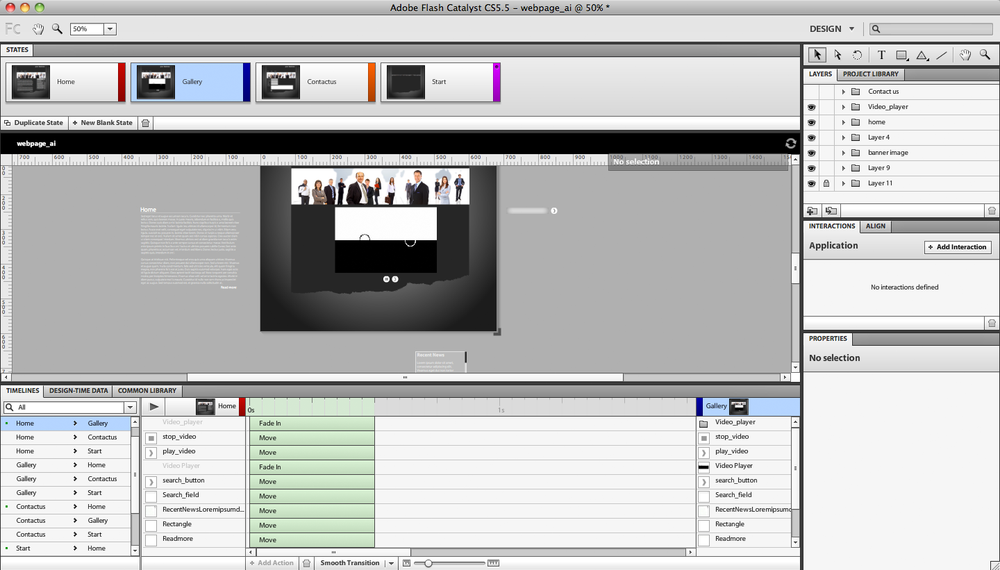
Before we discover how animations and transitions work in Flash Catalyst, let’s discuss the Timeline panel. It is quite different from the timelines we have in Flash or After Effects, which depend on keyframes and in between frames.
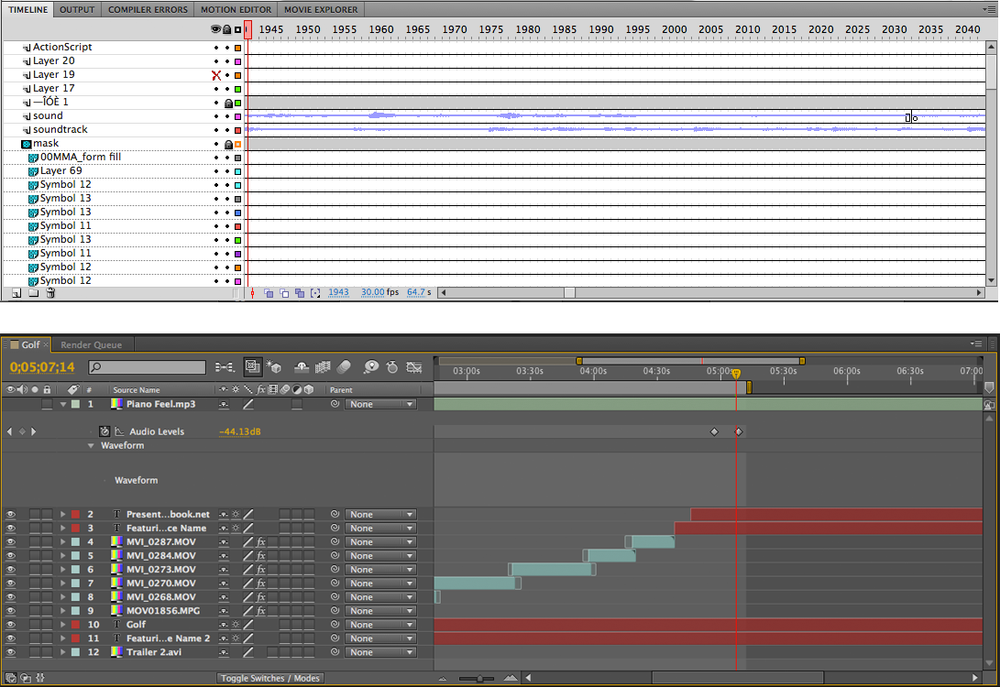
Unlike in those applications, transitions in the Flash Catalyst timeline are controlled by start points and end points. For example, if you want to create a fade in transition between two pages, you have to determine the first page where the animation starts from and the end page where the animation will end. The animation displays as a block in the timeline, as we can see in the figure about the anatomy of the timeline below.
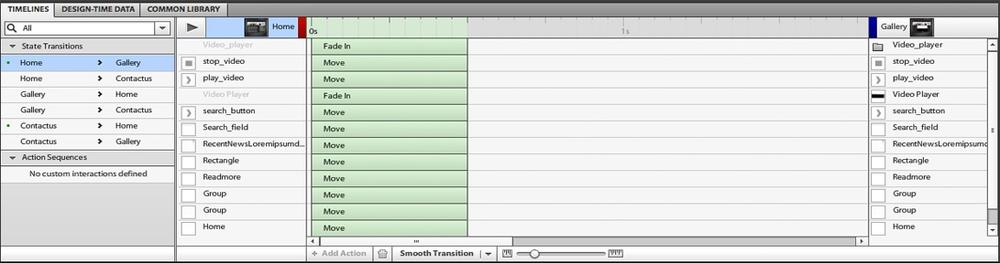
The State Transitions section includes all possible transition combinations between states and pages. Also, it contains the action sequences.
The second section is the start page or state, which defines the start point of the animation. Below it you will find all the elements of the page in layers; each layer should display the animation associated with each element.
The animation part shows the transition in a green block with a handle on its right, which controls the duration of the transition. By increasing the green area, you can make the animation slower, whereas if you decrease it, the animation will get faster. If more than one transition effect is associated with an object, you will find them under each other, linked to their layers. When you choose one of the transitions, you will notice that its properties appear in the properties panel where you can set its options, such as duration and easing.
The end state is on the right side of the timeline and shows the end point of the animation, which can either be a page or a component state.
The bottom section lets you create smooth transitions between the states and set their smoothness. You can add other types of transitions such as Move, Resize, Rotate, and 3D Rotate. The Zoom slider lets you zoom in and out of the timeline blocks so that you can see more of the areas in the timeline. Also, you can delete any of the animations by selecting them and clicking the delete icon.
Now we will learn how to add transition effects to our project by animating each element through the timeline.
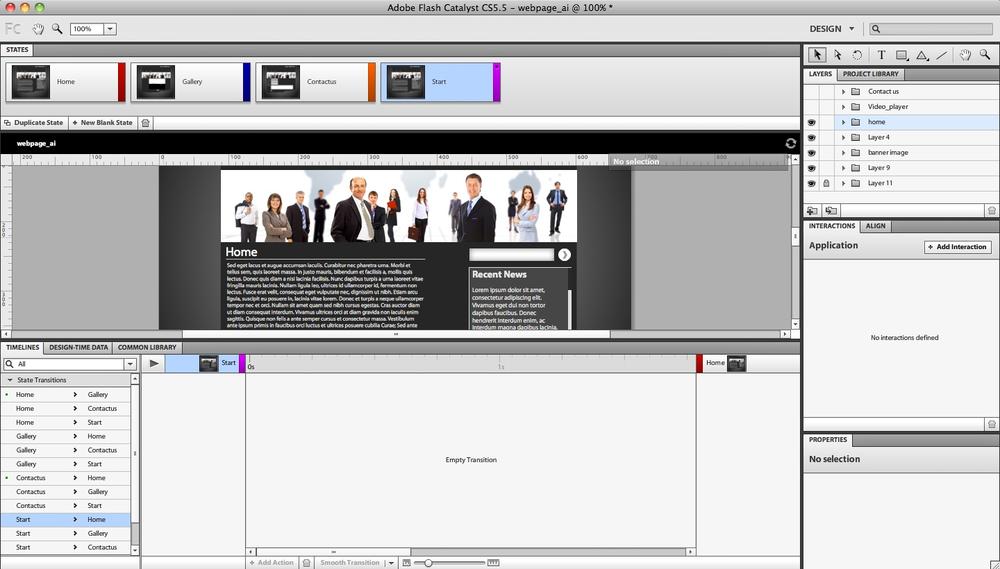
First, we will need to play a transition when the page loads. Based on the idea we discussed before, the animation should have start and end points. We will need to create a new duplicated page from the first Home page, which we can add to the beginning of the page sequence.
In this page we will position the elements to the start point of the animation.
We will also need to tell Flash Catalyst that this newly created page is the default start page, as every project must have a default start page. You can easily find this default page through the dot in the page or state in the Page/State panel. Let’s see how to apply this concept to our example as below:
Select the Home page in the Page/State panel and click Duplicate State to create a duplicated version of the home page.
Double-click on the duplicated version and name it Start.
Right-click the Start page and select Set as Default. This way, the animation will start with the Start page.
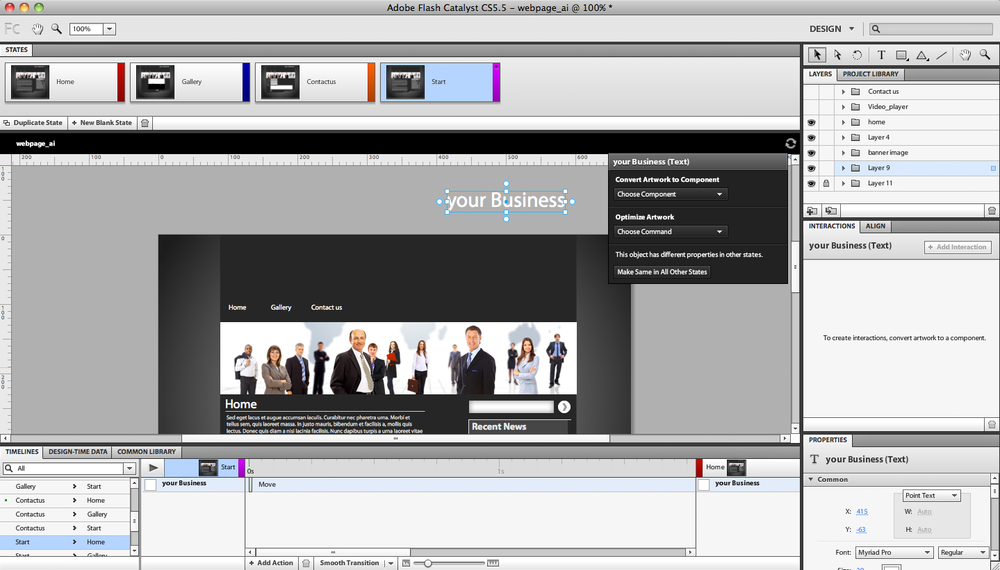
Click on the Start page stage without selecting any element. From the Interaction panel, choose Play Transition to State and choose target the Home page.
In the Start page, we are going to set the elements to the first position of the animation as follows:
In the Timeline panel, make sure you are selecting the Start→Home on the right side of the panel.
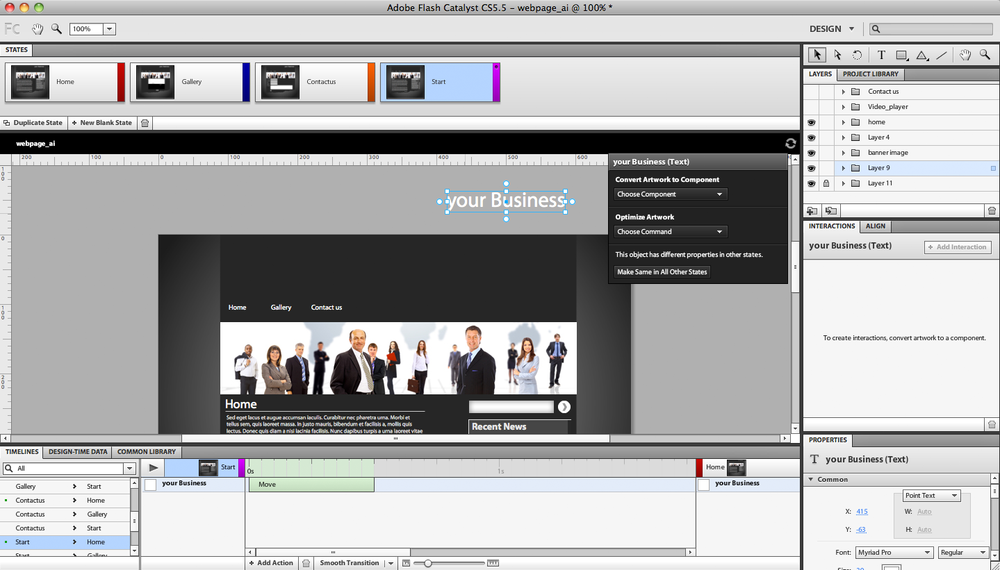
Drag the webpage logo to the top of the screen. You will notice that a green block appears on the timeline next to the logo layer to show that there has been a change in the logo position between the Start page and the Home page.
While the logo is still selected, click on the Smooth transition to create a smooth change in the animation’s position.
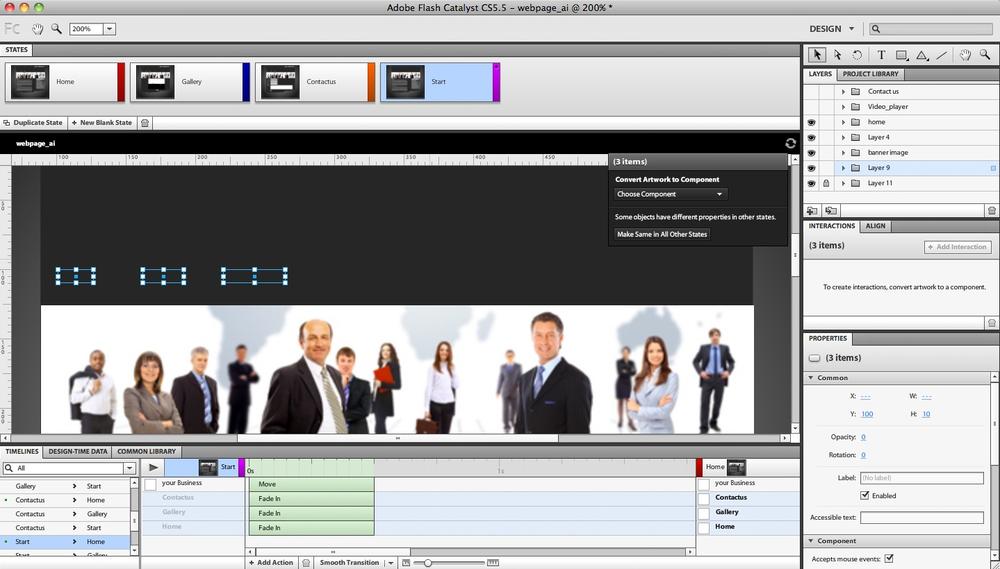
Select each of the top menu buttons and set their opacity value to 0% in the Properties panel.
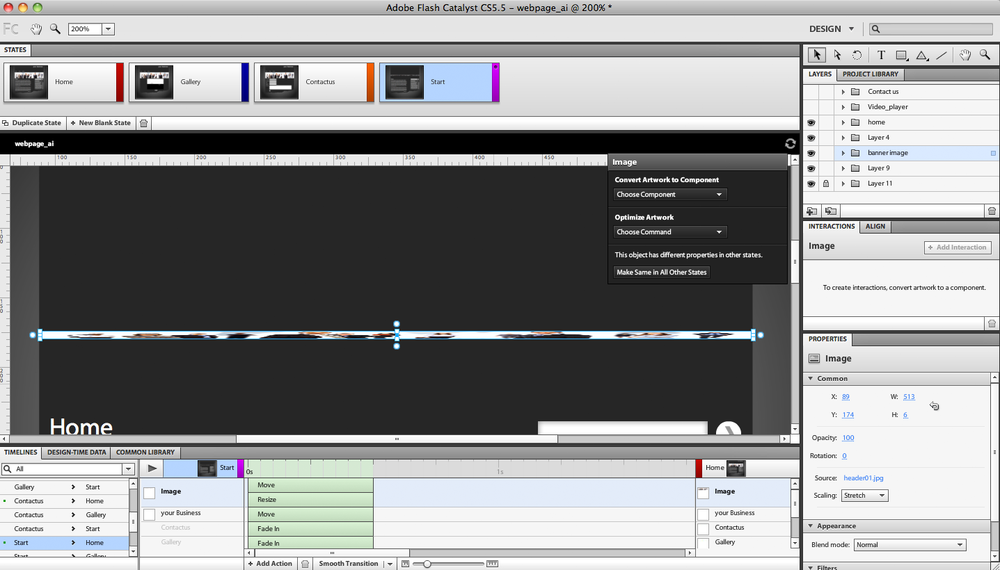
Select the image and shrink it into thin line in the banner area, using the resize handlers in the transform rectangle. Then click Smooth Transition to create a smooth animation.
Now select the Home page title, the line under it, the paragraph text, and the Read more button. Move all of them to the left of the screen stage and set their transition to smooth.
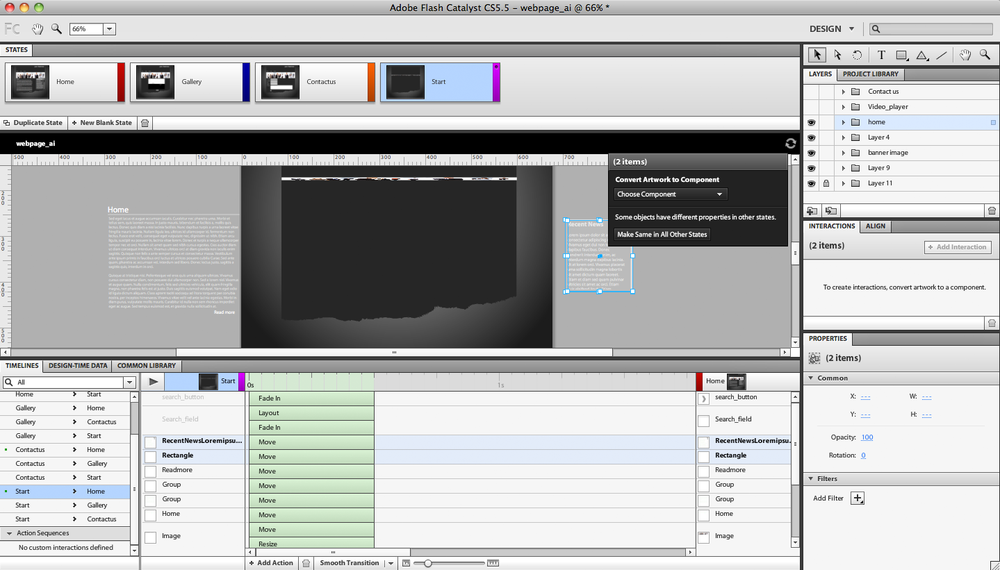
Select the search text area and the button next to it and set their opacity to 0%.
Drag the scrolling text content and background to the right side of the screen off the stage.
If you want to preview the animation, click the Play button on the top right of the Timeline panel to preview the animation without having to run the project.
By this stage, we have created a transition that will appear when the user loads the project. However, the transition may not look the way you want it, as all the content is animated with the same timing and animation speed. It is a good idea to create some variations in the timing of each animation to make the transitions more interesting, as we will see in the following steps and the figure below:
Keep the transitions of the logo and the Home button the same.
Select the Gallery button and move it a little so that it will appear after the Home button animation.
Select and drag the Contact us button to start after the Gallery button transition starts.
Drag the image banner animation’s handler to start where the timeline does and end by the Contact us button’s transition.
Change the transition time of the Home title, the line under it, the text, and the Read more button so that they appear one by one with intersected animations between them.
Drag the animation of the search text area, its button, and the scrollbar to appear after the Read more button.
In addition to these, you can also improve the transitions by adding easing to the animations to give them a more realistic effect. The easing options are located in the Properties panel. But before we look at how to add the easing to the transitions, let’s see the different easing types we can choose from:
Default is when the animation moves at a constant rate from the beginning to the end of the transition.
Linear easing starts slowly and keeps on its speed until the middle of the animation, then slows down again.
Sine is a transition that moves fast until the middle of the animation and slows down toward the end.
Power is similar to Sine, the only difference being that it includes an Exponent value that allows you to control the acceleration and deceleration of the transition.
Elastic makes the transition swing before it reaches its end point.
Bounce lets the transition move after the end point value and then return to the end point again.
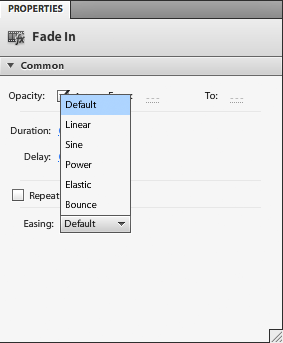
You can easily understand the difference between each easing if you look at how the curves appear under them to demonstrate how the transition will move. You can also edit the easing values through the properties related to each type.
Now, let’s see how to apply easing methods to the transitions we have created previously.
Select the logo animation block. In the Properties panel, go to the Easing part and set the easing to Bounce.
Click the Play button to see how the easing will affect the animation’s transition.
Select the Home title, the line under it, the paragraph, and the Read more part and set the easing to Elastic. Click the Play button to test the animation.
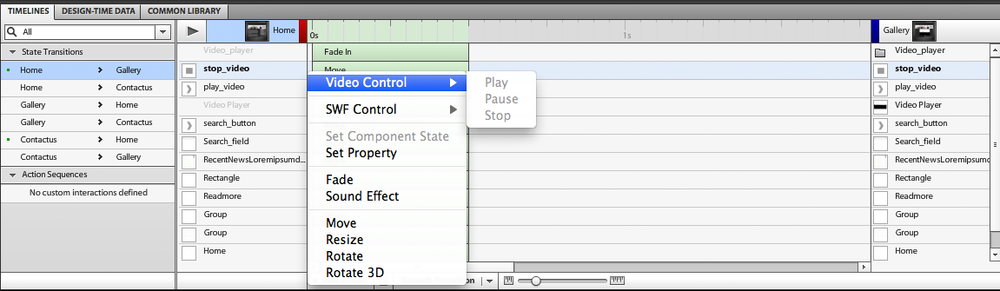
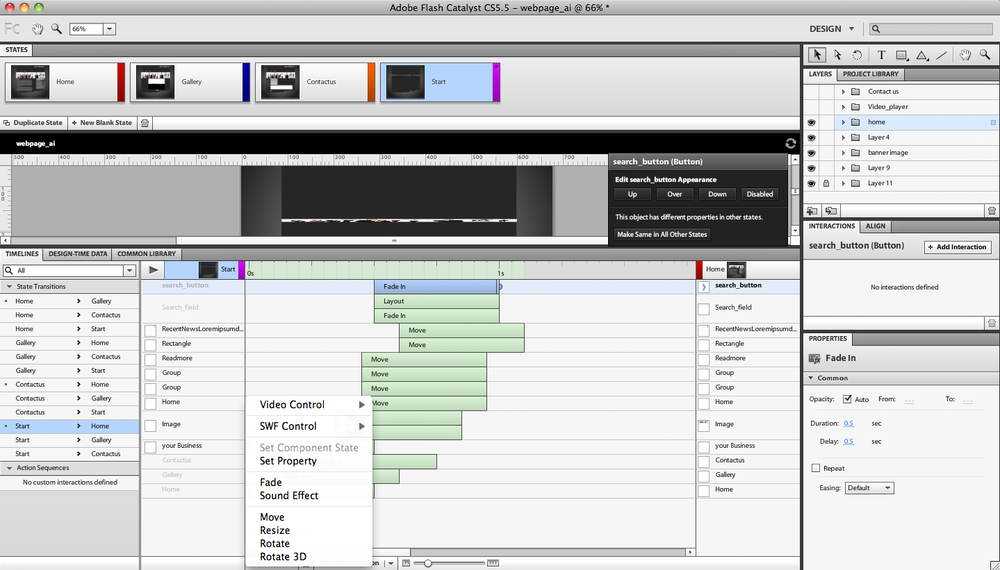
By this point, we have learned how to apply transition animations to the pages. In addition to the default transition properties, you can also add extra transitions by clicking the Add Action button next to the Smooth Transition button in the Timeline.
The Add Action button allows you to add the following actions:
Video Controls, such as Play, Pause, and Stop.
SWF controls that include Play SWF, Stop SWF, Go to Frame and Play, and Go to Frame and Stop.
Set Component State
Set Property, which lets you set a specific property for the component.
Fade, which gives you the option to create a fade for the object from one state to another; you can set this in the Properties panel.
Sound Effects lets you add a sound effect to the stage transition or component status, such as buttons.
Move
Resize
Rotate 3D lets you create 3D transitions in the 3D space, such as rotating the object in the 3D axes values that are listed in the Properties panel.
Notice that the added transition properties are added as green animation blocks under the default one in the artwork layer in the timeline.
These transition effects can be applied to the button statuses as well, so you can create animations that occur when the user hovers over a button, as we will see in the top menu button states.
In these buttons, we need to apply transitions for the lines under the menu text to appear along with a sound effect when the user hovers over it, as follows:
Double-click the Home button in the top menu to access the button editing-mode.
Move the rectangle under the text to the Up state a little below the text, and set its opacity to 0%.
In the Over state, move the rectangle just under the text and set its opacity to 100%.
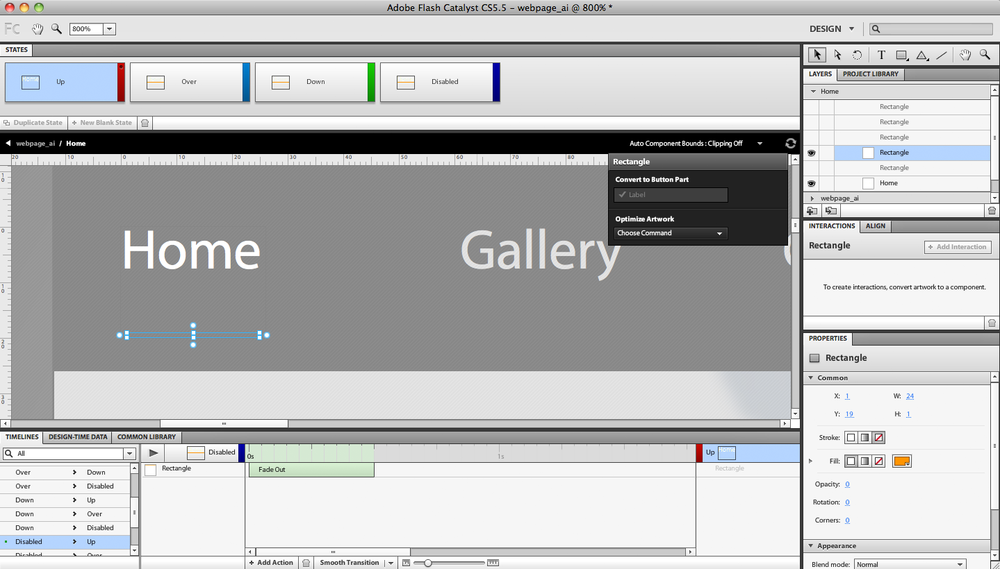
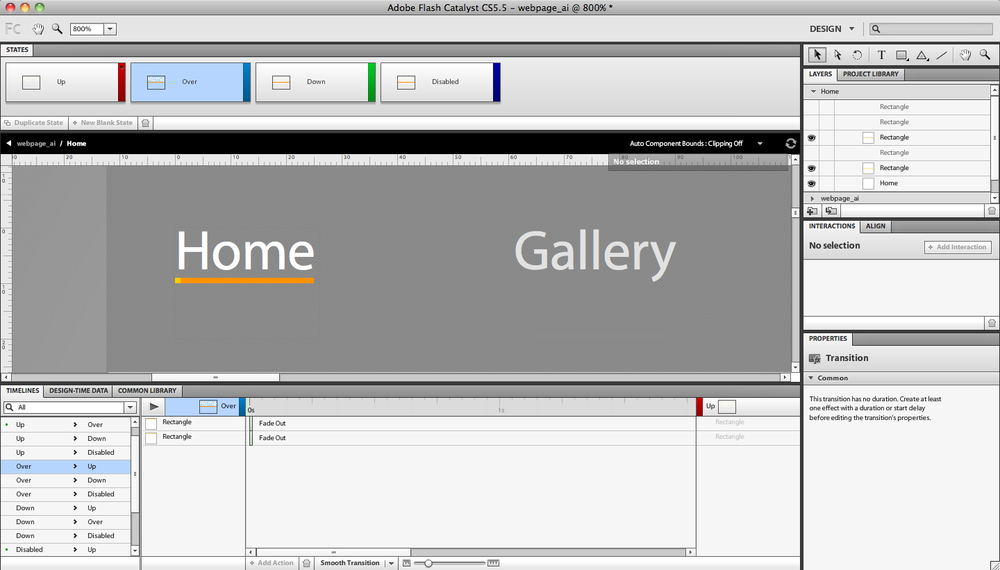
Repeat what you did in the Up state in the Down state.
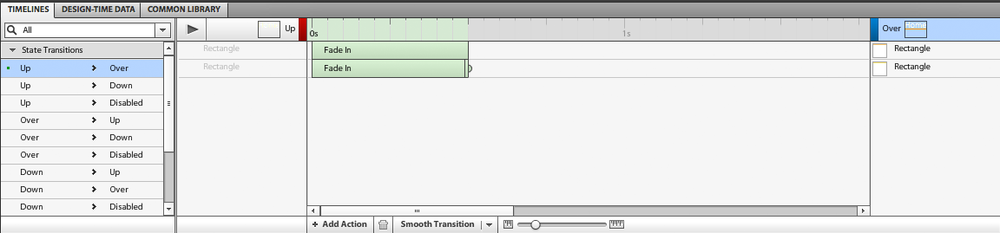
In the Timeline panel, select the Up→Over from the side list to change the animation between those two cases.
Select the rectangle’s layer and choose Smooth Transition to create a smooth move when the user hovers over the button.
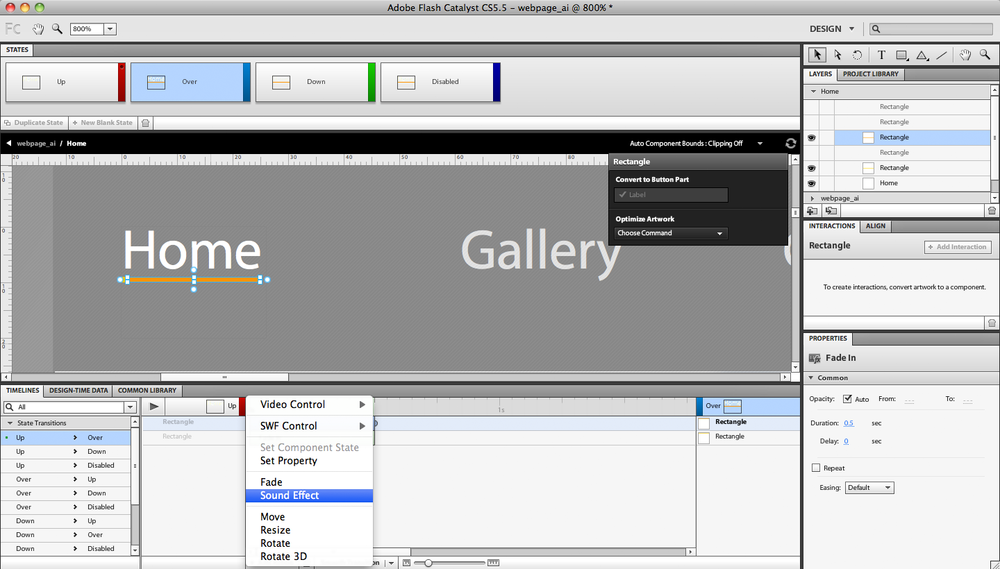
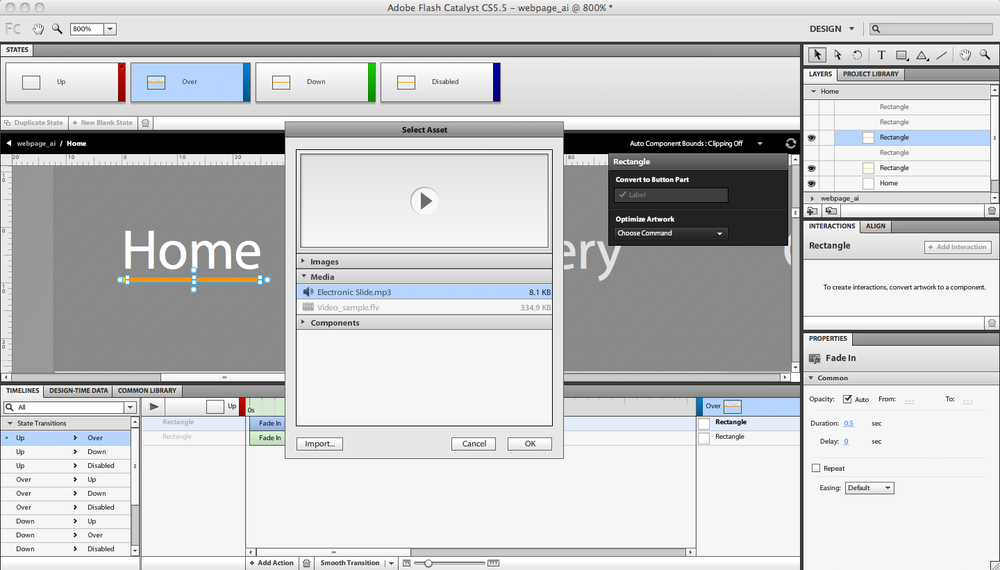
In the Up→Over state we need to add a sound effect that will be played when the user hovers over the button. While the rectangle layer is selected, click Add Action and choose Sound Effect from the list.
A dialog box appears to let you select the sound effect from the available assets. Click the Import button to import sound effects.
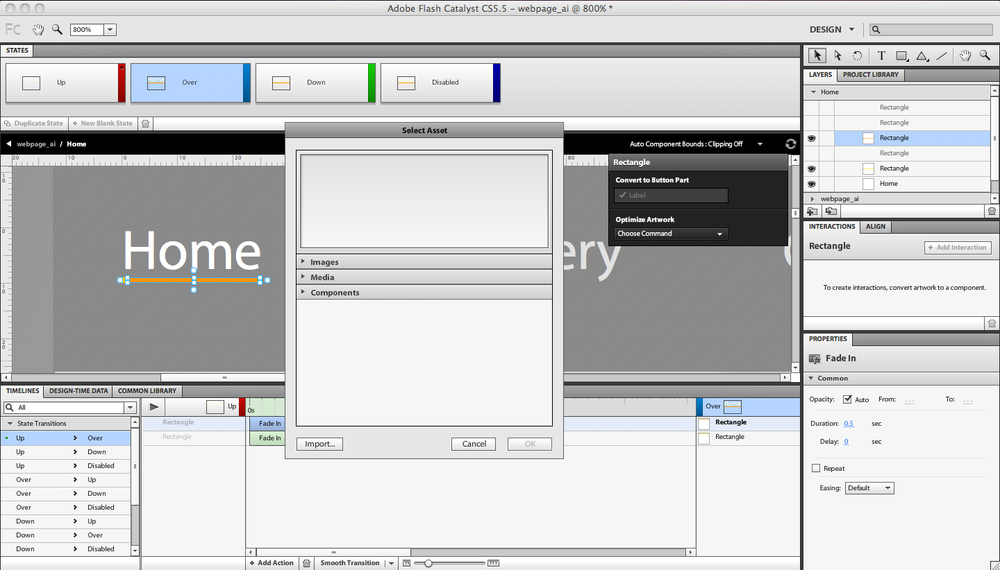
You can choose a sound effect from your own library or go to the Adobe Flash Catalyst sound effects folder (Applications→Adobe Flash Catalyst CS5.5→Sound Effects on a Mac, or Program files→Adobe→Adobe Flash Catalyst CS5.5→Sound Effects in Windows).
Select a sound file, for example Electronic Slide.mp3, and click OK.
You will find the sound files listed under the Media section. Choose one and click OK.
Repeat the same rectangle animation actions with the Over→Down state to make the rectangle fade when the user clicks the button.
Press the Play button to test the button animation sequence.
In the above steps, we learned to create transitions between two pages that have the same content. Now let’s see how to create transitions between two pages with different content.
When making a transition between two pages with different content, the content of each page should be located in both pages. This way, you can control the fade in and fade out of the content during the transition, as we will see on the Home and Gallery pages below.
Select the Home→Gallery from the state transition side list in the Timeline. You will notice that the Gallery’s page content is put outside the screen in the Home page. On the other hand, the Home page’s content is still located in the Gallery page outside the workspace.
Select all the elements in the Home page and click Smooth Transition to create an animated move off screen for the Home elements. Then move the animation to its position in the stage for the Gallery elements.
You can edit the transitions and apply easing options as we did in the previous steps.
In this chapter, we have learned to add interactivity and animated transitions to our project.
Now let’s see how to create user interfaces or web pages in Flash Catalyst based on imported artworks from Adobe Illustrator, and how to convert the artworks into functional components.
After finishing the project or wireframe and testing it, the project can be published in either SWF or AIR formats, as we will see in the next chapter.